Hello all! Simon here for today’s tutorial. The gigantic vector element bundle is a super exciting bundle for me, and it’s all because of Shepard Fairey. I promise this statement will make sense in a few seconds.
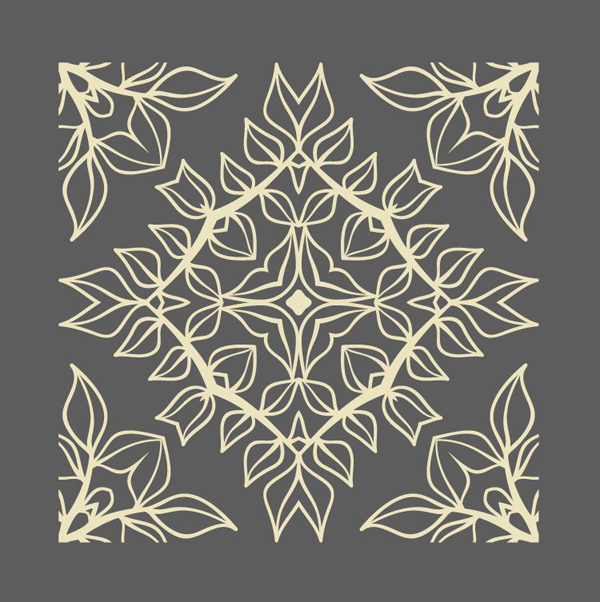
After going through the bundle’s content, I decided to create a propaganda style poster. Elena Pimonova’s various iconic elements are perfect as a source of simple, high impact iconography, and the various patterns by Dreaming Lucy are a superb nod to the OBEY aesthetic.
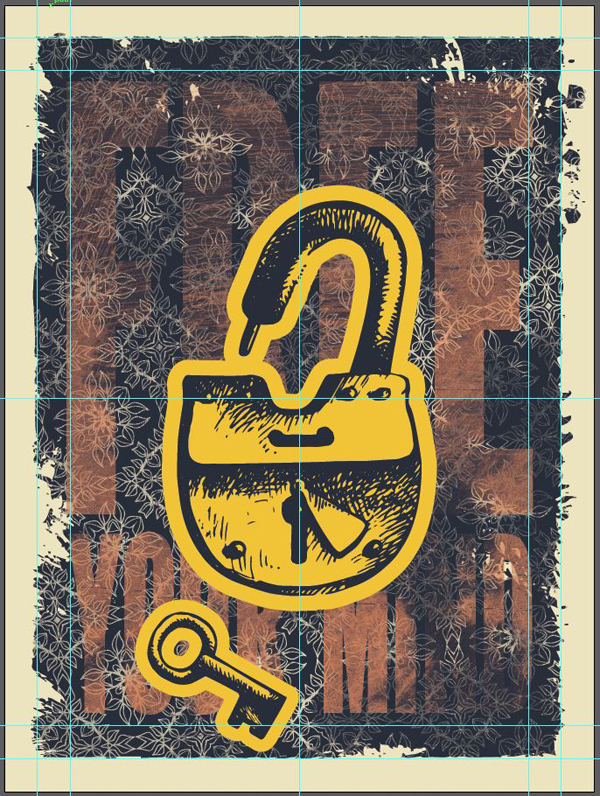
WHAT WE’RE CREATING:
GETTING STARTED
The idea was born when toying with the patterns. I remembered this awesome tutorial from the GoMediaZine that Jeff Finley wrote a long while back.
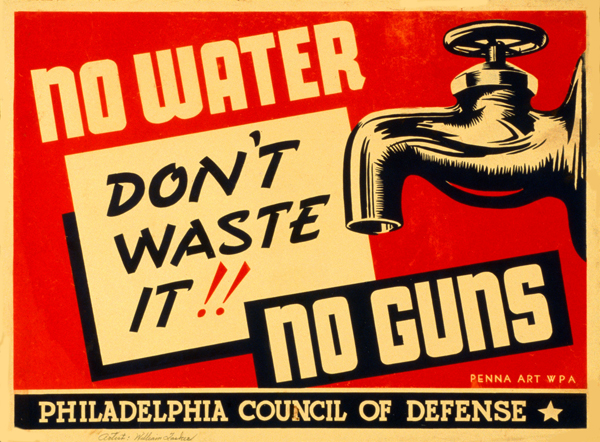
From there, I looked up a bit of inspiration:
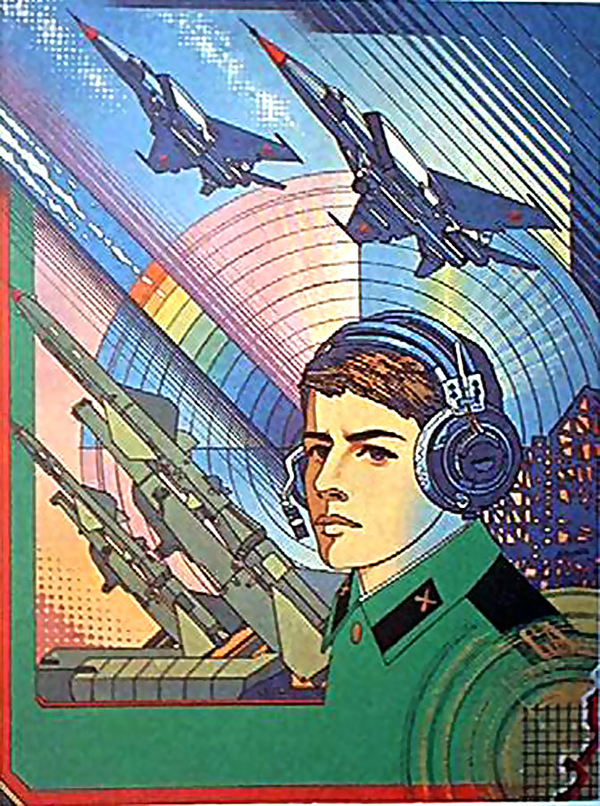
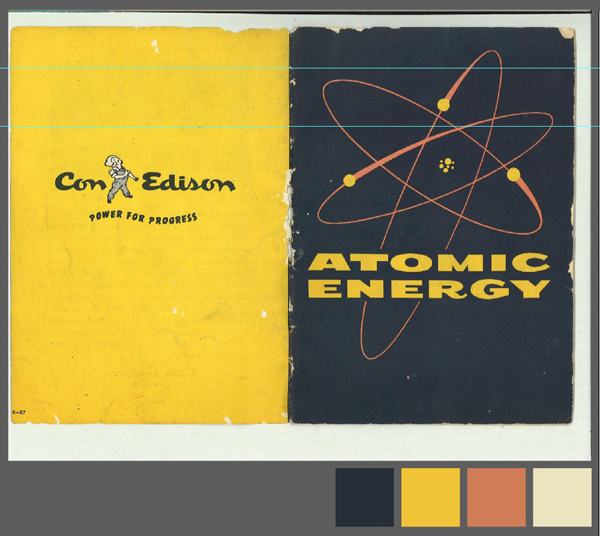
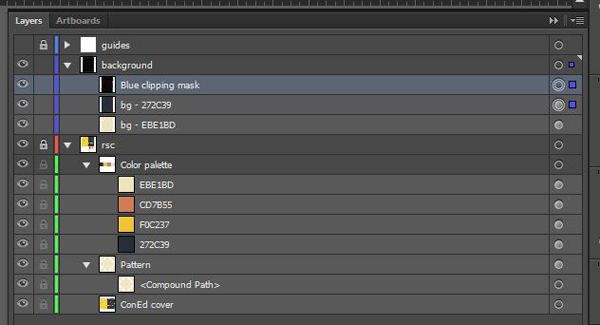
The best piece though was this old booklet by ConEd about atomic energy. It’s so good I’ve used it as a my color palette source.

Our work will take place in Illustrator. I wanted to see if I could find ways to replicate some of my texturing processes and effects in there rather than Photoshop. We’ll make a heavy use of opacity masks, and to a lesser extent of clipping masks. Opacity masks work the same way than layer masks do in Photoshop: black is transparent, white is opaque, and the grays in between provide various degrees of transparency. I’d like to suggest a bit of quick reading before you jump into the tutorial with me:
- Opacity Mask Basics: Illustrator (via Bittbox)
- Use opacity masks to create transparency (via Adobe)
- Opacity Masks (via Shutterstock)
Also, I’ve primarily used the freebie area’s High Resolution Dirty Textures for most of my worn effects. You should have these close-by, they’ll highly helpful. Note that you could use any grunge texture pack of your choosing. You just won’t have the same effects I do.
All set and done? Let’s get to it!
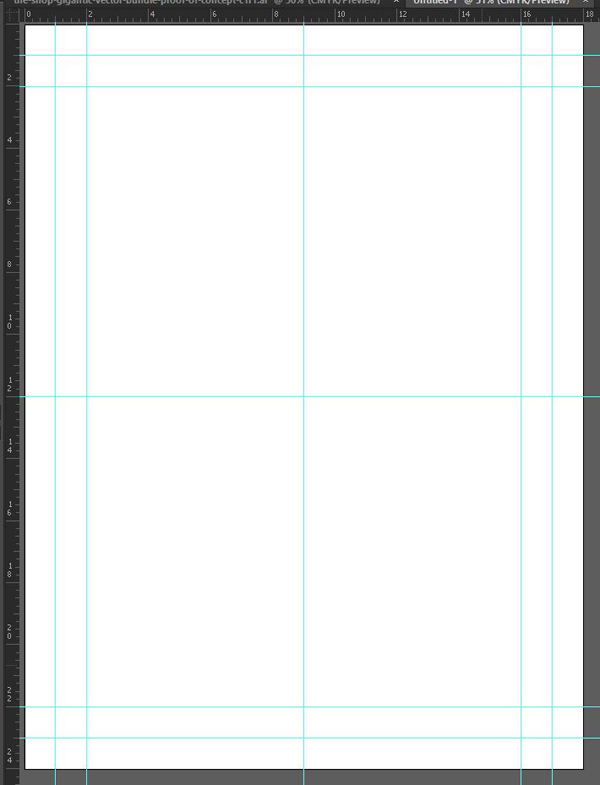
STEP 1: DOCUMENT SETUP
No mysteries here. We’re working in an 18″x24″ canvas. Since we’re working in vectors, PPI/DPI don’t matter too much, although I’d stay at 300 dpi if I were you. Also, CMYK colors will make your pre-press people and printer happy.

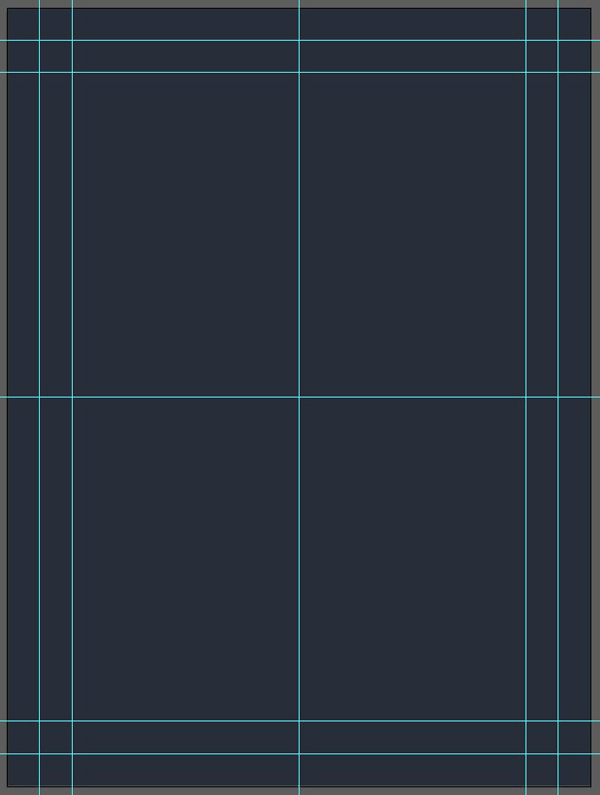
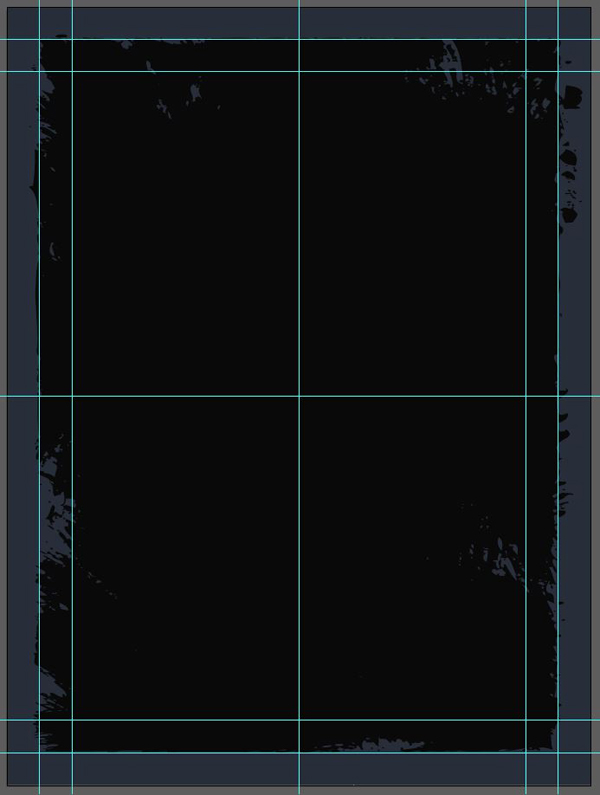
Let’s add some guides to help us place all the elements later in the design process. Vertically, I have guides at 1″, 2″, 9″, 16″, and 17″. Horizontally, I have guides at 1″, 2″, 12″, 22″, and 23″.
STEP 2: LET’S TALK COLORS
Before we actually start designing, we need to focus on color first. Remember the ConEd booklet cover spread?
I’m going with the same color palette than the front cover: dark blue, yellow, and faded orange. The paper will provide us with a fourth, off-white, color. I’m also going to follow the dark background/light and/or contrasting design elements scheme.
My colors are as follows:
- Dark blue: #272C39
- Yellow: #F0C237
- Pale orange: #CD7B55
- Off-white: #EBE1BD

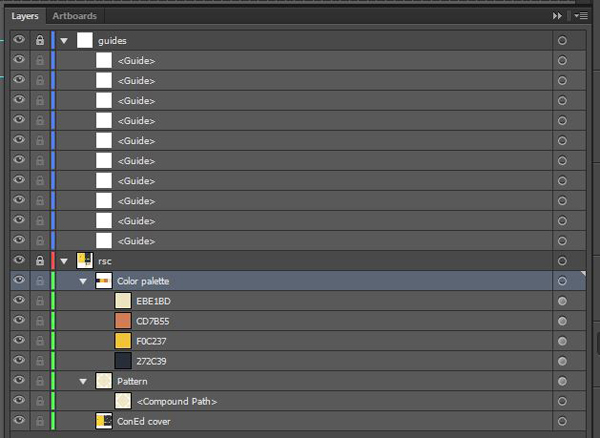
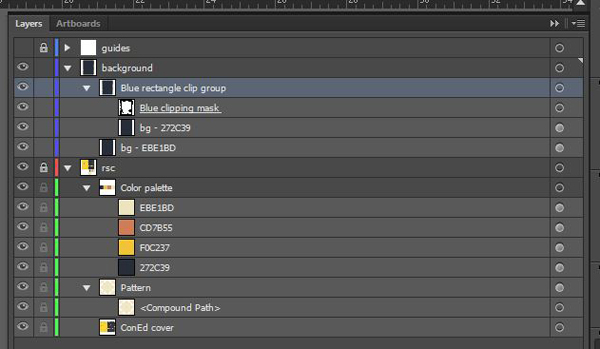
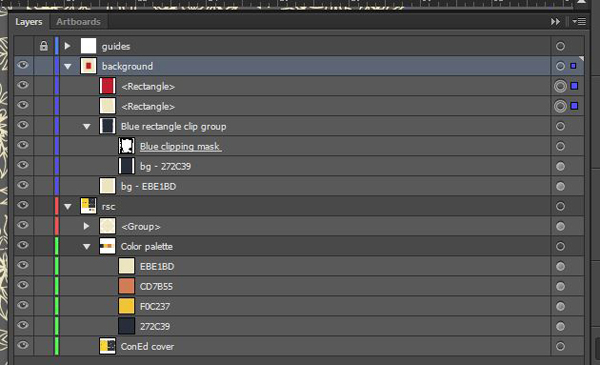
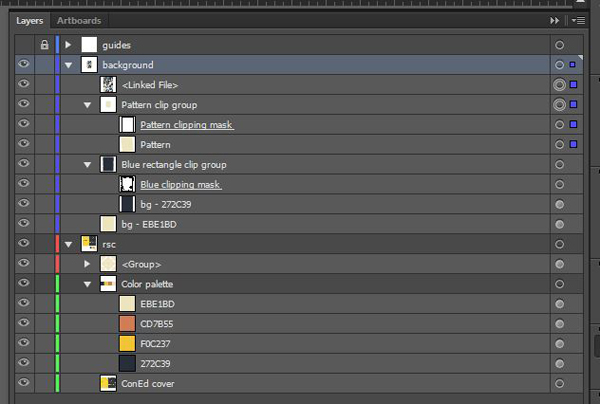
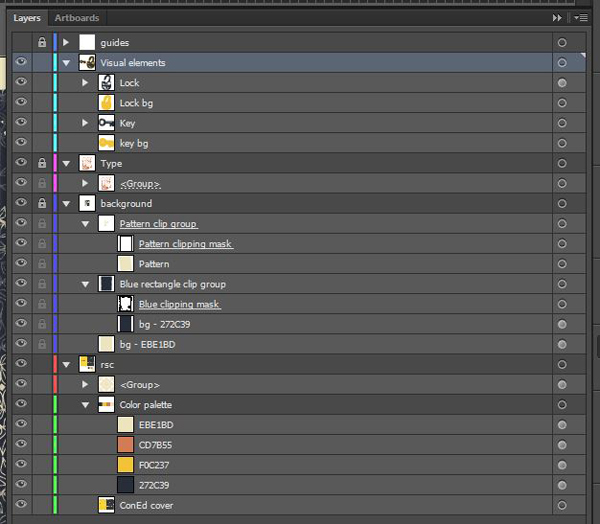
Create a dedicated layer for the color palette (and the cover image if you’d like). I’ll also use that layer to store the pattern tile and the other building blocks for the poster as I progress. Leave it locked, unless you need to select, copy, and paste elements from it.
STEP 3: THE BACKGROUND
Color sandwich
The background’s rough edge effect is obtained through a clipping mask. Start by creating a rectangle (covering the full canvas) for the off-white part (#EBE1BD) of the background.

Don’t forget the dedicated layer group, and the proper layer naming practices and etiquette.
Next, add another 18″x24″ rectangle on top of it, dark blue this time (#272C39).
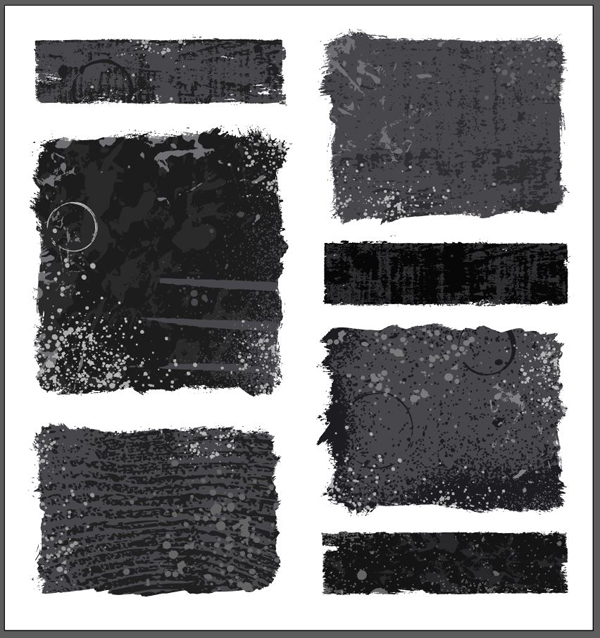
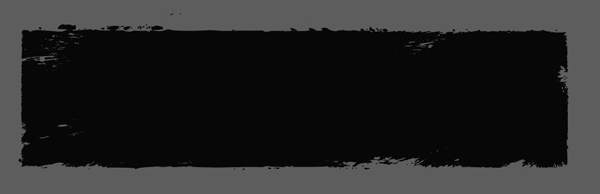
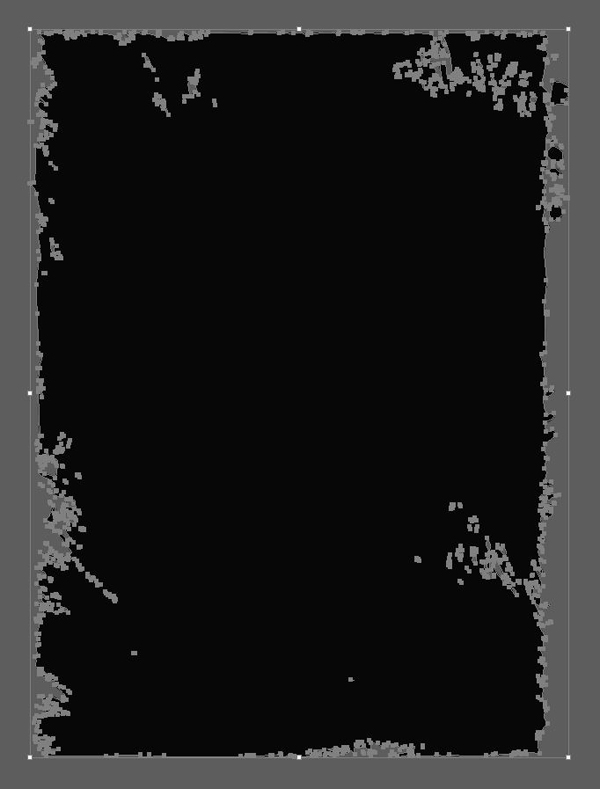
Next, we need to create the rough edge around the blue rectangle, so the off-white one shows through. We’ll be using one of Ember Studio’s Grunge banners & boxes to accomplish it.
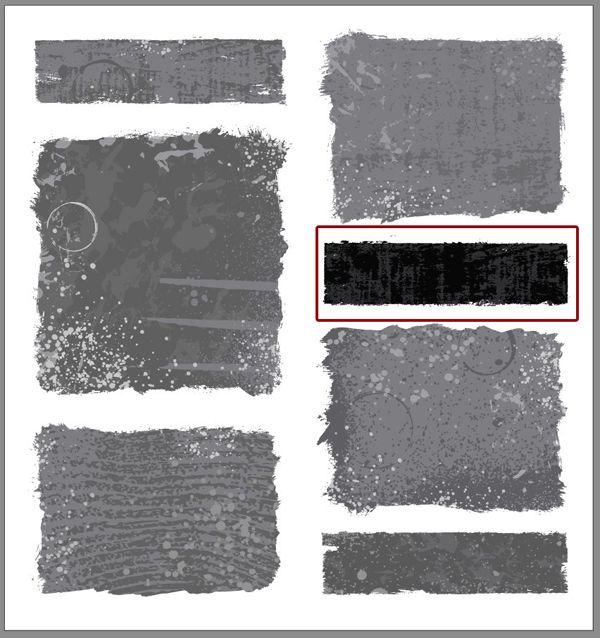
First, navigate to ember-studio\grunge-banners-and-boxesgrunge-boxes.ai. You can see that the boxes are made of shapes, overlayed with splatters and other grunge elements.
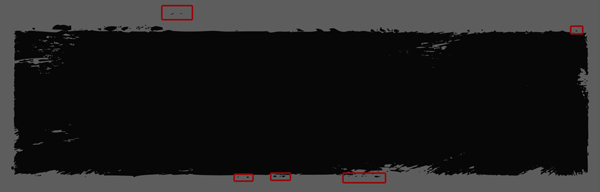
I’ve highlighted the shape we’ll be using below.
Start by duplicating the element (CTRL/CMD+C, then CTRL/CMD+F to paste it in place), and drag it aside for a bit of tweaking. I’ll be doing these tweaks straight into Ember Studio’s document, but feel free to bring the shape back into the Resources layer group of your main canvas instead (unlock it first!).
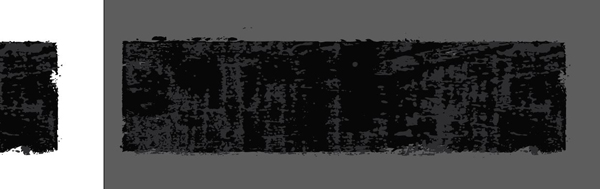
The shape doesn’t have the proper aspect ratio for our canvas, features a dark gray grunge pattern of sort, and features some distracting ink splatters at the top that we’ll remove.
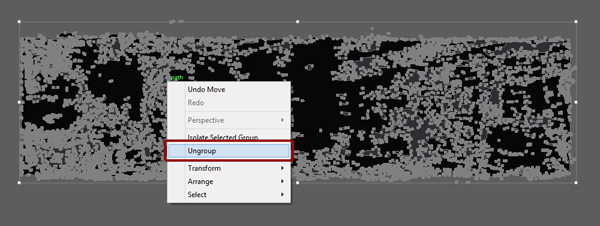
Start by ungrouping the interlocking pieces (Right click menu > Ungroup or SHIFT+CTRL/CMD+G).
Delete the dark gray pattern.
With your direct selection tool (A), delete the little splatters that are a bit far from the general shape.
Once the shape is cleaned to your taste, rotate it clockwise 90°.
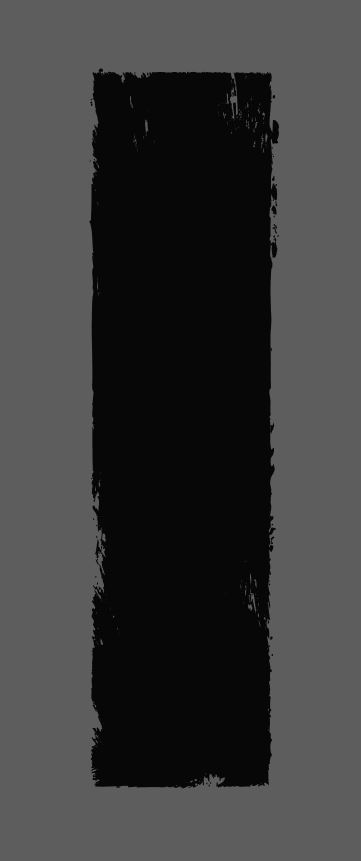
This is where the magic happens: we’re going to size it so it’ll be an appropriate layer mask for our final piece. Start by assigning it a size of 17″x23″. Make sure the little chain link between the dimension box is inactive, in order to be able to give the shape a new aspect ratio.
From there, copy and paste the transformed shape into your main document. It should be above your blue rectangle, and centered within the canvas.
If you pay close attention, the shape is slightly off-centered, due to the ink drops at its top right.

I fixed this by turning the guides back on, and manually adjusting the shape’s main outline on the guides closest to the canvas border. This gave me a final size for the shape of around 17″x22.15″. Tweak this to your liking.
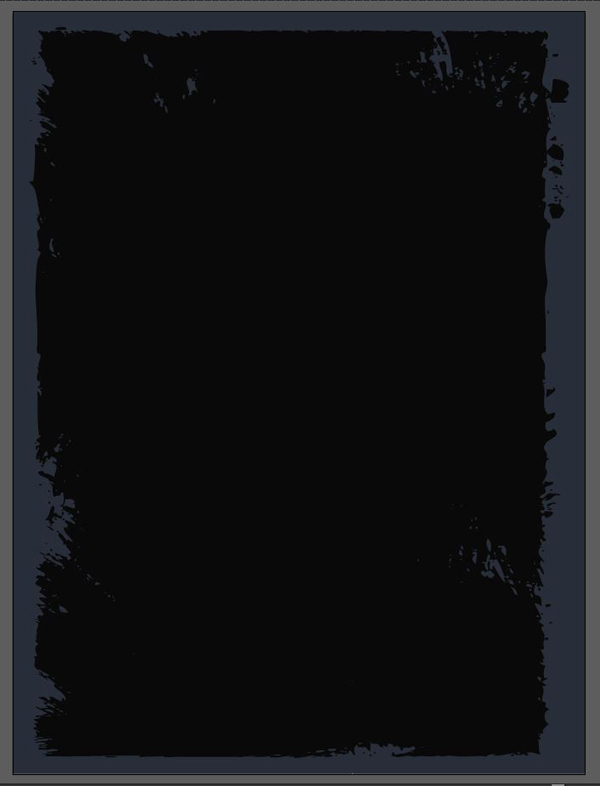
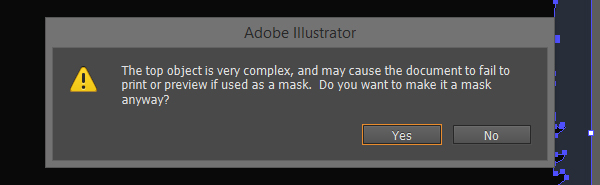
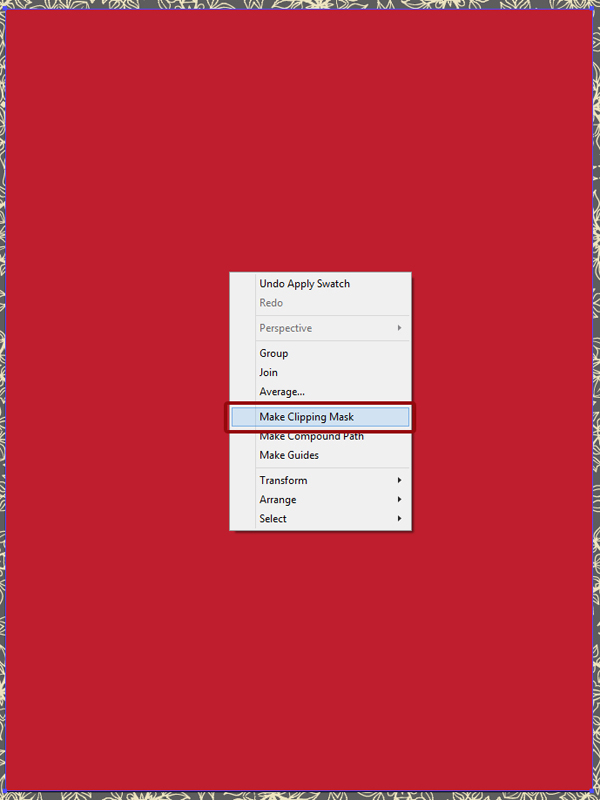
Once the shape is size and placed to taste, it’s time to actually create the clipping mask with it. Select both the black shape and the blue rectangle.

Proceed to Right click > Make clipping mask.

Ignore the potential warning.
And we have ourselves a rough-edged background.

After a little bit of cleanup and renaming, my layer palette looks like this:
Patterning it up
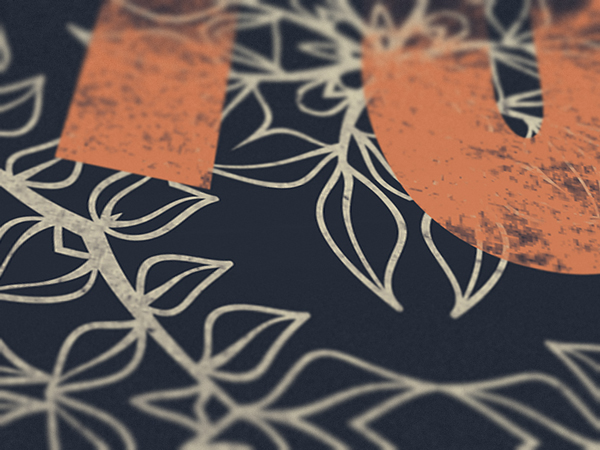
It’s finally time to add one of Dreaming Lucy‘s pattern. Grab your favorite from her collection. I’m using the following tile from dreaming-lucy\72_vintage_seamless_patterns\Vector\Vintage_seamless_patterns.ai. The color you grab it in doesn’t matter, as we’re going to change it anyways.
Copy and paste the tile in your Resources layer group.
Ungroup it (SHIFT+CTRL/CMD+G), and delete its background. Proceed to change the color to our off-white (EBE1BD). Make also sure it’s sized at around 2″x2″. The size of the tile will determine the scale of the pattern.
When happy with the size of the tile and its color, simply drag and drop it into your Swatches palette.

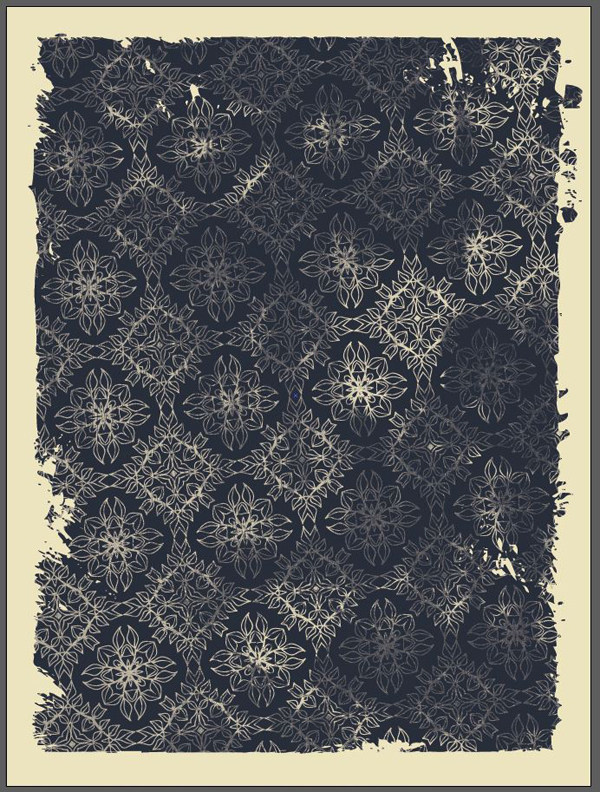
Next, create a 22″x28″ rectangle, centered on your canvas. It should be placed above your Blue rectangle clip group. Select the pattern swatch we created just before as its fill, and boom, a pattern-filled rectangle happens. Note: reuse at will on any other shape, with any pattern tile.
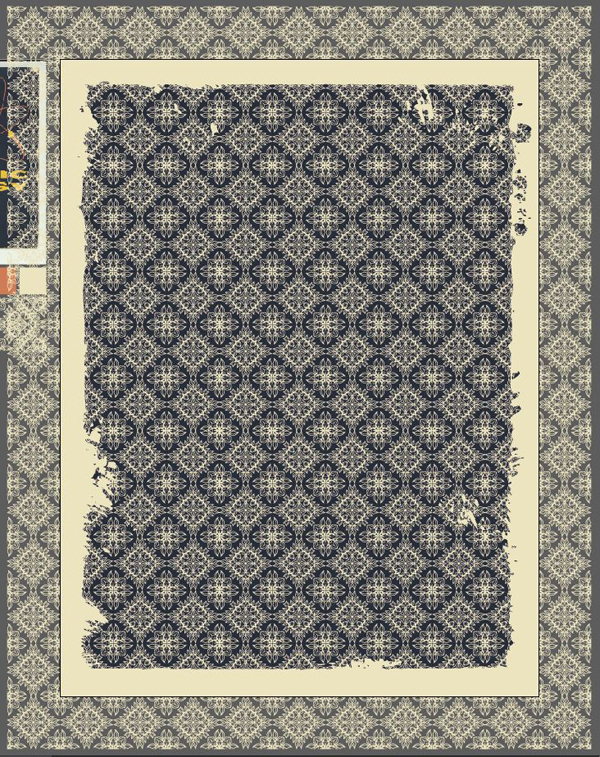
You’re probably wondering why we created a host rectangle for our pattern that’s bigger than our canvas. This question will be answered now: we’re going to rotate the pattern to give it a bit of dynamism. I’m using an angle of 6°.

This is shaping up nicely, but I have an issue. The pattern tile is too small compared to my canvas, and is overwhelming.
To fix it, let’s double the size of the pattern rectangle. Mine went from a height of around 30″ to 60″, which gives a much nicer result. Feel free to move the rectangle around a bit for any desired alignment effects.
Next, we’re going to hide all the excess pattern that overflows the canvas. Above the pattern-filled rectangle, create a canvas fitting rectangle. Its color doesn’t matter.

Select both that newly created rectangle and the pattern one, and create a clipping mask.
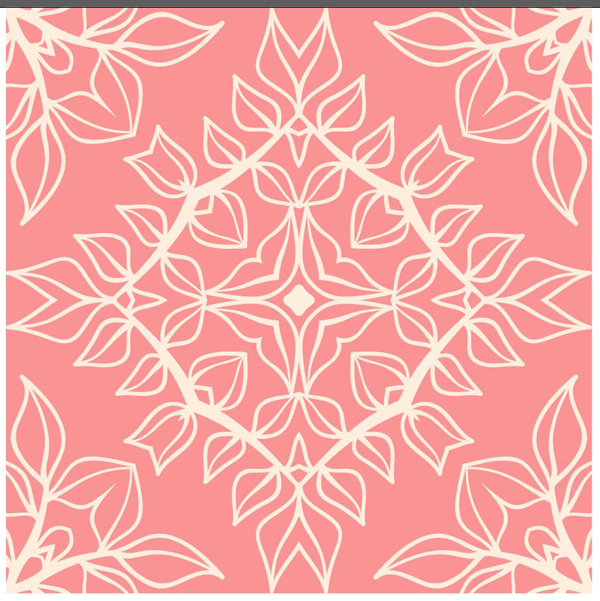
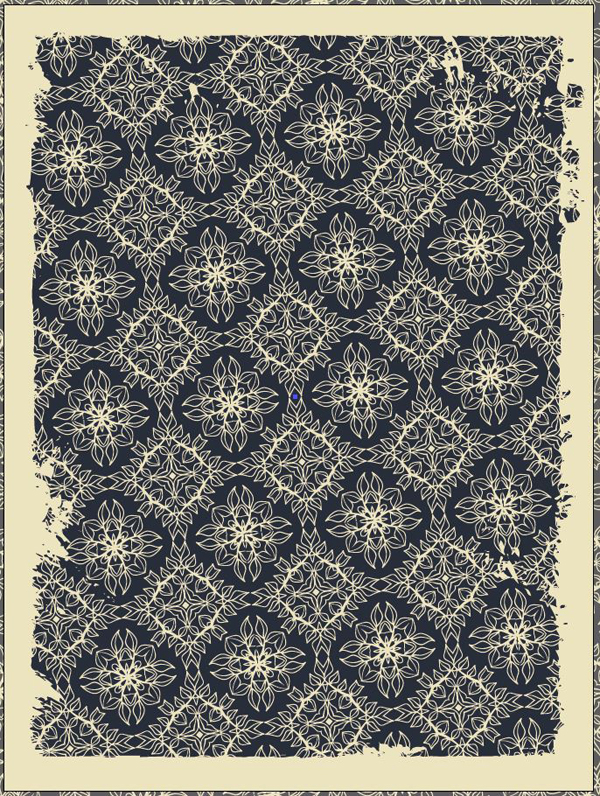
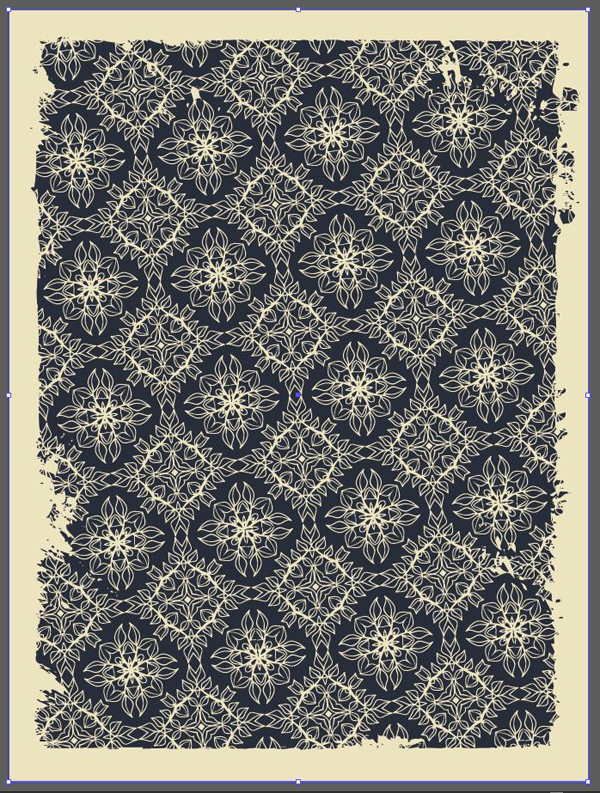
And here’s our result: a neatly patterned background.
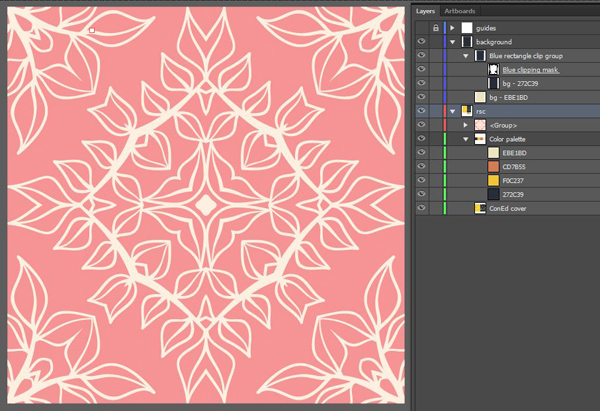
After a bit of cleanup in the layers, here’s what my palette looks like:

STEP 4: THE FIRST OPACITY MASK
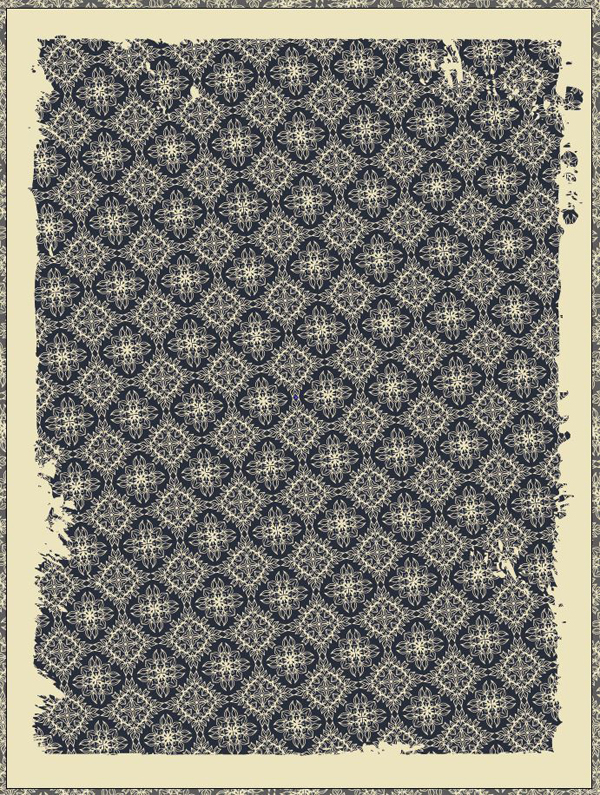
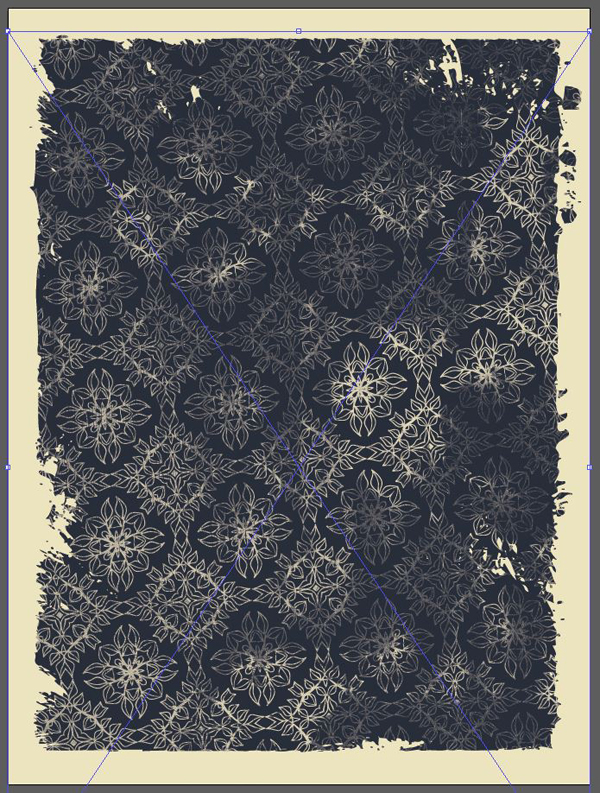
My background looks better: the big tile helps it to breath and not feel too intense. But it’s still very present. In order to fix this, we’ll use one of the dirty texture from the freebie area. The pack offers 7 textures. I’ll be using Dirty4 in this case.

The process is somewhat similar to the one of pasting a texture in a layer mask when using Photoshop. Start by placing the texture above the Pattern clip group (File > Place or SHIFT+CTRL/CMD+P). Size at will. Note that my texture is centered in the canvas, and sized at 18″ wide.
Proceed to select both the texture and the Pattern clip group.
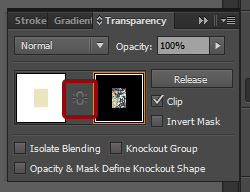
From there, head to the Transparency palette (SHIFT+CTRL/CMD+F10). Hit that Make mask button.
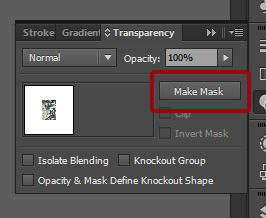
The result is a faded pattern, much like if we had pasted a texture in a layer mask in Photoshop.
Not happy with the placement of the grunge fades? You can move the texture around. Make sure that the textured elements are selected, and head back to the Transparency panel. Select the layer mask, deactivate the chain link, and move the texture around or transform it at will.

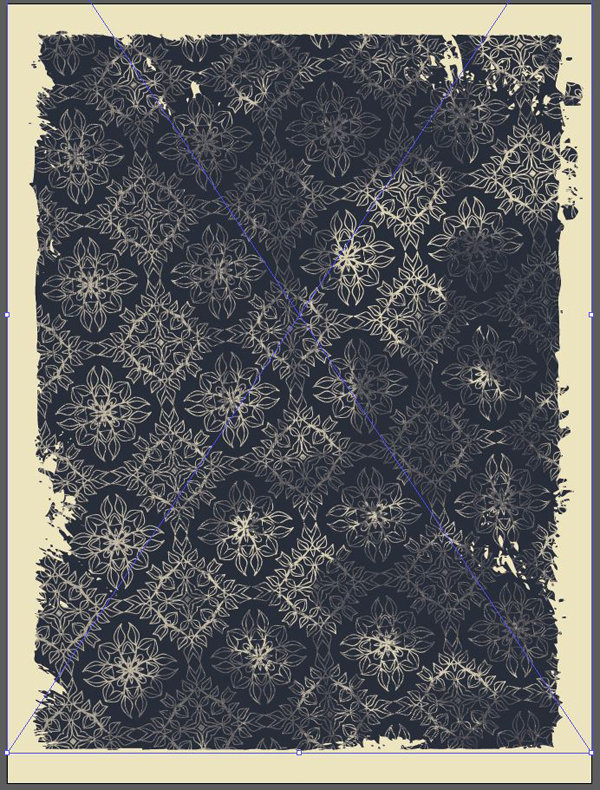
Here’s my final texture placement.

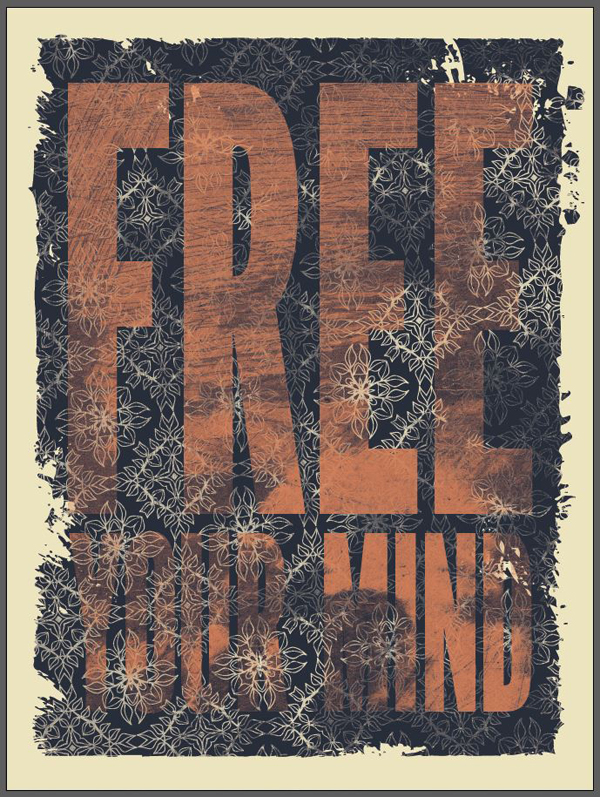
STEP 5: TYPE
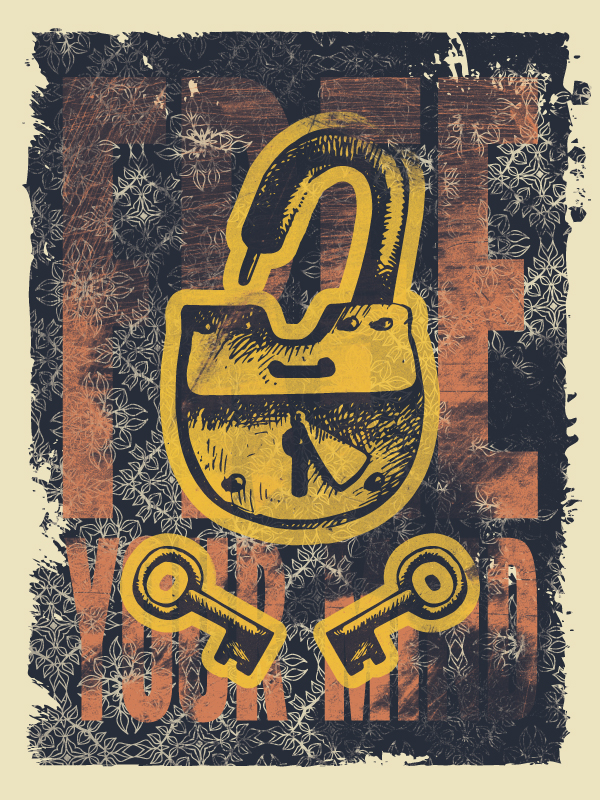
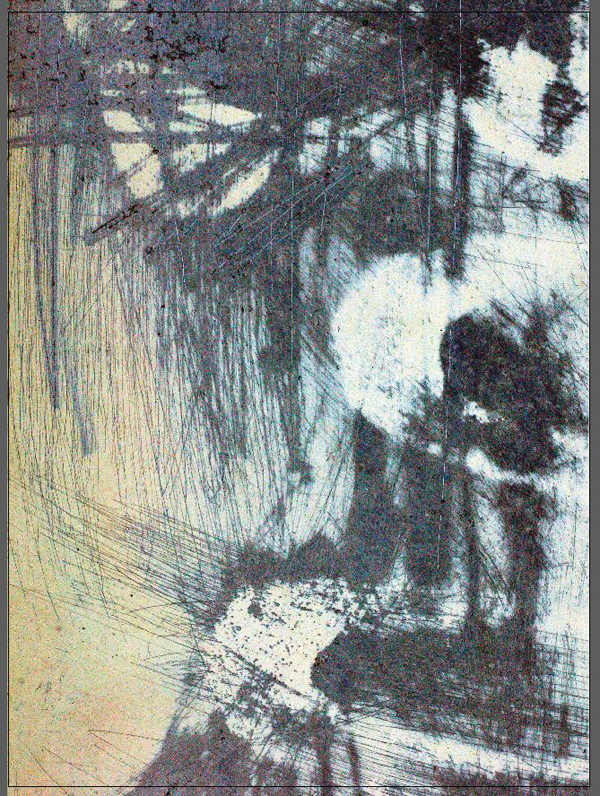
My wife and I marathon-ed through the Matrix movies recently. One of the taglines for the series was “Free you mind.” This taglines is what motivated the use of the lock and key as main iconography for the poster. The type is heavily faded in the background, kind of like a ghost.
Since I wanted my type piece to be very big in the canvas, I chose a condensed industrial sans-serif as my typefaces. After trying a few, I ended up going with League Gothic Condensed. Its letter forms are very elegant, yet posess a bit of that industrial ruggedness.
I wrote my copy on 2 lines: “Free / your mind,” all in uppercase. “Free” is sized at 1296 points, and “your mind” at 537 points. Both elements’ kerning is set to Optical. Their color is our pale orange (#CD7B55). Finally, the type block is visually centered at the center of the canvas.

In order to fade the type piece in the background of the piece, I’ve used the Dirty4 texture again, although sized and placed differently.
Place the texture in the file again. Make sure it covers the canvas.
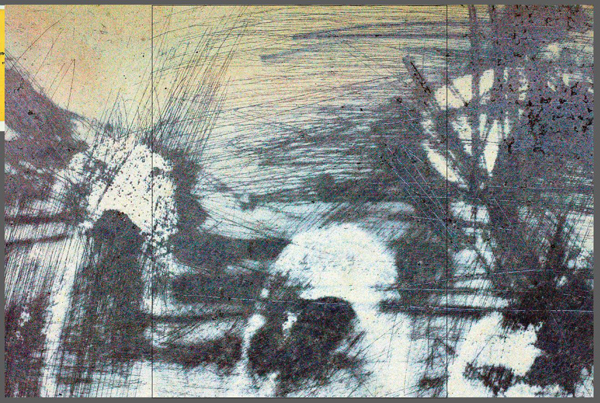
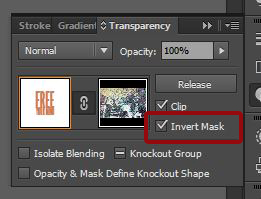
Select the type and texture, and make it a transparency mask. In this specific instance, one of the texture’s most interesting characteristics is its heavily scratched zone at the top.


The result is visually striking, but still a bit strong.
Hit the Invert mask check box in the transparency panel. This inverts the content of the mask, and, in our case, makes for a stronger fading effect.
And our type piece is done! Time to switch to iconography.
STEP 6: ILLUSTRATIVE ELEMENTS
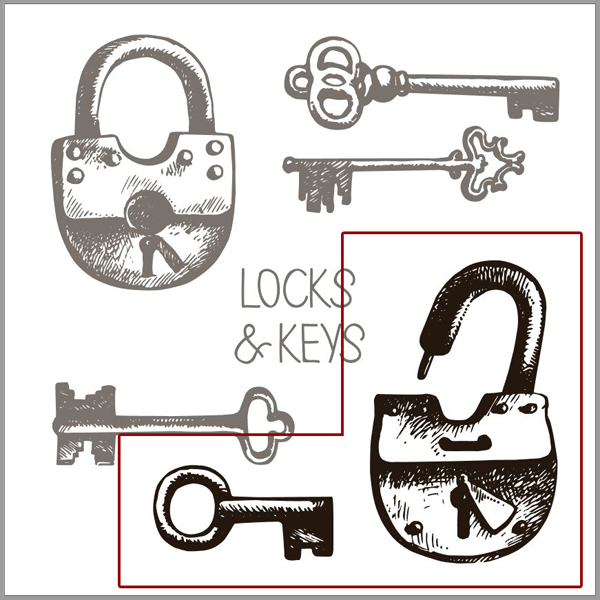
Which ones are we using?
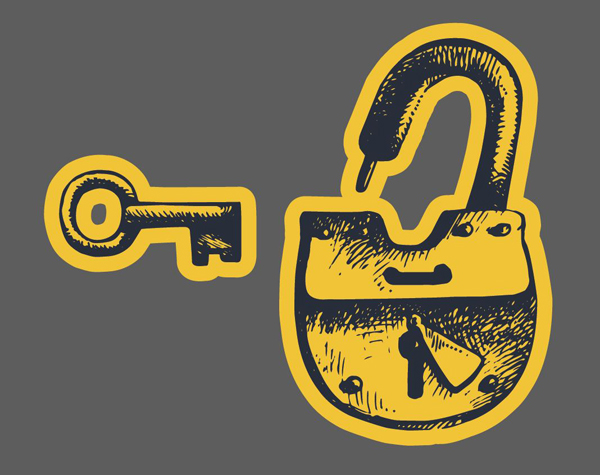
As stated before, the illustrative elements of our poster are to be found in Elena Pimonova’s hand drawn lock and key set. Navigate to elena-pimonova\Keys-And-Locks-Set\Keys & Locks set.eps.
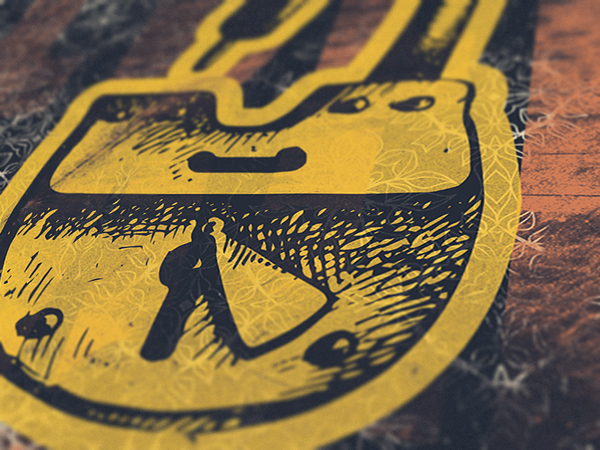
I chose the open lock in reference to the poster’s tagline. The key got picked because it was the one looking the simplest, and most fitting for the lock.
We’ll have to prepare the lock and the keys a bit before we can use them in the design. Most importantly, we’ll need to give them a background color, and an outline. Start by copying the elements to your Resources layer group.
The main piece
We’ll start with the lock. Start by creating a pasted in front copy (CTRL/CMD+C – CTRL/CMD+F).

Lock your top copy.
Now, select the bottom copy and change its color to our yellow (#F0C237).

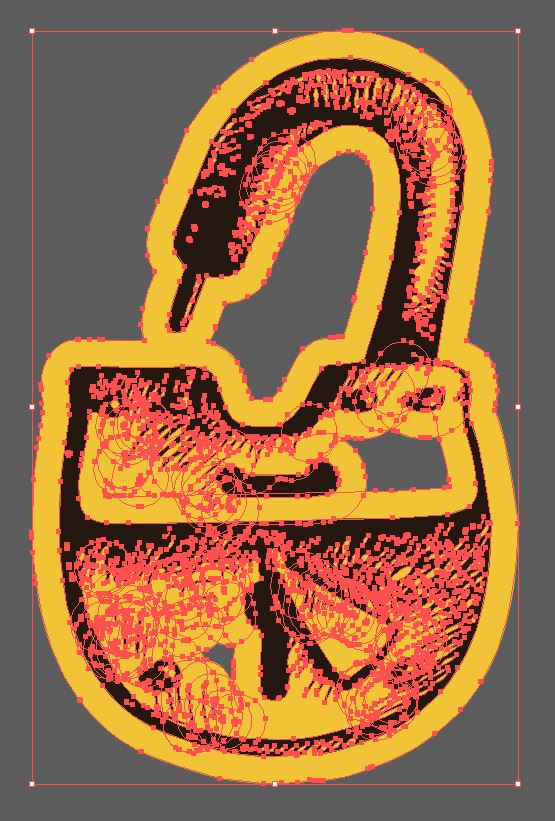
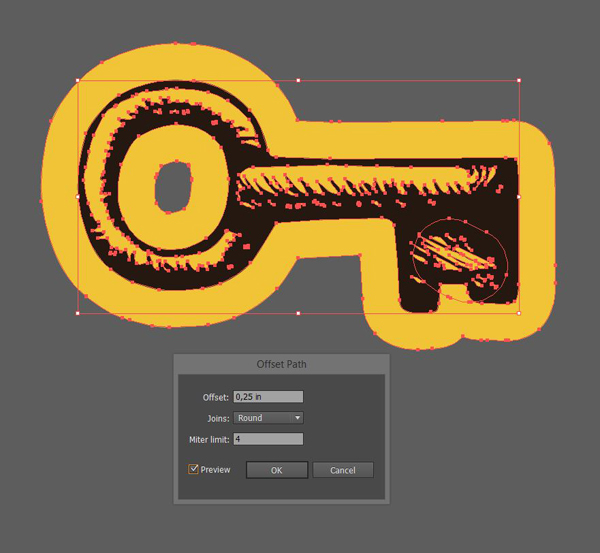
Next, head to Object > Path > Offset path, and apply the following settings:
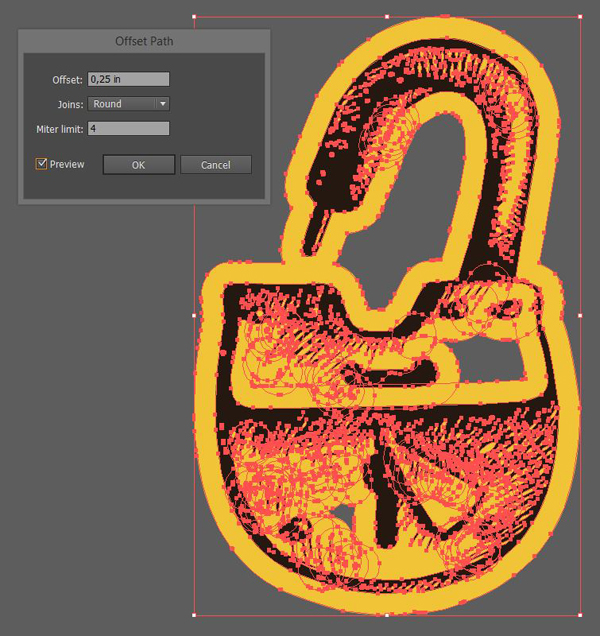
Select all the yellow lock, and merge its various bits and pieces together with the Pathfinder.

We almost have a complete solid color in the background. Use the pentool or the blob brush to fill the holes.

Once the holes are filled, merge the yellow background together once more.
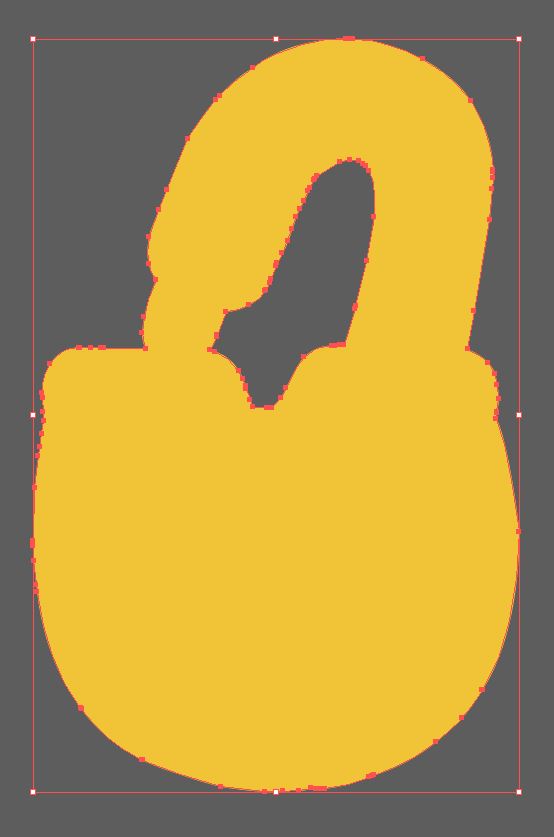
Once the process is completed, place the lock’s background behind our earlier copy. Change the lock’s color to our blue. The lock is ready.

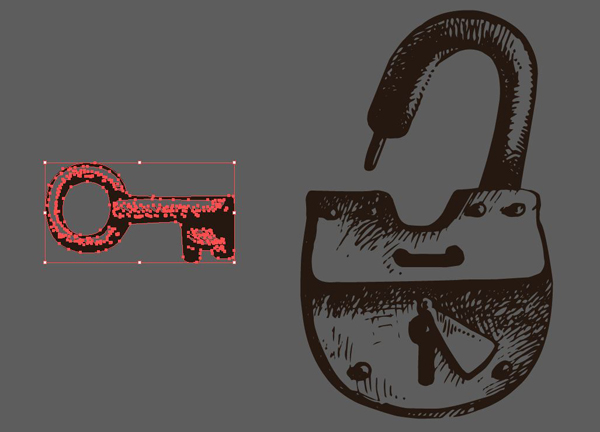
The key
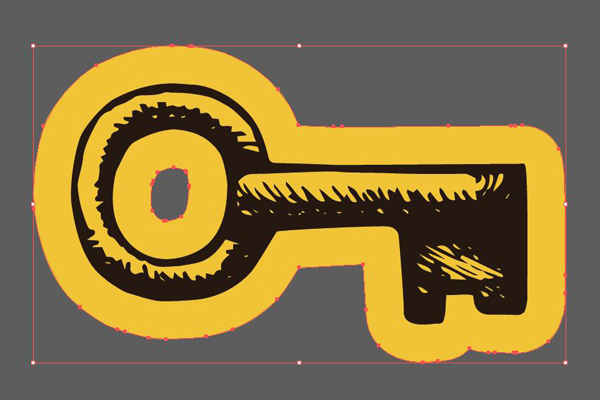
The key is next. Actually, we’ll have a pair of keys, but that’s not a concern right now. Follow a similar process to give the key a background, and the same path offset value. This is important for visual consistency.

Placing the elements in our composition
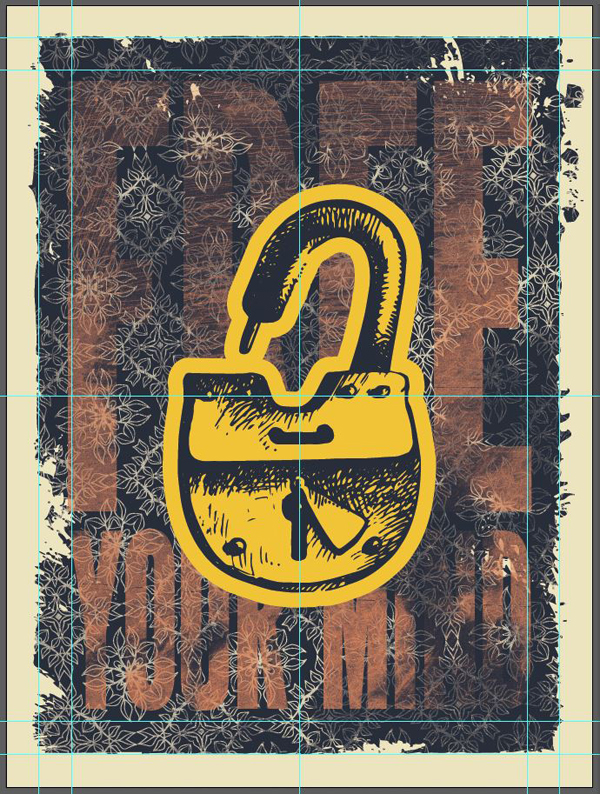
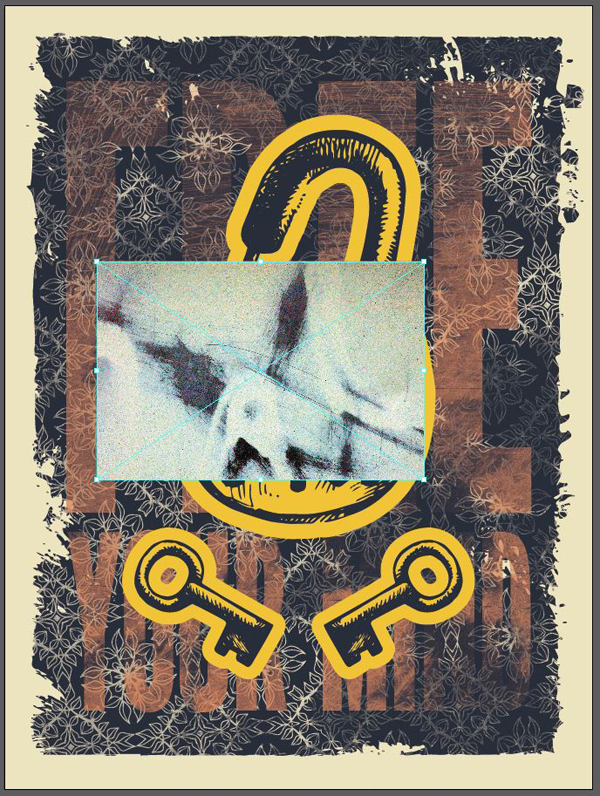
Propaganda posters are simple and straight to the point. Hence my very simple composition: the lock centered, with a pair of keys underneath.
Start by creating a new layer for our visual elements, and transfer them in there. By the way, have you kept your layers organized so far?
I’ve resized my lock to be 13″ tall. It’s currently centered in the canvas.
Let’s create that pair of keys. I almost wanted to do a blue one and a red one, but the limited color palette of the poster didn’t work too well for that.
In order to add a little dynamism in the piece, I’ve given my key a -30° angle.

Place the key under the lock. Their proportions don’t match very well.
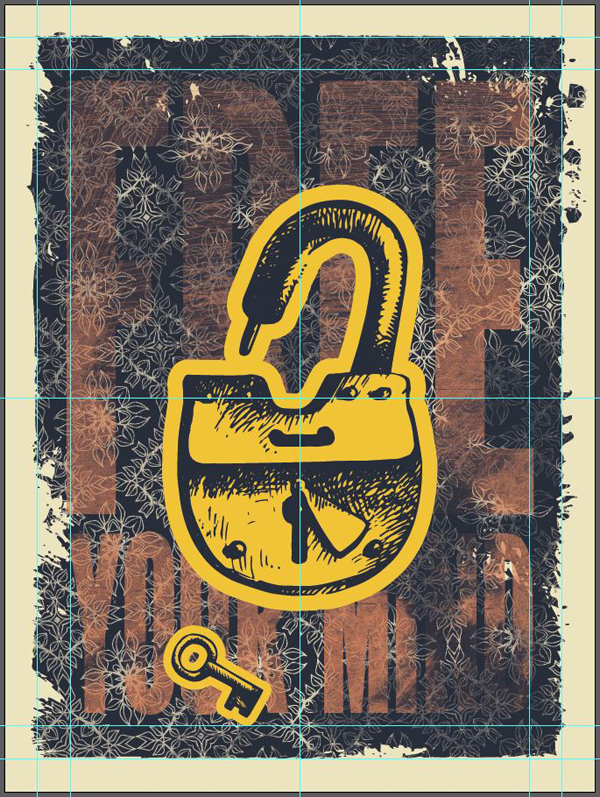
Now’s the perfect time to adjust that. My key is now close to 5″ wide.
It’s time to create the key’s mirrored twin. Simply select both the key and its background, and head to Right click > Transform > Reflect.

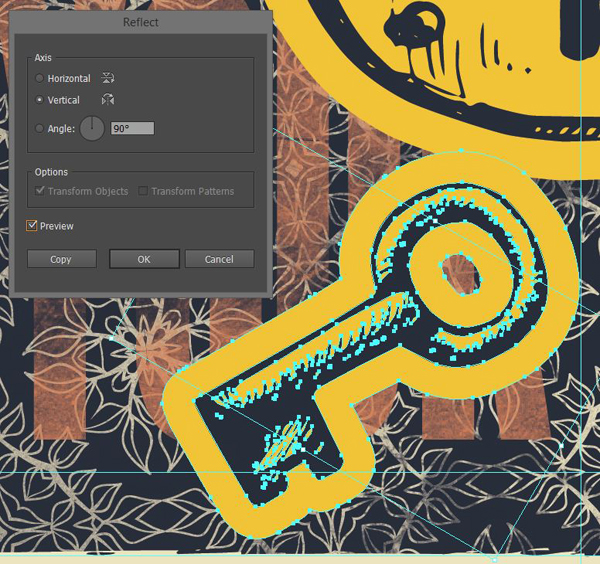
Don’t forget to hit the Copy button instead of OK to get Illustrator to automatically duplicate the key in the new orientation.

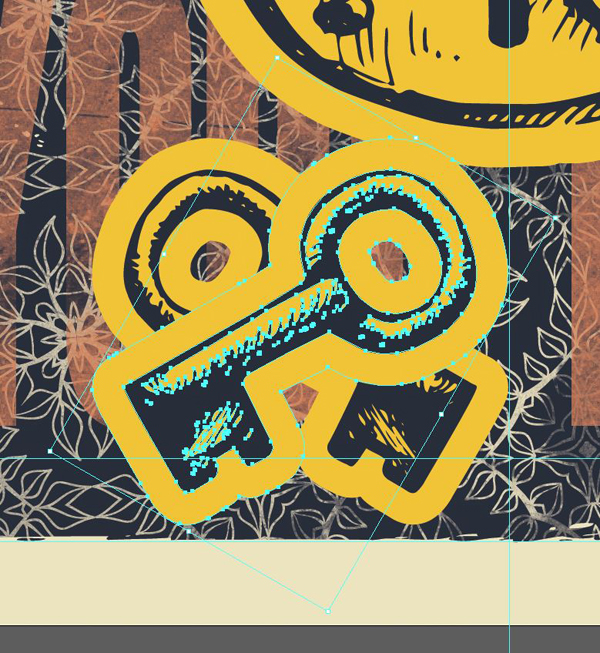
Visually space the keys to form a centered, supporting banner-like element for the lock. The space left between the two keys could be the same than the one left between the side curves of the lock and the top of the keys.

Once you’re satisfied with your alignments, simply center the whole block of visual elements within the canvas.
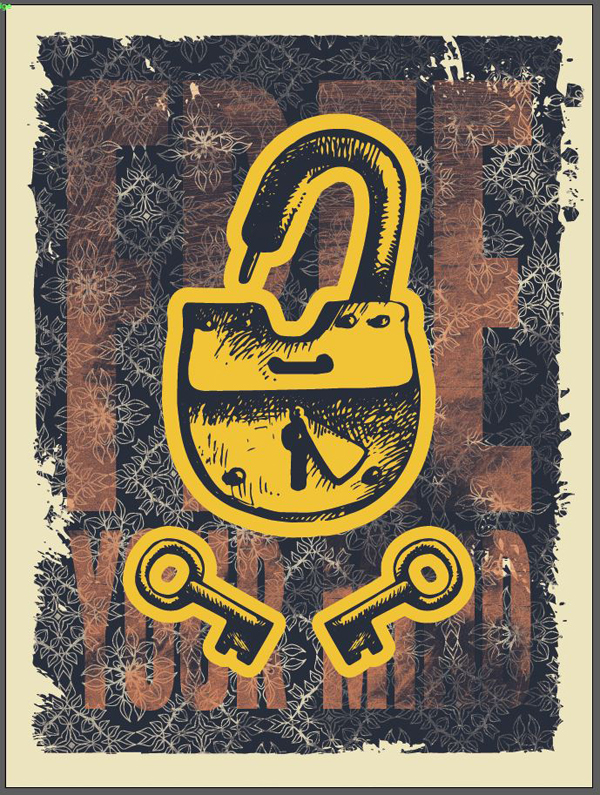
Finishing touched
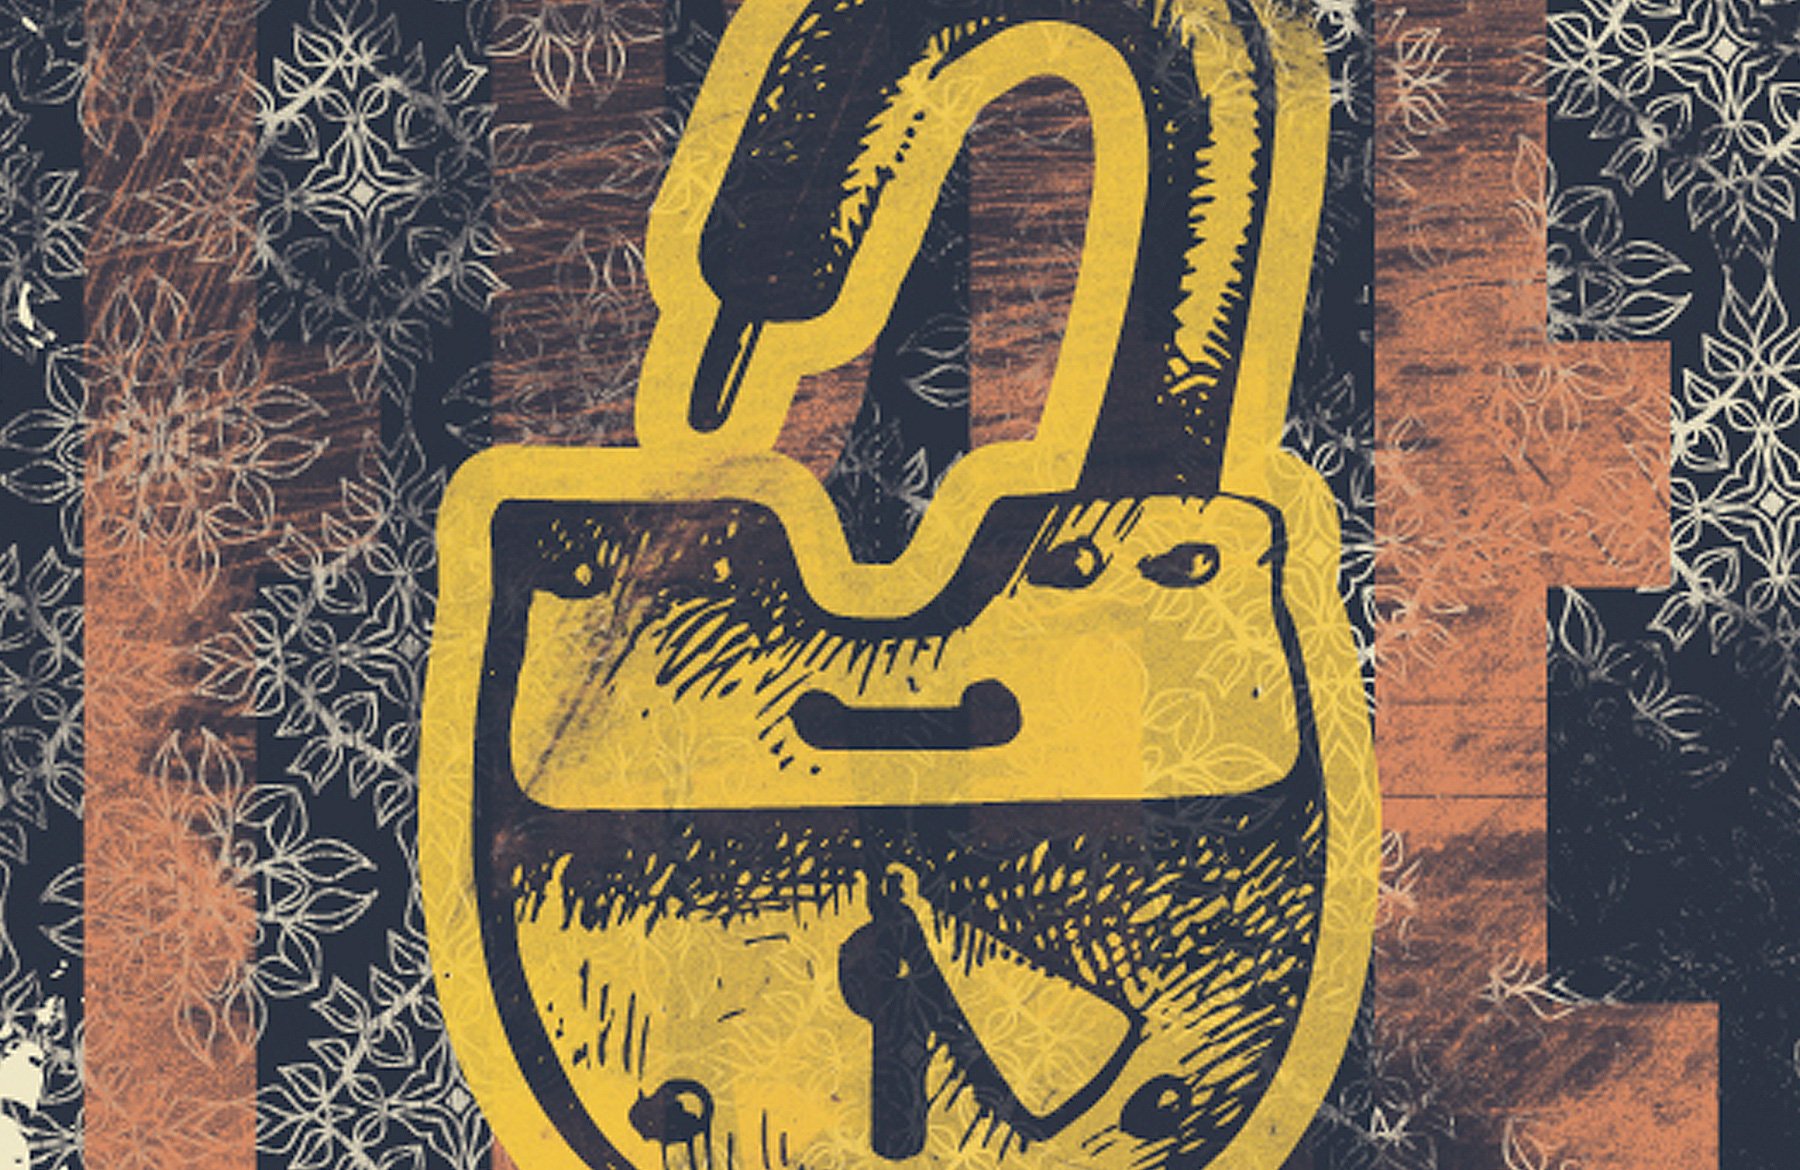
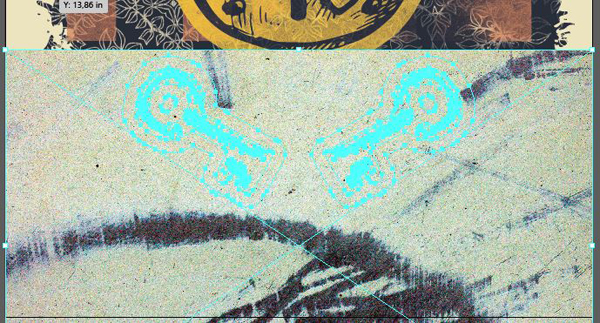
As for the type, we’re going to fade our lock and keys a bit with our set of dirty textures. The goal is to be a bit more subtle with our effect though, as we don’t want the main pieces of the poster to be obliterated to oblivion.
First, the lock. We’ll be using the less grunge, more noisy area of Dirty3.
Start by placing it in the canvas.
Here’s a view of it in place. I’ve rotated it 90° clockwise. I’ve also lowered its opacity so you can better understand its placement compared to the lock.
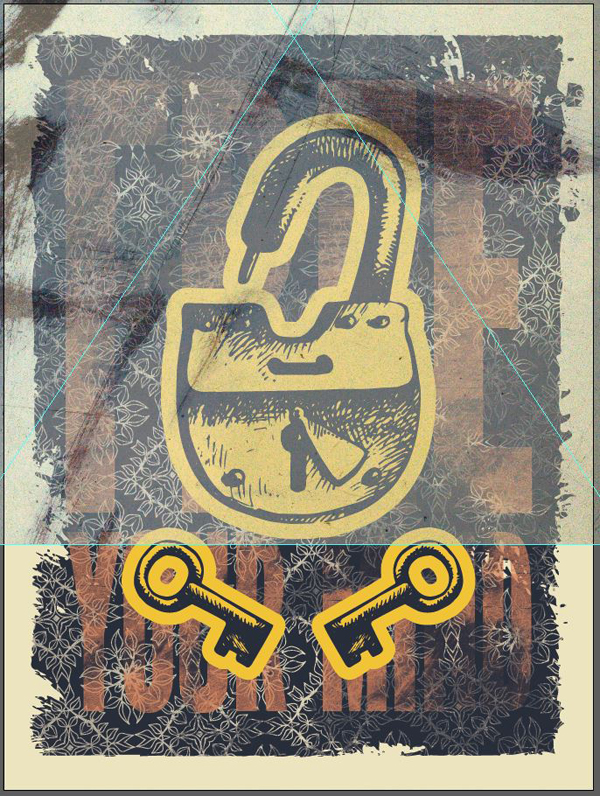
Once the placement suits you, proceed as we did earlier to fade the lock a bit.


Finally, the keys are the last piece of the puzzle left. We’re going to use the big noisy part of Dirty1 to wash them out a bit.

And we’re done! Have a look:
WRAP UP THOUGHTS
Well, this is the end of another tutorial. I hope it helped you guys learn a few new techniques to play with textures in Illustrator, as well as get a taste of OBEY-style propaganda art.

I hope you had as much going through the tutorial as I had writing it. Don’t hesitate to share your outcomes on the Design Cuts Facebook page. Was there anything unclear? Ask questions in the comment section, or ping me on twitter: @simonhartmann.
Remember, there’s just a few days left to grab the Gigantic Vector Elements Bundle for 91% Off. This collection features hundreds of best-selling vectors, including all of those featured in today’s lesson. This is your last chance to get the entire bundle before it expires:

Just thank you so much for this incredible tutorial!
Hey Gustavo,
Thank you so much for your comment!
You are so welcome, I really hope that you have enjoyed following this one and that you have picked up some new tips or tricks too :)
I have loved this art style for so many years. Thank you for posting this wonderful tutorial!
That is great to hear, Loren! I’m so pleased to hear you loved this tutorial :)
This was unhelpful
Hey Ted,
Thank you so much for your comment and I’m so sorry to hear this tutorial was not helpful for your specific projects. If there is anything that you are looking to learn in particular please do not hesitate to let us know, and if we do not have a tutorial on this already, we can certainly see if we can include this in future for you Ted :)