In this design tutorial I will be showing you how to create an Art Class Flyer Design in Photoshop! To create our flyer we will be using some of the various patterns and textures from The All-Purpose Textures and Patterns Collection. In addition, we are going to be working with a few different fonts, Photoshop brushes, and scene creator objects from Design Cuts to make our flyer really fly! All other free elements used will be linked in the steps below for you to download.
HAVE YOU SEEN OUR YOUTUBE CHANNEL?
Watch the video tutorial below and subscribe to our YouTube channel for regular updates direct to your inbox.
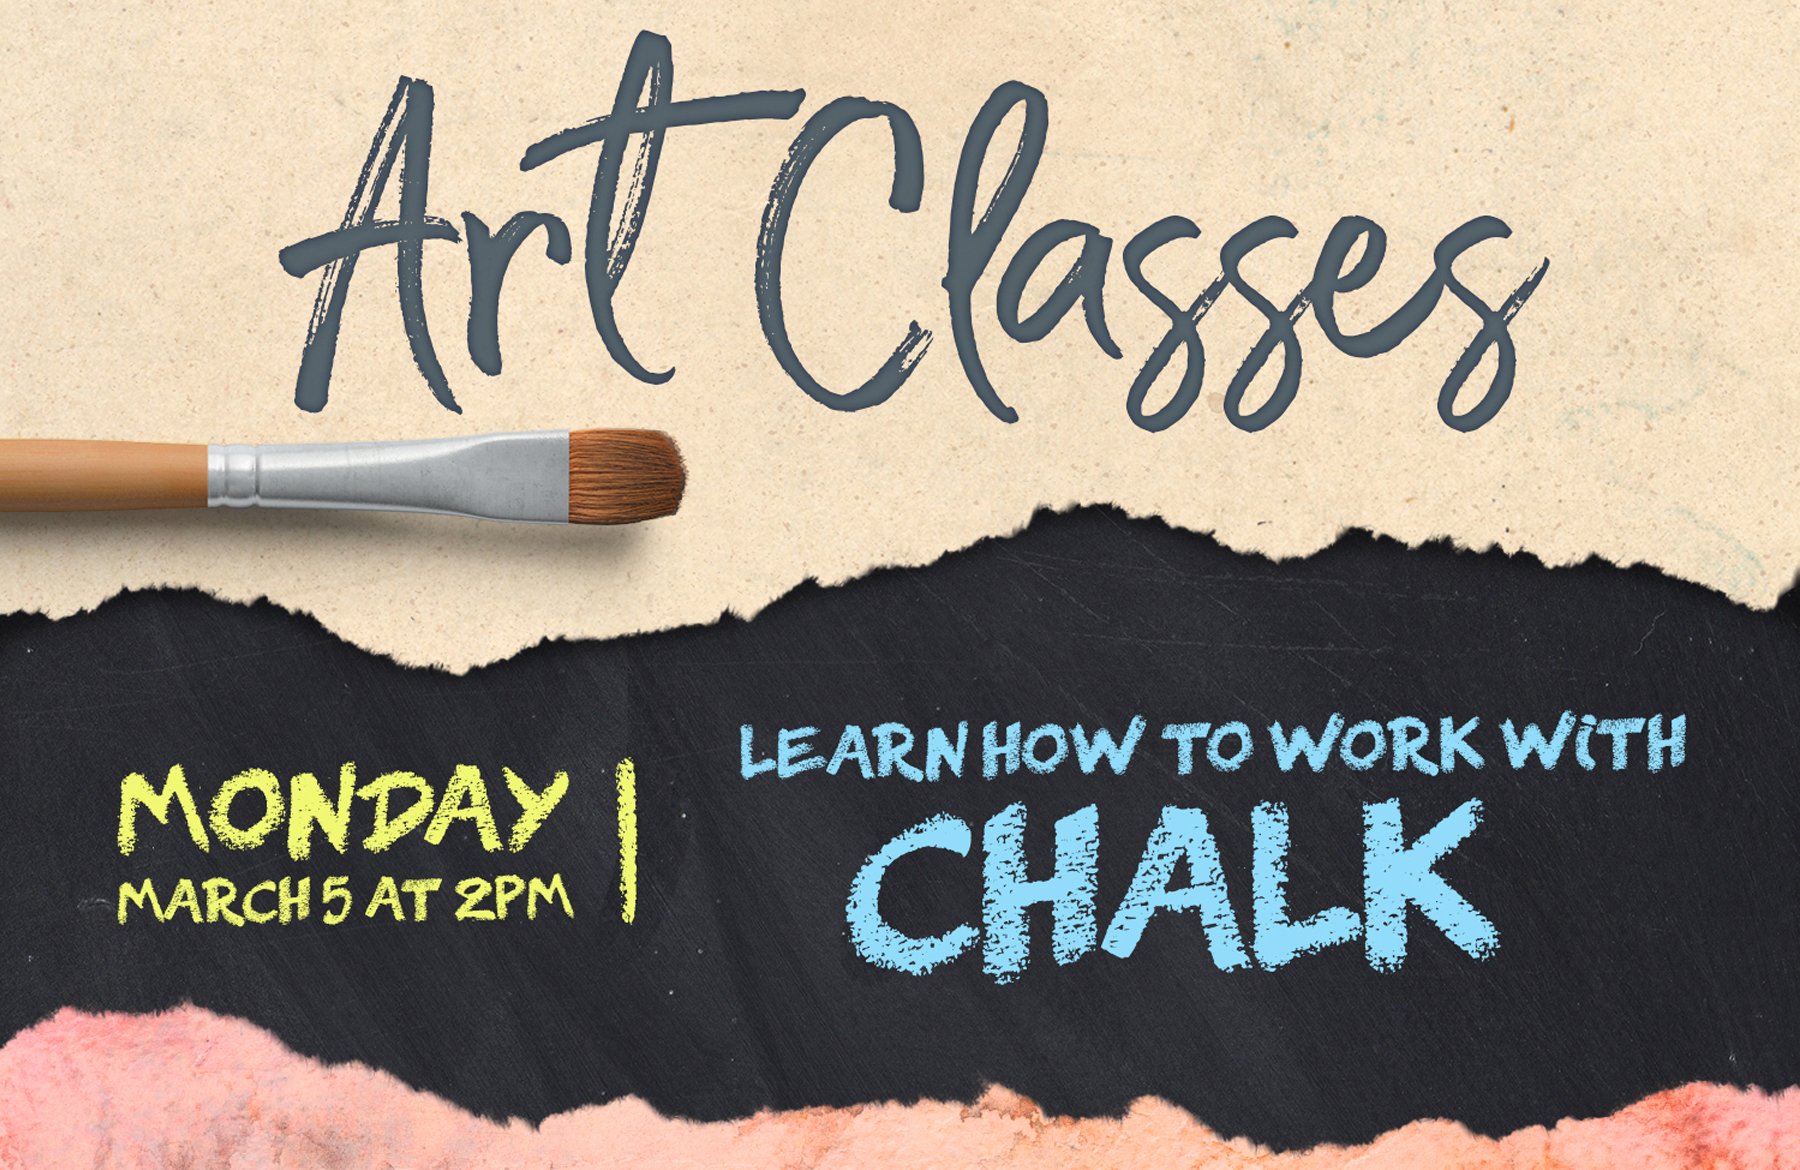
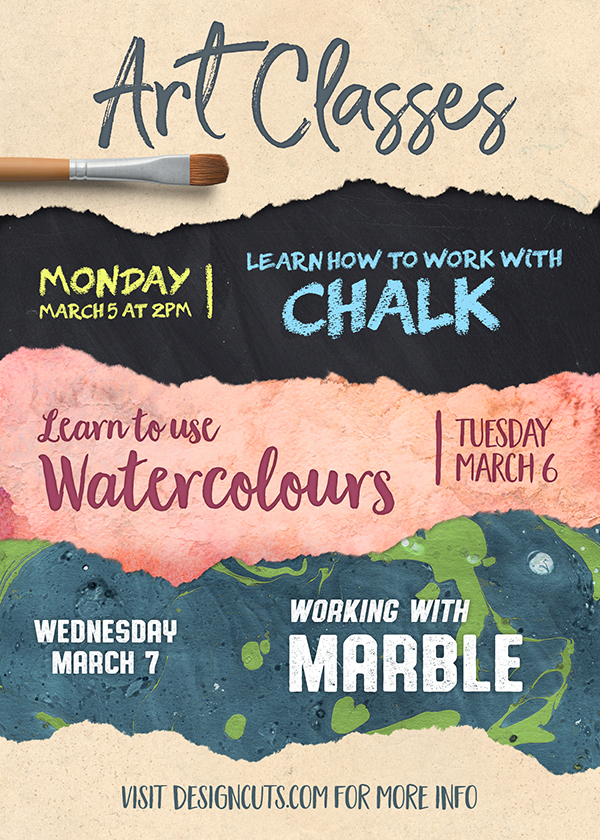
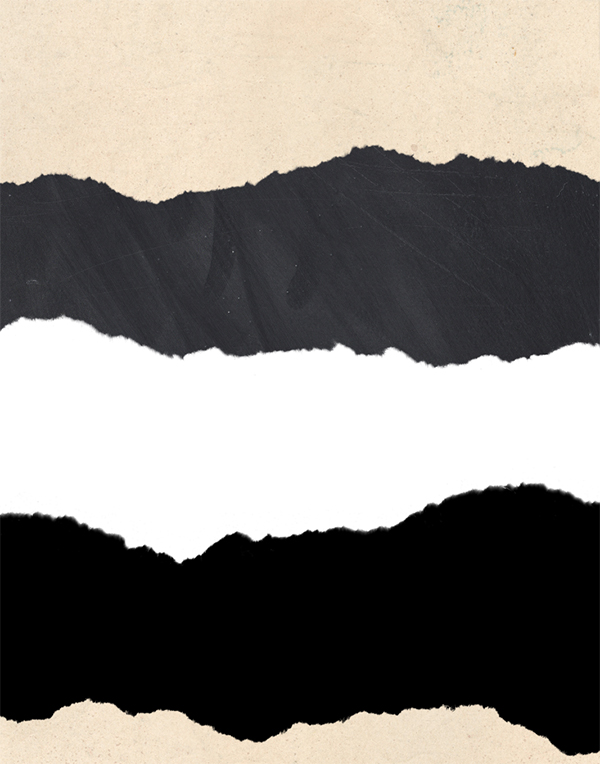
Here’s a look at what we’ll be creating:
Follow along with this tutorial: Download the freebie files
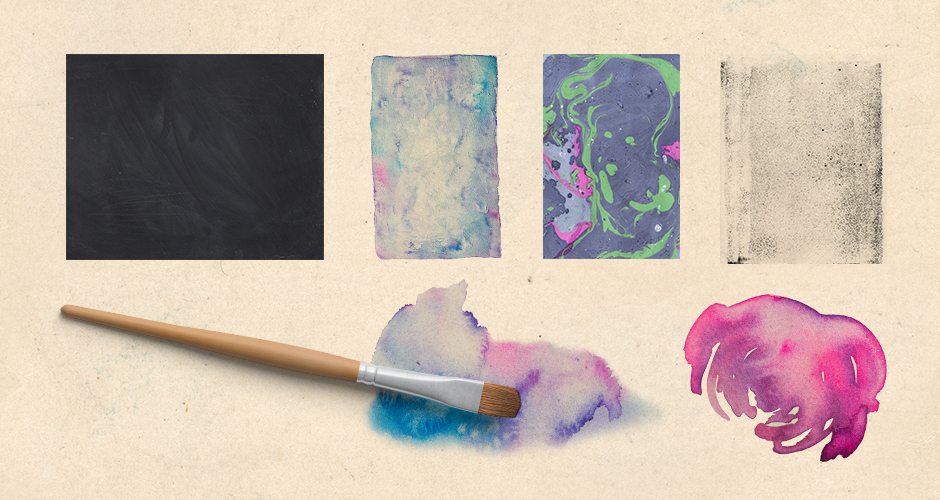
This freebie pack includes an assortment of patterns and textures that we will be working with in this tutorial.
This pack of freebies is just a sample of the massive collection you will find in The All-Purpose Textures and Patterns Collection for just $29 (that’s 99% off). This new bundle is possibly the largest collection of textures and patterns ever! With thousands of hand-picked resources from some of the top designers in the world, this collection is sure to be a major upgrade to your design toolkit.
Step 1: Art Class Flyer
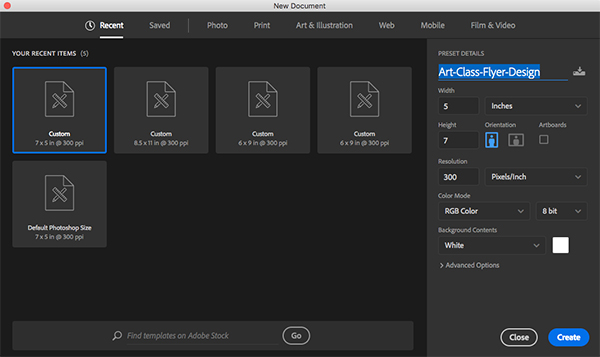
Let’s roll up our sleeves and fire up Photoshop to get started. The first thing we want to do is create a new document that is 5 inches wide by 7 inches tall. While we are here we will also ensure that our document is set to ‘300’ pixels per inch, ‘RGB’ for the ‘Color Mode’ and then set a ‘Background Contents’ of ‘White’. The last thing we want to do here is give our file a name – for this part I will be using the name ‘Art-Class-Flyer-Design’ but feel free to use a naming convention of your choice. Once you have set up these parameters go ahead and click ‘Create’ from the lower right corner to make your document.
After setting up your document you will notice that you now have a single ‘Background’ layer filled with white that has a small lock next to it. Let’s go ahead and double click this layer to unlock it. You will then be prompted with a ‘New Layer’ dialog box where you will want to name your layer ‘BG’ as shown in the image below:
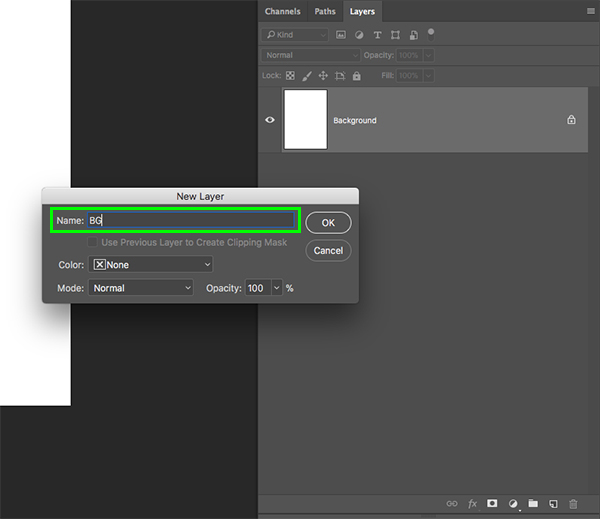
Press ‘OK’ to apply the name to the ‘Background’ layer and you will now have a single unlocked layer with your new name as shown here:

Step 2: Eclectic Anthologies
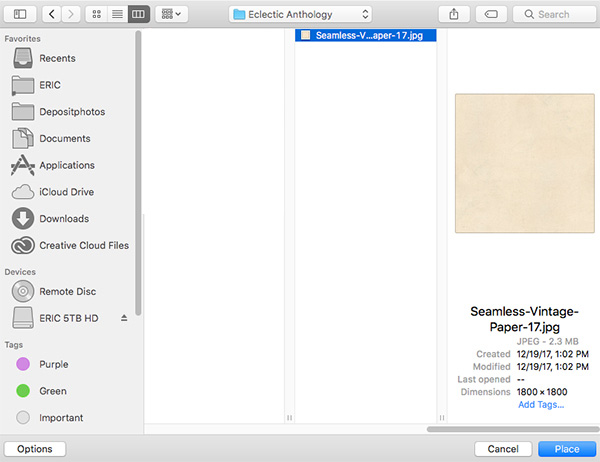
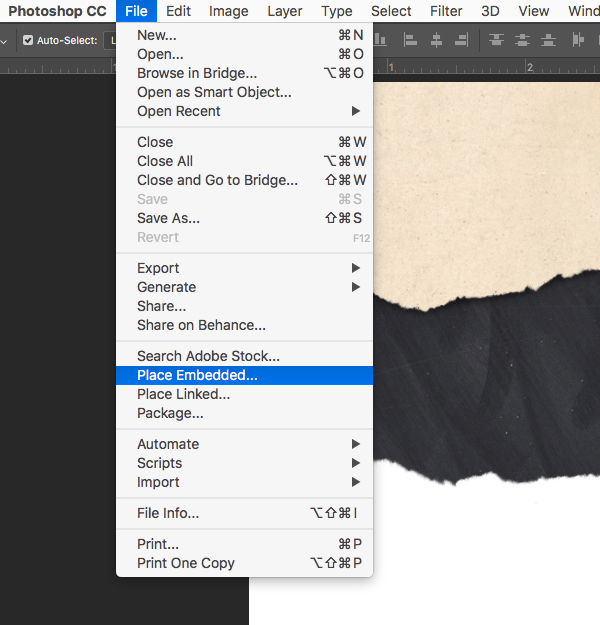
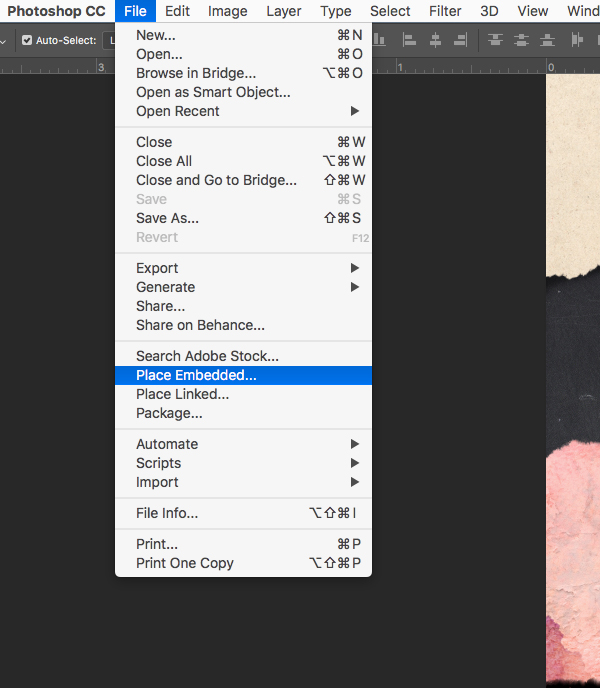
Now that we’ve set up our document we can begin building our background. First, go to the ‘File’ menu and choose ‘Place Embedded…’ from the menu as shown here:

From here, navigate to the ‘Seamless-Vintage-Paper-17.jpg’ file inside of the freebies folder for this tutorial and choose ‘Place’ from the bottom right to import the texture.
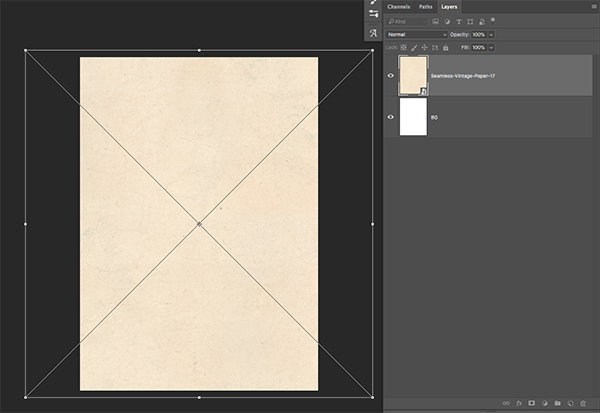
Once your file is imported you will notice that it is by default given the same name as the file itself and it is also set as a Smart Object. Before we press ‘Return’ on the keyboard to apply the changes let’ scale the texture up a bit by holding the Alt/Option+Shift keys and dragging outwards from any of the four corners of the bounding box until the texture fills the height of our canvas as shown here:
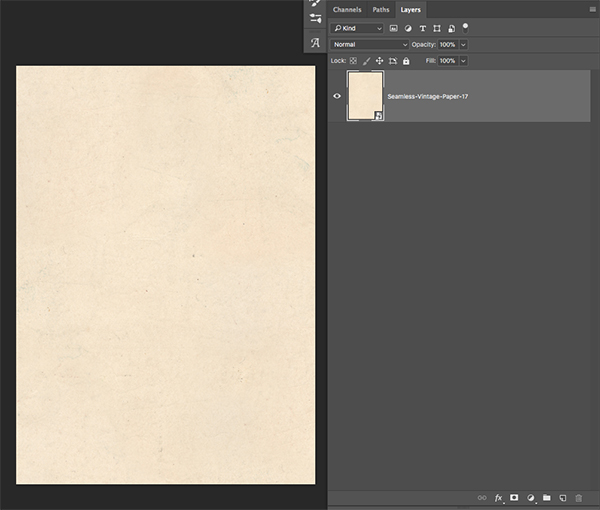
After increasing the size of the paper texture and making sure that it fills our canvas, press the ‘Enter’ or ‘Return’ key to apply the changes. Once you have done that you can select the ‘BG’ layer and delete it since our new texture will be serving as our background. You should now just have this Smart Object texture layer in your document.
Step 3: Adding Some Grit
Return to to the ‘File’ menu and choose ‘Place Embedded…’ from the dropdown as shown here:

From here, navigate to the ‘Roller_VOL1_20.png’ from Stock Mamba and choose ‘Place’ from the bottom right to import the texture.

After importing the file, click and drag any of the four corners of the bounding box outwards while holding the Alt/Option+Shift keys to make it larger from the center until it fills the entire canvas. Once you have done that, press ‘Return’ to apply the changes.

Step 4: Subtle Coloring
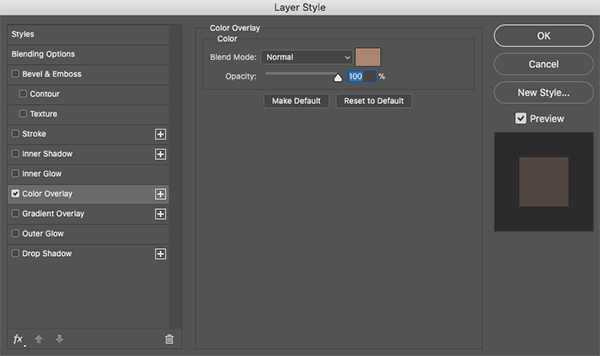
Double click on your roller ink layer to bring up the Layer Style box and check off the ‘Color Overlay’ option as shown here:
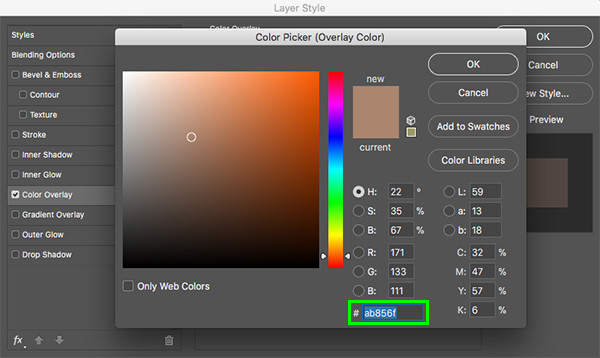
For the fill color, enter ‘#AB856F’ as the hex value and then click ‘OK’ twice to apply the changes and close out of both dialog boxes.
Step 5: Layer Grouping
Select your top layer, hold the Shift Key, and then select the paper layer so both of your layers are selected at the same time.
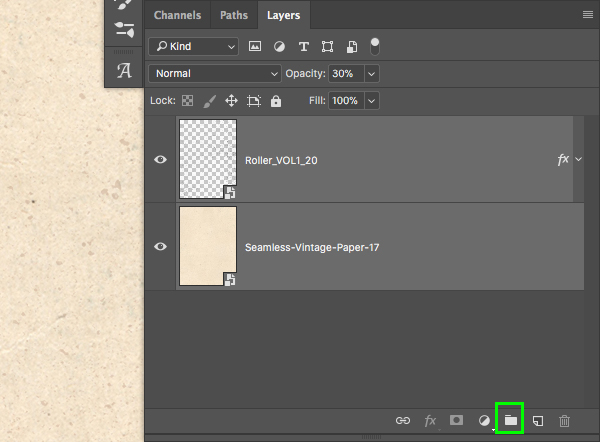
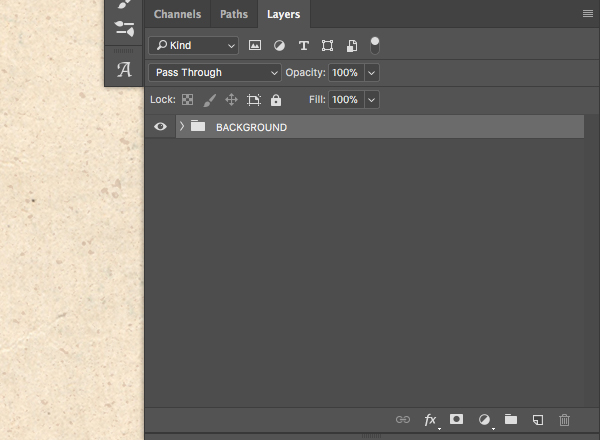
While both layers are still selected, click on the small folder icon at the bottom of the Layers Palette. You can also use the keyboard shortcut and press Command/Ctrl+G on to put both layers into a new Group Folder. Double click the ‘Group 1’ text in the Layers Palette and rename the layer ‘BACKGROUND’ as shown below:
Step 6: Importing Brushes
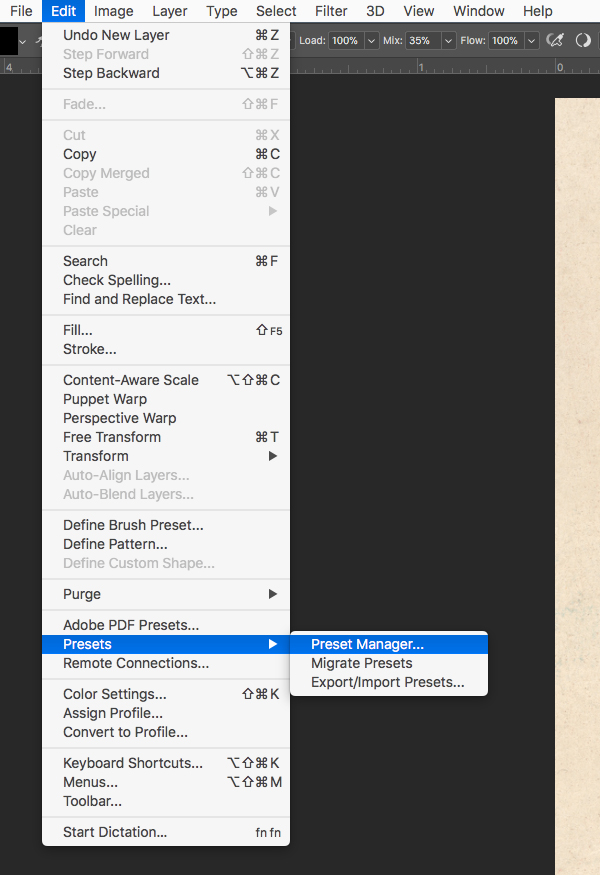
Go to the ‘Edit’ menu and choose ‘Presets > Preset Manager…’ from the list as shown here:
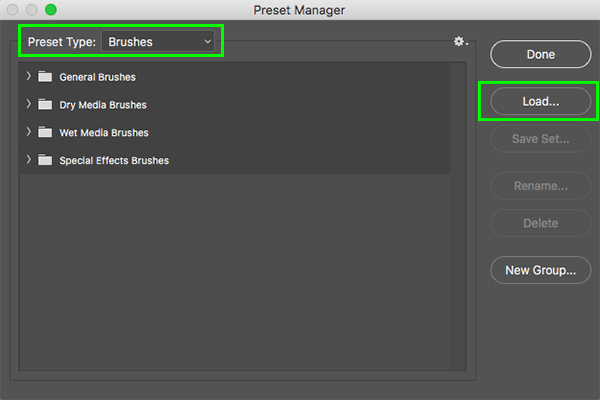
When the ‘Preset Manager’ window appears, make sure that your ‘Preset Type’ is set to ‘Brushes’ and then click the ‘Load’ button on the right side of the panel.
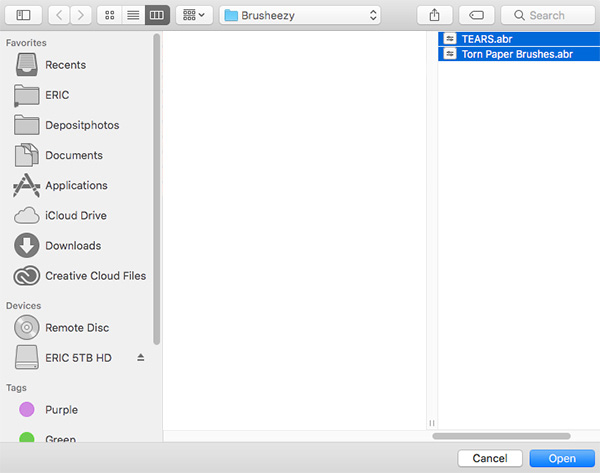
Here we are going to navigate to the two torn paper brushes, which we’ve previously downloaded for free from Brusheezy called Tears and Torn Paper Brushes Once you have selected both of your brushes, choose ‘Open’ from the bottom right of the window to import them.
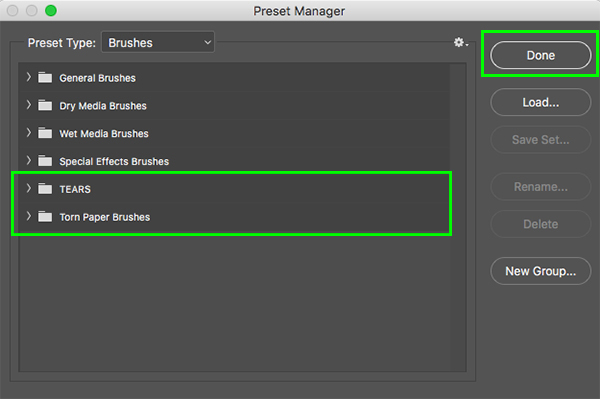
You will now be brought back to your ‘Preset Manager’ window where you should now see both of your brushes at the bottom of the list in what look like folders. We can now select ‘Done’ from the right to close out of this panel and we are ready to start working with the brushes!
Step 7: Torn Paper Brushes
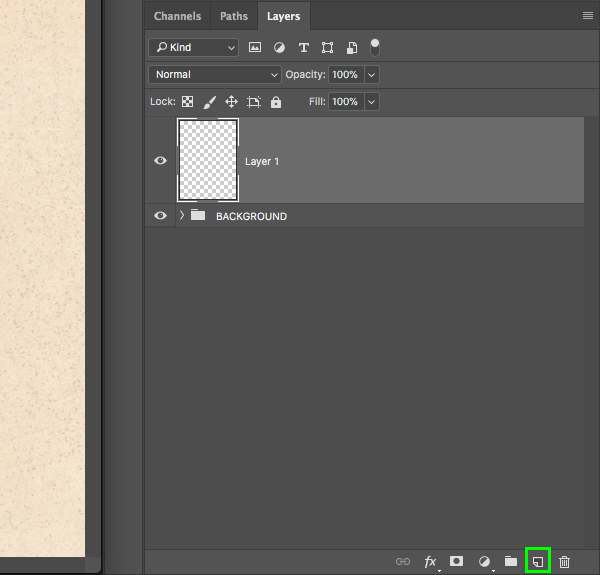
Create a New Layer by clicking the small icon that says ‘Create a new layer’ at the bottom of the Layers Palette. You can also use the keyboard shortcut Command/Ctrl+Alt/Option+Shift+N on the keyboard. Once you have made your new layer, press the letter ‘D’ to reset your default colors to black and white. Make sure that black is your foreground color and if it is not, simply press the ‘X’ key to toggle the foreground and background until it’s in the front.
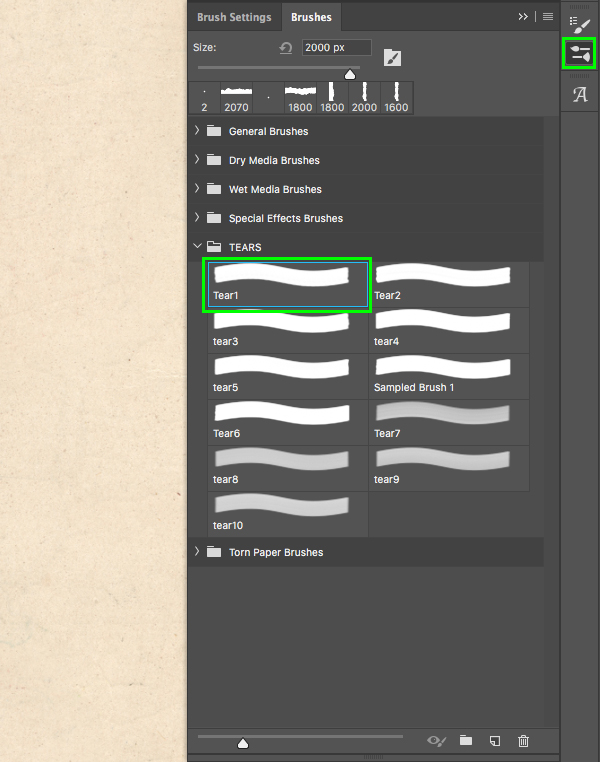
Press ‘B’ on the keyboard to get your Brush Tool and then click on the ‘Brushes’ icon towards the right side of the interface. You can also use the keyboard shortcut ‘F5’ to bring up your panel and then just switch to the ‘Brushes’ tab to start. Once you are in the correct tab, click the small arrow next to the ‘TEARS’ brushes to reveal the brushes inside. We will then select our first brush in here called ‘Tear 1’ from the list.
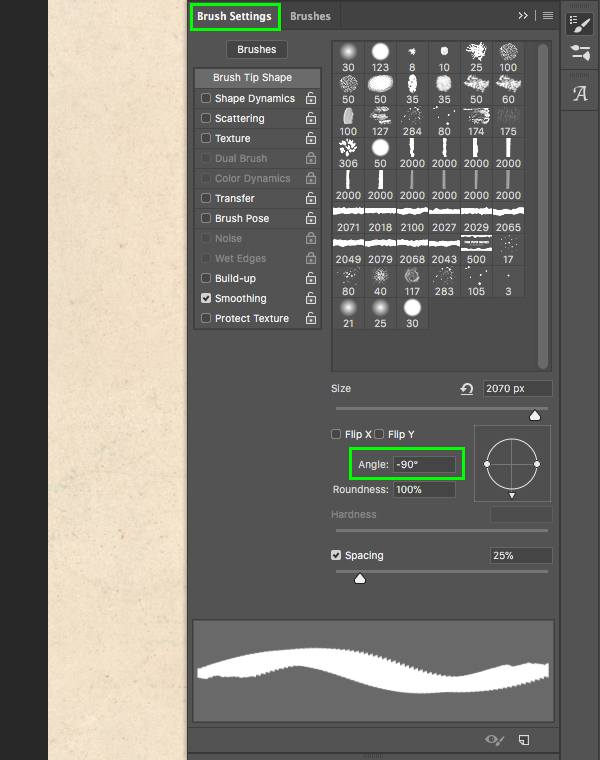
Now we want to switch over to the ‘Brush Settings’ tab to change the rotation of our brush. Go down to where it says ‘Angle’ and enter a value of ‘-90’ to make sure that our brush goes horizontally across rather than vertically. Once you’ve set up your settings, press ‘F5’ to close out of the panel.
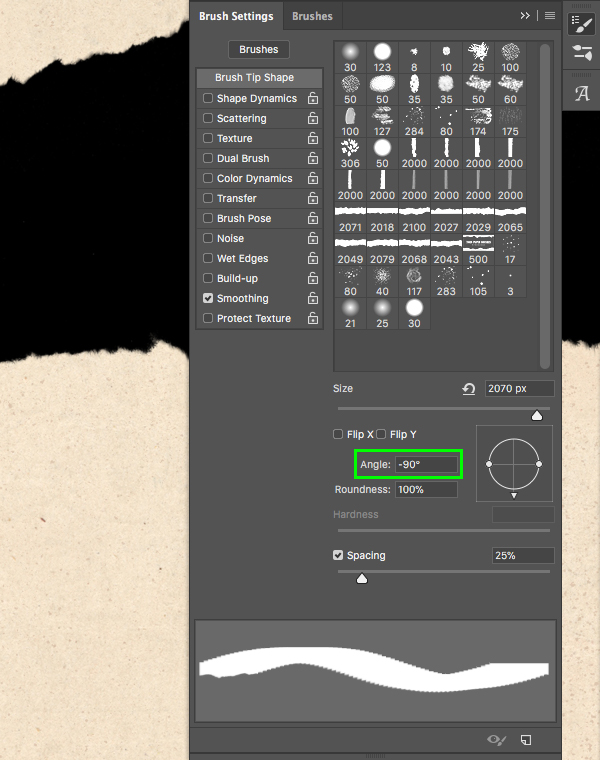
On your new layer, click your cursor once, and as long as you still have your Brush Tool (B) selected you should end up with your first torn paper brush going across the canvas as shown here:

Step 8: Creating the Second Strip
Create another new layer and place it below the first torn paper layer. Press ‘F5’ to once again open up your ‘Brushes’ panel or click the small icon in the corner. This time let’s choose ‘tear3’ from our ‘TEARS’ brushes as shown below:

Now we want to switch over to the ‘Brush Settings’ tab to change the rotation of our brush. Go down to where it says ‘Angle’ and enter a value of ‘-90’ to make sure that our brush goes horizontally across rather than vertically. Once you’ve set up your settings, press ‘F5’ to close out of the panel.
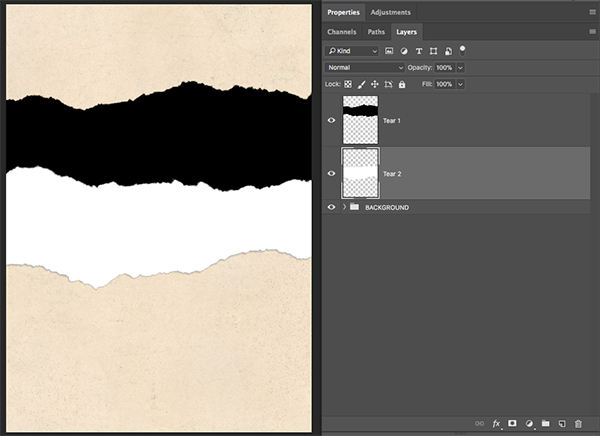
Before we create our second strip of torn paper, press ‘X’ on the keyboard to toggle your foreground and background colors again. Doing this should make white the foreground color. From here all you have to do is click your cursor in the workspace to use your brush and create the next piece of torn paper. Here I have named each of the layers ‘Tear 1’ and ‘Tear 2’ to show the order of the two brush layers we have created so far.
Step 9: Creating the Third Strip
We are going to repeat this process one more time to create a third strip of torn paper to help us divide our sections. Let’s start by making another new layer and moving it beneath the previous two torn paper layers. Press ‘F5’ on the keyboard and go to your ‘Brushes’ tab. This time let’s expand the other folder here called ‘Torn Paper Brushes’ and choose ’03.psd’ as highlighted below:

Fortunately, this brush is already set up to go in the direction we need, so we won’t have to modify the angle like we did with the previous two brushes. Next, press ‘X’ on the keyboard to once again toggle your foreground and background colors, which should now make black the foreground color. From here, click your cursor on the canvas to create the third strip and position it so that it looks like the image below:

Step 10: Creating the Chalkboard
Go to the ‘File’ menu and choose ‘Place Embedded…’ as shown below:

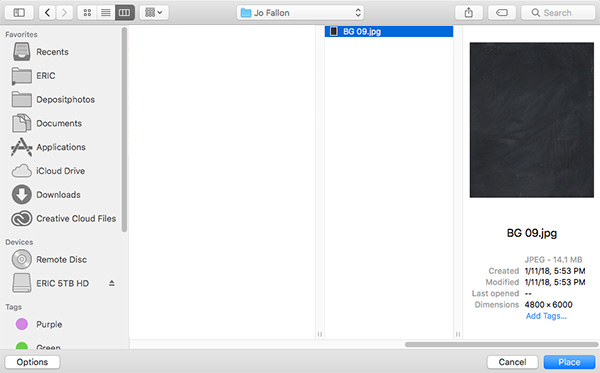
Navigate to the ‘BG 09.jpg’ file from Jo Fallon in the freebies folder for this tutorial and then choose ‘Place’ from the lower right corner to import the image. Once the image is brought into the document press the ‘Return’ key to commit to the changes.
You should now have your chalkboard background layer at the top of your Layers Palette which is automatically brought in as a Smart Object and with the file name.

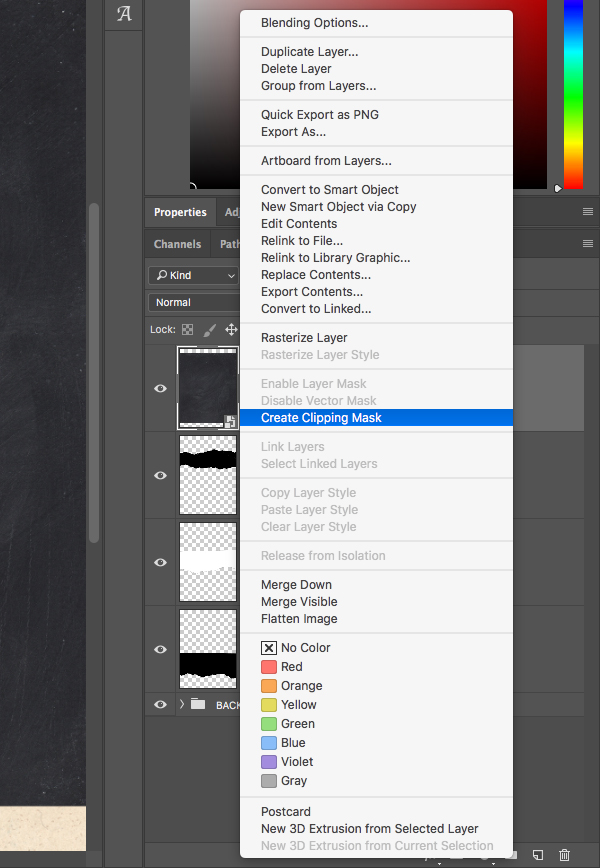
Hold the Control Key and click on the ‘BG 09.jpg’ layer and then choose ‘Create Clipping Mask’ from the menu that appears.
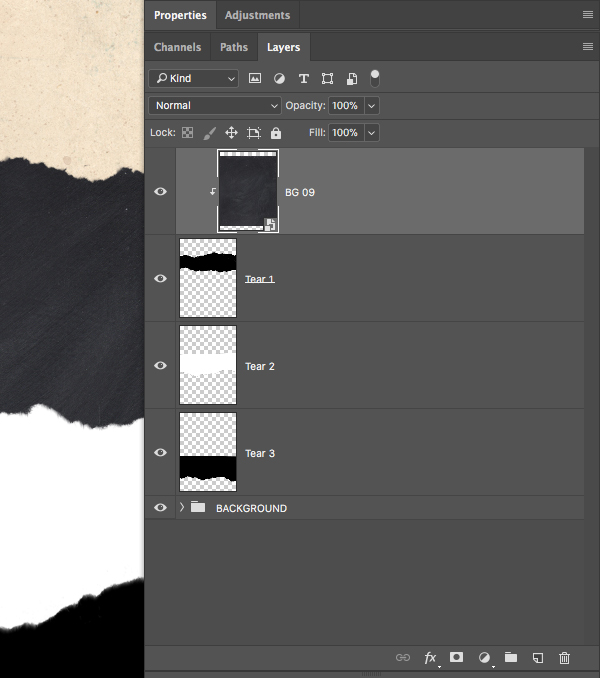
Now your chalkboard background will only be visible inside of the layer directly below it, which, in this case, is the ‘Tear 1’ layer.
Step 11: Chalky Rotation
Make sure that the ‘BG 09’ layer is active in your Layers Palette and then press Command/Ctrl+T to initiate a Free Transform. Doing this will reveal the bounding box around the shape, and then from here, hold the Control Key and click on the image to reveal a dropdown menu. From this menu we are going to select ‘Rotate 90º Clockwise’ and then press ‘Return’ to apply the changes. You can also reduce the size of the chalkboard or experiment with the size and portion of the image that you want showing through the torn paper.

After playing around with the size and position of the chalkboard your image should look something like this:
Step 12: Chalky Styles
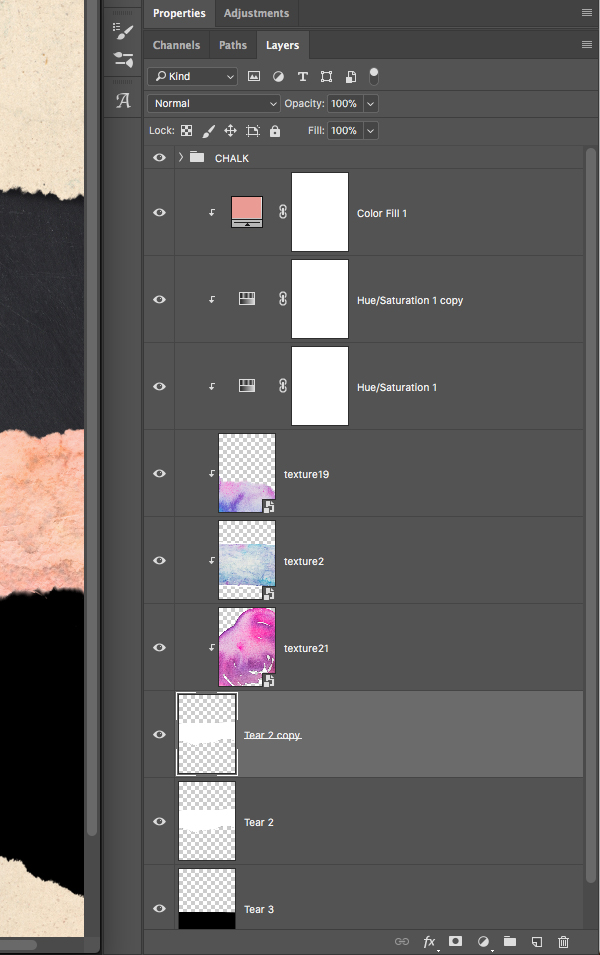
Select the ‘Tear 1’ layer and then press Command/Ctrl+J to duplicate it. Doing this will make it so that our Clipping Mask is now applied to the new copy of the layer instead of the original as shown here:

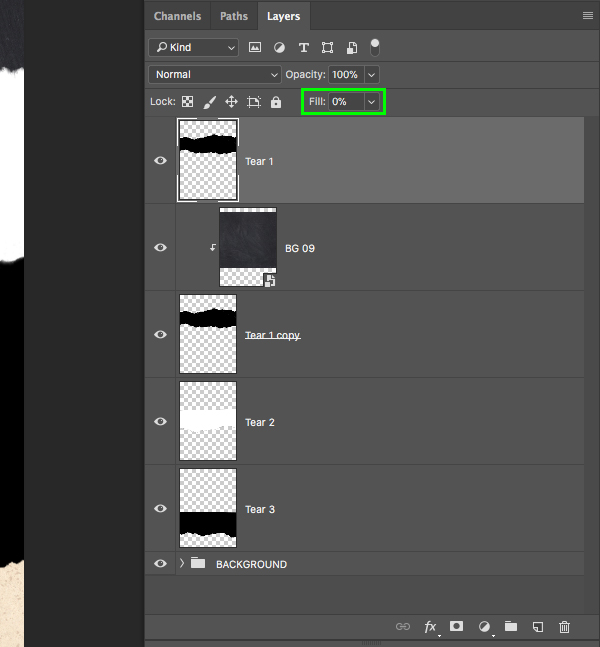
Next, grab the original ‘Tear 1’ layer and move it to the very top of the Layers Palette, above the ‘BG 09’ layer. From here, lower the ‘Fill’ of the layer all the way to ‘0’ to make the layer invisible.
Double click on the now invisible layer to bring up the Layer Styles and check off the ‘Inner Shadow’ effect. For the settings, use a ‘Blend Mode’ of ‘Normal’ with solid black, an ‘Opacity’ of about ‘54%’, an ‘Angle’ of ’90’, set the ‘Distance’ to ’25’, ‘Choke’ to ‘0’ and ‘Size’ to ’68’ and then press ‘OK’ to apply the changes and close out of the dialog box.

You will notice that although the top layer is invisible that we can still see the shadow effect which helps to make the torn paper look more realistic adding a bit of depth. From here, select the top layer, hold the Shift Key, and then click on the ‘Tear 1 copy’ layer so that you have all three of these layers selected simultaneously:

With all three of the layers selected, press Command/Ctrl+G or click the small folder icon at the bottom of the Layers Palette to place these layers into a new Group Folder. Double click the ‘Group 1’ text to rename the folder ‘CHALK’ as shown below:

Step 13: Watercolour Paper
Next, go to the ‘File’ menu and choose ‘Place Embedded…’ once again.
Navigate to the ‘texture21.png’ file in the freebies folder and then choose ‘Place’ to import the texture.
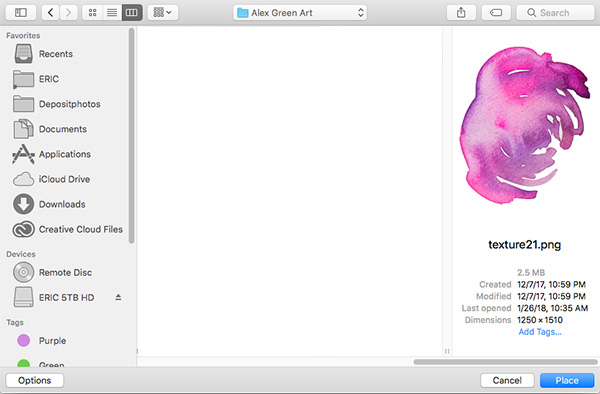
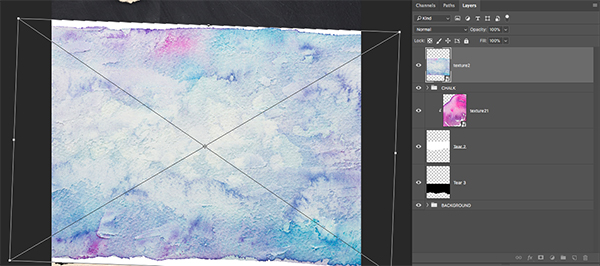
Once your image is imported, rotate it clockwise a bit and scale it by dragging any of the four corners of the bounding box while holding the Shift Key. Once you are happy with the position of your texture, press the ‘Return’ key to apply the transformation. Feel free to use the image below as a guide for the size and placement of your texture image.
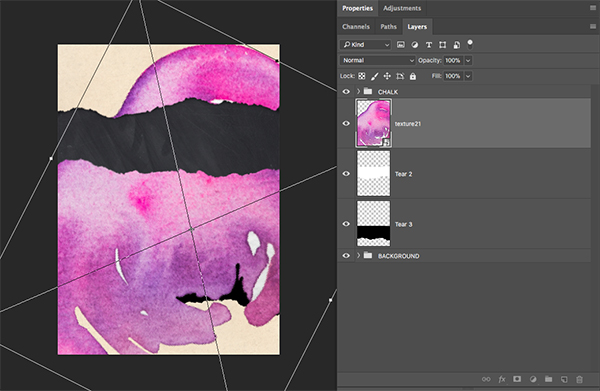
Hold the Control Key and click on the ‘texture21’ Smart Object to reveal a dropdown menu. From here we will once again select ‘Create Clipping Mask’ from the list.
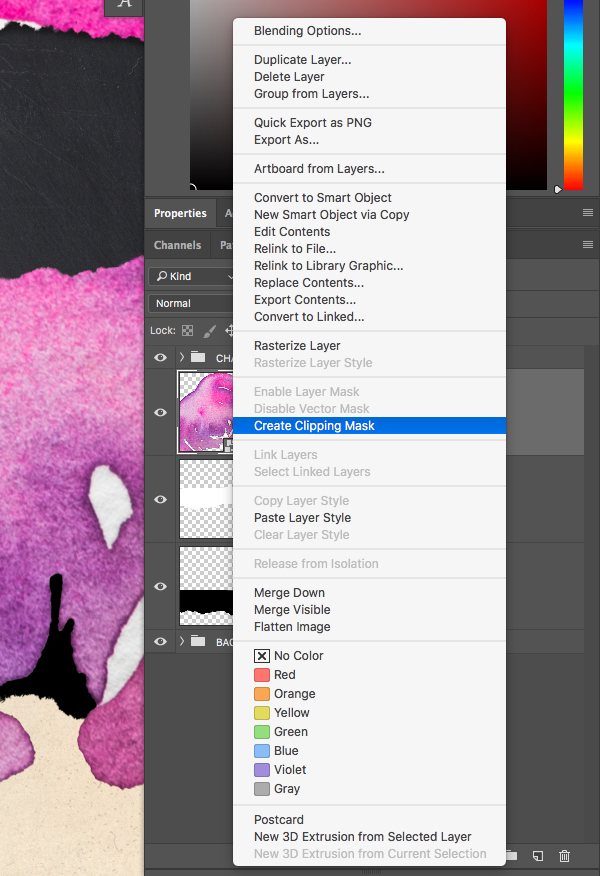
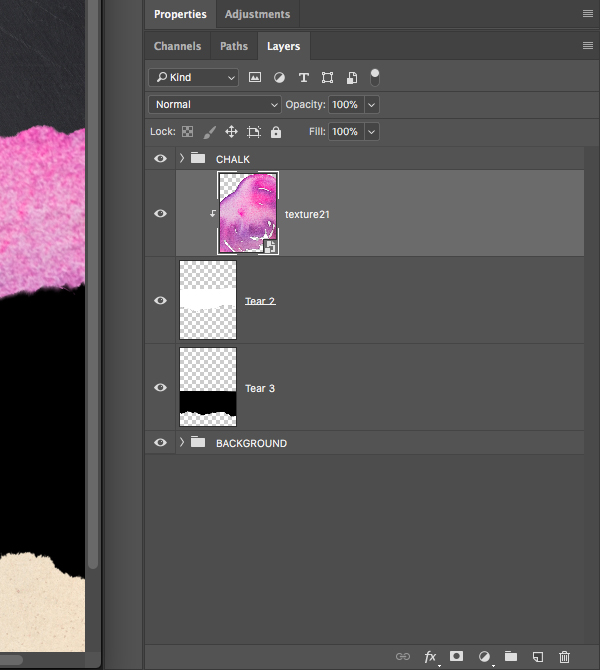
You should now only be seeing your watercolour texture inside of the ‘Tear 2’ layer.
Step 14: More Watercolour
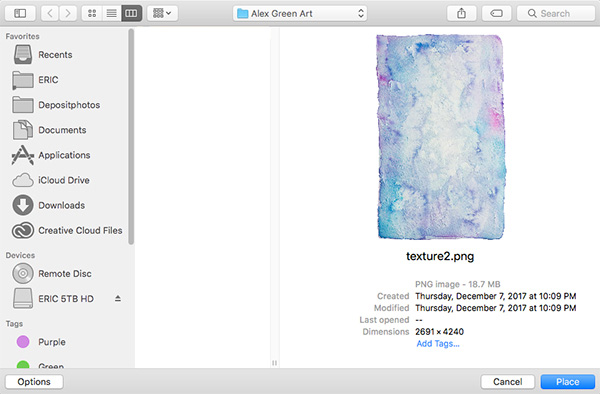
Use the ‘File’ menu and choose ‘Place Embedded…’ to import ‘texture2.png’ and then choose ‘Place’ to bring it into your document.
Rotate and scale the watercolour texture before pressing the ‘Return’ key to apply the transformations.
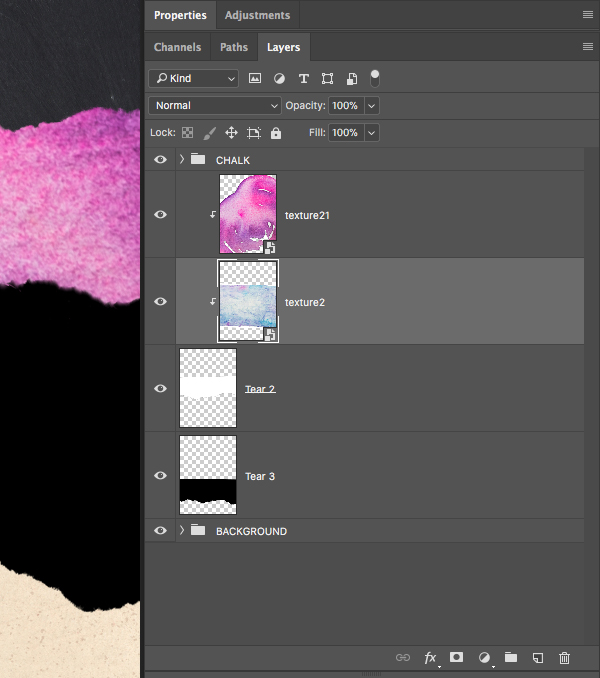
At the moment, our ‘texture2’ layer is at the top of the Layers Palette, but we want it to be connected to our first texture instead. To do this, click and drag the layer in between the ‘texture21’ layer and the ‘Tear 2’ layer as shown below:
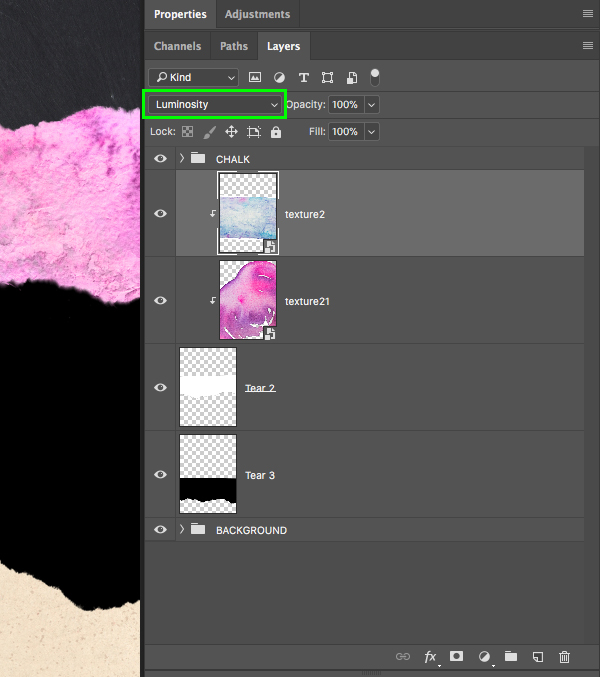
Now we need to move it up one spot in the order of our layers. To do this, press the Command/Ctrl Key and the right bracket key on your keyboard to move the layer up one place. Once you have done that, change the Blend Mode of the layer from ‘Normal’ to ‘Luminosity’ as shown below:
Step 15: Third Watercolour Texture
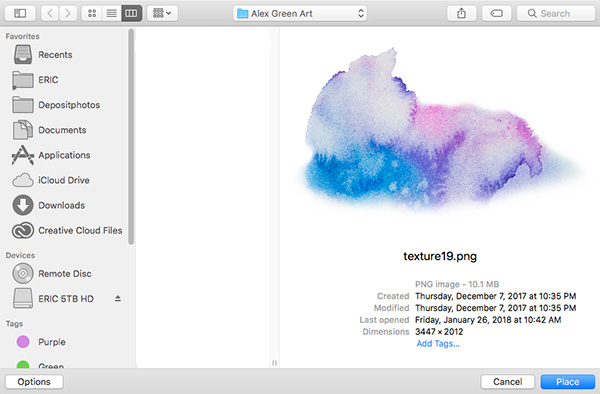
Use the ‘File’ menu and choose ‘Place Embedded…’ to import ‘texture19.png’ and then choose ‘Place’ to bring it into your document.
Scale and rotate your Smart Object layer accordingly before pressing ‘Return’ to apply the changes.

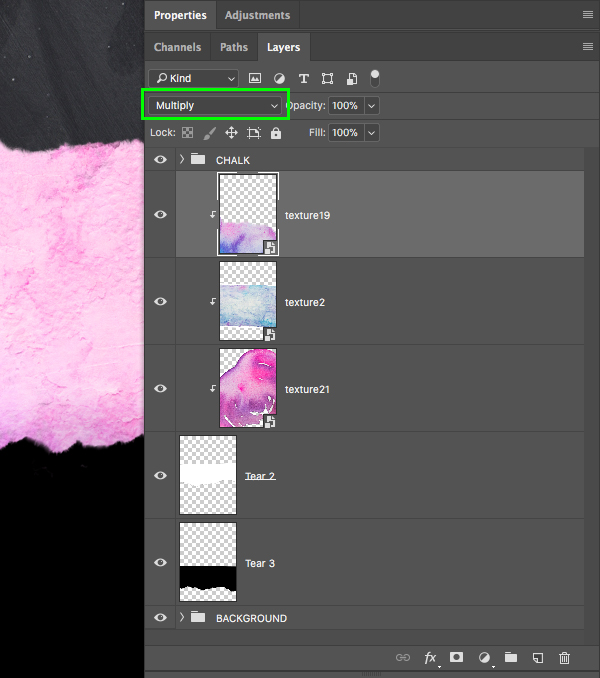
Once you are happy with the size and position of the texture, click and drag the layer in between the ‘texture21’ layer and the ‘Tear 2’ layer to make it part of our Clipping Mask stack. From here, use the Command/Ctrl Key and the right bracket key to move the layer upwards in the Layers Palette until it is above the ‘texture2’ layer and still part of the Clipping Mask chain that we have going. Be careful not to move the layer up too many times or it will come out of the group. The last thing we need to do with this texture is change the Blend Mode from ‘Normal’ to ‘Multiply’ and your layers should now look like this:
Step 16: Adjustment Layers
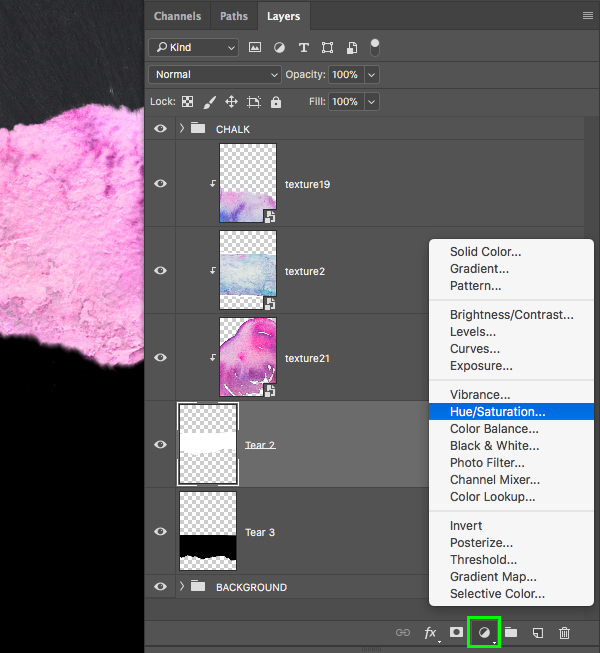
Select the ‘Tear 2’ layer that our texture layers are clipped to and then click on the Adjustment Layer icon at the bottom of the Layers Palette. From the list that appears, choose ‘Hue/Saturation…’ to apply the adjustment.
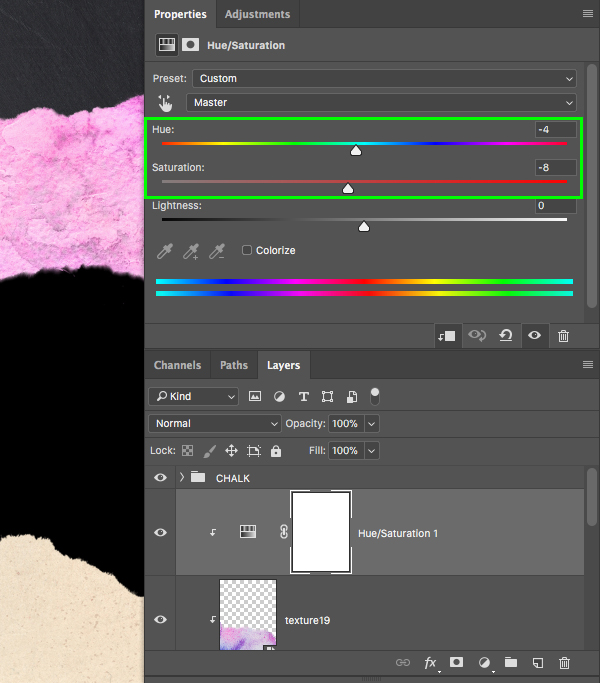
By default, the Hue/Saturation Adjustment Layer will be just above the ‘Tear 2’ layer, so let’s move it up a few places to the top of our Clipping Mask chain by once again using the keyboard shortcut Command/Ctrl and the right bracket on the keyboard. Your Adjustment Layer should now be at the very top of the chain. Inside of the ‘Properties’ panel we can now modify our settings by moving the ‘Hue’ slider to ‘-4’ and the ‘Saturation’ slider to ‘-8’ as shown here:
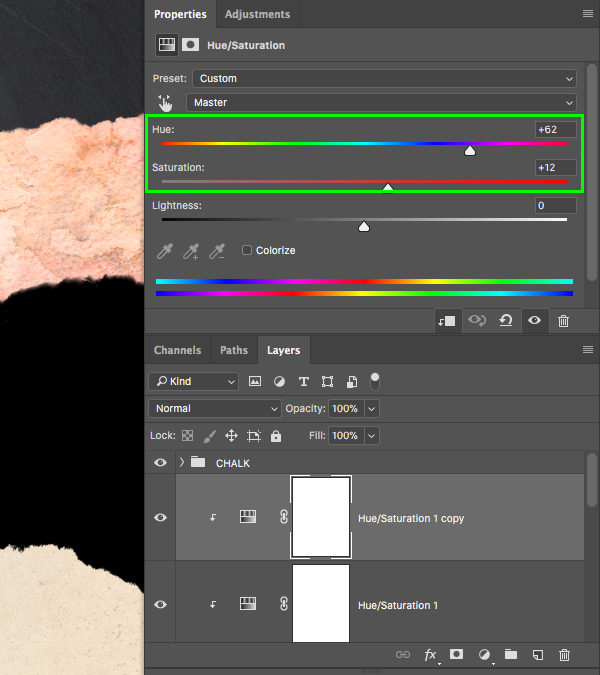
Repeat the last step to apply a second Hue/Saturation Adjustment Layer and move it to the top of the Clipping Mask chain. Here we will modify the settings so that the ‘Hue’ slider is set to ‘+62’ and the ‘Saturation’ slider is set to ‘+12’ as shown below:
Step 17: One More Wash!
Select the ‘Tear 2’ layer and then click on the Adjustment Layer icon at the bottom of the palette. This time we want to choose ‘Solid Color…’ from the menu.

For the fill color let’s use the hex value ‘#EA9C94’ and then press ‘OK’ to apply the changes as shown in the image below:

Just like in our previous step, once we apply an Adjustment Layer it will be automatically placed directly above the ‘Tear 2’ layer. We will now move the Solid Color Adjustment Layer to the very top of our Clipping Mask chain so that it’s on top of both of our Hue/Saturation Adjustment Layers. Once the Adjustment Layer is in the correct spot, change the ‘Opacity’ of the layer to about ‘18%’ as shown below:

Step 18: Paper Shadow
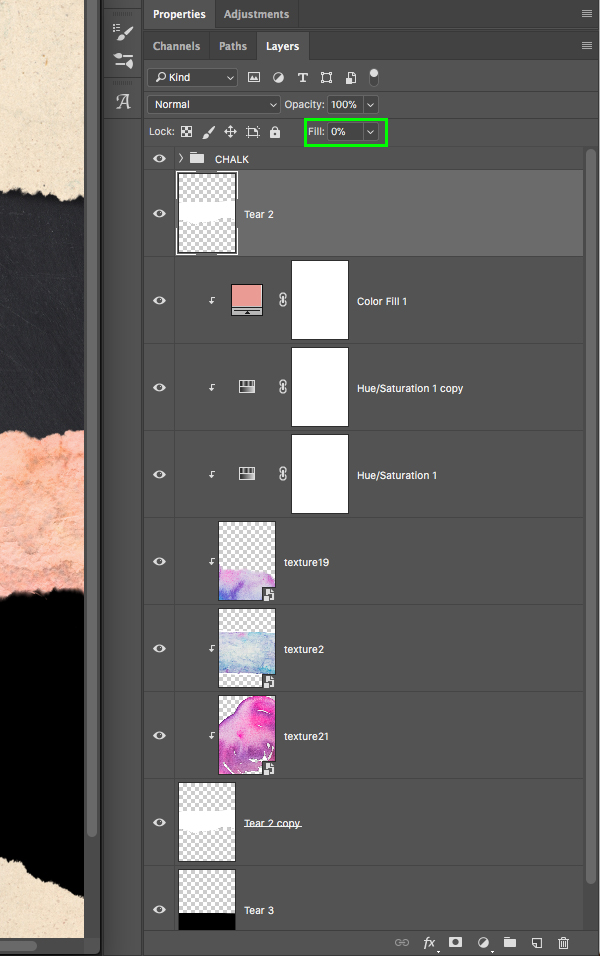
Select the ‘Tear 2’ layer and press Command/Ctrl+J to duplicate the layer. Your newly duplicated layer will now be the one that all of the layers are clipped to, and the original ‘Tear 2’ layer will be beneath.
We will now move the original ‘Tear 2’ layer so that it’s just below the ‘CHALK’ folder. We don’t want this layer to be a part of our Clipping Mask chain so we don’t have to worry about that. Once you have placed the layer in the correct position, reduce the ‘Fill’ of the layer to ‘0’ as shown here:
Next, double click on the ‘Tear 2’ layer to bring up the Layer Style panel and check off the ‘Drop Shadow’ effect. For the settings we want a solid black fill with an ‘Opacity’ of about ‘48%’. Then, make sure the ‘Angle’ is set to ‘120’, the ‘Distance’ is set to ‘6’, the ‘Spread’ should be ‘5’ and the ‘Size’ should be set to ‘7’ and then click ‘OK’ to apply the changes. You won’t notice the effect right away because the torn paper strip below is currently filled with black, however, once we place our next texture there will be a bit of a shadow on top to create some additional depth. Feel free to use the image below to make sure you have the right settings.

Step 19: Watercolour Paper Group
Select the ‘Tear 2’ layer that we applied our Drop Shadow to with a ‘Fill’ of ‘0’ and then hold the Shift Key and scroll down to select the ‘Tear 2 copy’ layer so all of these layers are selected at the same time:
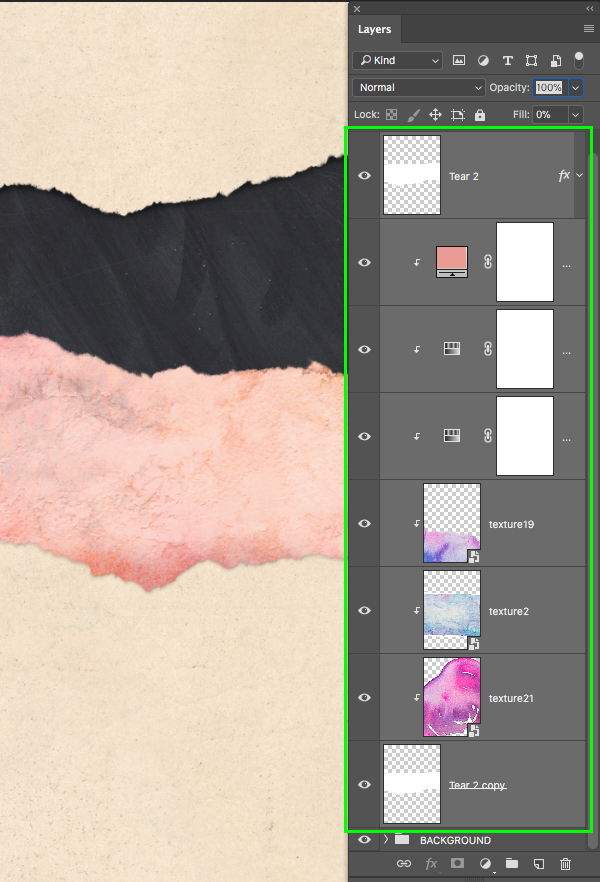
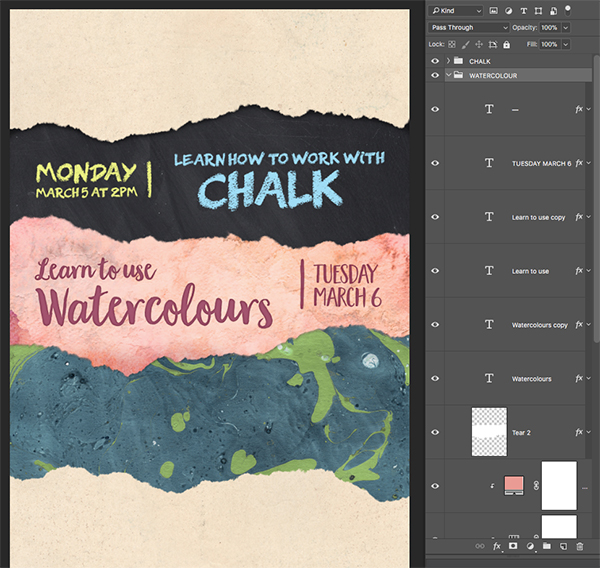
Press Command/Ctrl+G to place all of these layers into a new Group Folder and then double click the ‘Group 1’ text to change the name of the folder to ‘WATERCOLOUR’ and we should now have something like this:
Step 20: Marble Texture
Return to the ‘File’ menu and choose ‘Place Embedded…’ like we have been doing to import our textures.
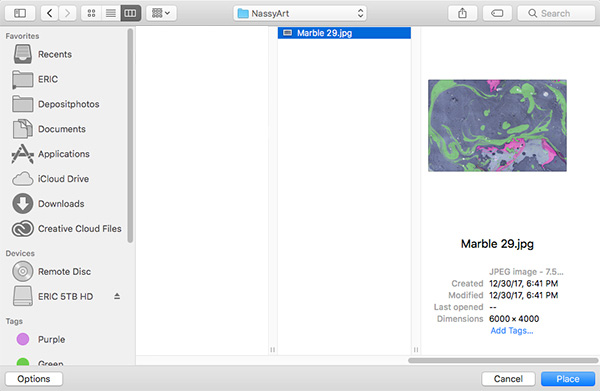
Navigate to the ‘Marble 29.jpg’ file from NassyArt and then choose ‘Place’ from the lower right to bring in the texture.
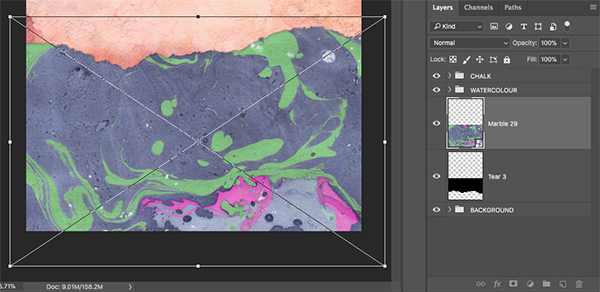
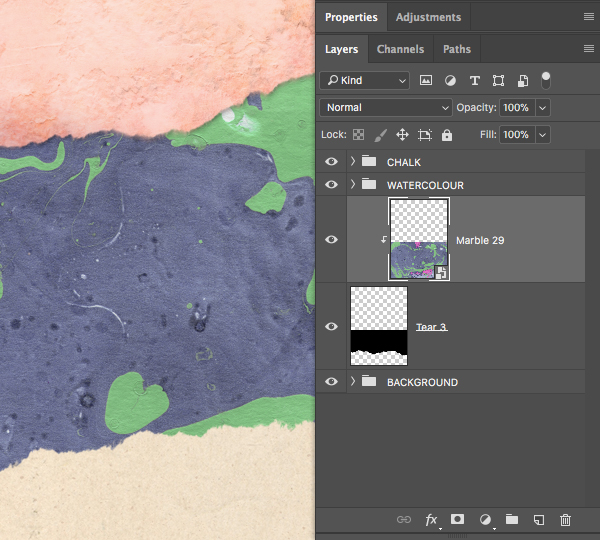
Place the texture Smart Object layer just above the ‘Tear 3’ layer and size it accordingly using the image below as reference before pressing the ‘Return’ key to apply the transformation changes.
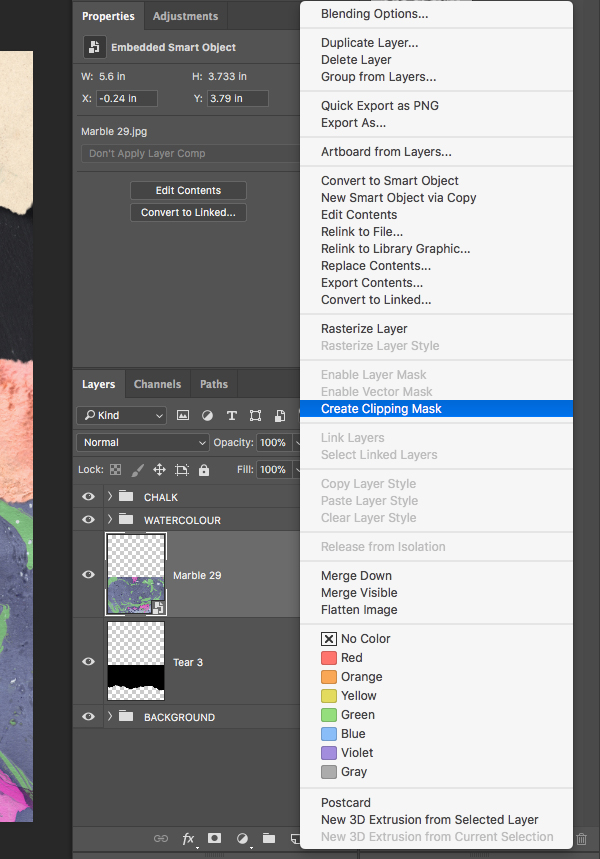
With your texture in place, hold the Control Key and click on the layer in the Layers Palette before choosing ‘Create Clipping Mask’ from the menu that appears.
Your marble texture should now only be visible inside of the ‘Tear 3’ shape as shown here:
Step 21: Additional Adjustments
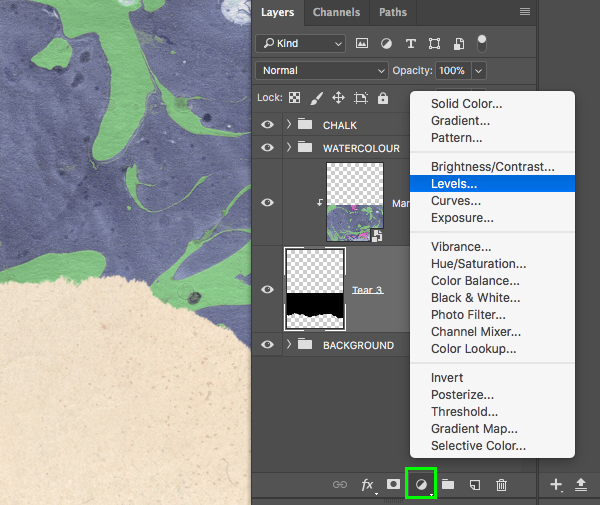
Select the ‘Tear 3’ layer and then click on the Adjustment Layer icon at the bottom of the Layers Palette. We will then select ‘Levels…’ from the menu.
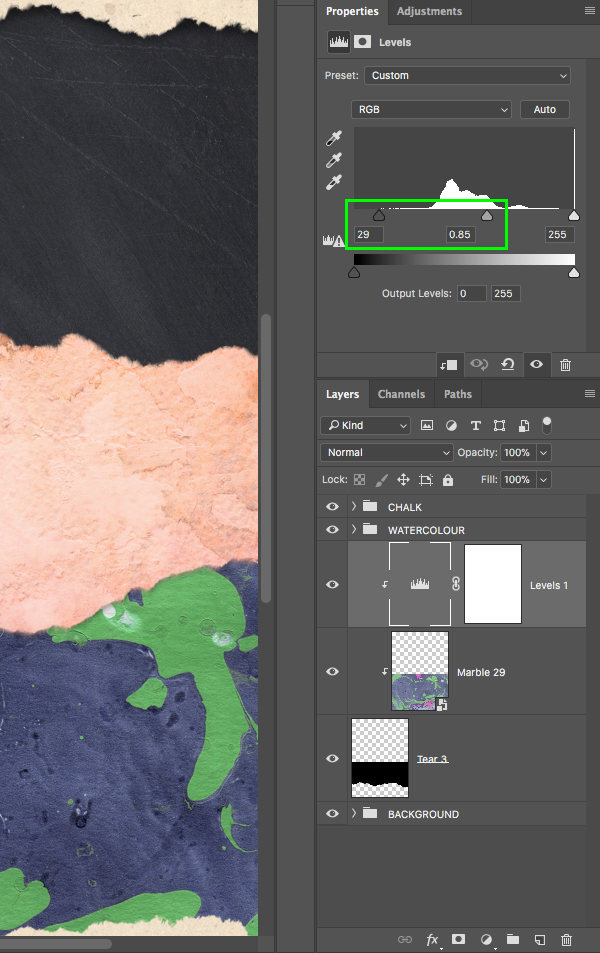
We will need to move the Adjustment Layer above the texture, so use the Command/Ctrl and right bracket key shortcut to move it up one place in the layer stack. Once you have done that, go to the ‘Properties’ panel and move the left slider towards the center until it’s set to ’29’ and move the middle slider so that it’s set to ‘0.85’ as shown in the image below:
Now let’s add a Hue/Saturation Adjustment Layer the same way and then place it above the Levels Adjustment Layer at the top of the Clipping Mask chain. For the settings here we simply want to move the ‘Hue’ slider to ‘-34’ to slightly desaturate the texture.

Step 22: Marble Group
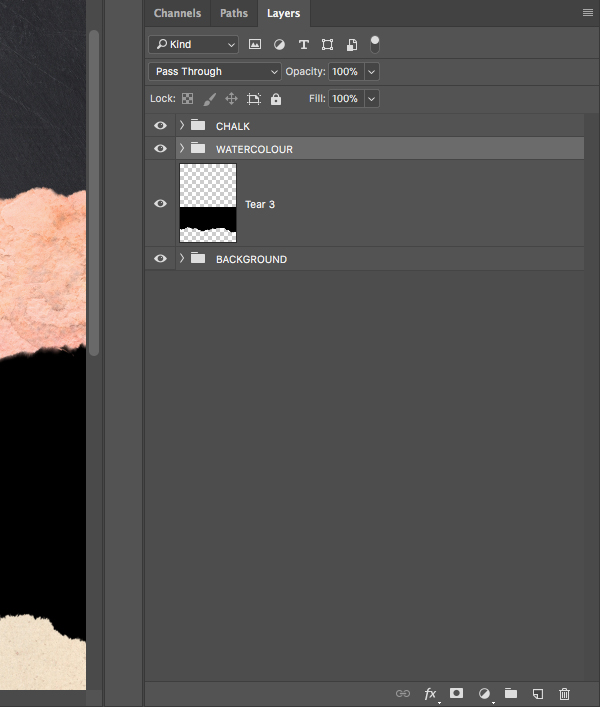
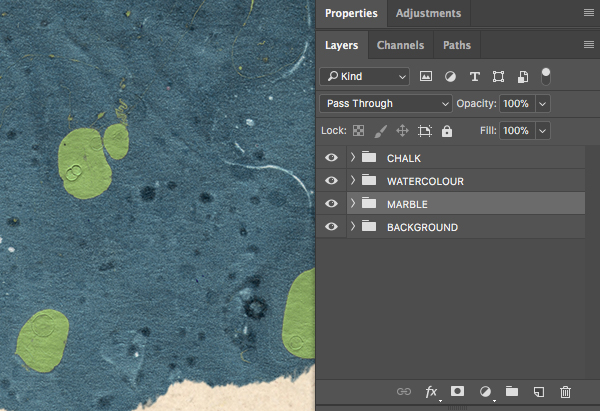
Select the ‘Tear 3’ layer and then hold the Shift Key and click on the ‘Hue/Saturation’ layer so all of these layers are selected simultaneously.

With all of the layers still selected, press Command/Ctrl+G to place them into a new Group Folder and then double click the ‘Group 1’ text to change the folder name to ‘MARBLE’ as shown here:
Step 23: Chalk Text
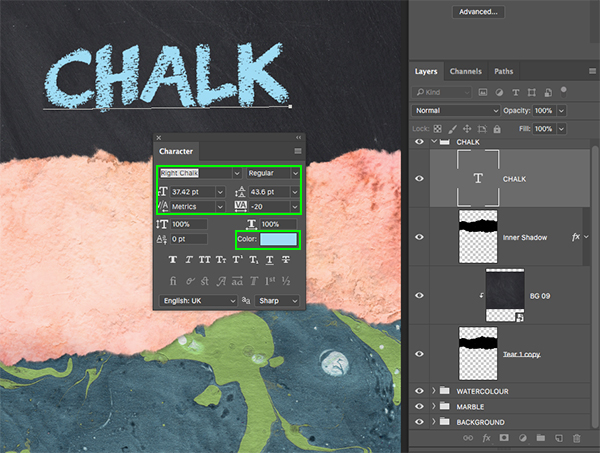
Expand the ‘CHALK’ folder and then add a new layer at the top of the group. Press ‘T’ to switch to your Type Tool and then click and type out the word ‘CHALK’ in all caps. For the typeface I am using a free font from DaFont.com called Right Chalk. If your Character Panel isn’t showing up automatically, you can get to it by going to the ‘Window’ menu and choosing ‘Character’ from the list. Once your panel is open, make sure that the chalk text is about ‘37.42’ points in size and that it has a tracking setting of ‘-20’. The other setting here we will need to change is the ‘Color’ highlighted in the image below:
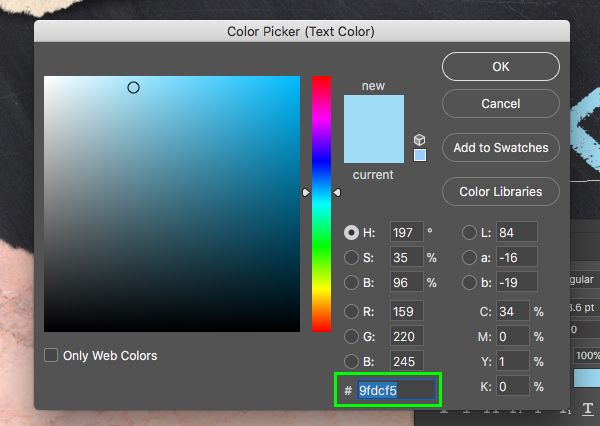
Use the Type Tool (T) to click two or three times inside of your text box to select the entire word. Once you’ve done that you will be able to click on the ‘Color’ box in the Character Panel where we will change the fill color to the hex value ‘#9FDCF5’ and then press ‘OK’ to apply the changes.
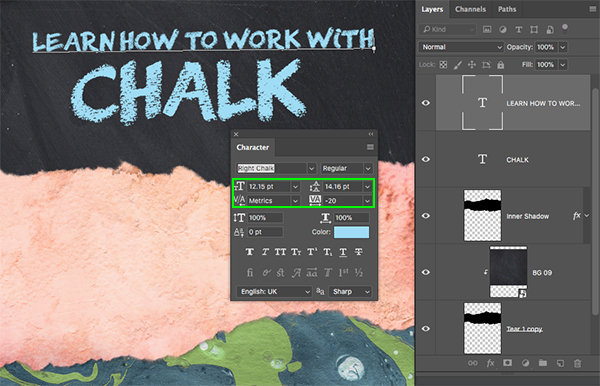
Select your ‘CHALK’ text layer and press Command/Ctrl+J to duplicate it. Move the layer up above the ‘CHALK’ text and click inside of it with your cursor to once again highlight the text. From here, go to the Character Panel and change the size of the text to about ‘12.15’ points in size and then click outside of the text box to deselect it. Next, grab the Move Tool (V) and then use your arrow keys to visually center this line above the ‘CHALK’ text so you end up with something like this:
Step 24: Time and Date
Create another new layer inside of the ‘CHALK’ folder and use the Type Tool (T) to type out the word ‘MONDAY’ in all caps using the same ‘Right Chalk’ typeface from the previous step. Once you have typed out the text, make sure that the size is set to about ‘19.75’ points in size and we also want to pay attention to the value used for the linespacing, which, in this instance is ‘6.77’ points.
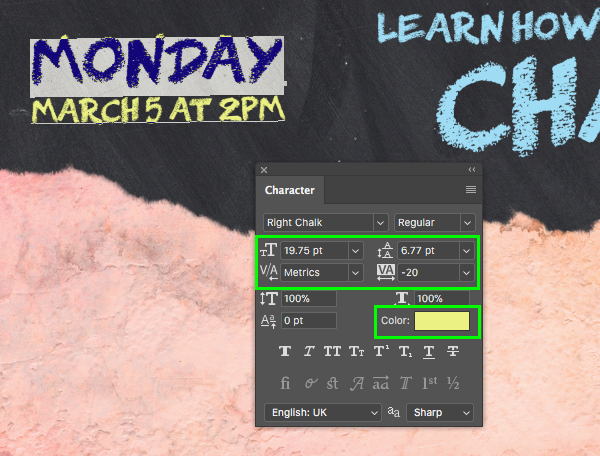
Press ‘Return’ at the end of the line where your ‘MONDAY’ text is to create a second line and type out the words ‘MARCH 5 AT 2PM’. For this line we just need to change the size of the text to ’10’ points so that it fits nicely below the first line.
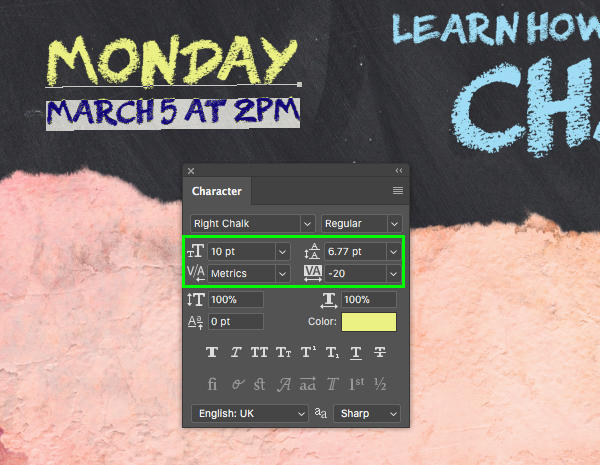
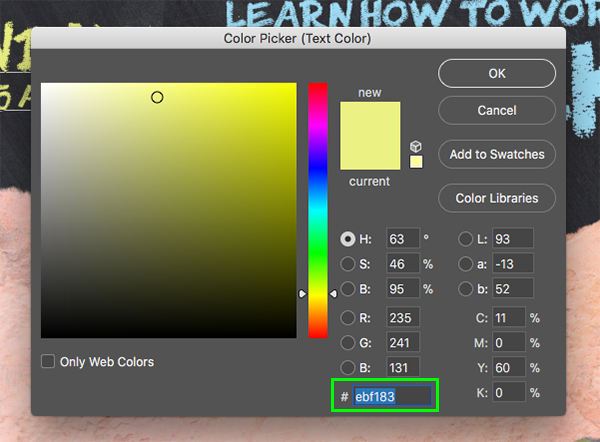
The other option we need to change here is of course, the color of our text. To do this we will use our Type Tool (T) to click and drag our cursor highlighting both lines of copy, and then clicking on the ‘Color’ box inside of our Character Panel. From here we want to use the hex value ‘#EBF183’ to help differentiate our text from the blue color we used before. After changing the color, go ahead and press ‘OK’ to apply the changes.
Step 25: Watercolour Text
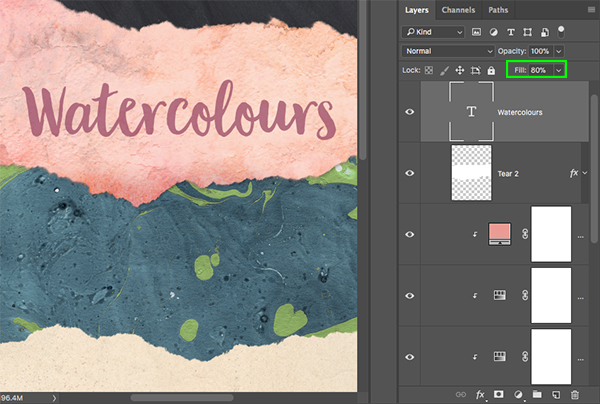
Now we can move on to creating the text for our ‘WATERCOLOUR’ group. Expand the folder and then create a new layer inside before switching over to the Type Tool (T) once again. Type out the word ‘Watercolours’ using upper and lowercase letters. Open the Character Panel once again so that we can modify some of the settings that we want to use. For the typeface here I am using Garden Grown typeface by Cultivated Mind which can be purchased in the Design Cuts Marketplace. You can use any other similar font from your personal collection. Once you have your Character Panel open and have typed out the word, make sure that the size of the text is set to ‘52.32’ points.

Now let’s click on the ‘Color’ box and change the fill to the hex value ‘#9F4C6A’ as shown below:

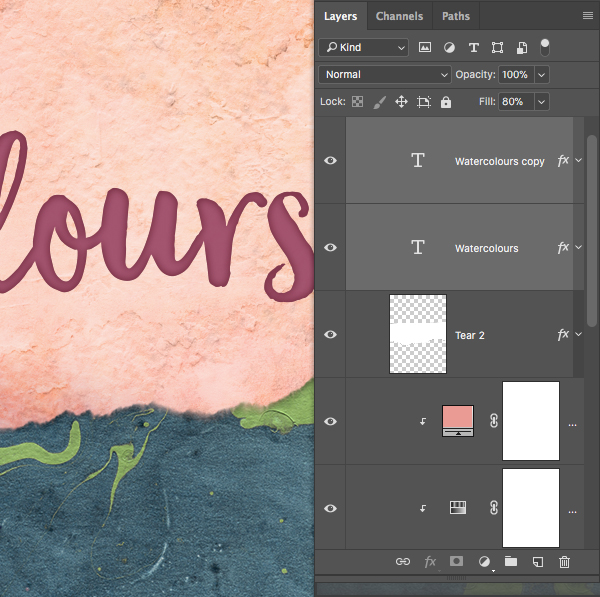
Once we change the color, return to the Layers Palette and reduce the ‘Fill’ of the text layer to ‘80%’ as highlighted below:
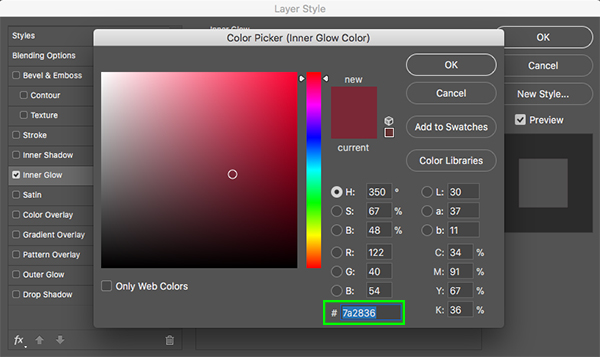
Double click the text layer to bring up the Layer Style panel and check off the ‘Inner Glow’ effect. Here we want to make sure that the ‘Blend Mode’ is set to ‘Multiply’ and that the ‘Opacity’ is set to about ‘30%’. Let’s also make sure that the ‘Choke’ is set to ‘0’ and ‘Size’ to ’10’ as shown in the image below:
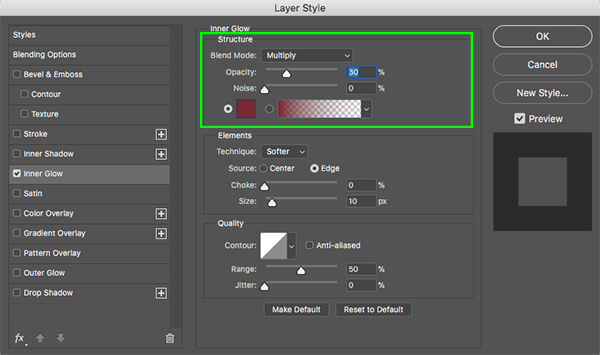
For the fill color, let’s use the hex value ‘#7A2836’ and then press ‘OK’ two times to apply the changes and close out both dialog boxes.
Next, select the ‘Watercolour’ text layer and press Command/Ctrl+J to duplicate the layer and intensify the effect.
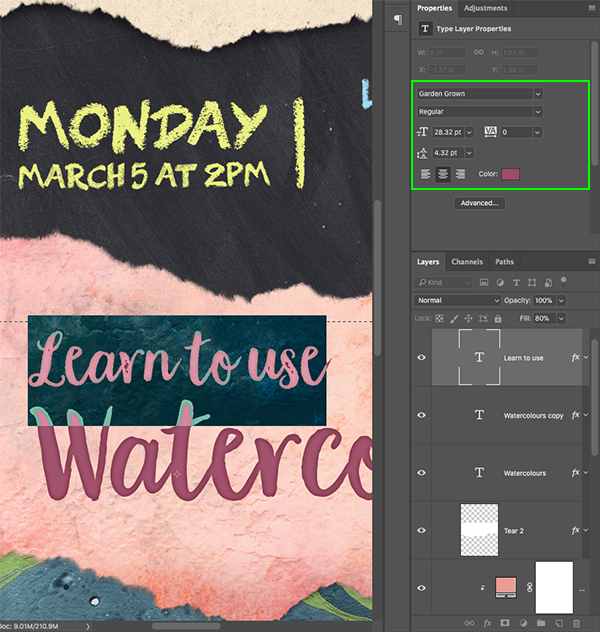
Duplicate the ‘Watercolour’ text layer one more time and then move it up. Use your Type Tool (T) to click inside the text box and change the text to read ‘Learn to use’ with a size of ‘28.32’ points. Notice that you can also change the settings for your text in the ‘Properties’ area instead of having to open the Character Panel. Once you have set up your smaller text, make a copy of it by once again pressing Command/Ctrl+J so you should now have two copies of the ‘Learn to use’ text and two copies of the ‘Watercolour’ text.
Step 26: Time and Date
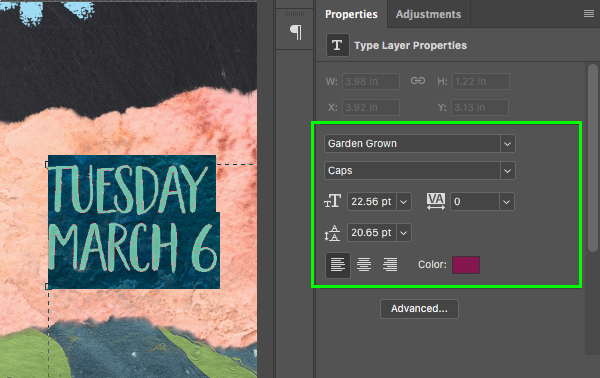
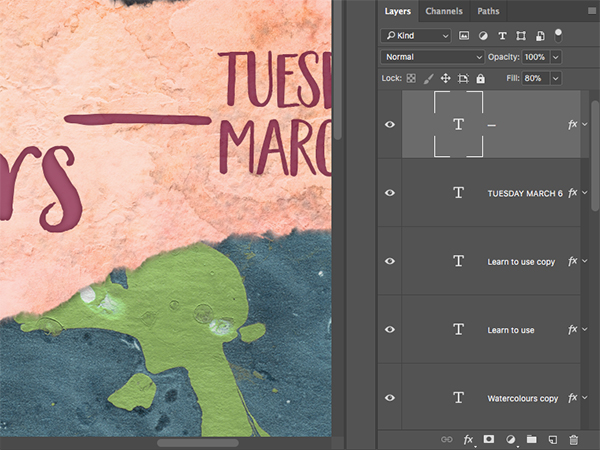
Select one of the two ‘Learn to use’ text layers and copy it by pressing Command/Ctrl+J. Move this text over towards the right side and click two or three times inside of the text box to highlight the text. From here we want to type out the word ‘TUESDAY’ in all caps, then press ‘Return’ to make a second line where we will then type out ‘MARCH 6’ in all caps. Next, change the font from the regular style of ‘Garden Grown’ to the ‘Caps’ version. While we are here we can go to the ‘Properties’ panel and change the size of the text to ‘22.56’ points, and the linespacing can be set to ‘20.65’ as shown here:
Now let’s click on the ‘Color’ box and change the fill to the hex value ‘#861650’ as shown here:

Step 27: Painterly Stroke
Duplicate the ‘TUESDAY’ text box and then move it over to the left of the original text. Click inside of the text box with your Type Tool (T) and hold the Alt/Option+Shift keys before pressing the dash key found right after the ‘0’ on your keyboard. Doing this will create an em dash.
Press Command/Ctrl+T to apply a Free Transform and then hold the Control Key and click on the text to reveal a dropdown menu where we want to select ‘Rotate 90º Clockwise’ as shown in the image below:
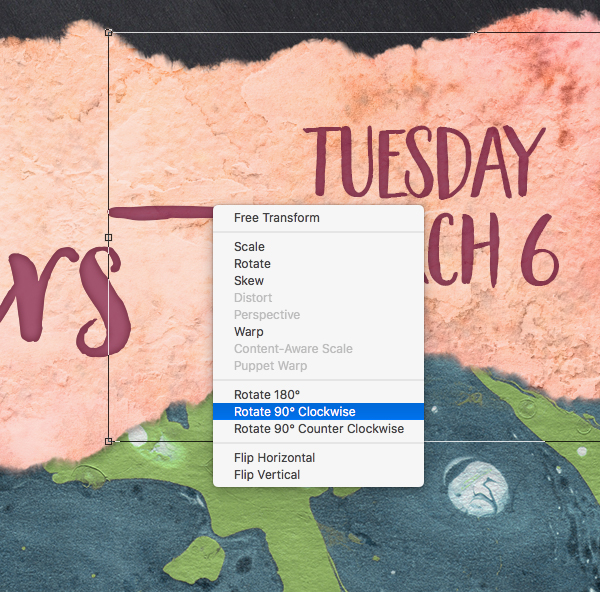
Your em dash should now be running vertically and we can position it just to the left of our time and date to serve as a nice painterly divider.
Step 28: Marble Text
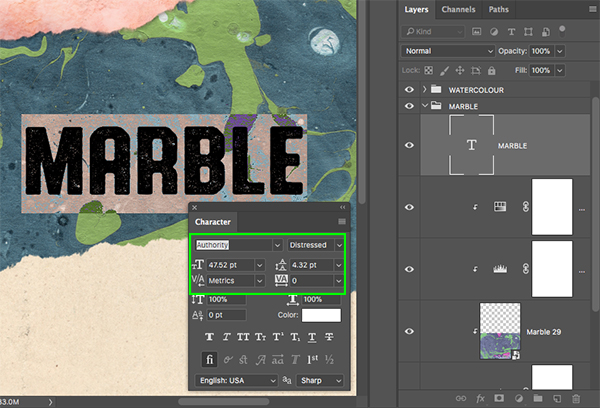
We can now close our ‘WATERCOLOUR’ folder and instead expand the ‘MARBLE’ folder to reveal the contents of the group. Create a new layer and place it at the top of the group and then use your Type Tool (T) to type out the word ‘MARBLE’ in all caps. Here I am jumping back to the Character Panel and will be using a free font called Authority 1970s Public with a solid white fill color. In the Character Panel, make sure your text is set to about ‘47.52’ points in size, and that we are using the ‘Distressed’ style of the typeface.
Double click on the text layer to bring up the Layer Style panel and check off the ‘Outer Glow’ option. For the settings let’s leave the ‘Blend Mode’ set to ‘Normal’ but reduce the ‘Opacity’ to ‘19%’. Let’s also check to make sure the ‘Spread’ is set to ‘0’ and the ‘Size’ is set to ’16’ pixels. After that, click ‘OK’ to apply the changes and close the dialog box.
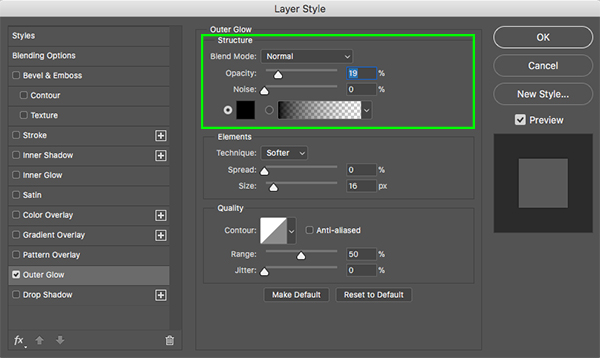
Your ‘MARBLE’ text will now have a subtle, dark, glow that will help it pop off of the background a bit more to help with the legibility of our type.

Step 29: Working With Marble
Duplicate the ‘MARBLE’ text layer by selecting it and then pressing Command/Ctrl+J. Move the text upwards and then click inside with the Type Tool (T) to change the words to ‘WORKING WITH’ in all caps. From here we will change the style of the text from ‘Distressed’ to ‘Distressed Italic’ and then make the size ‘18.72’ points as shown here:

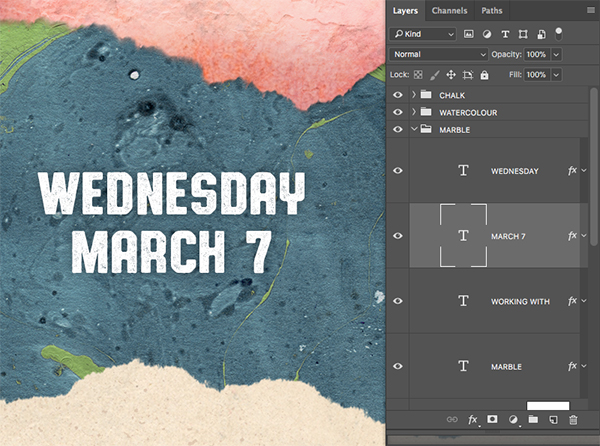
Let’s position this line above the ‘MARBLE’ text and left aligned. Once you have done that, duplicate the ‘WORKING WITH’ layer and move it towards the left side of the canvas. We will now change the text to read’ WEDNESDAY’ and then the style of the text can go back to the regular ‘Distressed’ version.

Duplicate the ‘WEDNESDAY’ text layer and then hold the Shift Key and tap the down arrow a few times to move the duplicate layer beneath the original. From here, click inside of the text box and change the type to read’ MARCH 7′ so you end up with this:
We have now finished setting up the strips that feature three different sections that will be covered in the art classes! Let’s move on to work on the other areas.

Step 30: Materials for Class
Next, open the ‘brushes.psd’ file which can be found in one of our previous freebies and you can download it here: Free: Scene Creator Items, Background Texture and Interiors Mockup Template
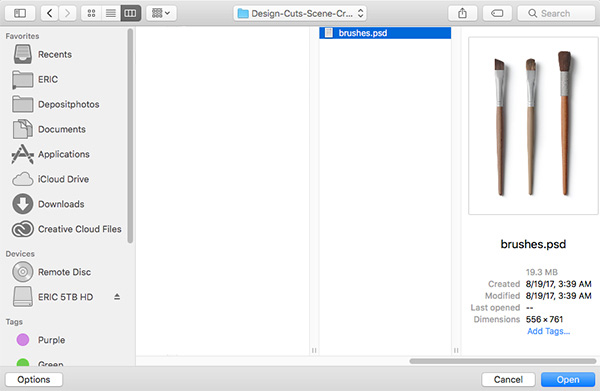
Once the file is opened you will see that there are three brushes inside. For this part we are going to use the middle brush so let’s click and drag the brush from this PSD into your file.
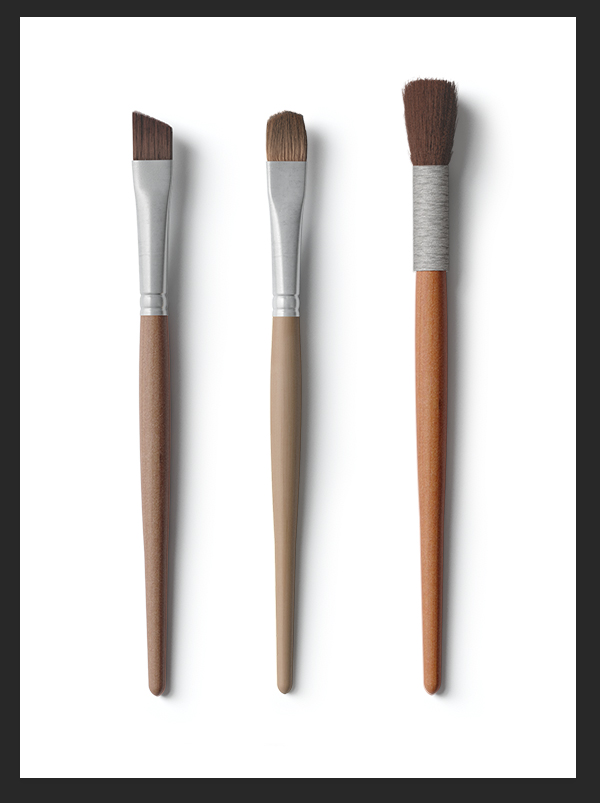
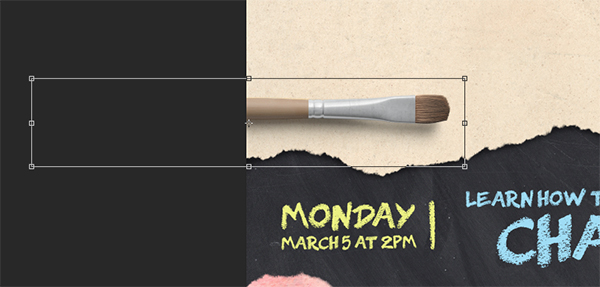
Once your brush is in your working document and place it above all of the paper strips. Press Command/Ctrl+T to initiate a Free Transform and then hold the Control Key and click on the brush. From here, choose the ‘Rotate 90º Clockwise’ option from the menu.

After rotating the brush let’s also make it larger by dragging outwards from any of the four corners of the bounding box while holding the Alt/Option+Shift keys and positioning it towards the left of the canvas so that only the right side of the brush appears on the canvas.
Step 31: Unlabeling
Just a quick side note or tip here but you may have noticed that the brush we’ve brought in has a green label on it. It’s not a huge deal but it bothers me that this is the only highlighted folder, so to get rid of that we can just hold the Control Key and click on the folder, and then scroll down to choose ‘No Color’ as shown below:

Step 32: Saturated Brushes
Expand the ‘BRUSH’ folder to reveal the contents and select the ‘brush’ Smart Object on top. From here, hold the Alt/Option key and click on the Adjustment Layer icon at the bottom of the Layers Palette. When the menu appears, choose ‘Hue/Saturation…’ as shown below:

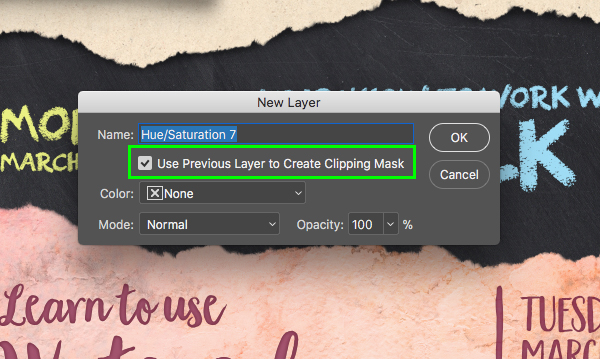
You will now be prompted with a ‘New Layer’ dialog box where we need to check off the option that says ‘Use Previous Layer to Create Clipping Mask’ and then click ‘OK’ to proceed.
You will now have a Hue/Saturation Adjustment Layer that will automatically have a Clipping Mask applied to it so that it only affects the ‘brush’ layer it’s attached to. For the settings here let’s increase the ‘Saturation’ slider up to ‘+45’ to brighten up the colors of the brush a bit more.

Step 33: Adding the Title
Create a new layer at the top of the Layers Palette and then grab your Type Tool (T). Type out the words ‘Art Classes’ in upper and lowercase. For the typeface I am using Five Boroughs Brush Font Family from Callie Hegstrom which can be purchased in the Design Cuts Marketplace. Or you can use any similar font from your personal collection. Here we can either use the Properties or the Character Panel to check that our type is ‘100.32’ points in size and then center the text in the top portion of the image.

Click on the ‘Color’ box and change the fill color to the hex value ‘#54636C’ as shown below:

Step 34: Glow FX
Double click on the ‘Art Classes’ text layer and then inside of the Layer Style panel check off the ‘Inner Glow’ option. Change the ‘Blend Mode’ to ‘Multiply’ and then lower the ‘Opacity’ to ‘30%’.

For the fill color let’s use the hex value ‘#0D1A61’ and then click ‘OK’ twice to apply the changes and close out of both dialog boxes.

Step 35: Call to Action
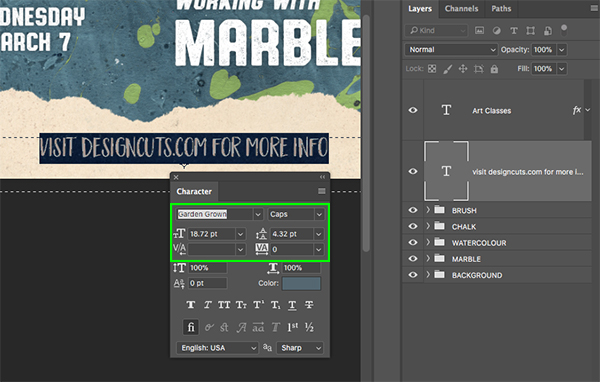
Like all flyers we need to add a call to action so that we can drive people to a website or somewhere they can get more information. To do this let’s create another new layer and then use the Type Tool (T) to type out ‘VISIT DESIGNCUTS.COM FOR MORE INFO’ using the ‘Garden Grown’ typeface in the ‘Caps’ style. We will be using the same fill color that we used for our main title text (#54636C) and then make the size ‘18.72’ points and then center this text along the bottom of the canvas.
Step 36: Title Folder
Select the ‘Art Classes’ text layer, then hold the Shift Key and select the call to action text beneath so both layers are selected at the same time.
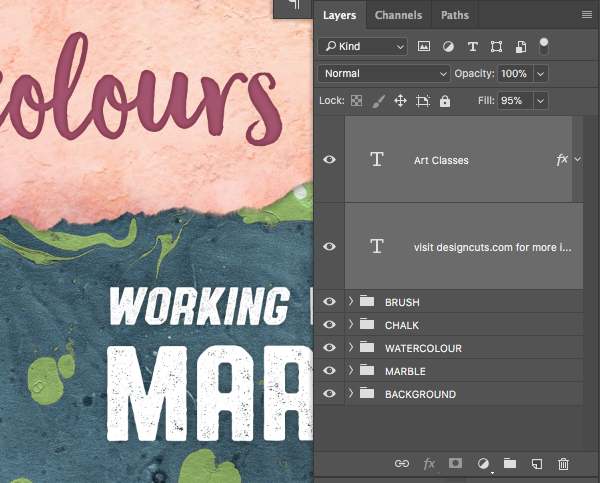
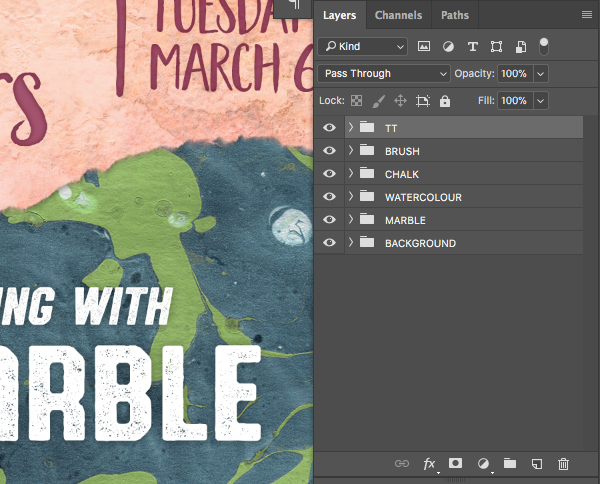
Press Command/Ctrl+G to place both of these layers into a new folder and then double click on the ‘Group 1’ text to change the folder name to ‘TT’ as shown below:
Step 37: Global Adjustments
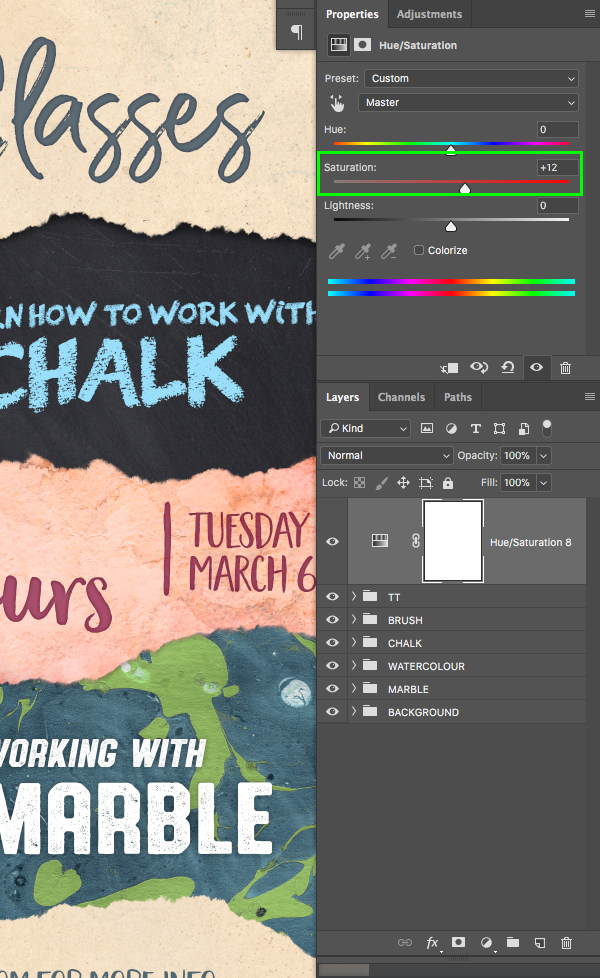
At this point you may find that the top of the image is looking a bit crowded with the title. If you need to, hold Command/Ctrl and select each of the folders for ‘CHALK’, ‘WATERCOLOUR’, and ‘MARBLE’ and then once the folders are selected you can hold the Shift Key and move them down to add a bit of breathing room to the title at the top. Once everything is in place, click on the Adjustment Layer icon at the bottom of the Layers Palette and select ‘Hue/Saturation…’ from the list. This effect will be applied to everything in our design so make sure it’s at the very top of your Layers Palette and then simply move the ‘Saturation’ slider to ‘+12’ boost the overall saturation in the image.
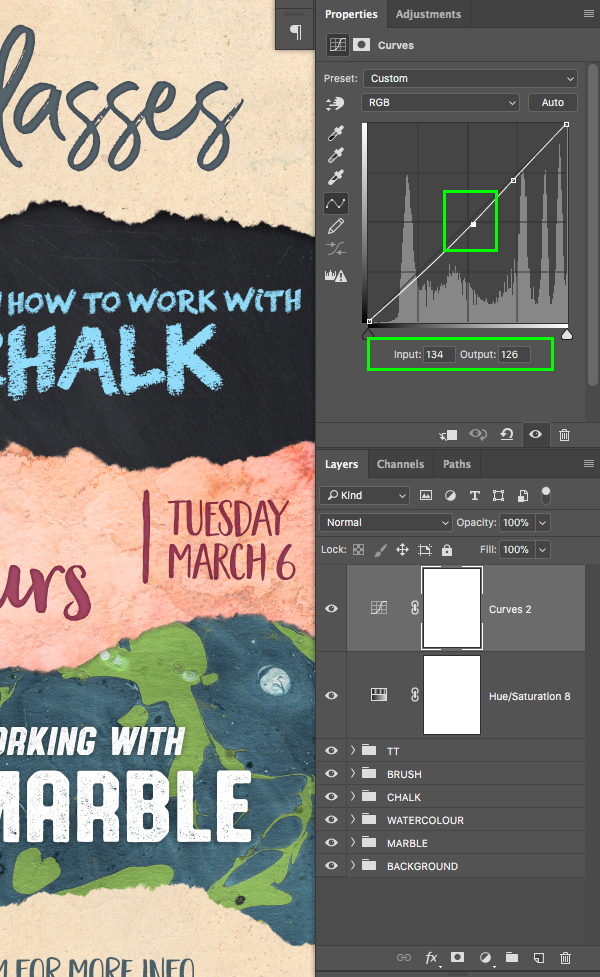
Return to the Adjustment Layer icon at the bottom of the Layers Palette and this time choose ‘Curves…’ from the list. In the Properties panel, click a point in the middle of the grid and then set the ‘Input’ to ‘134’ and the ‘Output’ should be set to ‘126’ as shown below:
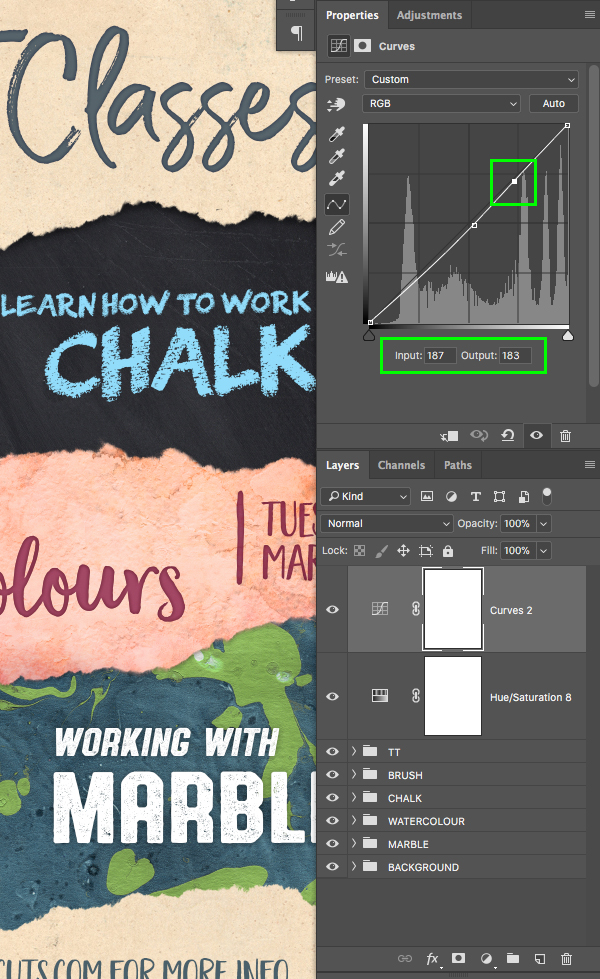
Click in the upper right quadrant to make a second point in the Curves Properties and this point should have an ‘Input’ setting of ‘187’ and an ‘Output’ setting of ‘183’ as shown in the image here:
Step 38: Last Group
Select the Curves Adjustment Layer at the top of your Layers Palette, and then hold the Shift Key and select the Adjustment Layer below.

Next, press Command/Ctrl+G to put both of these into a new Group Folder and rename it ‘GLOBAL ADJUSTMENTS’ to tidy things up.

That now completes our Art Class Flyer Design! We’ve created our flyer using a variety of elements from this ultimate collection of visually stunning and incredibly useful textures and patterns. The complete collection offers a truly enormous collection of best-selling textures and patterns, saving you 99% off the regular price! We can’t wait to see what you create with these amazing resources!
Remember that whether it’s your outcome for this tutorial or something new you’ve made, we’d love to see your designs on our Facebook page.
Please leave a comment if you have any questions or suggestions. I always look forward to hearing from you!
There’s still time to check out The All-Purpose Textures and Patterns Collection offering plenty of variety and versatility to cover you for any type of design project for an unbeatable price of $29!

Thank you so much, Loved it!
Hey C,
Thanks so much for the comment and we are delighted to hear you like this tutorial :) We would love to see how you got on with this one if you were keen to share your work!
Thanks for the detailed tutorial, which is very helpful to all involved in creative works.
You are so welcome- thank you for the lovely feedback, we’re so glad that it’s helpful :)
Geweldige tutorial,maar de bruches”Torn paper bruches” kan je niet downloaden
Oh no Monique, i’m so sorry that you are having trouble downloading the brushes! Please do let us know if you are getting any error messages at all and we should be able to help :)
Thank you for a new instructive tutorial. I prefer those tutorials with text, I find it much easier to read than to listen to them.
Best regards
Jan-Ove
Hey Jan-Ove,
You are so welcome!
Eric, our tutorial writer is really great and will often include both text and video to cater for our communities learning needs :)
Great tutorial! My mind is whizzing with many different applications. But, the link to download is not available. /am I missing something?
Thanks,
LaDonna
Hey LaDonna,
Thank you so much, we’re really glad that you liked it!
There are quite a few download links included in this tutorial, so if you could confirm which one you are having trouble with, I can certainly help with that :)