In this tutorial I will be showing you how to create a fun menu design for The Last Stand Coffee Shop & Bakery in Photoshop. To create our menu design we will be using the Buckwheat Typeface from The Supreme Quality Font Bundle. This all new design bundle is a special collection of some of the best fonts ever created! With artists such URW Type Foundry, Fenotype, Set Sail Studios, Tom Chalky, and many more. If you’re all ready to get started working on our menu then fire up Photoshop and let’s get started!
HAVE YOU SEEN OUR YOUTUBE CHANNEL?
Watch the video tutorial below and subscribe to our YouTube channel for regular updates direct to your inbox.
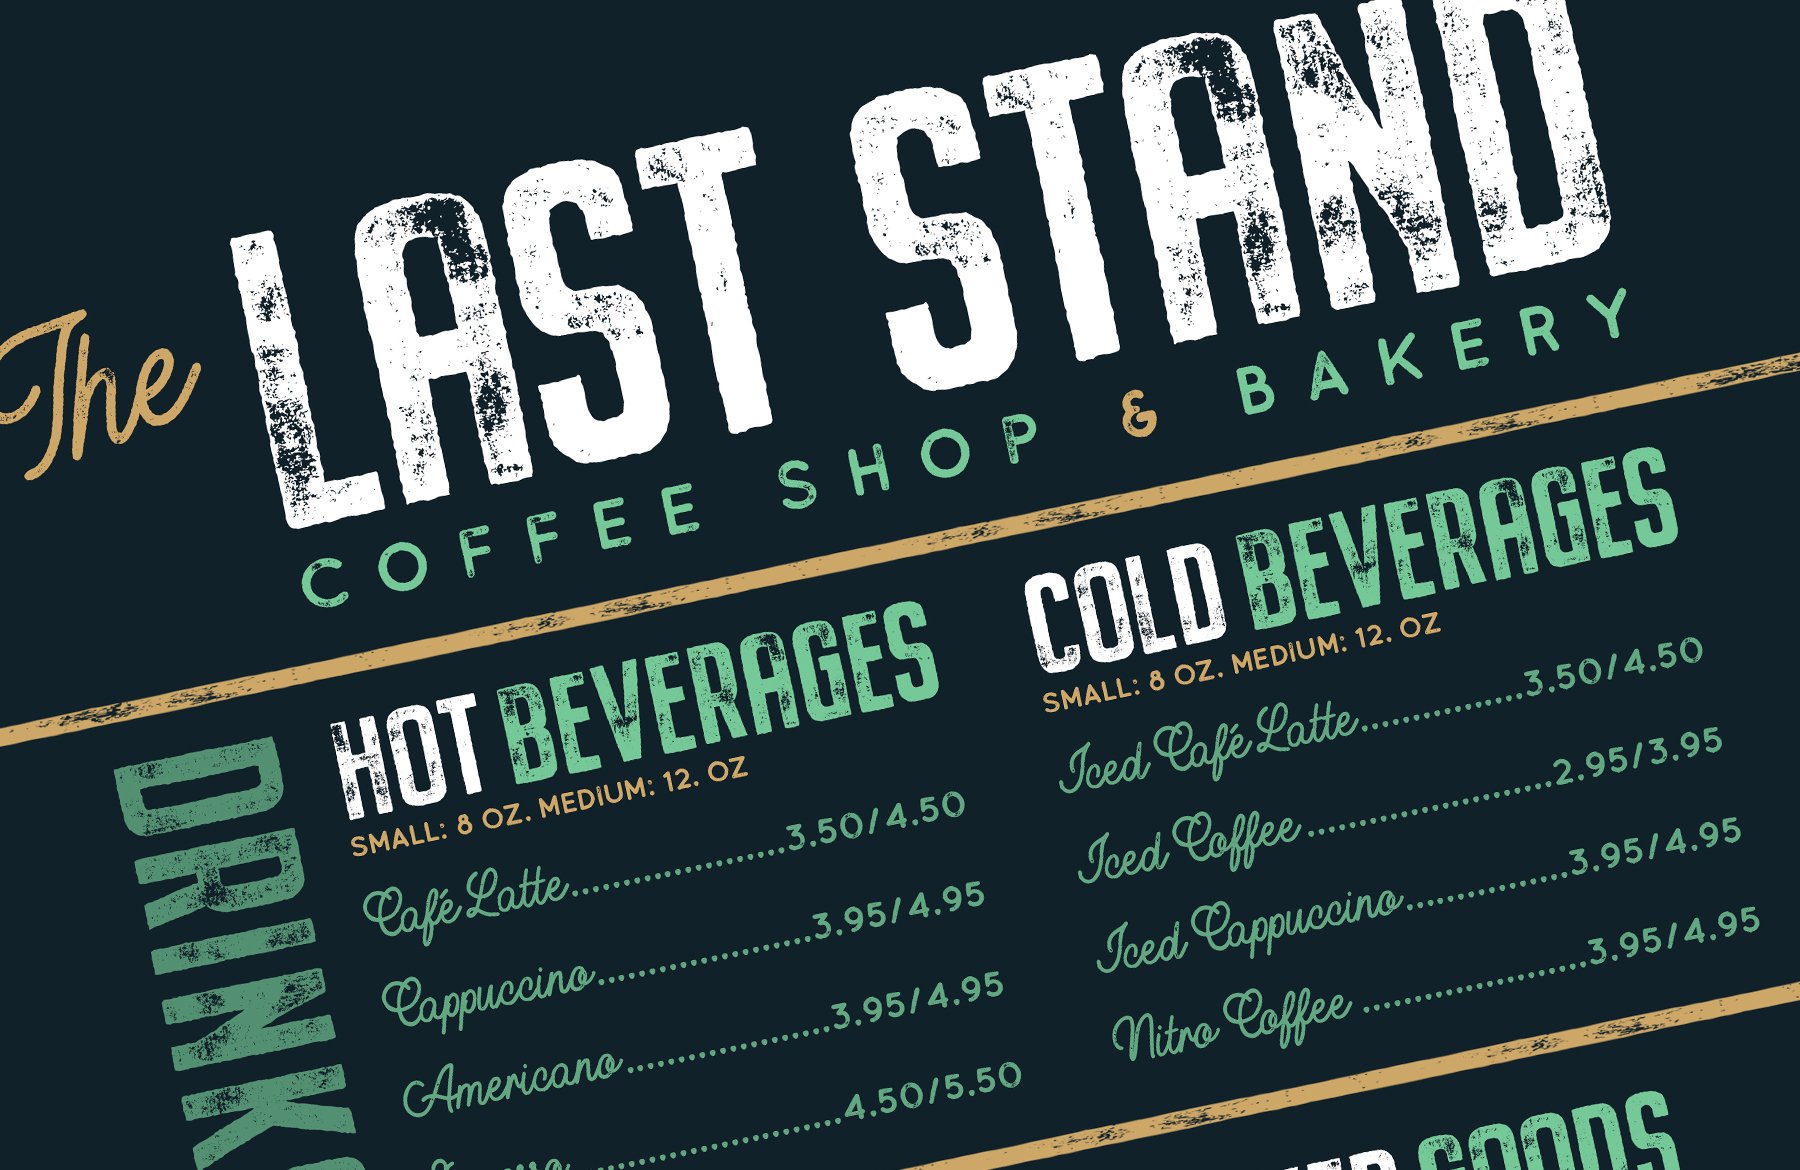
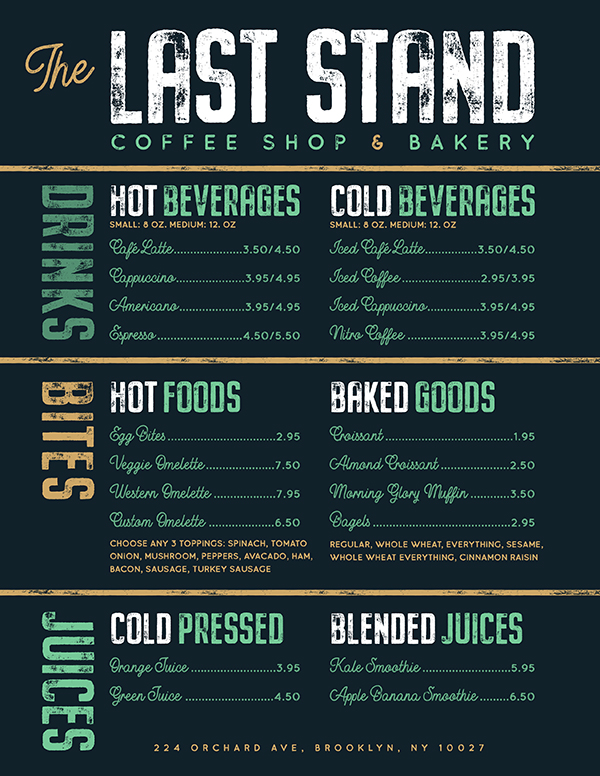
Here’s a look at what we’ll be creating:
Step 1: The Last Stand Menu Design
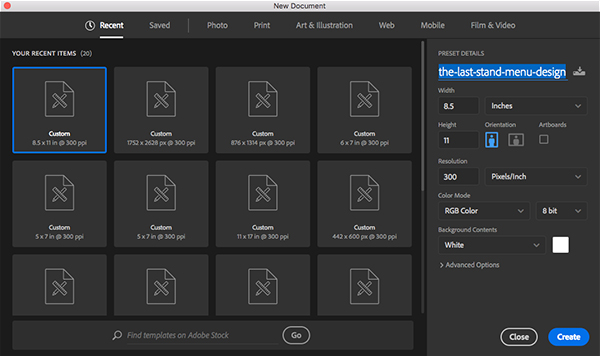
To begin, create a new document and make it ‘8.5’ inches wide x ’11’ inches tall. Check to make sure that the ‘Resolution’ is set to ‘300’ and then give your document a name – here I am using ‘the-last-stand-menu-design’. The ‘Color Mode’ can stay as RGB since we will mostly be viewing it on screen (although for a real printed design you would want to use CMYK instead). Once you have set the parameters for your document, let’s click ‘Create’ from the lower right corner.
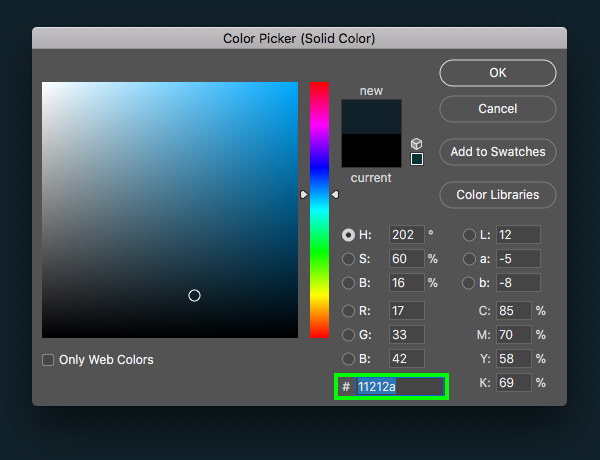
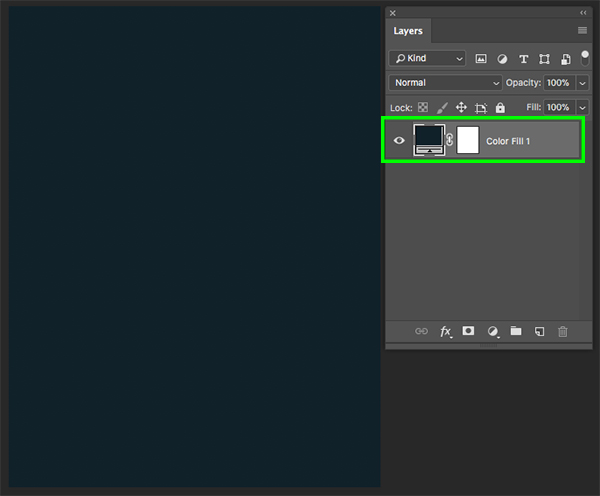
After creating your new document you will have a single ‘Background’ layer filled with solid white. Let’s click on the Adjustment Layer icon at the bottom of the Layers Palette and then we will add a ‘Solid Color…’ adjustment as shown here:
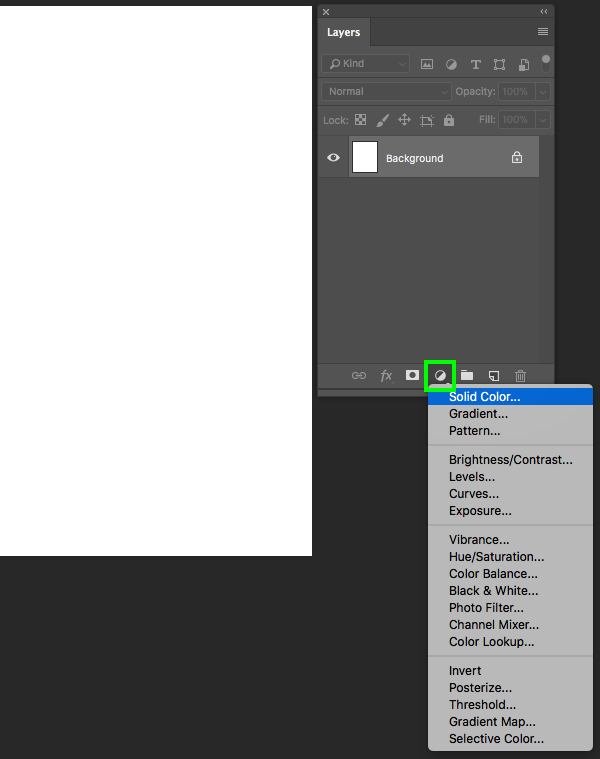
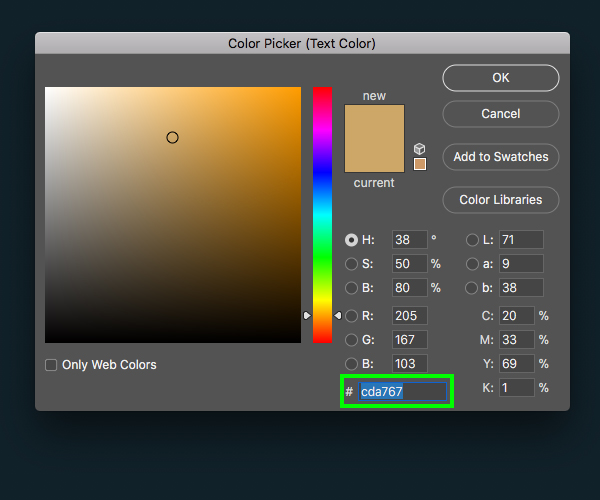
For the fill color, enter the hex value ‘#11212A’ and then click ‘OK’ to apply the changes.
Once you’ve added the new Adjustment Layer, drag the locked ‘Background’ layer to the trash can icon at the bottom right of the Layers Palette to remove it.
Step 2: Adding The Title Treatment
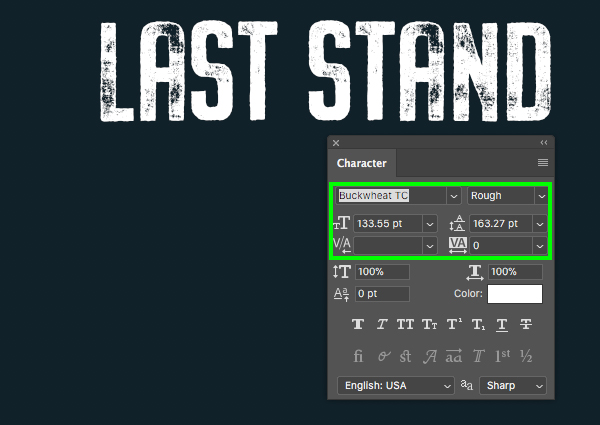
Create a new layer above the solid color background and press ’T’ to switch to your Type Tool. From here, open the Character Panel (if you don’t see it you can quickly find it under the Window menu). Once the Character Panel is open let’s type out the words ‘LAST STAND’ in all caps and here I am going to be using the ‘Buckwheat TC’ typeface in the ‘Rough’ style. Let’s go ahead and set the size of the text to ‘133.55 pt’ and leave the color to solid white. For those of you following along who don’t have the typeface, I’ve found some great free alternatives that can be used instead. A couple of nice substitutes for this typeface are KG All of Me or check Union Agrochem instead.
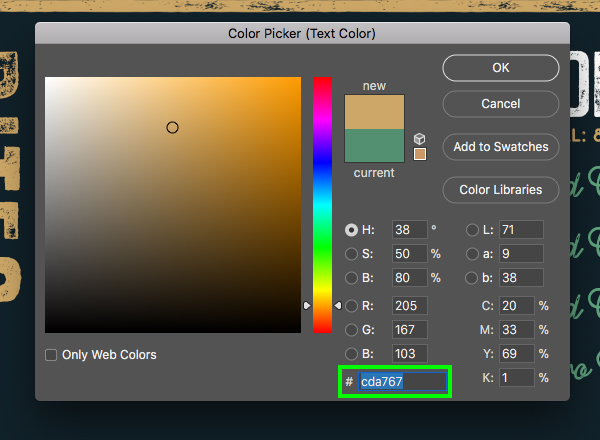
Let’s create another new layer and use the Type Tool (T) once again to type out the word ‘The’ in upper and lowercase. Here I will be using the ‘Buckwheat TC Script’ typeface, again in the ‘Rough’ style. We will use the Character Panel again to make the type ’64 pt’ in size and then go ahead and click on the ‘Color’ swatch to change the fill color. A free alternative for this typeface that looks pretty similar is Palm Canyon Drive from Retro Supply Co.
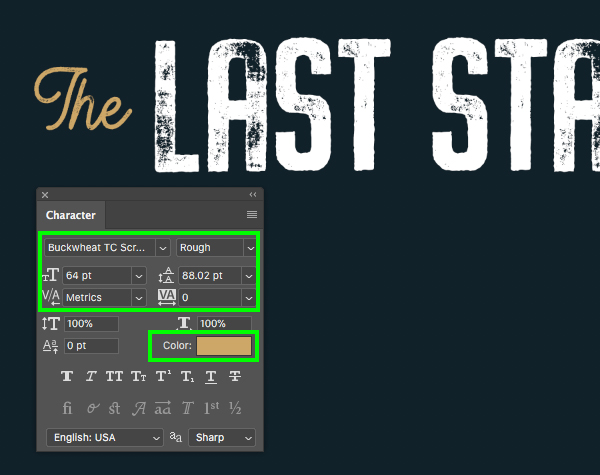
For the fill color, enter the hex value ‘#CDA767’ and then click ‘OK’ or press ‘Return’ to apply the change.
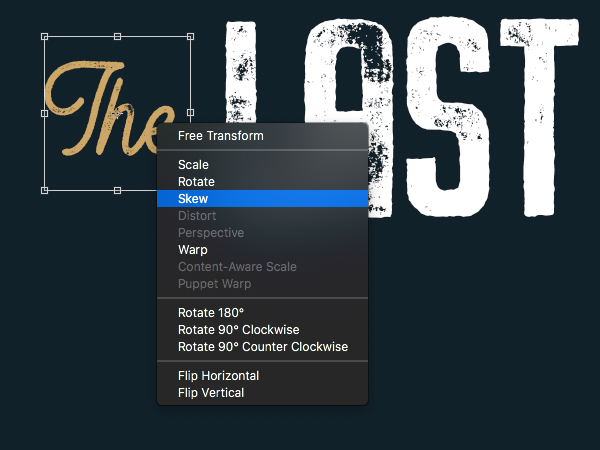
Next, select the text layer and press Command/Ctrl+T to do a Free Transform. From here, hold the Control key and click on the bounding box and then choose ‘Skew’ from the dropdown menu.
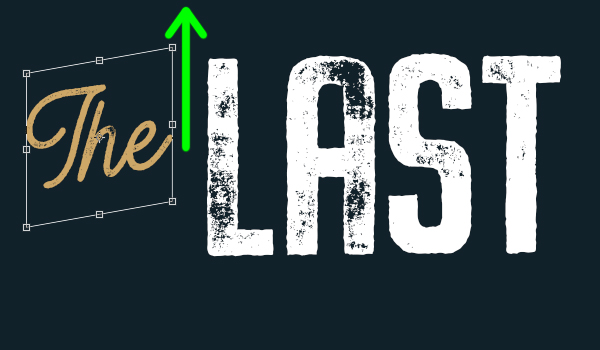
Hold the Alt/Option key and slide the right side of the bounding box upwards to apply a slight skew to the text to make it more dynamic and visually appealing. Once you have done that, press ‘Return’ to apply the changes to the text.
Step 3: Tagline
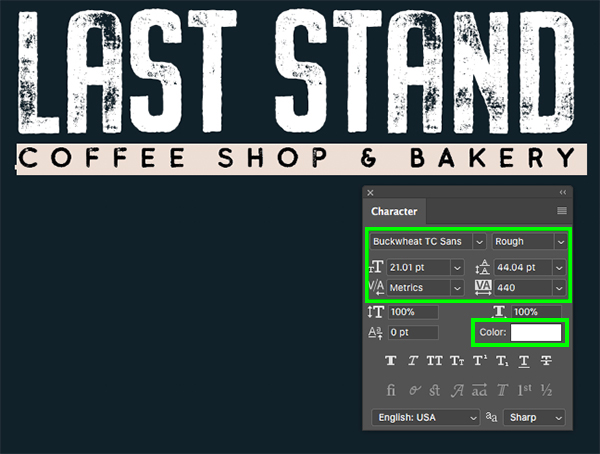
Add another new layer and use the Type Tool (T) once again to type out the words ‘COFFEE SHOP & BAKERY’ in all caps and place it below the ‘LAST STAND’ text. For the tagline here I will use the ‘Buckwheat TC Sans’ typeface in the ‘Rough’ style which is again part of the Buckwheat family from Tom Chalky. If you guys don’t have this typeface available, check out the free font Cocogoose Letterpress from 1001 Fonts. For the size, let’s make it about ’21 pt’ and then change the ‘Tracking’ setting to ‘440’ before clicking on the ‘Color’ swatch to change the fill.
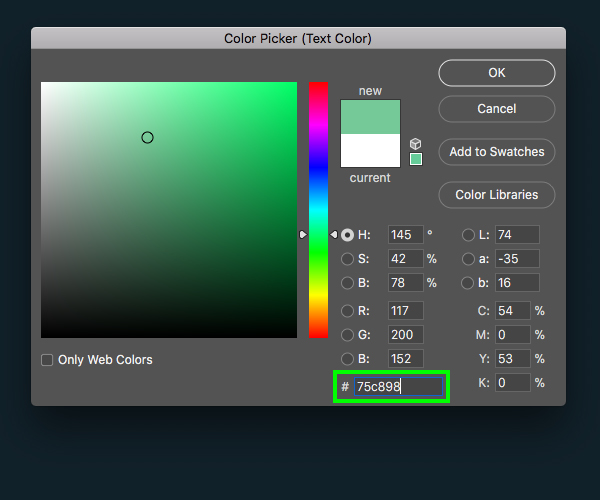
For the fill color, enter the hex value ‘#75C898’ to get a nice seafood green and then click ‘OK’ or press ‘Return’ to apply the change.
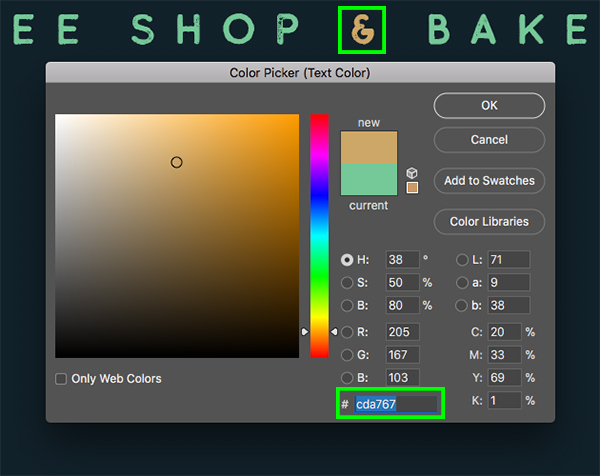
Use the Type Tool(T) to click and highlight just the ampersand symbol and then click on the ‘Color’ swatch in the Character Panel again before changing the hex value to ‘#CDA767’ so that it matches the word ‘The’ and then click ‘OK’ to apply the change.
Step 4: Makeshift Border
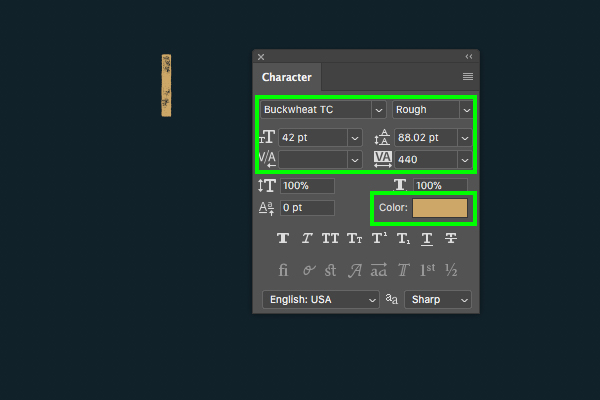
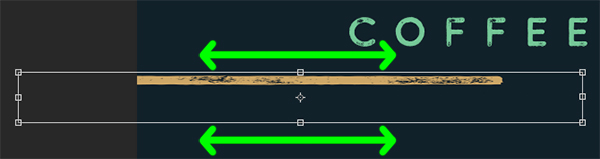
Let’s create a new layer and then use the Type Tool (T) to type out an uppercase ‘i’ on the keyboard using the same typeface you used for the ‘LAST STAND’ text. Let’s jump over to the Character Panel and change the size of the type to ’42 pt’ and then use the same tan color that we used in the previous step (#CDA767) to give it a nice fill.
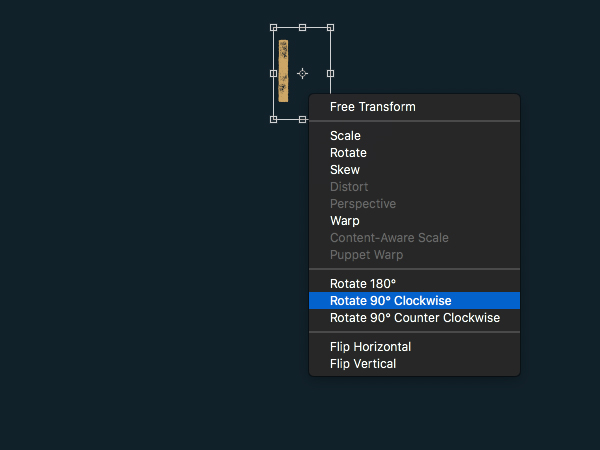
Select the type layer and press Command/Ctrl+T to initiate the Free Transform and then hold the Control key and click on the bounding box before clicking ‘Rotate 90º Clockwise’ from the dropdown menu that appears.
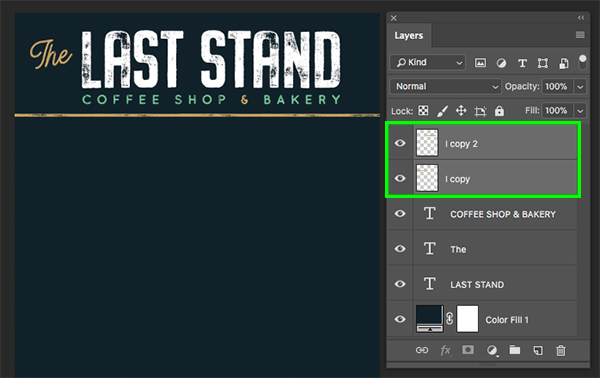
After rotating the letter, hold the Alt/Option+Shift keys and drag either the left or right handles of the bounding box outwards to stretch the letter horizontally. We can now duplicate this a few times until it spans the width of the entire menu to serve as a nice divider.
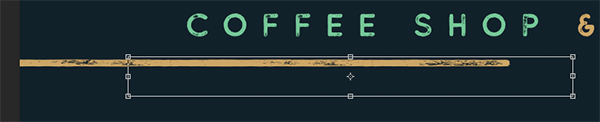
After stretching the letter a bit, press ‘Return’ to apply the transformation. From here, select the layer and press Command/Ctrl+J to duplicate it, then hold the Shift key and slide it over towards the right to make the line longer.
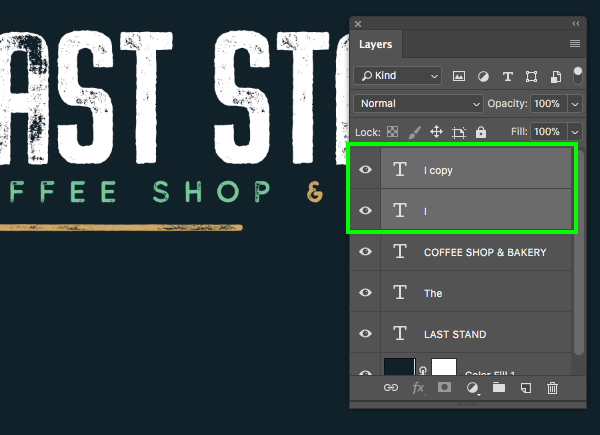
Once you have two copies of the stretched character, select the top copy in the Layers Palette, then hold the Shift key and select the second so you have them both selected simultaneously.
With both layer still selected, press Command/Ctrl+E to merge them into a single layer as shown here:
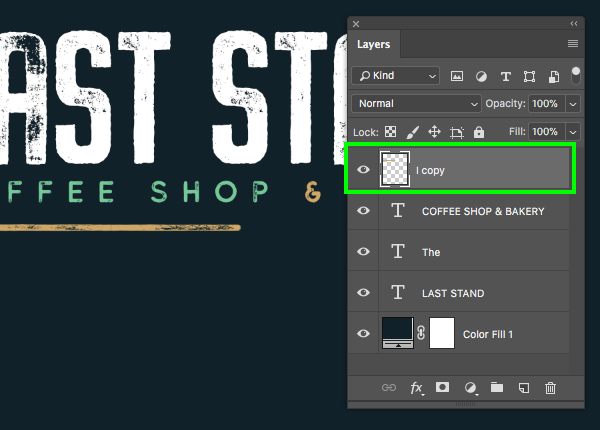
Select the newly merged layer and duplicate it by pressing Command/Ctrl+J. Hold the Shift key and slide this copy over and you should now have a divider going all the way across the design just below the text layers. After that, select the top copy in your Layers Palette, hold Shift key, and then select the merged copy below so that both of these are selected at the same time.
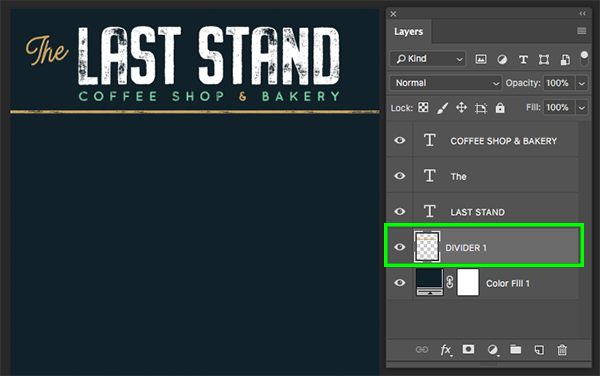
Press Command/Ctrl+E to merge these two copies together into a single layer and then double click on the layer name and change it to ‘DIVIDER 1’ and place it just below the solid color Adjustment Layer all the way at the bottom.
Step 5: Grouping The Title
Next, select the top text layer, then hold the Shift key and select the third text layer so all three text layers are selected at the same time.
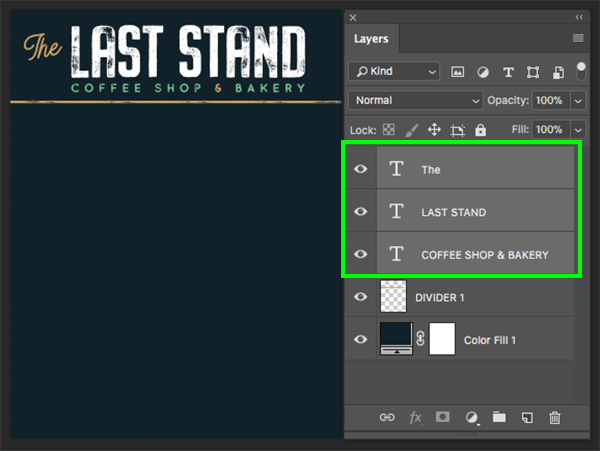
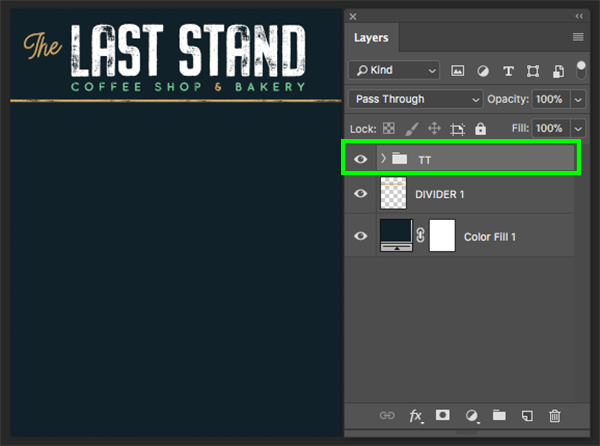
With your text layers selected, press Command/Ctrl+G to place them into a new folder and double click the ‘Group 1’ text and change the name to ‘TT’ as shown below:
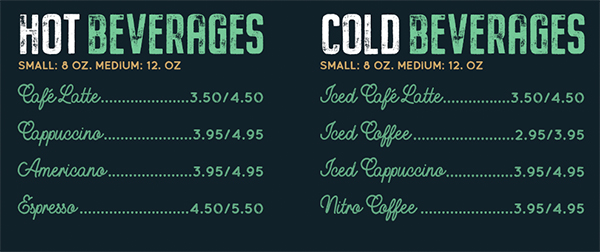
Step 6: Hot Beverages
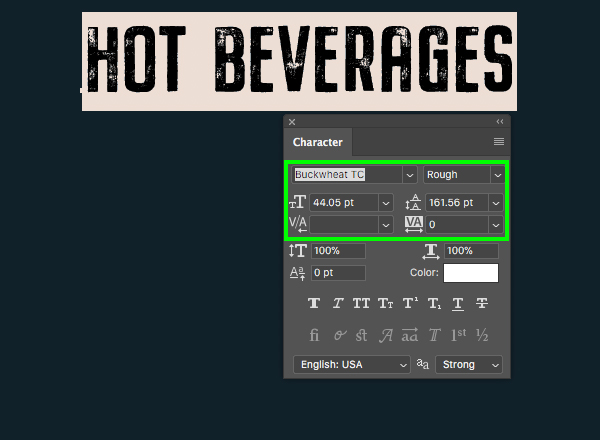
Create a new layer and grab your Type Tool (T). Type out the words ‘HOT BEVERAGES’ in all caps using the same condensed sans serif that you used for the ‘LAST STAND’ text in the title. Here I will be using ‘Buckwheat TC’ in the ‘Rough’ style once again, and then we’ll head over to the character panel where we will make our text about ’44.05 pt’ with a solid white fill color.
Using the Type Tool (T) click the cursor in between the words ‘HOT’ and ‘BEVERAGES’ and then hold the Alt/Option key and tap the left arrow key to reduce the amount of spacing between the two words. Let’s go ahead and do that to reduce the spacing between some of the other characters as well just to tighten things up.

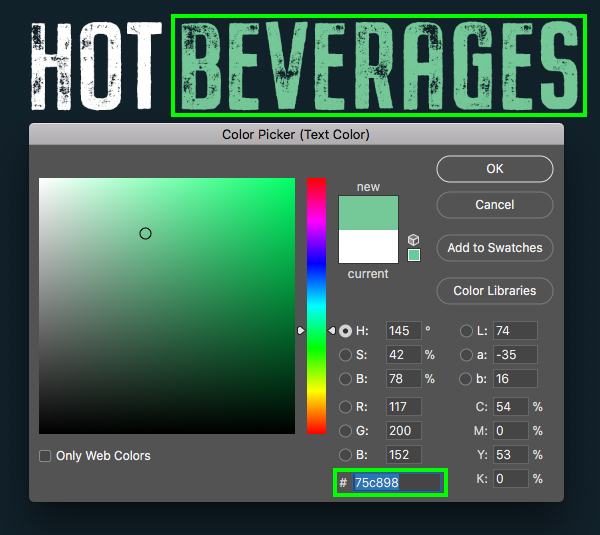
After adjusting the spacing in between characters, highlight just the words ‘BEVERAGES’ with the Type Tool (T) and then click on the ‘Color’ swatch in the Character Panel and change the fill color from white to ‘#75C898’ as shown below:
Step 7: 12 Ounces To Freedom
Make another new layer just below the ‘HOT BEVERAGES’ layer and type out the words ‘SMALL: 8 OZ. MEDIUM: 12. OZ’ using the same typeface that we used in the ‘COFFEE SHOP & BAKERY’ text from the title treatment. Here I am once again using the ‘Buckwheat TC Sans’ font in the ‘Rough’ style with a point size of ‘8.75’.
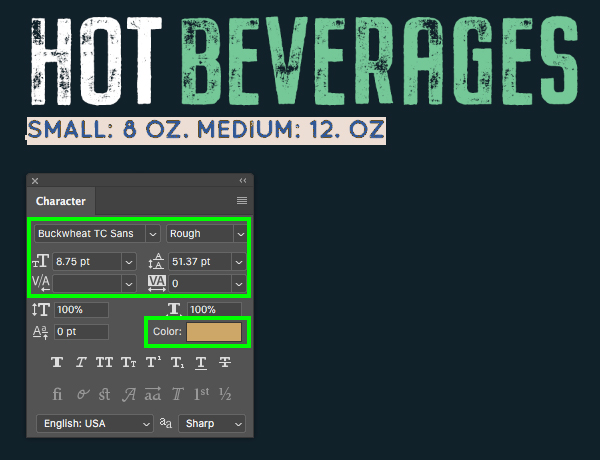
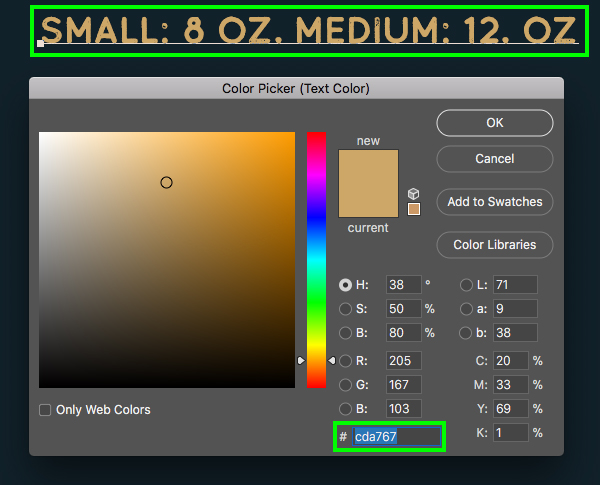
Once you’ve added the new line of text, click on the ‘Color’ swatch and change the fill color to ‘#CDA767’ and then press ‘Return’ or click ‘OK’ to proceed.
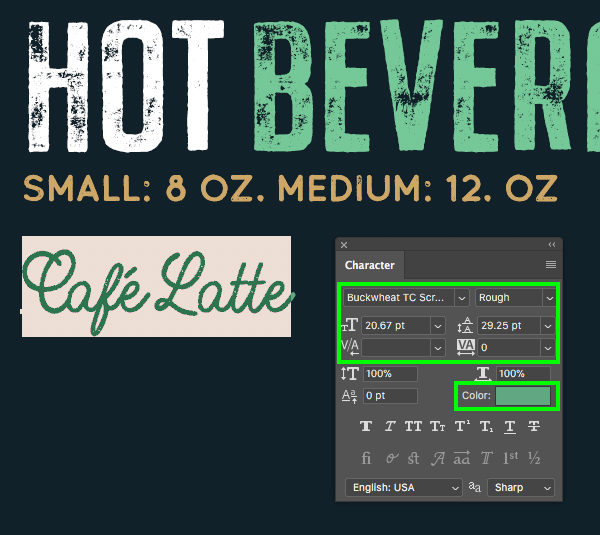
Step 8: Café Latte To Go
Create another new layer and use the same rough script typeface from earlier to type out the first menu item -‘Café Latte’ in upper and lowercase. Here I am using the ‘Buckwheat TC Script’ typeface in the ‘Rough’ style. Once you’ve typed out the first menu item, use the Character Panel to make the text about ’20.67 pt’ and then change the linespacing to ’29.25 pt’ as shown in the image below:
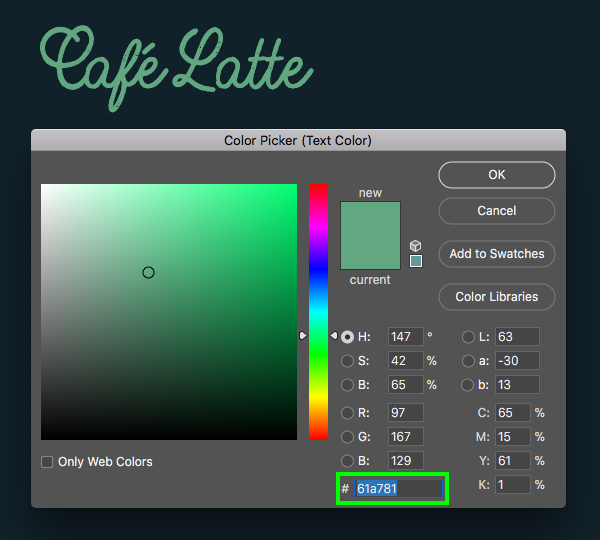
Click on the ‘Color’ swatch and change the fill color to the nice seafoam green color – ‘#61A781’ and then press ‘Return’ on the keyboard or click ‘OK’ to apply the changes and proceed.
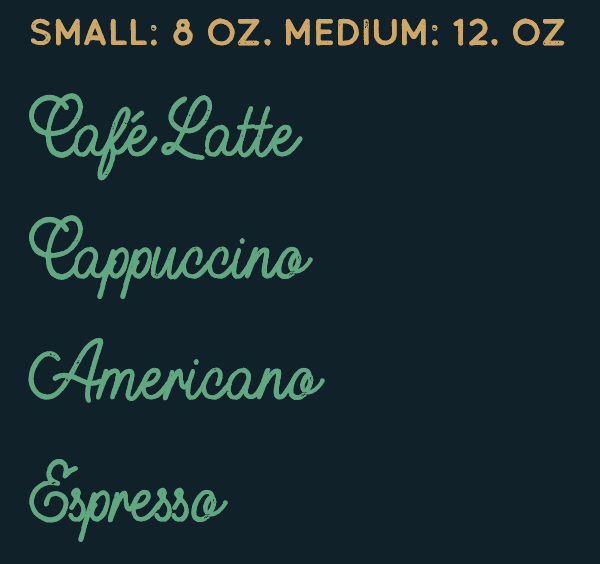
Since we changed the linespacing with the first menu item, all we need to do is press the ‘Return’ key and then we can add our next few items. Let’s add a ‘Cappuccino’ and then ‘Americano’ and end with an ‘Espresso’ as shown below:
Step 9: Name Your Price
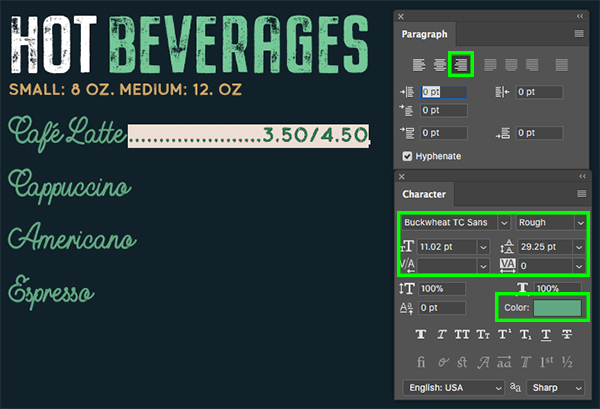
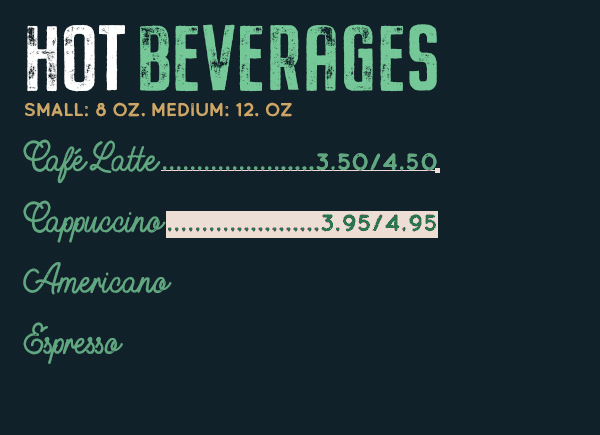
Add another new layer and what we want to do next is press and hold the period key on the keyboard to make about 20 periods or so, and then type out the numbers ‘3.50/4.50’ which is going to serve as our price for the first item. Here I am once again using the ‘Buckwheat TC Sans’ typeface in the ‘Rough’ style, which should match the font we used for the tagline in the title and also the cup sizes under the ‘HOT BEVERAGES’ text so be sure to use which ever font you used for those parts here. In the Character Panel let’s make the size of the type about ’11 pt’ and then make the linespacing the same as what we used for our menu items list – ’29.25 pt’. Next, open the Paragraph Panel and choose the flush right, ragged left option so that our text will be aligned on the right side, opposite our menu items. From here let’s line up the bottom of the text with the first menu item just so it looks like it’s all one line going across. For the fill color, we will use the same seafoam green from the previous step – ‘#61A781’.
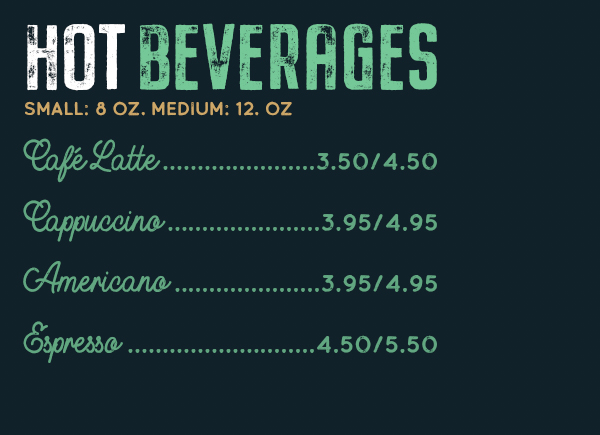
Press ‘Return’ to add a second line, and then type out another 20 periods or so, followed by the prices ‘3.95/4.95’. The idea here is that because our prices are right justified, we can add or remove as many periods as we need to get fairly close to the menu item on the opposite side.
Repeat this process for the next two prices shown in the image and notice that some lines will require more or fewer periods than the others.
Step 10: Beverage Group
After finishing up the hot beverages, come over to the Layers Palette and select the ‘HOT BEVERAGES’ type layer. From here, hold the Shift key and then click on the bottom text layer, just above the ‘DIVIDER 1’ layer so all of your text in this group is selected together.
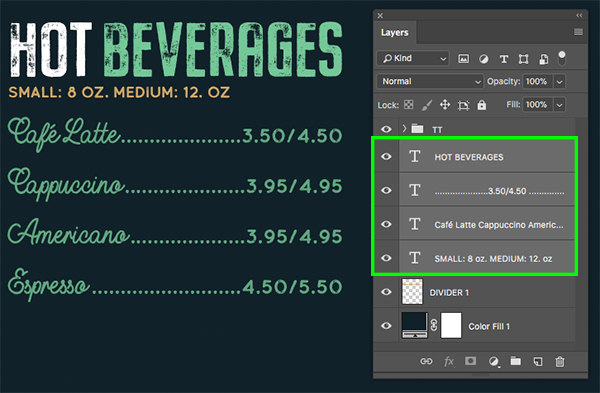
With your layers still selected, press Command/Ctrl+G to put the layers into a new folder and then double click the ‘Group 1’ text and rename the folder ‘HOT BEVERAGES’ as shown below:
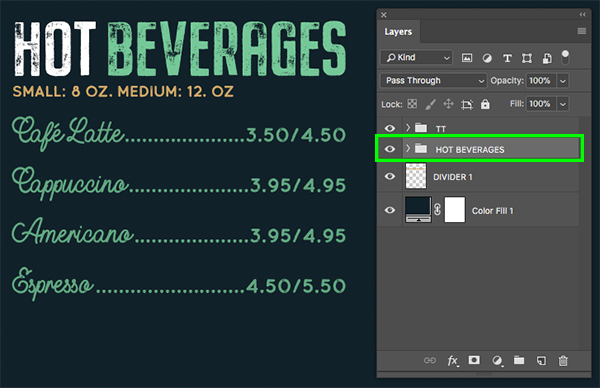
Select the ‘HOT BEVERAGES’ folder and then press Command/Ctrl+J to duplicate the whole group, and then press Command/Ctrl and the left bracket on the keyboard to move this group below the original copy.
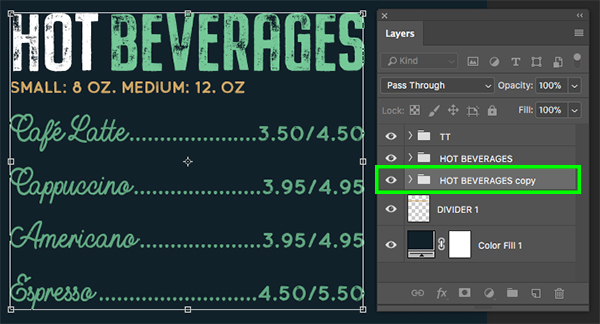
Step 11: Cold Beverages
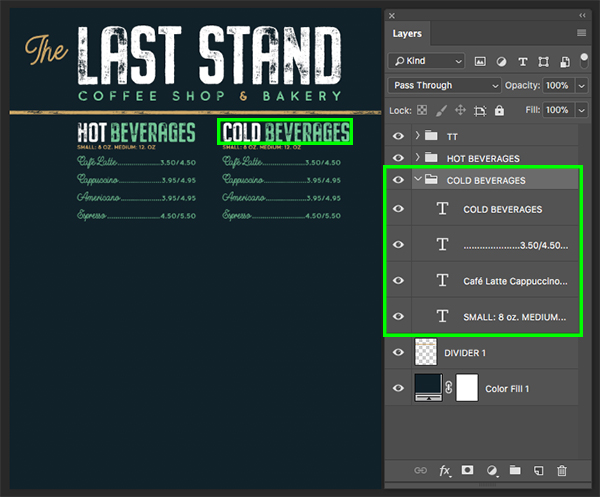
Double click the ‘HOT BEVERAGES Copy’ folder name and rename it ‘COLD BEVERAGES’. Press Command/Ctrl+T to do a Free Transform and then select the group, hold the Shift key, and slide it over towards the right so it lines up with the right side of the title treatment. We will then use the Type Tool (T) to change the main header in our design from ‘HOT’ to ‘COLD BEVERAGES’ as shown here:
Here I will turn off the price list for a moment so that we can change the names of the cold beverage items first. All we need to do here is replace the text with the following menu items:
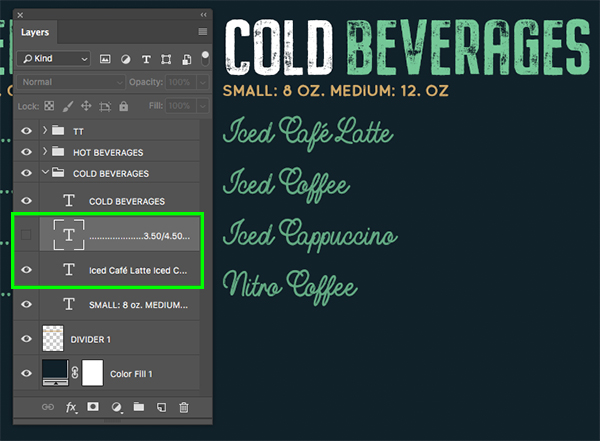
Turn the visibility of the price list layer back on, and then you will notice that things aren’t quite as neat as before because we will need to add or remove periods from each of the four lines.
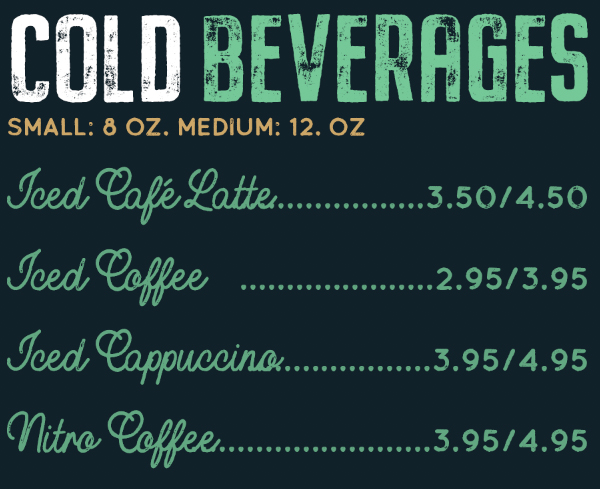
Let’s update a few of the prices and then fix the periods so that our lines look cleaner and you should end up with something like this:
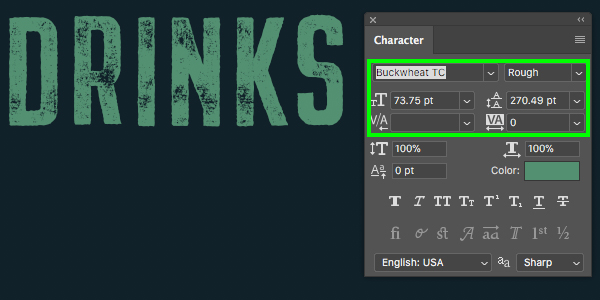
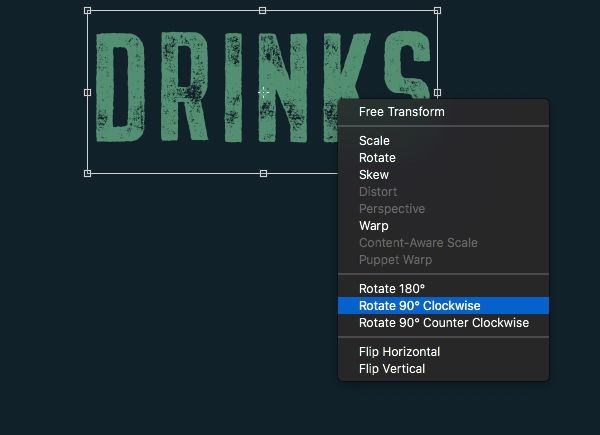
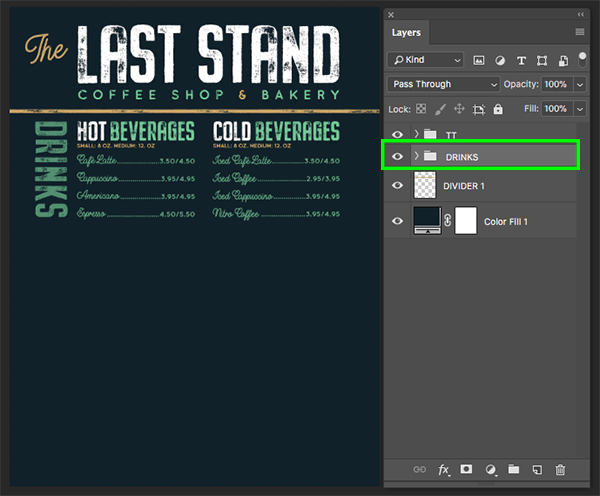
Step 12: Drinks!
Create a new layer and type out the word ‘DRINKS’ in all caps using the same typeface from the ‘LAST STAND’ text and also the ‘HOT/COLD BEVERAGES’ text. Let’s use the Character panel to change the size of this text to ’73.75 pt’ and use the green color for the fill.
After typing out the text, press Command/Ctrl+T to do a Free Transform and then click on the text while holding the Control key to reveal a dropdown menu. From this list we want to choose the option that says ‘Rotate 90º Clockwise’ as shown here:
Now we will place our ‘DRINKS’ text to the left side of the ‘HOT BEVERAGES’ group, checking to make sure that the top of the word and the bottom align with the top and bottom of the beverage groups. Once you have done that, select the ‘DRINKS’ text layer in your Layers Palette, hold the Shift key, and then select the ‘COLD BEVERAGES’ folder. You should now have the text layer and both groups selected simultaneously.
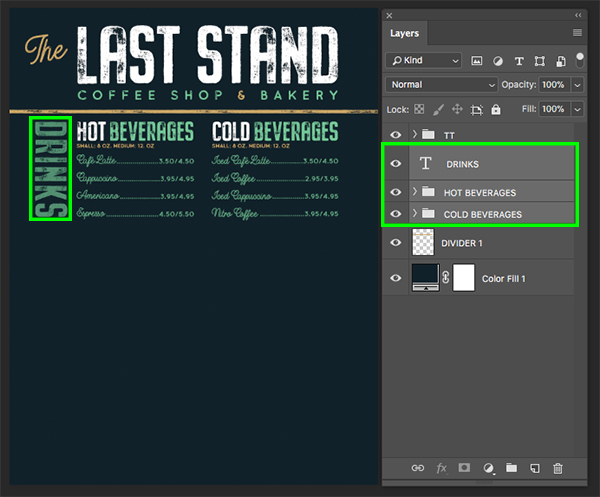
From here, press Command/Ctrl+G to place these three items into a new folder and double click the ‘Group 1’ text to rename the new folder ‘DRINKS’ as shown in the image below:
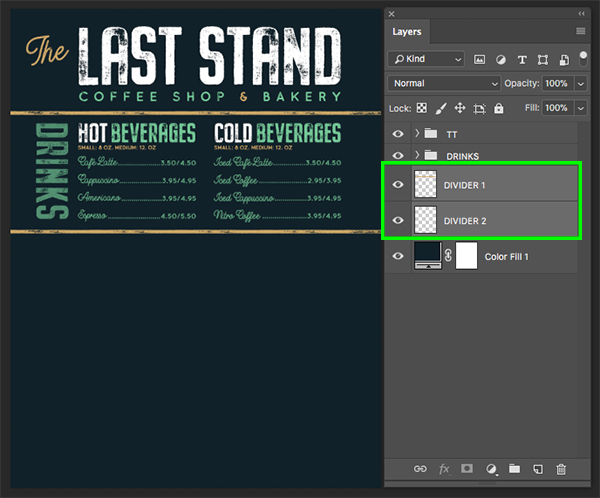
Step 13: The Great Divide
Select the ‘DIVIDER 1’ layer and press Command/Ctrl+J to duplicate it, and then Command/Ctrl and the left bracket to move it below the first divider layer. After that, hold the Shift key and the down arrow to move the new divider down until it’s below the entire ‘DRINKS’ folder.
Step 14: Section Two
Select the ‘DRINKS’ folder and press Command/Ctrl+J to duplicate the folder and then Command/Ctrl and the left bracket to move the new copy below the original.
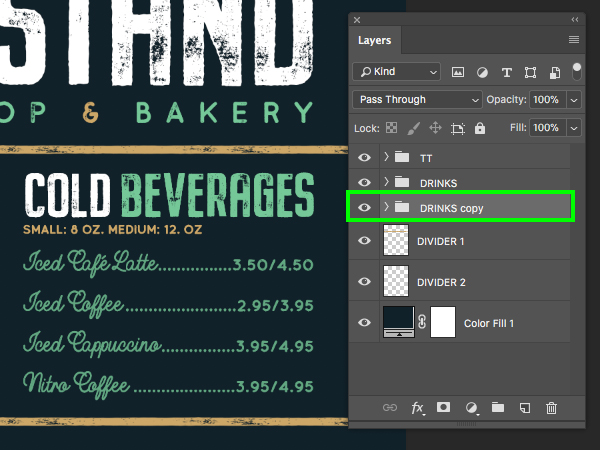
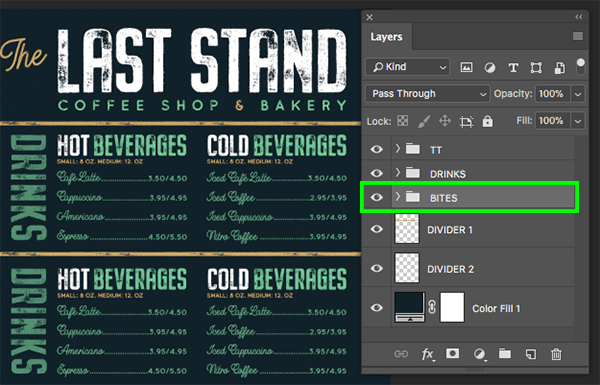
After moving the newly duplicated folder below the original in the Layers Palette, select the folder and press Command/Ctrl+T to do a Free Transform. From here, click on the group, hold the Shift key and slide it down just below the divider with a bit of space on top before pressing ‘Return’ to apply the changes. Next, double click the folder name in the Layers Palette and change it to read ‘BITES’ as highlighted here:
Step 15: Big Bites
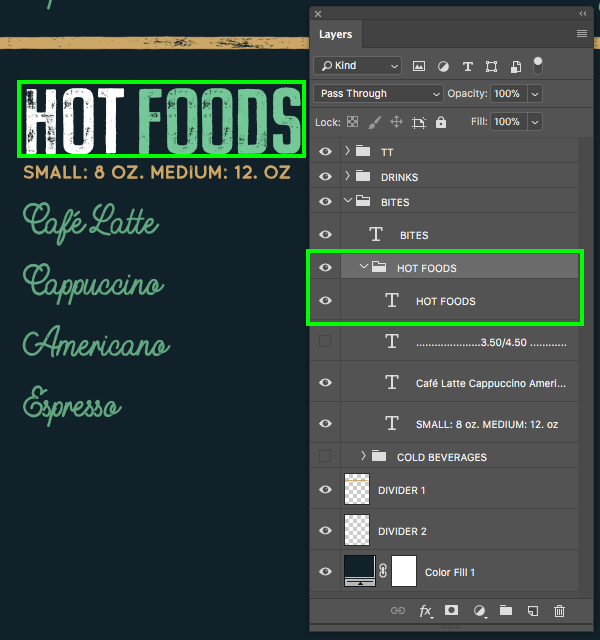
Select the top layer inside of the folder – the sideways ‘DRINKS’ text, and change it to read ‘BITES’ instead. After that, click on the ‘Color’ swatch.

Let’s change the fill color for the ‘BITES’ text to ‘#CDA767’ and then press ‘Return’ or click ‘OK’ to proceed.
Step 16: Changing Headers
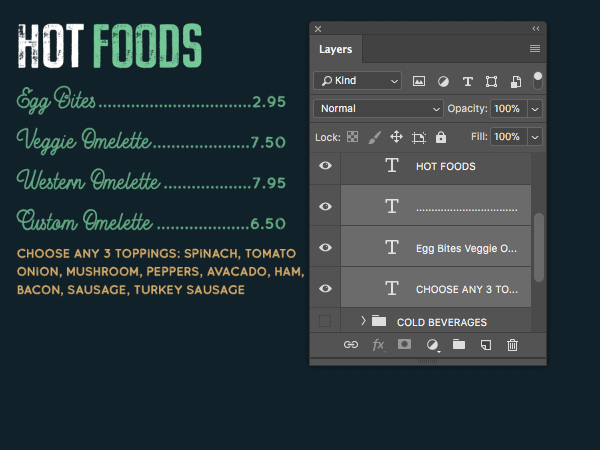
Next, click inside of the section header and change the text from ‘HOT DRINKS’ to ‘HOT FOODS’. Remember to use the Type Tool (T) to move your cursor in between the letters and press Alt/Option and the left arrow to reduce the amount of space between the characters to tighten things up.
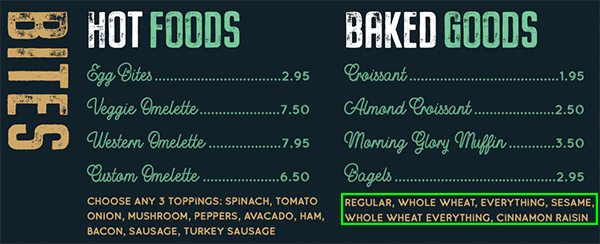
Turn off the visibility of the price layer and change the menu items to ‘Egg Bites’, ‘Veggie Omelette’, ‘Western Omelette’, and ‘Custom Omelette’ as shown here:
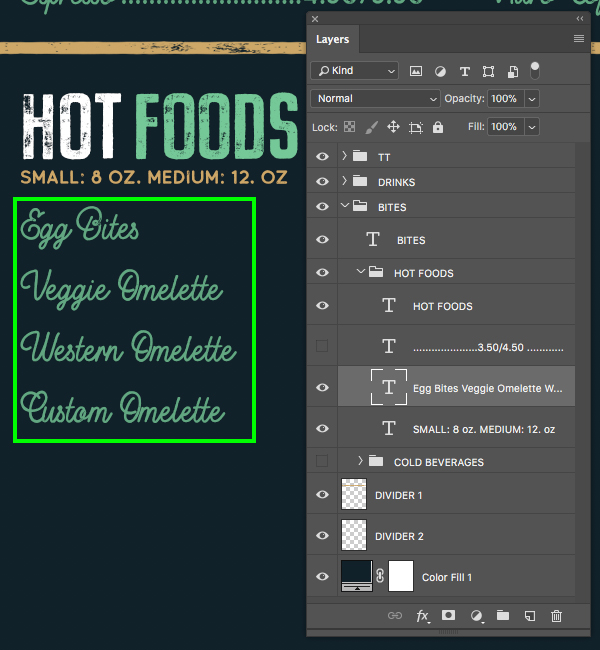
Turn the price list layer back on and update the prices. Here we only need one price per item as there is only one size for the foods as opposed to our drinks which had a ‘small’ and ‘medium’ size. We will also need to add and remove periods from the price list layer accordingly until you have something like this:

Select the ’SMALL: 8 OZ. MEDIUM: 12. OZ’ text layer and move it below the menu items and price list for this section. Use the Type Tool (T) to click inside and change the text to read: ‘CHOOSE ANY 3 TOPPINGS: SPINACH, TOMATO, ONION, MUSHROOM, PEPPERS, AVACADO, HAM, BACON, SAUSAGE, TURKEY SAUSAGE’ as shown below:
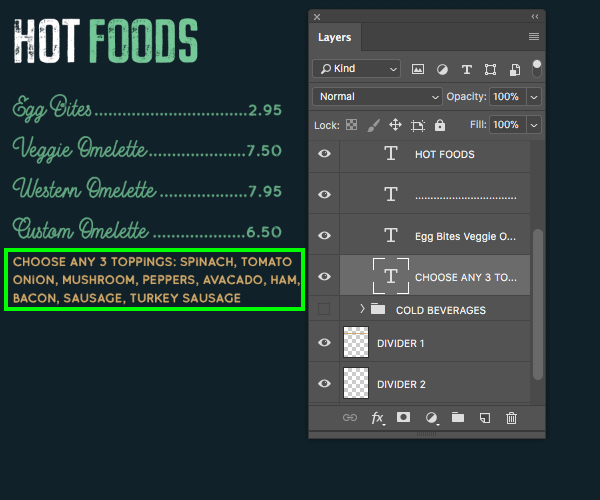
Click on the price list layer and then hold the Shift key and select the other two layers below the ‘HOT FOODS’ section header to select these three layers at the same time. After that, hold the Shift key and tap the up arrow on the keyboard about four times to move all of the layers up closer to the section header to compensate for the text that we moved to the bottom.
Step 17: Baking The Goods
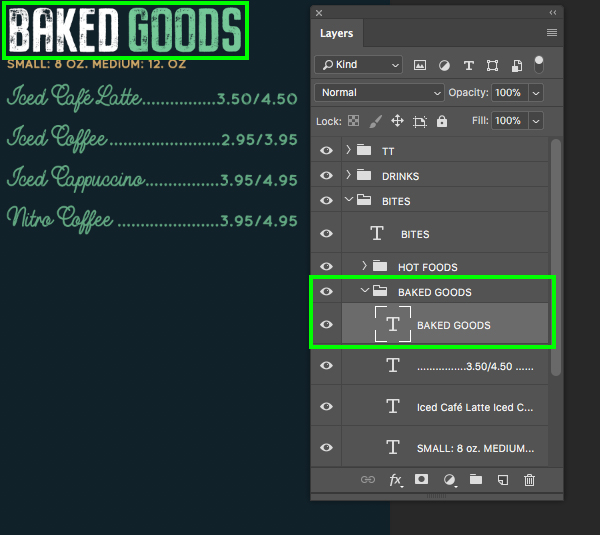
Let’s now work on the ‘COLD BEVERAGES’ folder to get that updated next. Turn the visibility of this folder on if it isn’t already and then change the folder name to ‘BAKED GOODS’. After that, change the section header as well and adjust the spacing in between the letters like we have done with the previous section headers.
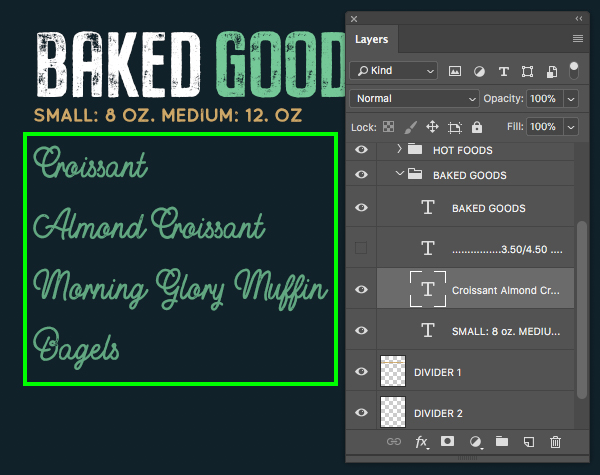
Turn off the price list and update the menu items for this section to read: ‘Croissant’, ‘Almond Croissant’, ‘Morning Glory Muffin’, and ‘Bagels’ as shown here:
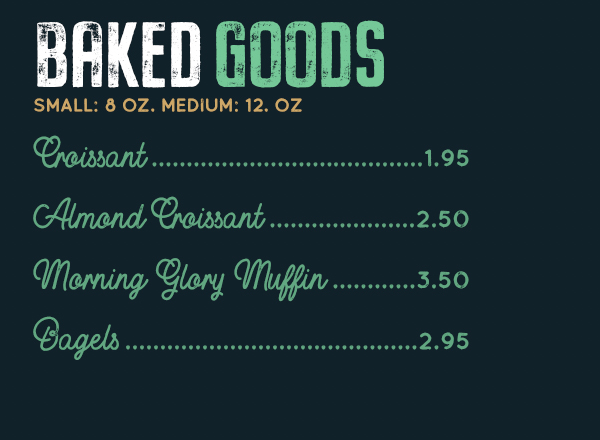
Next we can turn the visibility of the price list back on and update that as shown below:
Select the small ‘SIZE’ text below the header and move it to the bottom of the section. Click inside with the Type Tool (T) and change the text to read: ‘REGULAR, WHOLE WHEAT, EVERYTHING, SESAME, WHOLE WHEAT EVERYTHING, CINNAMON RAISIN’. After that, select the menu items, price list, and types of bagels in the Layers Palette and move them up all together by holding the Shift key and tapping the up arrow four times on the keyboard.
Step 18: Thrice Dividers
Select ‘DIVIDER 2’ and duplicate it by pressing Command/Ctrl+J and then move it down one position in the Layers Palette by pressing Command/Ctrl and the left bracket on the keyboard. Double click inside of the layer name and change this new copy to ‘DIVIDER 3’. After that, hold the Shift key and then the down arrow to move this third divider below the ‘BITES’ section. From here, select ‘DIVIDER 1’ and then hold the Shift key and select ‘DIVIDER 3’ on the bottom so all three of the dividers are selected simultaneously.
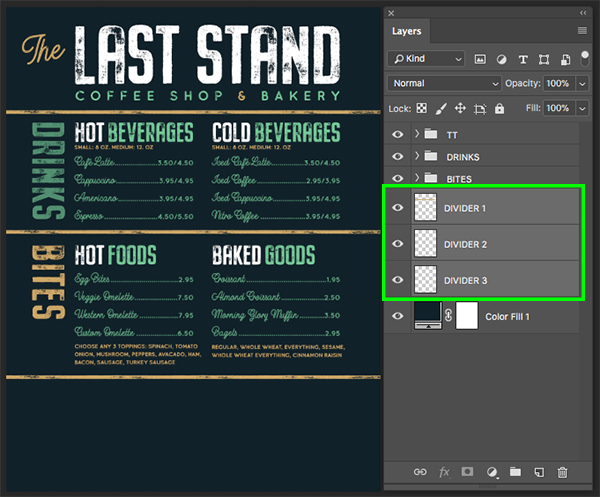
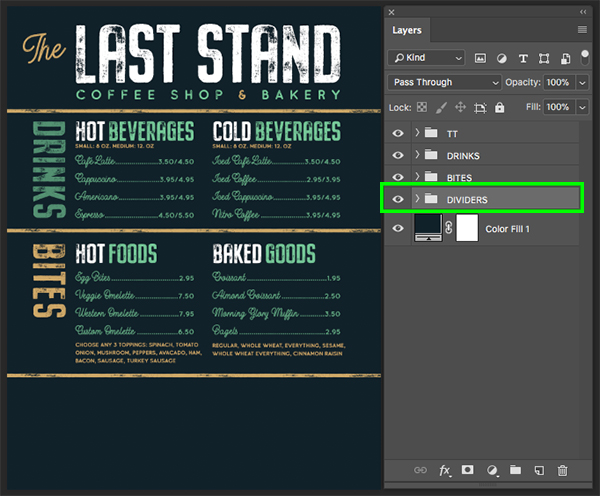
With all three of the dividers selected, press Command/Ctrl+G to put them into a folder and double click the ‘Group 1’ text and rename it ‘DIVIDERS’ as shown below:
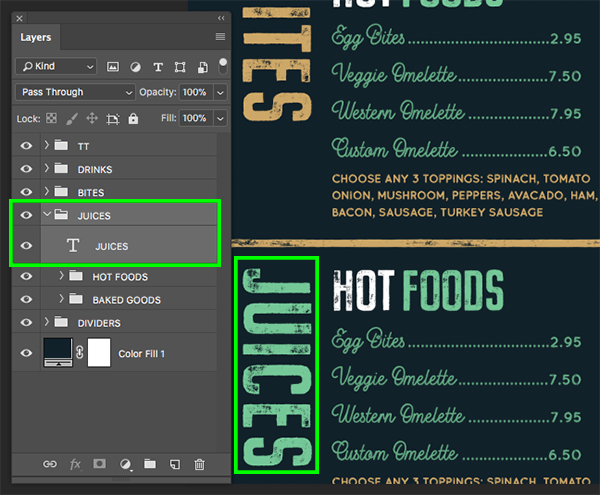
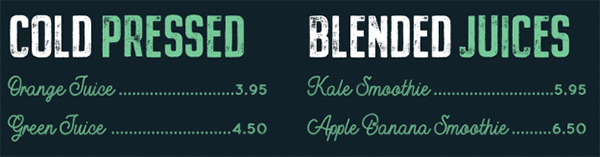
Step 19: Juices
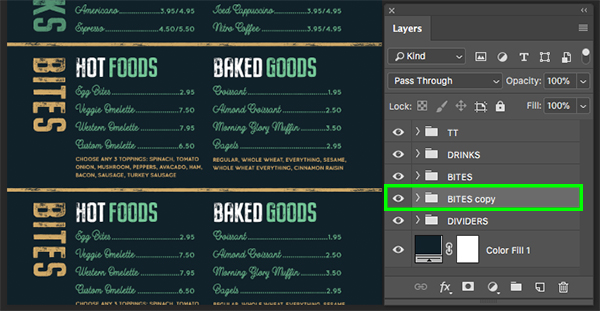
Select the ‘BITES’ folder and duplicate it by pressing Command/Ctrl+J and then move it below the original folder by once again using the keyboard shortcut Command/Ctrl and the left bracket. Move this newly duplicated section down below the original ‘BITES’ section as shown below:
Change the folder name and the ‘BITES’ text rotated on it’s side to read ‘JUICES’ and use the green fill color instead of tan. This can be easily changed by clicking the ‘Color’ swatch in the Character Panel and then using the eyedropper to sample an area of that color from the design.
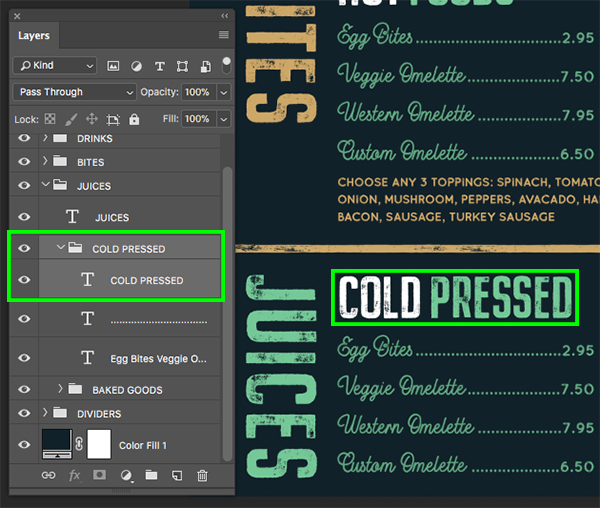
Inside of the folder let’s change the section header to ‘COLD PRESSED’ and move the type cursor in between each of the letters and press the Alt/Option and left arrow keys about two times between each letter to tighten the spacing a bit.
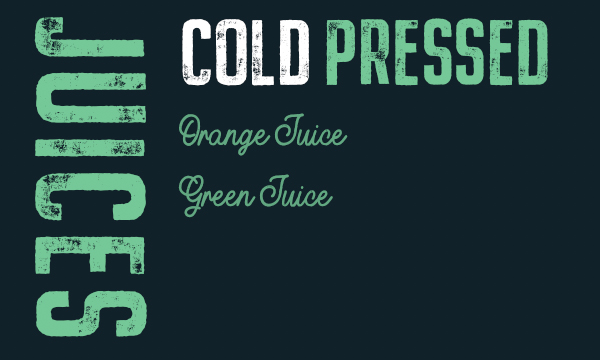
Turn off the visibility of the price list, and then lets update the menu items to ‘Orange Juice’ and ‘Green Juice’.
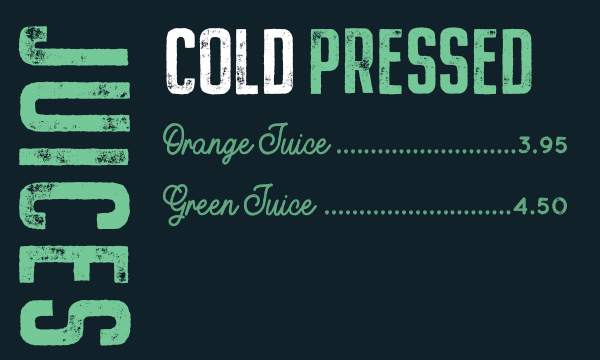
Turn the price list back on and update the prices for the two items. We will also need to adjust the number of periods between the item and the price like we have done in previous steps throughout the tutorial.
Step 20: Blended Juices
Change the second section header here at the bottom to read ‘BLENDED JUICES’ and once again tighten the spacing between the characters. Once you have done that, turn off the visibility of the price list and then update the menu items to read ‘Kale Smoothie’ and ‘Apple Banana Smoothie’ as shown here:
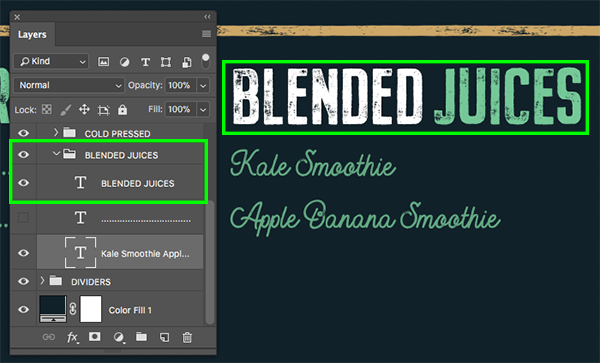
Turn the price list back on and remove the two extra lines since we now only have two items in this section. Add in these last two prices and add/remove the number of periods needed accordingly.
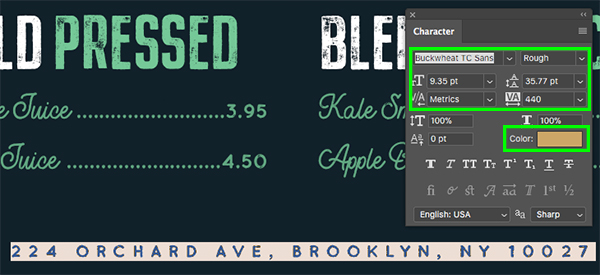
Step 21: Address
Add one more text layer to the bottom of the design and type out ‘224 ORCHARD AVE, BROOKLYN, NY 10027’ using the same typeface we have been using for our prices and small descriptive text. Open the Character Panel and make the size about ‘9.35 pt’ and then adjust the tracking setting to ‘440’ to space the letters apart. Once you have done that, click on the ‘Color’ swatch to update the fill to our tan color. Let’s move the text into the center of the bottom so it balances out our design.
Step 22: Last Groups
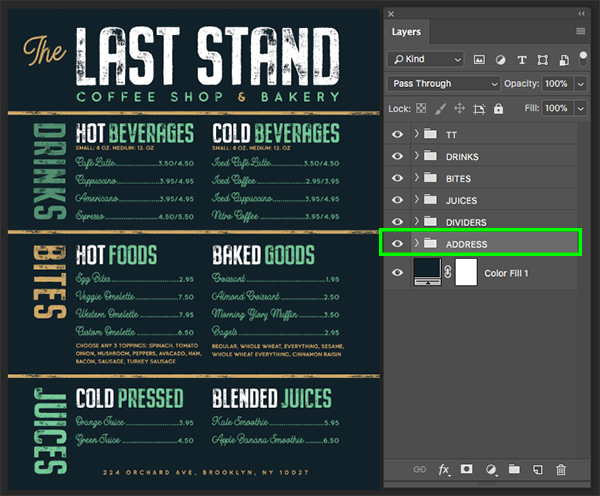
Select your address text and then press Command/Ctrl+G to place it into a new folder.
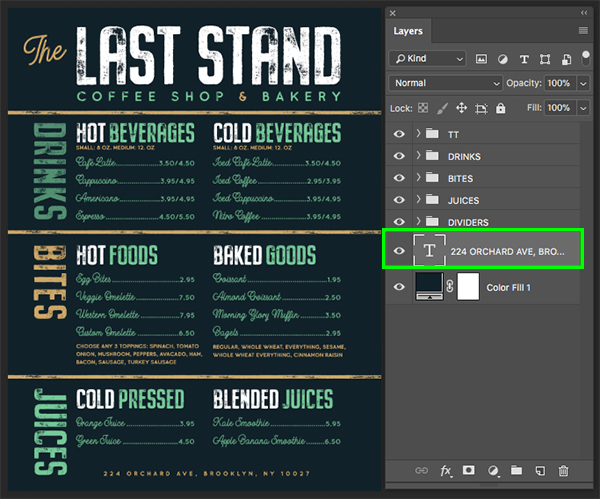
Double click the ‘Group 1’ text to rename the folder ‘ADDRESS’ as shown here:
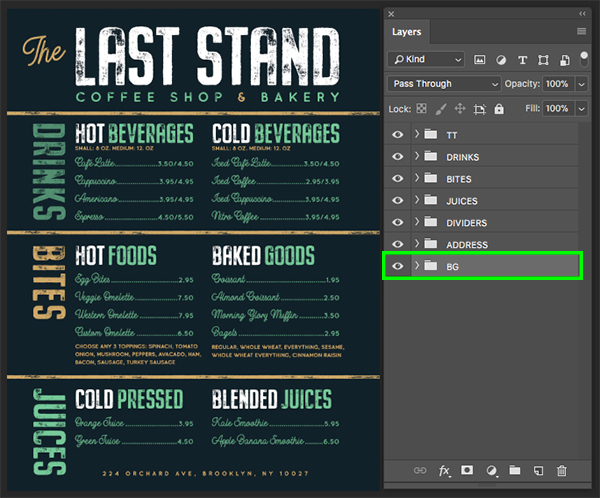
Select the very bottom layer, which should be your Solid Color Adjustment Layer, and then press Command/Ctrl+G to place this into a folder and rename it ‘BG’ as shown in the image below:
We have now completed our menu design for The Last Stand Coffee Shop & Bakery in Photoshop. To create our design we’ve used one of many amazing typefaces from the new design bundle. Check out the complete bundle to this special collection of amazing typefaces!
Remember that whether it’s your outcome for this tutorial or something new you’ve made, we’d love to see your designs on our Facebook page.
Please leave a comment if you have any questions or suggestions. I always look forward to hearing from you!
There’s still time to check out The Supreme Quality Font Bundle to gain access to the rest of this supreme collection featuring a wide range of incredible best-selling fonts an unheard of 99% discount!
Thanks for the tutorial, the end result looks appealing.
I like the choice of colors, too.
Thank you so much for the lovely feedback Mariamh we hope you loved following along :)
Hello! I enjoy reading through all your tutorials, as well as following a great deal of them. It’s a real boon to have this resource, as I work freelance and therefore don’t always have personal contact with colleagues to explore new skills or attend training. So, thank you once again!
I have one niggling question regarding all your tutorials: is there any particular reason that text point sizes are often chosen as “133.55 pt”, etc? Does that 0.55 of a point really make all the difference? Am I strange that I always use whole numbers?? It just seems such an unnecessary three extra keystrokes… am I missing something as to why whole numbers are rarely used, or am I merely outing myself as overly pedantic?! It just all seems so… untidy… to me, I’m all about clean lines and neat numbers ;0)
Hey Melissa,
Thanks so much for your comment! Eric is away on holiday at the moment, but i’ve popped him over an email, so I will let you know as soon as he gets back to me on this :)
Hey again Melissa,
The great news is we’ve heard back from Eric now, so i’ve popped his response below for you:
“Using whole numbers is totally fine – you can round to the nearest whole or half number and it won’t make a world of difference. The reason that I sometimes have random numbers like that is because I am going by my eye and what I think looks right, which sometimes results in crazy numbers. As long as you are using something close to what I have and things are still lined up in a nice way it won’t make much of a difference. ? ”
I hope this helps!
Did I miss something…I don’t see a link to the free sample pack?
Hey Rocco,
Unfortunately, we were unable to secure any fonts from our current bundle to be given away free of charge for this one I am afraid! Our tutorial writer has linked alternative free fonts throughout the tutorial though which we hope will work just as well :)
I don’t see the link to download the free sample pack. Help!
Hey Amy,
I am so sorry for any confusion caused!
We were, unfortunately, unable to secure any fonts from our current bundle to be given away free of charge, but our tutorial writer has linked alternative free fonts throughout the tutorial which should work just as well :)