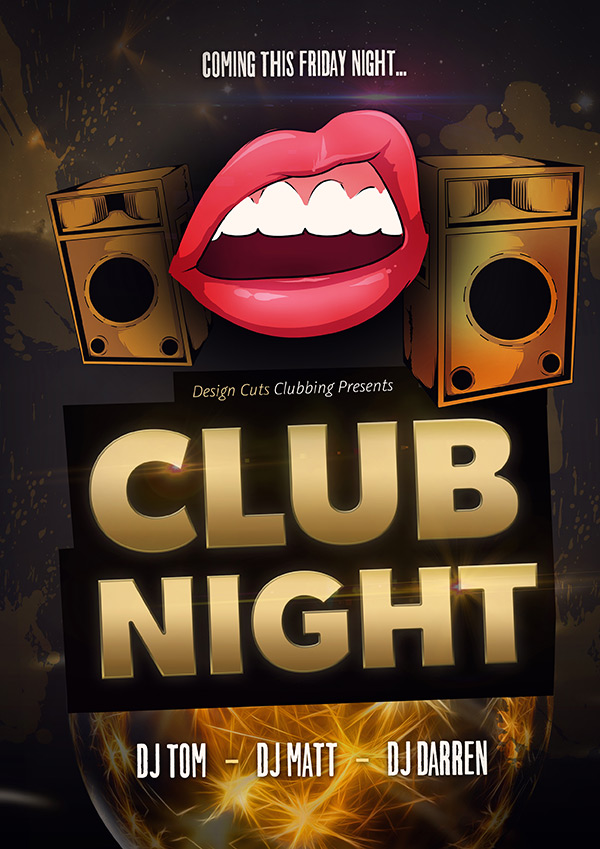
WHAT WE’RE CREATING:
In this tutorial I’ll show you how to create a club event poster with plenty of impact. You’ll learn how to create a lavish gold text effect, how to blend multiple images together, and how to create awesome lighting effects to add a touch of glamour to your work.
Let’s get started
Follow along with this tutorial: Download the freebies
This tutorial is accompanied by a fantastic freebie pack, taken from this week’s deal, offering you 400+ extended license vectors from T-Shirt Factory for 95% off.
To give you a sample of the vectors on offer, we’re giving away a free lips vector pack. Enter your email below to download the vectors, as well as the Photoshop source file for this tutorial, so you can follow along easily.
Step 1:
Start by creating a new document (A4 Paper default size).
Fill your background layer with dark, purplish grey (#222124).

Now create a new layer called ‘black gradient’. Drag up a black to transparent linear gradient from the bottom of your canvas:

Step 2:
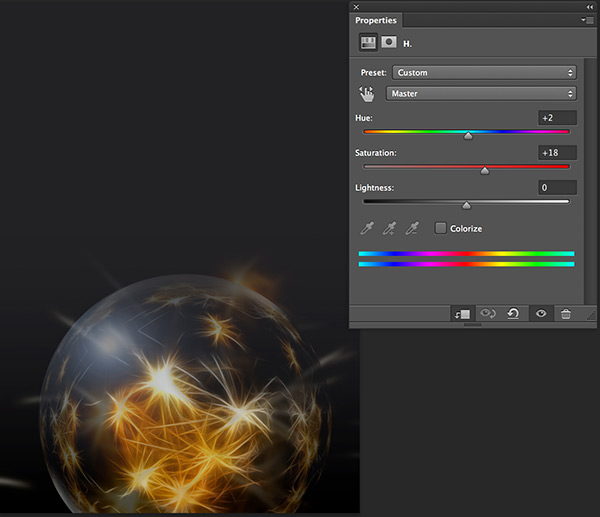
Download this great image of a Christmas light: Christmas Eve Light Image.
Paste it into the bottom of your canvas, and use a layer mask to mask off the top of the image, fading it smoothly into your background:

Change this layer’s blend mode to ‘screen’ and reduce it’s opacity to 80%.
Then apply an adjustment layer (with clipping mask) to increase the saturation on your Christmas light image:
Hue/Saturation Adjustment Layer:
Hue: +2
Saturation: +18
Lightness: 0
Step 3:
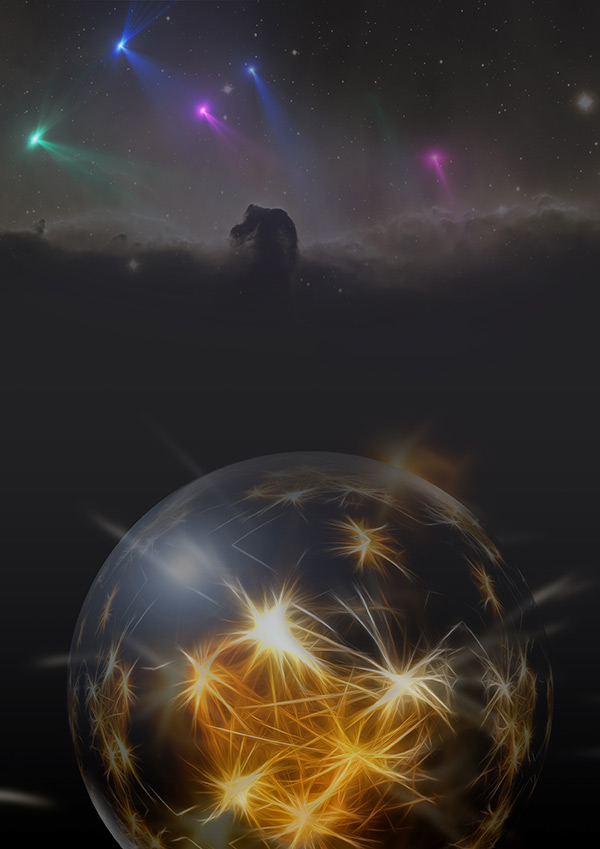
Download this awesome image of a nebula: Nebula Image.
Paste it into the top of your canvas. Use a layer mask to mask off the bottom of your nebula image, using a soft paintbrush.

Reduce the opacity of this nebula layer to 30%. Then apply a hue/saturation adjustment layer to knock back the saturation of this nebula image:
Hue/Saturation Adjustment Layer Settings:
Hue: 43
Saturation: 20
Lightness: 0
Colorize: (check)

Step 4:
Download this fantastic 50 free high res lens flare image pack.
Paste in one of the multi-colored .png images into the top left of your canvas:
Set this layer’s blend mode to ‘screen’ and reduce it’s opacity to 35%.
Then apply a hue/saturation adjustment layer:
Hue/Saturation Adjustment Layer Settings:
Hue: 33
Saturation: 100
Lightness: 0
Colorize: (check)

Step 5:
Download this splatter brush set
Create a new layer, and apply some of the splatter brushes (colour: #edcf90). Set this layer’s blend mode to ‘overlay’:

Step 6:
Now select a bold font, and type out ‘CLUB’ and ‘NIGHT’ (having each on it’s own layer).

Apply the following blending options to your text layers:

Step 7:
Create a new layer behind your text layer called ‘black area’.
Create a selection like this, and fill it with black:

Now create a new layer above your text layers and use your downloaded lens flare images to add a couple of highlight effects to your text. Adjust the hue of these lens flares as necessary.
Also, add some smaller text above your main title text with event details:

Step 8:
For this step we’re going to be using some music speaker vectors taken from our current deal:
T-Shirt Factory Professional Vector Collection (Extended License) – 95% Off.
Paste the speakers into your canvas, positioning them like so:

Now apply a hue/saturation adjustment layer to each:
Hue/Saturation Adjustment Layer Settings:
Hue: -13
Saturation: -30
Lightness: 0
I also dodged/burned the right speaker a little to make it bolder:

Step 9:
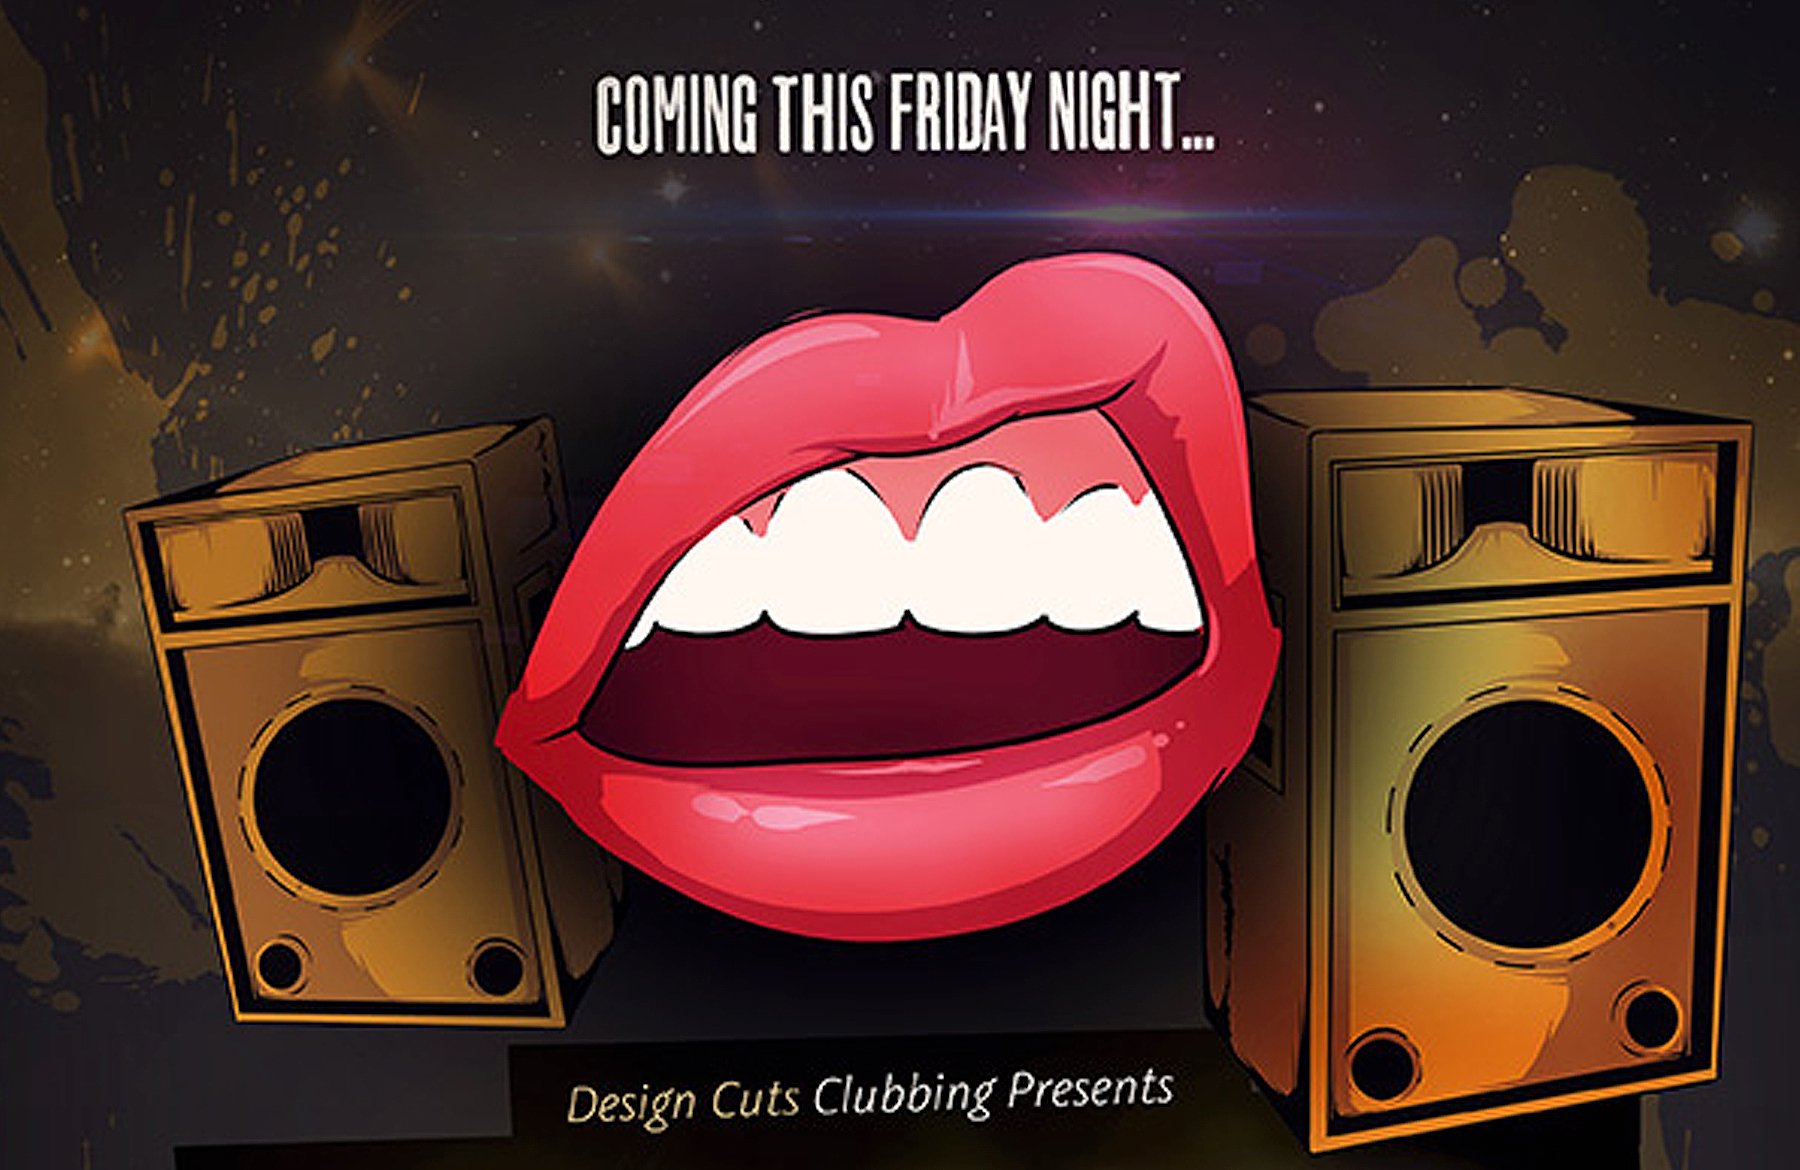
Create a new layer called ‘shadow behind lips’ and use a large, soft black paintbrush to apply a circular shadowed area between your two speakers like so:

Now, download the awesome lips vector pack, which is this week’s freebie, taken from our current deal T-Shirt Factory Professional Vector Collection (Extended License) – 95% Off.
You can download this freebie vector pack at the top of this page.
Here’s a look at the great vectors included:

Once you’ve downloaded your freebies, paste one of the lip vectors into your canvas like so:

Apply a hue/saturation adjustment layer and set the hue to +30. This will help the lips to blend better with your surrounding poster design:

Finally, dodge/burn your lips, using the dodge/burn tools in order to give them a more 3D, glossy appearance:

Step 10:
Apply some further text to your poster design, and include a couple of extra lens optical flares from the pack you downloaded earlier:

Step 11:
Create a new layer called ‘vignette’ and use a large, soft black paintbrush to paint shadows around the corners and edges of your composition:

Step 12:
Finally, apply a couple more adjustment layers to bring everything together:
Hue/Saturation Adjustment Layer:
Hue: 0
Saturation: +25
Lightness: 0
Gradient Map Adjustment Layer:
Gradient: Purple to Orange default gradient
Layer blend mode: Normal
Opacity: 6%

Here is the final result:
AND WE’RE DONE
I really hope that you enjoyed this tutorial. Next time you’re hosting a party or event, why not create an impressive flyer or poster to promote it? Have fun with it, and enjoy your freebies pack.

very very nice
Hey Punjabiraju,
Thanks for getting in touch, I’m really pleased to hear you liked this tutorial! :)
What program/software did you use to create this image?
Hey Mr. Kinguu,
Thanks for getting in touch! This image was created using Photoshop CC :)
I hope that helps, and please don’t hesitate to contact me should you have any other questions. I’m here to help!
I seem to not have the gold metallic gradient to recreate the main copy, just a copper one. Any advice?
Hey Lishamisha,
Thanks for the comment on this one :). I have sent you over an email to help you with completing the tutorial but please do let me know if you have any further questions!