In this design tutorial I will be teaching you guys how to create a fun Christmas greeting card that you can mail to your relatives or friends! In order to create our card we will be using some beautiful artwork from Denise Anne, Julia Dreams as well as Lisa Glanz! If you’re ready to dive into the holidays then let’s get right to it!
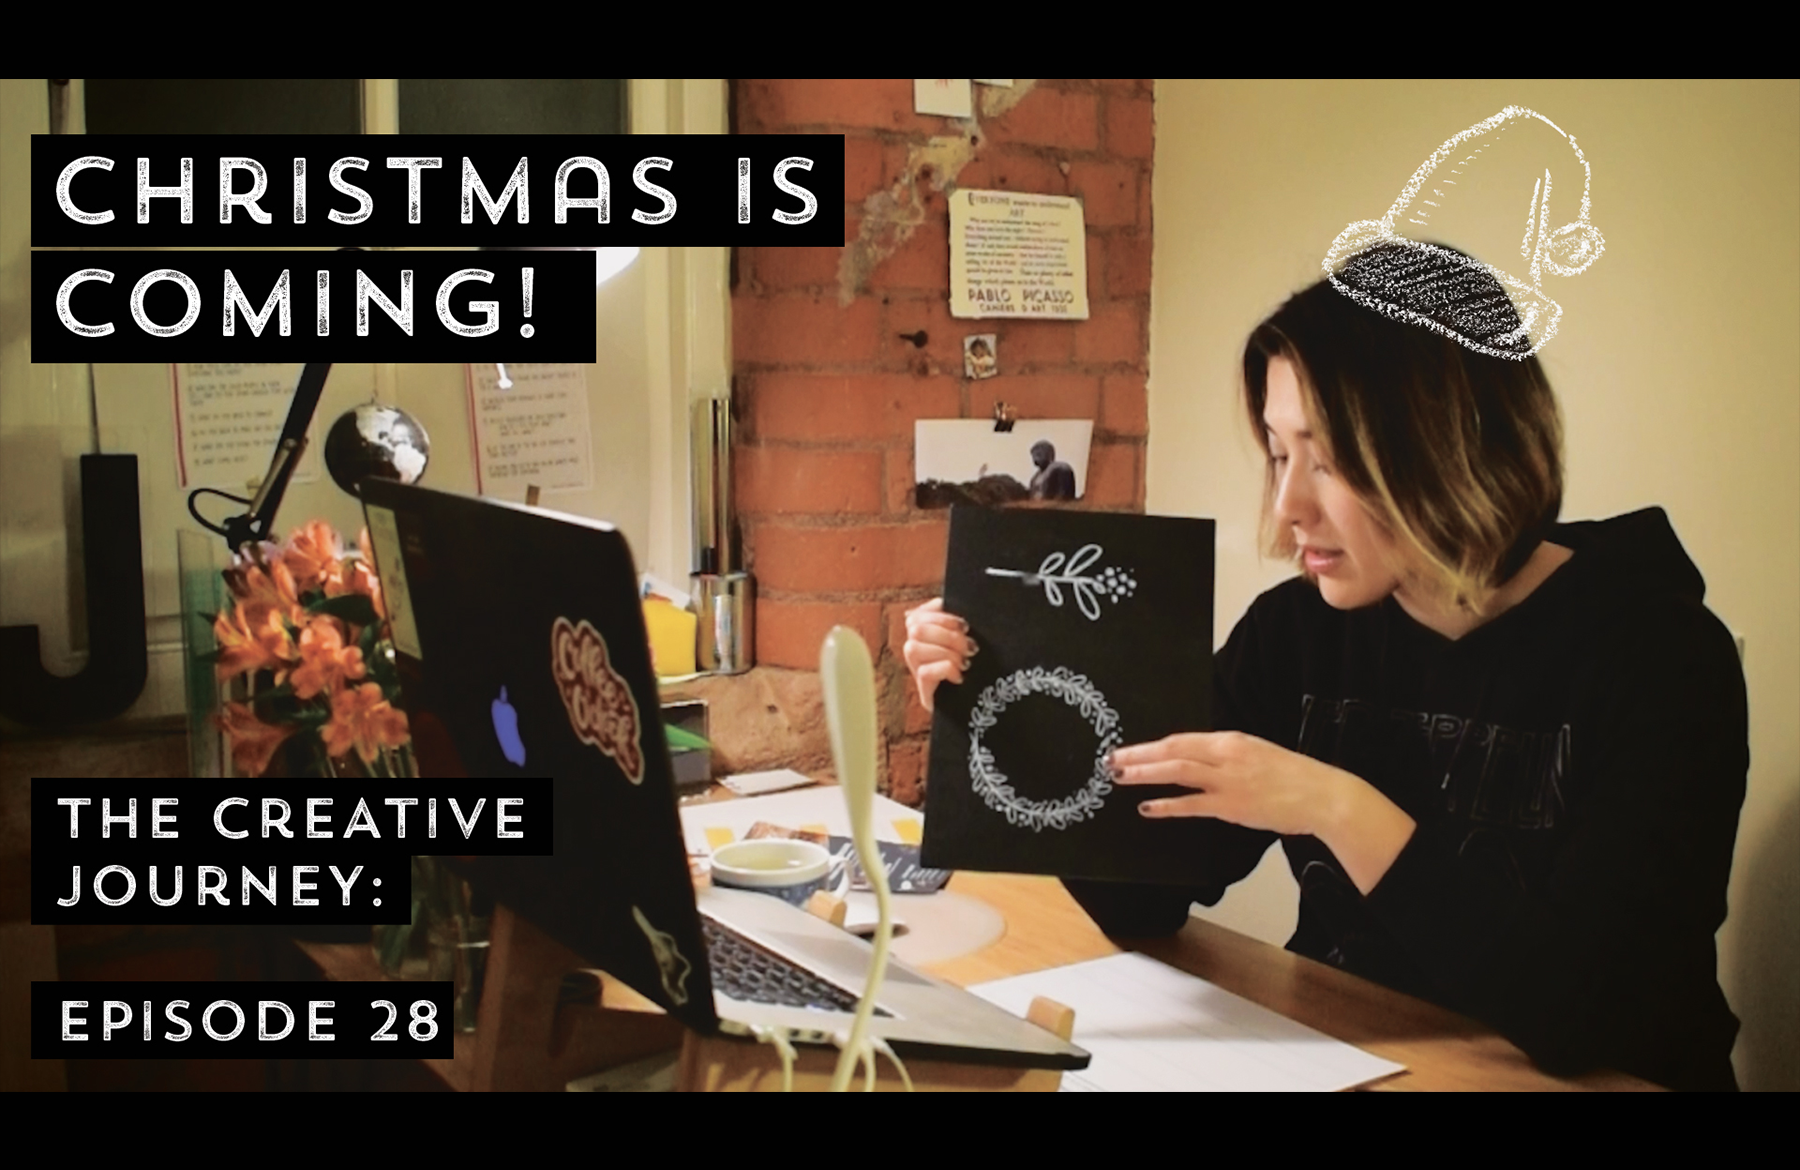
HAVE YOU SEEN OUR YOUTUBE CHANNEL?
Watch the video tutorial below and subscribe to our YouTube channel for regular updates direct to your inbox.
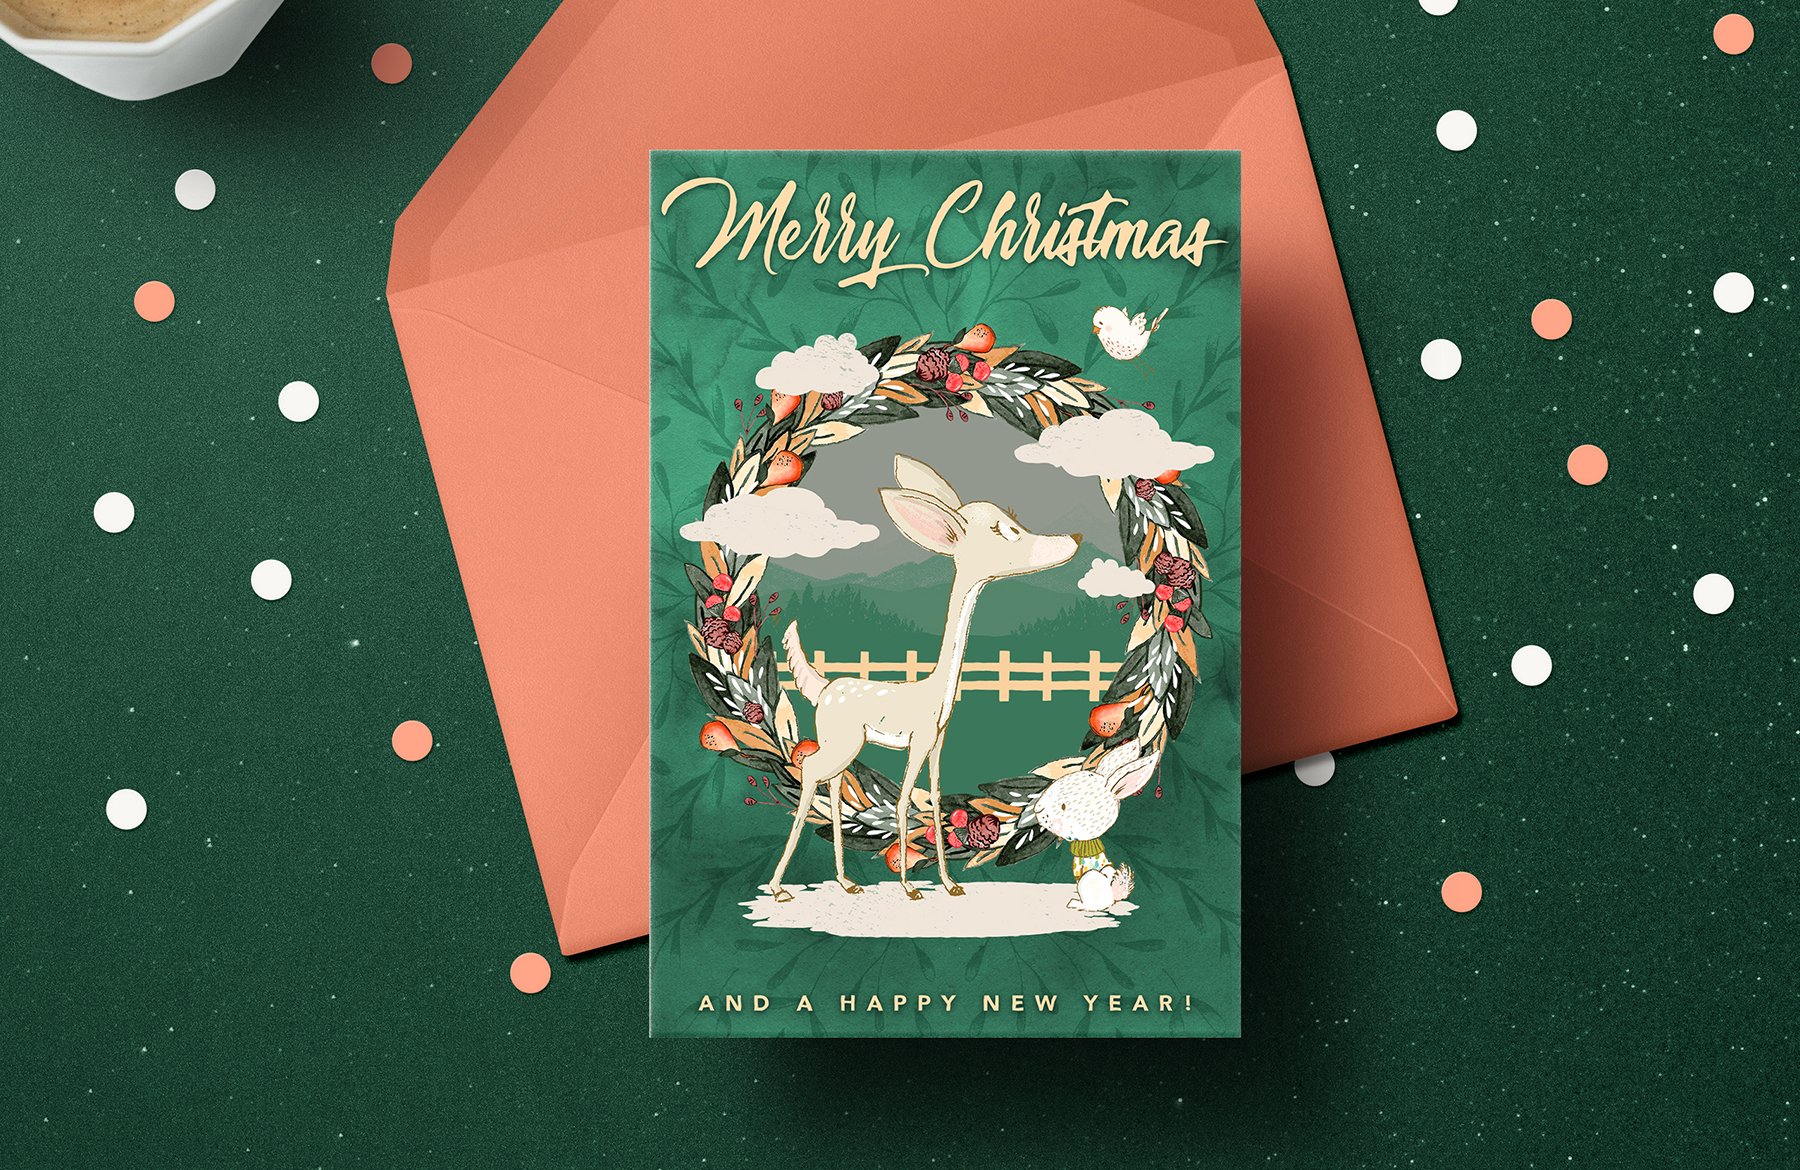
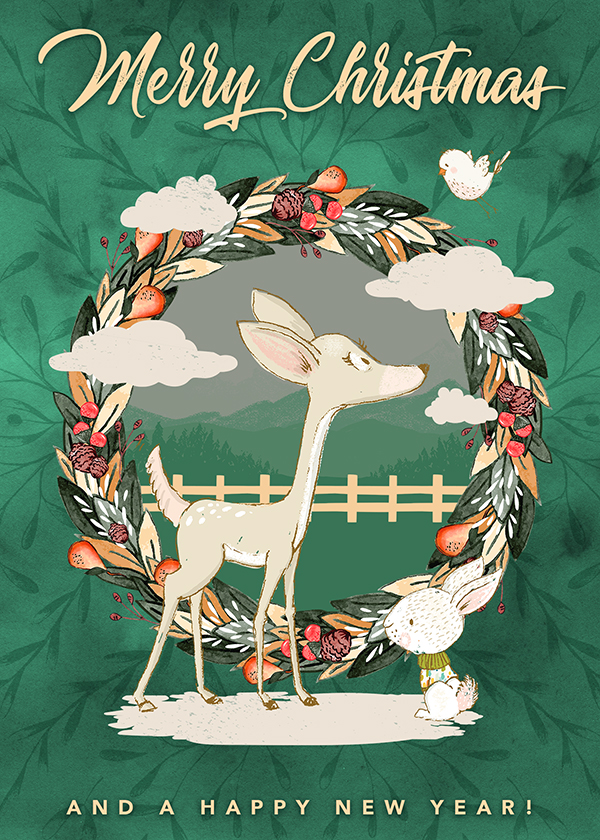
Here’s a look at what we’ll be creating:
Follow along with this tutorial: Download the freebie files
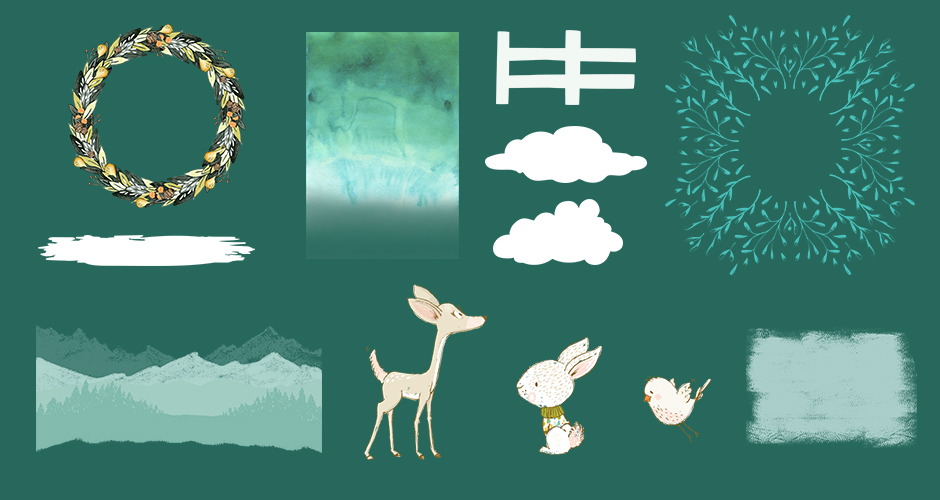
This freebie pack includes a range of watercolor and hand illustrated artwork that we will be using to design our festive greeting card.
The freebie pack is just a sample of the massive collection you can expect to find in The Essential Artistic Design Bundle for just $29 (that’s 99% off). This bundle brings you a huge selection of top-of-the-range tools from some of the biggest names in the industry, and not just for the festive season! You will find thousands of high-quality creative resources to help keep your creative juices flowing for all of your projects, all year round!
Step 1: Greetings!
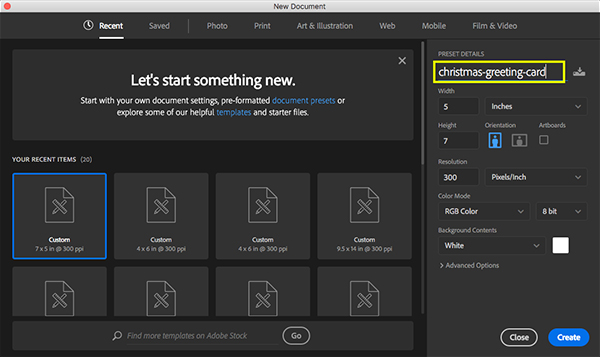
To begin we will open Photoshop and create a New Document that is 5” wide by 7” tall and set to ‘RGB’ Color Mode with the ‘Background Contents’ set to ‘White’. We’ll also want to make sure that we have a ‘Resolution’ of ‘300’ and then we will enter a name for our document. In this case I am using the name ‘christmas-greeting-card’ but feel free to name the file anything you like! Once you have done that, go ahead and click ‘Create’ from the bottom right corner to make your document.
Once you’ve created your new document you should see one locked layer named ‘Background’ in your Layers Palette. Double click on this layer to unlock the layer and bring up the ‘New Layer’ dialog box. Here we can unlock the layer and rename it ‘BACKGROUND’ before clicking ‘OK’ as shown in the image below:
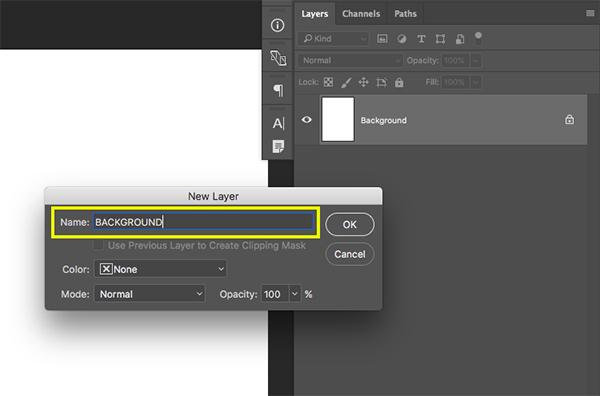
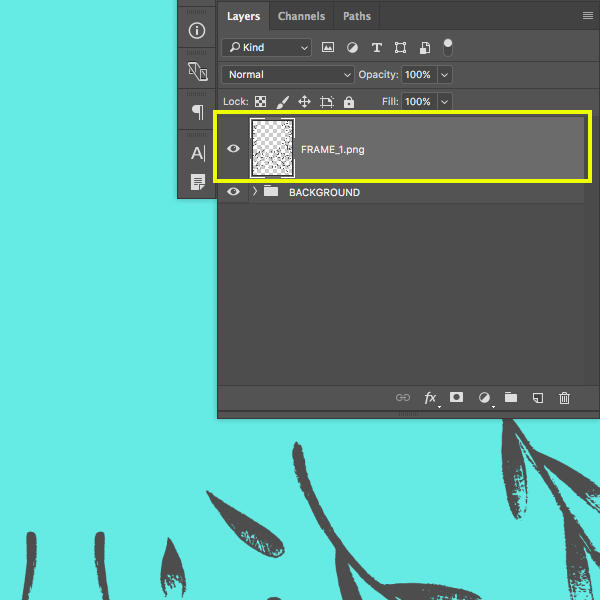
After renaming and unlocking the layer, your Layers Palette should look like this:

Step 2: Filling the Background
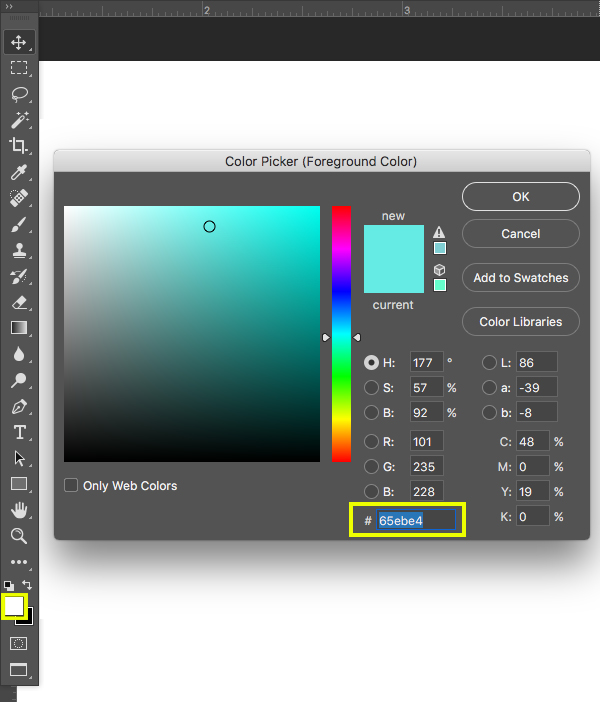
The next thing we are going to do is click on the foreground color from the bottom of our toolbar on the left side of the interface. You should then see a ‘Color Picker’ dialog box where we will enter the hex value ‘#65EBE4’ and then pressing ‘OK’ as shown in the image below:
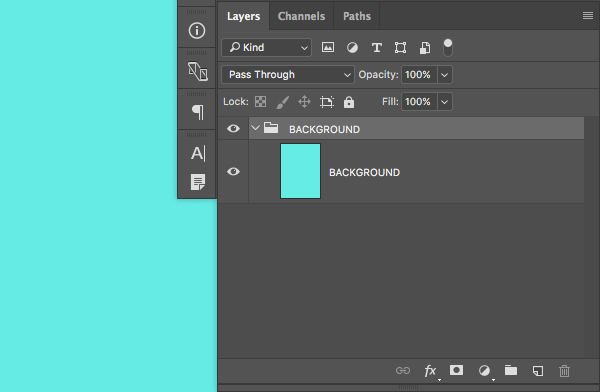
With your ‘BACKGROUND’ layer still selected, and your new blue color set as the foreground color, press Alt/Option+Delete on the keyboard to fill the layer with your new color. Once you have done that, press Command/Ctrl+G to put the layer into a Group Folder. Double click on the ‘Group 1’ text or the default folder name to rename it ‘BACKGROUND’ as seen here:
Step 3: Frame
Open the ‘FRAME_1.png’ file from the freebies folder for the tutorial in Photoshop.
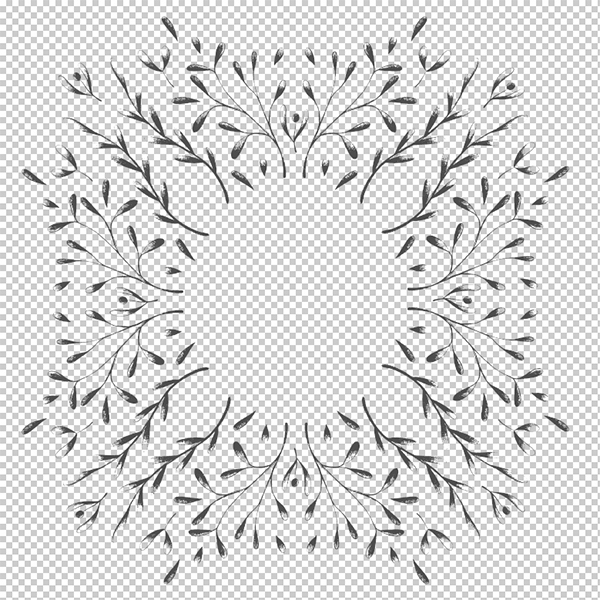
Click and drag the frame into your main document and rename the layer ‘FRAME_1.png’ like the file itself. Also make sure that this layer is on top of the ‘BACKGROUND’ folder.
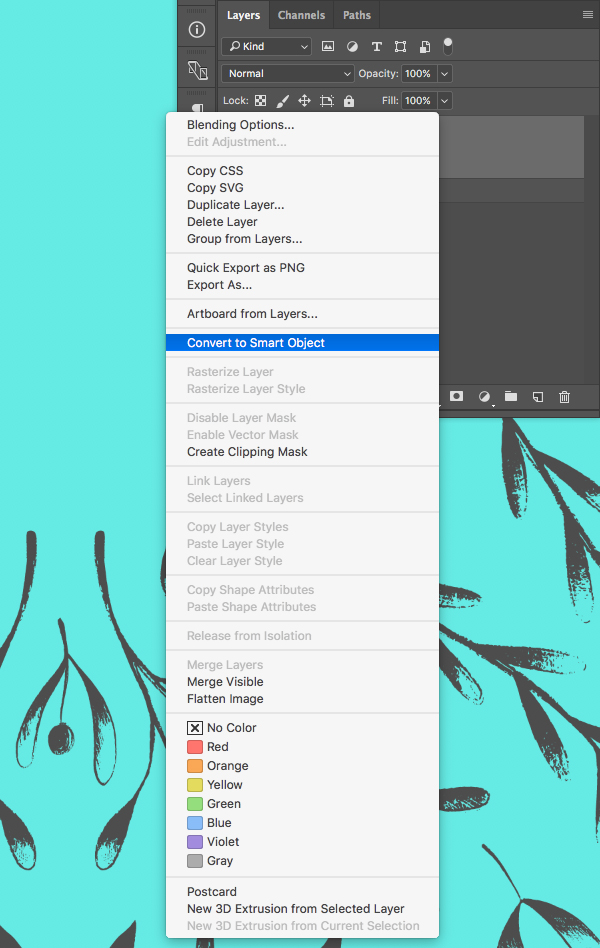
Hold the Control Key and click on the ‘FRAME_1.png’ layer and then choose ‘Convert to Smart Object’ from the dropdown menu that appears.
With the new ‘FRAME_1.png’ Smart Object layer selected, press Command/Ctrl+T to initiate a Free Transform and then scale the image down by holding Alt/Option+Shift and dragging inwards from any of the four corners of the bounding box to make the frame smaller proportionally from the center. Use the image below as a guide for the size and placement of your frame.

Step 4: Bad Hombre
Next, open the ‘OMBRE_6.png’ file from the freebies folder for this tutorial.
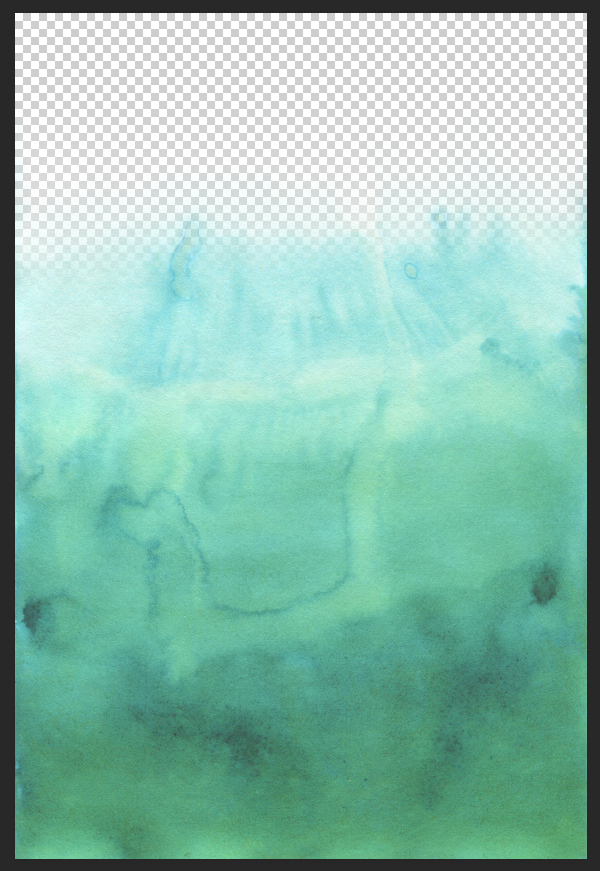
Click and drag the watercolor texture into your document and place it at the top of the Layers Palette. Change the name of the layer to ‘OMBRE_6.png’ and then convert the layer into a Smart Object.
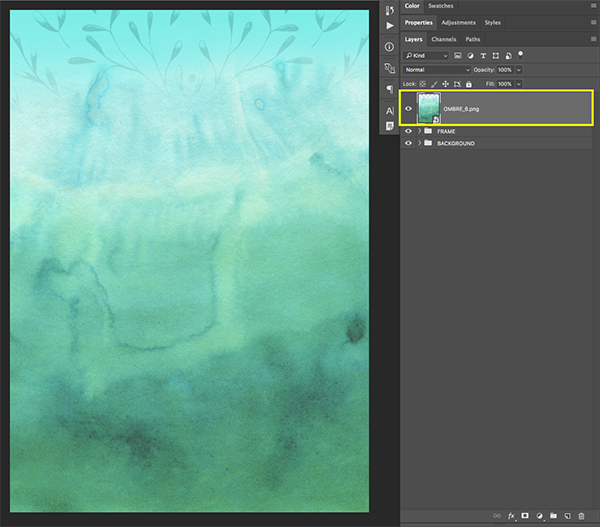
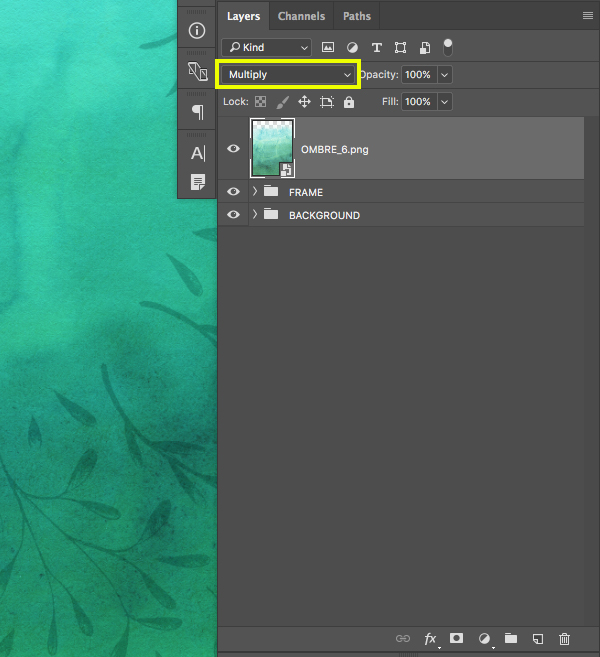
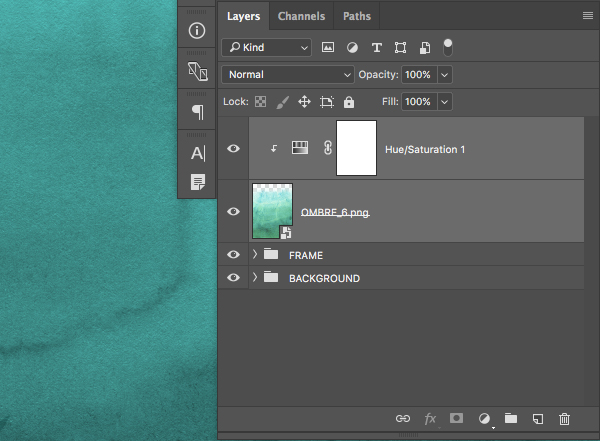
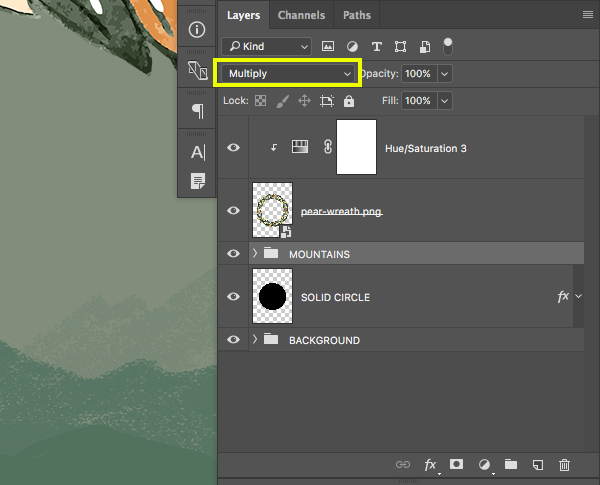
From here, change the Blend Mode of the ‘OMBRE_6.png’ Smart Object layer to ‘Multiply’ as shown below:
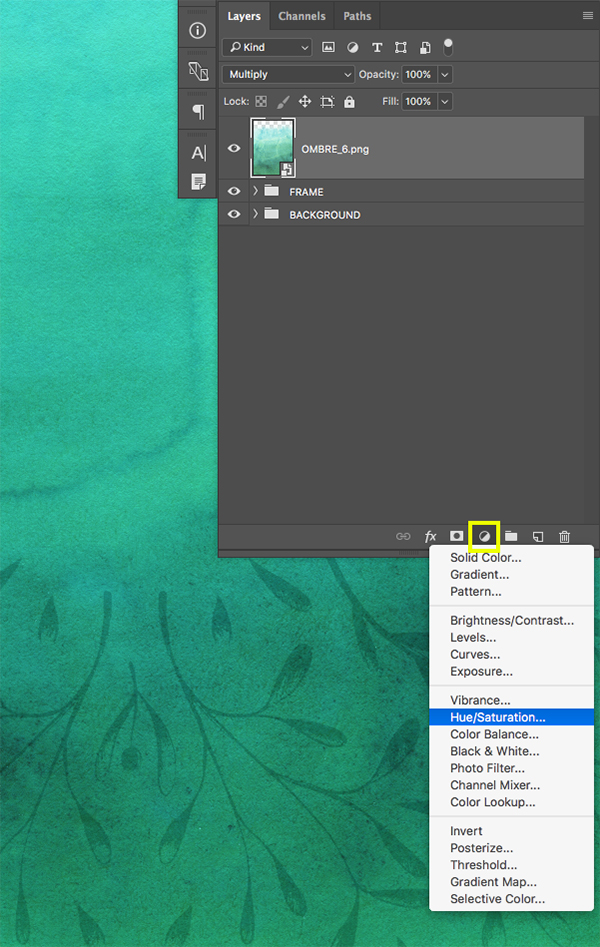
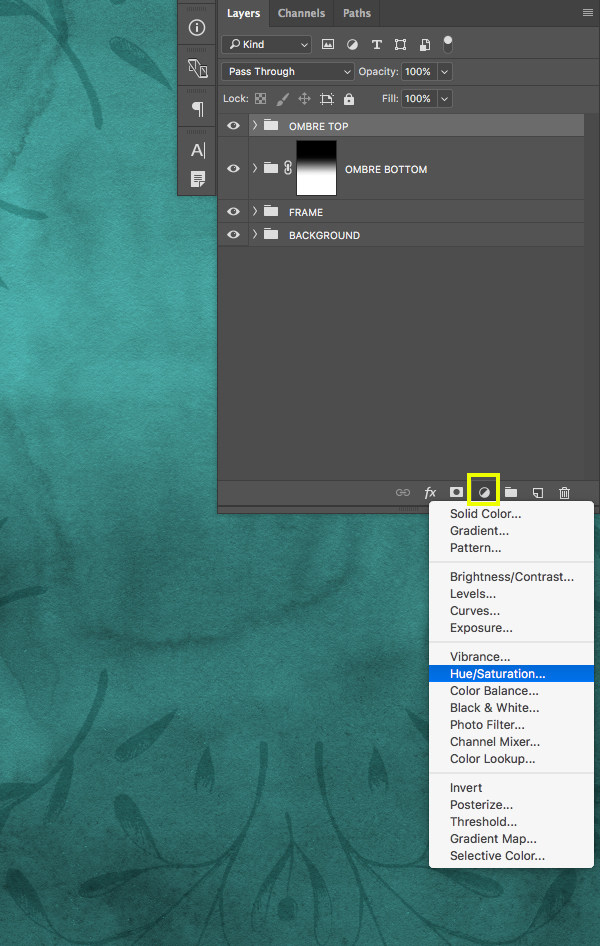
With the new ‘OMBRE_6.png’ Smart Object layer selected hold Alt/Option on the keyboard and then click on the Adjustment Layer icon at the bottom of the Layers Palette and then choose ‘Hue/Saturation…’ from the menu that appears.
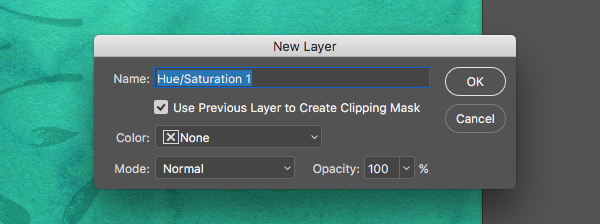
When the ‘New Layer’ dialog box appears, check off the box that says ‘Use Previous Layer to Create Clipping Mask’ and then click ‘OK’ to make the new Adjustment Layer. Since we held down the Alt/Option Key while clicking on the icon, we will have the option to apply a Clipping Mask so that it only affects the layer directly below.
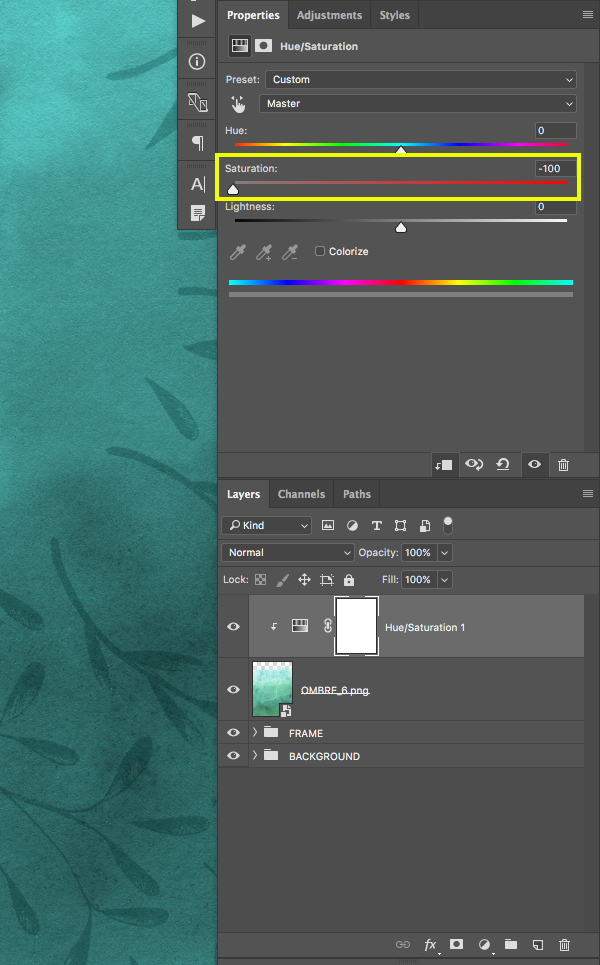
For the settings we will now want to move the ‘Saturation’ slider all the way to the left so that it is set to ‘-100’ which will desaturate the ‘OMBRE_6.png’ layer.
Select the Hue/Saturation Adjustment Layer and then hold the Shift Key and click on the ‘OMBRE_6.png’ layer below so that both layers are selected simultaneously.
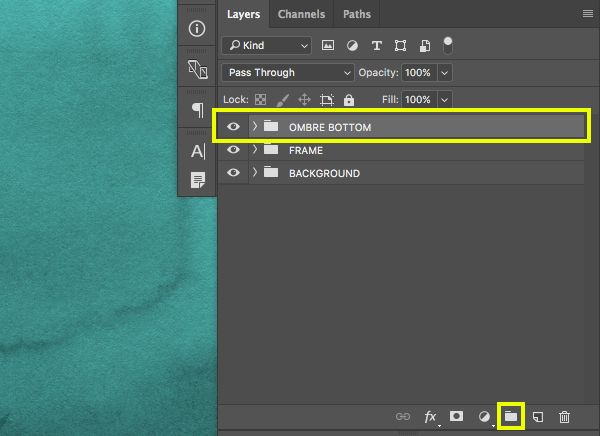
With both layers selected, press Command/Ctrl+G to put both layers into a new folder. Double click on the folder name and change it to ‘OMBRE BOTTOM’ which will make a bit more sense after the next step.
Step 5: Hombre Mask
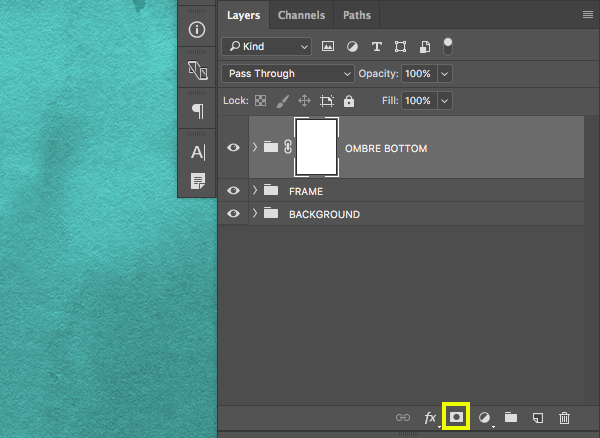
Select the ‘OMBRE BOTTOM’ folder and then click on the ‘Add Layer Mask’ icon at the bottom of the Layers Palette as indicated by the highlighted box in the image below:
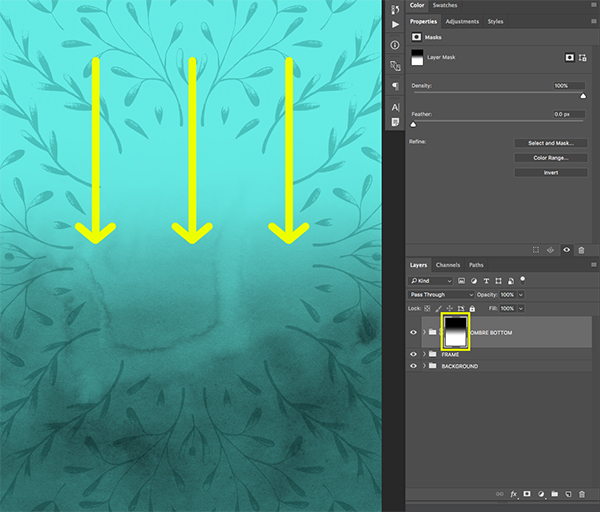
After we apply the Layer Mask we want to press ‘G’ on the keyboard to switch to our Gradient Tool. If you have the Paint Bucket Tool selected instead, you will need to click and hold on the tool and then choose the Gradient Tool from the pop out box. Once selected, there will be several options for the Gradient Tool that can be seen along the top toolbar in the interface. From here we want to make sure that we have a solid black color selected with a Linear Gradient that fades from solid to transparent like this:

Once you have the right settings, click and drag from the top of the canvas downwards to apply the gradient to the mask. Doing this should hide the top of the ‘OMBRE_6.png’ layer leaving only the bottom visible. You should also notice the change in the thumbnail of the layer.
Next, select the ‘OMBRE BOTTOM’ folder with the mask applied and press Command/Ctrl+J to duplicate the entire folder. Hold the Control Key and click on the Layer Mask Thumbnail to reveal a dropdown menu. From this menu we want to choose the option that says ‘Delete Layer Mask’ to remove the mask that we applied.

After removing the mask from the duplicate folder layer, press Command/Ctrl+T to initiate a Free Transform. Hold the Control Key and click on the canvas to reveal another dropdown menu, and this time choose the option that says ‘Flip Vertical’ to flip the folder upside down before pressing ‘Enter’ on the keyboard to apply the changes.

After flipping the watercolor texture and applying the transformation, click on the Adjustment Layer Icon found at the bottom of the Layers Palette. This time we do NOT need to hold the Alt/Option Key when clicking. From the menu that appears we will once again choose ‘Hue/Saturation…’ from the list as shown here:
Since we did not hold the Alt/Option Key when we clicked on the icon, we won’t get the same menu option that allows us to apply a Clipping Mask which is what we want. We instead want this Adjustment Layer to affect ALL of the layers below. For the properties this time we want to move the ‘Hue’ slider towards the left so that it’s set to about ‘-21’ as shown in the image below:

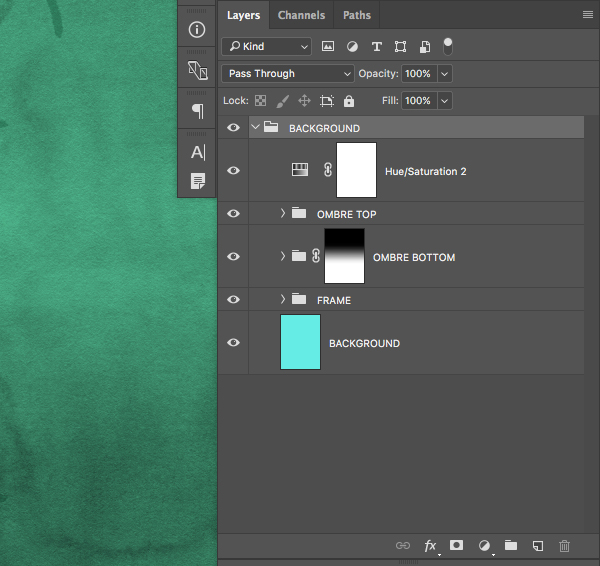
Select the top ‘Hue/Saturation 2’ layer, hold the Shift Key, and then select the ‘FRAME’ folder so all of the layers except the ‘BACKGROUND’ folder are selected at the same time. From here, click and drag all of these layers on top of the ‘BACKGROUND’ folder to put them all inside and nest them within this folder. You should now have all of your current layers placed inside of the ‘BACKGROUND’ folder as shown below:
Step 6: Holiday Wreath
Open the ‘pear-wreath.png’ file from the freebies folder in Photoshop.
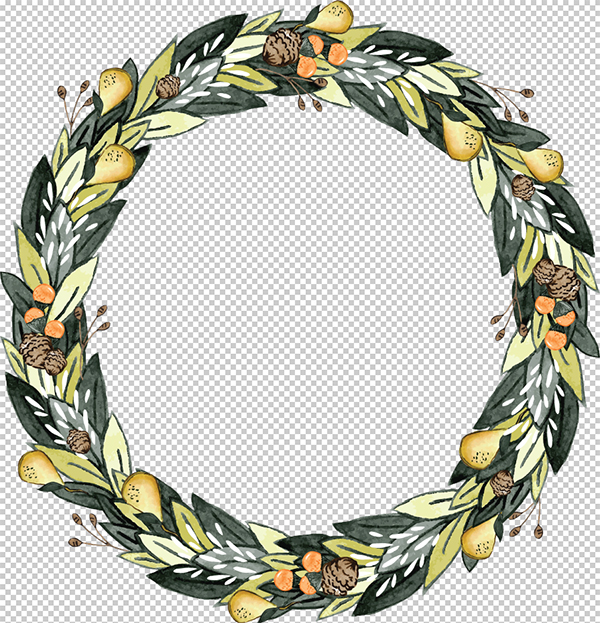
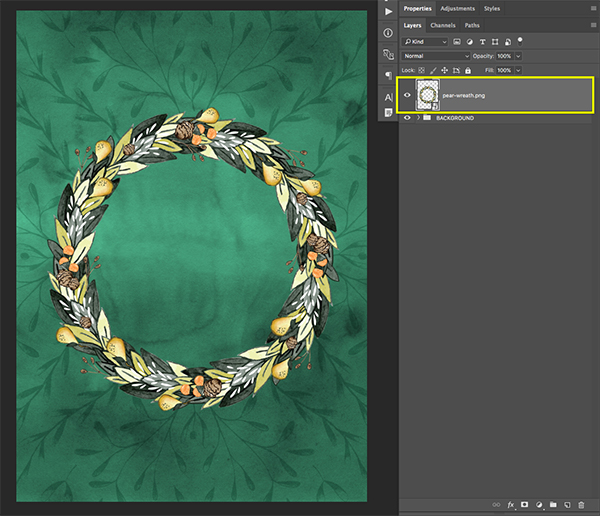
Drag the wreath into your working document and place it on top of your ‘BACKGROUND’ folder. Rename the layer ‘pear-wreath.png’ and then convert it into a Smart Object. If you can’t see the wreath when you first bring it into your file it is because the wreath is too large, so in that case we will need to apply a Free Transform (Command/Ctrl+T) once we make it a Smart Object, and then scale it down while holding Alt/Option+Shift and dragging inwards from any of the four corners of the bounding box around the shape. Scale the wreath down until it fits nicely in the center of your canvas with a bit of breathing room around the left and right like the image below:
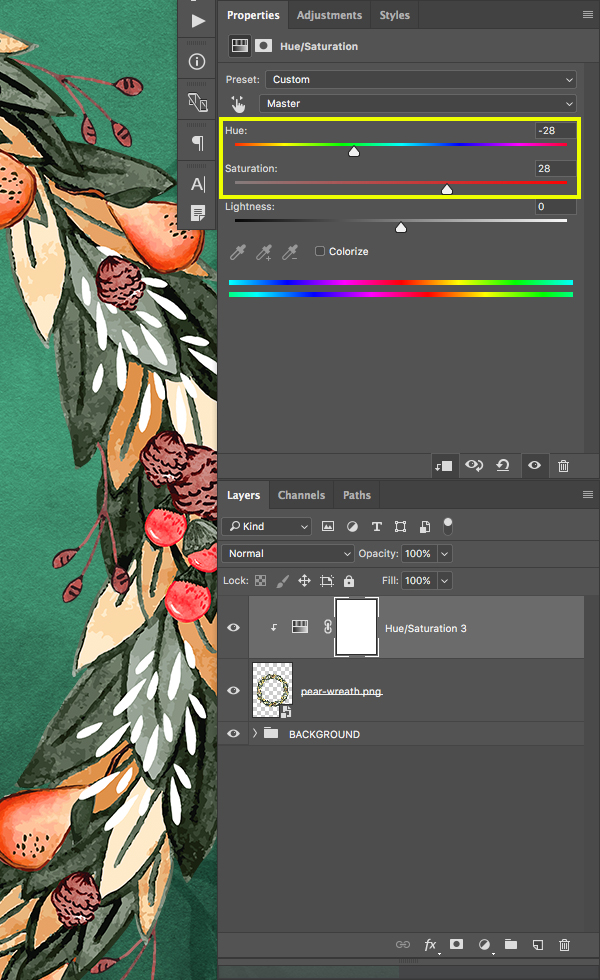
Hold the Alt/Option Key and click on the Adjustment Layer Icon at the bottom of the Layers Palette before choosing ‘Hue/Saturation…’ from the menu that appears.

When prompted with the ‘New Layer’ dialog box, check off the option that says ‘Use Previous Layer to Create Clipping Mask’ as shown in the image below:

For the settings let’s set the ‘Hue’ slider to about ‘-28’ and the ‘Saturation’ slider to ‘+28’ as shown below:
Step 7: Wreath Background
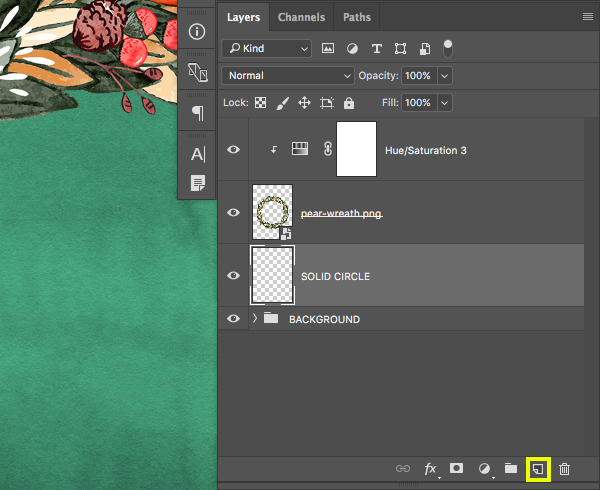
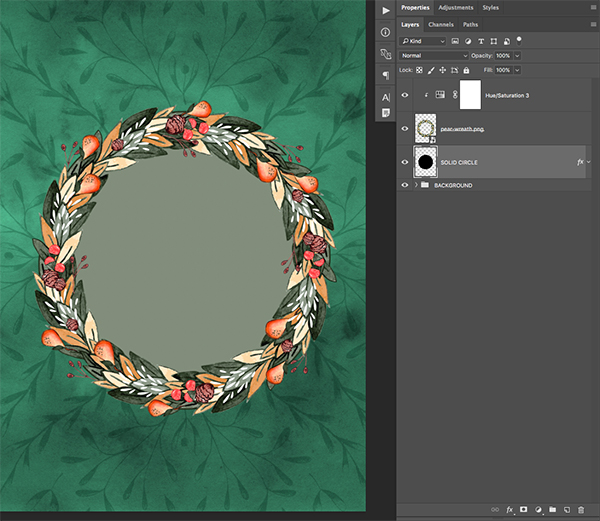
Click on the ‘Create a new layer’ icon at the bottom of the Layers Palette to make a new layer and then place this layer just above the ‘BACKGROUND’ folder, but below the ‘pear-wreath.png’ layer. Double click on the layer name and rename the layer ‘SOLID CIRCLE’ as shown below:
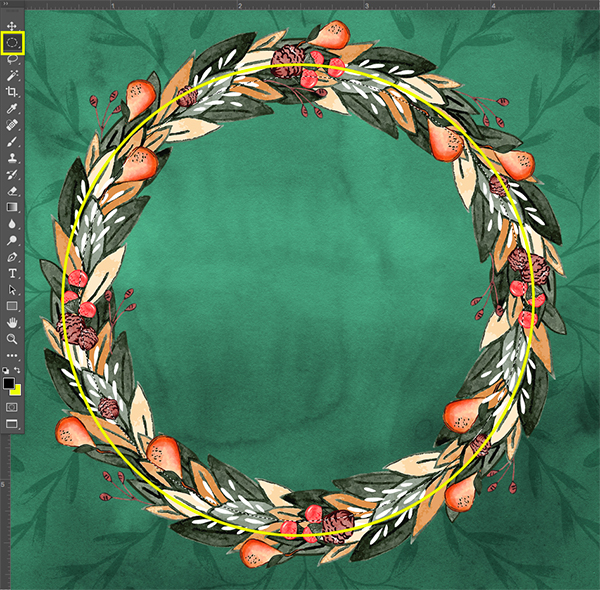
Press ‘M’ on the keyboard to switch to the Rectangular Marquee Tool and then hold the Shift Key and press ‘M’ once again to switch instead to the Elliptical Marquee Tool. Next, hold the Shift Key and click and drag out a large circle shape that goes behind the wreath but not outside of the edges. You can also toggle the position of the shape as you scale it by holding down the Spacebar Key which allows you to drag the shape around freely. Ideally we are looking to create a circular shape about the same size and placement as the image shown here:
Once you’ve created your circle shape and can see the active selection, press ‘D’ on the keyboard to switch to your default colors and then press Alt/Option+Delete on the keyboard to fill the selection with your foreground color which, in this case, should be solid black.
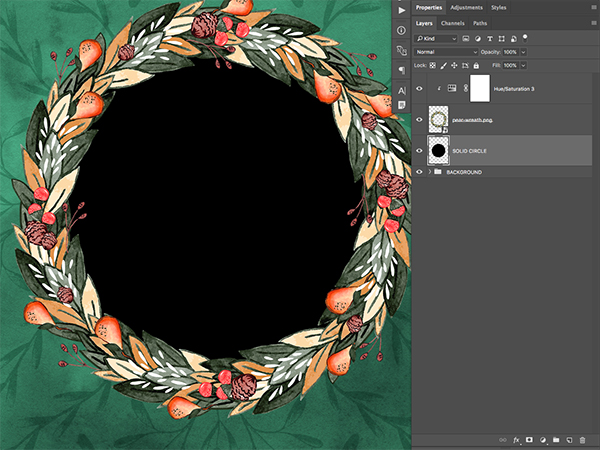
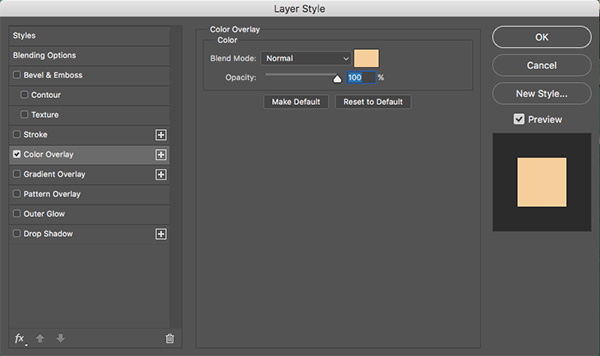
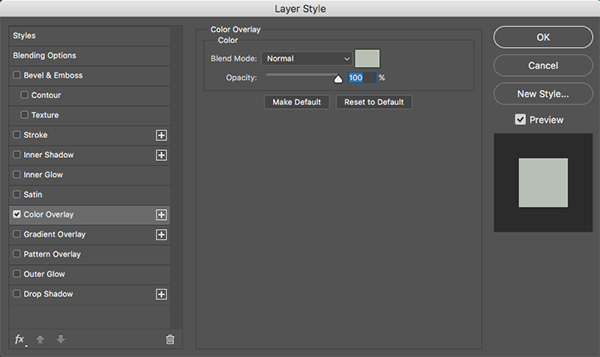
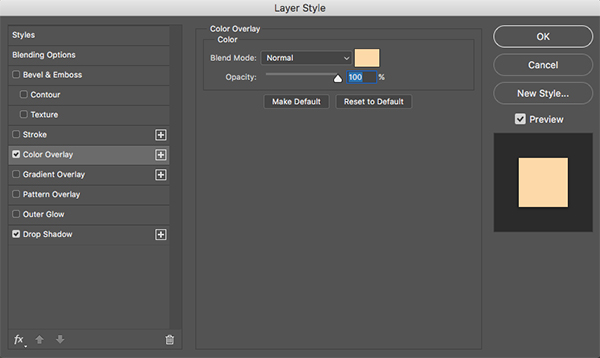
Double click on the ‘SOLID CIRCLE’ layer to bring up the Layer Style panel and check off the ‘Color Overlay’ option as shown here:
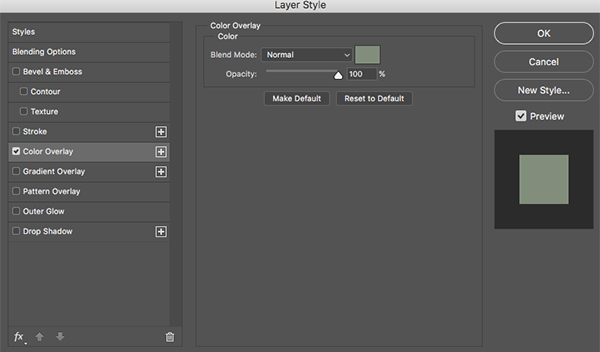
For the fill color let’s enter a hex value of ‘#828E7C’ and then press ‘OK’ to apply the changes.
Your image should now look like this:
Step 8: Mountainscapes
Open the ‘4-Mountains.png’ file from the freebies folder for this tutorial.
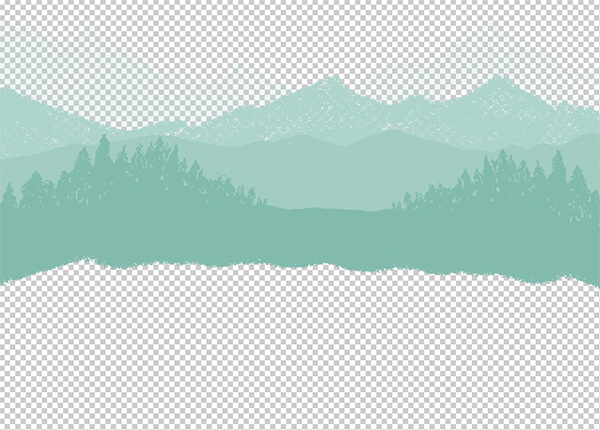
Click and drag the mountains into your document and place it just above the ‘SOLID CIRCLE’ layer, but below the ‘pear-wreath.png’ layer. Convert the mountains into a Smart Object by holding the Control Key, clicking on the layer, and choosing ‘Convert to Smart Object’ from the menu. After that, double click on the layer name and rename the layer ‘4-Mountains.png’ as shown in the image below:

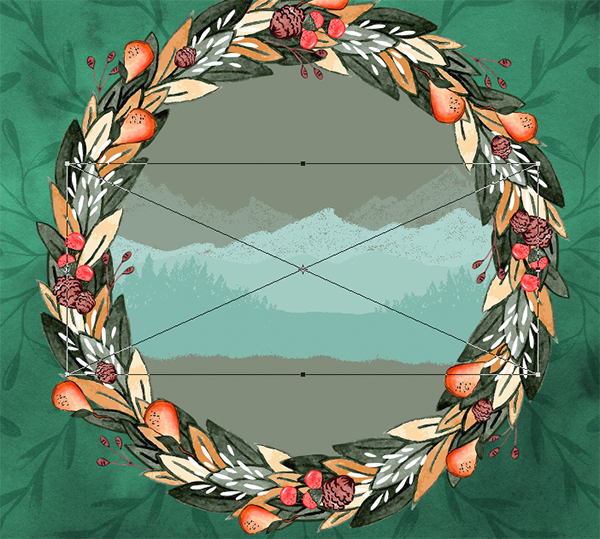
Press Comand/Ctrl+T to initiate a Free Transform and then press Command/Ctrl+0 on the keyboard to fit the bounding box to your screen. From here, hold the Alt/Option+Shift keys and drag inwards from any of the four corners of the bounding box to scale the mountains down proportionally until they fit inside the boundaries of the wreath.
Click the ‘Create a new layer’ icon at the bottom of the Layers Palette and place it just below the mountain Smart Object layer. Double click the layer name to rename this layer ‘MOUNTAIN FILL’ as shown here:
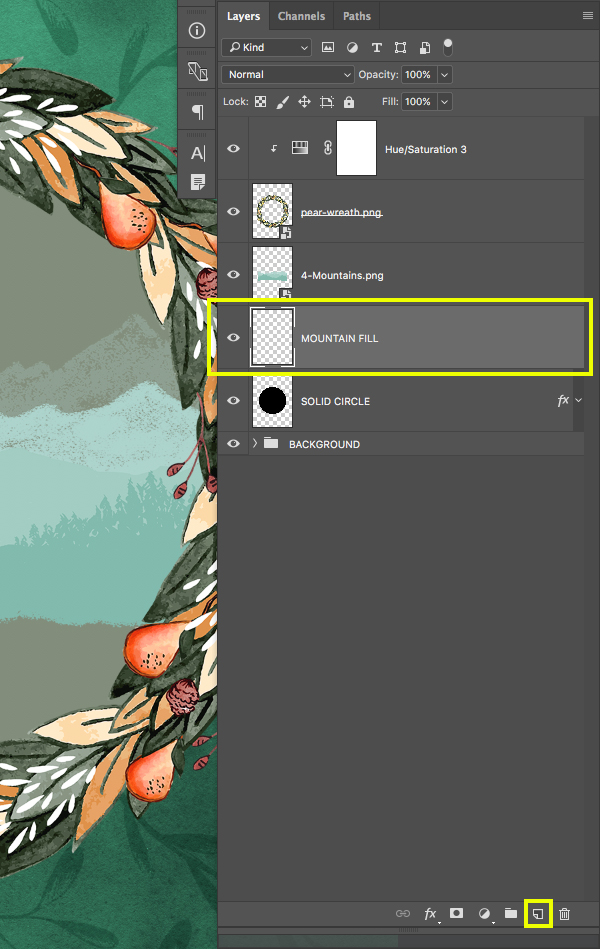
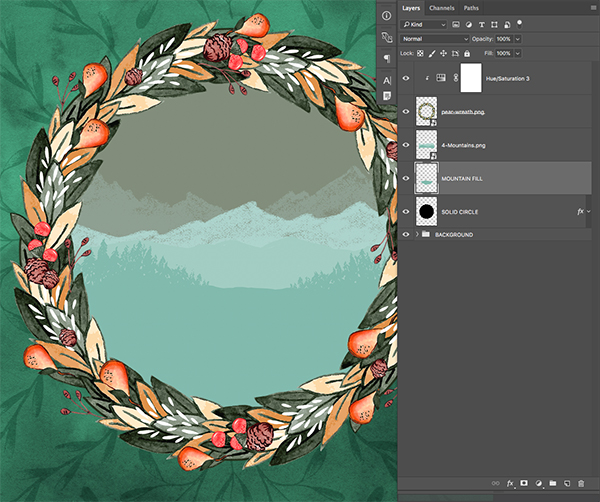
Press ‘B’ to grab the Brush Tool and make sure you have a hard round brush with 100% opacity selected. From here, hold the Alt/Option Key to toggle to the Eyedropper Tool and while that tool is active, select the color from the bottom of the mountains. Once you have selected that color you can release the Alt/Option Key and it will automatically revert back to the Brush Tool. From here we just want to fill in the space below the mountains with the solid color while being careful not to go outside of the wreath. You should now have something like this:
Step 9: Multiplying the Mountains
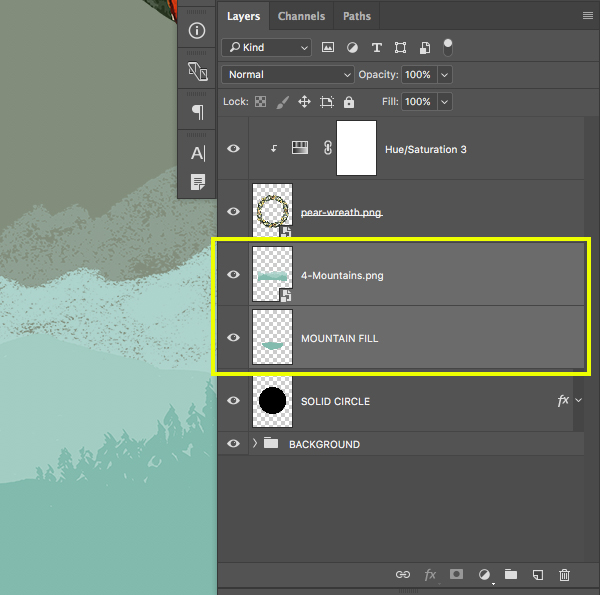
Click on the ‘4-Mountains.png’ layer in your Layers Palette, and then hold the Shift Key and select the ‘MOUNTAIN FILL’ layer directly below so that both of these layers are selected a the same time.
Press Command/Ctrl+G to place both of these layers into a new folder. Double click on the folder name and rename it ‘MOUNTAINS’ as shown below:
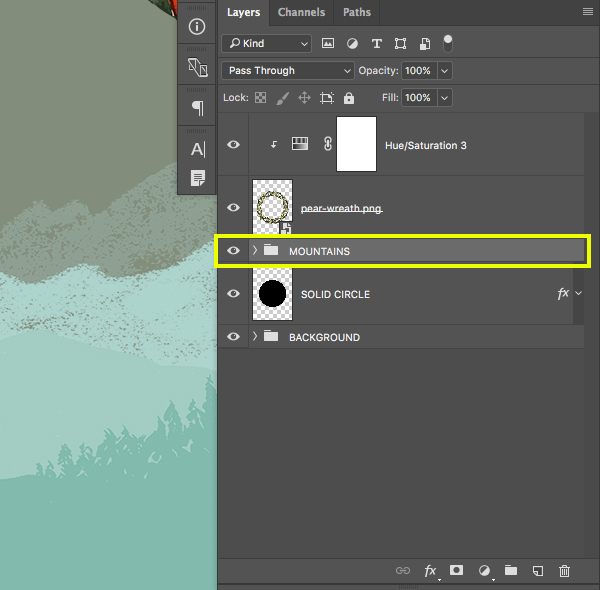
Next, switch the Blend Mode of the ‘MOUNTAINS’ folder from ‘Normal’ to ‘Multiply’.
Step 10: Groups on Groups on Groups
Select the newly created ‘MOUNTAINS’ folder, and then hold the Shift Key and select the ‘SOLID CIRCLE’ layer directly below it.
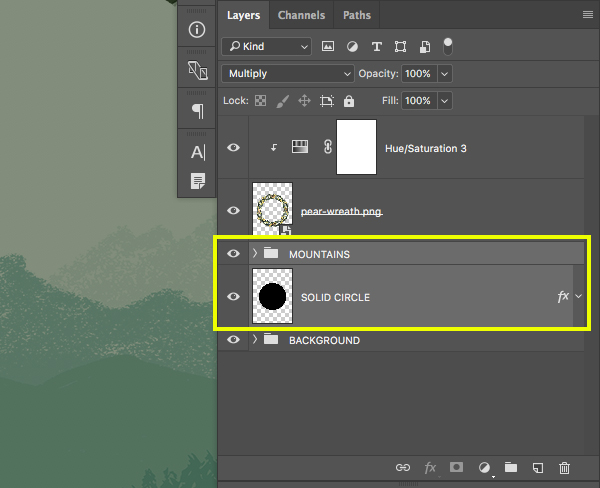
Press Command/Ctrl+G to place the ‘MOUNTAINS’ folder and ‘SOLID CIRCLE’ layer into a new folder. Double click on the folder name and rename it ‘MOUNTAINSCAPE’ as shown below:

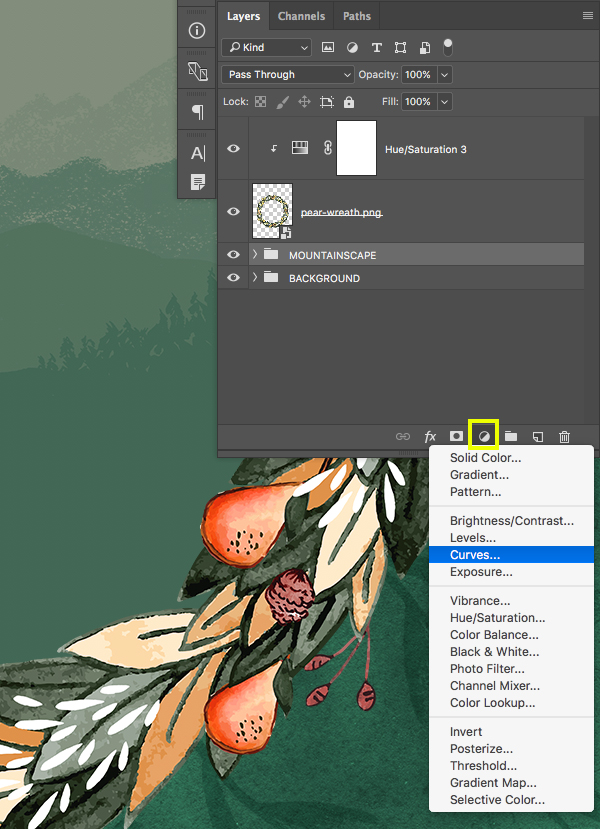
From here, hold the Alt/Option Key and click on the Adjustment Layer Icon at the bottom of the Layers Palette and then choose ‘Curves’ from the list that appears.
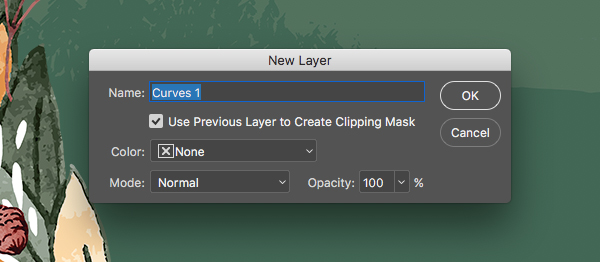
When prompted with the ‘New Layer’ dialog box, check off the option that says ‘Use Previous Layer to Create Clipping Mask’ and then click ‘OK’ to apply the changes. Doing this will ensure that the Adjustment Layer only affects the ‘MOUNTAINSCAPE’ folder directly below rather than every layer beneath it.
For the properties we will need to make three points inside of the grid on the Curves Adjustment Layer that looks like this:
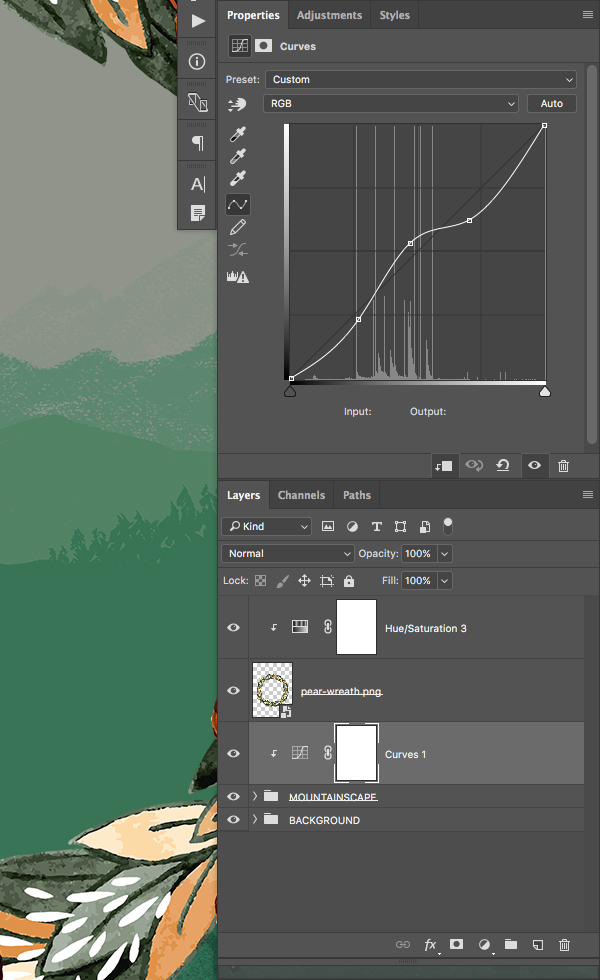
The first point on the lower left has an ‘Input’ setting of ’68’ and an ‘Output’ of ’59’, the middle point has an ‘Input’ of ‘120’ and an ‘Output’ of ‘136’, and the final point on the right has an ‘Input’ value of ‘179’ and an ‘Output’ that is set to ‘159’ as shown in the image below:

Step 11: Building the Fence
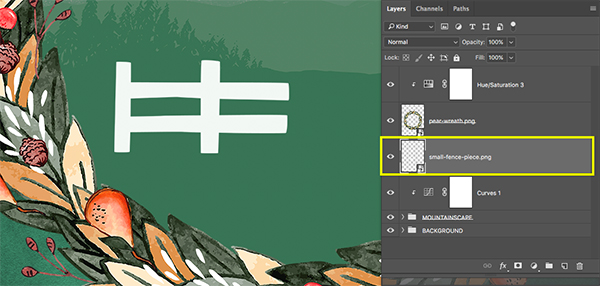
Open the ‘small-fence-piece.png’ file in Photoshop from the freebies folder for this tutorial.
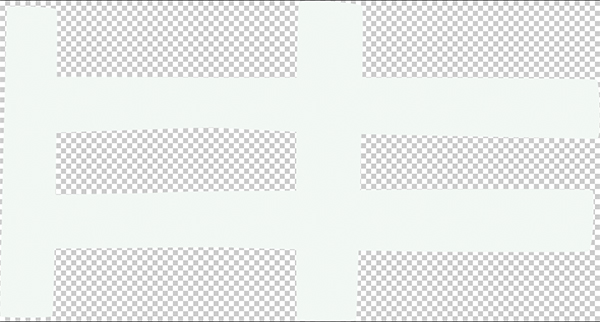
Click and drag the fence into your main document and rename it ‘small-fence-piece.png’ and convert it into a Smart Object. We will then place this layer directly below the ‘pear-wreath.png’ Smart Object but above the Curves Adjustment Layer.
Press Command/Ctrl+J to duplicate the fence piece and then hold the Shift Key and tap the right arrow to move it over so that it begins where the first piece ends.
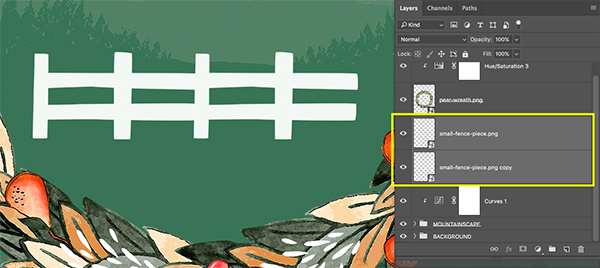
Create about four or five more copies so that you end up with a whole fence that extends all the way across the wreath. From here, select the very top fence piece, hold the Shift Key, and then select the very bottom fence piece so they are all selected at the same time.
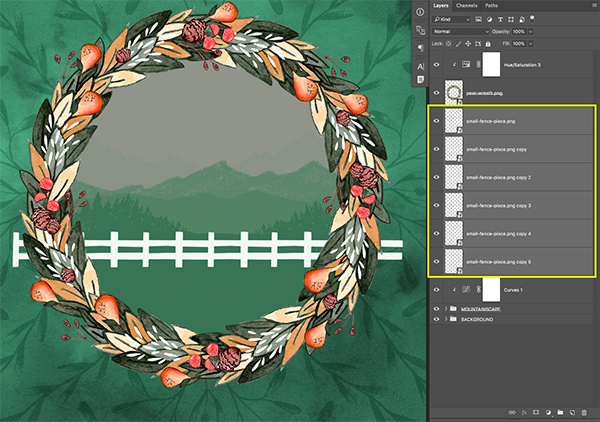
With all of the fence pieces still selected, press Command/Ctrl+G to put them into a new folder and rename it ‘FENCE’ as shown below:
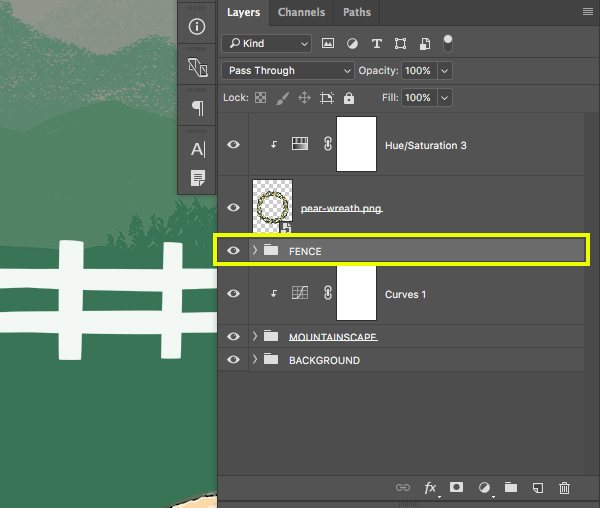
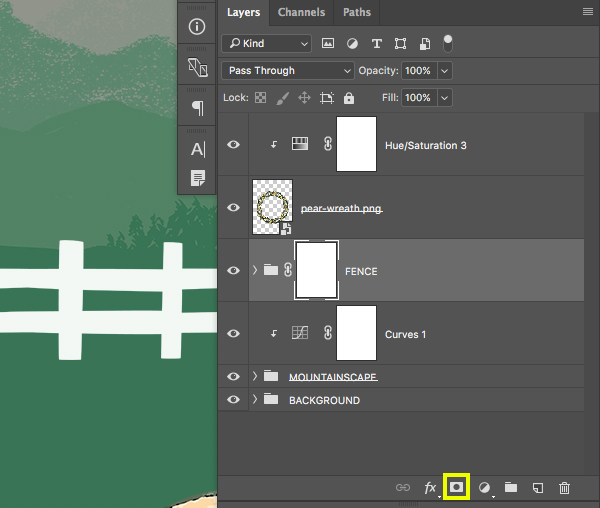
Now that we have created our ‘FENCE’ folder we will select it and then click the ‘Add Layer Mask’ option found at the bottom of the Layers Palette to add a mask.
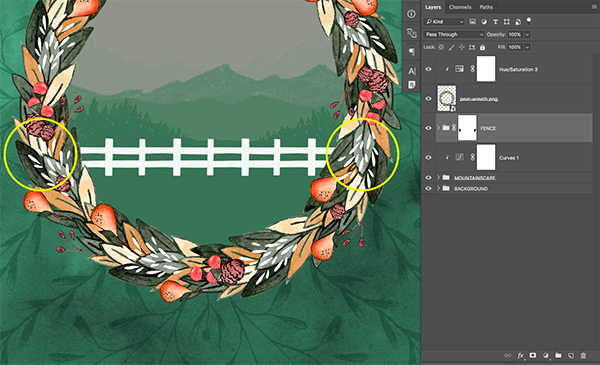
Press ‘B’ on the keyboard to switch to your Brush Tool and make sure that you have a hard round brush with 100% opacity selected with solid black as your foreground color. From here we are simply going to brush over any parts of the fence that are sticking out on the sides of the wreath to hide them. The image below shows the result after brushing out the extended parts of the fence that we want to remove.
Step 12: Painting the Fence
Double click on the ‘FENCE’ folder to bring up the Layer Style panel and check off the ‘Color Overlay’ option as shown below:
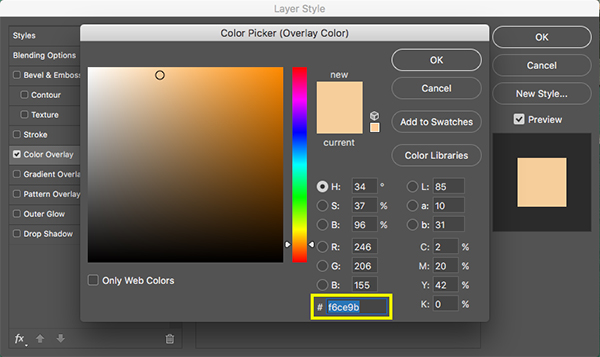
For the fill color let’s enter a hex value of ‘#F6CE9B’ and then press ‘OK’ two times to apply the changes and close out of both dialog boxes.
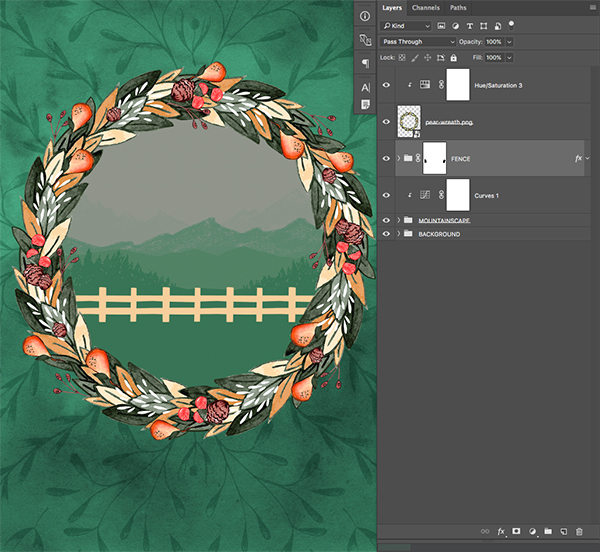
After applying the color changes to the fence your image should now look like this:
Step 13: Snowy Grounds
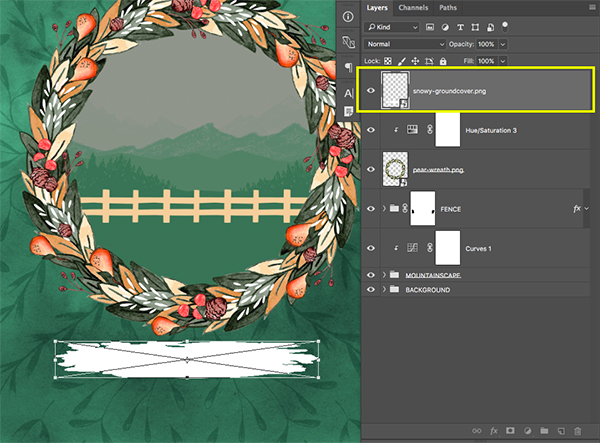
Next, open the ‘snowy-groundcover.png’ file from the freebies folder in Photoshop.

Bring the illustration into your working document and place it at the top of your Layers Palette. Rename the layer ‘snowy-groundcover.png’ like the file itself, and then convert the layer into a Smart Object. From here, press Command/Ctrl+T and drag inwards from any of the four corners of the bounding box while holding the Alt/Option+Shift keys to scale the snow down proportionally from the center. The goal here is to place the snow just below the wreath and in the center as shown below:
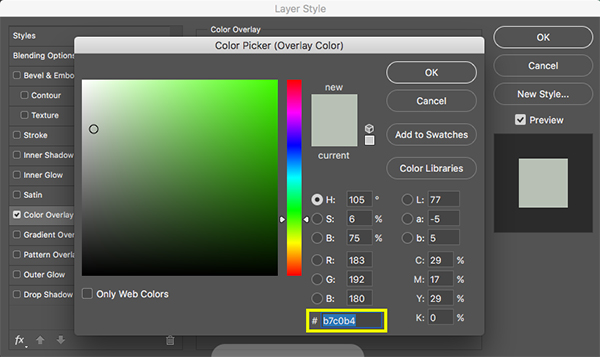
Double click on the Smart Object to bring up the Layer Style panel and check off the ‘Color Overlay’ option.
For the fill color we will enter a hex value of ‘#B7C0B4’ and then click ‘OK’ twice to apply the changes and close out of both dialog boxes.
Step 14: Cloudy Days
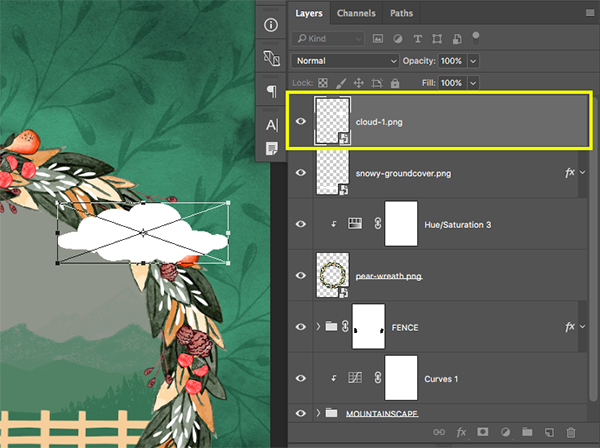
Open the ‘cloud-1.png’ file from the freebies folder in Photoshop.

Click and drag the cloud into your document and place it at the top of your Layers Palette before renaming the layer ‘cloud-1.png’ and making it into a Smart Object. From here press Command/Ctrl+T to do a Free Transform and scale the cloud down by holding the Alt/Option+Shift keys and dragging inwards from any of the four corners of the bounding box. Place the cloud over the top right portion of the wreath using the image below as a reference for the size and placement:
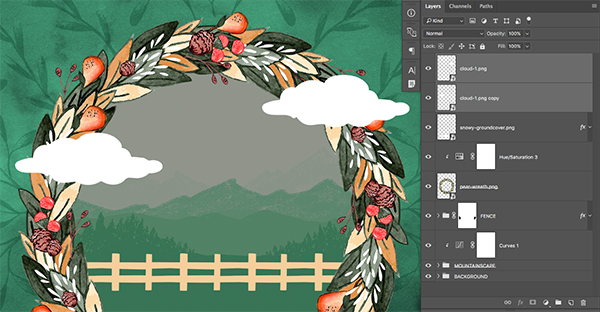
Press Command/Ctrl+J to duplicate the cloud Smart Object and move this copy over towards the left and down slightly. You may also want to scale this one down (or up) just to have some variation.
Step 15: More Clouds
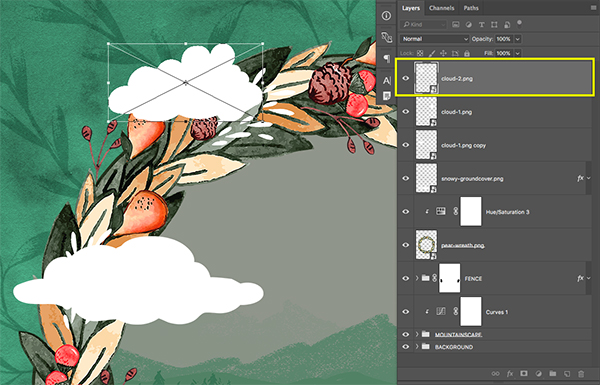
Now let’s open the ‘cloud-2.png’ file from the freebies folder for this tutorial in Photoshop.

Let’s bring this cloud into our document and place it on top of the Layers Palette above ‘cloud-1.png’ and we will again rename this layer with the name of the file – ‘cloud-2.png’ and also make it into a Smart Object. Just like before let’s scale this cloud down a bit and place it in the top left above the wreath as shown below:
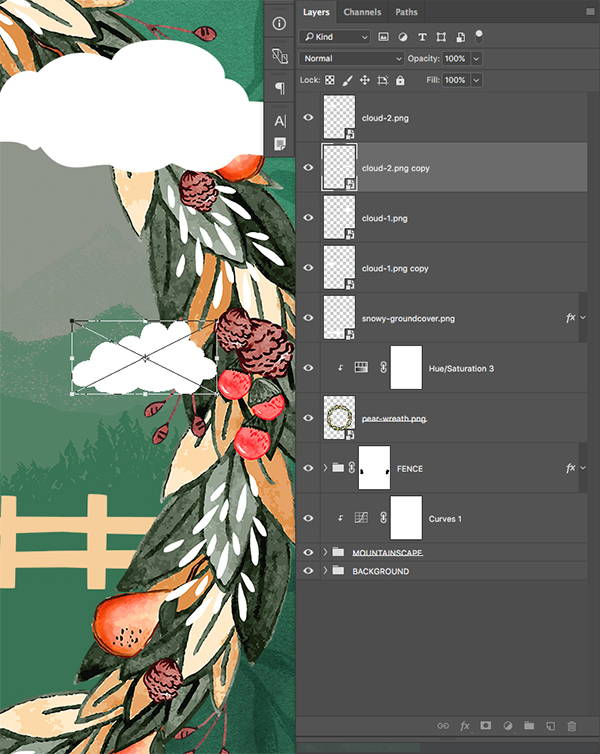
Press Command/Ctrl+J to duplicate this cloud and move it below the large cloud on the right side making it quite a bit smaller as seen here:
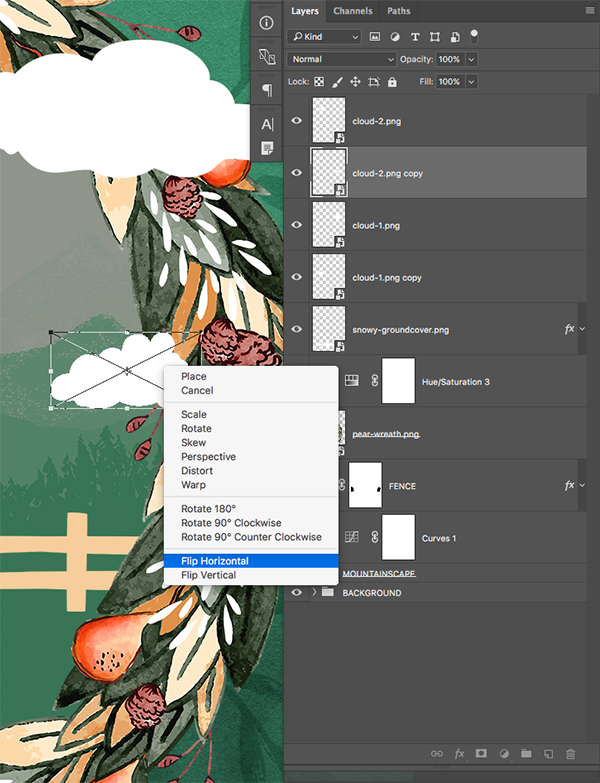
To add a bit more variation let’s press Command/Ctrl+T on this second copy of the ‘cloud-2.png’ Smart Object and then click on the cloud to reveal a dropdown menu. From this menu we want to choose the option that says ‘Flip Horizontal’ and then press the Return Key to apply the changes.
Step 16: Grouping the Clouds
Select the very top cloud Smart Object layer in the Layers Palette, and then hold the Shift Key and click on the very bottom cloud layer so all four of your clouds are selected simultaneously.
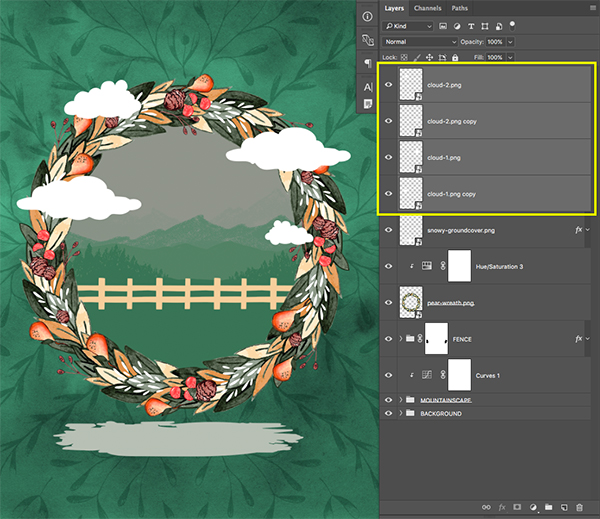
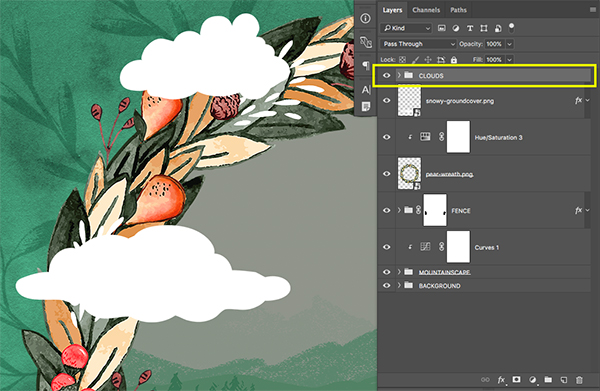
With all four of the clouds selected in your palette, press Command/Ctrl+G to place them into a new folder and rename it ‘CLOUDS’ as shown here:
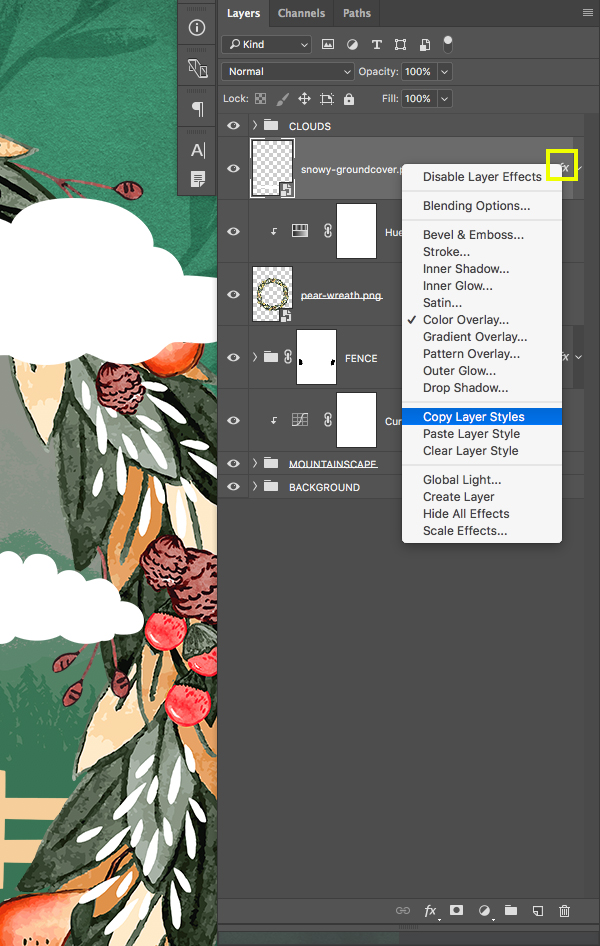
Next, hold the Control Key and click on the small ‘fx’ icon on the ‘snowy-groundcover.png’ layer just below the ‘CLOUDS’ folder to reveal a dropdown menu. From this list we want to select the option that says ‘Copy Layer Styles’ like the image below:
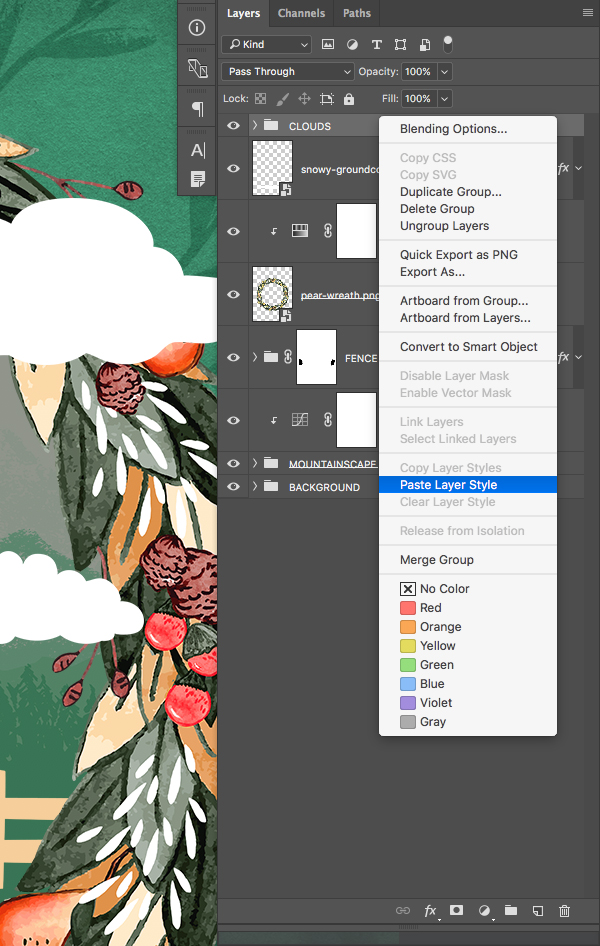
After copying the layer properties of the ‘snowy-groundcover.png’ Smart Object, hold the Control Key and now click on the ‘CLOUDS’ folder to reveal the same dropdown menu. This time we want to choose the option that says ‘Paste Layer Style’ to apply the same effects to everything inside of the folder.
All four of the clouds should now be the same color as the snow below the wreath.

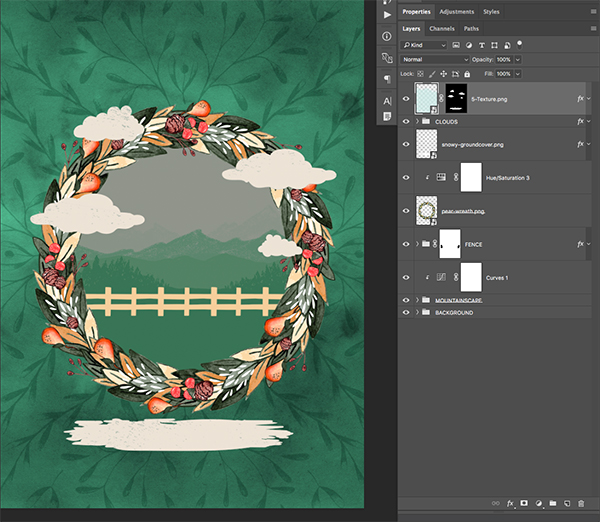
Step 17: Textured Skies
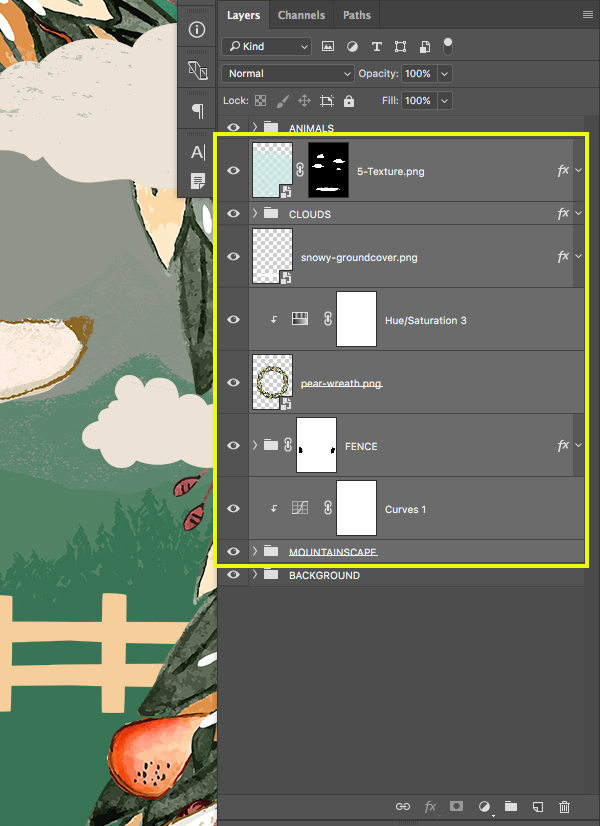
Next, open the ‘5-Texture.png’ file from the freebies folder in Photoshop.
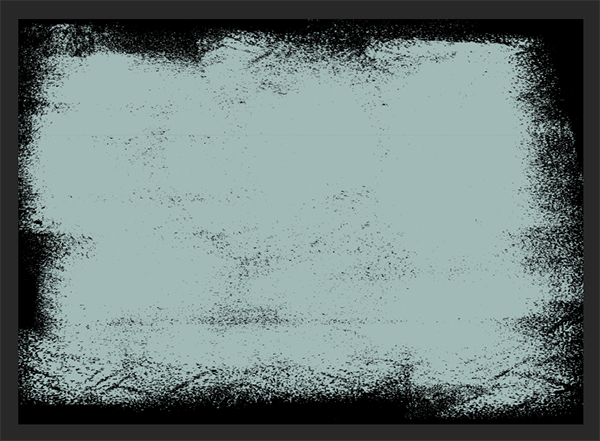
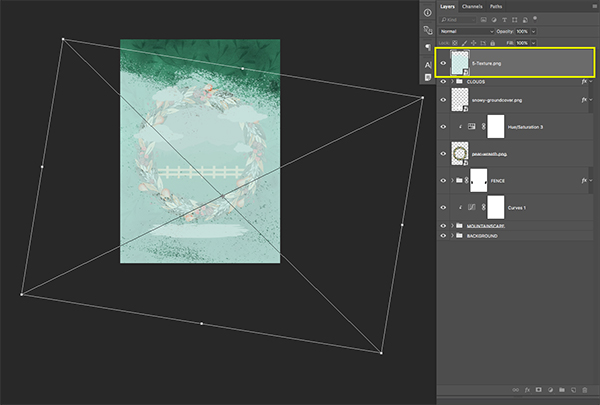
Click and drag the texture into your working document and place it at the top of your Layers Palette above the ‘CLOUDS’ folder. From here we will rename the layer ‘5-Texture.png’ and convert it into a Smart Object. Once you have done that, press Command/Ctrl+T to initiate a Free Transform and then scale the texture and rotate it slightly like the image shown here:
What we are going to do next is make sure that our new texture layer is selected and then expand the ‘CLOUDS’ folder to reveal the four Smart Object layers inside. Hold the Command/Ctrl+Shift keys and click on each of the layer thumbnails for the four cloud layers and then also select the layer thumbnail of the ‘snowy-groundcover.png’ Smart Object. Doing this should activate a selection around all five of the shapes at the same time.
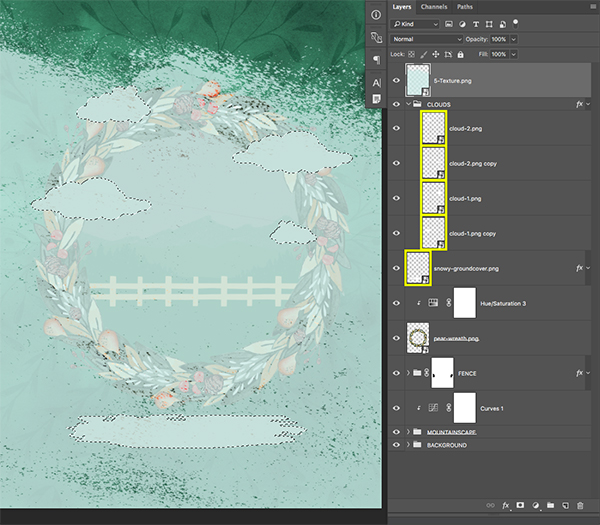
While our ‘5-Texture.png’ layer is still selected we will now click on the ‘Add Layer Mask’ icon found at the bottom of the Layers Palette to add a mask using our previous selection of the snow and clouds.

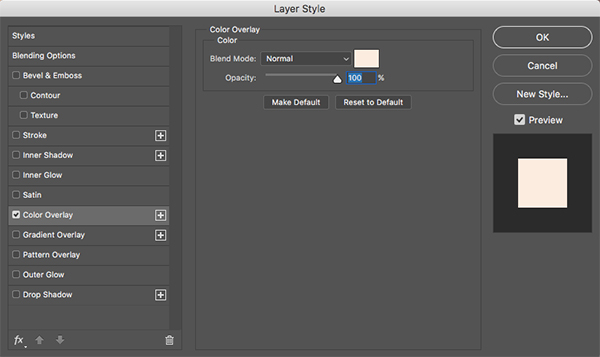
Next, double click on the texture Smart Object to bring up the Layer Style options and check off the ‘Color Overlay’ box.
For the fill color let’s enter a hex value of ‘#FBECDF’ and then press ‘OK’ two times to apply the changes and close out of both dialog boxes.
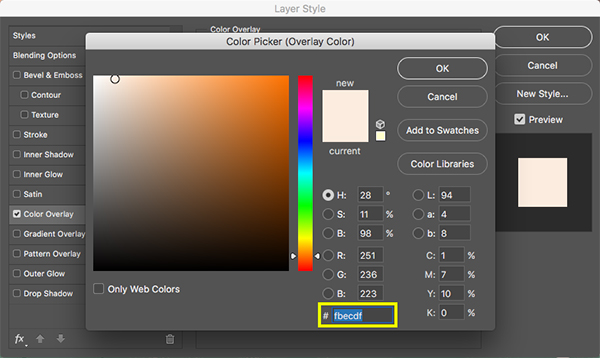
Your image should now look like this:
Step 18: Animal House
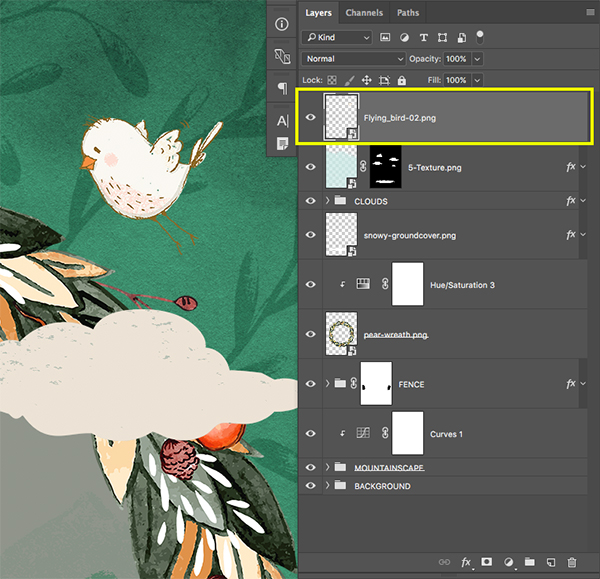
Open the ‘Flying_bird-02.png’ file from the freebies folder in Photoshop.
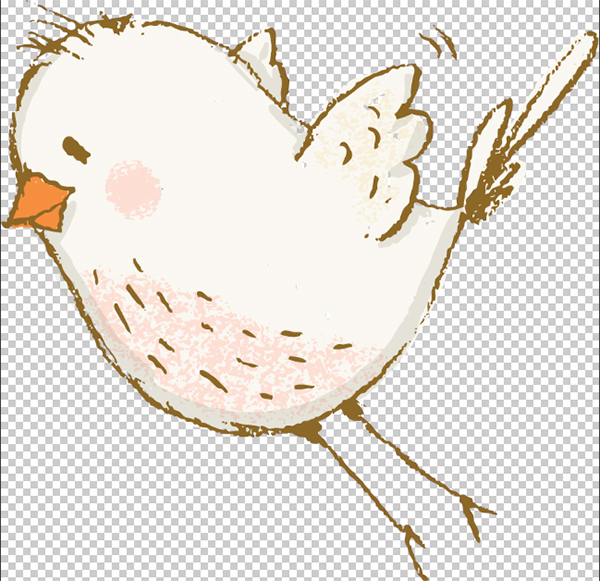
Bring the bird into your working document and place it at the top of your Layers Palette. Rename this layer ‘Flying_bird-02.png’ and convert it into a Smart Object. Once you have done that, press Command/Ctrl+T and scale the bird down while holding the Alt/Option+Shift keys and placing it just above the upper right part of the wreath and clouds.
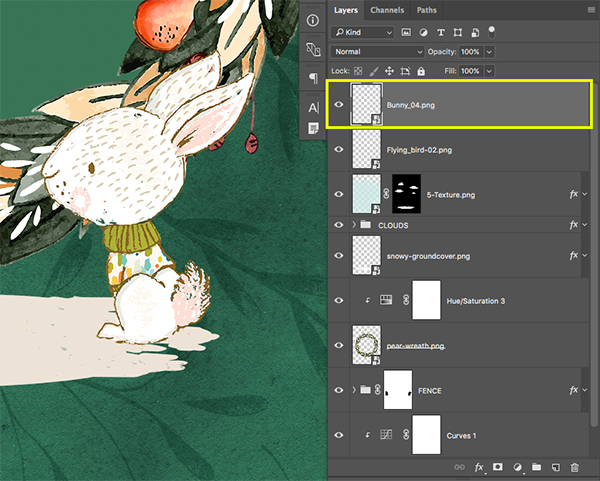
Next, open the ‘Bunny_04.png’ file.
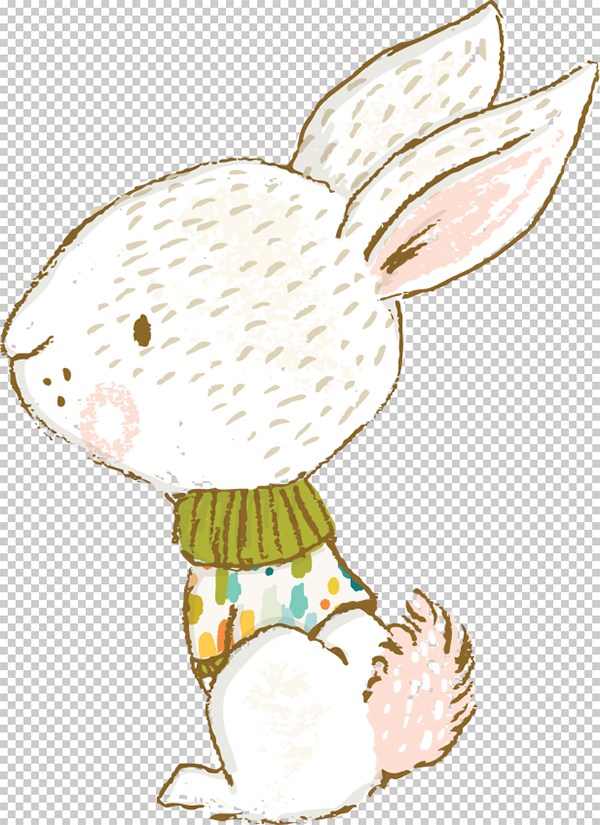
Bring the rabbit into your main file and then place this one at the top of the Layers Palette. Let’s go ahead and rename this layer with the file name – ‘Bunny_04.png’ and make it into a Smart Object. After that we can do another Free Transform and scale the bunny down placing it towards the right edge of the snow below the wreath. Use the image below as a guide for the size and placement of the illustration.
We will now open the ‘Deer_looking_up.png’ file from the freebies folder in Photoshop.
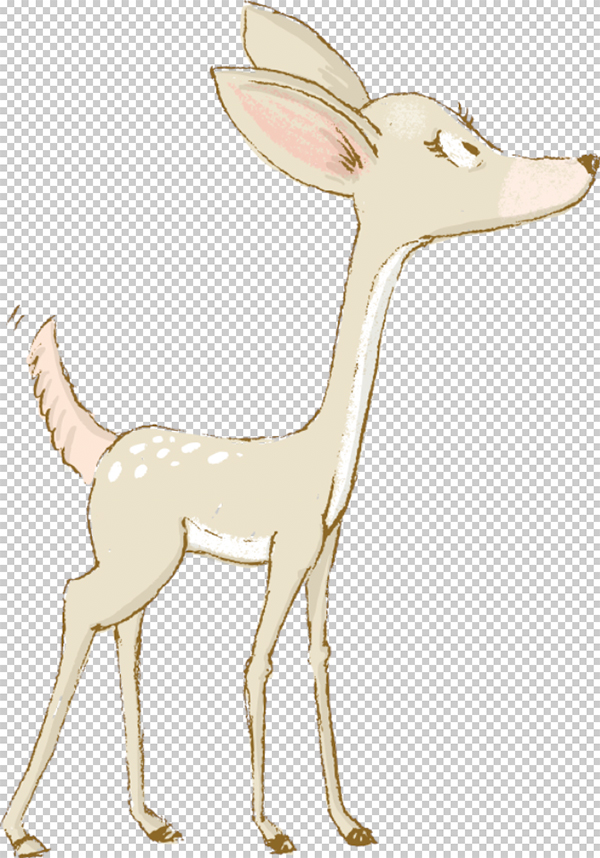
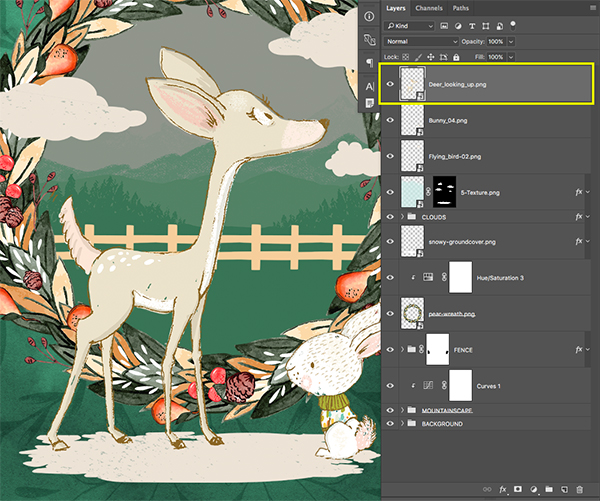
Repeat the same steps of bringing the animal illustration into your file, renaming it, and then converting it into a Smart Object. After that, use the Free Transform command to scale the deer down a bit and place it to the left of the bunny so that it occupies most of the space in the center of our wreath as shown below:
Step 19: Gathering the Animals
Select the top Smart Object layer in your Layers Palette, which should be the deer, and then hold the Shift Key and select the flying bird. You should now have all three of your animals selected at the same time.
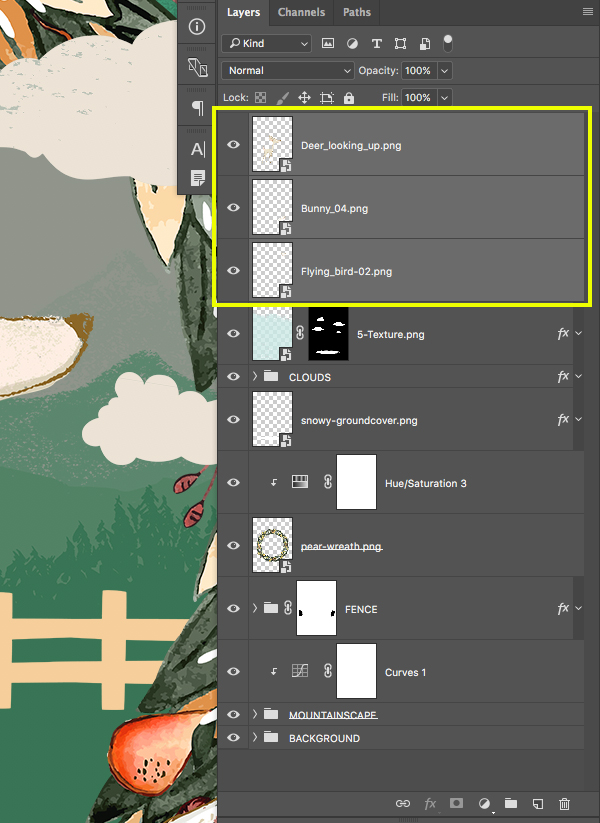
Press Command/Ctrl+G on the keyboard to place these three animals into a new folder and rename it ‘ANIMALS’ as shown in the image below:

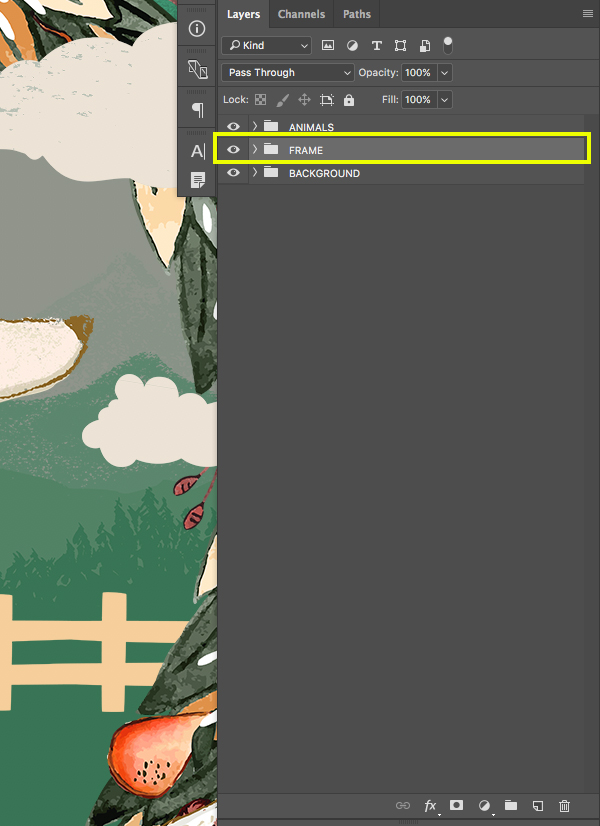
Now we will select the first layer just below our ‘ANIMALS’ folder, which should be the ‘5-Texture.png’ Smart Object. After that, hold the Shift Key and select the ‘MOUNTAINSCAPE’ folder all the way down towards the bottom of the Layers Palette. You should now have all of the layers and folders between the ‘ANIMALS’ folder and the ‘BACKGROUND’ folder selected.
Let’s press Command/Ctrl+G once again to put all of these into a new folder to help keep things organized, and then rename this folder ‘FRAME’ as shown below:
Step 20: Merry Christmas!
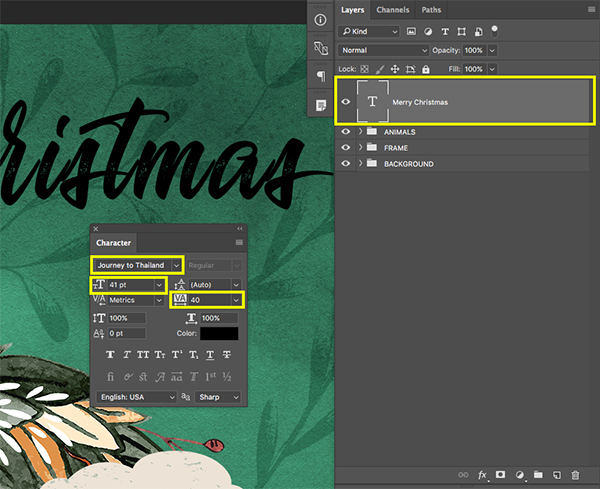
Create a New Layer at the top of your Layers Palette by pressing Command/Ctrl+Alt/Option+Shift+N on the keyboard. Next, press ‘T’ to switch to your Type Tool and type out the words ‘Merry Christmas’ using the font ‘Journey to Thailand’ which is a free typeface that can be downloaded from DaFont.com. Once you’ve typed out the phrase we want to check a few options in our Character Panel. If you don’t see this panel automatically you can access it by going to ‘Window>Character’ to bring it up. Let’s make sure that we are using a point size of about ’41’ and the ‘Tracking’ should be set to ’40’ as indicated by the highlight boxes in the image below:
You may notice that some of your letters don’t appear to be joined together, but luckily this is a quick fix that just requires us to manually adjust the kerning or spacing between the individual letters. Using your Type Tool (T) click in between any of the two letters that aren’t joined together and then press Alt/Option and the left arrow to move the letters closer together. Conversely, you can press Alt/Option and the right arrow to move them further apart, but for now we probably don’t need that option since we actually have too much space and need to reduce it. Go through the full phrase to ensure that things look good and you should end up with something like this:

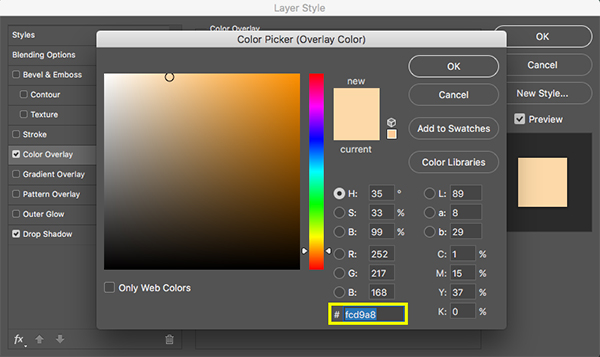
Double click on the ‘Merry Christmas’ text layer to bring up the Layer Styles and check off the ‘Color Overlay’ option.
For the fill color let’s enter a hex value of ‘#FCD9A8’ as shown below:
Press ‘OK’ to apply the color change and before we exit out of the Layer Style panel let’s also check off the ‘Drop Shadow’ option at the bottom. For the settings here we want to change the ‘Blend Mode’ to ‘Multiply’ with an opacity of about ’55’ and after that we can make the ‘Distance’ about ‘4’, the ‘Spread’ can be set to ’14’ and the ‘Size’ should be set to ’21’ like this:
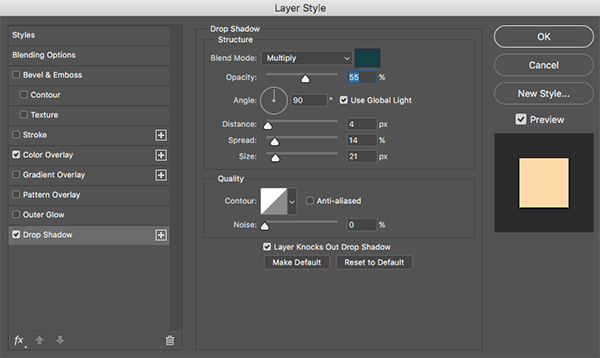
Before we move on we also want to change the color of the shadow to ‘#163E44’ and then we can press ‘OK’ two times to apply the changes and close out of both dialog boxes.

Your headline text should now look like this:

Step 21: And a Happy New Year!
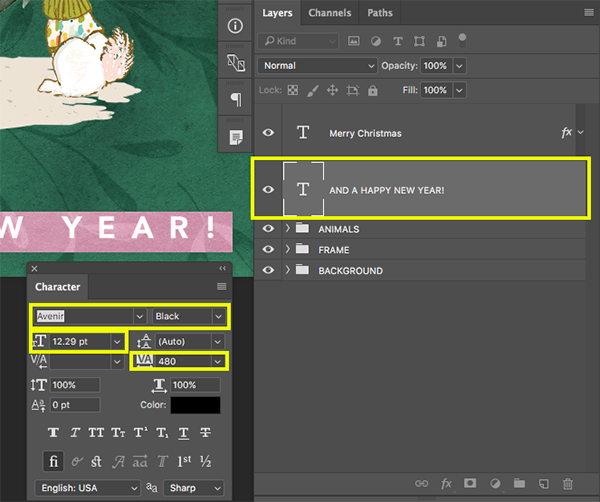
Create another layer and place it below the ‘Merry Christmas’ type layer. This time we will use the Character Panel to make sure we have the typeface ‘Avenir’ selected with a style set to ‘Black’ at about ‘12.29 pt’ for the size and a value of ‘480’ for the tracking. We will then type out the phrase ‘AND A HAPPY NEW YEAR!’ in all caps and place it along the bottom of your design.
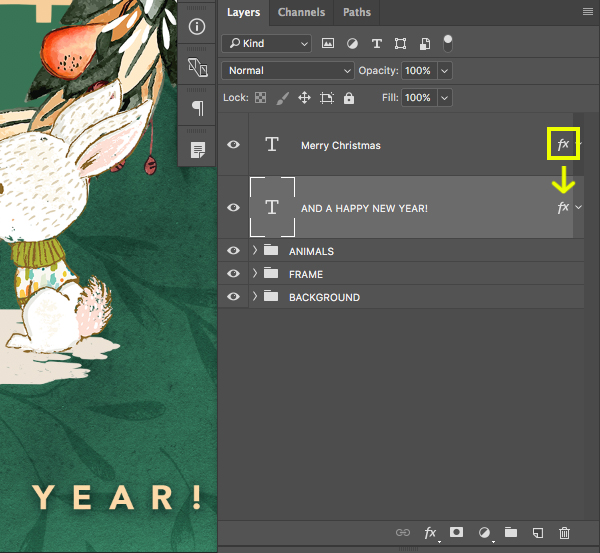
From here we want to apply the same effects that we used for our ‘Merry Christmas’ text so we are going to hold the Alt/Option Key and click and drag the small ‘fx’ icon from the top layer down onto our ‘AND A HAPPY NEW YEAR!’ layer as shown below:
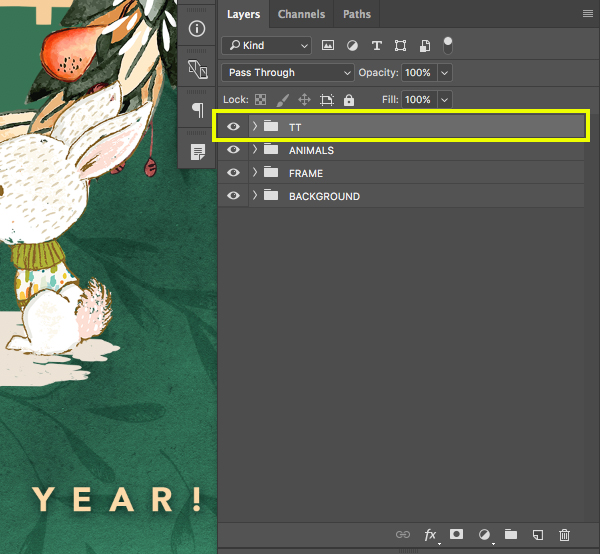
Next, select the ‘Merry Christmas’ type layer, hold the Shift Key and select the ‘AND A HAPPY NEW YEAR!’ layer below so both layers are selected together.
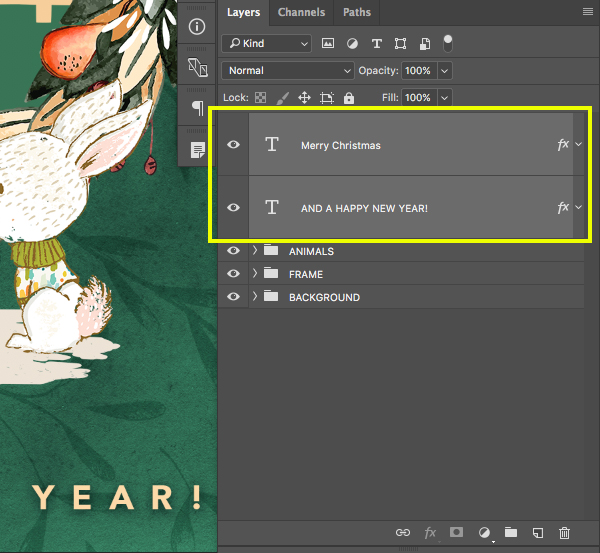
Press Command/Ctrl+G to put both of these text layers into a new folder and rename it ‘TT’ as shown below:
We have now completed our Christmas Greeting Card! We made this card using just a small number of elements from this jam-packed design bundle. The resources in the full bundle are essential for every kind of project. You can discover even more hand-drawn illustrations from artists like Lisa Glanz while also gaining access to fonts from Callie Hegstrom, scene creators, innovative brush packs, Photoshop actions, stitch effects and so much more! We can’t wait to see what you create with these amazing resources.
Remember that whether it’s your outcome for this tutorial or something new you’ve made, we’d love to see your designs on our Facebook page.
Please leave a comment if you have any questions or suggestions. I always look forward to hearing from you!
There’s still time to check out The Essential Artistic Design Bundle featuring thousands of high-quality creative resources ranging from ready to use elements to professional-grade effects packs. This bundle will be your new best friend making sure you are never stuck for that perfect brush or texture all for an unbeatable price of $29!
Hi, thank you for the freebie and the tutorial! Added a little more text and made this as a giveaway for our christmas programs. Really good stuff.
P.S.
There is one step missing in the text above. A color Overlay for the FRAME1.png is mentioned in the video but i guess it was missed in the text.
Oh no- sorry about that but thank you for letting us know!
We are so pleased to hear you have enjoyed the freebie and are getting good use out of the tutorial! We would love to see your finished product if you were keen to share!
this tutorial is fabulous! I was looking for an idea for a Christmas card I can end electronically and this one appears to have won my top vote. Thank you so very much for all your wonderful tutorials, I have learned such unique things! All the very best for a Happy/Merry Holiday Season and continued success in the New Year!
That is awesome to hear and we are so pleased our tutorial got top vote :) We are so happy you are enjoying them!
Happy Holidays to you and here is to many more tutorials in the New Year!
Thank you so much for the kind words and for commenting! I am very pleased to hear that this won your vote for an electronic card that you’d like to send! Happy Holidays to you as well and keep up the good work.
I tried to post my card on the Facebook page but it won’t let me.
Hey Rocky,
Thanks for the comment and I am so sorry that you are unable to post! Were you getting an error message at all or a reason as to why it wouldn’t post? Rest assured if you want to pop us a DM on Facebook we should be able to help!
Hey Rocky! Sorry to hear you are experiencing some issues when trying to post this. I am wondering if the file size is perhaps too large? You could try converting the card from inches into pixels to make it a bit more manageable?
Hi, can you explain why you set up your document in RGB mode? The printer where I get my postcards, posters etc. printed requires CMYK. What is the best practice for that? Would I change from RGB to CMYK when the design is completely finished? Why? Why not in the beginning? Thanks for explaining, you are a great teacher and I look forward to your next tutorial!
Hey Franziska,
The great news is, our tutorial writer, Eric does usually check in on the comments, however i’ll pop him over an email for you to see if he can offer any advice on this one :)
Hey Franziska,
The RGB Color model is the model used by your monitor and many desktop printers. Even if your desktop printer have inks labeled as Cyan, Magenta, Yellow, and Black – they still use software to interpret the RGB files from a computer and thus work better with the RGB Color Model. Thus if a file will be printed on a desktop home printer, or sent via email to view on a monitor or on the web, then RGB is the preferred color model. If printing to a professional printer, then CMYK is the preferred color model.
If you want to design so that files are compatible in both models… keep in mind that the RGB color model contains a larger amount of colors than a CMYK model. Thus if starting with the RGB model, check in the Color Picker dialog box to verify if the RGB color is compatible with the CMYK model. You can do this by picking a color, and if the RGB color is NOT compatible with the CMYK model, then you will see an exclamation mark icon appear near the color swatch in the upper-right area of the Color Picker dialog box. If you see this exclamation icon appear, simply click on it to see the nearest color that IS compatible with CMYK.
Due to this smaller amount of colors in a CMYK model… you should be cautious about converting an RGB file to CMYK because many of the colors may shift and be lost… especially noticeable with blues (due to more vibrant blue colors in the RGB model). So always save your original RGB file and use a copy of the file to convert to CMYK in case you need to preserve the original rich colors of the RGB version.
Here’s a test you can try to see how different and less vibrant the colors can be when converting from RGB to CMYK. Open a Photoshop file using RGB and create three circles (you can create them on different layers if you prefer). Create one circle and fill with the GREEN RGB color (R=0, G=255, B=1). Fill a second circle with the RED RGB color (R=254, G=0, B=0), and fill a third color with the BLUE RGB color (R=0, G=0, B=254). All three colors are out of the CMYK gamut and will display the exclamation icon in the Color Picker dialog box, but ignore this detail when creating the colors as described. Now arrange the circles so you can see all three in the image file and go to the Image menu and choose Mode > CMYK Color. Watch the colors shift when you click the final dialog box confirmation. This will give you an idea of the difference between the vibrant colors available in RGB and the difference during a conversion.
Hope this explanation helps to understand the two models better.
All my best,
Mara
Hey Mara,
Thanks so much for taking the time to come back to Franziska and for popping me over an email with some more information.
I’ve updated the comment for you and this is all super helpful, so we really appreciate you taking the time :)
I know I didn’t ask this question but the answer was SOOO helpful for me as well! Thank you so much for the detailed explanation it was really informative :)
We’re so happy to hear this Kitti :)
Sara-Jane, Mara’s input is awesome (thanks, Mara). I’m guessing more of us than post would like Eric’s feedback, as well. Rather than emailing each of us individually, can Eric’s reply be posted here? If not, please email me, too. :)
Hey Lisa,
I’ve just posted Eric’s reply now, so hopefully that should help :)
Hi Lisa –
Thank you for your response and for checking out the tutorial! I have responded to a few of the comments here but wanted to make sure to let you know that if you are planning to print these cards then it would be better to start off working in CMYK rather than converting it at the end although that is still an acceptable way to do it. In this case however, I decided to go with RGB because many folks seem to send electronic cards these days so I wanted to make sure that the colors would look better when seen on-screen. Hopefully this and the other comments here will help, but let us know if you have any other questions! Happy Holidays :)
Thankyou so much for the freebies and the tutorial!
The poster is so gorgeous! I will definitely try it.
Sarah would you please forward the response mail to Franziska’s query to me as well.
I thank you in advance.
Hey Shruti,
Thanks so much for the awesome feedback!
As soon as we have some feedback from Eric, I can of course send that over to you too :)
To Shruti —
You may also be interested in reading my reply to Franziska’s question on RGB vs CMYK… just scroll up above your question to see my response and hopefully the explanation will help to clarify the difference between these two color models.
All my best and have a Merry Christmas
Thank you so much Mara
This is super helpful. So kind of you to write to me.
Wishing you a very Merry Christmas too!
Hey again Franziska,
I just wanted to let you know that we’ve heard back from Eric now and the great news is if you were going to be printing these you would need to convert it to CMYK.
He’s advised that he could have (and normally would) start in CMYK if it was something like a business card that you know you’d be printing, but the main reason Eric didn’t do that for this tutorial is because a lot of folks tend to lean towards sending electronic cards, so he figured most people would be viewing it digitally :)
You are absolutely right though about CMYK being the correct color mode for printing!
Hey Franziska –
Thanks so much for your comments and questions on the tutorial. Mara has indeed posted a very thoughtful and thorough reply which I hope will be helpful to many of the readers. I also replied in an email to this but wanted to confirm that you would indeed want to use CMYK if you were sending these off to a printer so you are absolutely correct about that. In this instance though I decided to use RGB as I know many people who tend to send out electronic cards these days but if you know you will be printing these it would be best to set it up as CMYK from the beginning.
Thank you !
I wanted to change the layout of the animals, with the rabbit bigger than the fawn, but that unbalanced the illustration … ;-)
You are very welcome and I am so pleased to hear you are enjoying the tutorial! We would love to see your finished work, if you were keen to share and we definitely encourage you to have a play around and try out different options within the tutorials to make them bespoke to your needs :).
Thank you ! I posted my story on the group page on Facebook and I’m going to put it here.
http://imagizer.imageshack.com/v2/800x600q90/923/NF57mR.jpg
It looks great, thank you so much for sharing :D