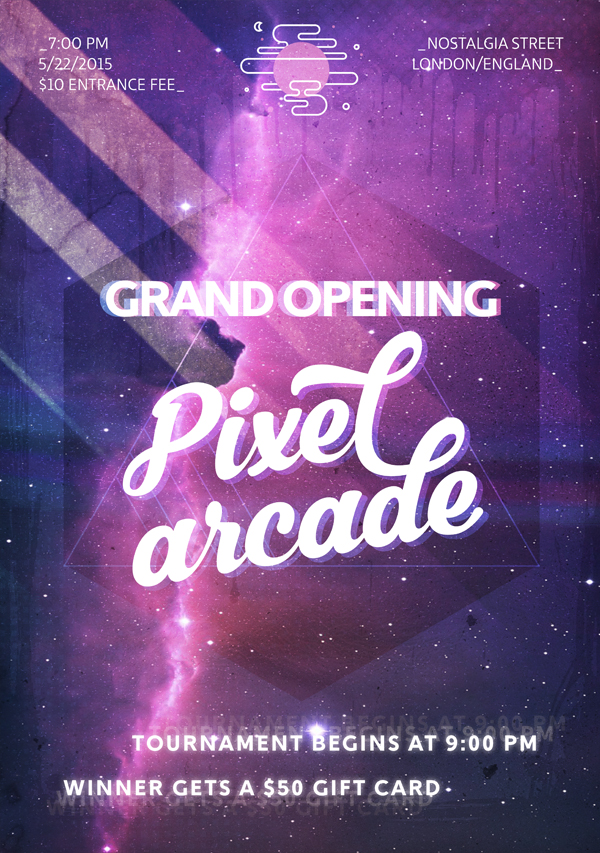
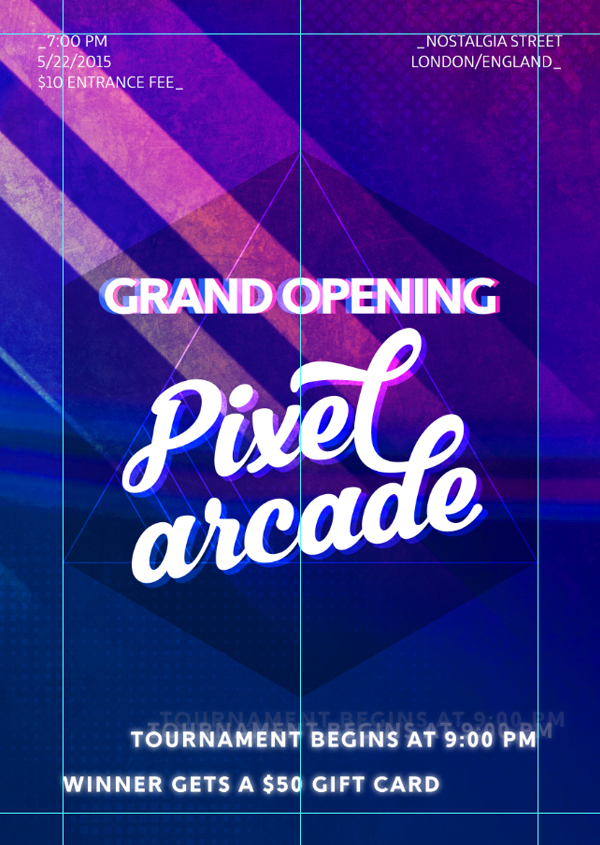
WHAT WE’RE CREATING:
Greetings Design Cutters!
Pam here with a tutorial that is sure to be a nostalgic blast from the past. Today we are going to be creating a poster for the grand opening of an arcade that takes inspiration straight from the 1980’s, complete with a crazy color palette and light beam that is out of this world.
Quick note: In this tutorial, the term “clipping” or “clipped layer” is used a few times. This means that the layer is only visible/applies to the layer directly below it. You can very quickly do this by holding ‘Alt’ down on your keyboard and clicking between the two layers. Here’s a quick demonstration.
Now grab your fingerless gloves and let’s get started!
Follow along with this tutorial: Download the freebies
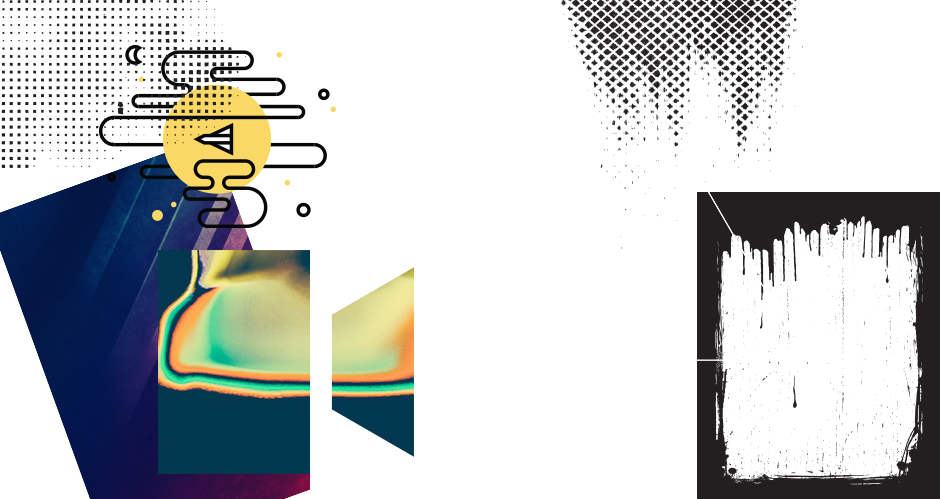
As always, we have an incredible freebie to help you follow along. Our designers have been kind enough to provide some beautiful textures and vector items.
Remember, this freebie is just a tiny sample taken from the amazing collection: The Modern, Creative Design Bundle (1000s of Best-Selling Resources) at just $29 (an amazing 97% Off). This bundle has a huge variety of resources perfect for client-based work and fun, personal projects alike. From a huge array of icon and mock-up items to professional and hand-done fonts there is something for every design cutter!
Step 1:
Open up Photoshop and create a new A3 document with the following attributes:

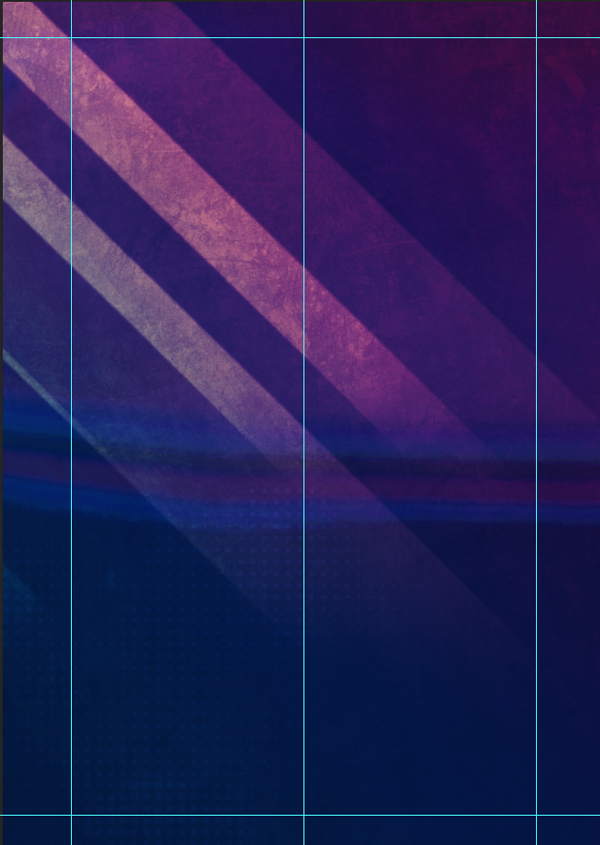
Now we are going to add a few guides for placing items later. Navigate to View > New Guide and place guides in the following:
Vertical: 1754 px, 375 px, 3133 px
Horizontal: 210 px, 4751 px
Step 2:
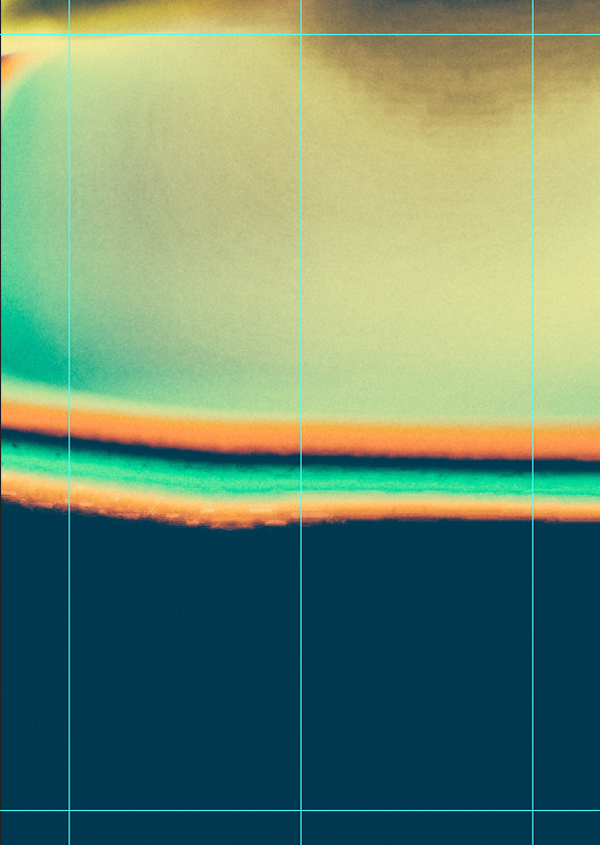
Let’s start with the background! From the freebie pack, place Digital Art’s 03.jpg. Scale up to fit the page. As I place my files, I like to rename the layers so that I can find them easily later. I decided to name this my “background” layer. If you are working from the bundle, feel free to choose your favorite motion background. All of them have the right look and feel for our poster, but vary in color and placement.
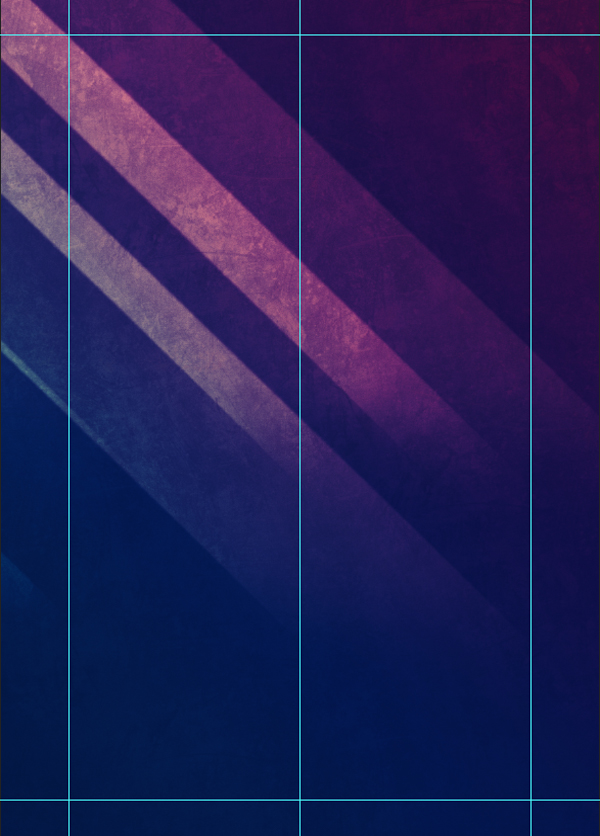
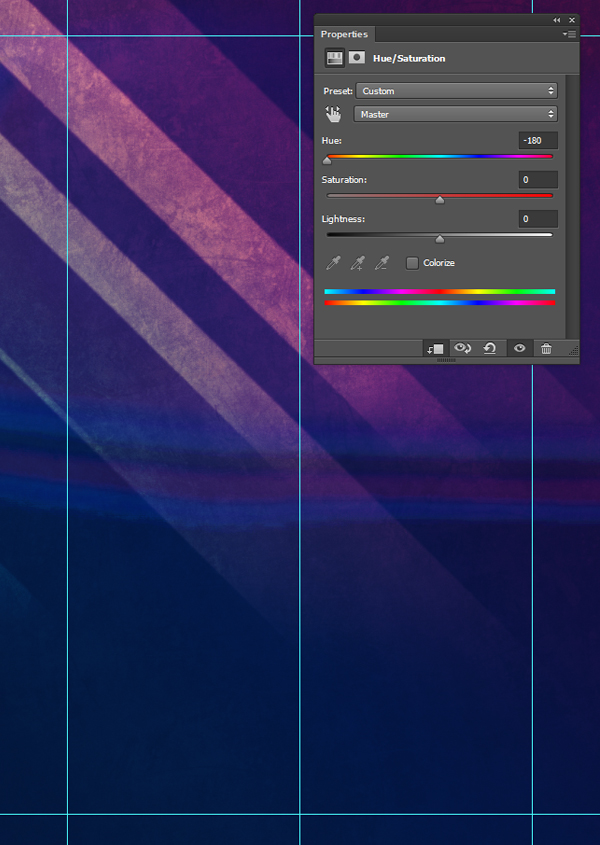
For another color effect in our background, place Rule by Art’s 24.jpg from the Freebie’s folder. I named mine “Synth.” Scale up and move the image so that the lines strike through the relative center of the file.
Change the opacity of the “Synth” layer to 12% and set the blending mode to “Pin Light.”
Create a Hue/Saturation adjustment layer by clicking the half-filled circle icon at the bottom of the layers panel. Clip it to the “Synth” layer and set the Hue at -180.
Step 3:
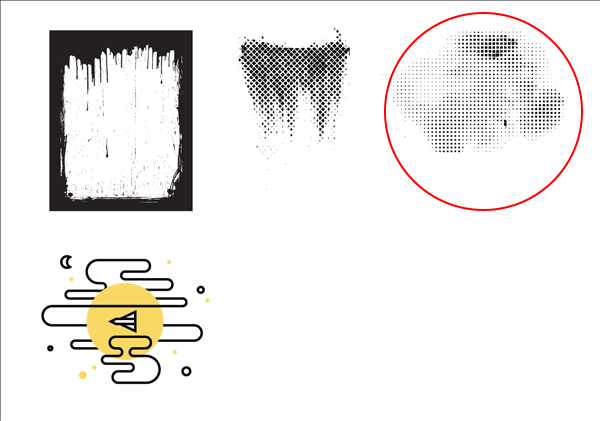
Now we are going to add some vector elements to our background. Open up the freebie-vectors file and choose the following pixels.
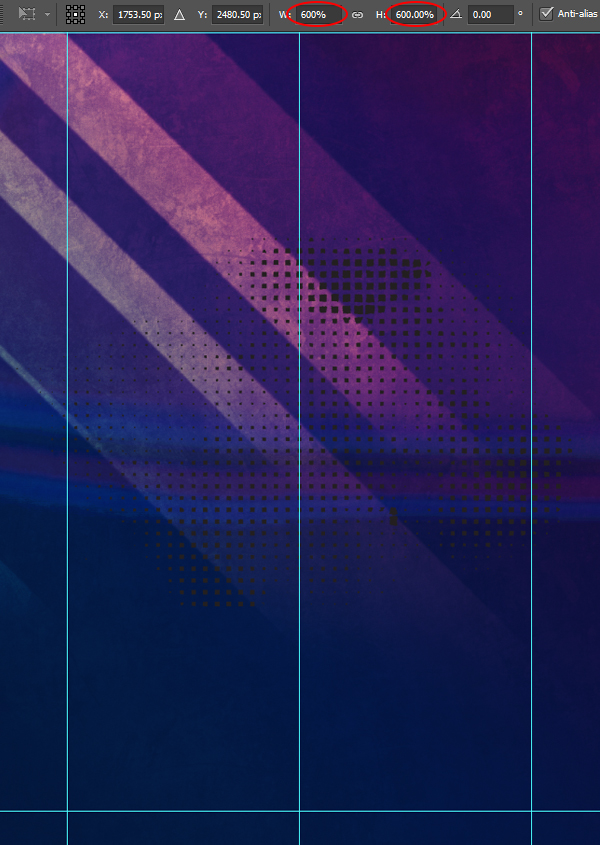
Copy and paste the vector into the poster file, selecting “smart object” when prompted. Scale the layer up 600% by pressing “ctrl/cmd + t” and using the options in the upper transform toolbar to input W: 600%, H: 600%.
Now use transform again to rotate the layer 180 degrees.
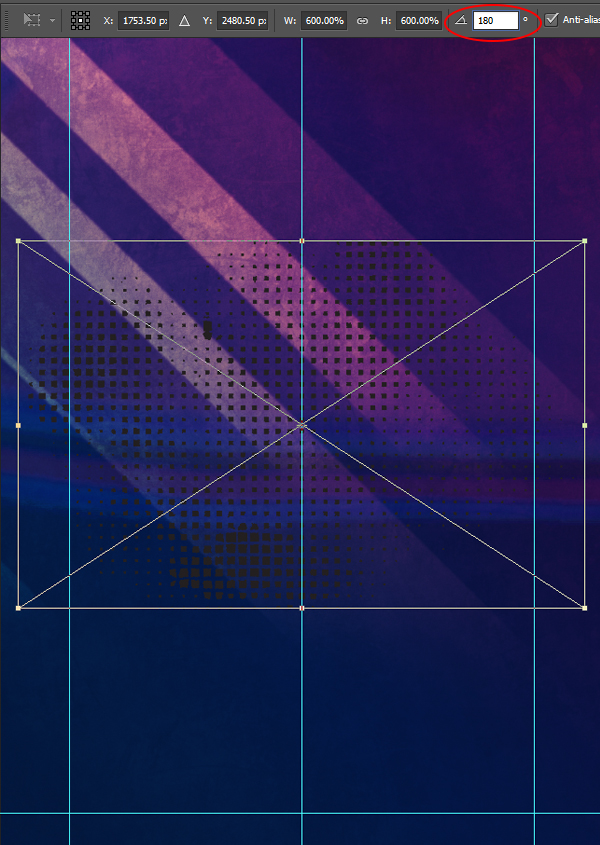
Move the pixel layer to the bottom left corner of the poster. Then, set the blending mode to “Color Dodge.”
Return to the freebie-vector file and select the middle pixel vector.
Paste into your poster as a smart object. Scale up by 600% and set the blending mode to “Color Dodge.” Move the layer so that it bleeds off the upper right corner.
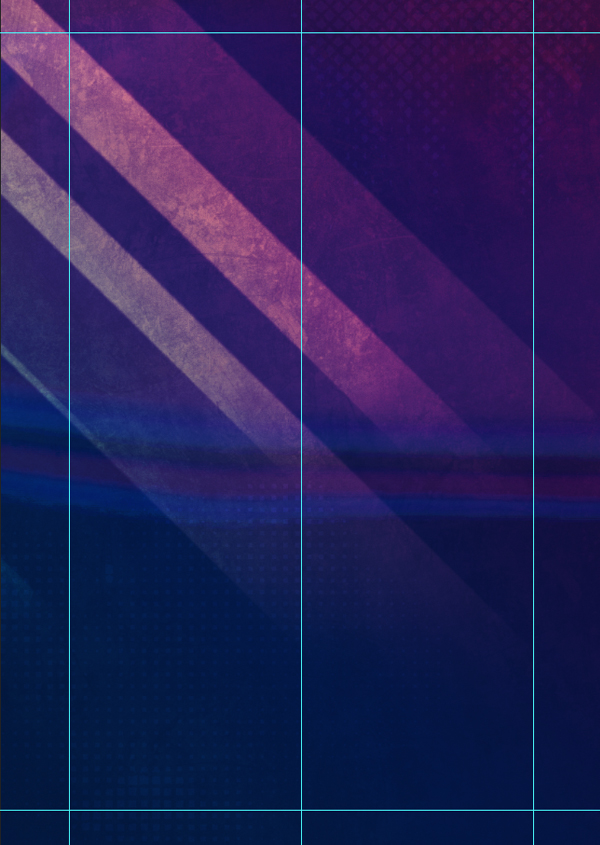
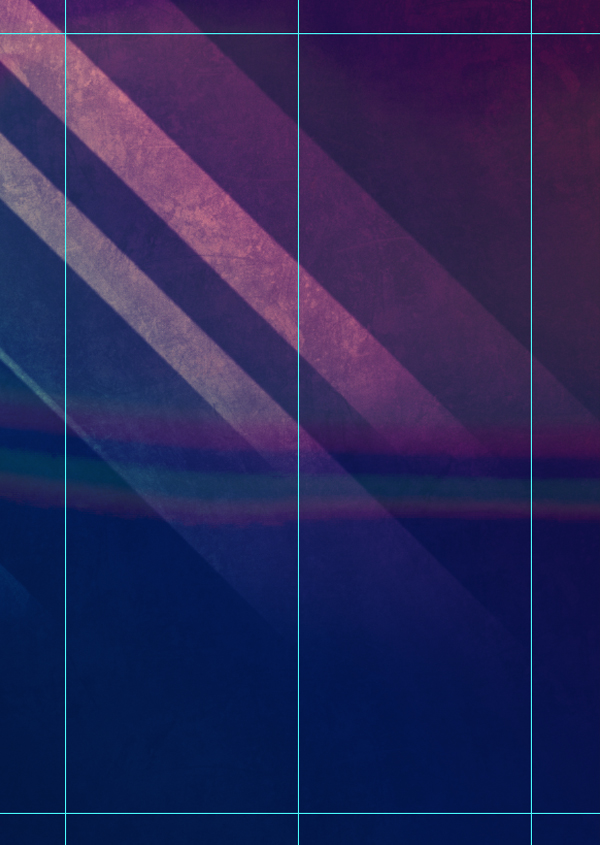
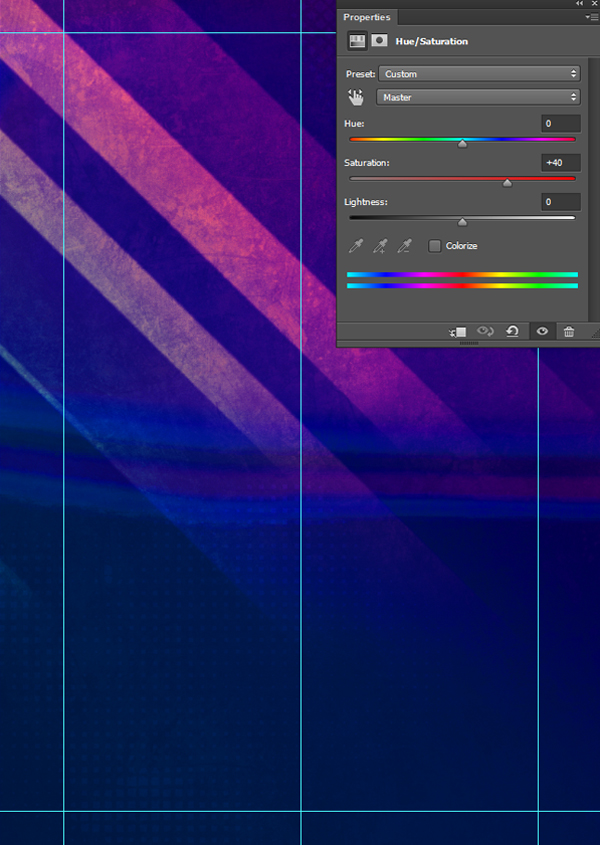
For our final background step, add a Hue/Saturation adjustment layer on the top with the Saturation set at +40. This will give our poster a louder, more vibrant look.
Step 4:
Now let’s start on the main graphic! First, from the freebie pack, place Offset’s HEXAGONAL_MASK.png. It should automatically scale to fit the size of your poster.
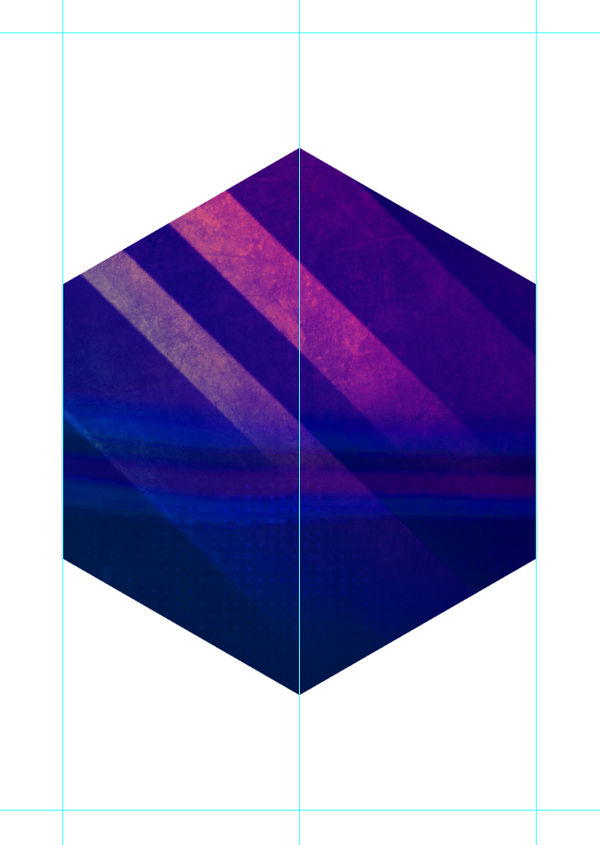
Set the blending mode to “Overlay” and the opacity to 40%.
Now, from the freebie pack, place Offset’s TRI_03.png and set the blending mode to “Overlay.”
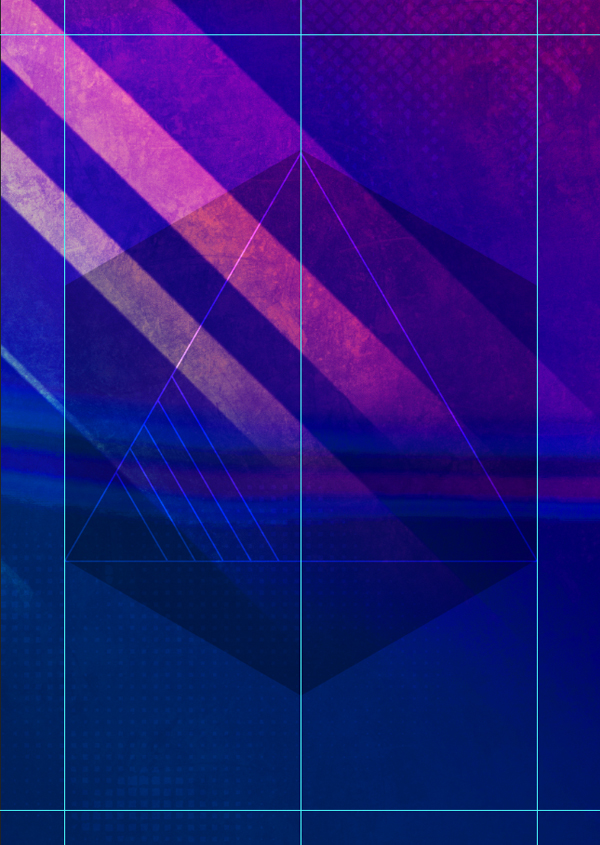
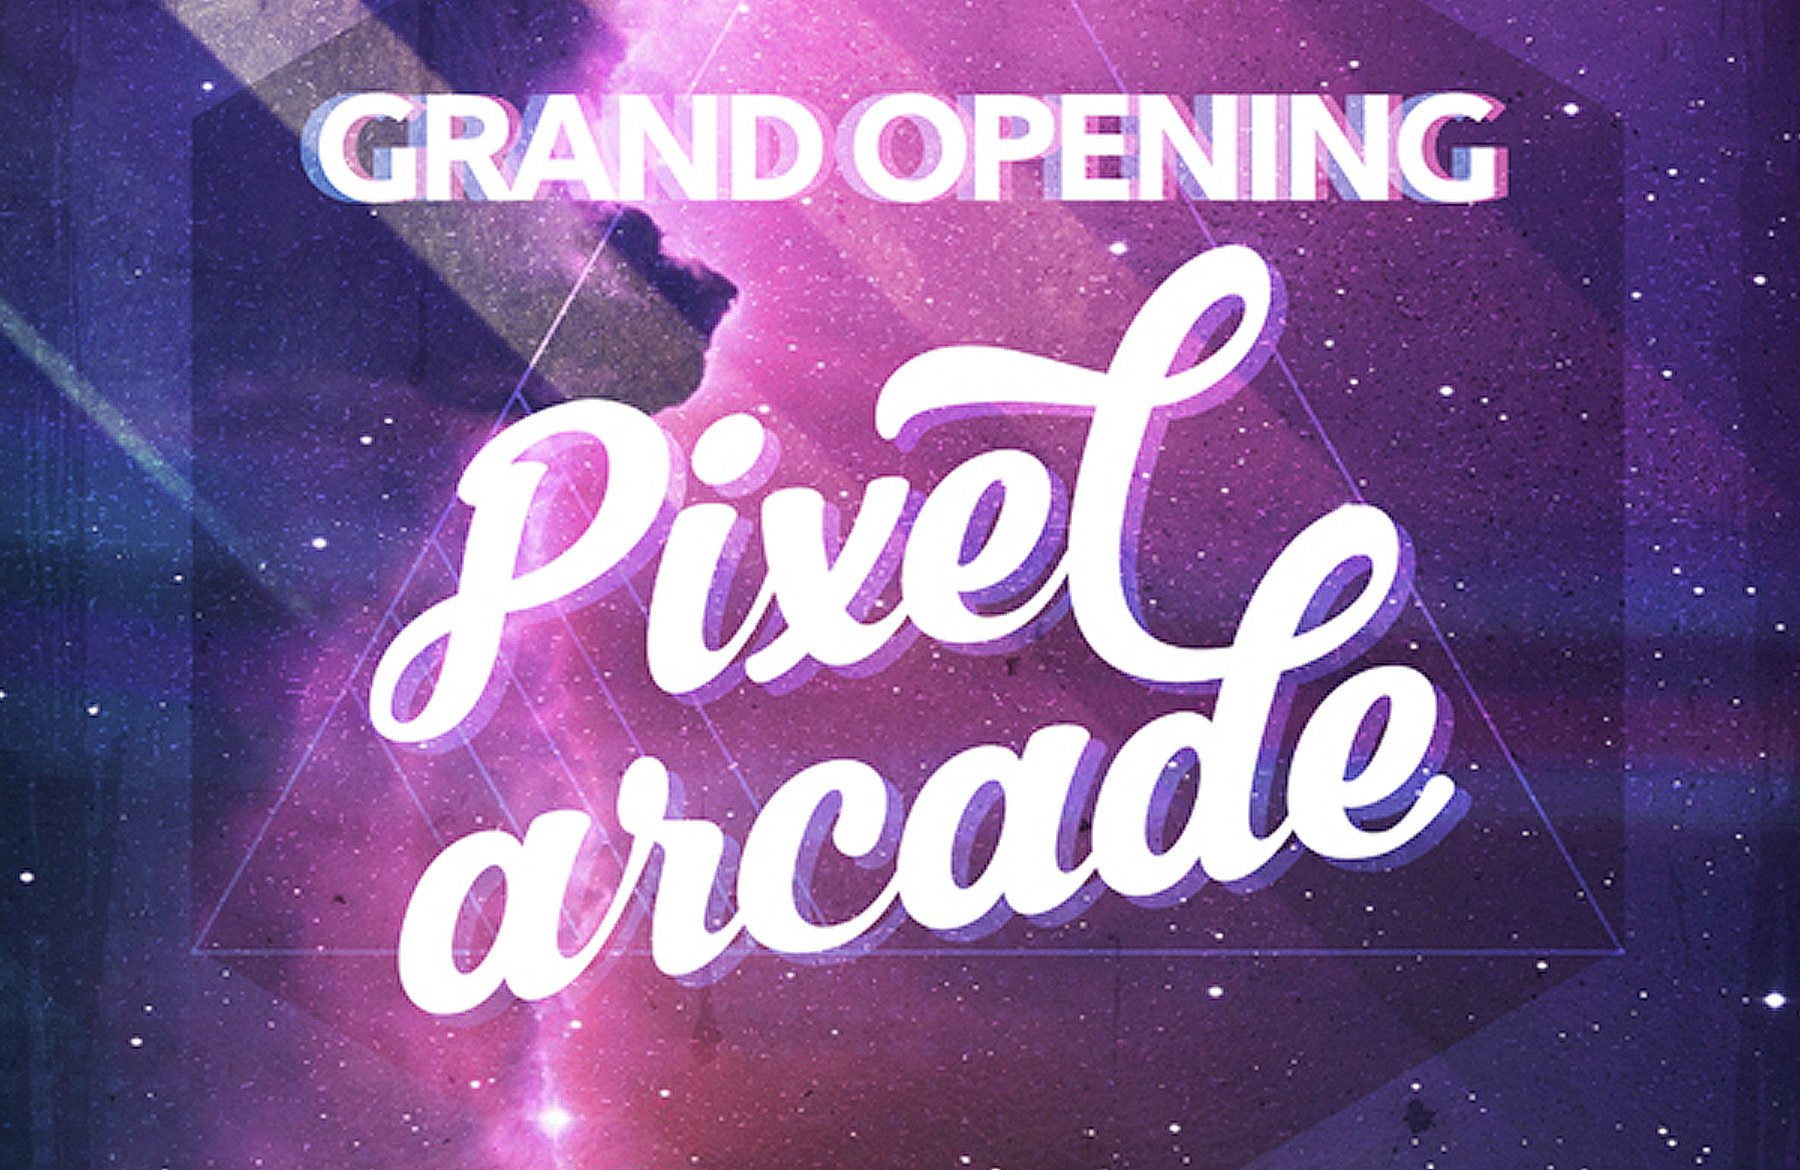
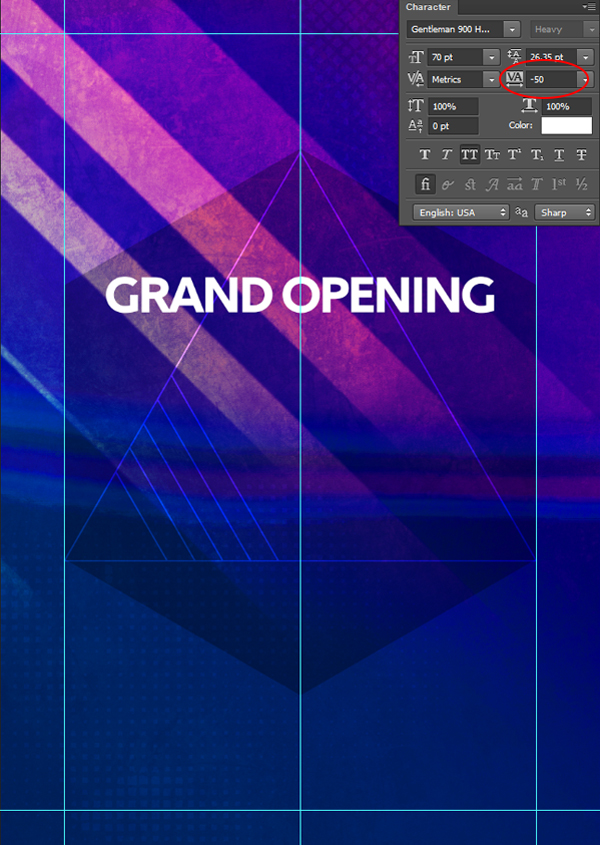
Next, take the type tool and draw a box inside the vertical lines at the top portion of the hexagon. In white 70 pt Gentlemen 900 Heavy type “GRAND OPENING.” Open up the character panel by navigating to Window > Character. Now, we are going to kern the letters together using the tracking tool. In the box shown below, choose -50 from the drop down menu. The resulting text will be closer together, which is going to make our type more readable after we apply our next effect.
Duplicate the “GRAND OPENING” layer by either using the layer panel drop down menu or by alt clicking the layer and dragging a new one above. With the lower text layer selected, change the text color to R: 236, G: 34, B: 93 and change the blending mode to “Screen.” Then, shift the layer to the right similar to the following example:
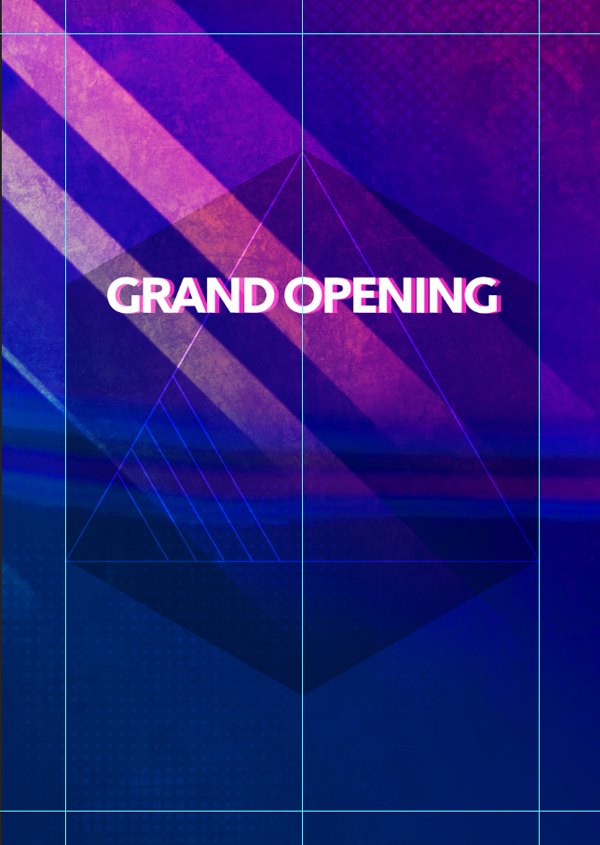
Duplicate the layer one more time, this time changing the text color to R: 14, G: 90, B: 243 and changing the blending mode to “Screen.” This time, shift the layer to the right of the type. The result will be vibrating type that imitates the wonderfully bad 3d effects of the 80’s!
Step 5:
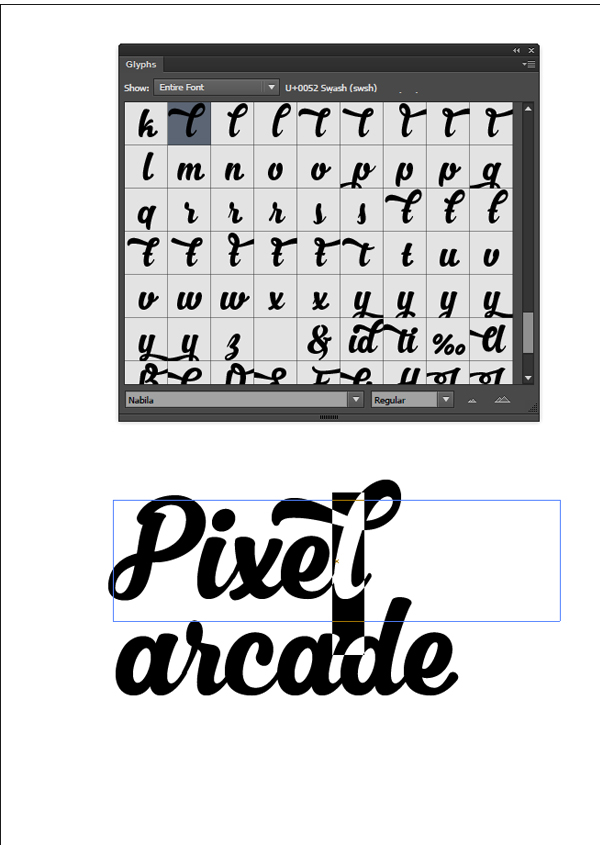
To create main title of the arcade we will be using Illustrator to do some type customization. Open up a new A3 illustrator file. Then, in 150 pt Nabila on two separate lines, type “Pixel” and “arcade.” Keep the “a” lowercase on “arcade” so that the words stack together nicely, like so:

Open up the Glyphs panel in Illustrator by navigating to Type > Glyphs. As you can see, Nabila has some incredible glyph combinations to choose from! Normally I would say choose your favorite, but in this case we are going to pick two specific glyphs so that we can connect the two words. Change the “l” in “Pixel” to the following glyph by highlighting it and clicking the choice below in the glyphs panel:
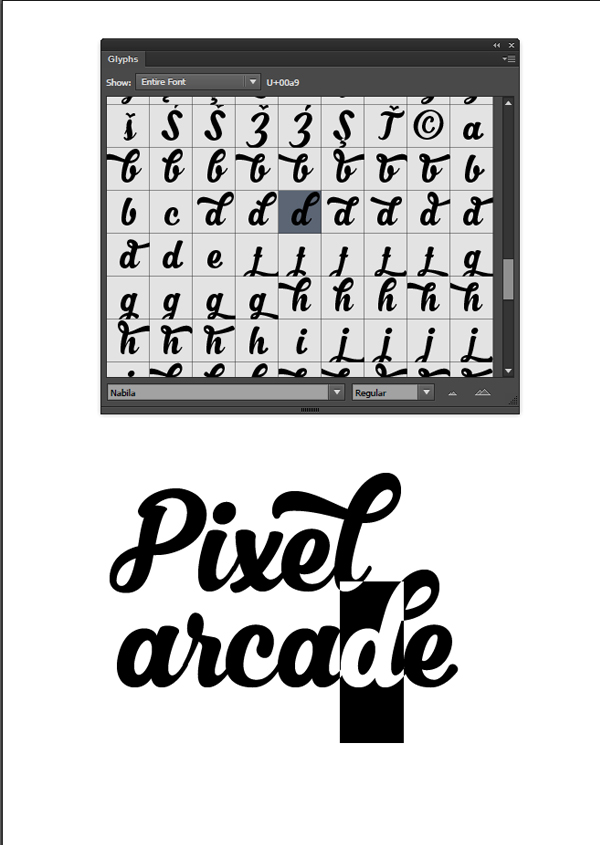
Now, change the “d” in “arcade” to the following:
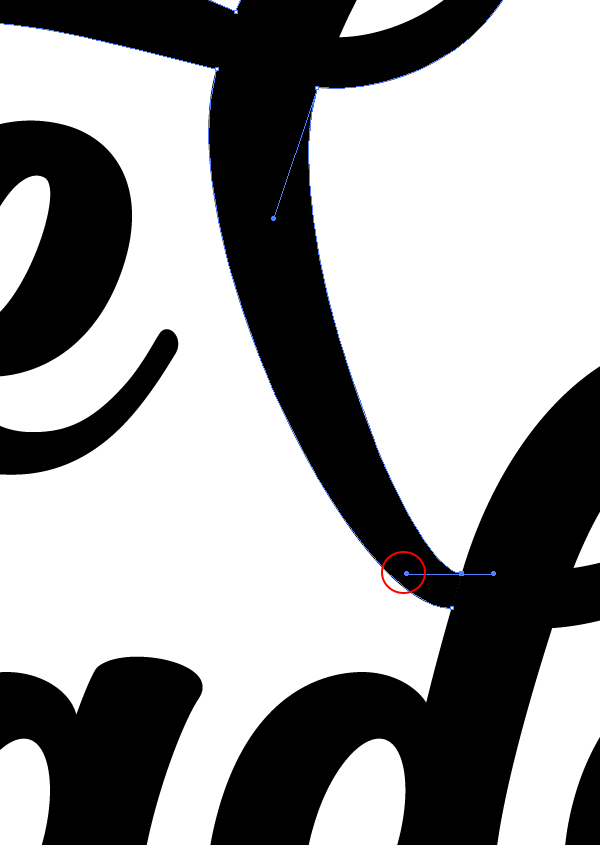
Next, using some quick alteration to the type, we are going to create a connecting element to tie our two words together. First, select the type and navigate to Type > Create Outlines. Now our type will become a vector object. Next, zoom in on the “l” in “pixel.” Select the type and take a look at the current anchor points in the type. Specifically, take note of the two at the very end of the “l.”
Using the direct selection tool (which can be accessed by pressing “A”) select the two points highlighted above and delete them.
Now, using the same tool, select the anchor point highlighted below and drag it to the “d” so that it hits on approximately the same line as the ending swash of the “d” in “arcade.”
Repeat this process with the anchor point shown below:


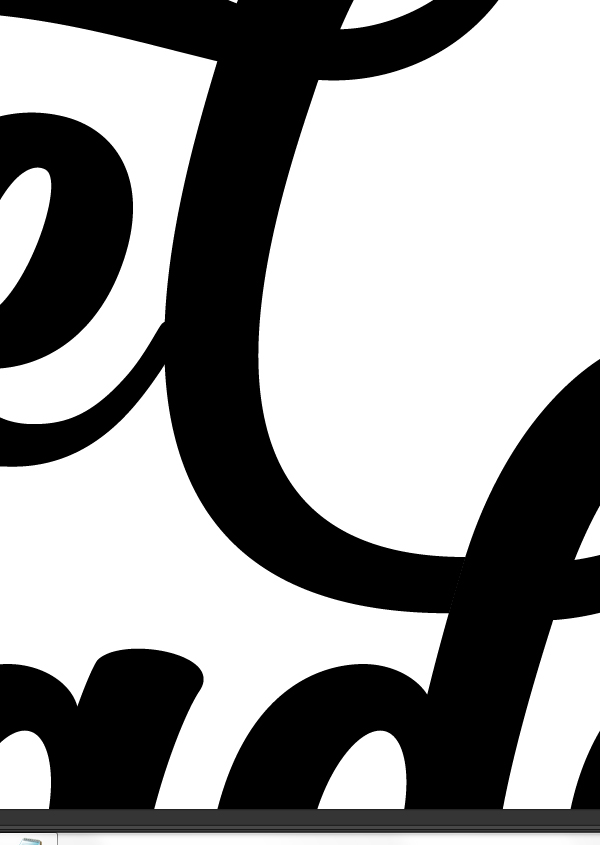
Now we have our “l” connected, but it has a really awkward shape to it. To fix this issue, click on the higher of the two anchor points with the direct selection tool. You will see two handles protrude from the anchor point. You can drag these handles to play with the curve of the line. We want to select the left handle bar and drag it to the left until the curve is more similar to what the “l” shape had originally been.

Repeat this process for the lower point. After adjusting the curve you may have to move the points so that they line up correctly with the swash at the end of the “d.” Your resulting words should have a new swash connecting the two like so:
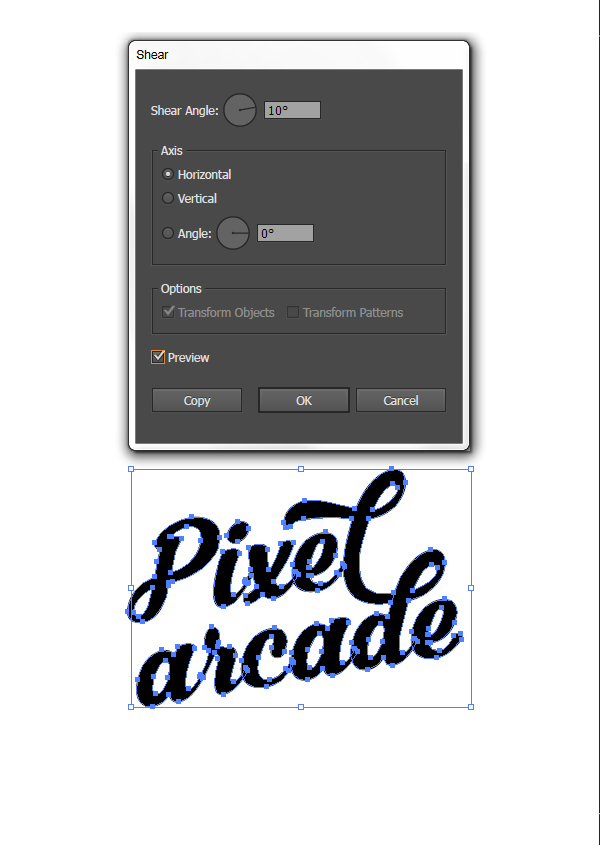
Next we are going to rotate and shear the type. With the entire name selected, navigate to Object > Transform > Rotate and rotate the type 10 degrees.
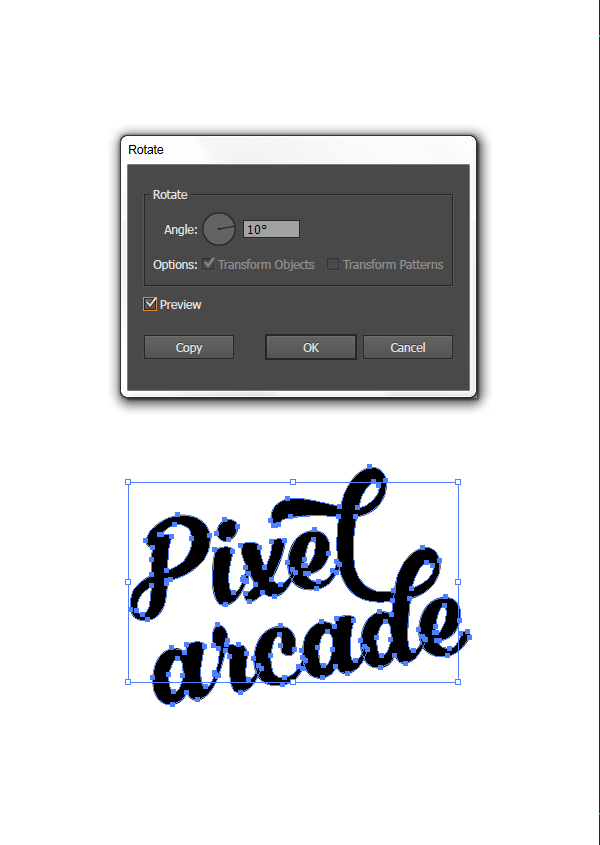
Then, with the name still selected, navigate to Object > Transform > Shear and shear the type at a 10 degree angle to match the rotation. Now, our type is angled but still upright.
Change the text color to white and then copy and paste the type into your arcade poster PSD file. Move the type slightly below center so that it fits in the space underneath “GRAND OPENING.”
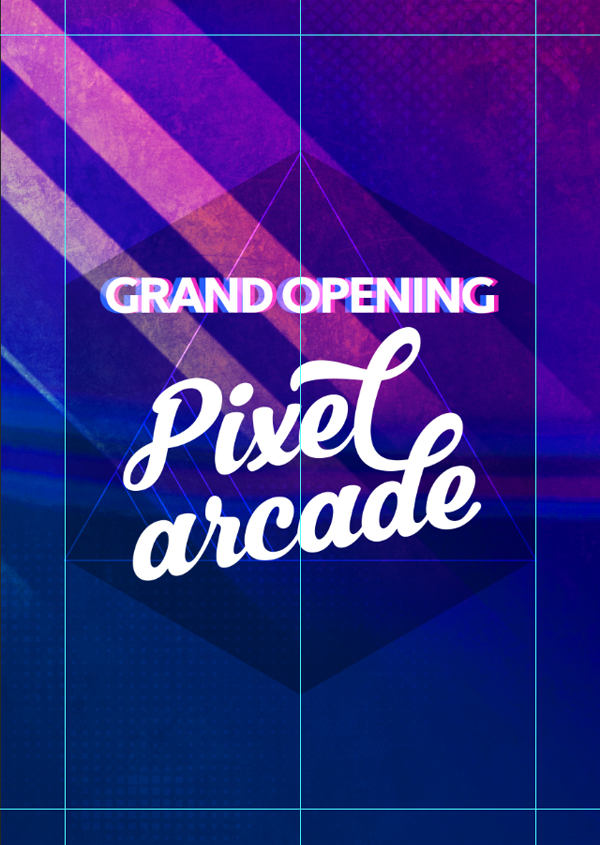
For our last title name step, duplicate the layer and move it slightly to the right and down. Then, apply the blending mode “Overlay.”

Step 6:
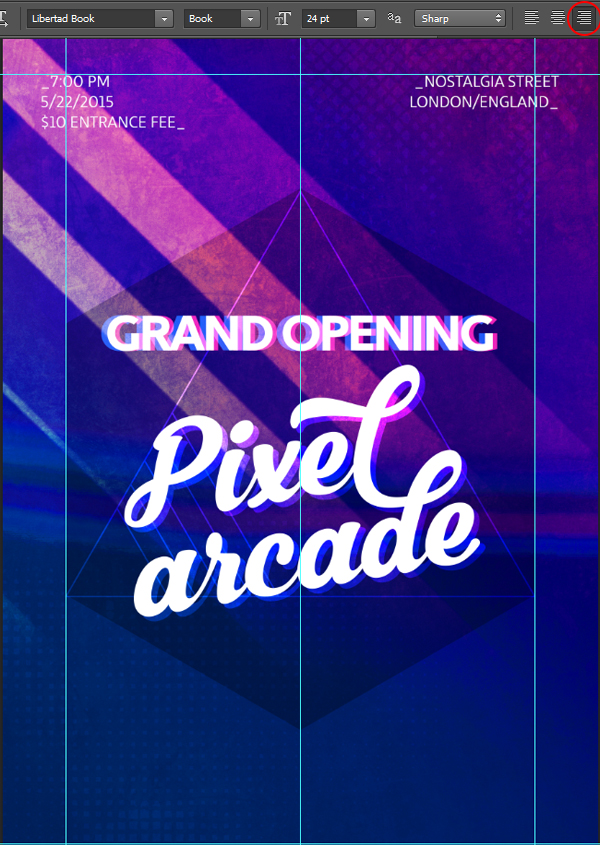
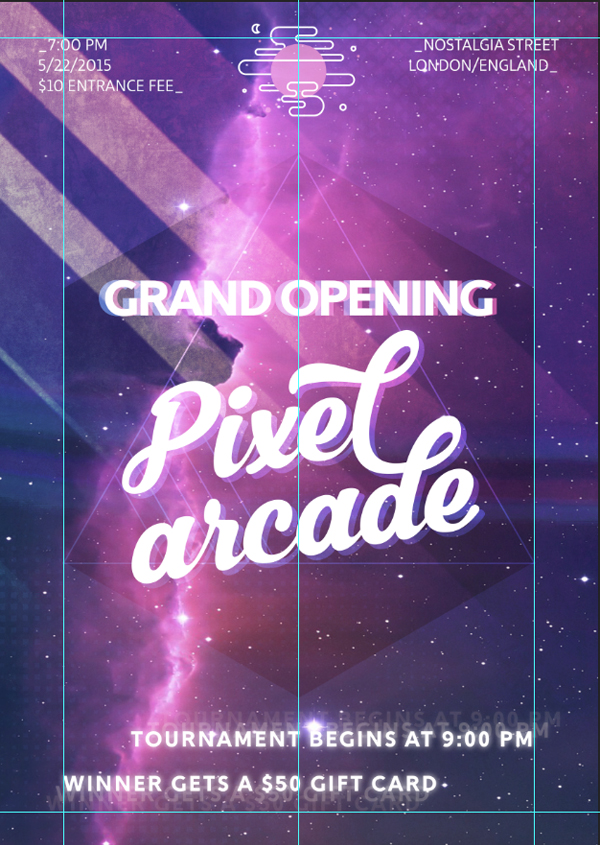
Now we are going to add our other type elements to the poster. In Liberated 24 pt. Book white, type “_7:00 PM (enter) 5/22/2015 (enter) $10 ENTRANCE FEE_” and place it so that the top of the type is aligned with our upper horizontal guide. Move the type just to the left of the vertical guide that we used for the hexagon.
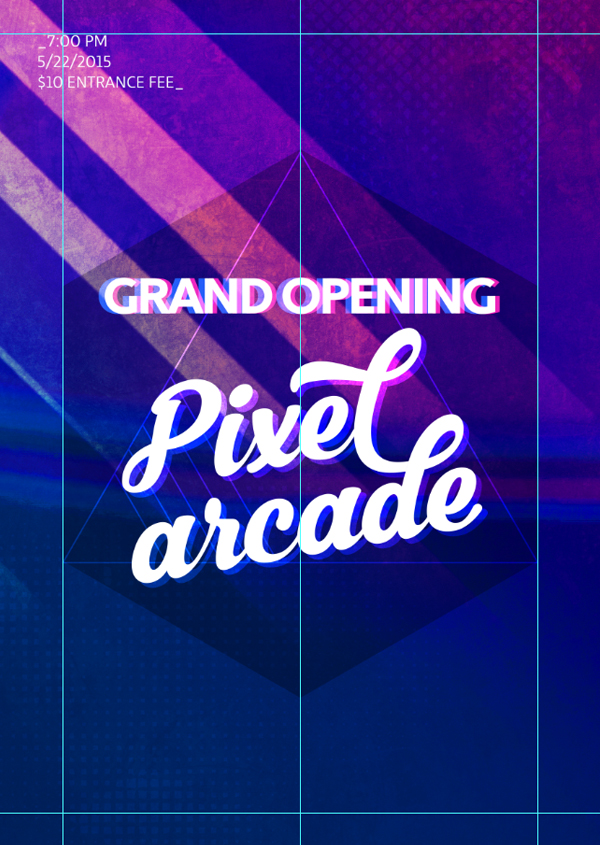
With the same font settings, type “_NOSTALGIA STREET (enter) LONDON/ENGLAND_” and set your type to right aligned. Place it so that it touches the top horizontal bar and sits just outside of the right vertical guide.
At the bottom we are going to add details regarding an arcade tournament. In Gentleman 900 Heavy 30pt white, type “TOURNAMENT BEGINS AT 9:00 PM” in all capital letters. Then, in the character panel, track the type out to 100. Place the type so that it aligns with the right vertical guide and sits just beneath our hexagon, like so:
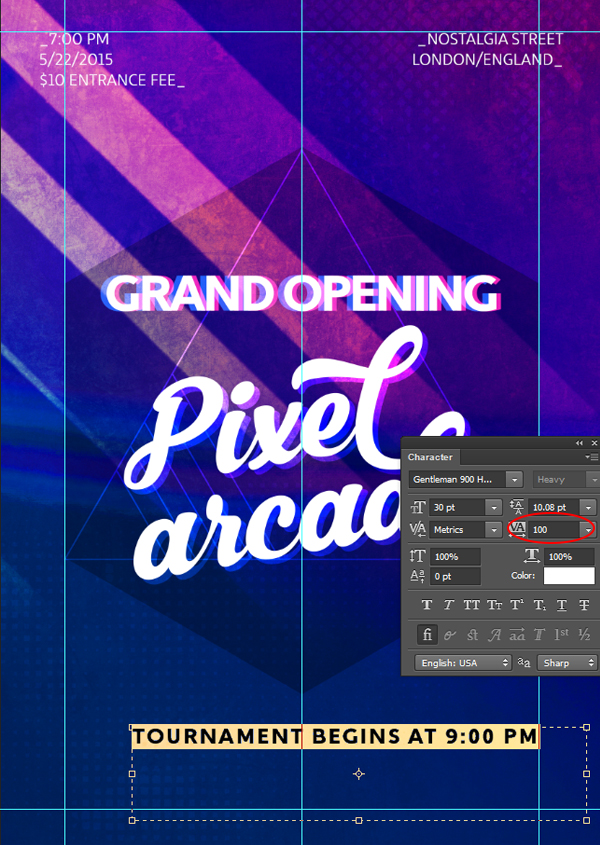
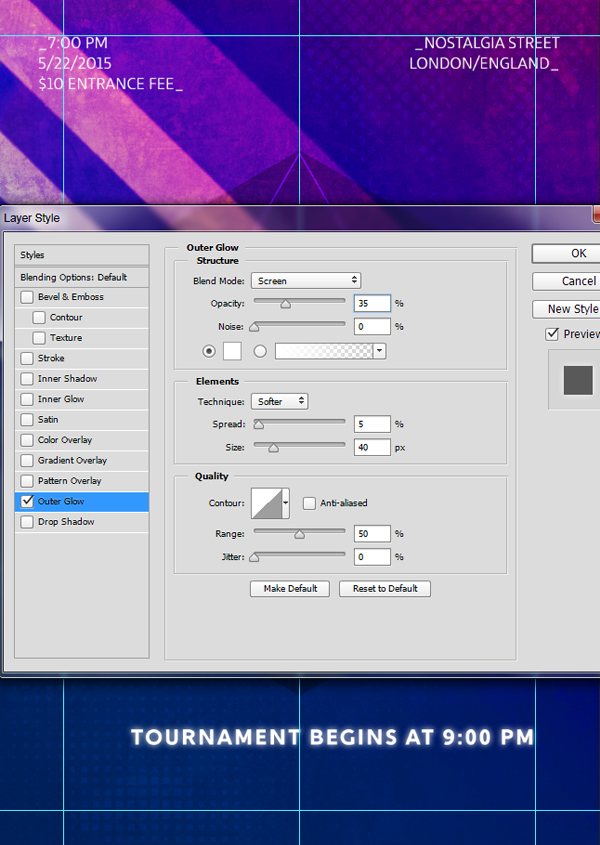
To make our type fit the theme of the era, click the “fx” button with the tournament type layer selected and choose “Outer Glow.” I used the following settings to give my type a glowing effect:
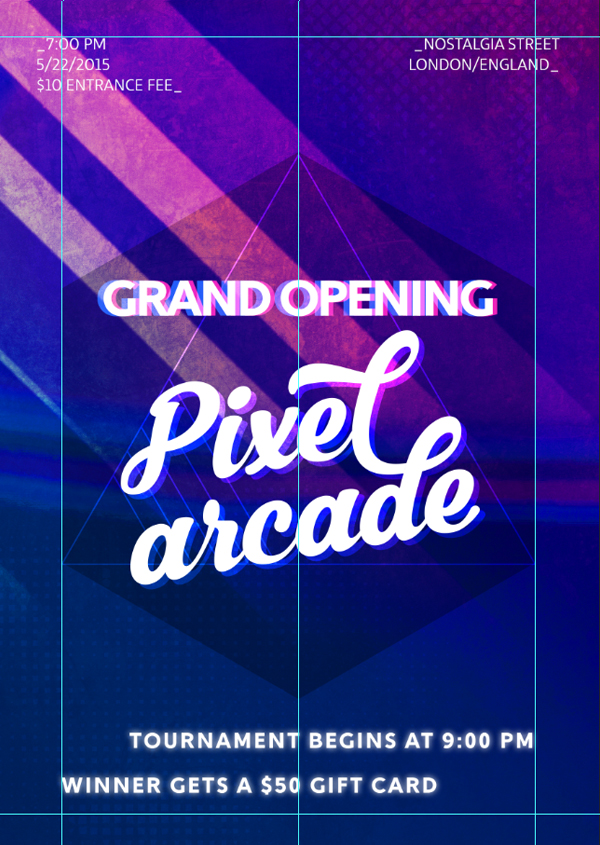
Use the same settings and FX using the type “WINNER GETS A $50 GIFT CARD” and align it so that it sits against the left vertical guide just below the “TOURNAMENT” type.
Now we are going to make our type look like it is zooming in at a diagonal angle. Duplicate the Tournament layer and move it up and to the right of the type so that it still overlaps with a few of the letters. Then, set the opacity to 15.
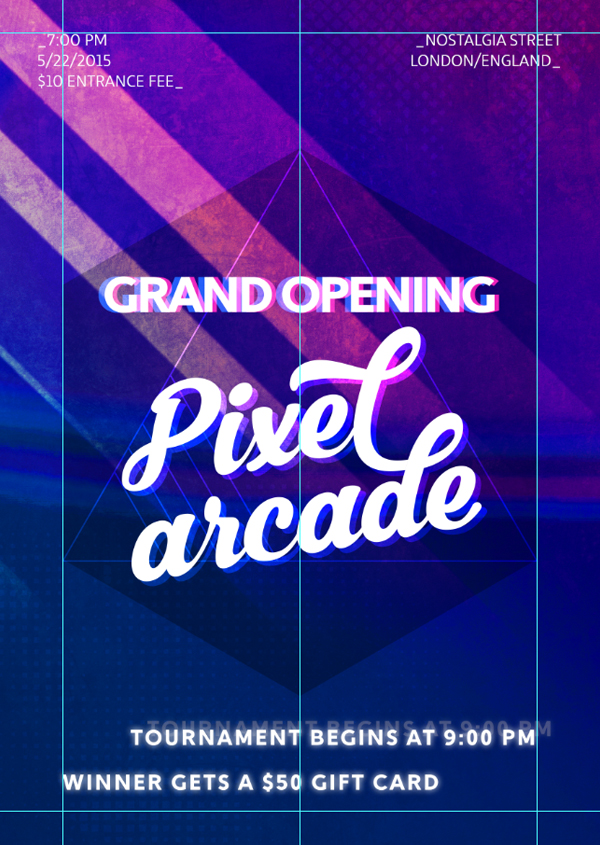
Duplicate it one more time, this time so that the type overlaps the faint duplicate. Set this opacity to 5%.
Now, repeat this process with the “WINNER” line, but this time move the type to the lower left so that it appears to zoom in from the bottom left corner.
Step 7:
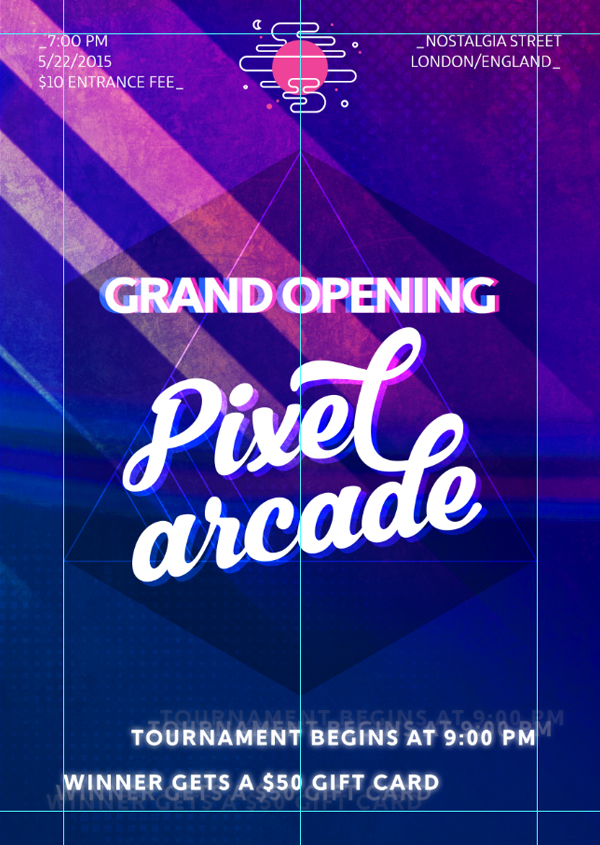
Next, we are going to use a playful icon to create a logo for the arcade. From the freebie-vector file, we are going to be working with the following icon:
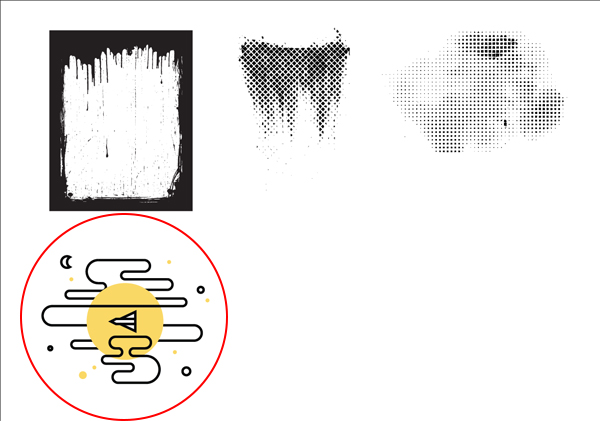
I chose this icon because I thought it made a nice reference to arcade games (since so many are space related) but if you have access to the bundle there are TONS of cool ones to choose from if you would like to change it up a bit.
In illustrator, select the icon and outline the stroke by navigating to Object > Path > Outline Stroke. Ungroup the items (multiple times) by hitting ctrl/cmd + shift + g. Then, select and delete all of the rocket ship pieces to simplify the icon.

We want to change the color of the icon but it is hard to see white on the white page, so I dragged my icon outside of the Artboard. Change the colors so that everything black becomes white and the sun and various other stars are R: 255, G: 61, B:159.

Copy the icon into the PSD file and scale up by 250%. Place the icon so that it is centered between the time and location at the top of the screen.
Step 8:
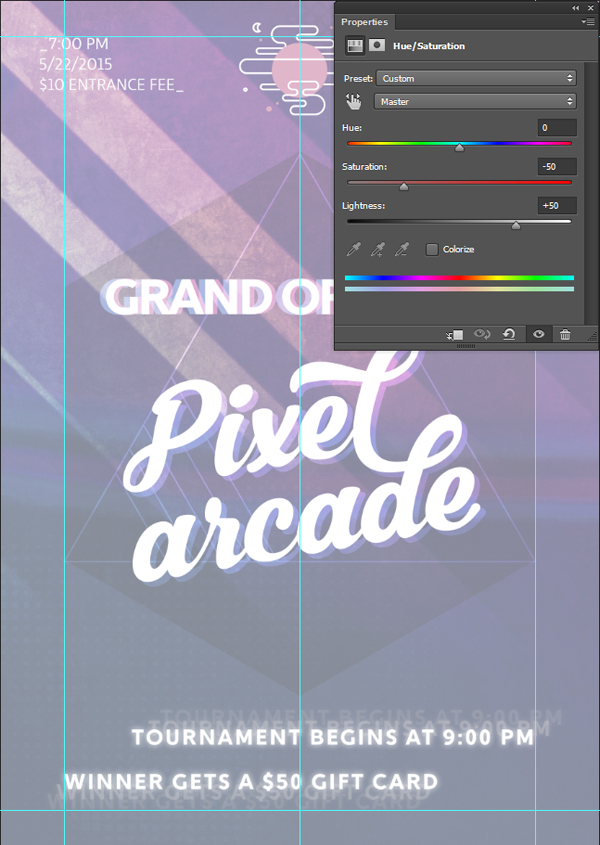
Now it’s time to really step up our 80’s game by adding the final texture layers. Before we add our first image to layer (which is incredibly bright with lots of color), we need to pull back and lighten up our image so far. Create a Hue/Saturation adjustment layer above all of our layers so far and set the Saturation at -50 and the Lightness at +50.
To add a flash of light and color to our poster, download this beautiful Nebula Photo from Pixabay. Place it on top of your other layers and scale each side individually so that it fits within the document.

Now set the layer blending mode to “Overlay.”
From the freebie-vectors file, choose the following element:
Paste it into the PSD as a smart object and scale to fit the page.
Set the blending mode to “Overlay” and change the opacity to 20%.

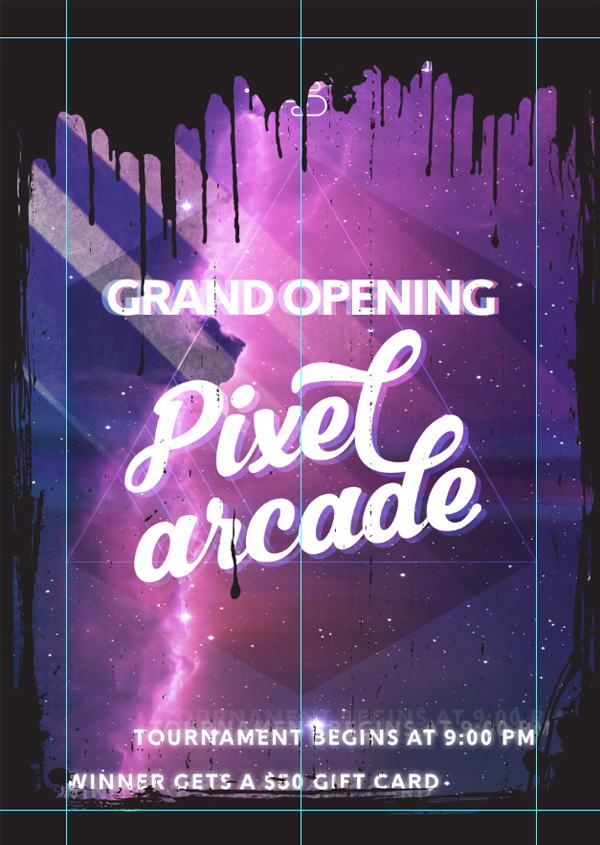
Now, courtesy of the wonderful Lost and Taken, download this Stained Paper Texture. Paste it into your file and scale to fit the page.
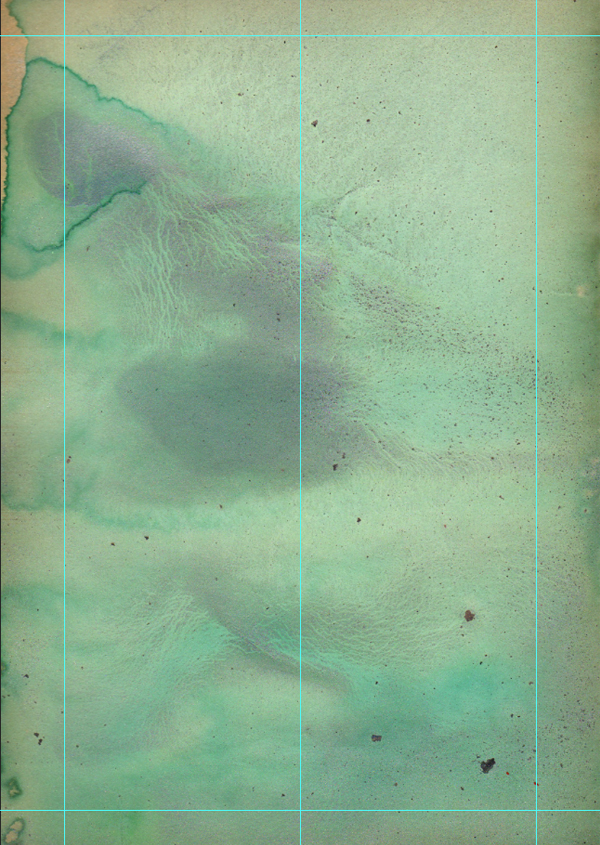
Change the blending mode to “Overlay” and set the opacity at 80%.
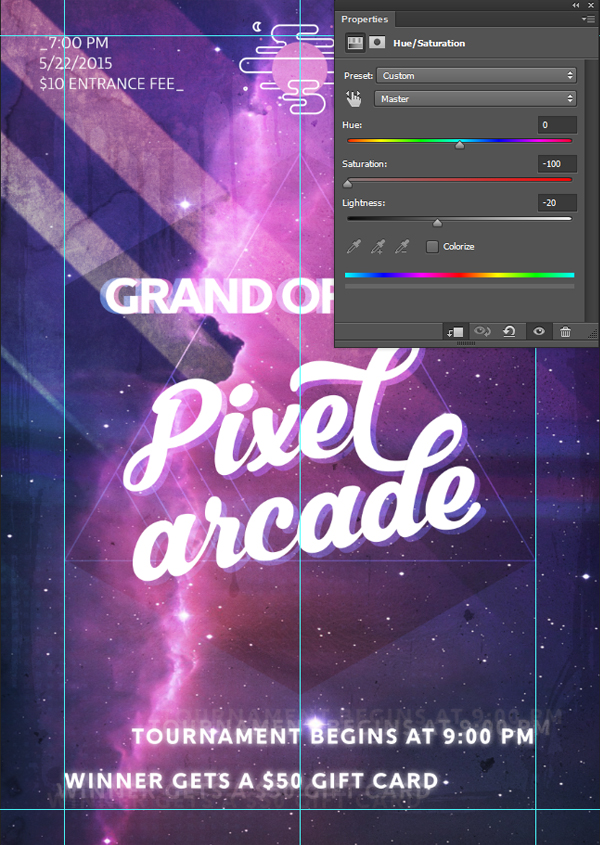
Because the paper has a green color to it, it has added a strange green tint to our poster. To fix this, create a Hue/Saturation adjustment layer with the Saturation at -100 and Lightness at -20 and clip it to the hand stained paper layer.
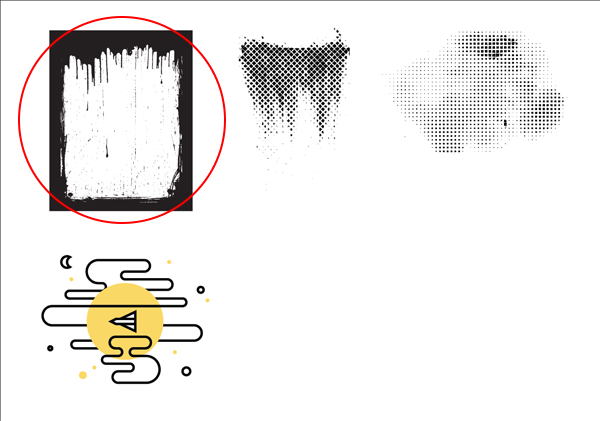
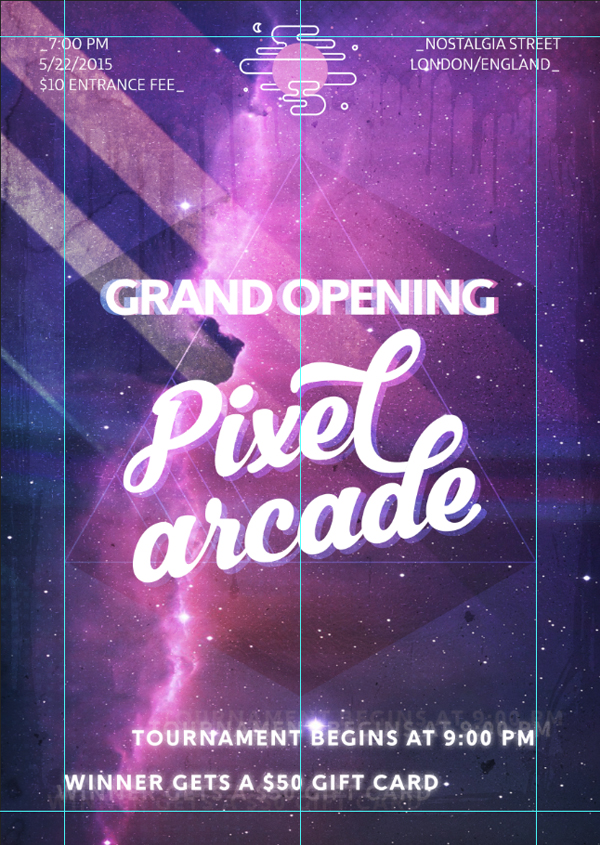
Finally, grab GRIT.png from the freebie folder and place it on the top of the image. Set the blending mode to “Overlay” and the opacity to 75%. This adds a bit of grain to our poster.
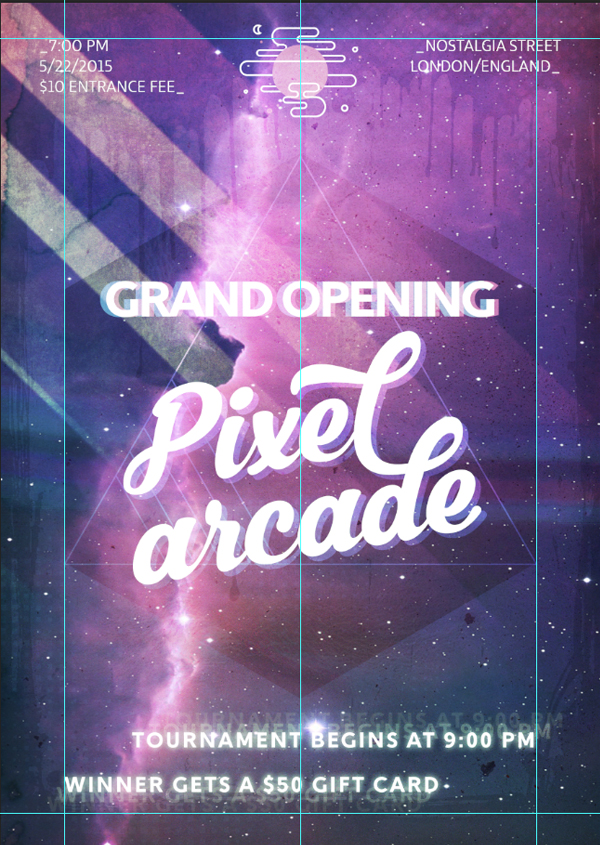
And we’re done!
I hope you enjoyed completing this tutorial with me! I had a ton of fun revisiting the lost era of bold, bright and in your face design from the 80’s, and we barely scratched the surface of this expansive bundle!
Remember to share your designs on the Facebook page too, as we love being inspired by the way you make these tutorials your own.
Hopefully this tutorial is a great example of how you can mix and match unexpected elements of your bundle to create something fun and exciting. This incredible design resource is available for 97% off this week; Grab your bundle now while it’s still available!
The Modern, Creative Design Bundle (1000s of Best-Selling Resources)
That was a really cool tutorial! Had a great time and learnt a bunch of cool tricks! Thanks guys!
Hey Julie,
Thanks so much for your comment, it’s great news that you enjoyed this one!
We are also really happy that you picked up some new tips too and we hope that they come in super handy :)
That was an awesome tutorial! :) I love spacey-stuff! Turned my attempt into a poster for an imaginary concert: https://www.pinterest.com/pin/292804413250325800/
Hey Dominique,
Thanks so much for sharing your piece with us- awesome job! I love spacey- stuff myself so this tutorial was right up my street :).
I would definitely part with my €10 for that space age gig!
These tutorials are amazing! Are you all aware of this Photoshop plugin GuideGuide? It is an amazing little (free) plugin that I found discovered a while back and it makes creating guides for your Photoshop documents so much easier! I have included the link if anyone is interested. I figured Tom might be interested in this if he hasn’t seen it already!
http://guideguide.me/
If you have Photoshop CC, there’s a feature called “Guide layout.” It essentially does what Guide Guide does, although with a slightly different interface.
Thanks Simon! I have been using CC for a while and had not noticed this in the updates! :D I guess I can use them both in tandem!
Totally! And GuideGuide, if I recall properly, allows you to store presets.
Hey Elijah,
Thanks for the comment and for the tip! I will definitely pass it on to Tom in case he isnt aware of it!
We are so pleased to hear you are loving the tutorials- I will pass your feedback onto Pam and Simon :)
Awesome tutorial! Very fun.
Hey Delaney,
We are so pleased you enjoyed the tutorial! Pam did a great job on this one :).
Neat piece, Pam!
I totally agree with you Simon- its a cool tutorial!
Thanks so much Simon! Glad you liked it :)
My pleasure!