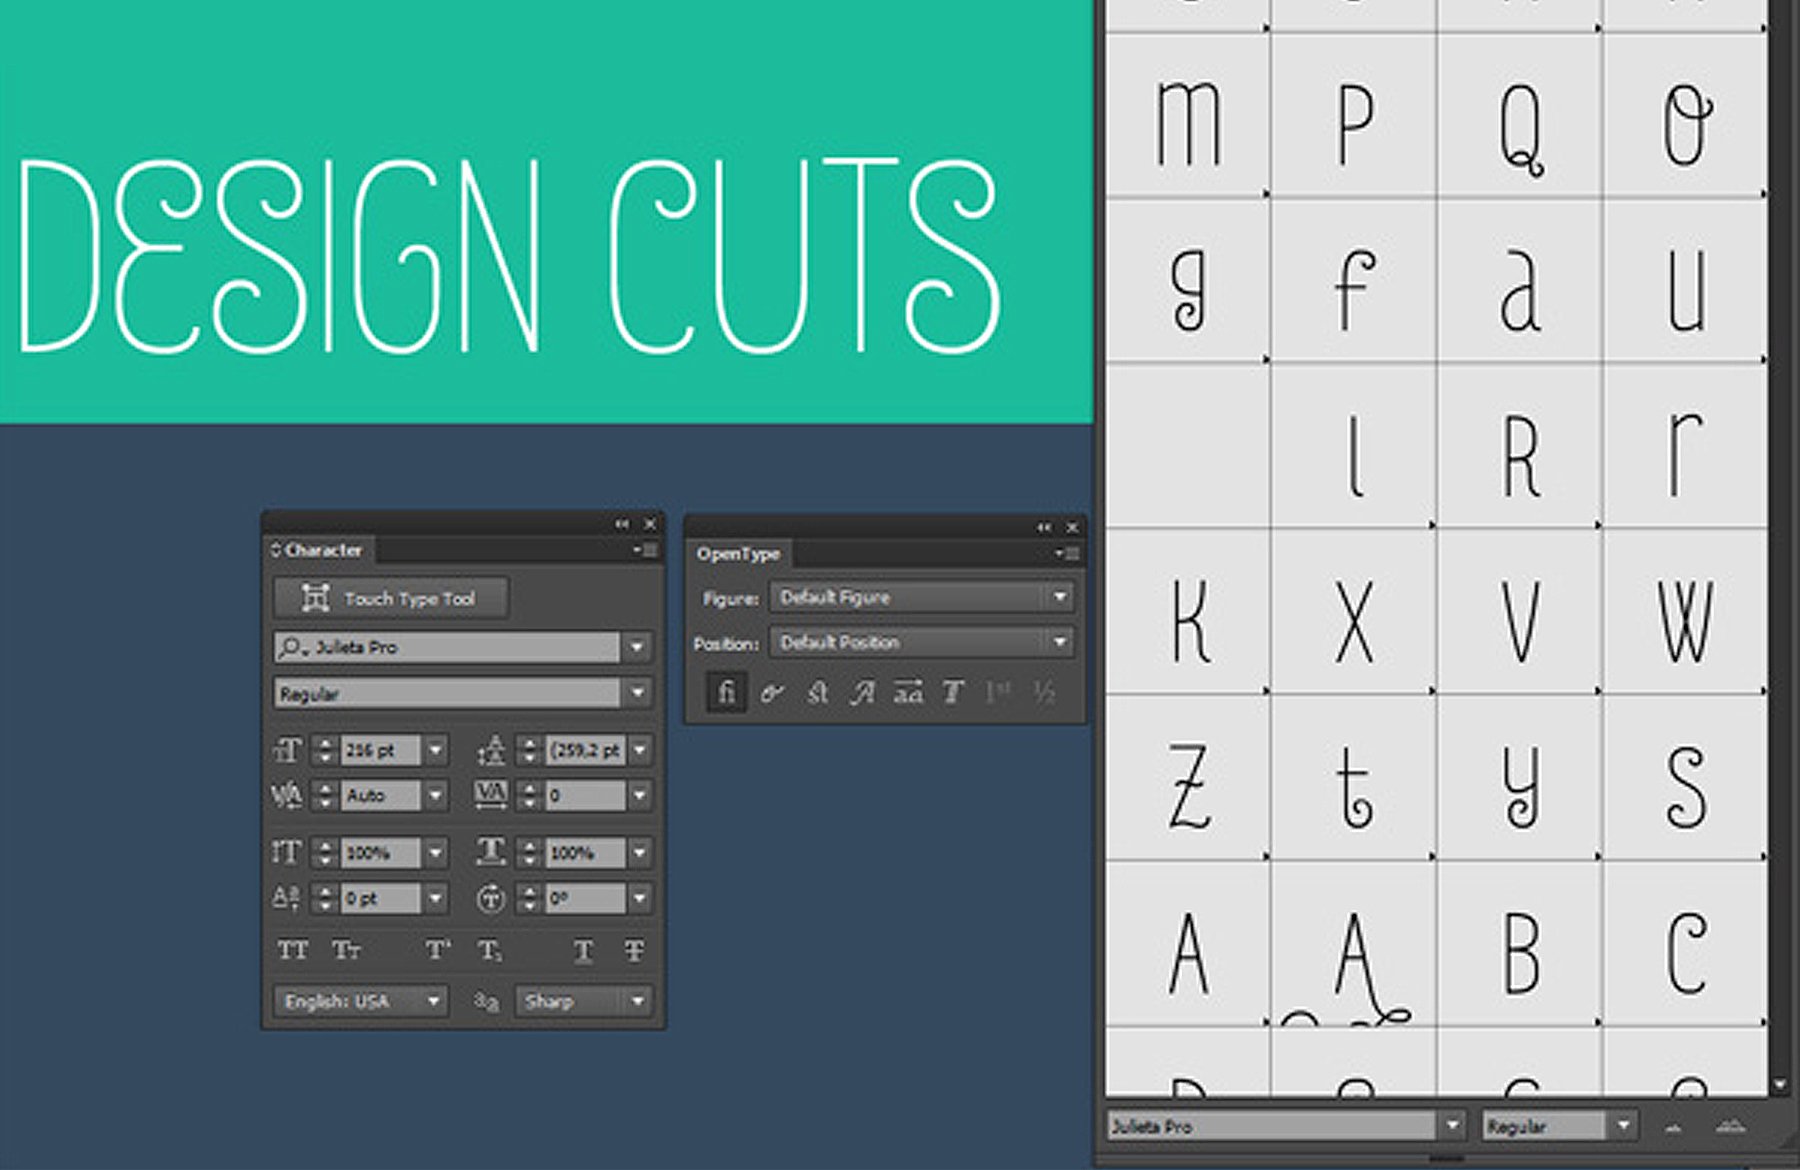
Hello Design Cutters! Today’s tutorial comes to us from Simon, one of the two partners and designers at Studio Ace of Spade. To Simon!
Hello all! I’m excited to share another tutorial with you today. The good peeps at Design Cuts have put the Monster Creative Font Bundle in my hands, and watched me run with it. Today’s tutorial is very comprehensive, but I hope that you’ll stick with it, as you should pick up plenty of excellent techniques.
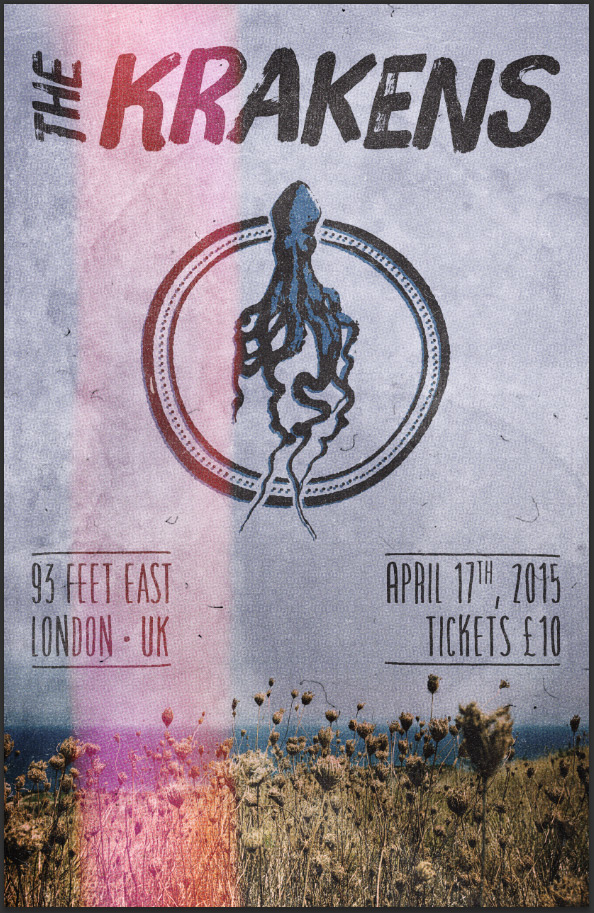
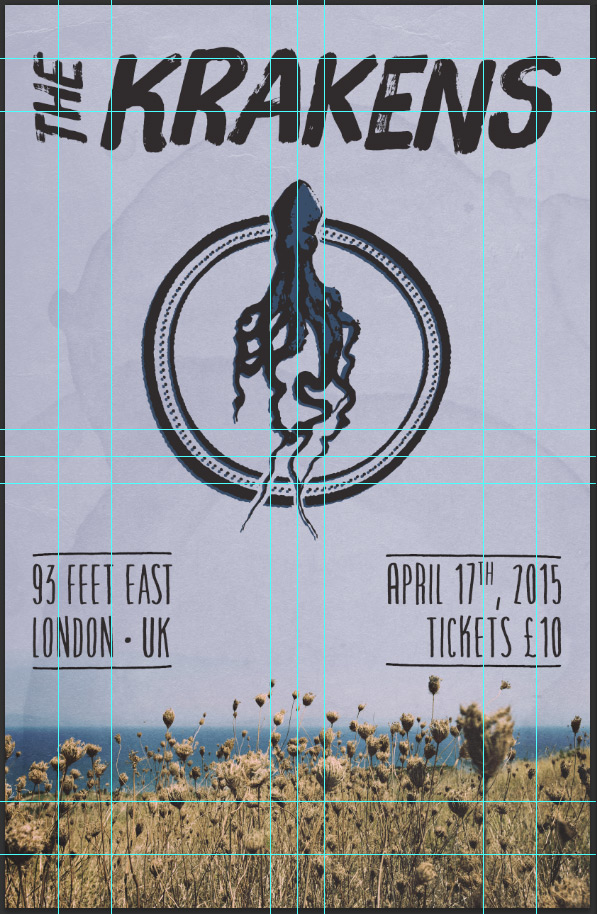
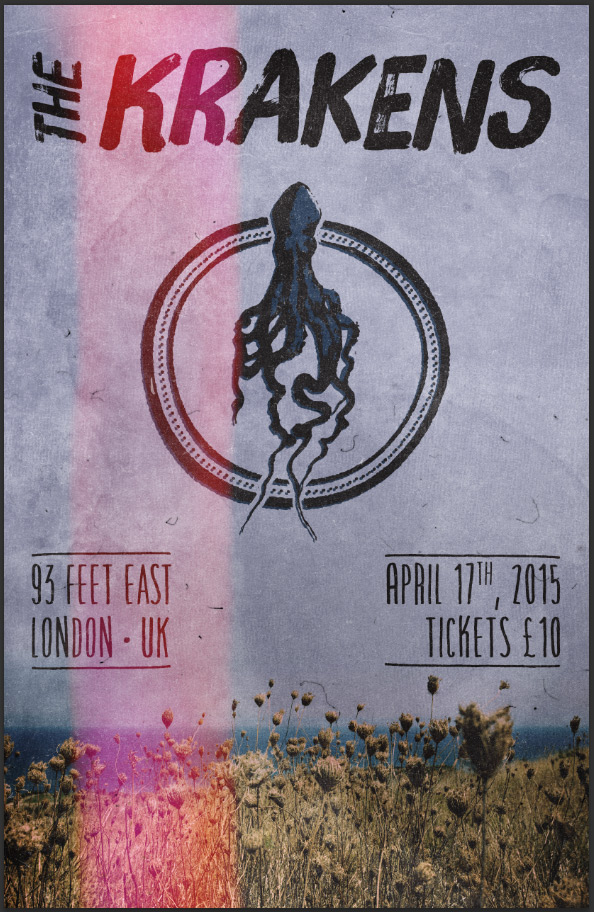
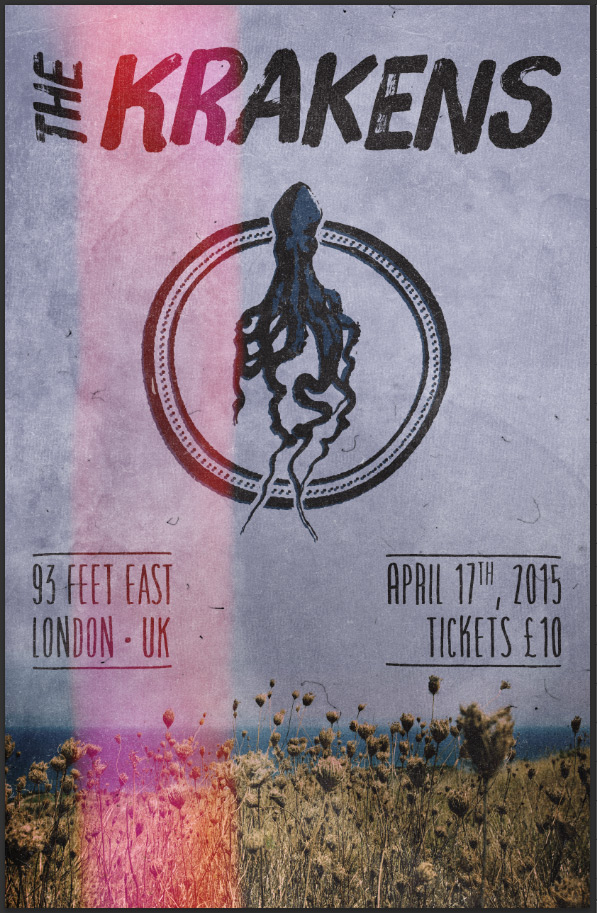
One of the things that I’m excited by now that spring is finally showing up, is concert season. So I felt it very fitting to use the amazing typefaces of the bundle to create a fake concert poster.
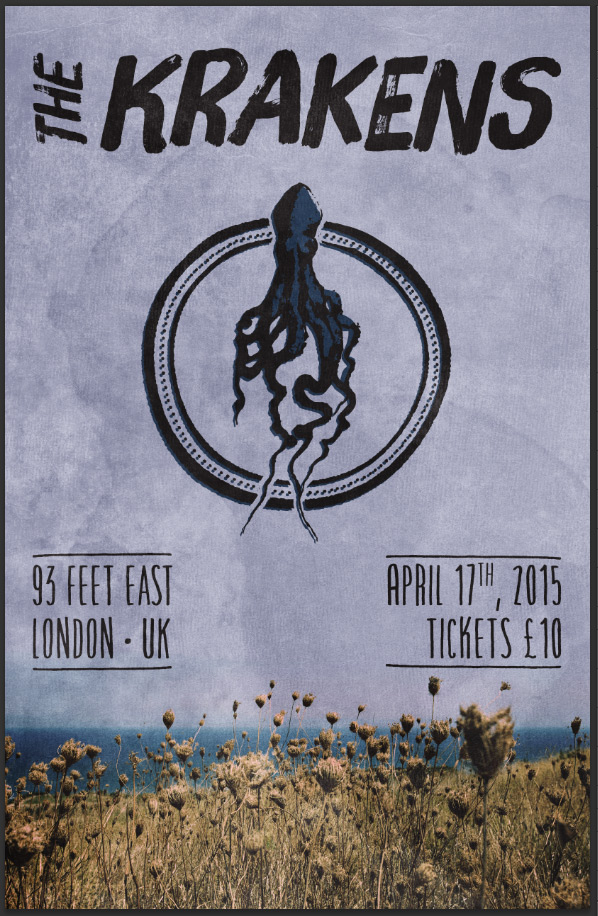
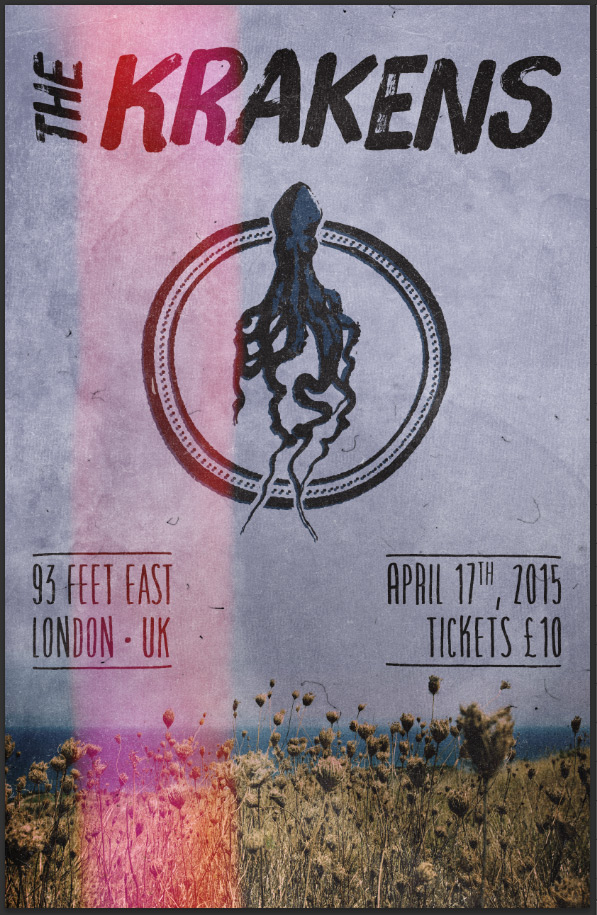
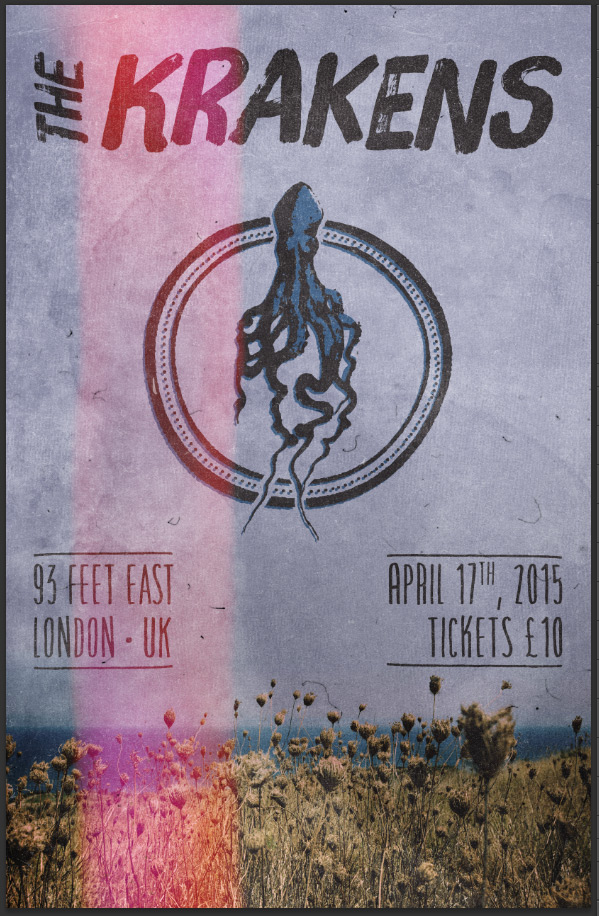
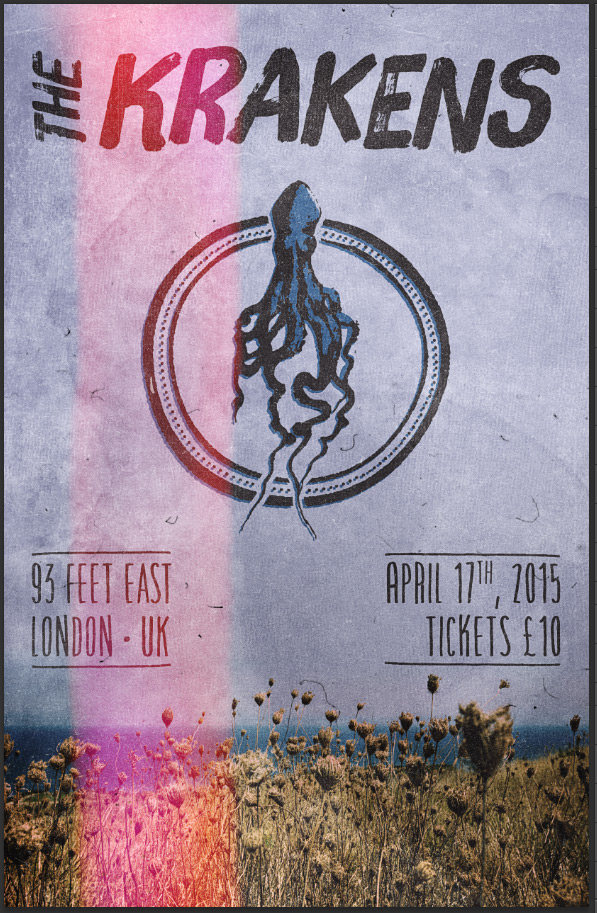
WHAT WE’RE CREATING:
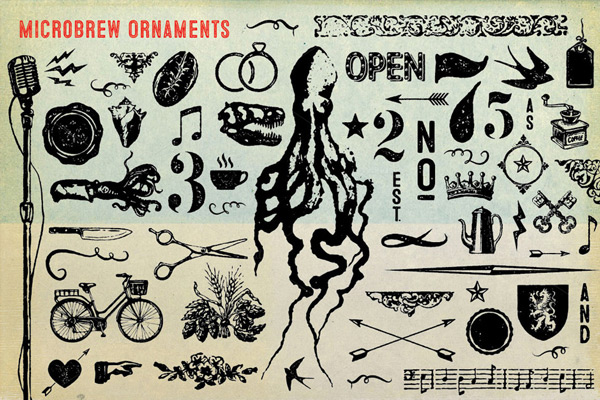
One image in particular that struck a chord was these specimens from Microbrew Ornament by Albatross Studio:
From there, I decided to invent the band The Krakens, and book them a gig at 93 Feet East, a popular London concert venue.
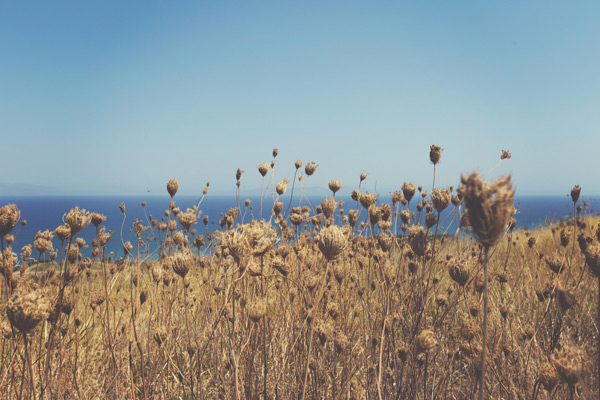
After a little bit of research, I found this amazing image on Unsplash. It’s by Jonas Nilsson Lee, and depicts a field with the sea in the background. Fitting for the krakens to be unleashed.
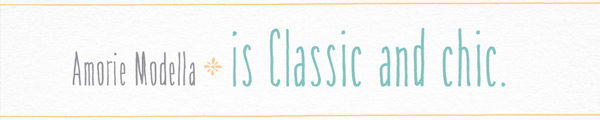
From there, I wanted to give the poster a grunge vibe, but without being overwhelming. So, looking through the typefaces in the deal, Amorie Modella and BrushUp just jumped at me.

Sprinkle a few additional resources on top, and we’ll make ourselves a cool poster. Let’s get started, shall we?
STEP 1: DOCUMENT SETUP
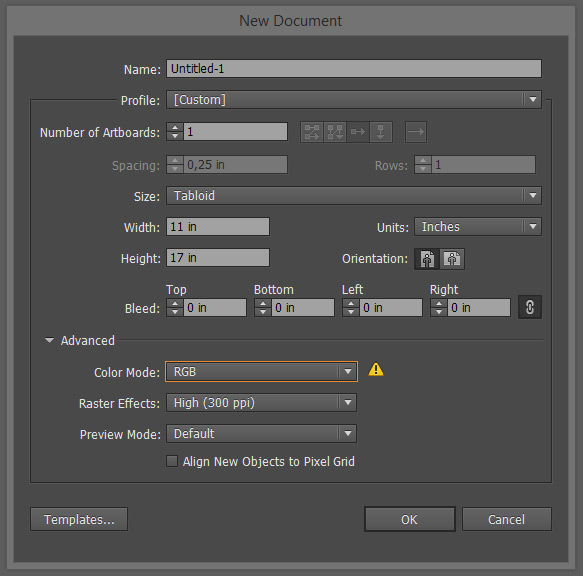
I’m working with a 11″x17″ @300 dpi canvas, in Photoshop CC (but any version of Photoshop past CS3 should do).
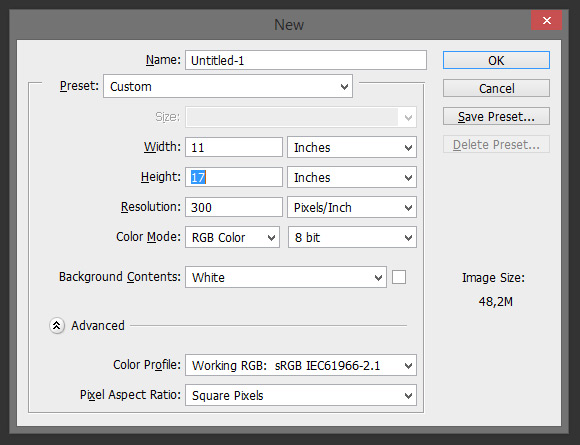
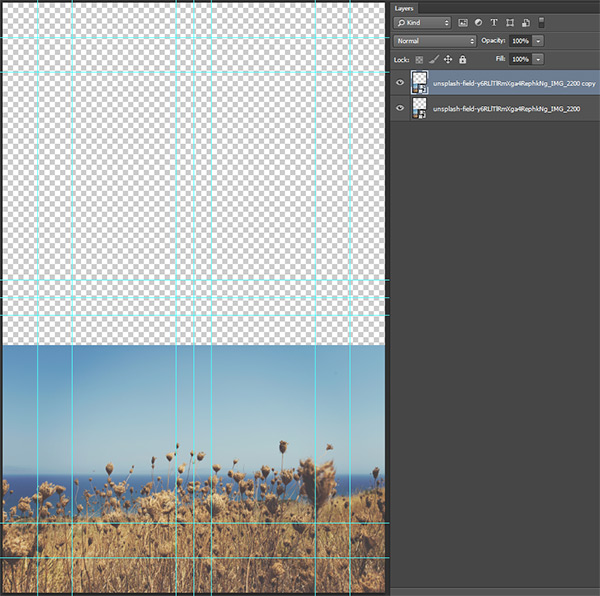
Next, it’s time to add a few guides. I have vertical guides at 1″, 2″, 5″, 5.5″, 6″, 9″, and 10″, and horizontal guides at 1″, 2″, 8″, 8.5″, 9″, 15″, and 16″.

STEP 2: BUILDING THE BACKGROUND
To start, we need to build the background. We’ll place the picture, we’ll sharpen it, and do some post-processing to it.
Placing and sharpening the image
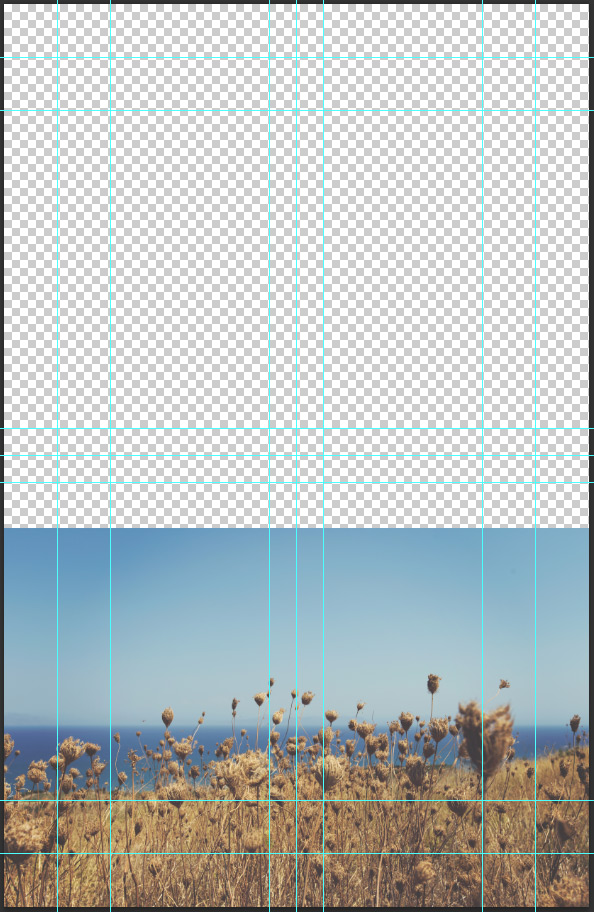
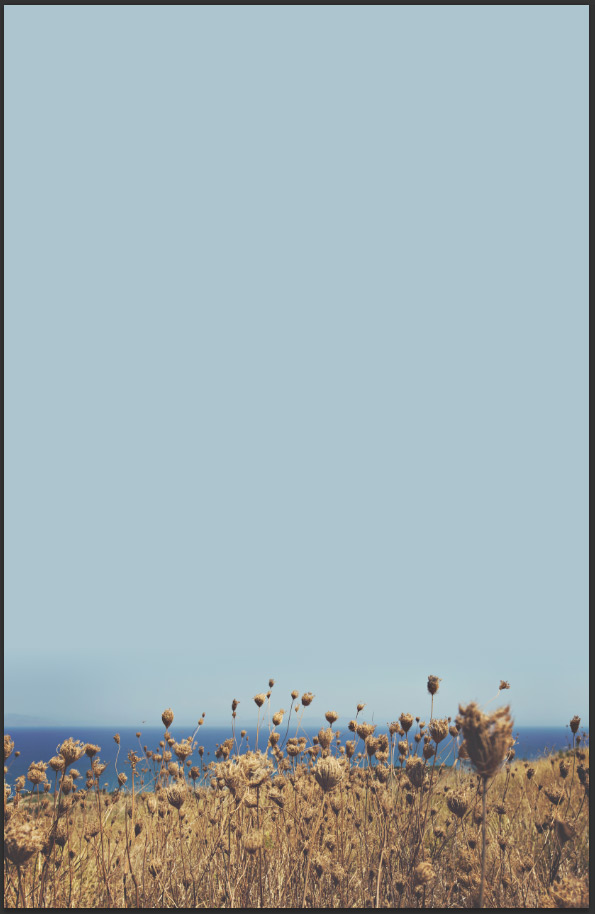
Use File > Place embedded to place the sea scene as a smart object in your document. I lined up the top left limit of the field with the horizontal guide at 15″.
Next, we’ll use a technique that I’ve already shared in my retro, grungy poster design tutorial to sharpen the image a bit. It involves the High pass filter.
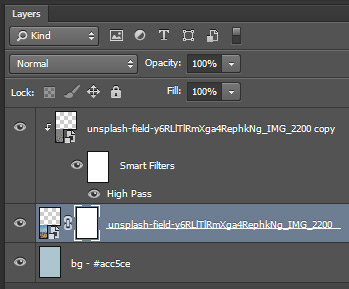
Start by creating a copy of your background layer (Layer > Duplicate layer or CTRL/CMD+J).
Clip it to the original layer below (CTRL/CMG+G). Note that I’ve left both layers as smart objects.

Then, run the High pass filter on the layer copy (Filter > Other > High pass). I’m using a 50 pixels radius.
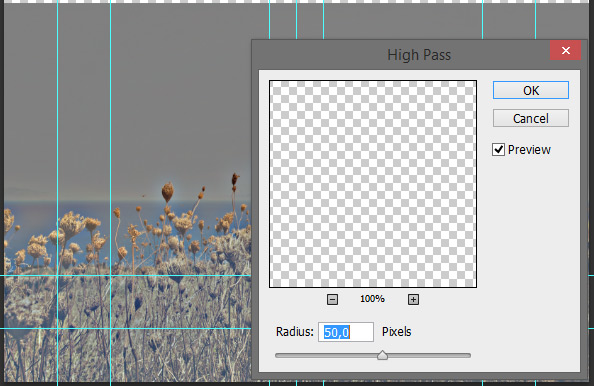
Once the filter has been applied, place the layer on Soft light @ 35% opacity. The result is a sharper image, as well as an slightly increased contrast.

Extending the background
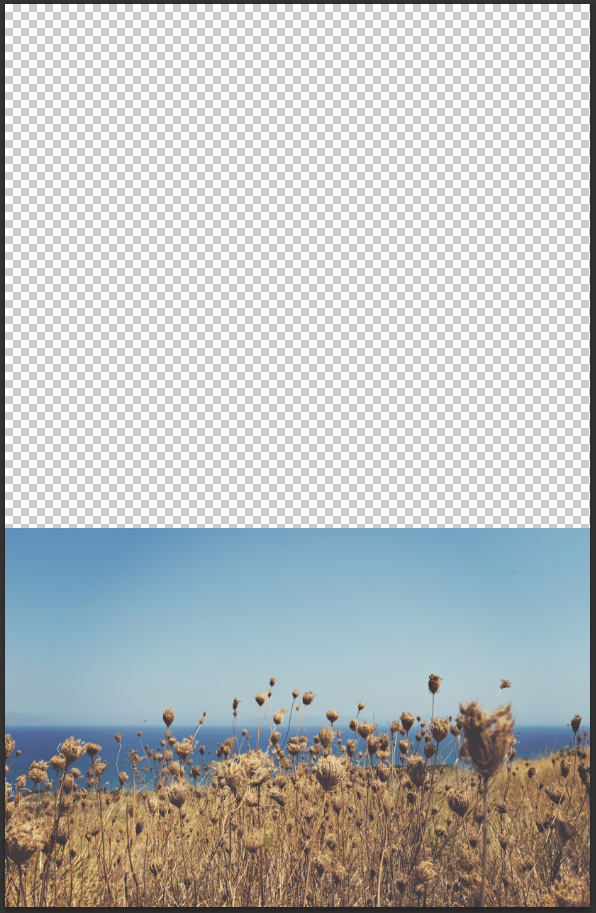
The image is in place, but we still have a wide open spot at the top of our poster.
To fill this spot, we’re going to sample a blue hue at the edge of the vegetation, and fill a new layer with this blue. We’ll then place that layer at the bottom of our layer stack.

The color I sampled is #acc5ce.
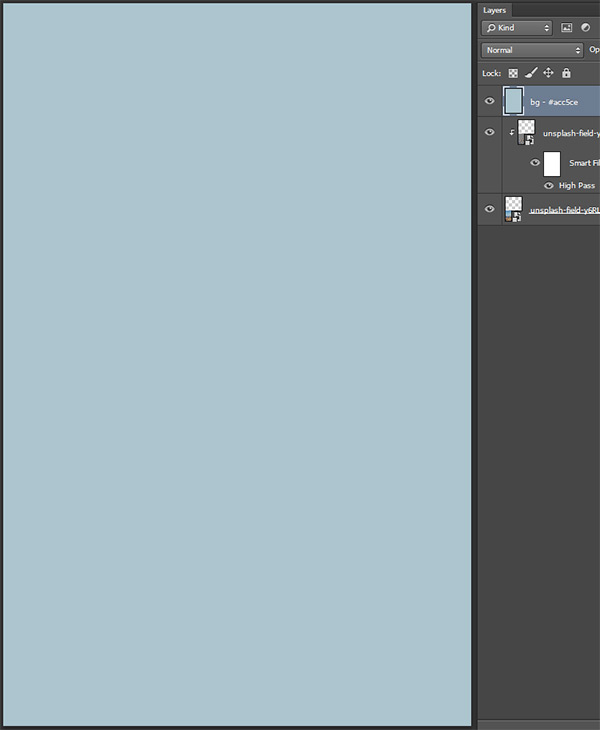

Now, in order to get rid of that line, we’ll leverage the power of layer masks. Simply add a layer mask to the original photo layer (Layer > Layer mask > Reveal all with the proper layer selected).
With that done, you can simply paint in the layer mask with a big, soft brush to make the limit disappear. But that’s a bit tedious. I’m using the gradient tool to go a bit faster. Make sure to start your gradient below the line you’re looking to hide.

The gradient I used is a simple black to white gradient, in a top to bottom direction.
With that done, let’s move on to processing the image a bit.
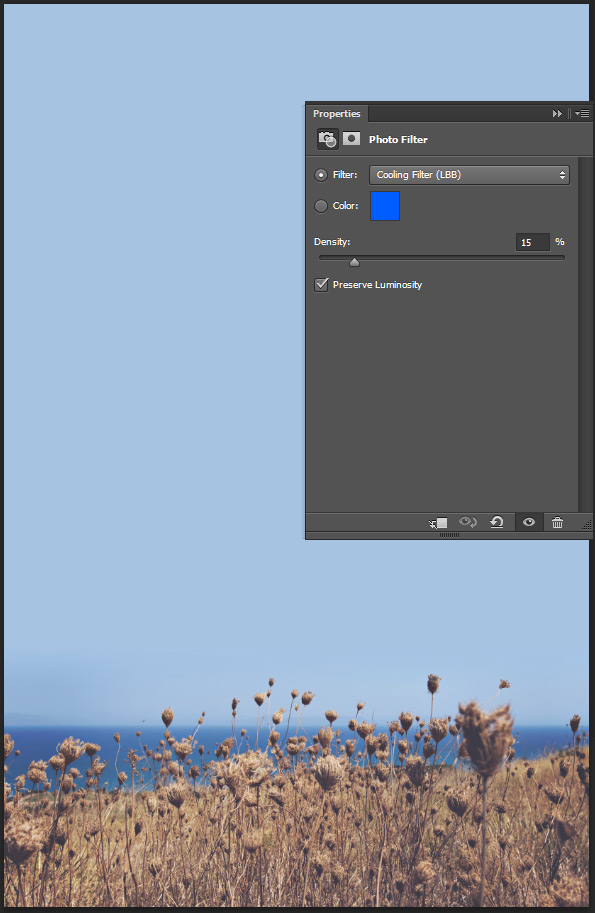
Post-processing the image
The post-processing “recipe” I’m using below is just one among many. Feel free to tweak the image differently!
First, we’ll be “lowering the temperature” of the image by using a photo filter adjustment layer.

I’m using the LBB cooling filter, with a 15% density.
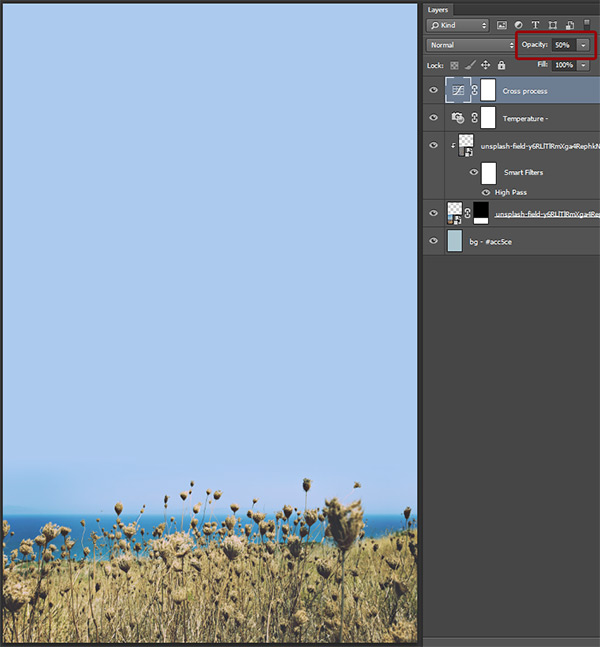
Next, we’ll emulate a cross-processing effect by using a curve adjustment layer. Simply add a curve layer, and toggle the Cross process (RGB) preset from the drop-down menu.

The effect is quite strong, so I chose to lower the opacity of that layer to 50%. You can also note that I’ve labeled each adjustment layers with what they accomplish.
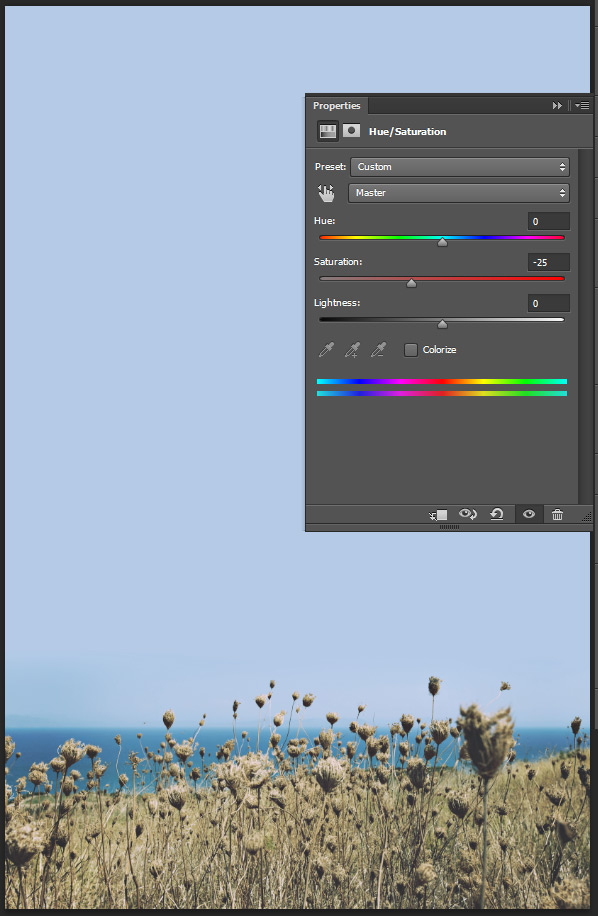
Next, we’ll emulate a vintage saturation on the image. Simply add a Hue/Saturation adjustment layer to the image, and bring the saturation to -25.
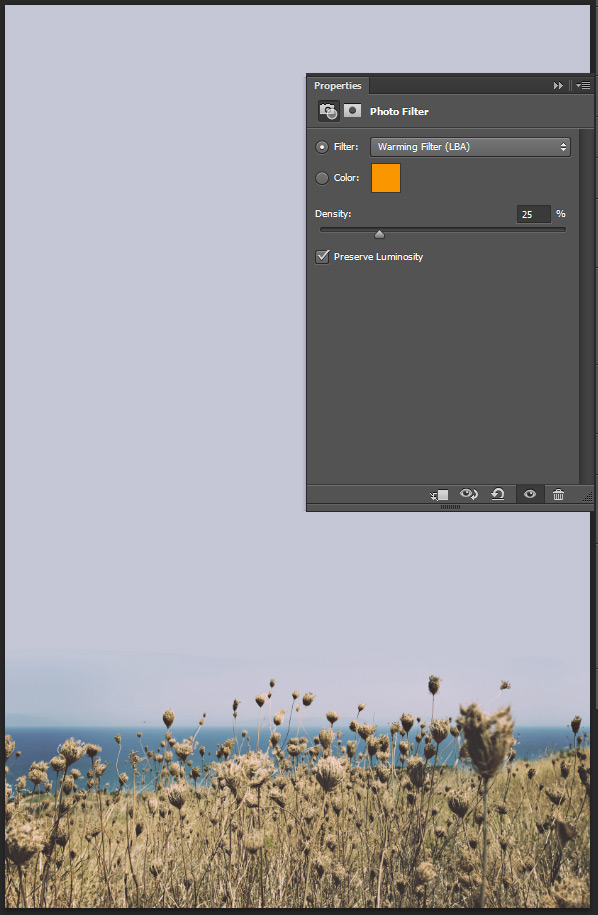
Then, we’ll “increase the temperature” of the image with another photo filter adjustment layer. I’m using the Warming filter (LBA) preset, at a 25% opacity.
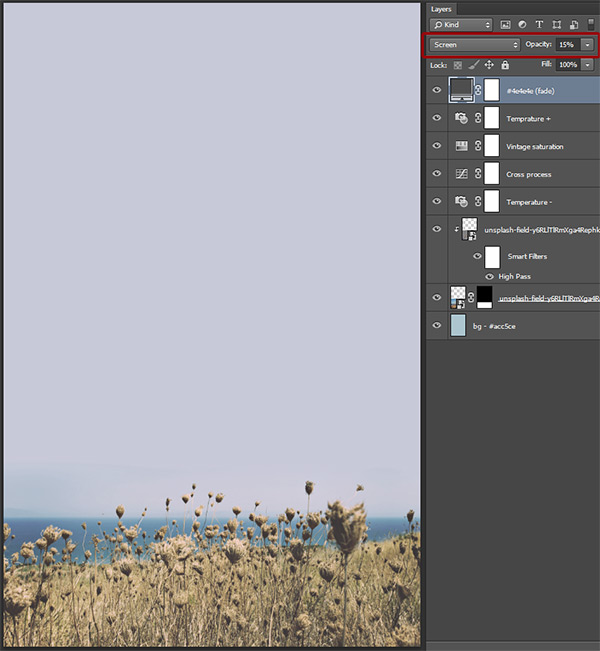
Next, we’ll “fade” the image a bit. Use a Solid color adjustment layer, and fill it with #4e4e4e. Then, change its blending mode to Screen @ 15% opacity.
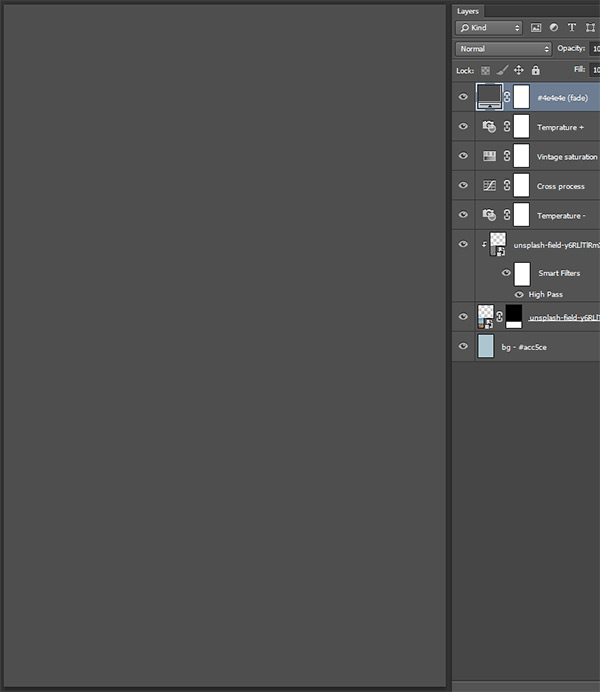
A bit of house-keeping
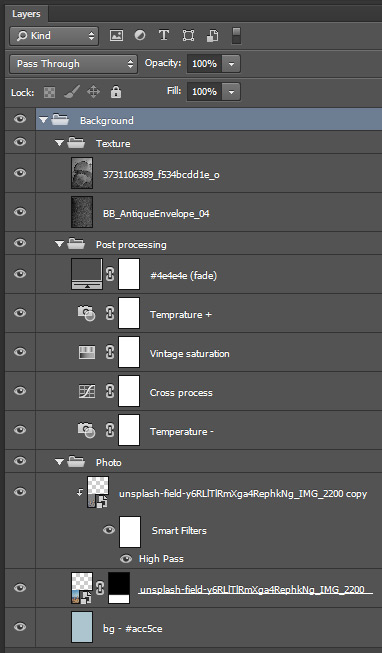
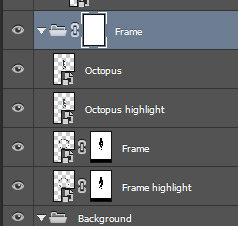
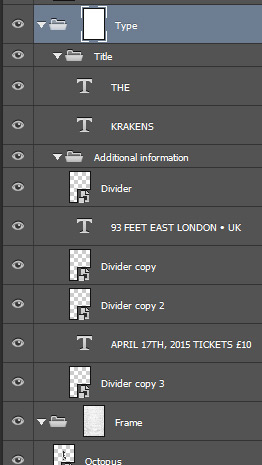
Before we switch to the last part of the background build-up, I’d like to suggest to organize our layers a bit. Here’s a view of my structure: the photo and its related layers are in their own layer group, and so are the layers for the post-processing.
Textures!
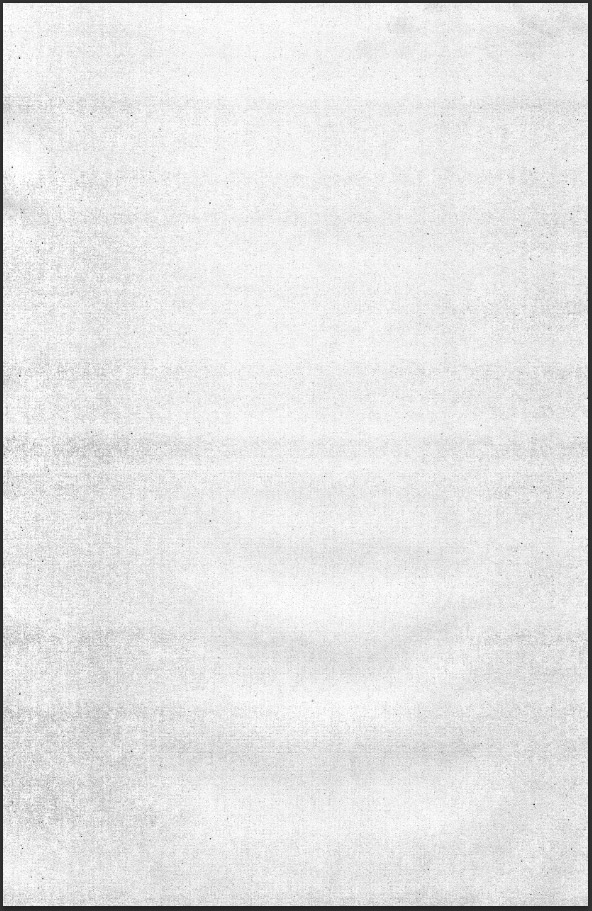
It’s time to add a few textures to our background. It’ll give it a bit more depth and substance. Here are the textures you should have at hand:
- BB_AntiqueEnvelope_04 by Dustin Schmieding
- Coffee Stains Texture 02 by SixRevisions
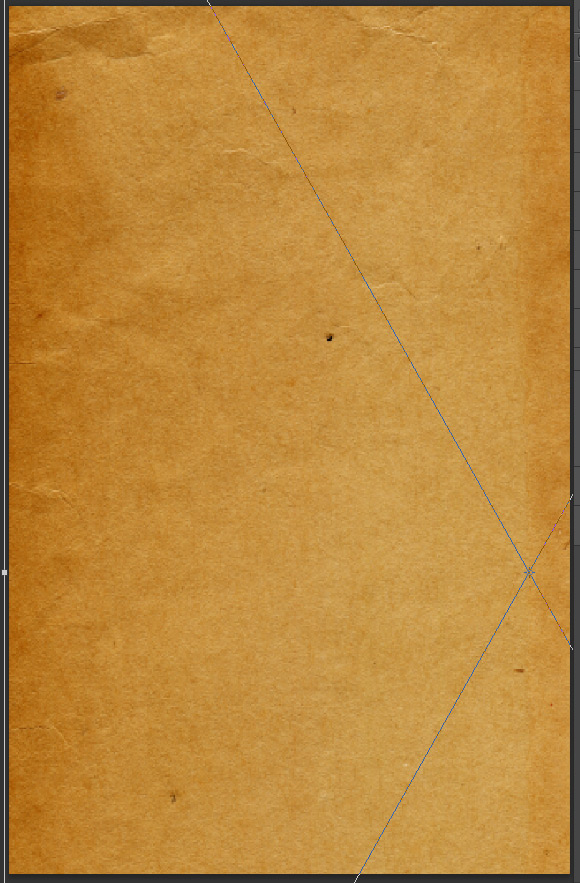
Start by placing BB_AntiqueEnvelope_04.jpg in your document. I’ve placed, turned, and sized mine so the seam at the middle is out of the frame.
Once the texture is in place, rasterize it, desaturate it (CTRL/CMD+SHIFT+U), and sharpen it a few times using Filter > Sharpen > Sharpen.
Note that you could keep the workflow non-destructive by using adjustment layers.

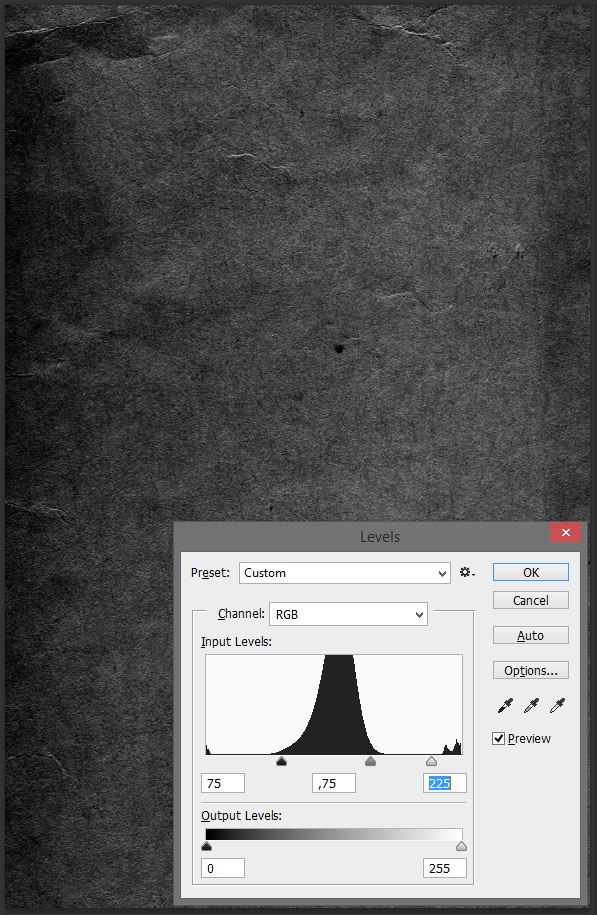
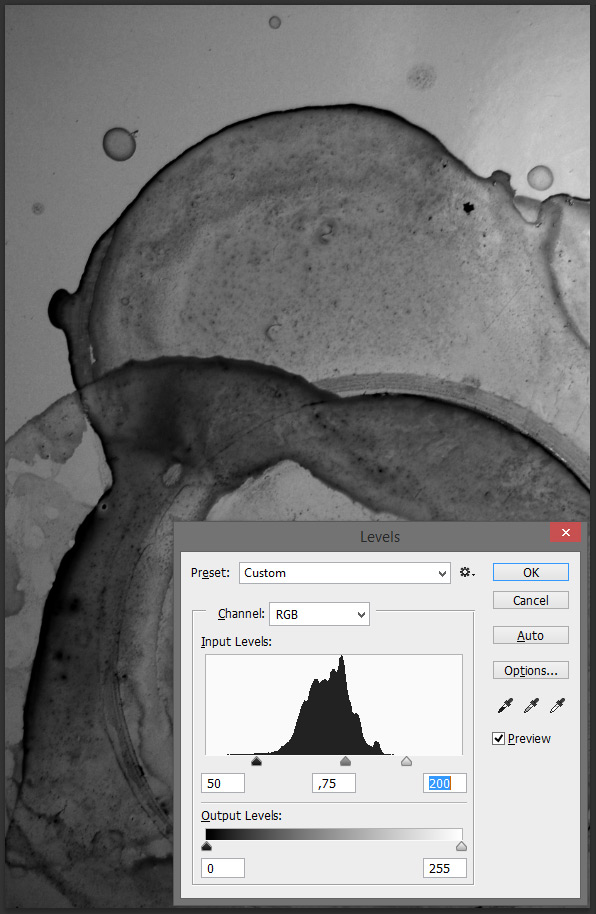
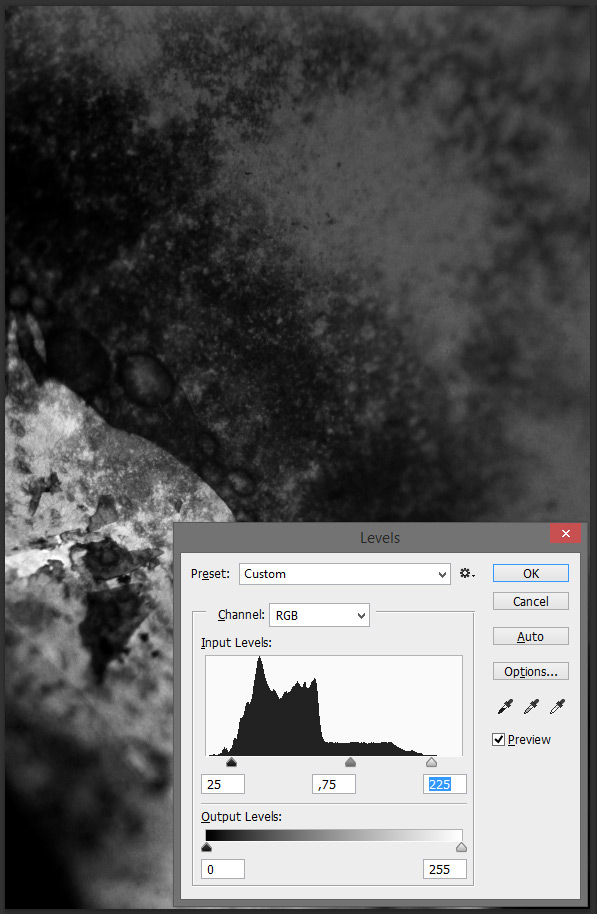
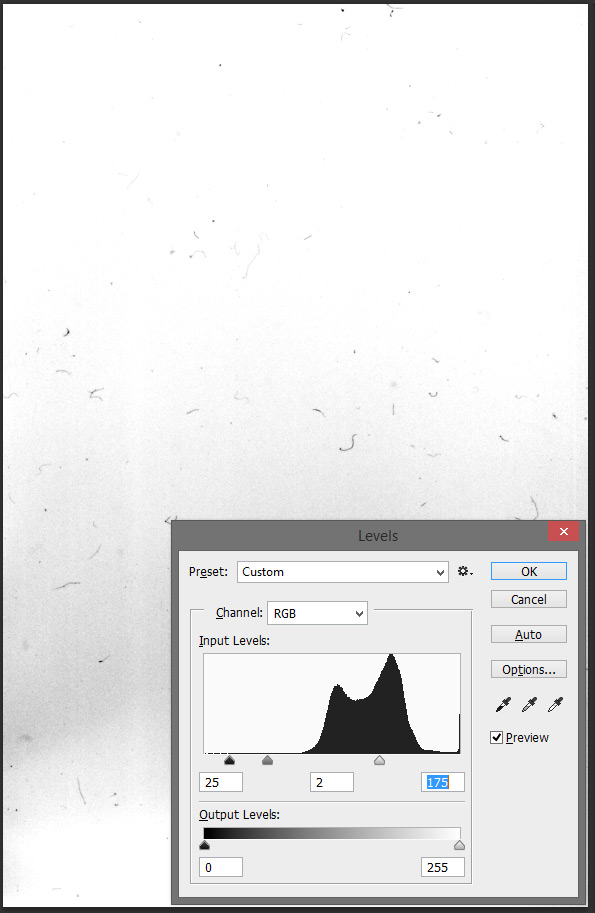
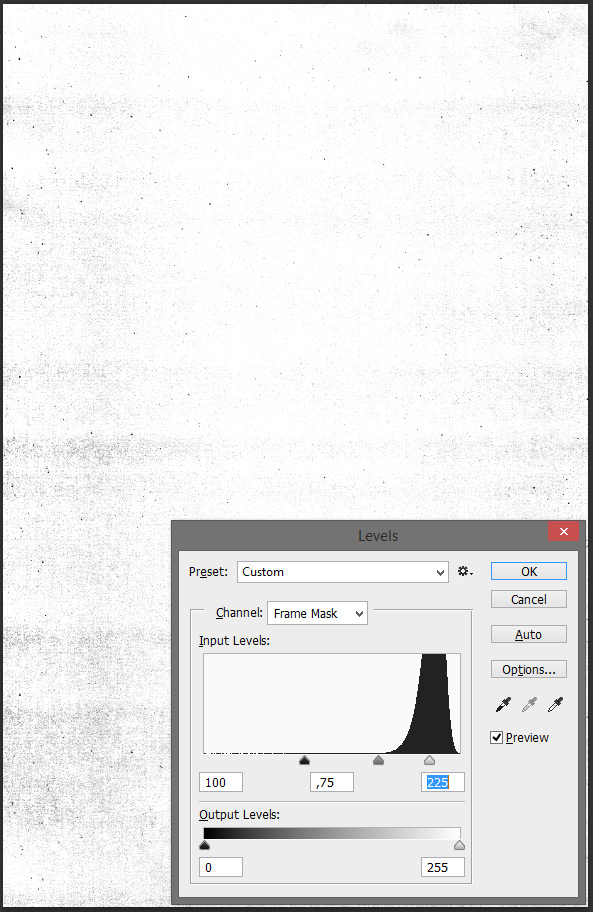
Next, we’ll be using levels (CTRL/CMD+L) to bring some of the textures details out. We’ll use a value of 75 for the dark tones, 0.75 for the mid-tones, and 225 for the light tones.
Once the adjustments are done, change the layer’s blending mode to Soft light @ 50% opacity.

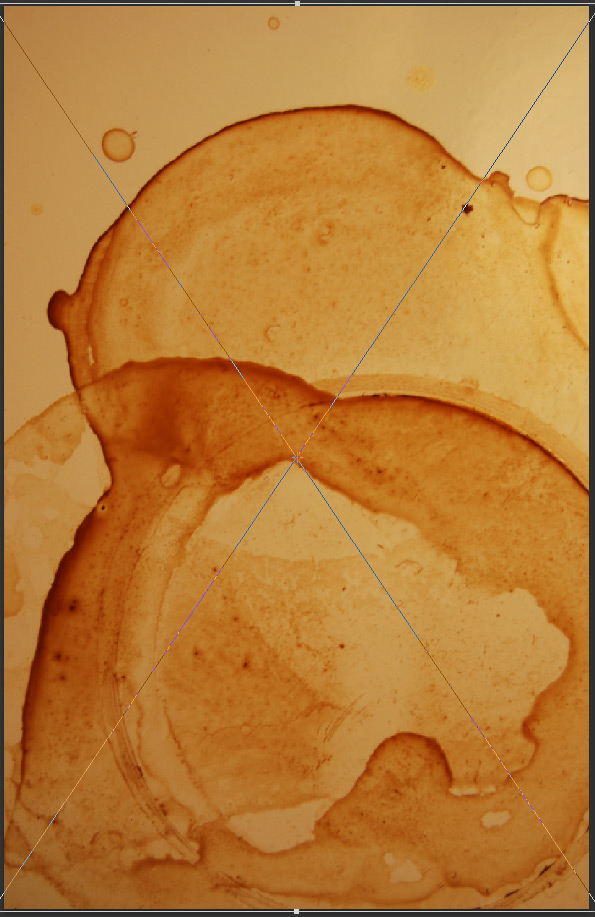
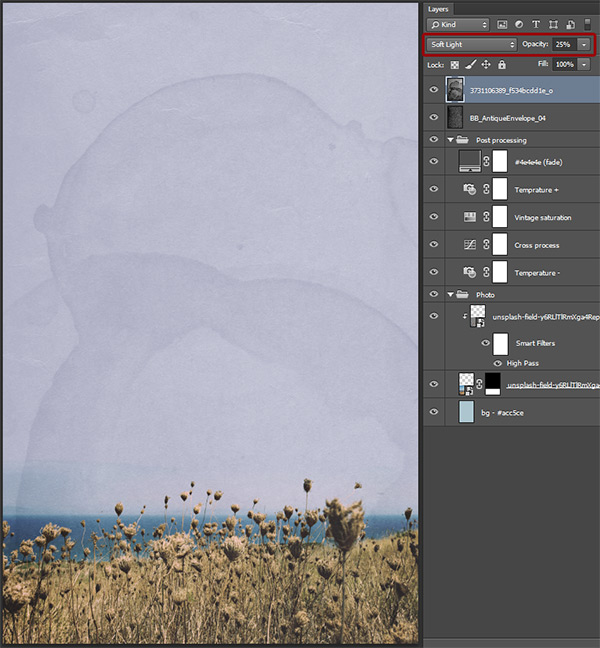
The next texture we’ll be using is Coffee Stains Texture 02. I placed, turned, and sized the file so it covers the whole canvas.
After that, following the same process as above (desaturation, sharpening, and levels), we’re bringing the stains into the design. The layer’s blending mode is Soft light @ 25% opacity.
One more bit of house-keeping, and we’re ready to move on to the rest of the poster.
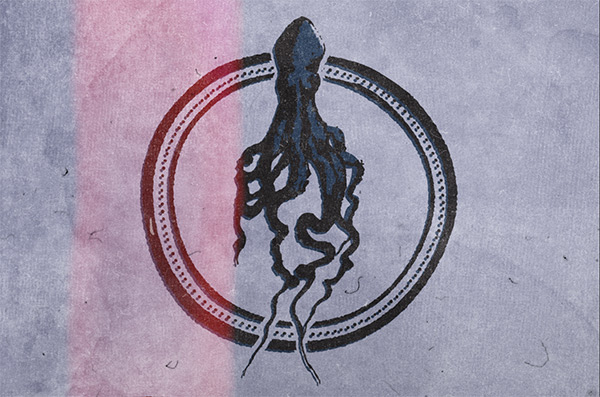
STEP 3: THE BADGE
The center badge with the octopus is easy to build, but we’ll need to quickly leave Photoshop for Illustrator.
Grabbing the elements in Illustrator
Let’s go ahead and create a document in Illustrator that has the same specifications than our Photoshop canvas. Note the RGB color mode.
Using the same size and color modes allows us to start playing with sizes and colors straight in Illustrator, without fearing any discrepancy between the two documents we have.
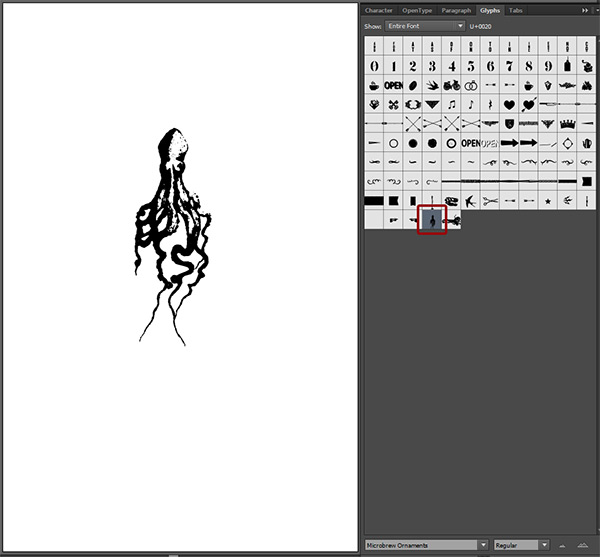
Once in Illustrator, make sure that your Glyphs panel is visible. If it isn’t, make it appear by using the Window > Type > Glyphs menu.

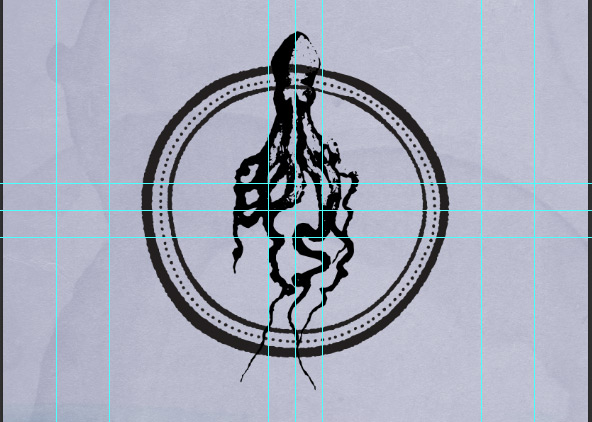
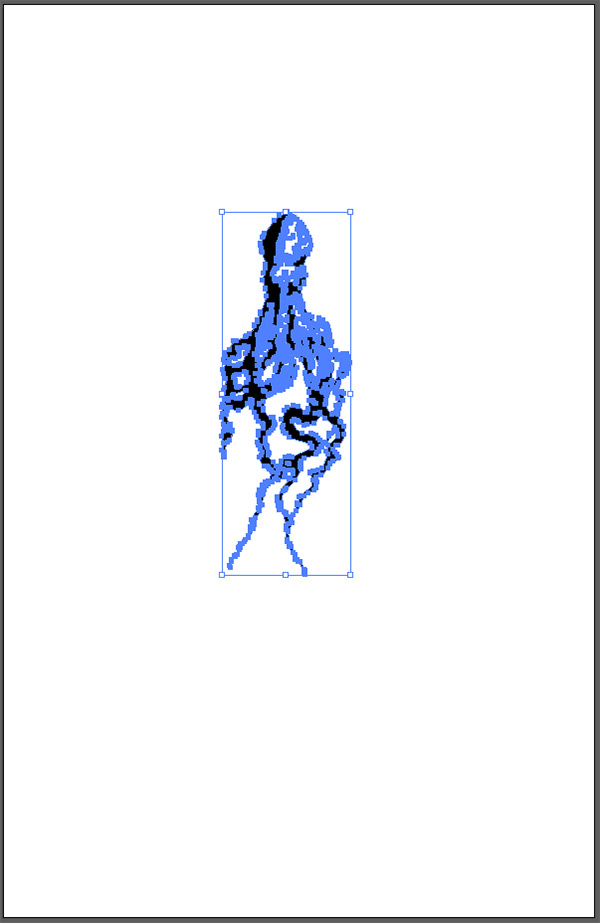
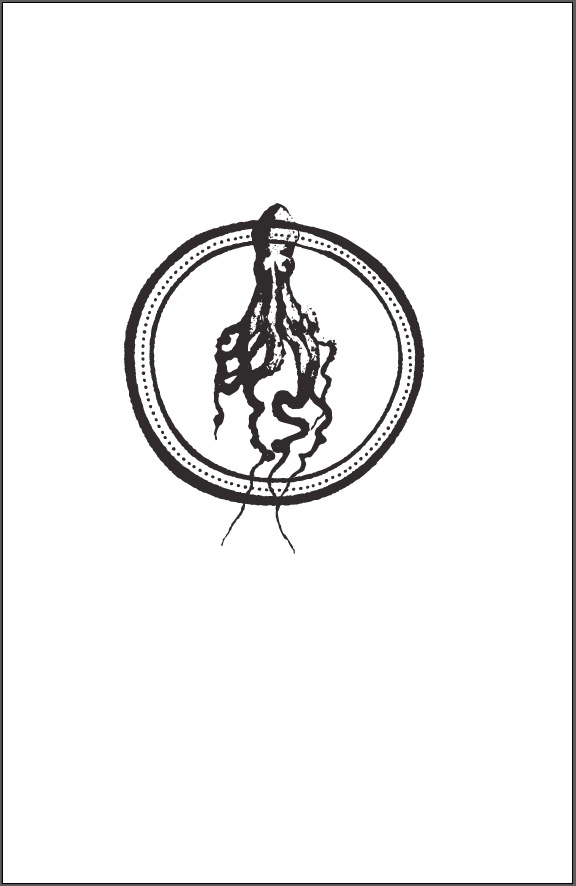
Next, choose the typeface Microbrew ornaments and grab the octopus symbol. Start a new text block, and then simply double-click on the glyph in the Glyphs panel. Size it very big (at least 500 points).
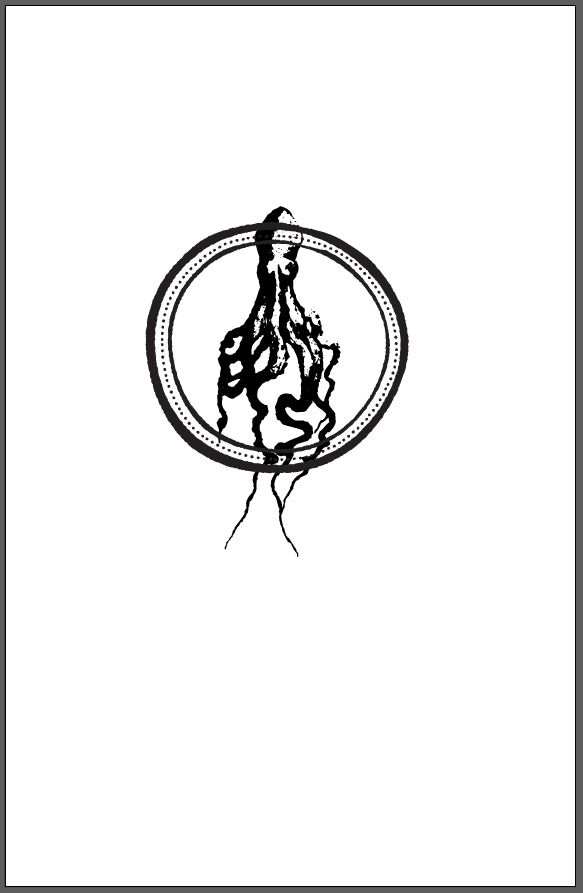
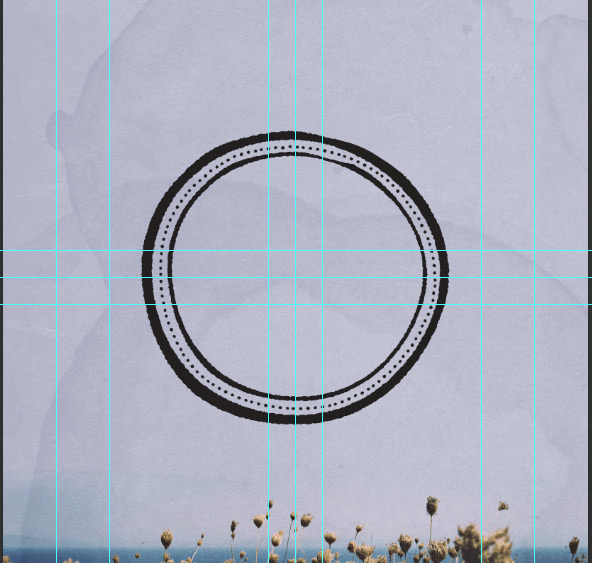
Next, we’ll need to grab this circular frame from the extras that comes with the Amorie type family. You could either grab them from the Glyphs panel, or from the handy Illustrator file (AMORIE_EXTRAS-Frames.ai)included in the bundle. I chose the later.

Copy and paste it in your Illustrator document, and start playing with sizes.
Once you’re happy with the size relationship between the frame and the octopus, it’s time to prep the vector elements to be brought into Photoshop.
Bringing the vectors in Photoshop
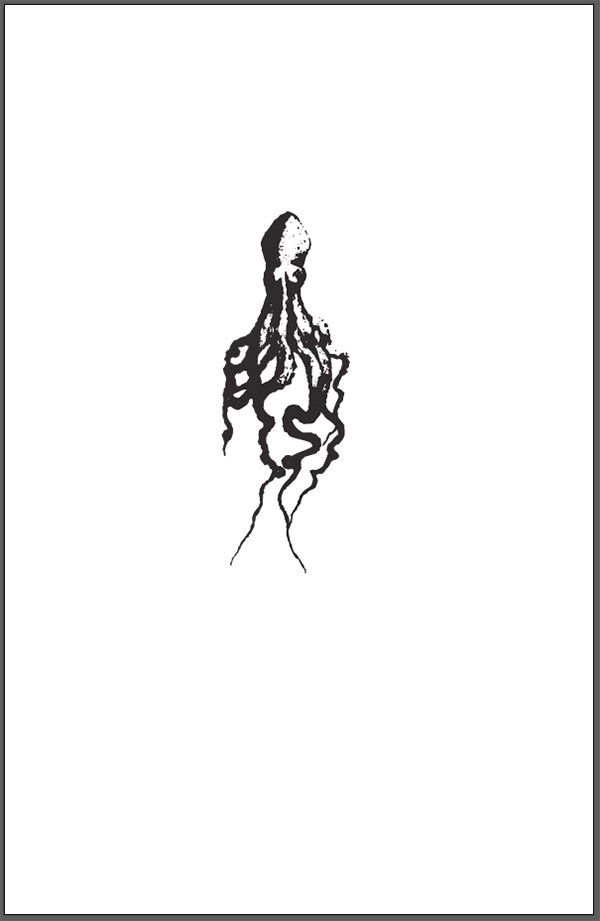
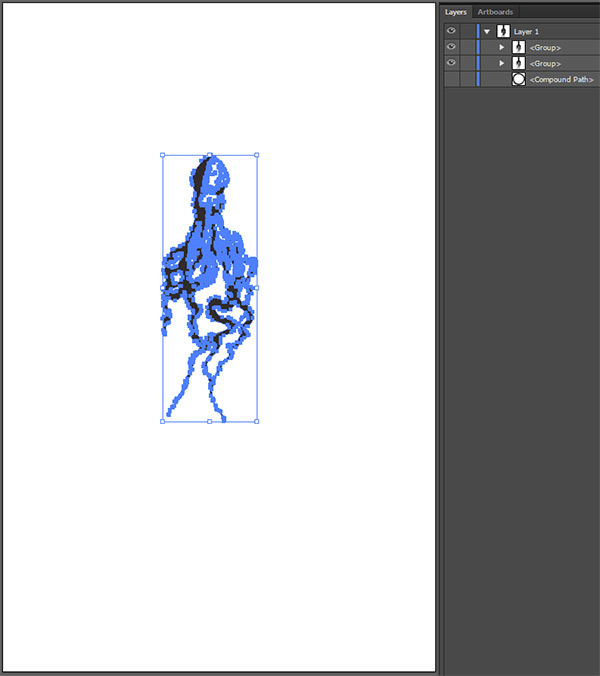
First, expand the appearance of the octopus text object. Simply right click on the character, and choose the Create outlines option.
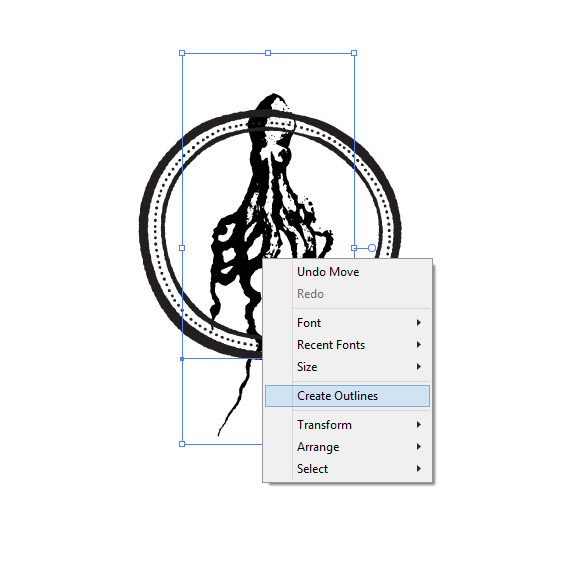

Make any size adjustments you feel are necessary now, as they’ll be a far more annoying to deal with once in Photoshop.
Once done, simply copy and paste each element individually into Photoshop, as smart objects. This will allow us to play with each element independently of each other, and to retain their vector characteristics should we need to refine their sizes.

I also went ahead and gave these two their own layer group, as things will get a bit more complicated later.
Creating the badge itself
First, we need to assign a color to the badge elements. I went ahead and sampled one of the dark browns from the field. I went in the lower-right corner, and chose #302b2c, a darker, red-brown hue.
Once the color has been chosen, you should double-click on the octopus’ smart object thumbnail. This will open the smart object in Illustrator, where you should change its color to the brown you just sampled.
Once you’re done, save your modification (CTRL/CMD+S), close the smart object, and return to Photoshop to admire the result.
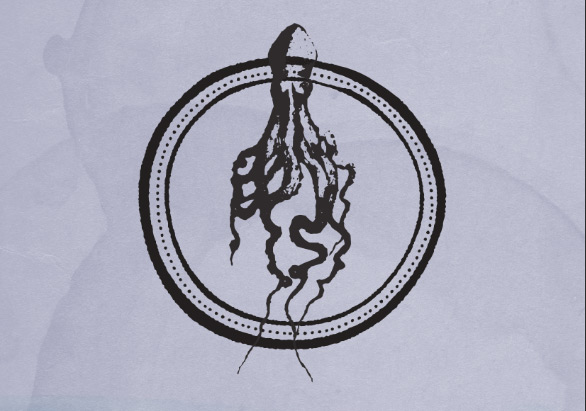
Follow the same process for the frame.
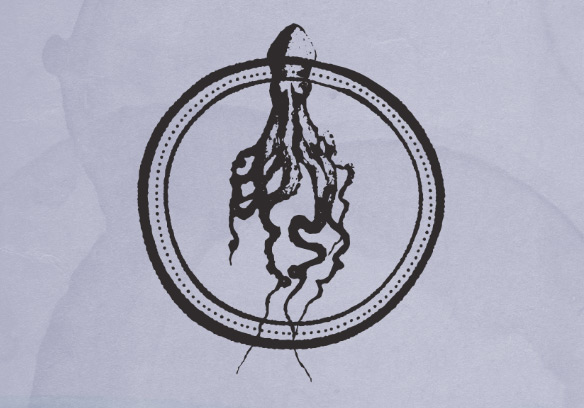
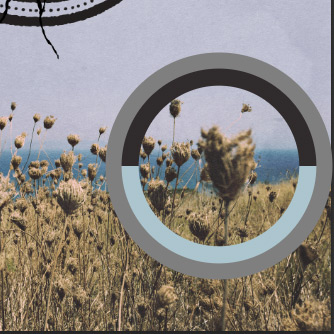
Creating the mis-registered color overlay
This step is a bit delicate. Go back to the Illustrator document in which we were originally experimenting with size relationships. Turn off the frame in the layer panel. Then, proceed to copy (CTRL/CMD+C) and paste in place (CTRL/CMD+F) a copy of the octopus.

Turn off the top copy of the octopus.
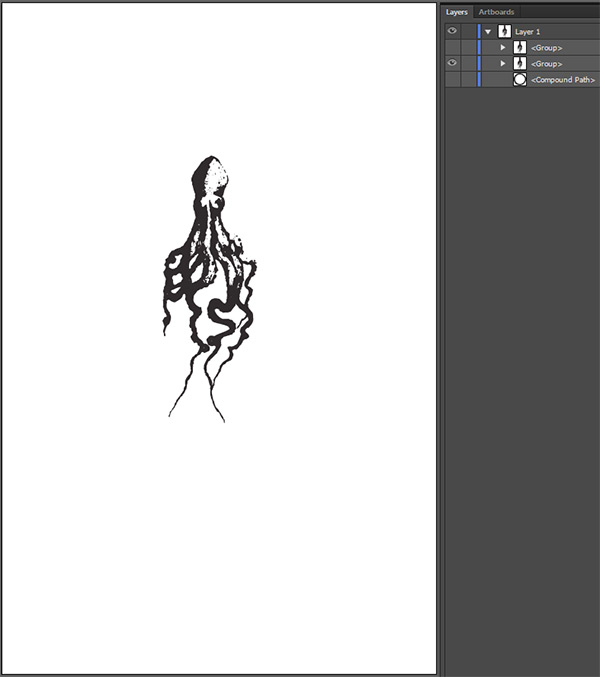
Next, grab the Blob brush tool (SHIFT+B). You’ll want to fill the highlights of the octopus in, like below (I’m painting in red so you can see). You can change the size of the brush by double-clicking on the tool’s icon. The goal isn’t to paint a perfectly smooth shape, but something that will feel enough like done by hand.


Once you’ve done the shape to your liking, fuse it with the octopus by using the Unite functionality of the Pathfinder tool (Window > Pathfinder). Select both the octopus and the shape you’ve just painted, and hit the unite button, and you’ll be done.
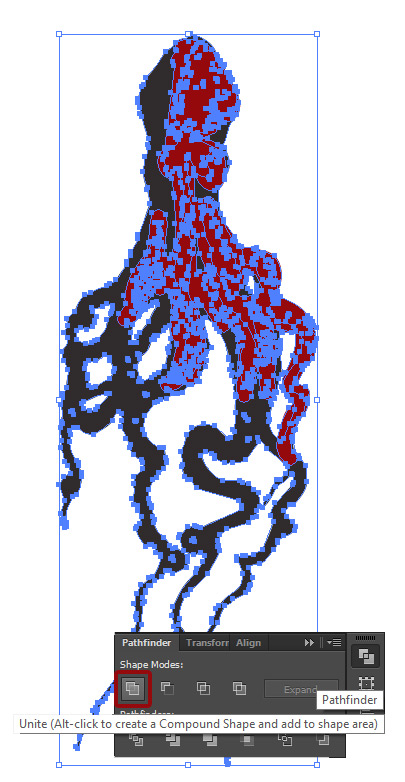

Slide the newly created shape underneath the remaining copy of the octopus, turn it back on, and admire the result. The two still line up, and it looks like the highlights of the octopus have been colored red.

Go back to your Photoshop document. Sample a darker blue from the original photo. I went in the lower-left area of the image, and got #384d69.

Switch the highlight shape we created in Illustrator to that color.
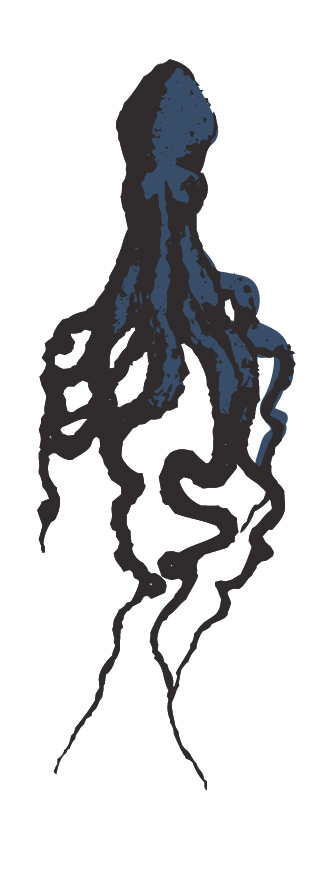
Once that’s done, paste the shape in Photoshop as a smart object, below the octopus layer you have there.
To make it look out of alignment, you simply have to offset it using the keyboard arrows (with the Move tool active, of course – V). I offset it 4 taps down, and 4 taps to the left.
To create the frame’s off-registered effect, you’ll first have to create a new smart object via copy (through the right-click menu obtained when clicking the layer). If you just duplicate the smart object, the changes you’ll do to one will be replicated on all of its other instances.
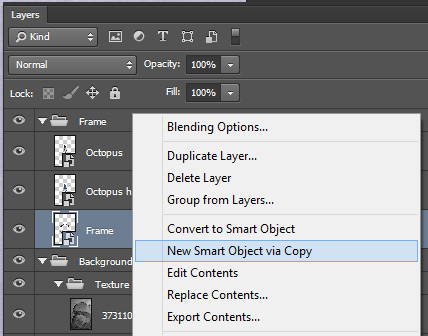
Once that’s done, slide the copy underneath the first frame, and change its color via Illustrator to the same blue you gave to the octopus highlight.

Then offset it the same way you offset the octopus highlight (the out-of-register effect of a color has to stay consistent throughout the piece).
Adding the stroke around the octopus and its highlight
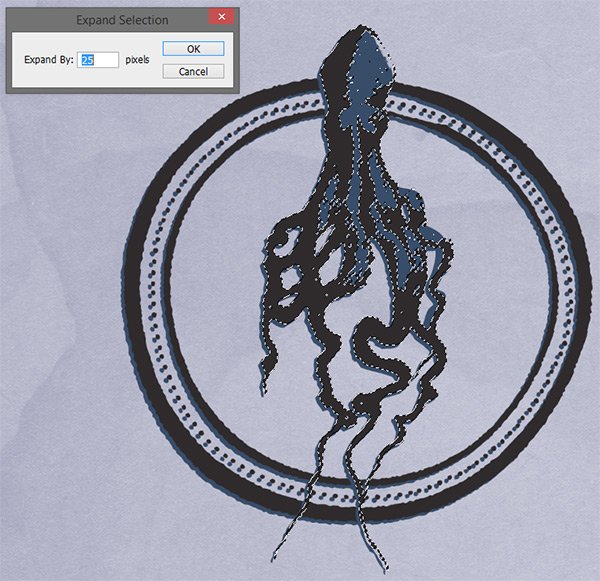
The badge’s finishing touch is a little gap between the octopus and the badge (and their respective highlights). To accomplish this, create a selection around the octopus by CTRL/CMD+CLICK its layer thumbnail.

Then go to Select > Modify > Expand to expand the selection by 25 pixels.
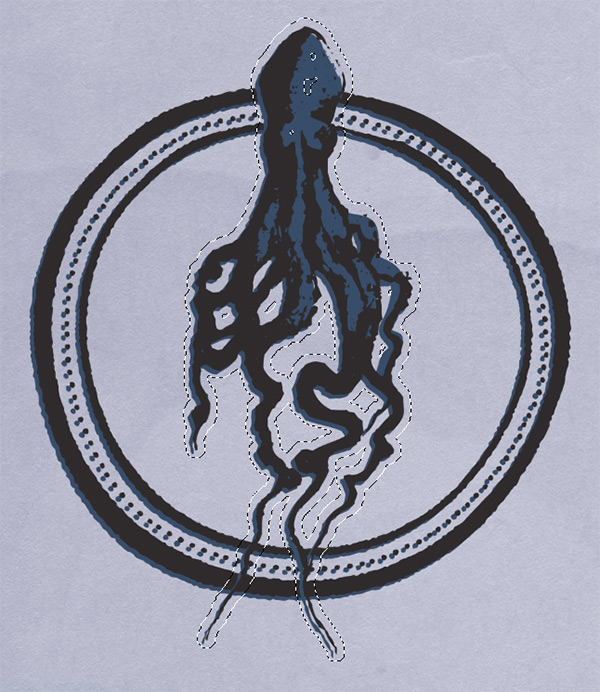
Invert the selection (CTRL/CMD+SHIFT+I), and add a layer mask to the dark brown frame smart object. It will fit the selection we’ve made, and show the gap.
Repeat the same steps, but using the highlights layers to show the gap on the offset frame.

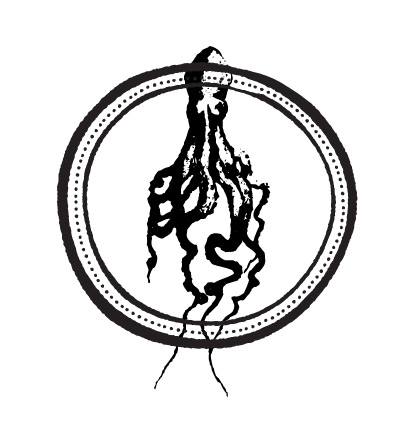
We’ve got ourselves a pretty nifty center-piece element. Now, onto the type!
STEP 4: THE TYPE
What’s the copy?
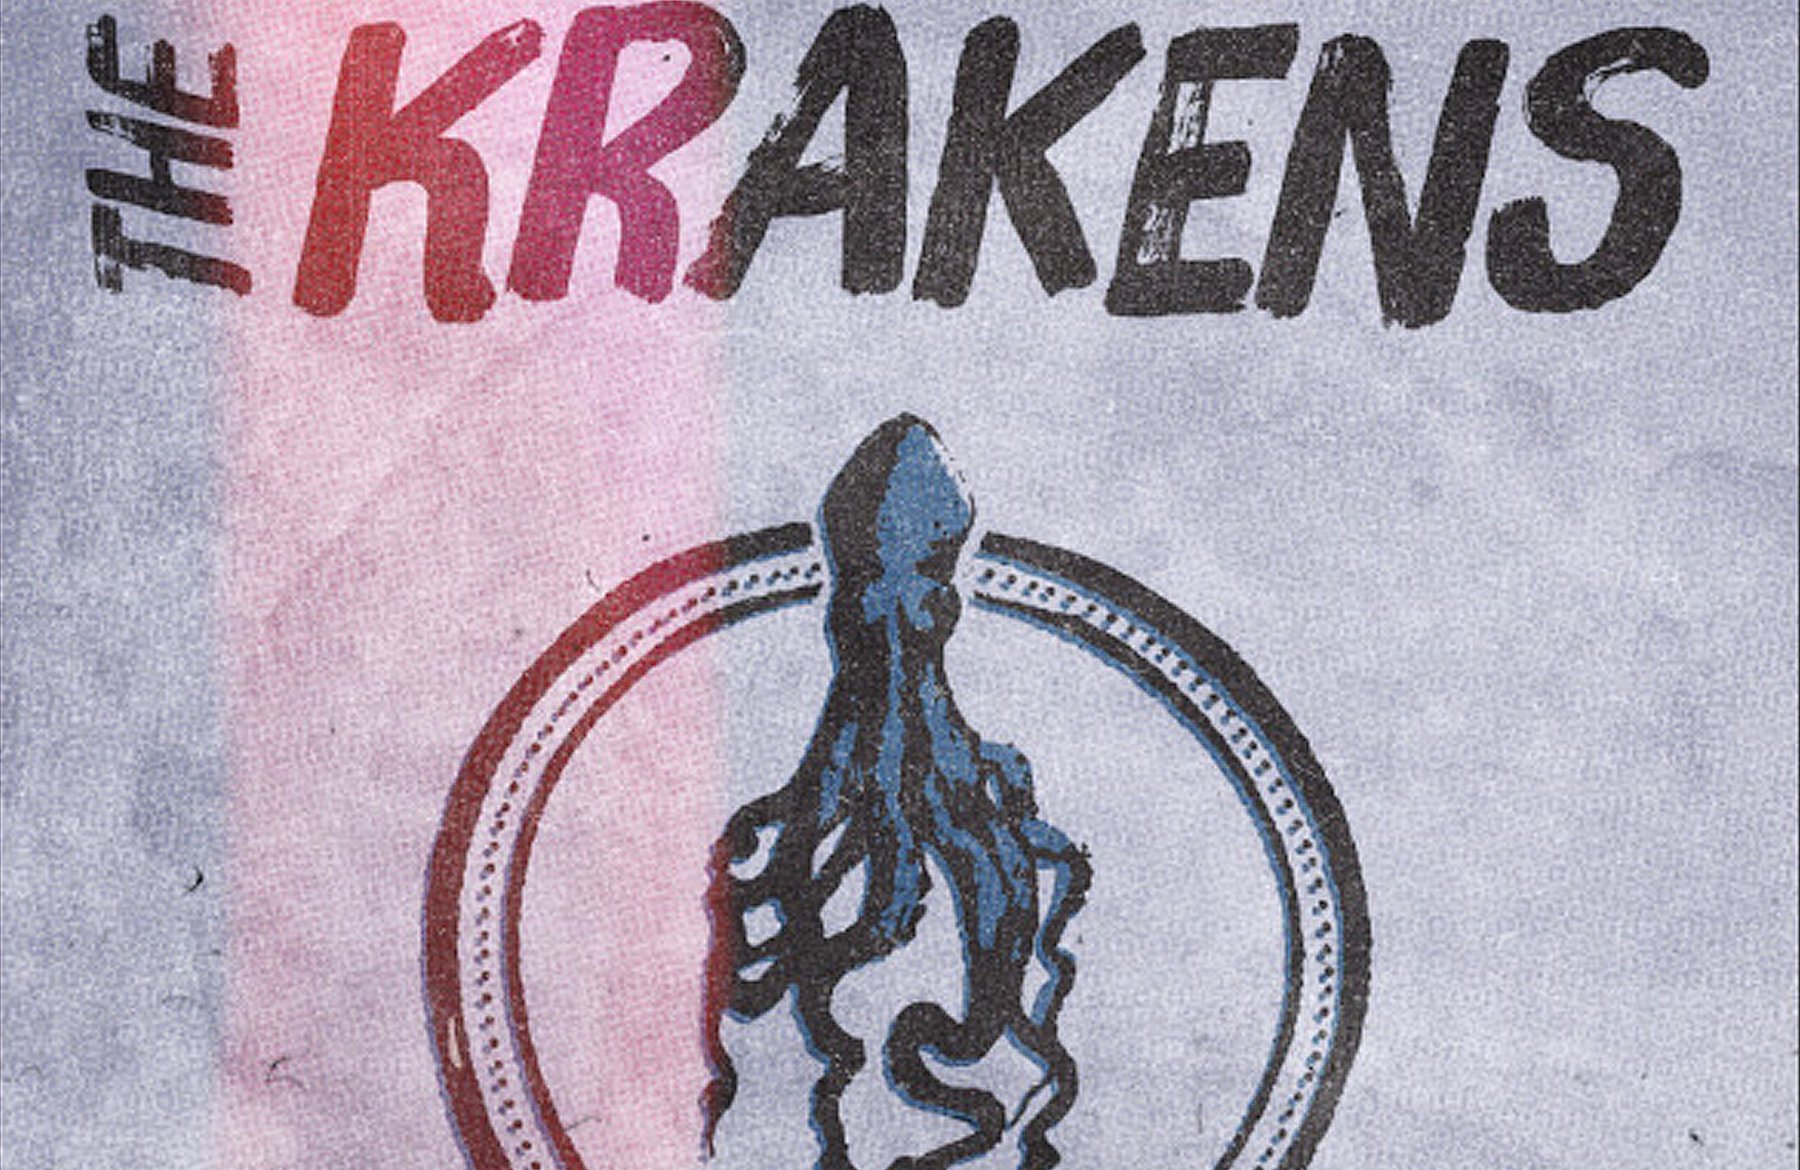
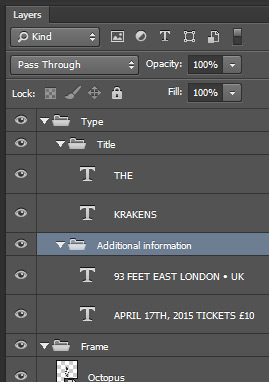
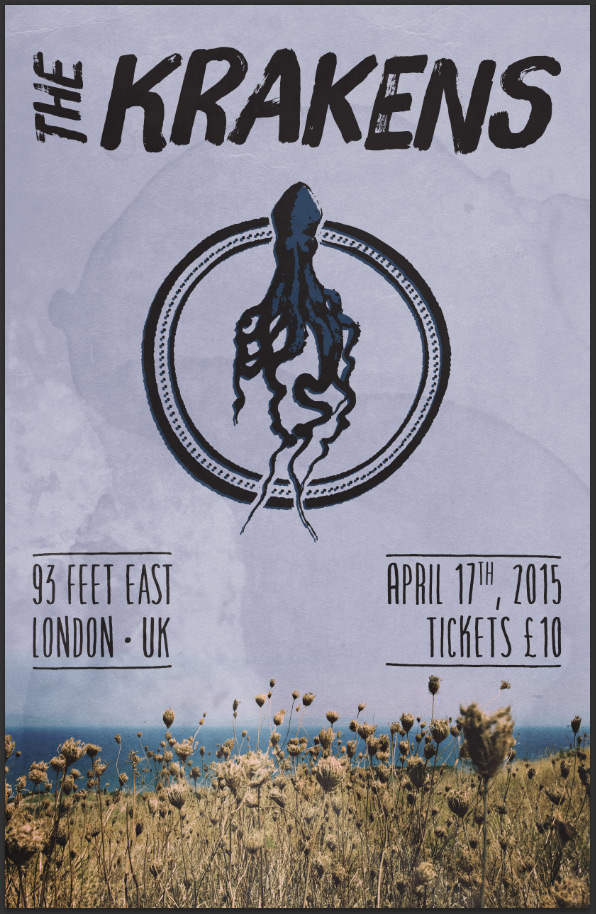
Before adding type to our poster, let’s agree on some copy. The title element should be the band’s name: The Krakens.
We’ll also need to add the venue’s name (93 Feet East, London, UK), a date (April 17th, 2015), and a cover charge (£10).
The band’s name will be written in Brush Up Too, while the additional information will be written in Amorie Modella Bold. The lines that frame the additional information are coming from the Amorie extras: lines vector file (AMORIE_EXTRAS-Lines.ai). All of the type elements are colored in #302b2c.


The title
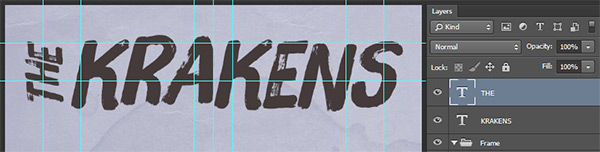
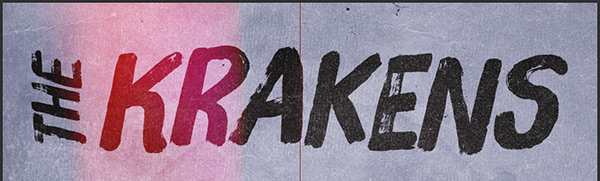
As you saw above, it’s written in two parts. The “The”, which is rotated 90° counter-clockwise, and the “Krakens.” Start by writing both parts, and placing them in relationship to each other.
I wrote “Krakens” 174 points big, and “The” 90 points big.
Now that this is done, it’s time to take advantage of the many alternative characters that Brush Up has. This will avoid repeating a letter in an identical manner, which in the end gives the type a true “handwritten” vibe.
For instance, select the second “K”, and hit the Stylistic alternates button in your Type panel.
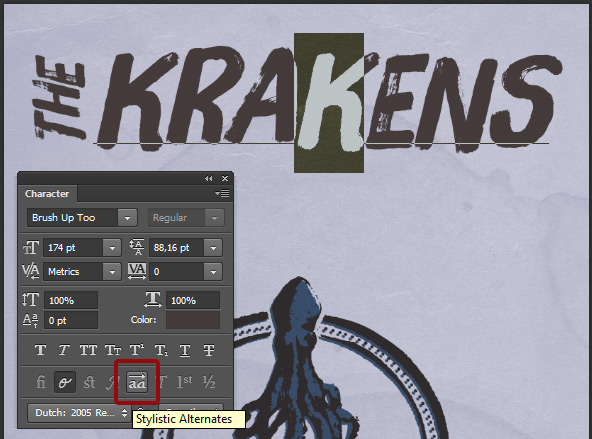
This results in a different “K” to be displayed.
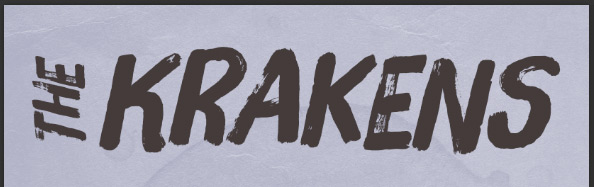
Repeating this process, let’s change the “E” in “Krakens” so it’s different than the one in “The.”


Turn the guides back on, and double check that there isn’t any spacing or placement issue you’d like to fix at this stage. Once you’re happy, it’s time to move on the additional information for the gig.

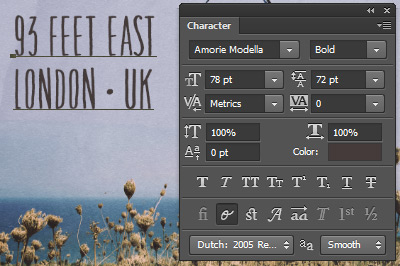
The venue
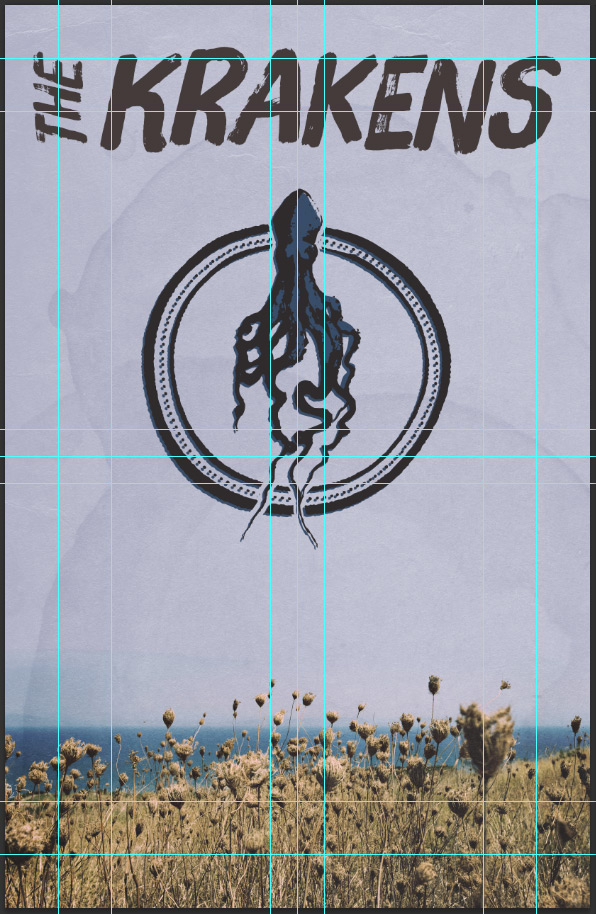
Before being able to start, it looks like I have to bring the badge element up a bit in my canvas, so I actually have room to add the extra information.
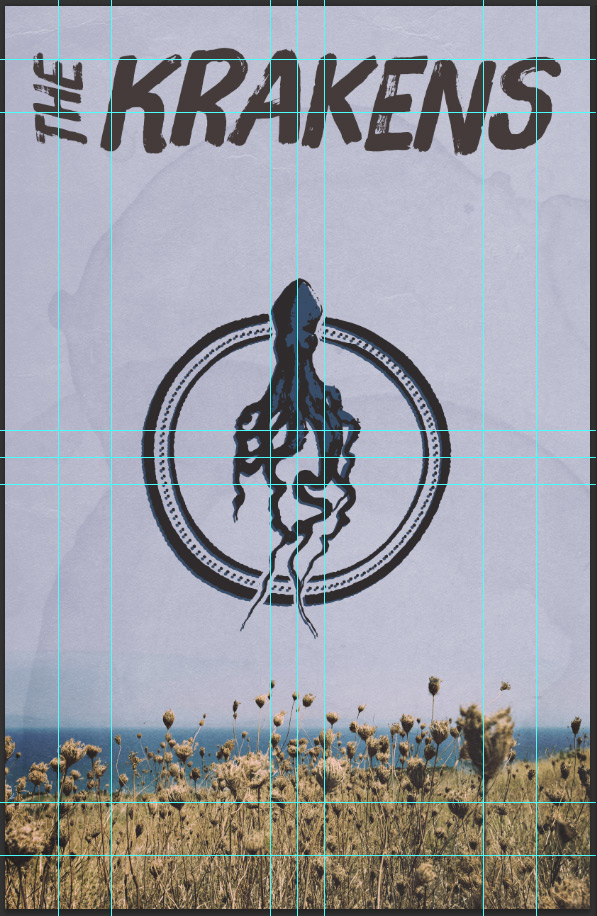
We’ll adjust the spacing again once all the elements are there, but I like working with a little bit of room at least.
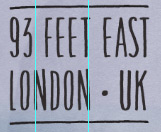
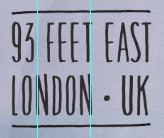
I wrote 93 Feet East / London • UK on two lines. Amorie Modella Bold is set in 78 points tall, with a 72 points leading. The copy is left aligned, and placed on the bottom-left side of the canvas.
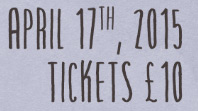
The date and cover charge
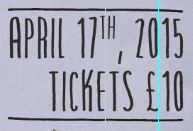
I wrote April 17th, 2015 / Tickets £10 with the same size and leading values. The main change is that this time, the block of text is right-aligned, and placed on the bottom-right side of the piece.

Let’s tweak this block of text a bit more. First, let’s put the “th” as superscript.


Then, using the same Stylistic alternates functionality as before, let’s make sure than characters don’t repeat themselves identically (pay attention to the “A” and “E” for instance).

A bit of layer housekeeping:
Oh, and next, make sure that your text blocks are well aligned, both vertically to their respective extremities of the title, and between themselves. Feel free to use the Layer > Align menu to make this quicker.
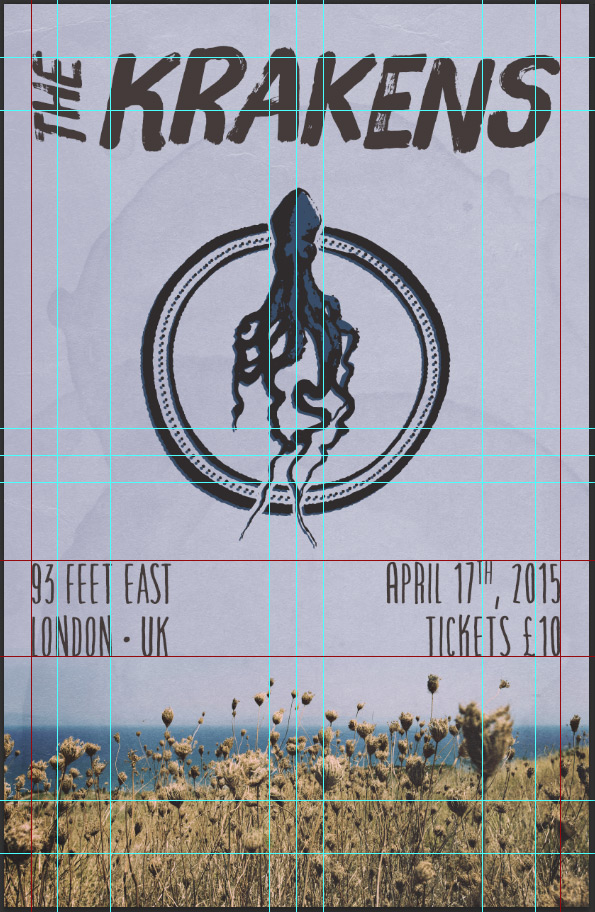
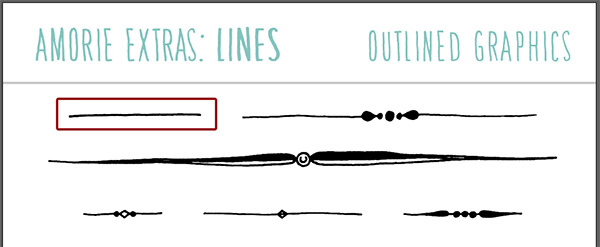
We can finally add the dividers to frame the additional information blocks. Head to AMORIE_EXTRAS-Lines.ai, and grab one of the dividers.
Paste copies as smart objects around the venue info. You can just paste one from the Illustrator file, and then make duplicates from it in Photoshop.
Don’t hesitate to flip and/or rotate the dividers, so the fact that they’re copies of each other doesn’t jump out to the eyes of the viewers.
Repeat with the date and cover info (don’t forget to adjust the width accordingly).
Now is also a good time to make sure that the dividers are also of the appropriate color. If you just duplicated one smart object through the piece, you should just have to change one of them to #302b2c, and you’ll be good to go.
Global adjustments
With all of that done, we’re getting close to having our layout completed.

It’s time to adjust the various elements in relation with each other before moving further. In my case, it means bumping the badge up a little bit.
Remember to also look at the piece with the guides turned off, as your perception might shift.

STEP 5: MORE TEXTURES!
It’s time to do the second and last pass of textures. These, by being applied to the poster as a whole, will participate to tie everything together in a consistent ensemble.
We’ll follow the same process than for the background: place, size, rasterize, desaturate, sharpen, and contrast enhancement.
Please note: I’ve been collecting and making textures actively for the past three to four years, and my library is quite big (40+ Gb). I know my texture library very well, and usually I’m able to pick the ones I’ll be using on a project ahead of time based on the desired outcome. Most of the ones below are some that I’ve not made myself. Note that the two that are mine are part of pack I’m selling on my Creative Market store, The Shop.
Note that you’ll also need a Ps action from the good people at Go Media that I’m calling “Aged 2.” You can download it in this post (and read the poster tutorial should you feel so inclined). If you don’t want to read the tutorial, you can also try this direct link to it.
Grabbing the different resources
Here are the textures you’ll need to have at hand to reproduce the effects I’ve obtained:
- VV_MicroscopicBurnedFilm_10 by Dustin Schmieding
- The painter’s effect #7 by Startextures
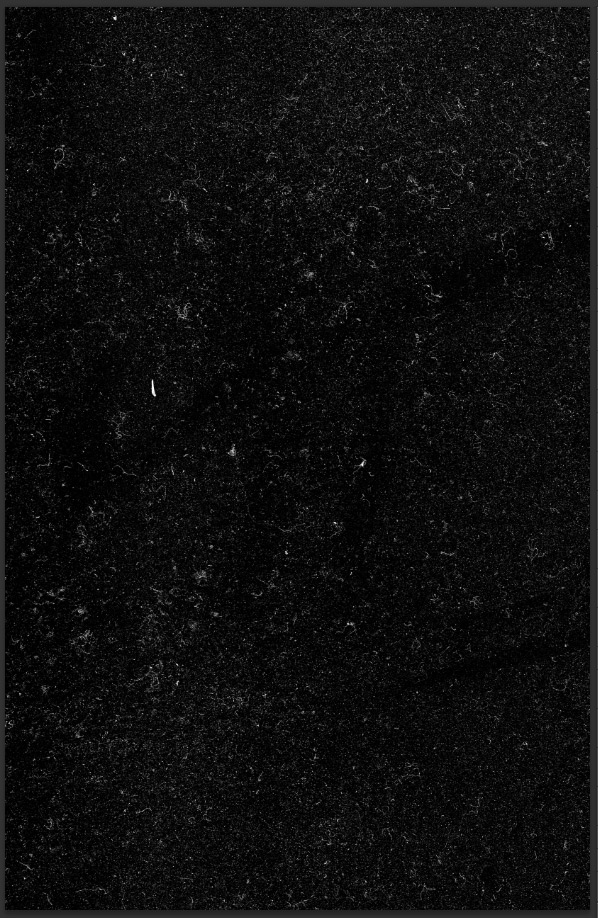
- VV_GrindhouseTexture_07.jpg from the Grindhouse texture pack at Valleys in the Vinyl
- Delta 3200 – 120 film – very dusty by JakezDaniel
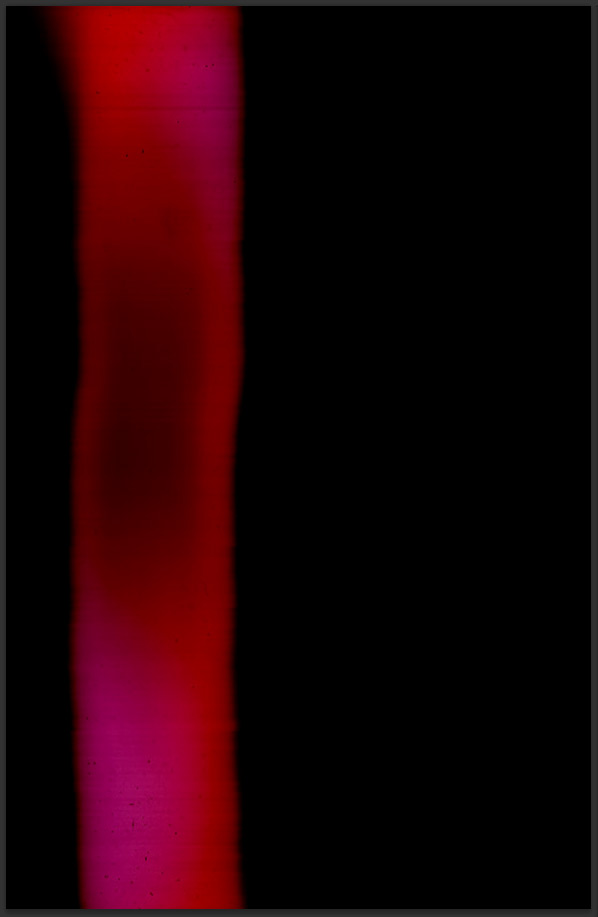
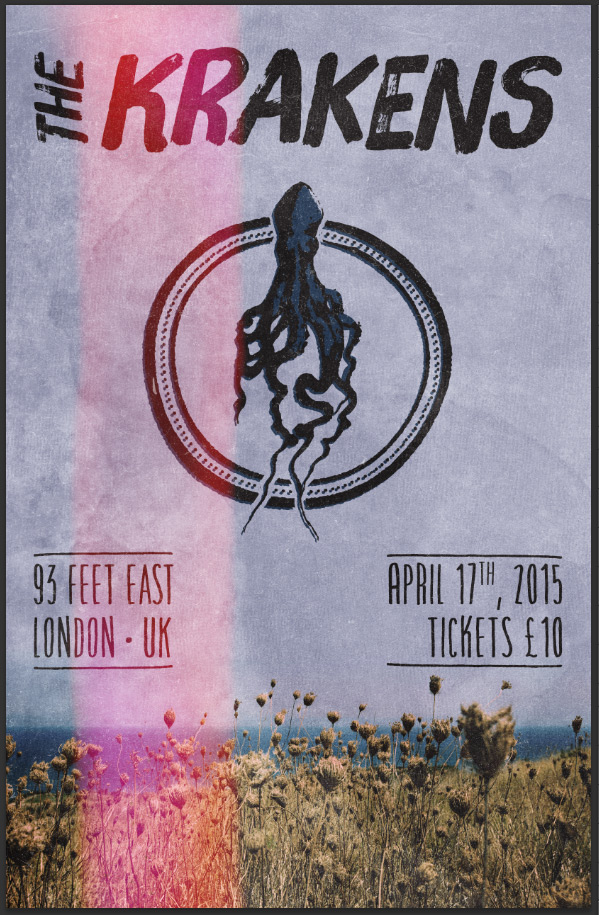
- Like leak #8 from the free light leak pack at Spoon Graphics
- .too dusty. film texture by missAlienation-stock
- photocopy by clarisaponcedeleon
- photocopy-noise-textures-sbh-001.jpg and photocopy-noise-textures-sbh-004.jpg from the Photocopy noise texture pack at the Shop
With these ready, let’s get started.
Applying the textures
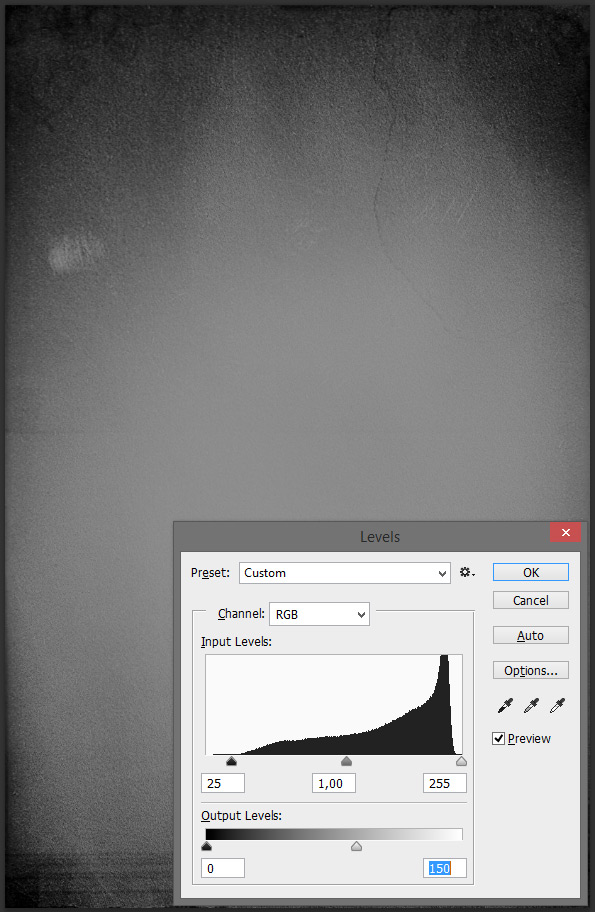
Open and place VV_MicroscopicBurnedFilm_10.jpg in your document.

Rasterize, desaturate, and sharpen it, before moving onto levels (CTRL/CMD+L). I’m using the values below.
Finalize by setting the layer to Soft light @ 35% opacity.
Next up is the painter’s effect #7 texture. Open and place painter-s-effect-snb-07-4416485295_a78f2da722_o.jpg (yay Flickr file names) into your document.

Levels adjustments.
Blending mode: soft light @ 50% opacity.
Next: VV_GrindhouseTexture_07.jpg


Next: delta_3200___120_film___very_dusty_by_jakezdaniel-d5milqk.jpg (yay DeviantArt file names). It’s sized up so none of the film edge numbers show up, but not rotated.
No need to play with levels. Simply put the blending mode to screen @ 50% opacity.

Next: Like leak #8. Place 8.jpg in your canvas, and change the layer’s blending mode to screen @ 100% opacity.
Next: .too dusty. film texture. Place _too_dusty__film_texture_by_missalienation_stock-d3bxobe.jpg into your canvas.

Blending mode: multiply @ 100% opacity

Next: photocopy_by_clarisaponcedeleon_-_deviantart.jpg. You’ll have to slightly distort this texture so it fully covers your canvas.
Note the particular levels settings, lowering the white output on the texture.
Blending mode: soft light @ 25% opacity.

A bit of housekeeping:

The case of the photocopy noise textures
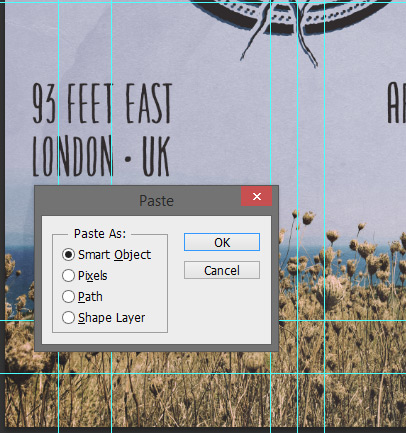
The two textures from the Photocopy noise texture pack are not used as overlays, but rather pasted into layer masks to weather the type and the badge.
The process to paste a texture in a layer mask is super simple:
- Open your texture.
- Copy its contents.
- ALT/OPTION+CLICK the thumbnail of the layer mask you wish to paste the texture into. This will show you the content of the layer mask, and allow you to edit it. Make sure to disable the little chain link of the layer mask so you can move the texture without moving the element along
- Make the edits you deem necessary (size, placement, sharpening, levels, etc.)
- Admire the result
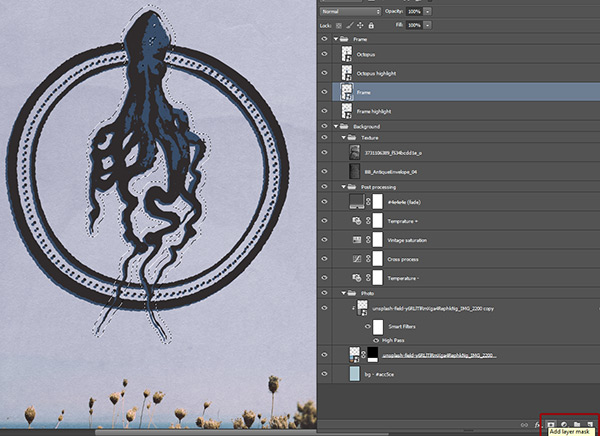
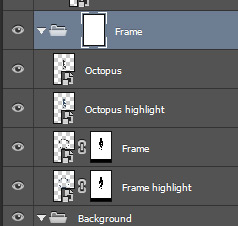
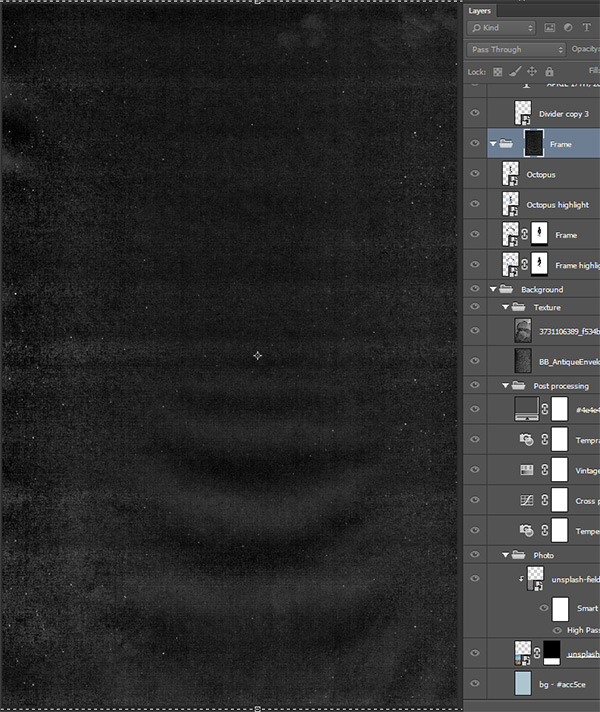
Let’s start with photocopy-noise-textures-sbh-001.jpg. Add a layer mask to the layer group that contains your badge. It’s name Frame in my document. Make sure the link between the layer mask and the layer group is disabled.
ALT/OPTION+CLICK the layer mask, so you can access its content. Note how the layer mask is highlighted.
Open photocopy-noise-textures-sbh-001.jpg, and copy and paste it into the layer mask.
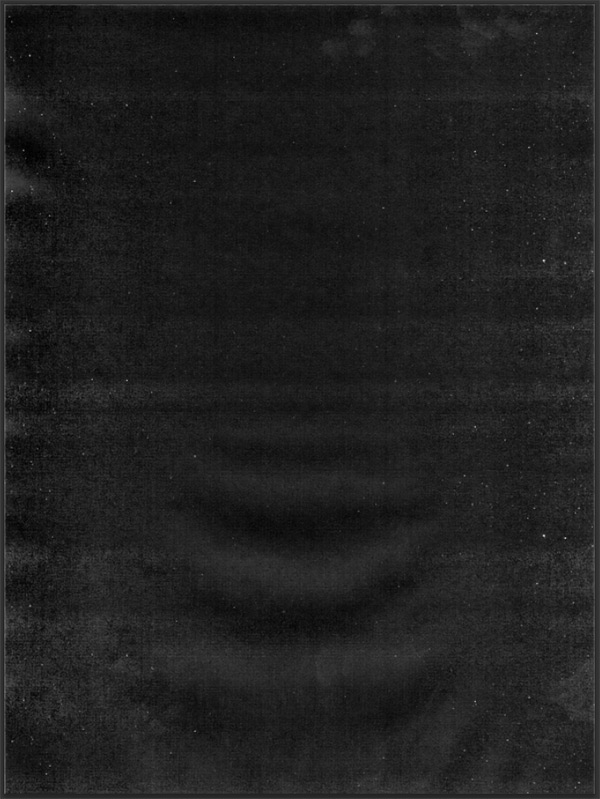
Sharpen it, and invert it (CTRL/CMD+I).

Use levels to increase the contrast.
Note how the result will slightly differ from the preview given by the levels. It’s probably due to how high-resolution our document is.
Click on the octopus layer thumbnail, and admire the result. Adjust the levels again if necessary.
We’ll follow the same process, and paste photocopy-noise-textures-sbh-004.jpg into a layer mask attached to the layer group containing all the type elements.


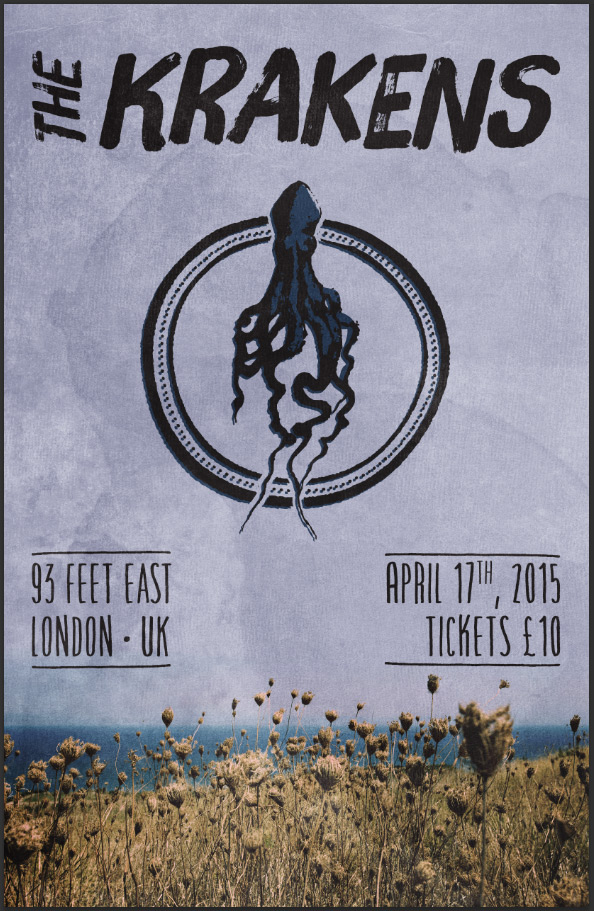
With that done, here’s a before/after comparison of the effect on the title. It’s very subtle, but it participates to the overall vibe.
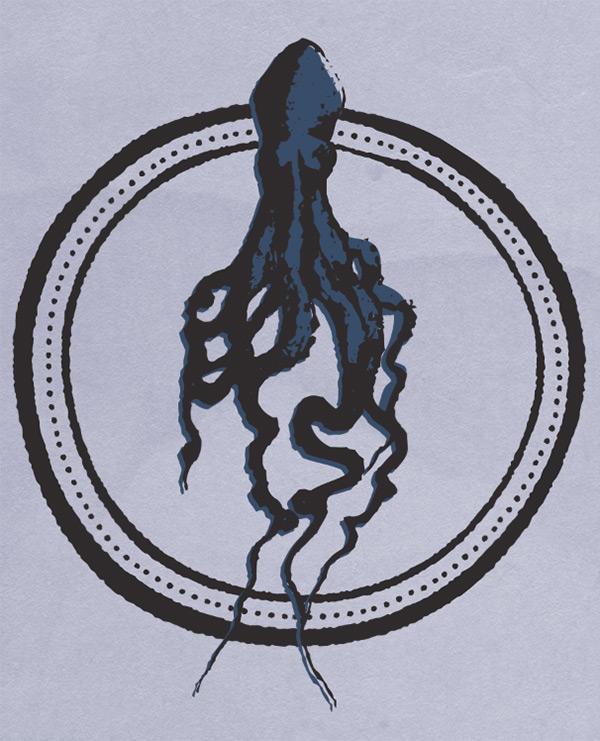
STEP 6: BRIGHTNESS ADJUSTMENTS
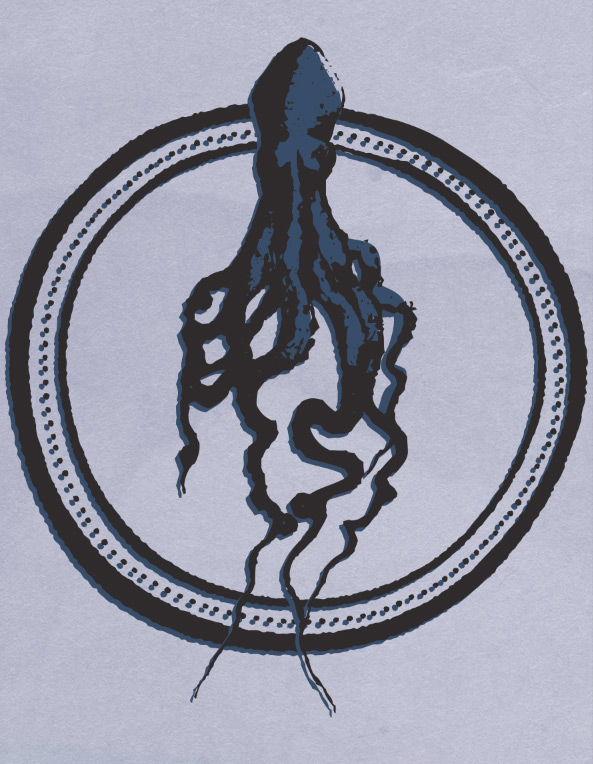
The poster is quite dark. So dark in fact, that we can’t read the details of the octopus very well.
My solution: changing the blue hue used for the offset highlights. You’ll want to stay in a range of brightness and saturation levels that could be present in the original image, so the blue doesn’t seem out of place in the final piece.


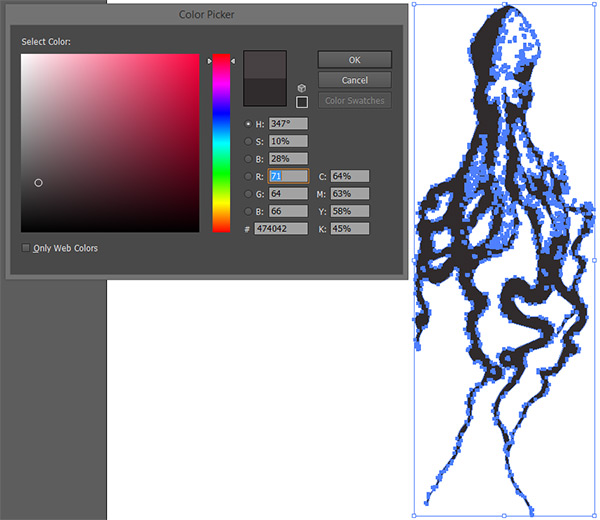
Going from #384d69 to #54769b helps, but it seems that we could do a bit more. Let’s change the brown hue of the type a bit too, to #474042.
After switching around all the dark brown elements, we’re in a better place.
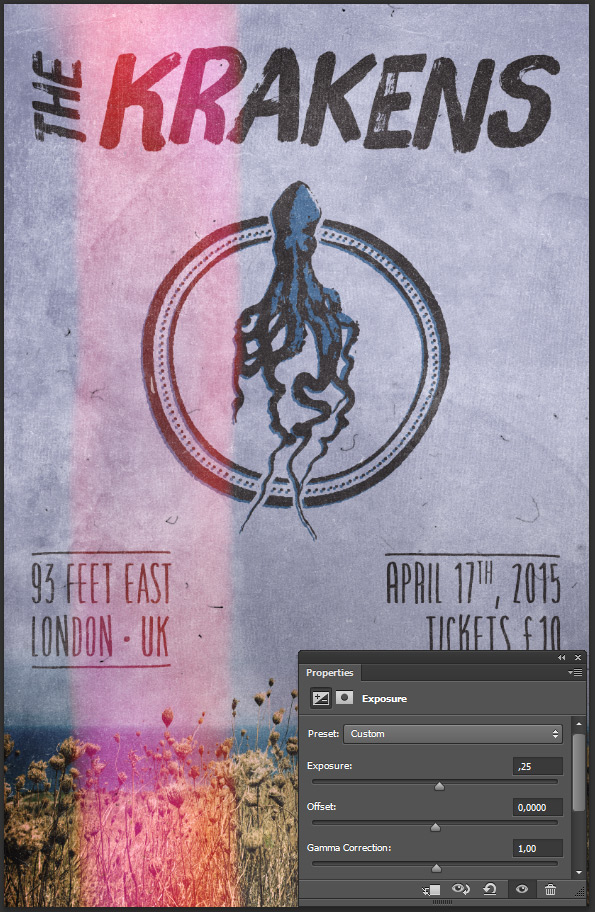
But it isn’t enough. So I added an Exposure adjustment layer at the top of my layer stack, to brighten things a bit more. I just changed the Exposure value to +0.25, which is plenty enough to make a visible difference.
STEP 7: FINAL TOUCHES
With the poster in place, it’s time to use the Photoshop action I mentioned when applying the global textures.
First, create a merged copy of all your layers at the top of your layer stack. There’s a convenient keyboard shortcut for that: CTRL/CMD+SHIFT+ALT/OPTION+E. Just make sure you have your most top layer selected when doing that.

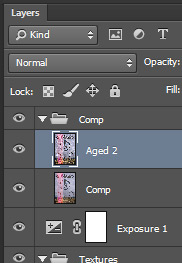
After a bit of layer organization, you should have something like my layer stack. I’ve called the merged copy Comp, and I’ve given it its own layer group.

Duplicate the Comp layer, and rename the copy into Aged 2. Run the Aged 2.atn action you’ve downloaded earlier on the layer.
The result will be this very noisy version of the poster. It’s like a bad color copy of the poster.
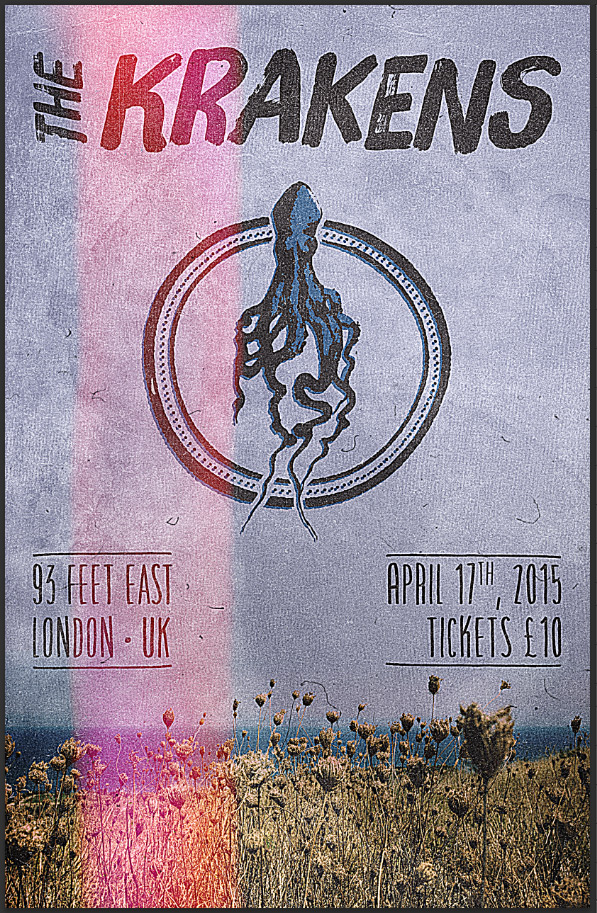
Simply change the layer blending mode to soft light @ 25% opacity. It’ll add a bit of that noise to the piece, and also boost the contrast slightly.
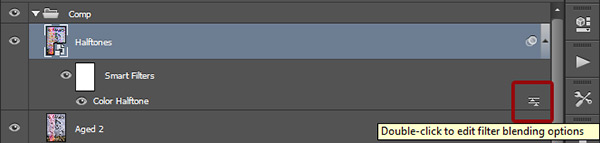
Create another merged copy at the top of your layer stack. Rename it Halftones, and make that layer a smart object (Filter > Convert for smart filters).

Let’s apply a color halftone filter to that top layer (Filter > Pixelate > Color halftone.


Change the filter’s blending mode to Soft light @ 100% opacity by double clicking on this little icon in your layer palette.

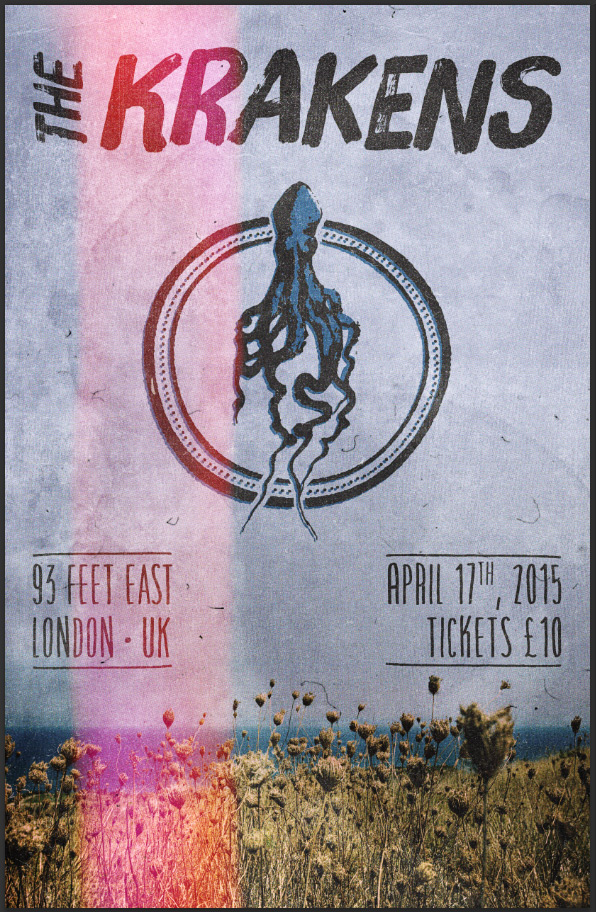
Change the layer’s blending mode to lighter color @ 50% opacity.
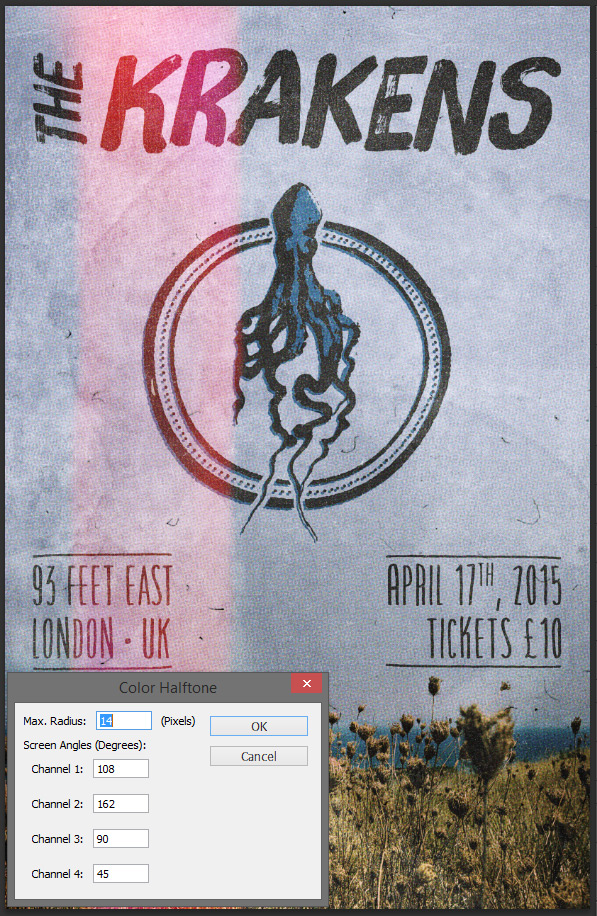
Since the effect has been faded too much, we’re just going to increase the size of the halftone dots. Double click the filter’s name in the layer palette.

Simply change the value of the Max. radius to 14 for a more pronounced effect.

The icing on the cake: a last Hue/Saturation layer, that’s clipped to the Halftone layer (CTRL/CMD+G with the layer highlighted in the layer palette). With a value of -75, it’ll participate to soften the color distortion brought by the halftone effect.

And we’re done!
Last notes
I hope that you enjoyed this poster design tutorial. As usual, if you have any questions, comment below or tweet at me @simonhartmann.
Remember, there’s only a few days left to get the Monster Creative Font Bundle for just $29, so if you don’t want to miss out, we recommend jumping on it now.
Monster Creative Font Bundle (Including Web Fonts + Extended License) – 97% Off
Amazing and extensive article!! thanks for sharing!
Hey Julian,
Oh thank you so much for your extremely kind words!
I really hope that this tutorial is helpful and that you enjoy recreating the poster :)