Would you like to convert your Adobe Illustrator brushes to Affinity? We have put together this step by step guide to talk you through the process. You can also follow this tutorial if you are wanting to create a brand new set of Affinity brushes, and are looking for some tips.
Things to note: Affinity has both Vector and Raster Brushes. This tutorial will help you convert your Illustrator brushes to Vector format.
Step 1. Prepare your Illustrator brush
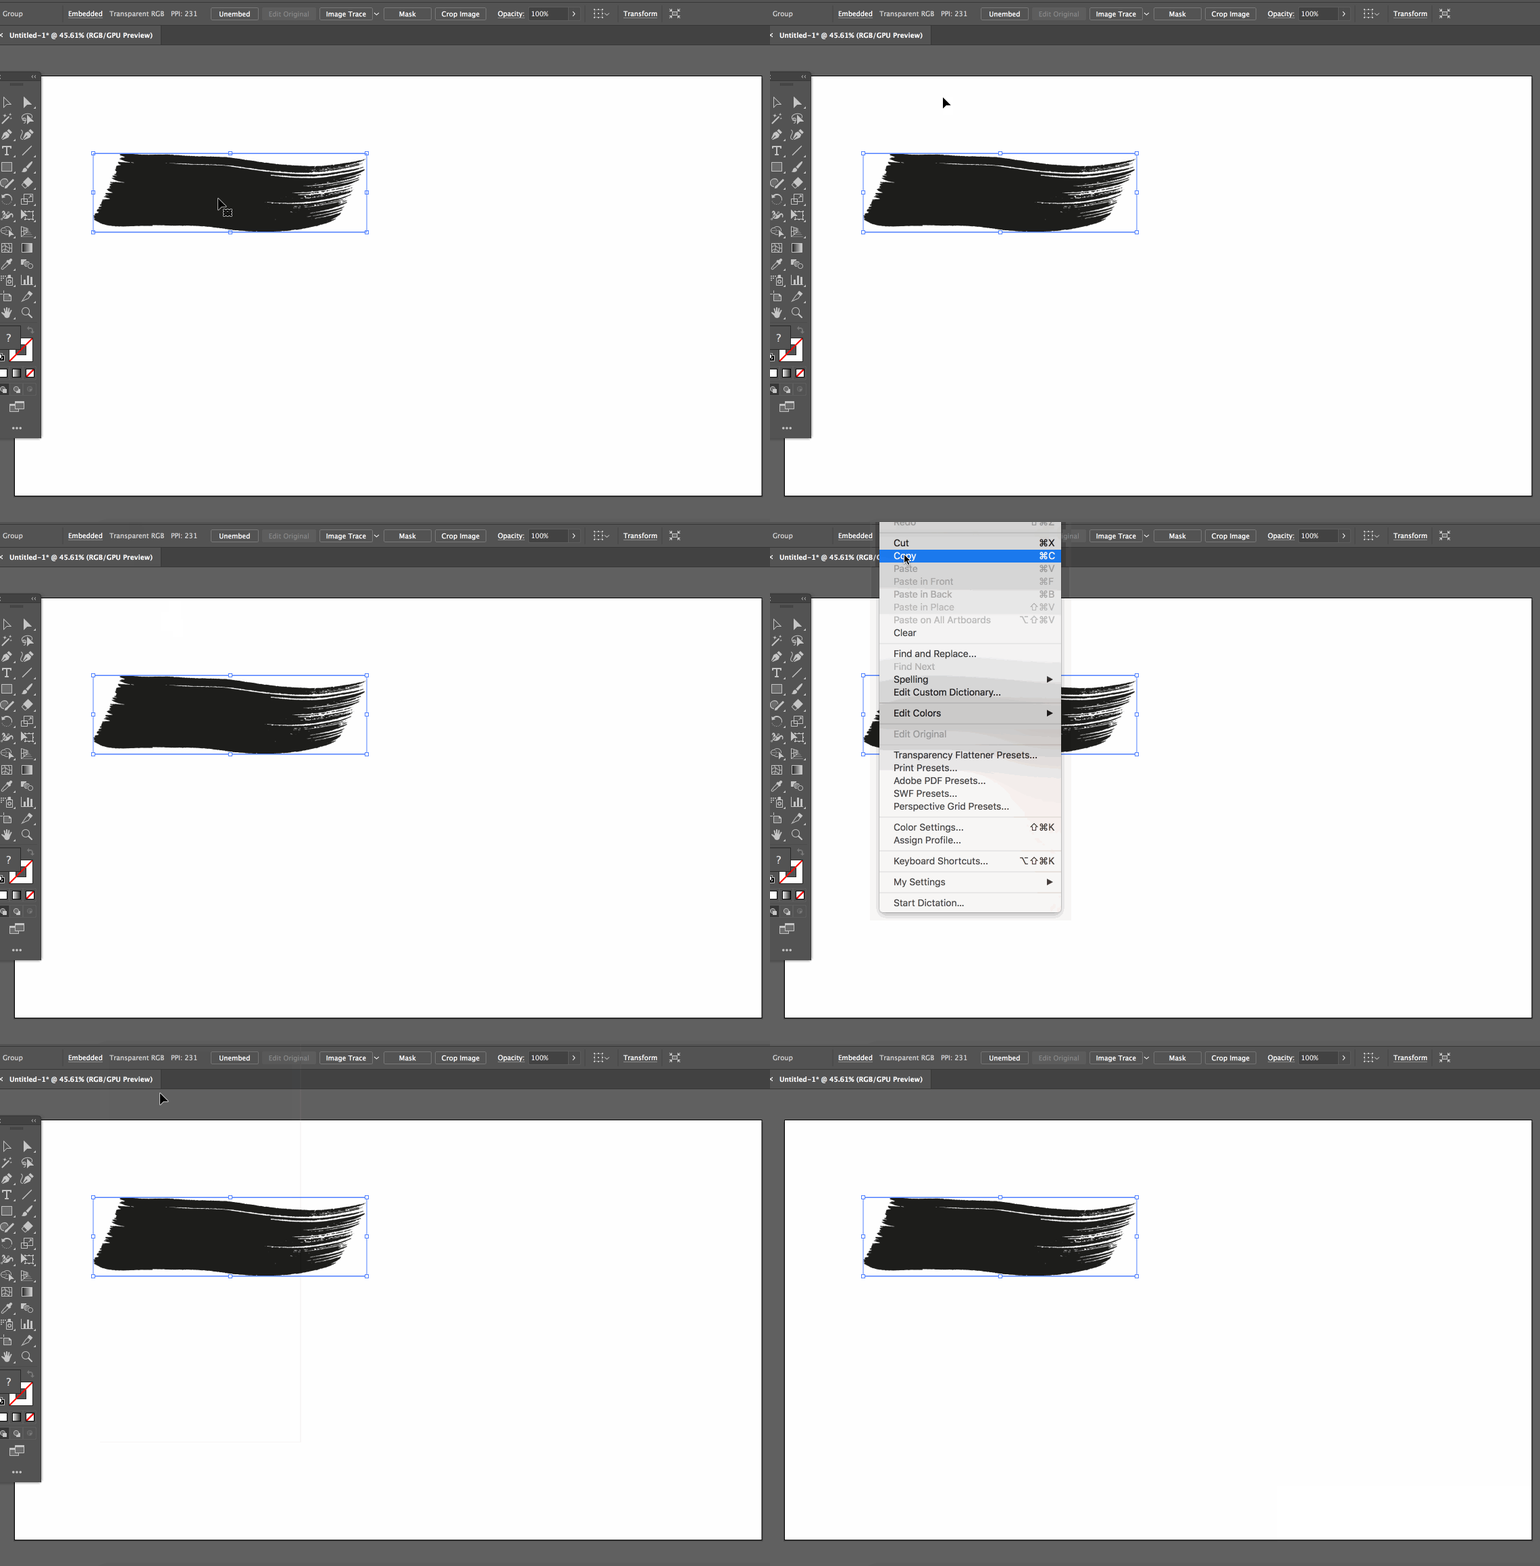
- Open Adobe Illustrator.
- Open your brush swatch that you would like to convert.
- Click Edit > Copy.
Step 2. Paste your brush into a raster software
If you are creating a brand new brush for Affinity you can follow the process from here and simply open your brush swatch in Photoshop or Affinity.
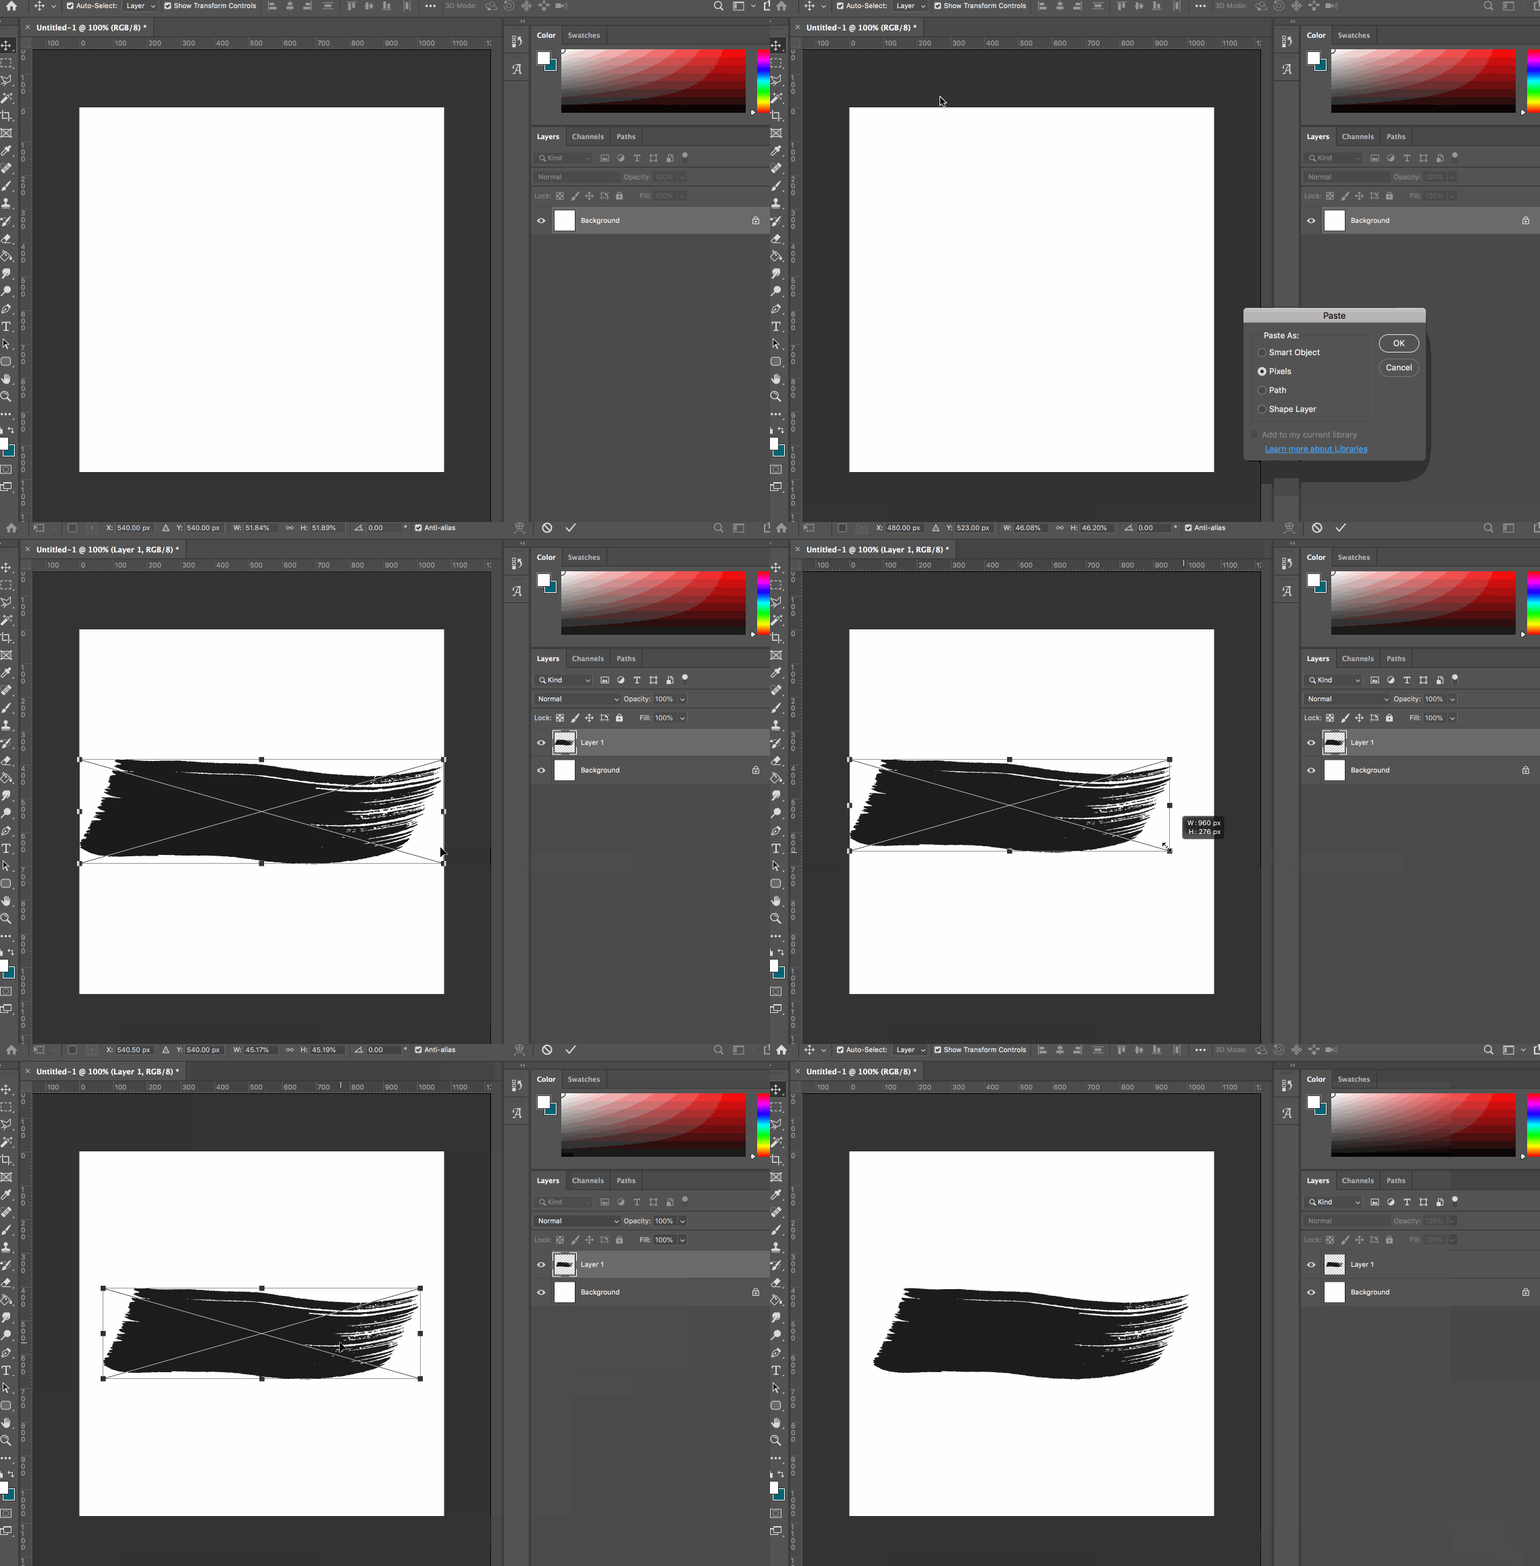
- Open Adobe Photoshop or Affinity – for this tutorial we have used Photoshop.
- Create a new document. Make sure that you have selected 300 DPI or over.
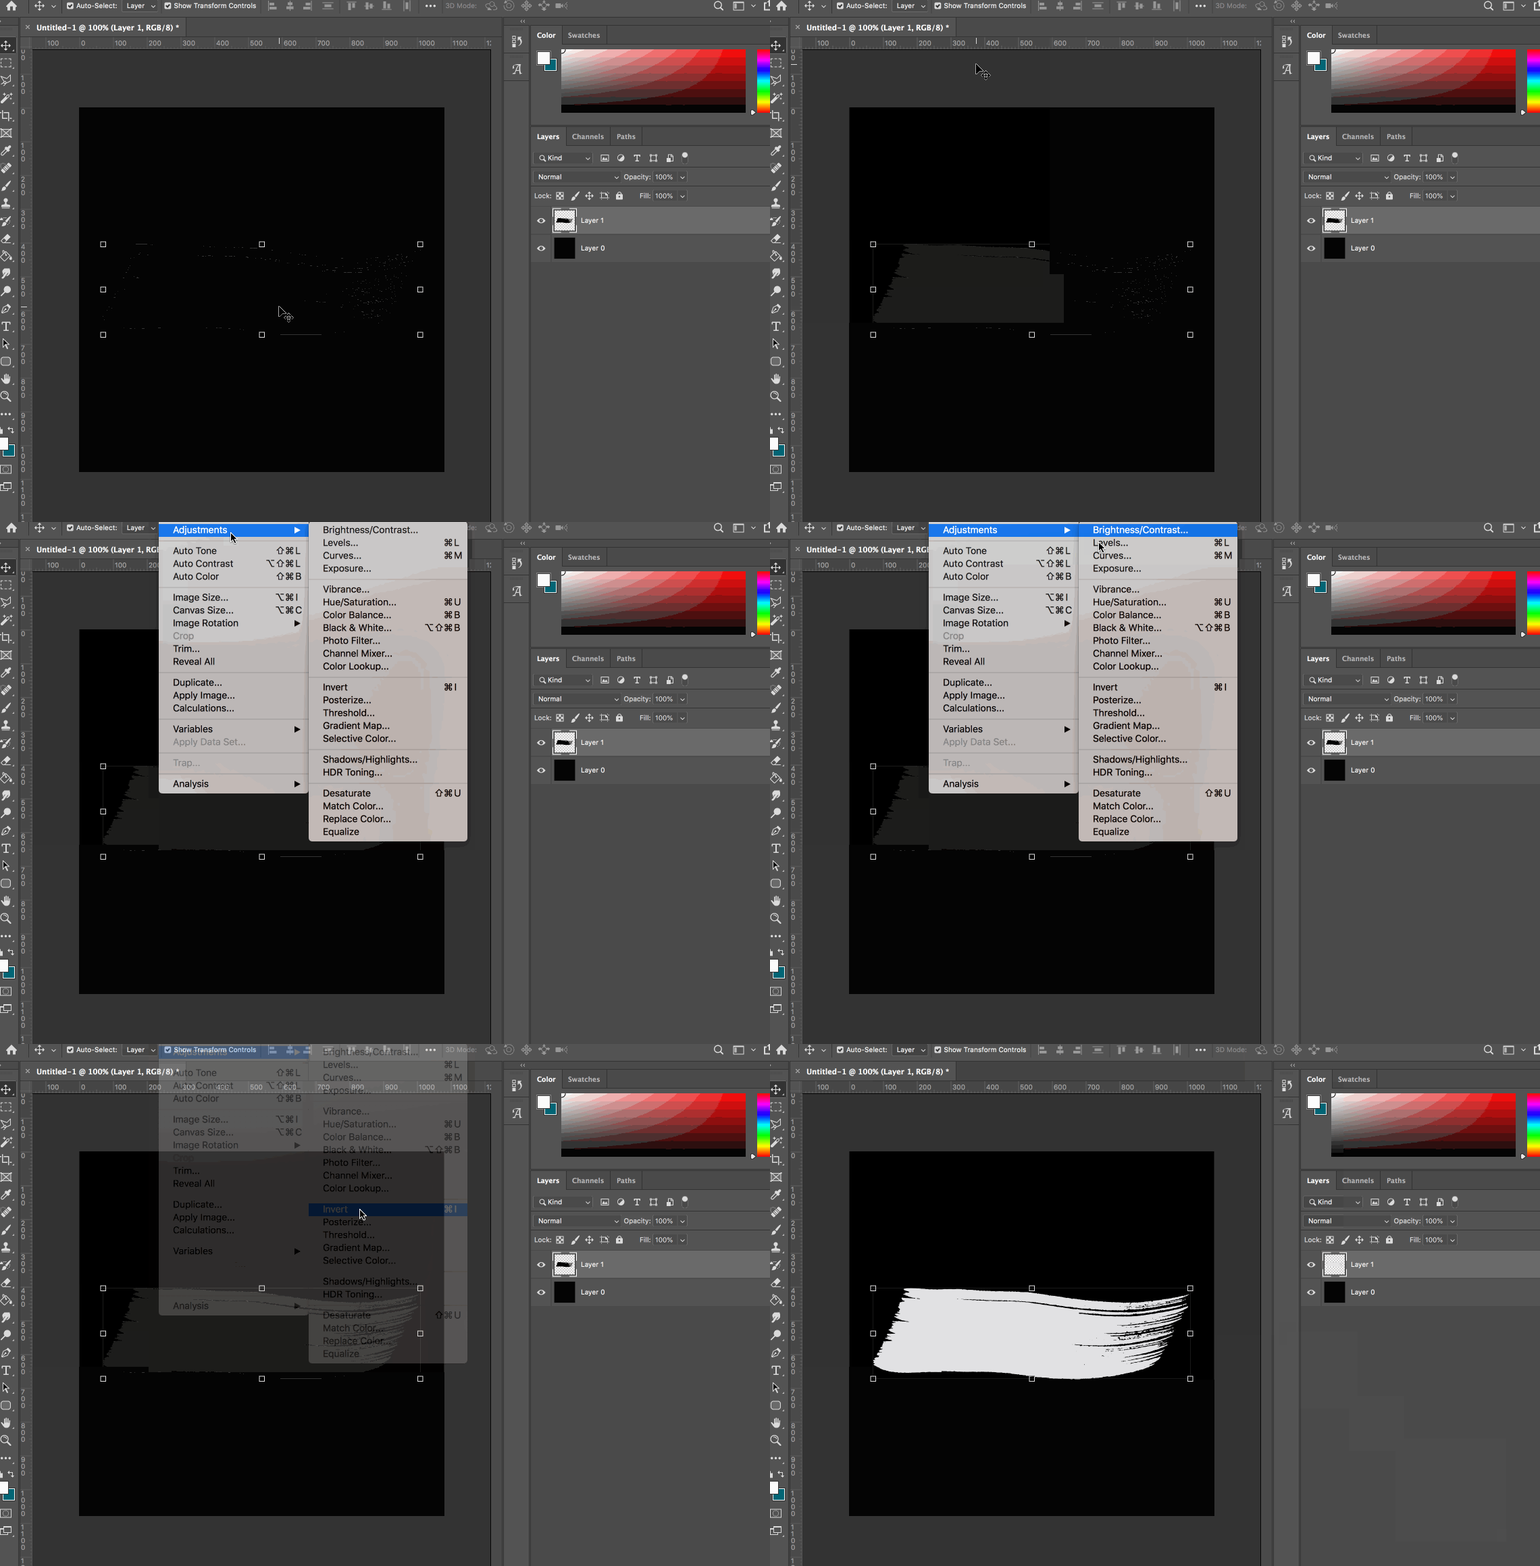
- Click Edit > Paste to paste your brush swatch.
- Resize your brush swatch, leaving space around it. We have left 100 pixels either side, as shown below.
Step 3. Make your background black
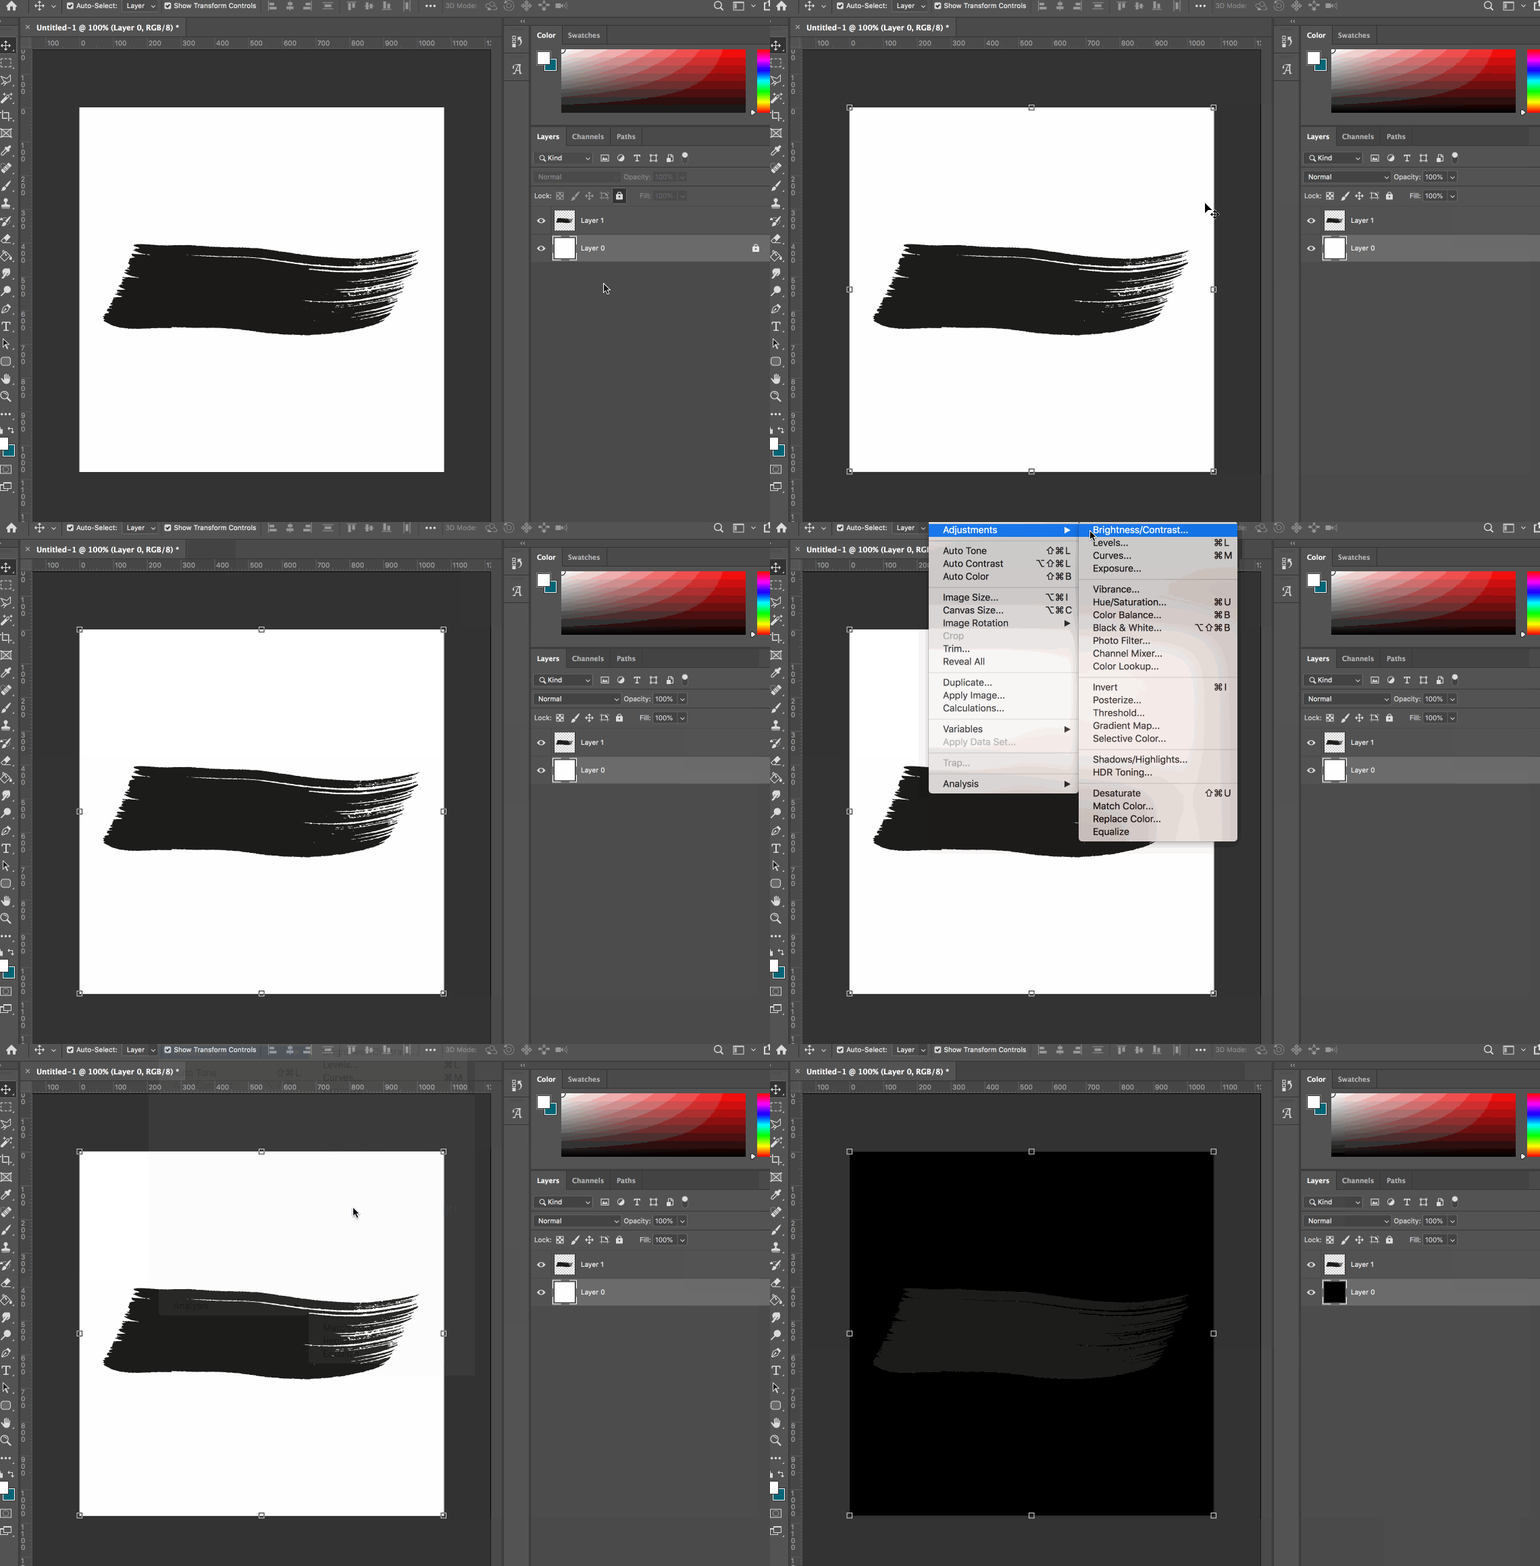
- Select your background layer.
- Click the lock icon to unlock your background layer.
- Click Image > Adjustments > Invert. This will then make your background black.
Step 4. Change your brush to white
- Select your brush swatch layer.
- Click Image > Adjustments > Invert. This will then make your brush swatch white.
Tip: You can also change your brush swatch colour by adding a white ‘Colour Overlay’ if you prefer.
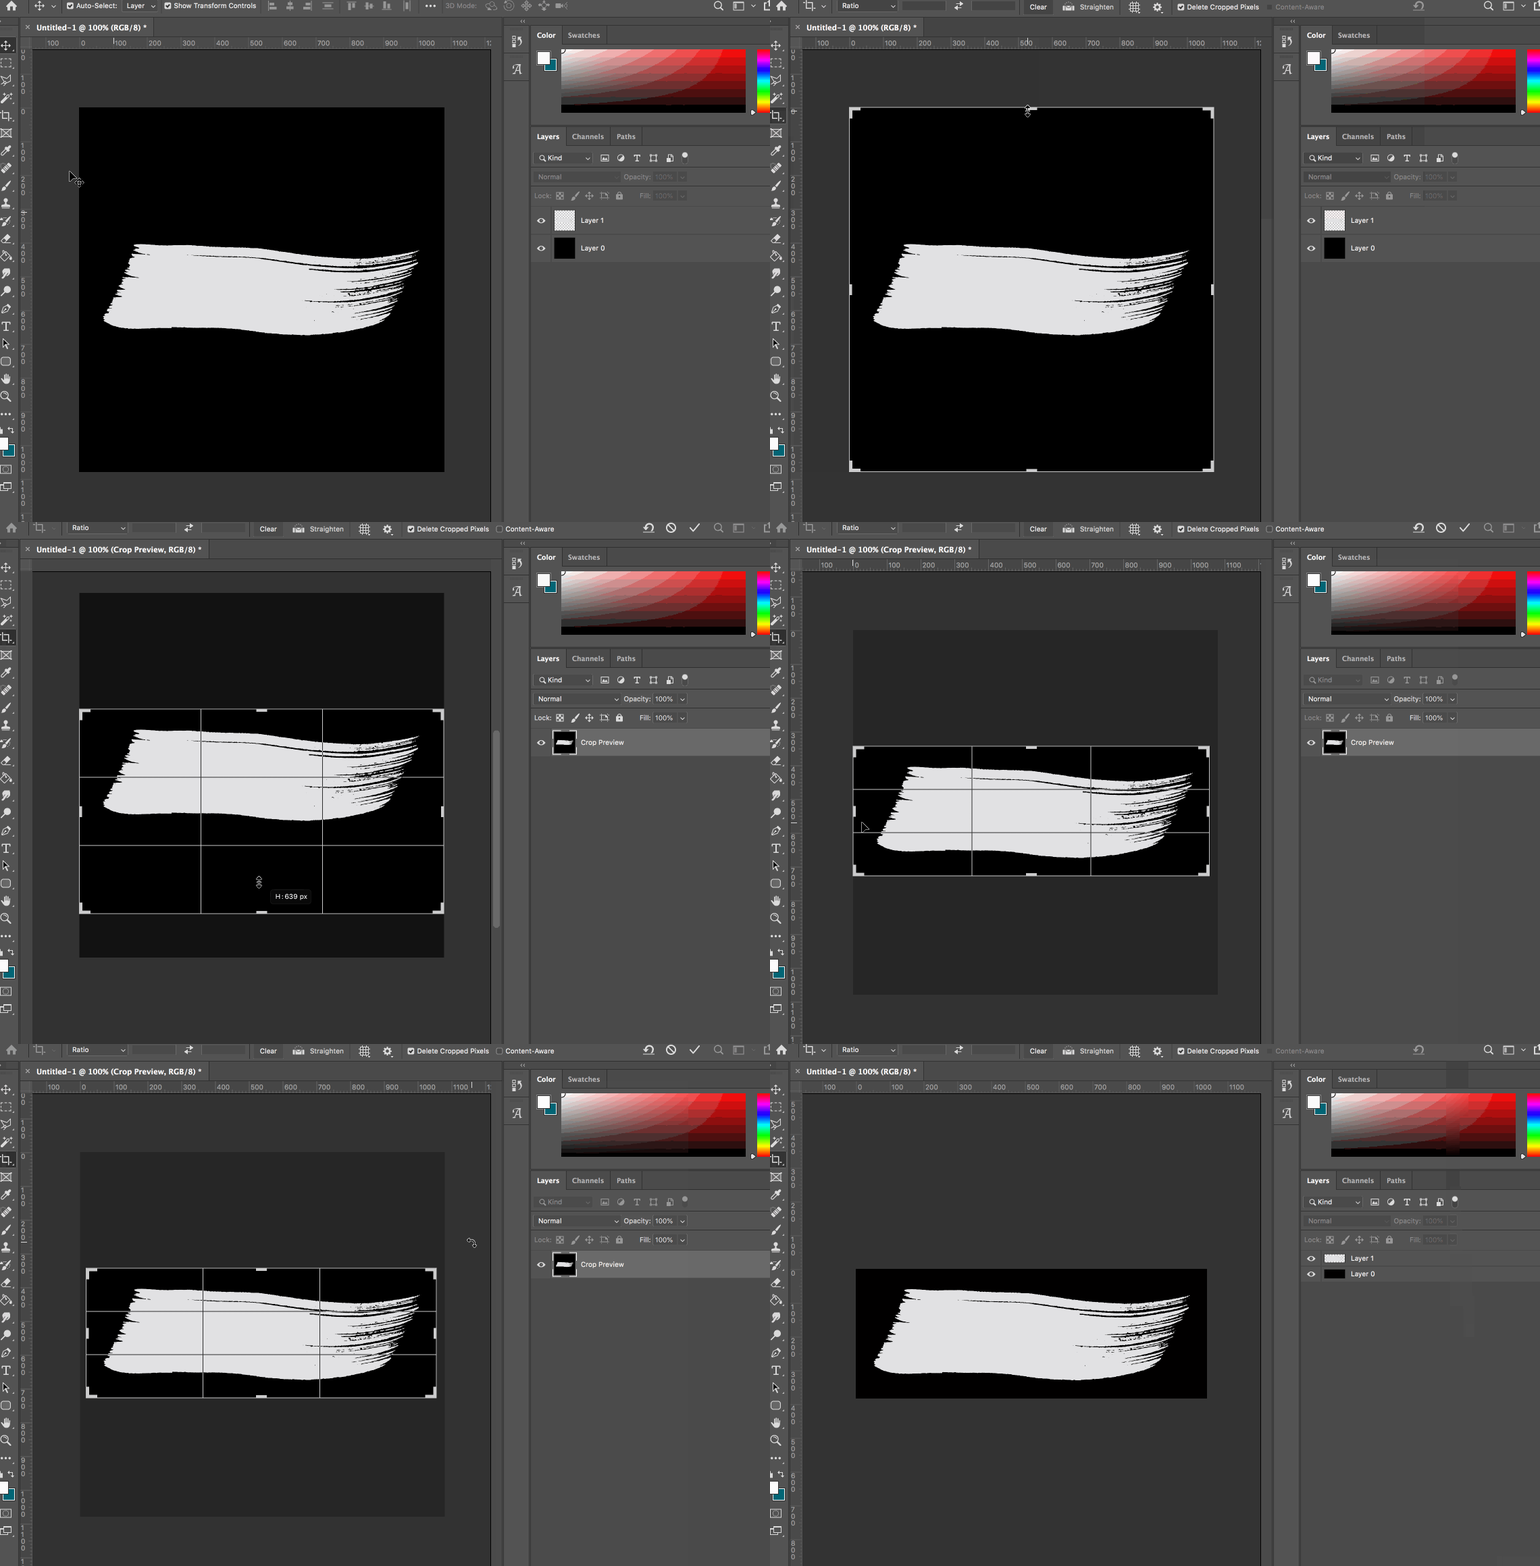
Step 5. Crop your brush
- Select your Crop Tool.
- Click and drag your canvas edges in to crop your brush swatch preview, leaving a gap of around 100 pixels round your brush stroke.
- Click the Tick icon to crop your image.
Note: If you have the canvas too tight to the brush, this can cause problems when uploading into Affinity.
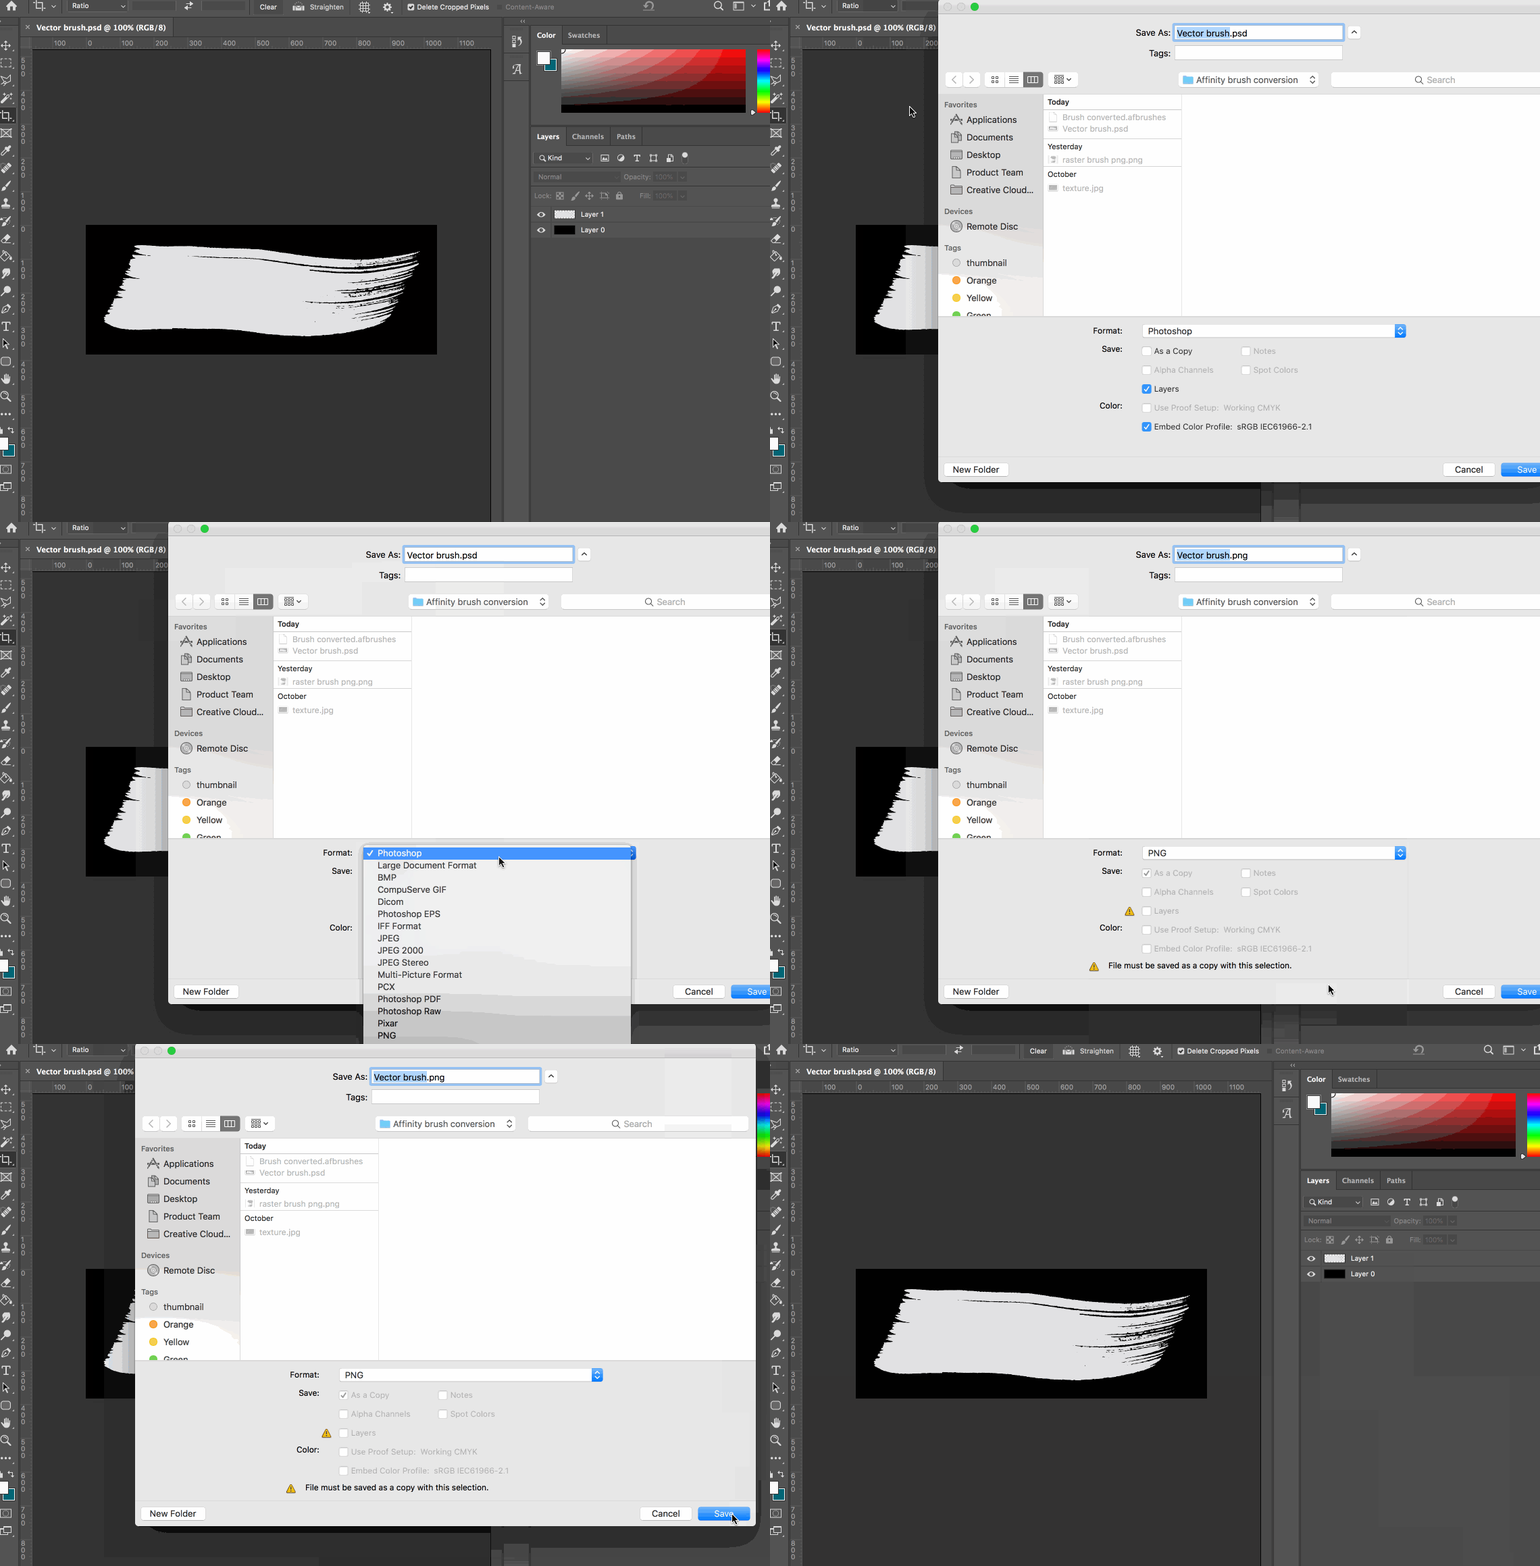
Step 6. Save your brush
- Click File > Save As.
- Name your brush.
- Click the ‘Format’ dropdown menu and select PNG.
- Click Save.
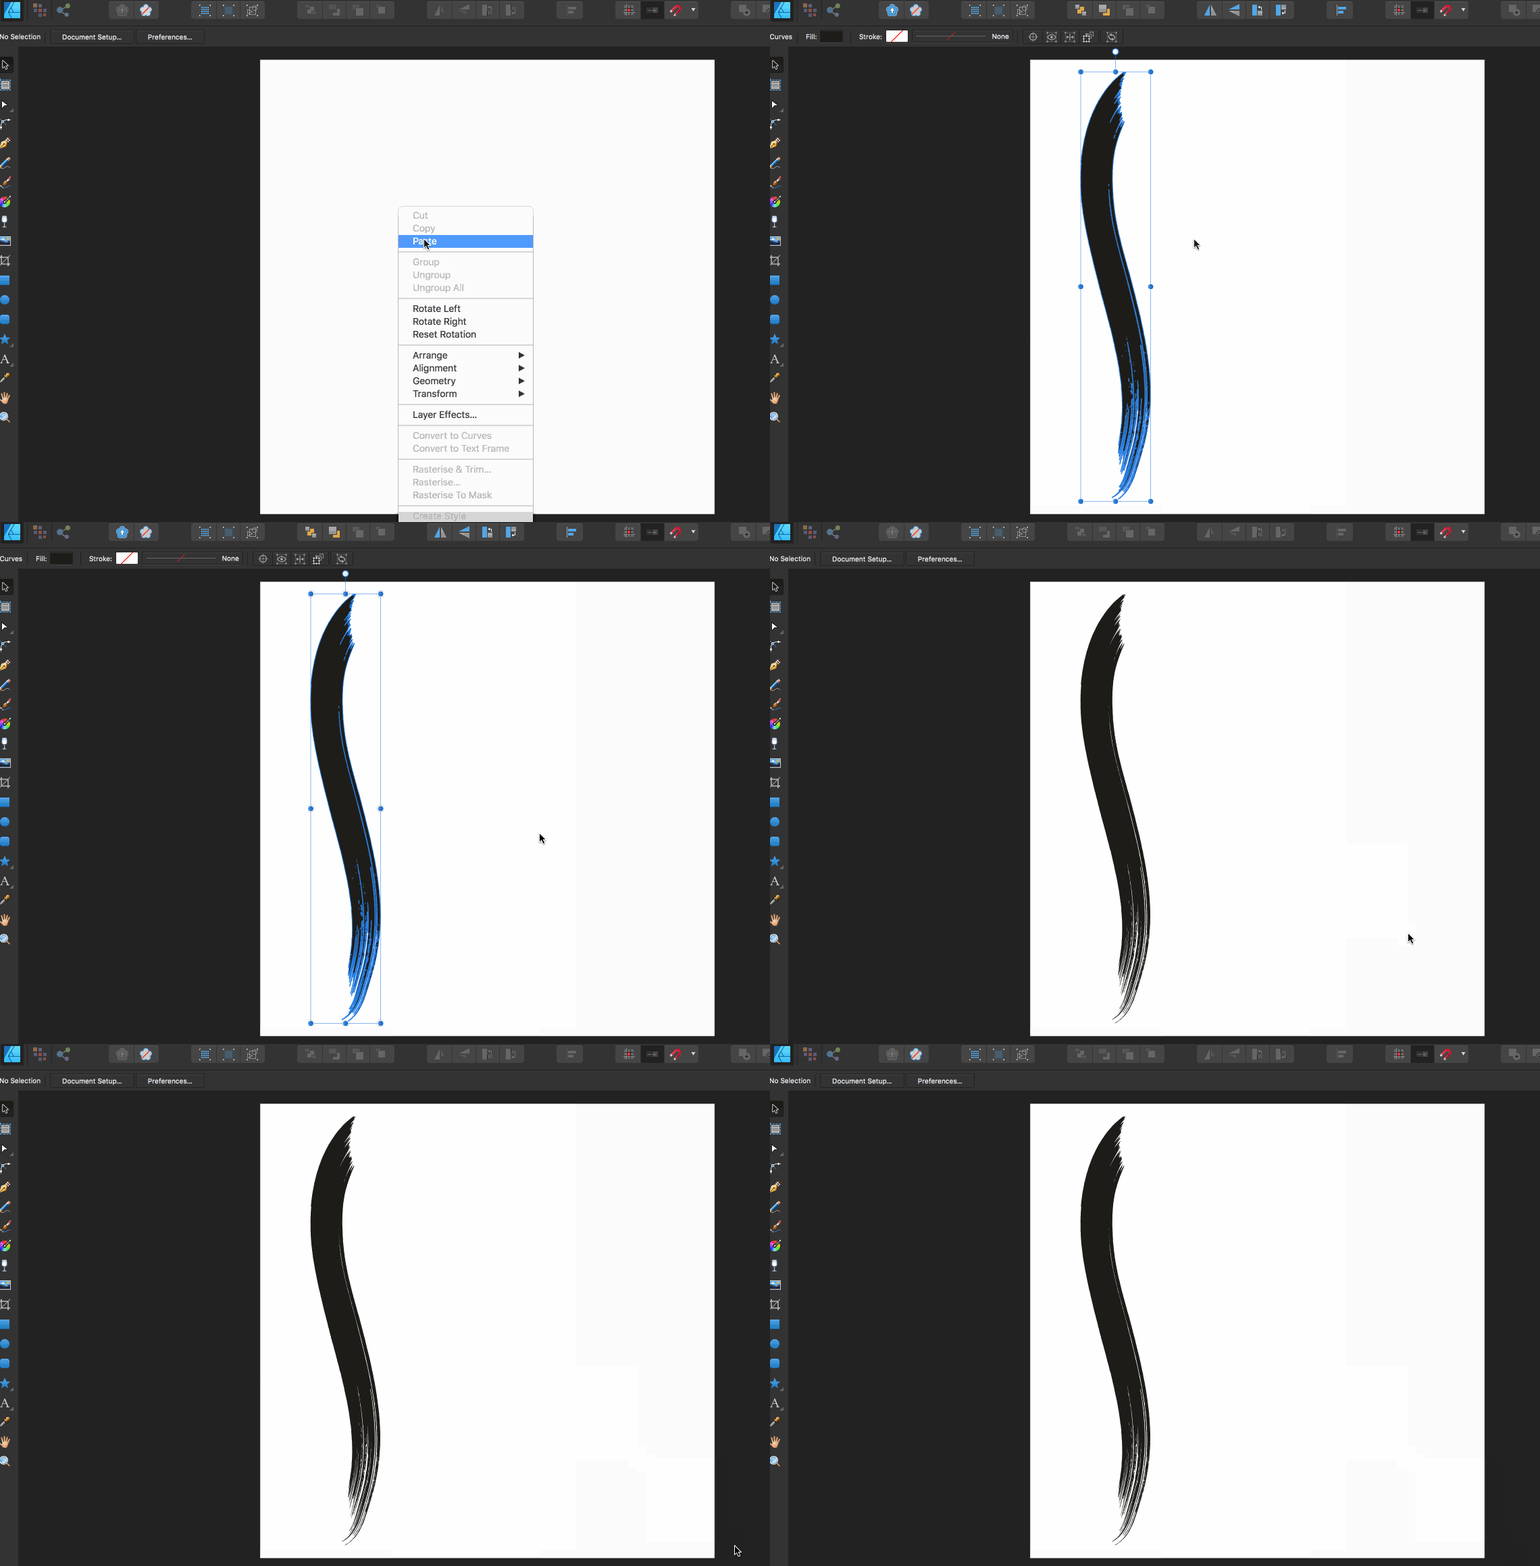
Step 7. Open your brush swatch in Affinity
This is an optional step but it can be helpful to be able to match up your Affinity brush’s appearance to your original Illustrator brush, by comparing them side by side.
- Open Affinity.
- Right click and select Paste to Paste your original brush swatch that you copied from Adobe Illustrator in Step 1.
Tip: If you are recreating a brush from Illustrator into Affinity, use the brush and copy and paste your brush stroke into Affinity so you can test your new brush against your old one to check that it looks aesthetically the same.
Step 8. Create your initial brush
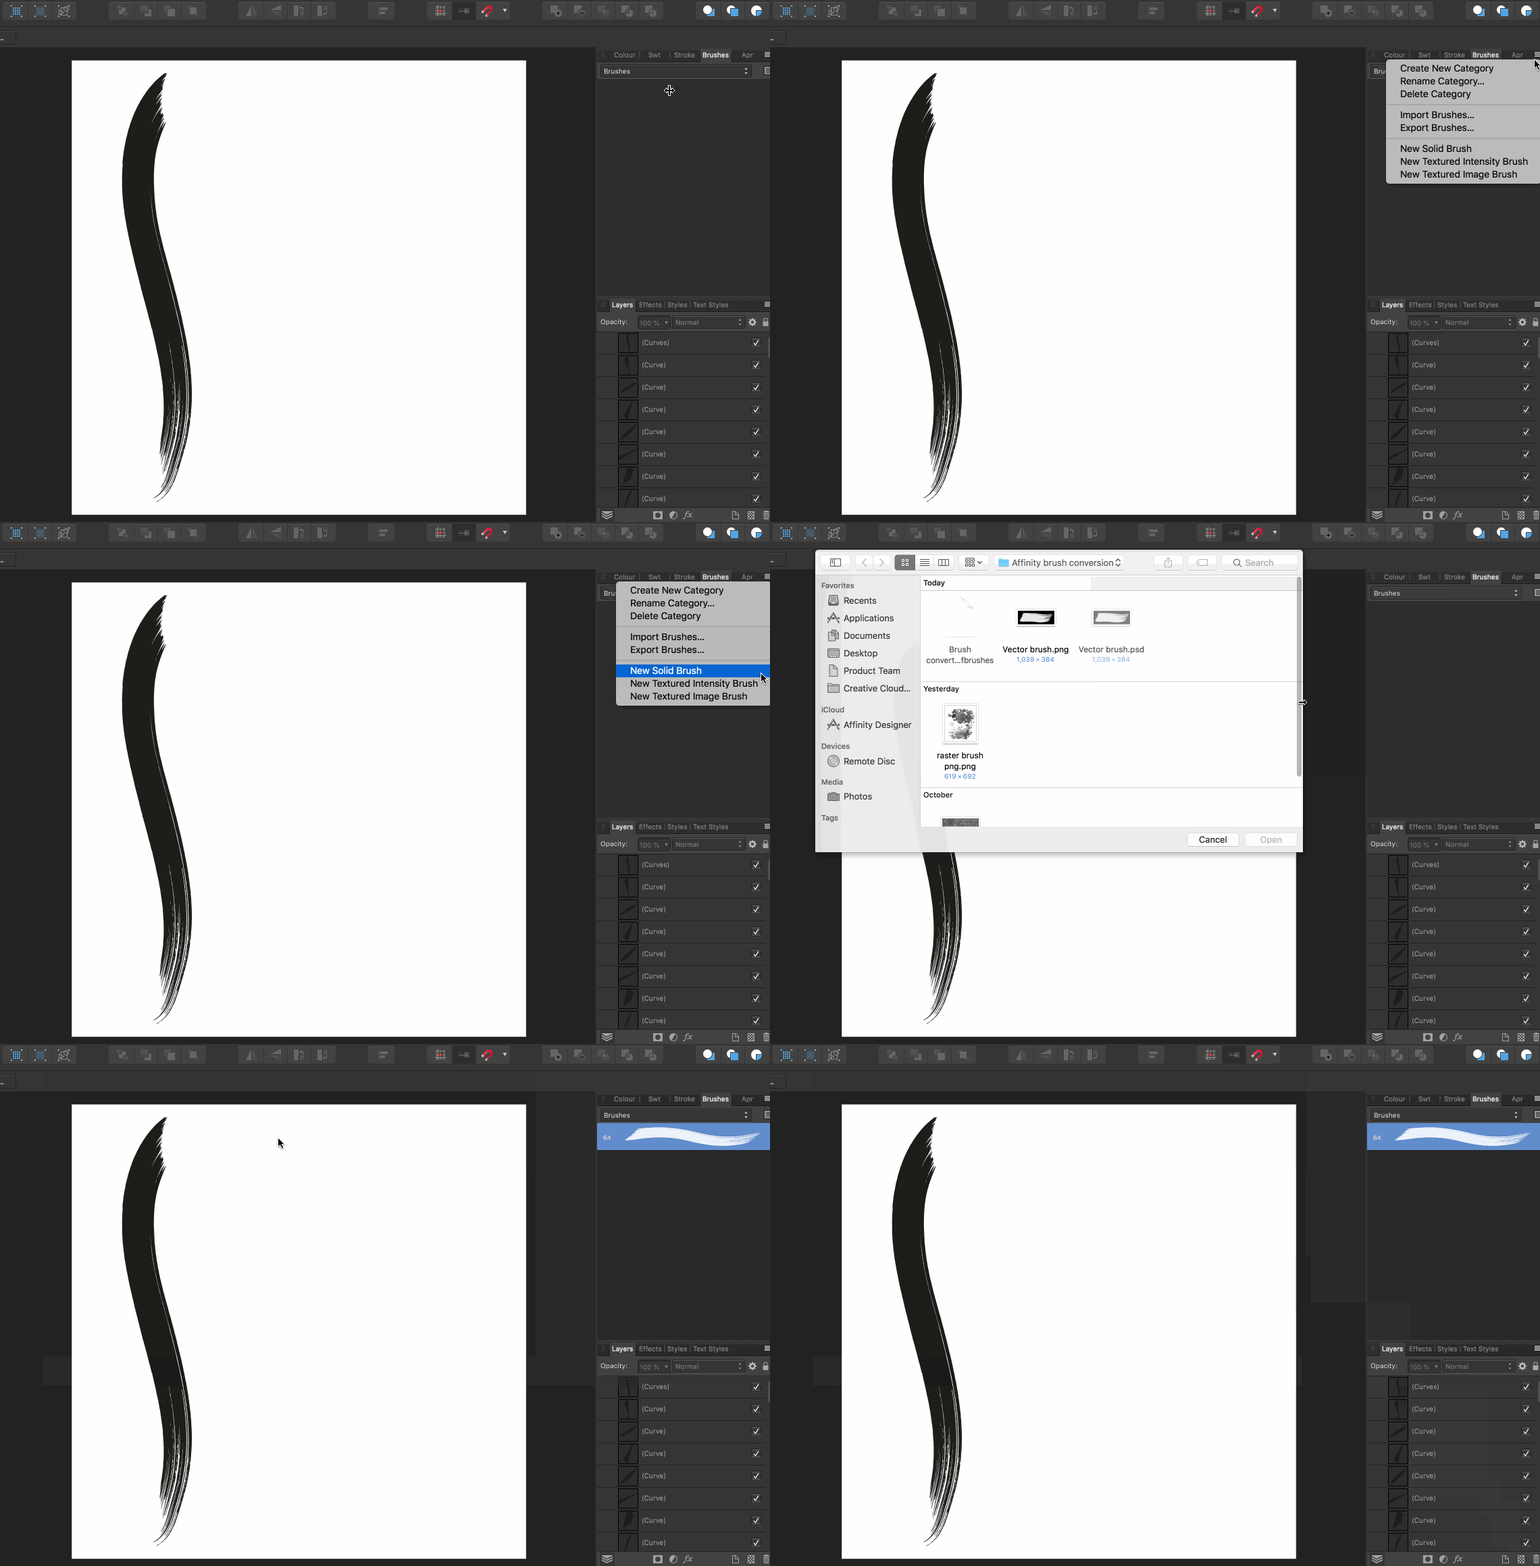
- Open the ‘Burger menu’ on the right-side tab (this icon looks like a tower of horizontal lines).
- Select ‘New Textured Intensity Brush’, as shown below.
- Select your PNG brush file.
- You will now see a new brush appear in your ‘Brushes’ tab.
Step 9. Test your brush
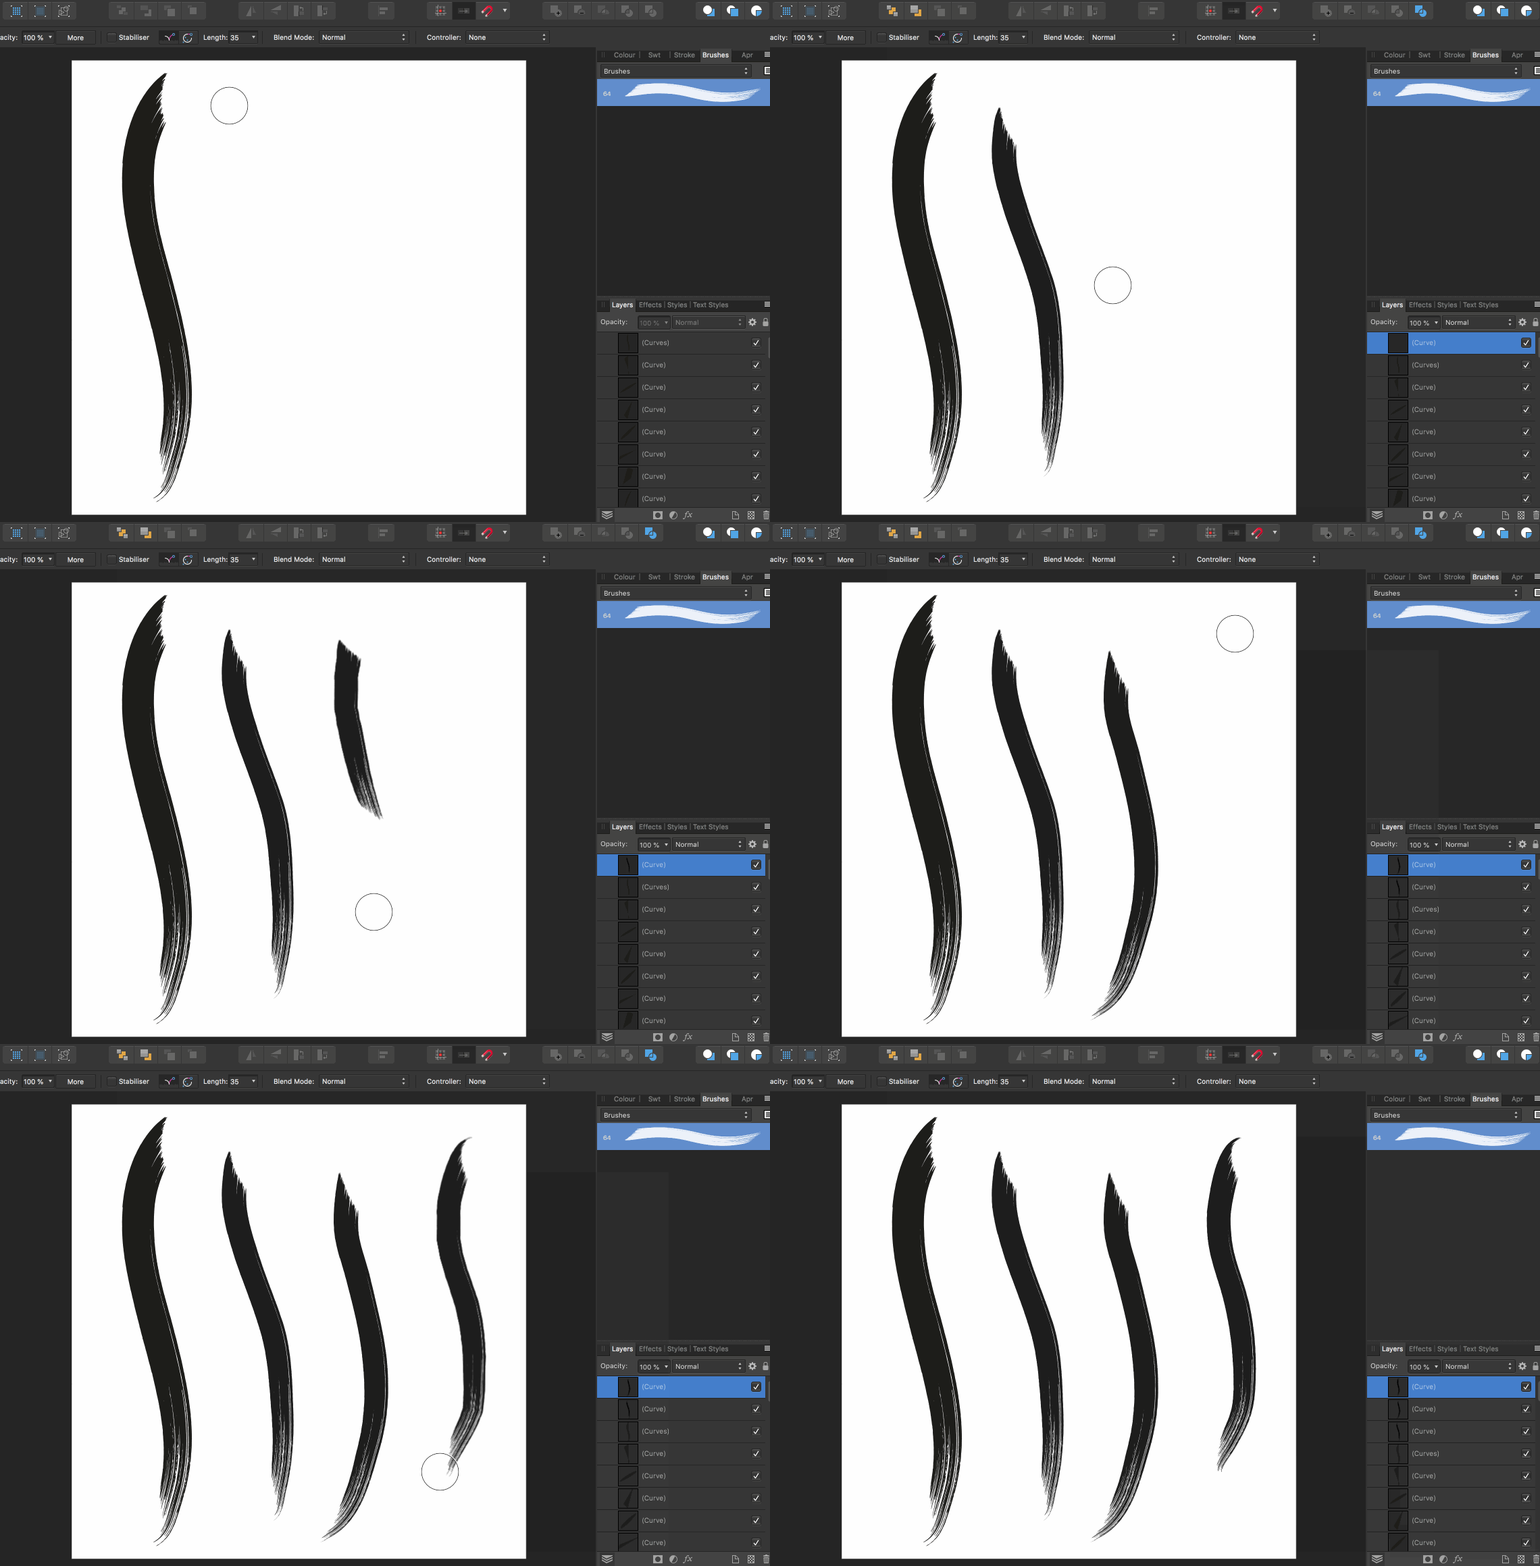
- Play around with it and ensure it looks right for your needs.
- If you followed Step 7, you can compare your brushes side by side to see if there are any differences between them.
- If you are happy with it, skip ahead to Step 11: Export your brush.
Step 10. Edit your brush
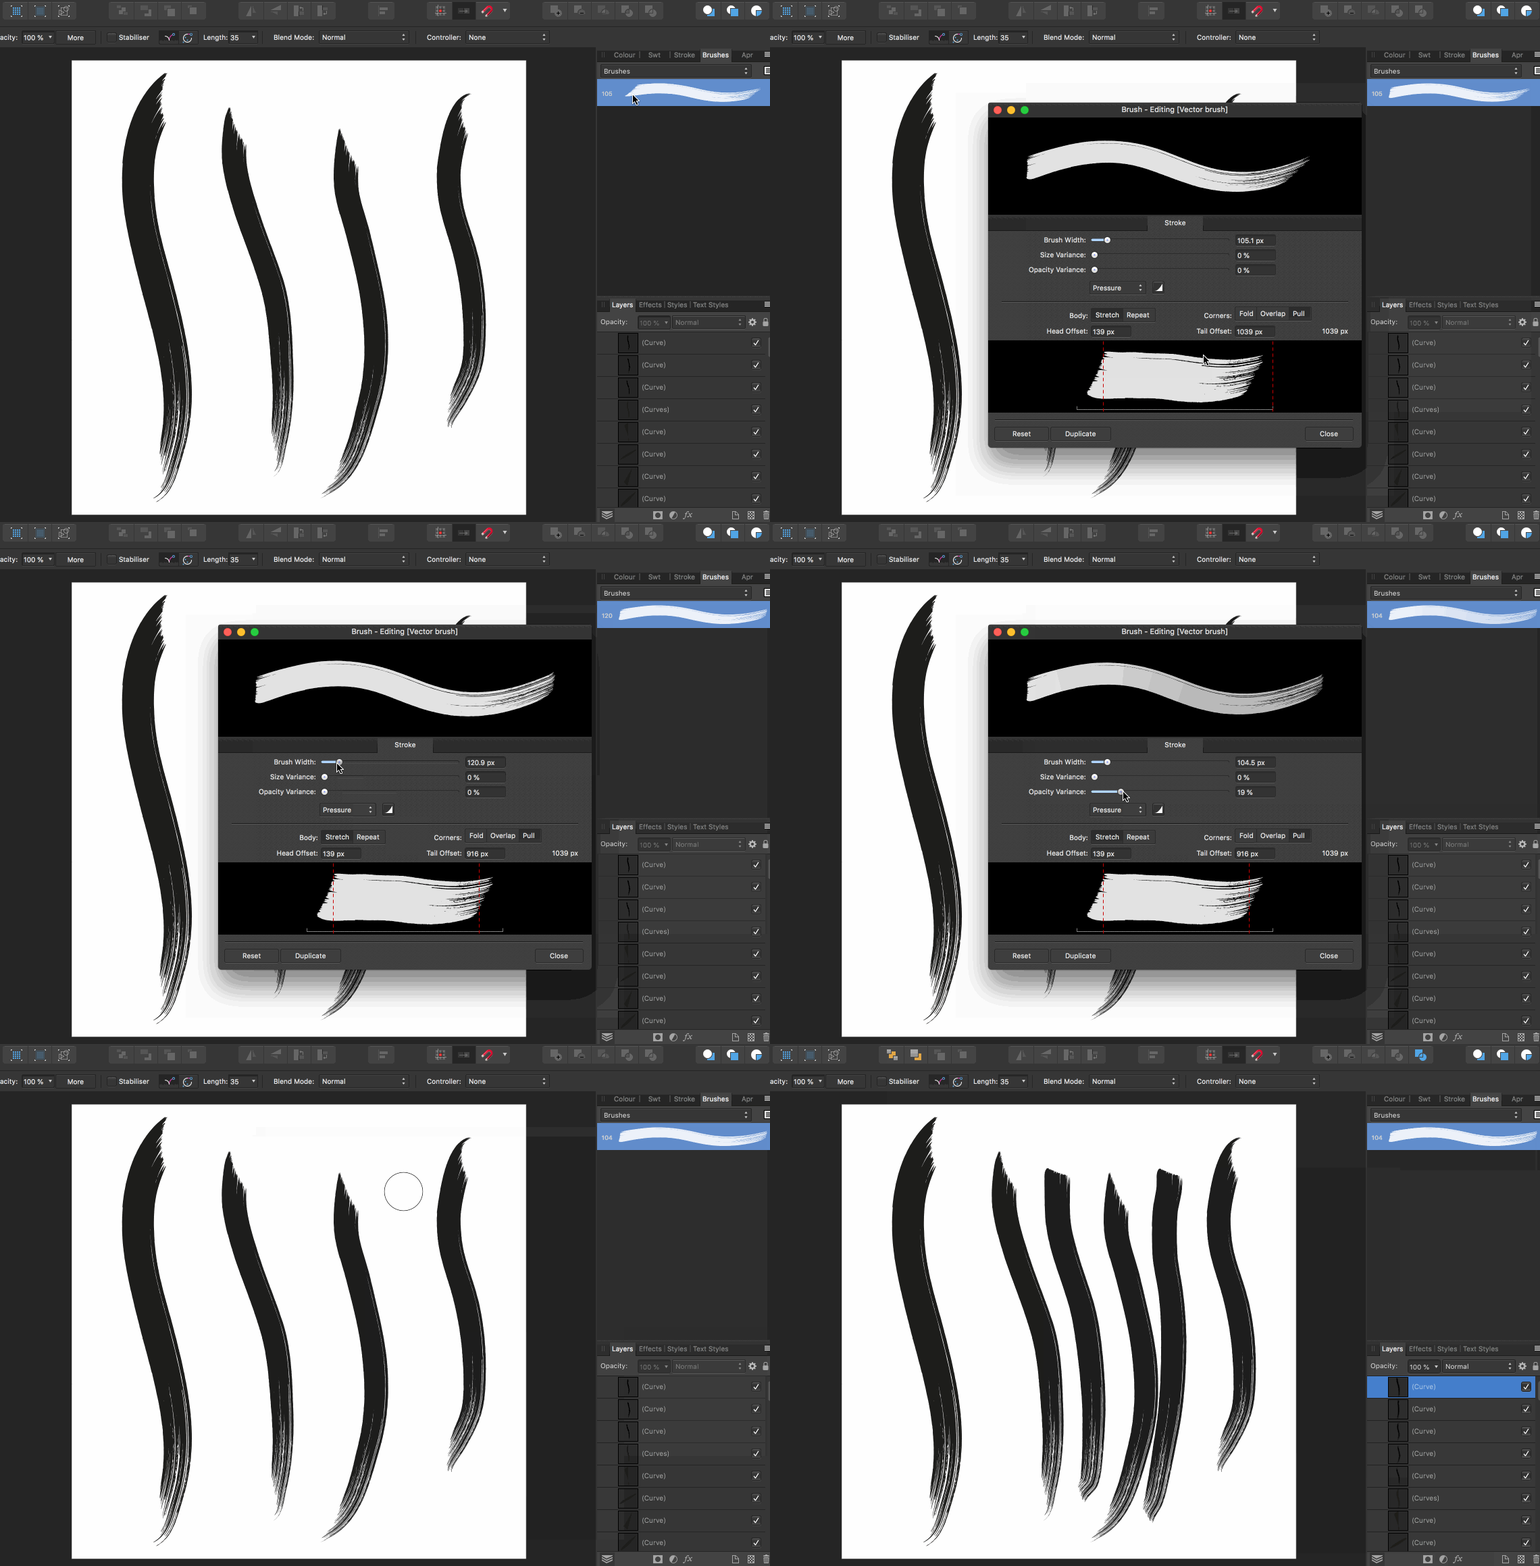
- Right click on your brush in your ‘Brushes’ tab and select edit brush or double click to open the ‘Brush – Editing (Vector Brush)’ options.
- Experiment with the sizing, spacing and any other options that you want to get your Affinity-created brush stroke looking as close to your original Illustrator brush as possible.
- Click and drag the dashed red lines on the lower brush preview to control the exact area of your brush stroke that will be repeated when your user draws with it. The areas of the brush outside the red dashed lines will be your head and tail of your vector brush.
Tip: Unless you are confident or experimenting, leave the pressure options alone.
Step 11. Export your brush
Once you are happy with how your brush looks, you are ready to export the brushes!
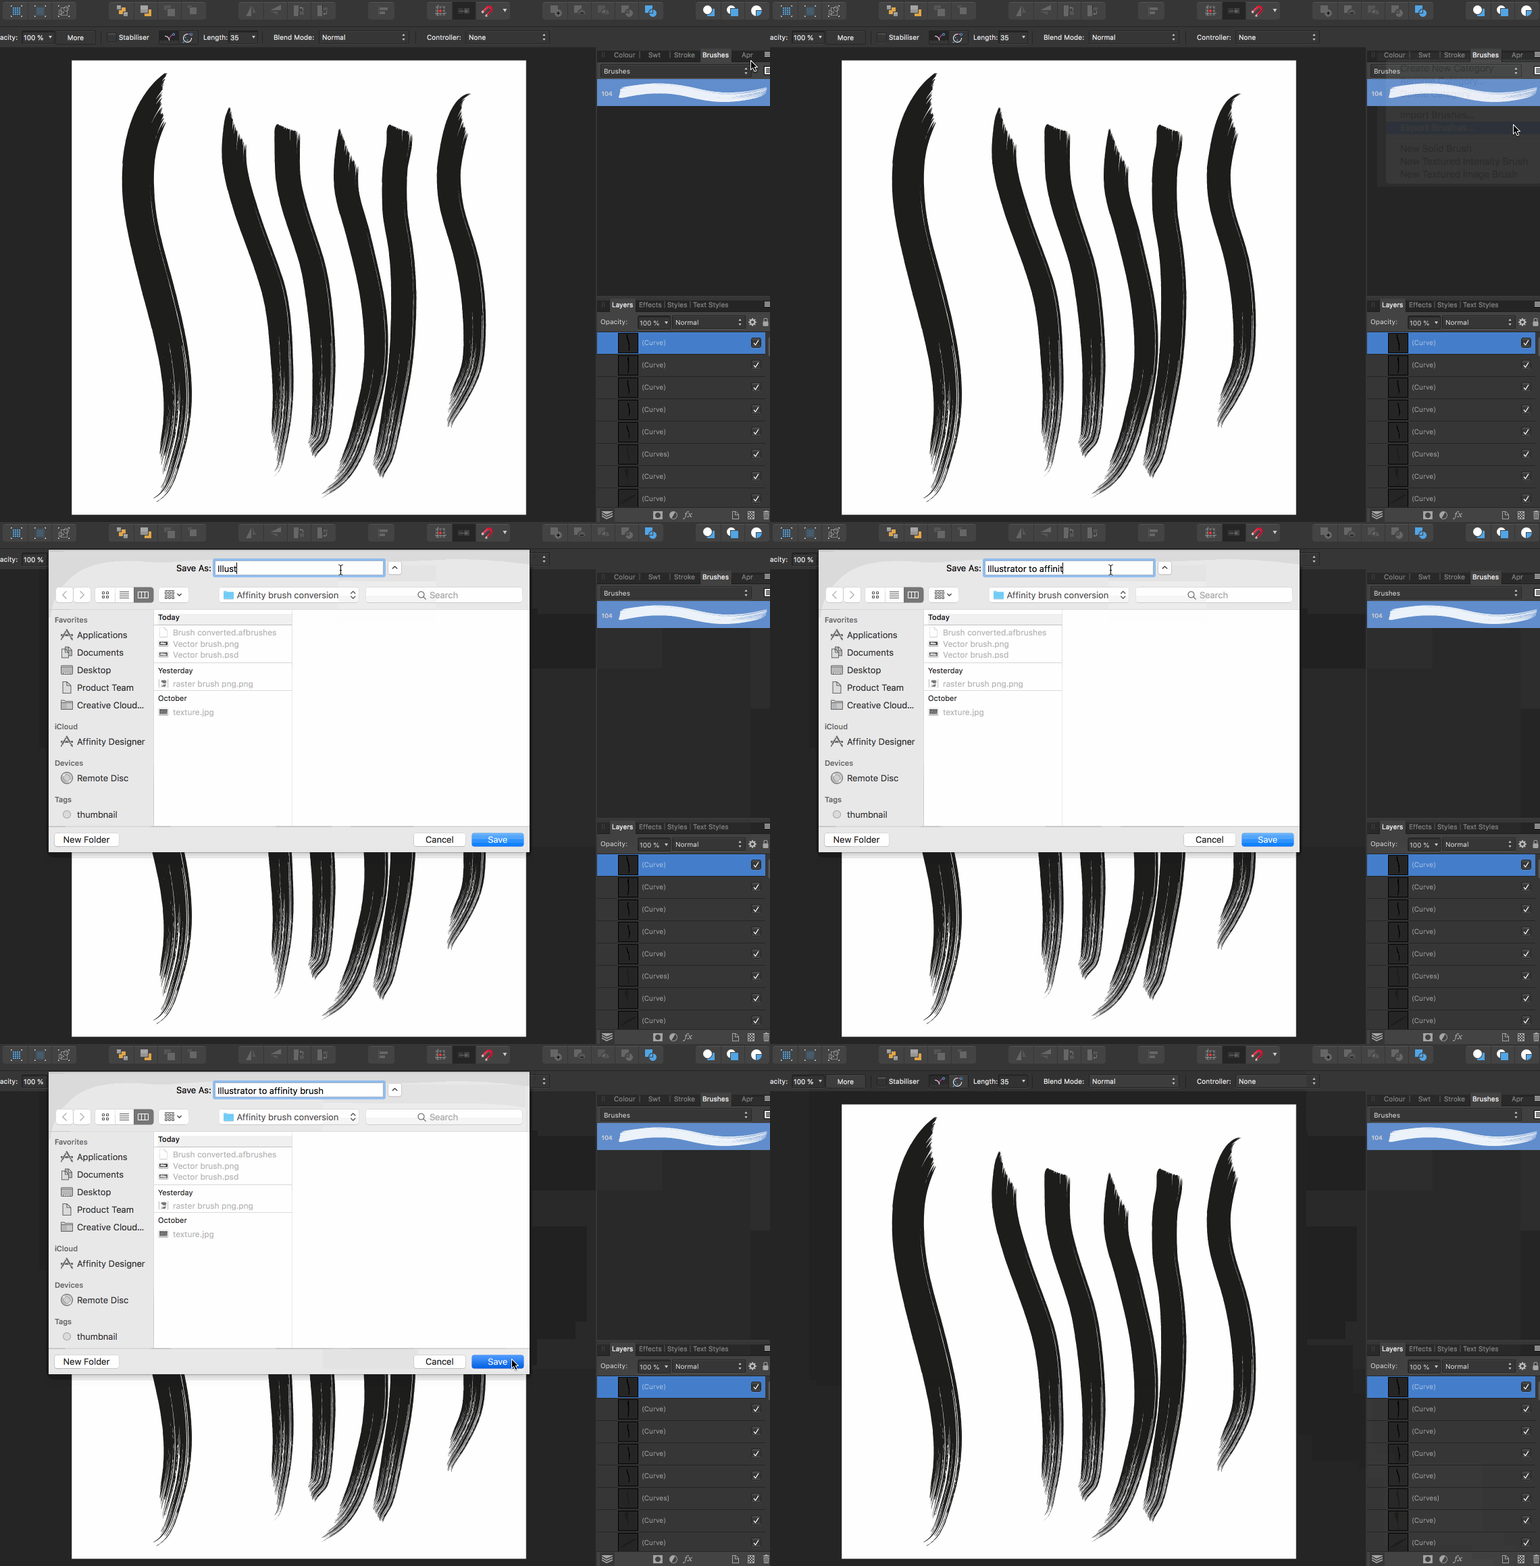
- Click the burger menu in your brush panel, as shown below.
- Select Export Brushes.
- You have now exported your brush as an Affinity .Brush file. Great job!
Thank you and good luck with your brush ventures. If you enjoyed this tutorial and have other suggestions for future tutorials, please let us know in the comments below.
I use both adobe illustrator and Affinity designer, Adobe on my PC and Affinity on my iPad. They both have their upsides and downsides, but Affinity Designer’s iPad version at least is 100% more intuitive to use.
I use a XPPen Artist 12 (2nd Generation) drawing display in adobe illustrator. Did wonders for my wrist!
That’s great to hear you use both Adobe Illustrator and Affinity Designer Andy! I hope you continue to have lots of fun designing with your brushes :)