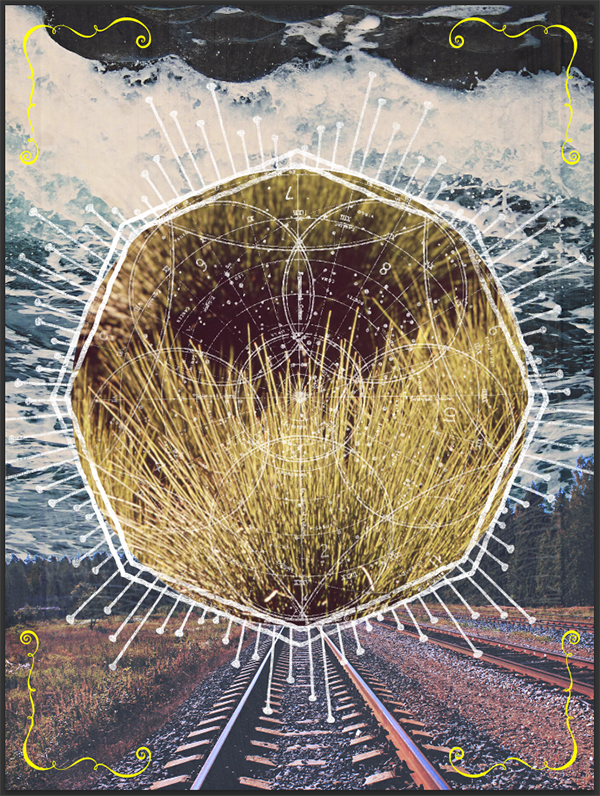
WHAT WE’RE CREATING:
Aloha DesignCutters! Simon here today for a fun retro poster design tutorial. I’ll be showing you how to combine some of the resources of the Ultimate Vintage and Retro Design Bundle to build a neat print.
PLEASE NOTE: This is quite an advanced tutorial, and isn’t aimed at beginners. We have lots of beginner tutorials in our tutorial archive if that is more your level. However, if you’re familiar with Photoshop, then this tutorial should teach you some great new techniques.
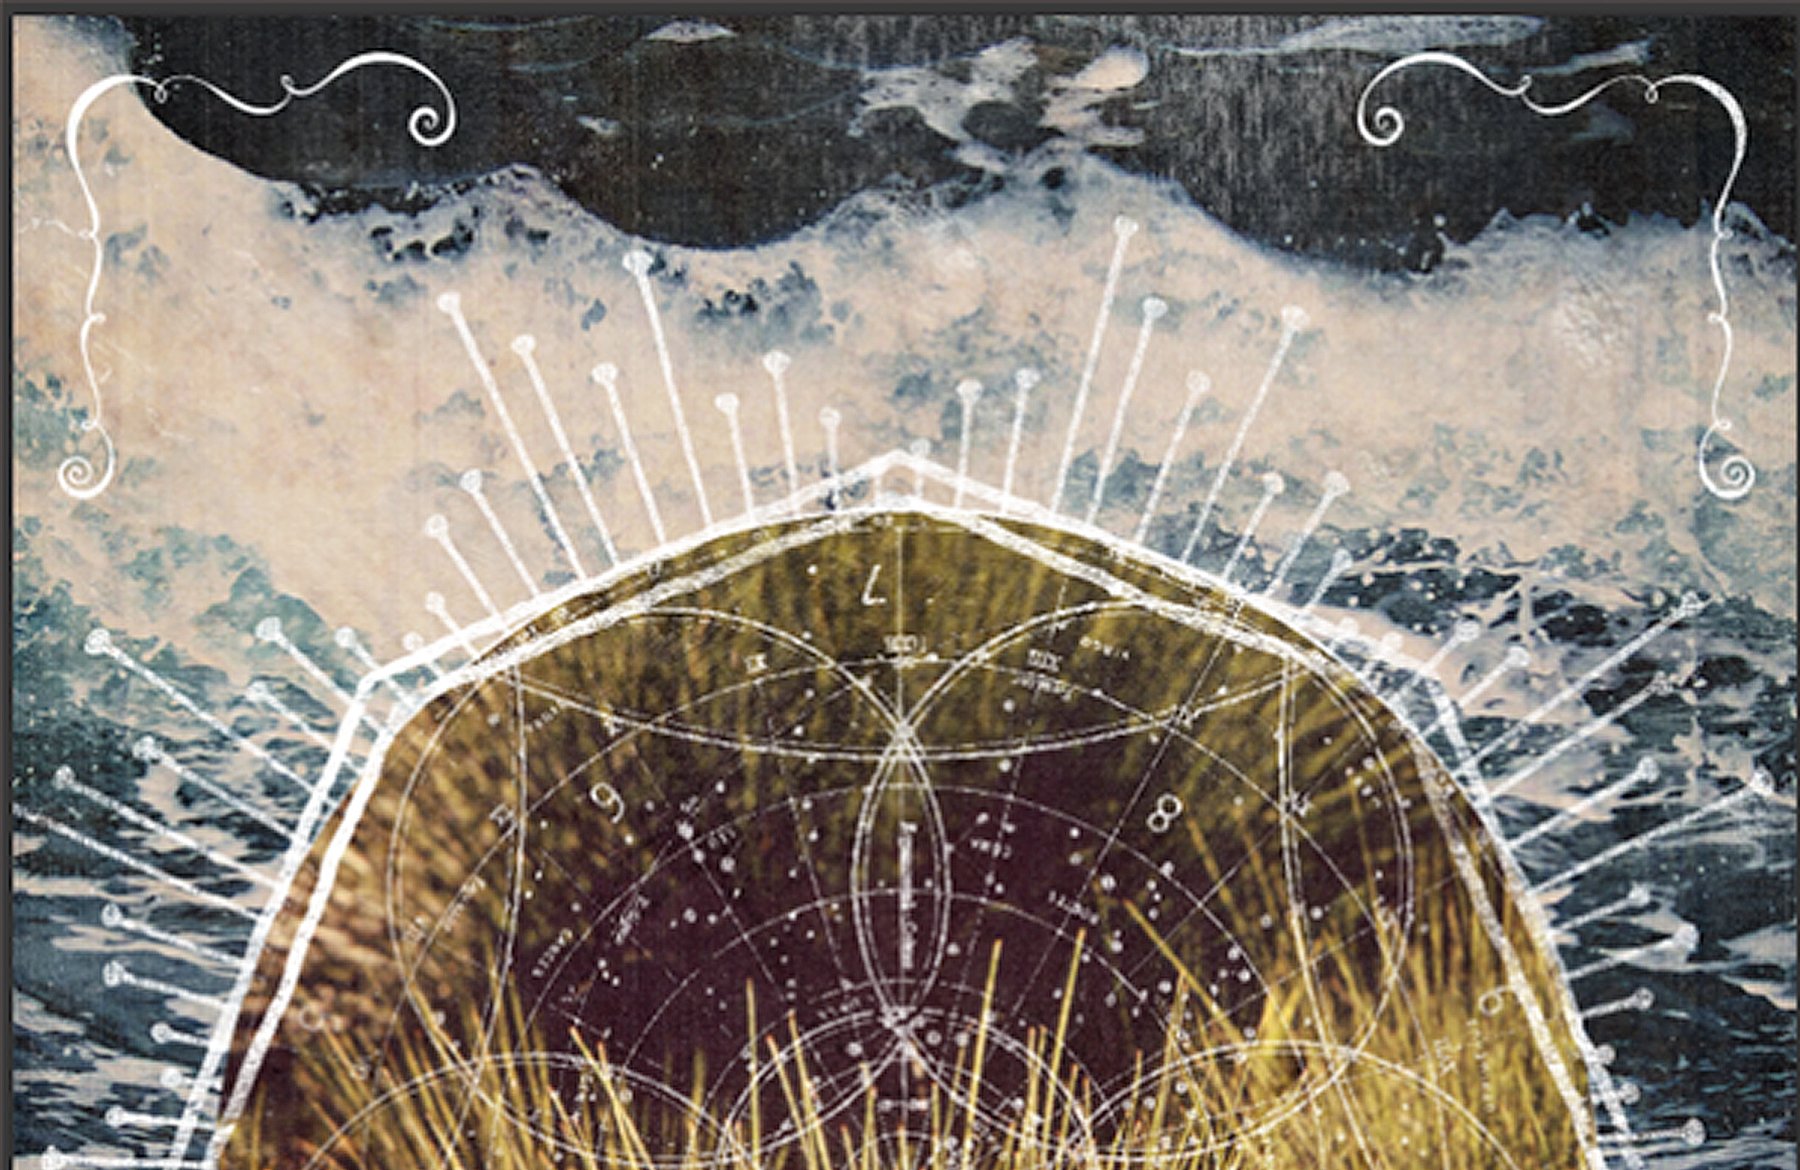
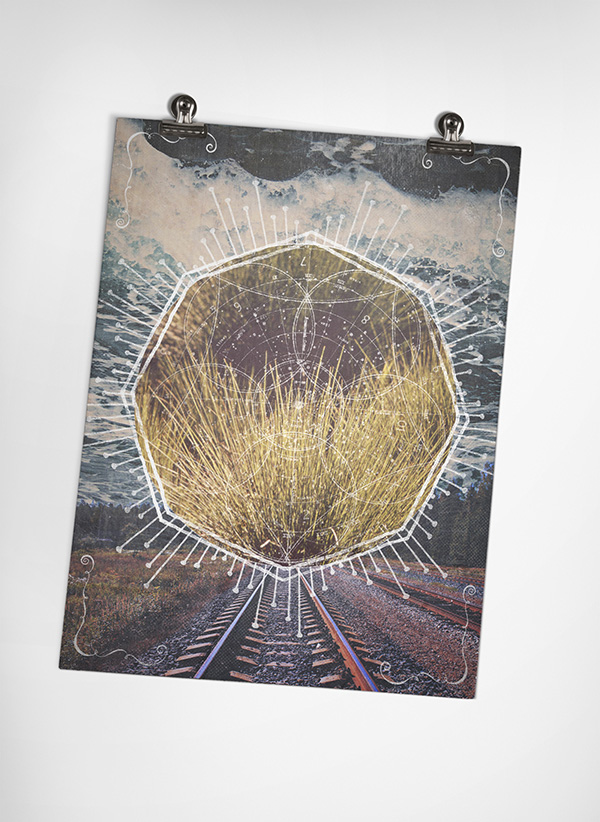
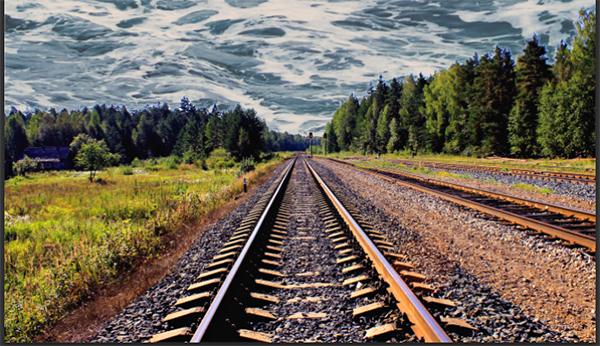
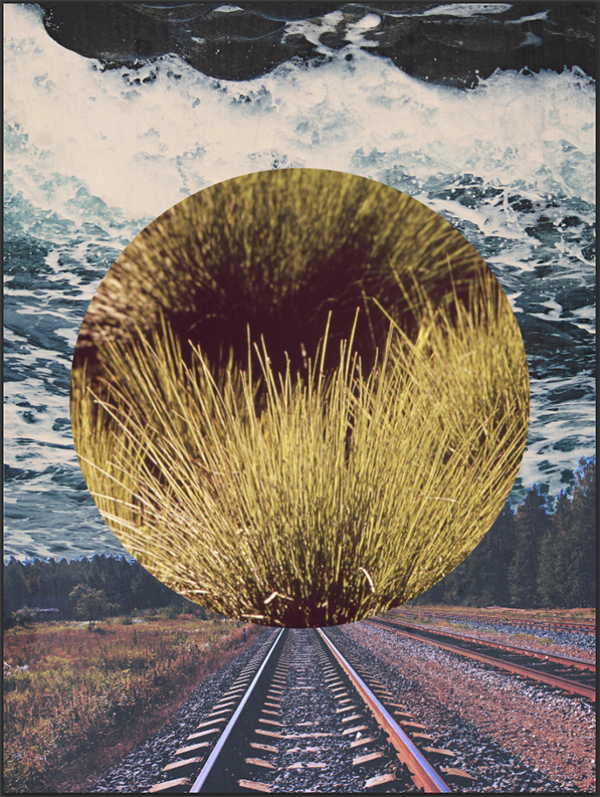
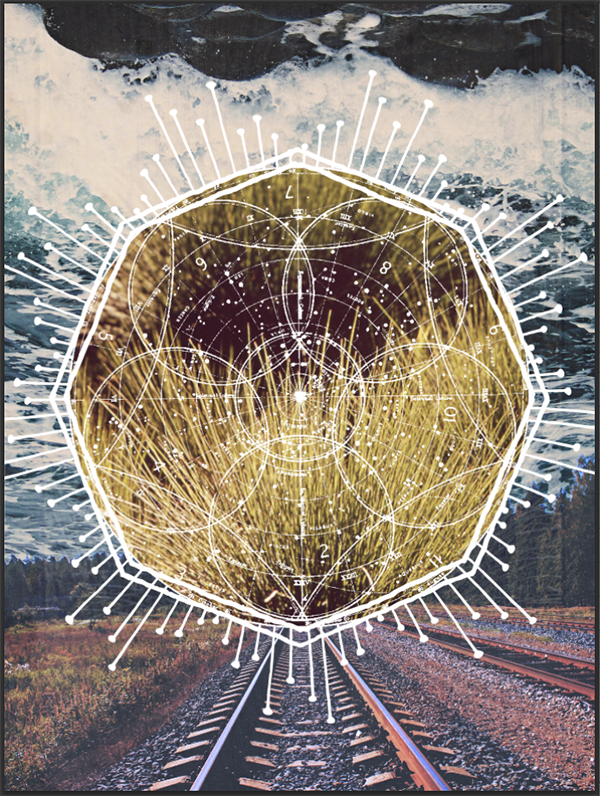
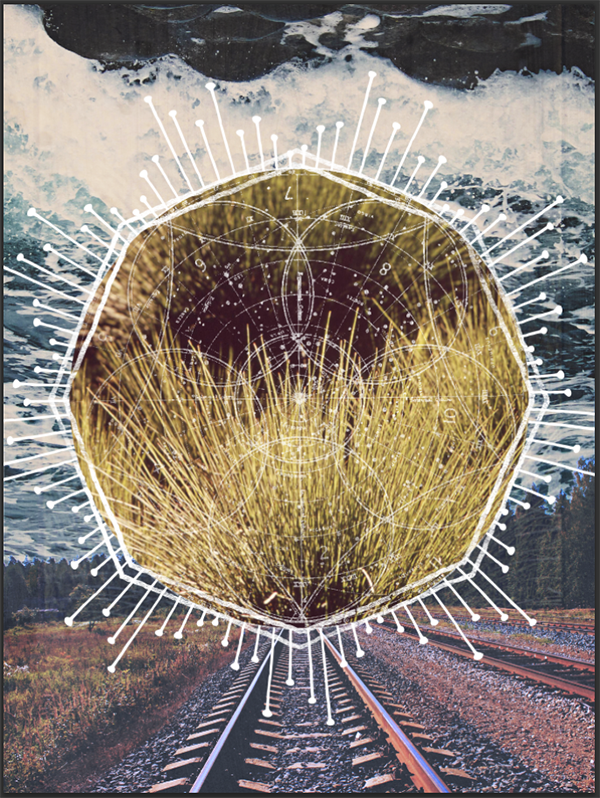
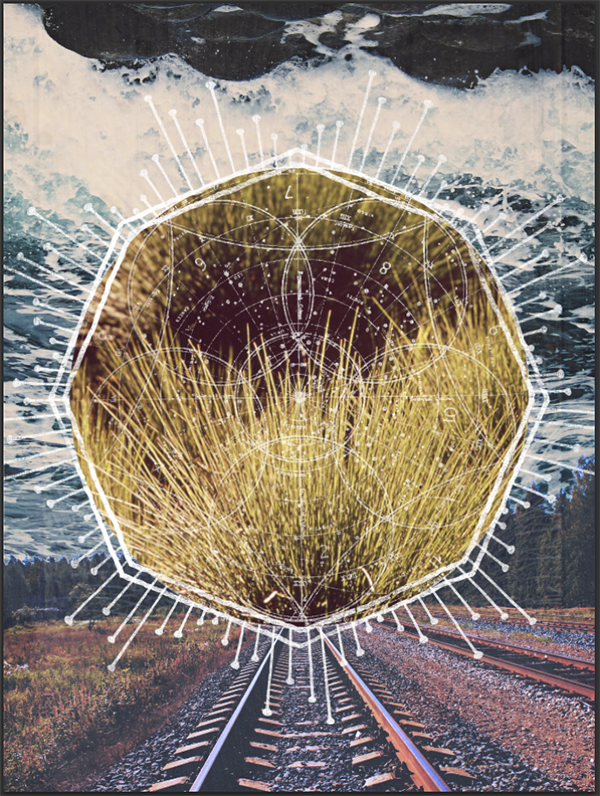
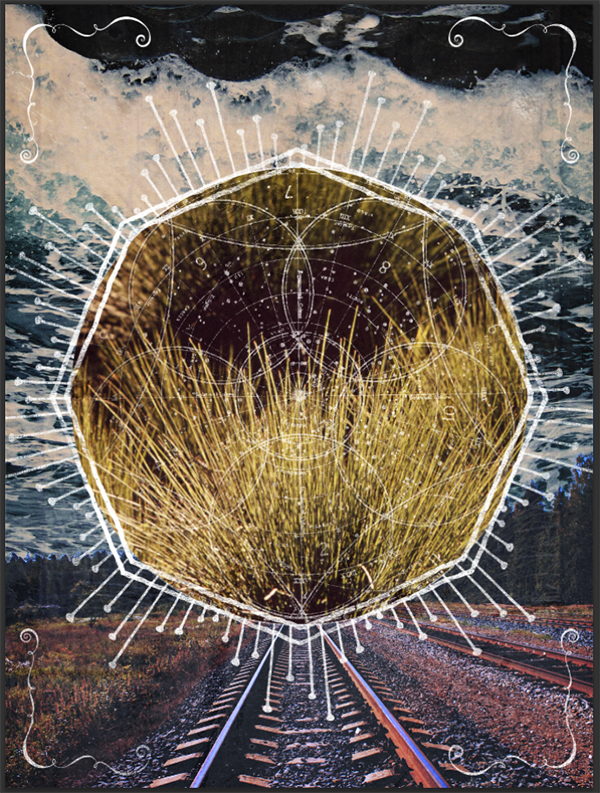
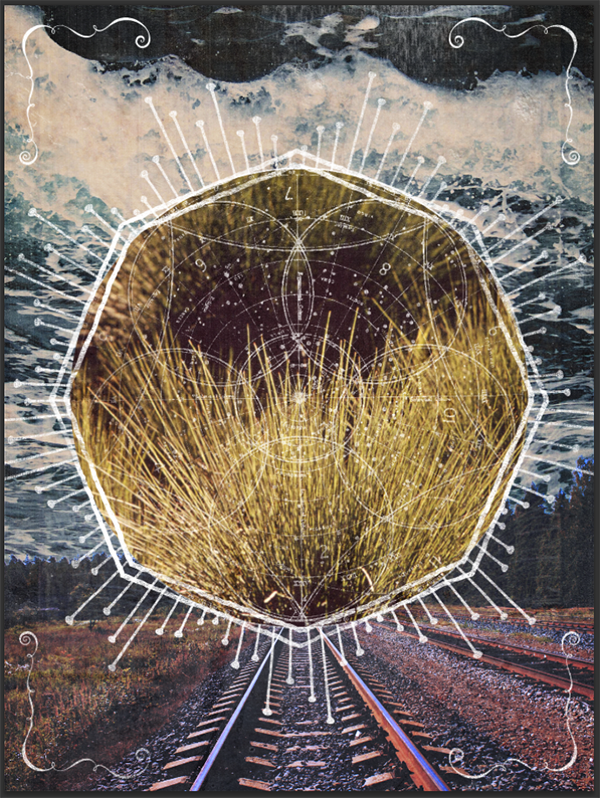
Here’s a look and what we’ll be creating:
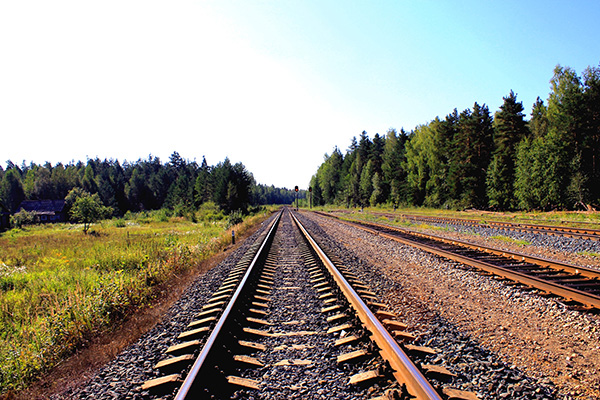
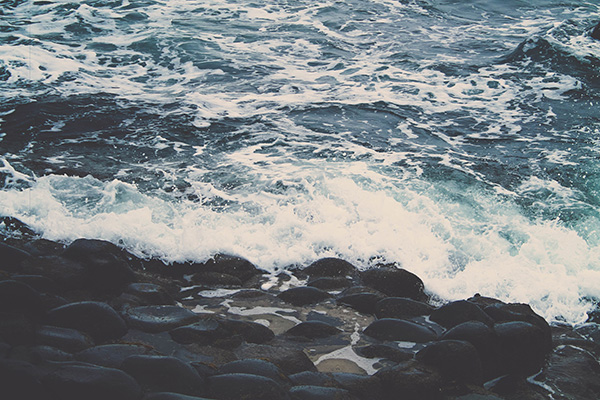
We’ll make use of these three stock images, that are available for free.
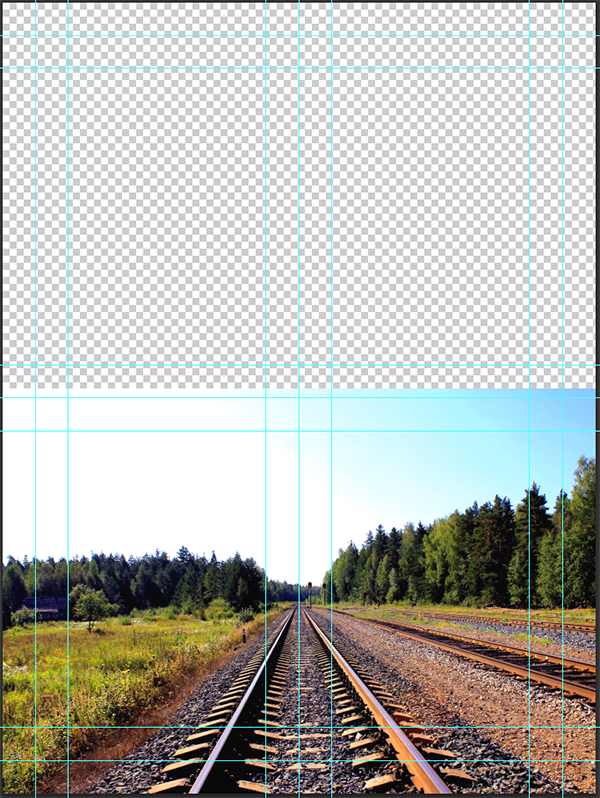
Train tracks via Unsplash
Sea scene via Unsplash
A shot from the Uncompahgre National Forest via the U.S. National Archives
You should note that the process below has been cleaned-up, and doesn’t include a lot of the back-and-forth of the trial and error process I’ve followed. I’ve been using both Photoshop and Illustrator to manipulate the elements of the bundle, but I’m pretty sure that you could get away with using only Photoshop. Finally, get yourself a cup of coffee, put on some music, and let’s dive in!
STEP 1: RESEARCH AND CONCEPTUALIZING
If you’ve read some of my other tutorials for Design Cuts (the owl, the typographic poster, the fake tube advertising poster), you know that I like to make some research before jumping into Photoshop and Illustrator.
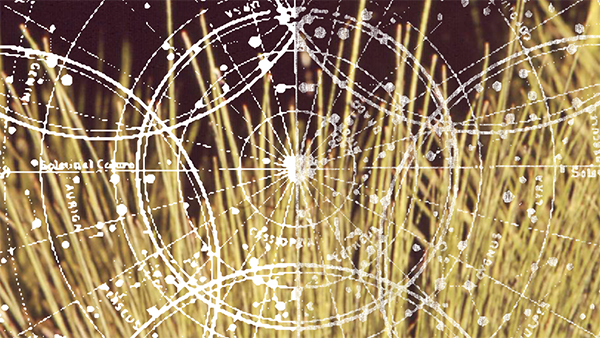
For this specific tutorial, my goal was to demonstrate the possibilities offered by the resources of the bundle. I spent quite a little bit of time looking at the various promo shots for the resources, and it’s when I saw this image, used to showcase Offset Designs’ maps and charts, that it came together:

From there, the rest of the piece came together rather quickly: combining the two images as the background, editing them to blend together with post-processing and textures, adding and editing the centerpiece, blending all the elements together with textures, and that was it.
Let me walk you through it.
STEP 2: DOCUMENT SETUP
I’m working with an 18″x24″ RGB document, at 300 dpi.

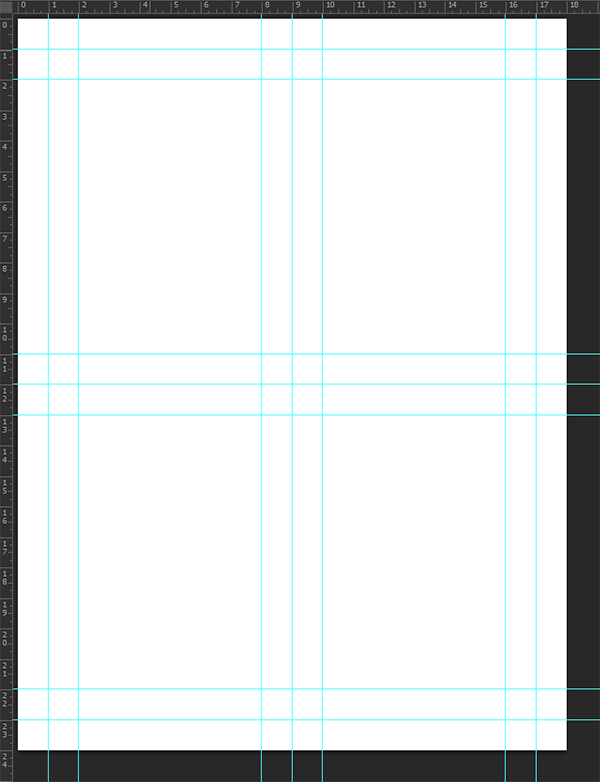
I added a series of guides to form a grid, that will help me later to correctly position my elements. I have put guides at the 1, 2, 8, 9, 10, 16, and 17 inches marks vertically. I’ve then added guides at the 1, 2, 11, 12, 13, 22, and 23 inches marks horizontally. It might be a bit much, but oh well.
STEP 3: THE BACKGROUND
Placing the images
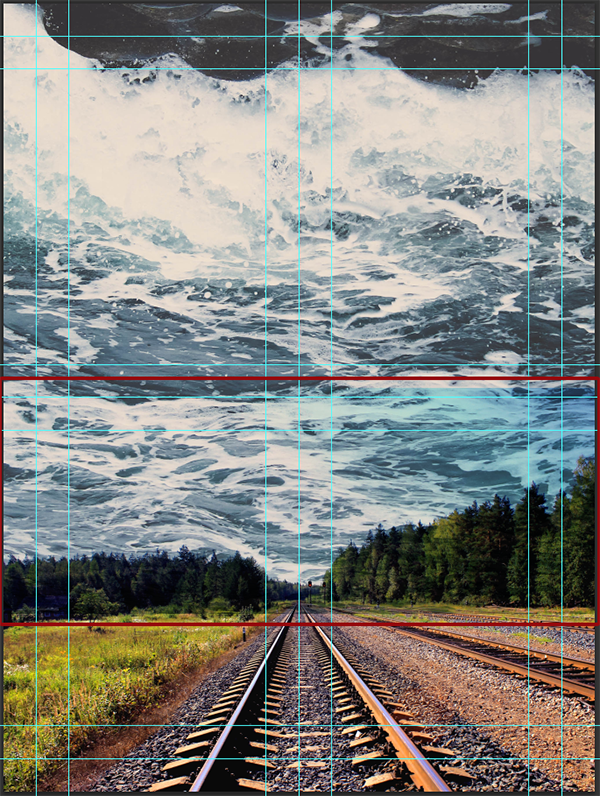
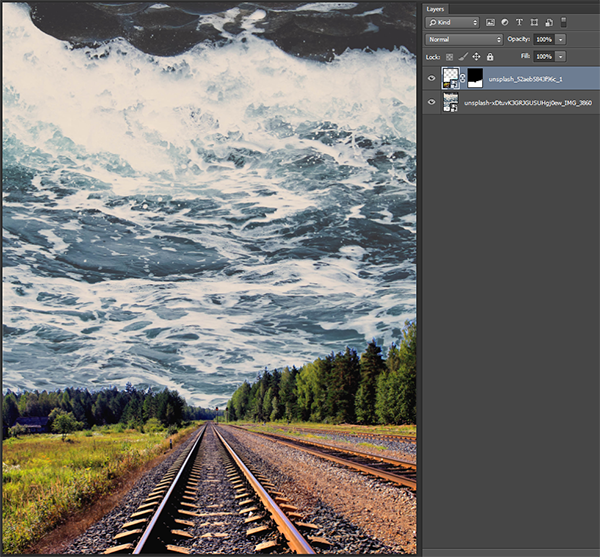
The first step for building our poster is to place our images. Let’s start by adding the train track image into our canvas. I’m positioning it at the bottom of my canvas, and centering it so the train track lines up with the middle of the frame.
Next, let’s place the sea scene image into the canvas. Make sure the image’s layer is below the train track image’s layer. I’ve placed it upside down, to give a strange vibe to the composition.
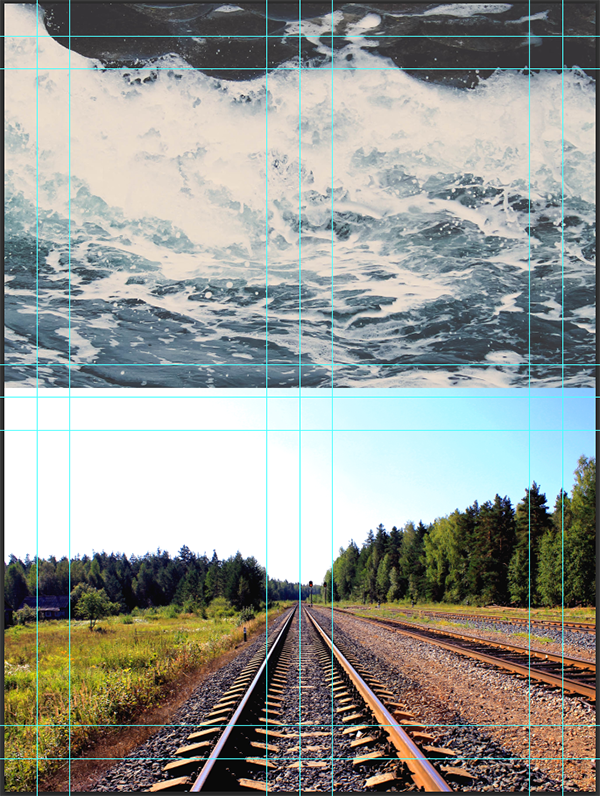
I’ve put the train track layer on multiply, so you can see how I’ve aligned the layers compared to each other.
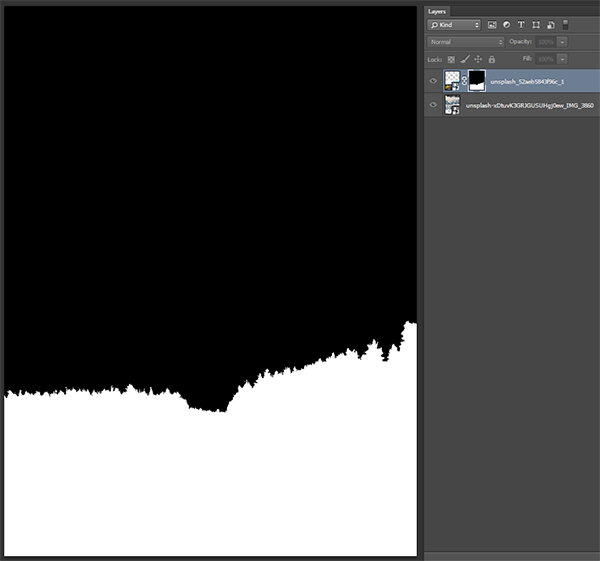
The next step is to mask the blue sky part of the train track image. I’ve simply used the magic wand (W) to select the blue pixels.

Once you’ve made your selection, just hit the Add a layer mask button at the bottom of your layer palette…
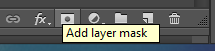
… And you’ll get yourself this weird looking result:
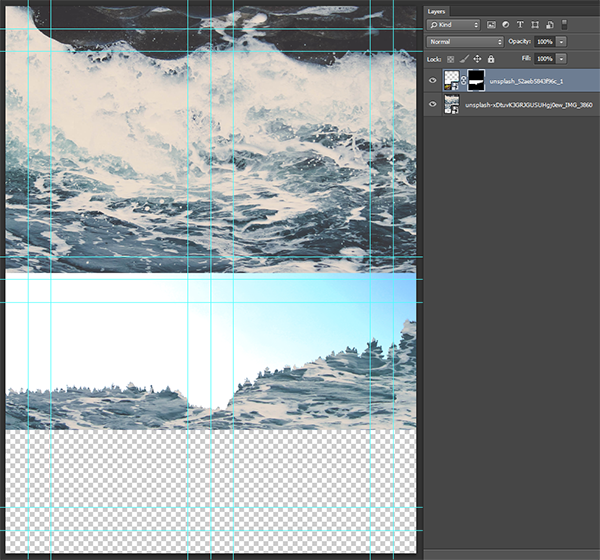
Simply invert the layer mask’s content to go achieve our original intent. To do so, you can either highlight the layer by clicking on it, and using the invert shortcut (CTRL/CMD+I), or you could ALT/OPTION+CLICK to access the mask’s content, and repeat the inverting process there.
Finally, you could also finalize things by painting over the top part of the layer mask, to make sure that things don’t show.
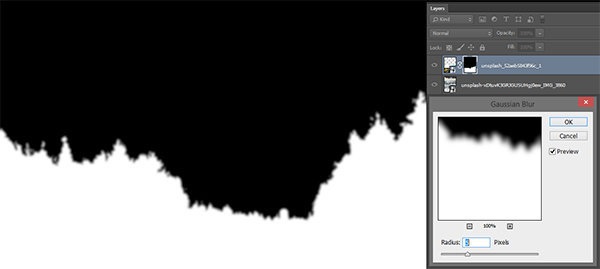
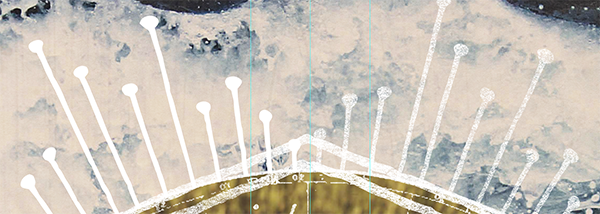
Finally, let’s have a look at the junction of our two pictures.
As you can see, the edge of our mask is so sharp that it creates some artifacts. The trick I use here is to simply blur the mask to soften the edges a bit. I’ve used Gaussian blur to do it, so I can control the amount of blur I’m generating.
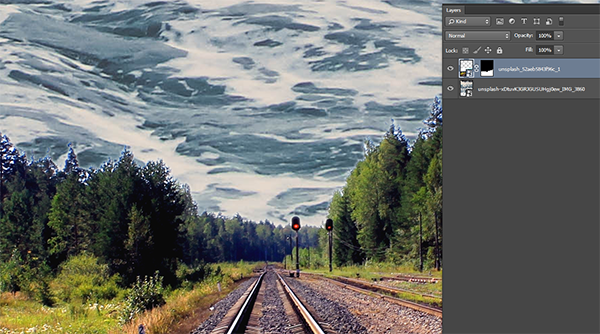
And our images are placed:
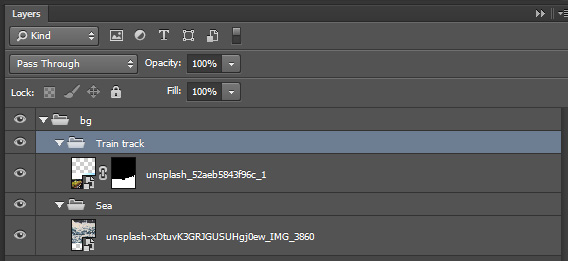
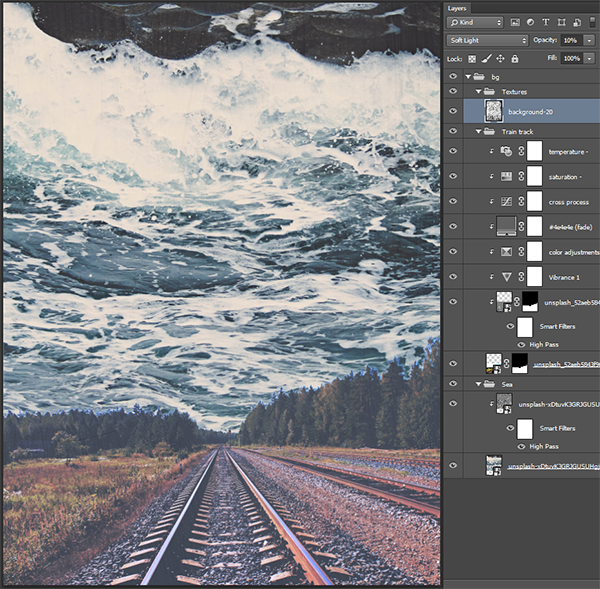
Now, a little bit of house cleaning. I’ve created a bg layer group to include all of my background layers. I have also given our two background images their own layer groups. It will come in handy in a bit, when we start adding some adjustment layers and textures to the background.
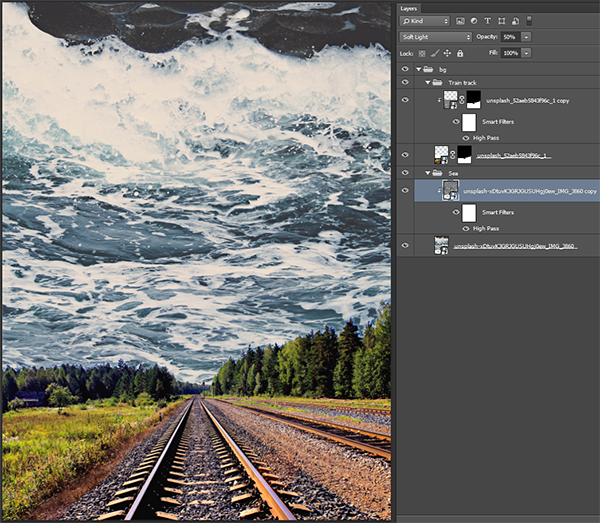
Sharpening using the high pass filter
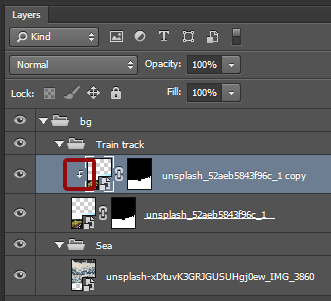
Before we can move on to post processing, let’s sharpen our images a bit. I’ll show you the process on the train track image, but do it on both.
Start by duplicating the image’s layer, and clip it (CTRL/CMD+ALT/OPTION+G) to the original layer.
Then, go to Filter > Other > High pass. I’m using a 50 pixels radius.
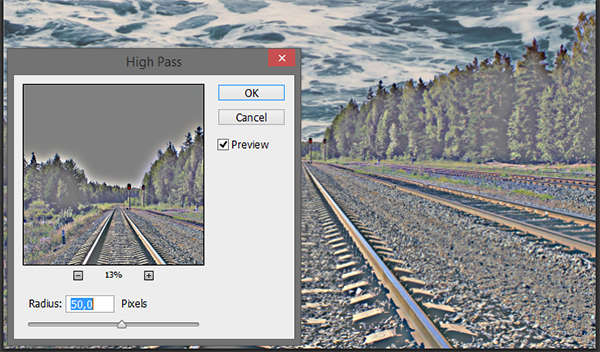
After that, simply put the layer’s blending mode to Soft light @ 50% opacity, and we have a sharpened layer.

Repeat the process for the sea scene, and we’re good to move on to the next steps.
Some post-processing to blend the two images together
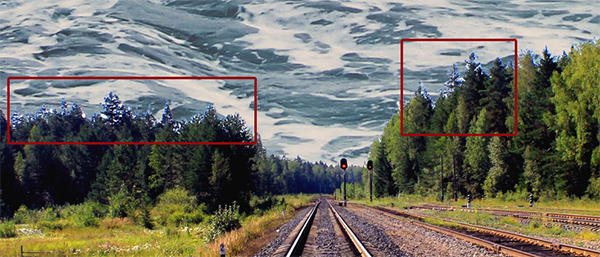
At this point, our two images aren’t really blending well together. Part of the problem comes from the fact that they’ve been processed into a different approach: the train track is a very vivid and saturated images, while the sea scene is a soft, faded image, a little bit like a VSCO Cam filter.
The solution I chose is to manipulate the train track image to give it that vibe. Luckily for everybody, I already wrote a tutorial on how to accomplish that VSCO Cam vibe in Photoshop back in October 2013. Since all the stuff is in that tutorial, I won’t go too much in details of the whys and hows of my process.
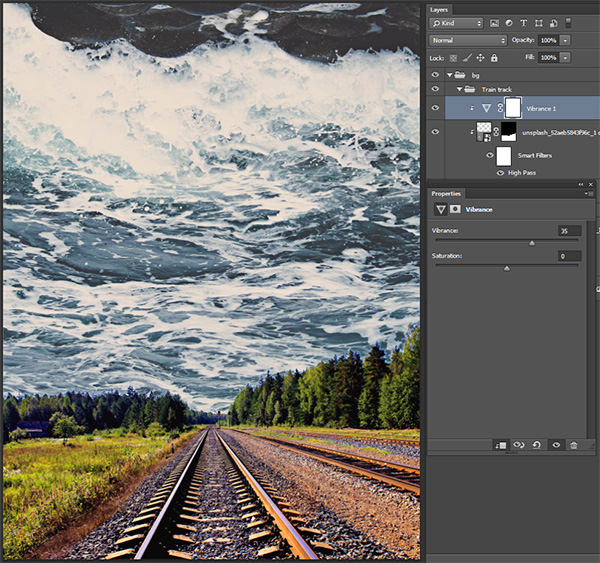
Keep in mind that all the adjustment layers we’ll be adding need to be clipped to the original train track image’s layer, just like the high pass filter layer.
First, we’ll add a Vibrance adjustment layer. I’ve set the value at 35.
Second, and that’s the core of the effect, comes a Selective color adjustment layer. We’ll be touching up the yellows, the greens, the blues, and the blacks. See the values below:
- Yellow: magenta +75, yellow +25
- Greens: yellow +50, black +100,
- Blues: black +25,
- Blacks: black +10
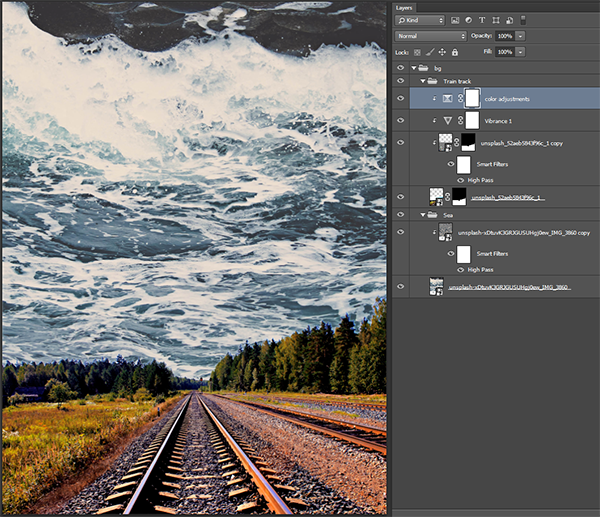
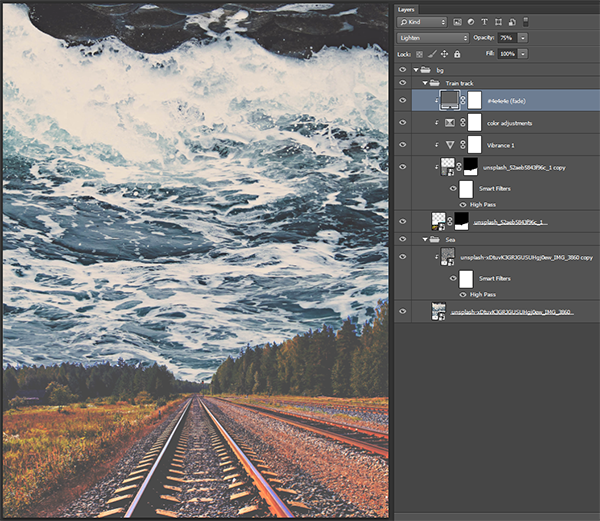
Next is the layer that creates the “faded” quality to the image. It’s a solid color adjustment layer, set to #4e4e4e. The blending mode is set to Lighten @ 75% opacity.
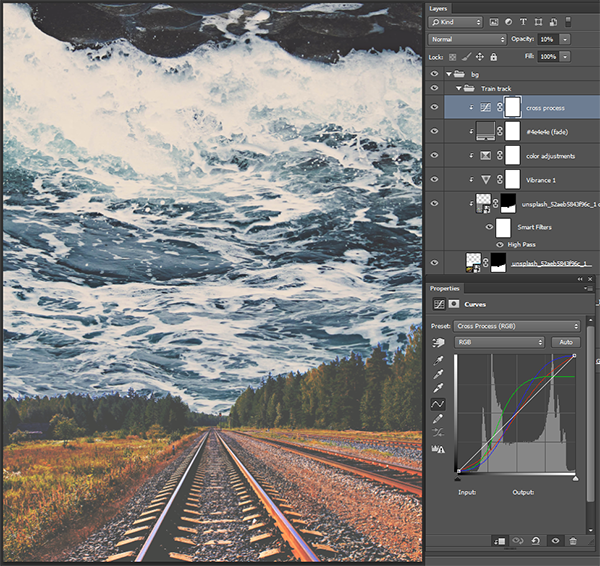
The next step is to add a curves adjustment layer. Its preset is set to Cross process, and its opacity to 10%.
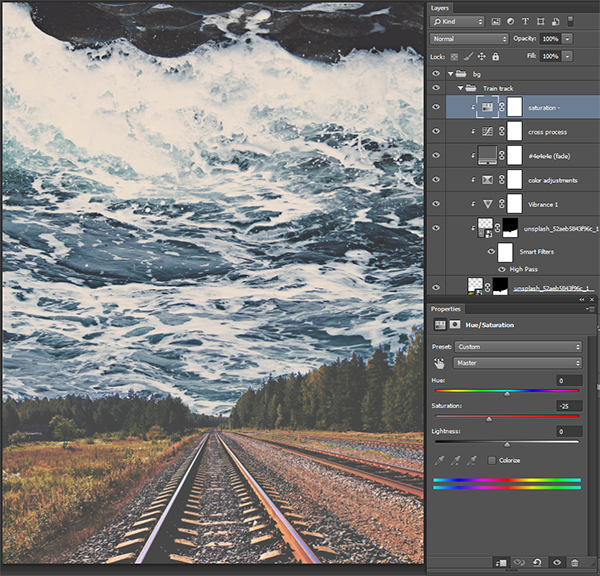
After that, we’ll lower the saturation with a hue/saturation adjustment layer. I’ve set the value at -25.
Finally, we’ll lower the temperature of the image with a photo filter adjustment layer. I’m using the Cooling filter (80) at 25% density.
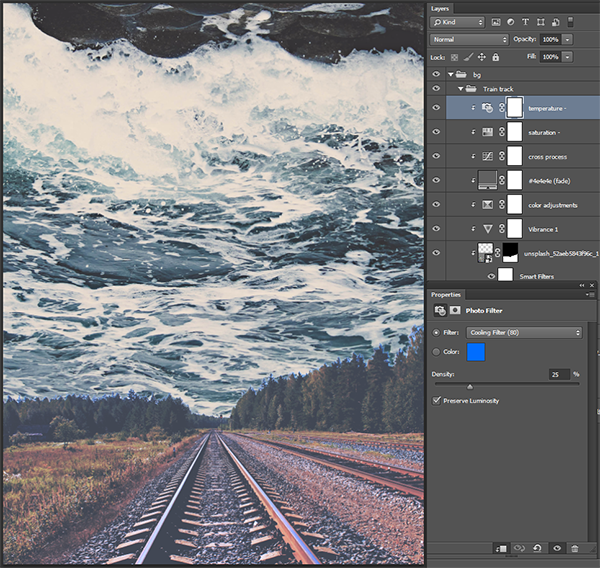
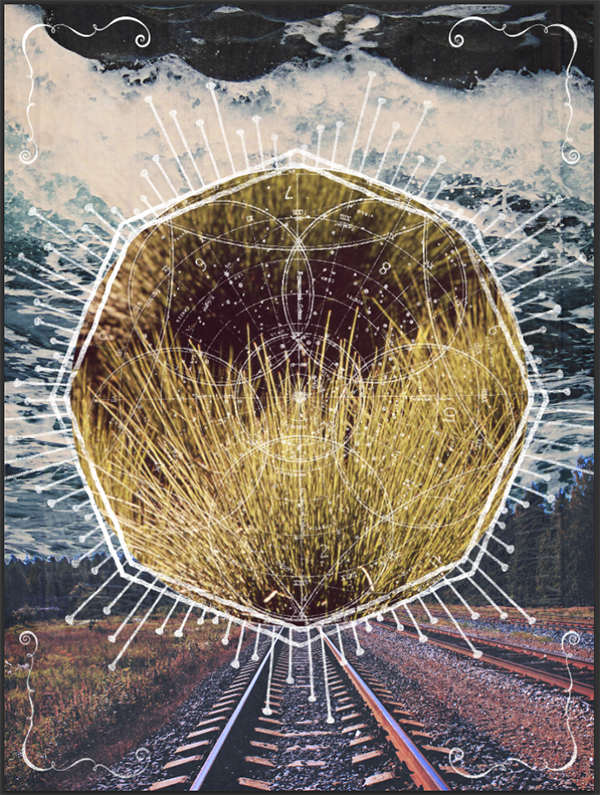
And we’ve got our background ready for texture work.

Textures to tie the background images further together
Applying a series of textures to the both images at the same time will help us to visually link them together.
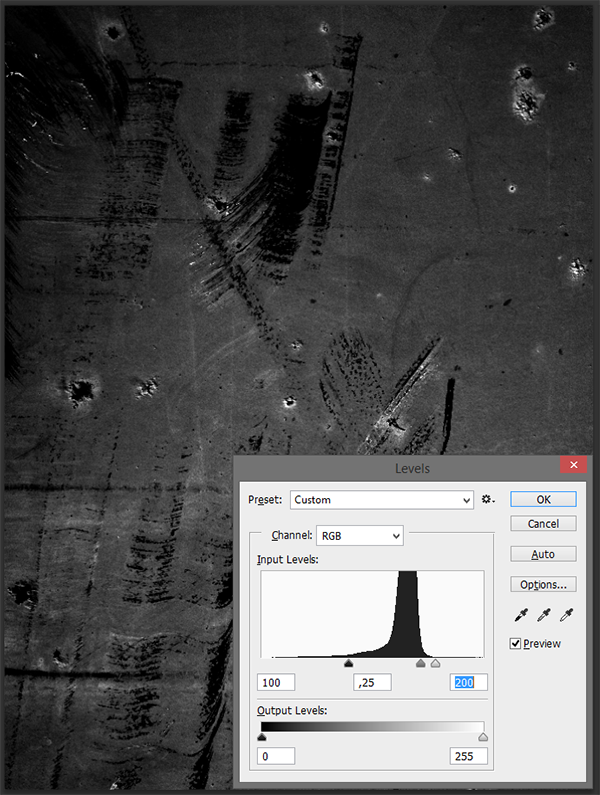
I’m starting with background-20.jpg from Ian Barnard’s backgrounds series of his texture armoury.
Place it into your canvas, rotate it 90° counter-clock wise, and resize it so it covers your canvas. I chose to actually crop out the black stain at the bottom left.
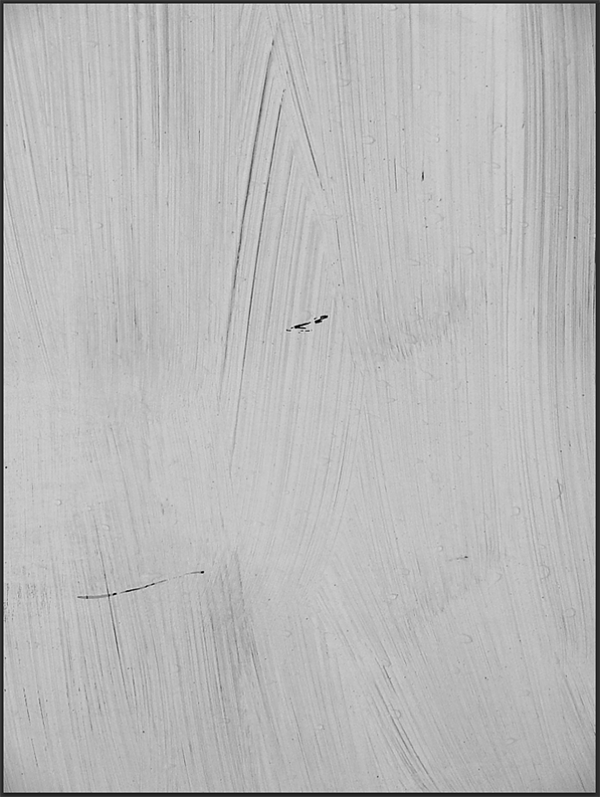
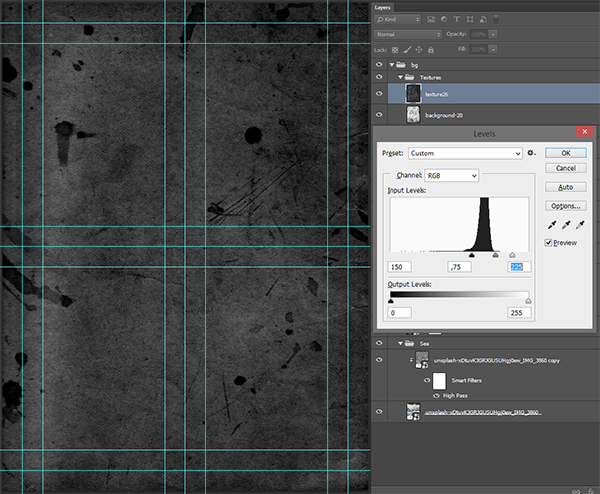
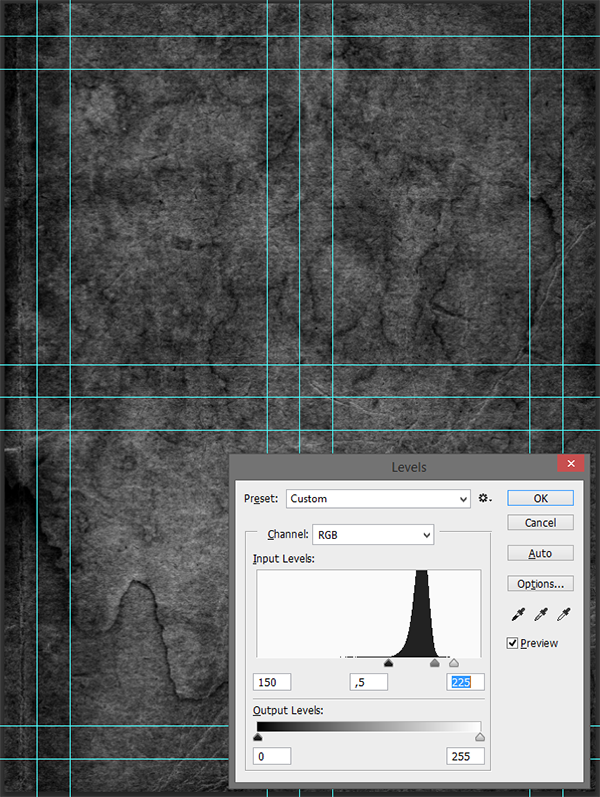
Rasterize the layer if needed, and desaturate it (CTRL/CMD+SHIFT+U). You can also sharpen it a few times to keep it crisp (Filter > Sharpen > Sharpen). We’ll then use the levels palette (CTRL/CMD+L) to make the texture’s characteristics more preeminent. See my values below (150, 0.75, and 200)

Once you’ve manipulated the levels to your satisfaction, simply change the texture’s blending mode to Soft light @ 10% opacity.
The second texture I’m adding to the background is texture26.jpg. It’s from Cruzine’s flyer’s photo overlay 1 collection. Following the same workflow (resizing, rasterizing, desaturating it, sharpening it, and playing with its contrast through levels), I added a little bit of its paper grain to the piece.
The blending mode I chose is Soft light @ 50% opacity.
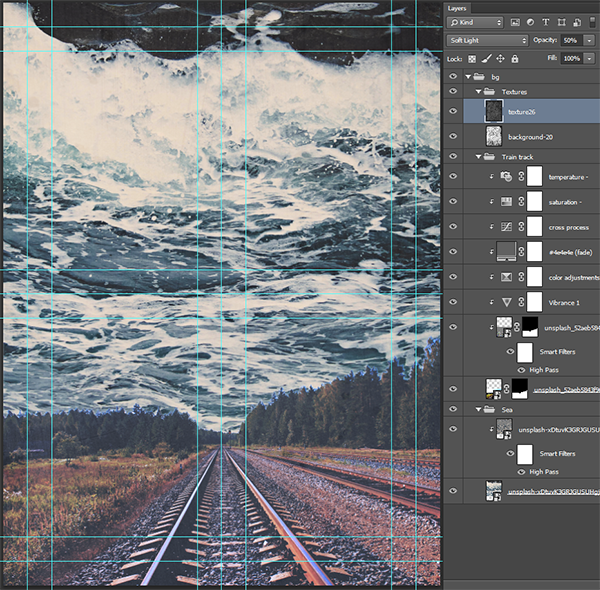
Note also that I’ve given both textures their own layer group. And this concludes the work on the background. Next up, the center piece.
STEP FOUR: THE CENTERPIECE
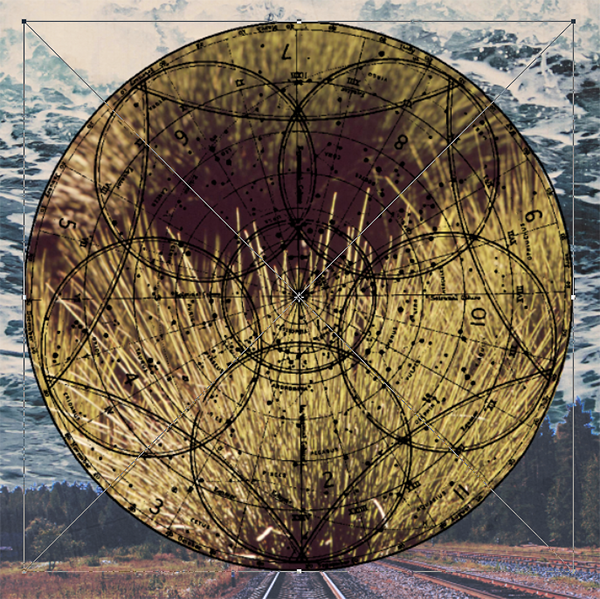
Placing and masking the image
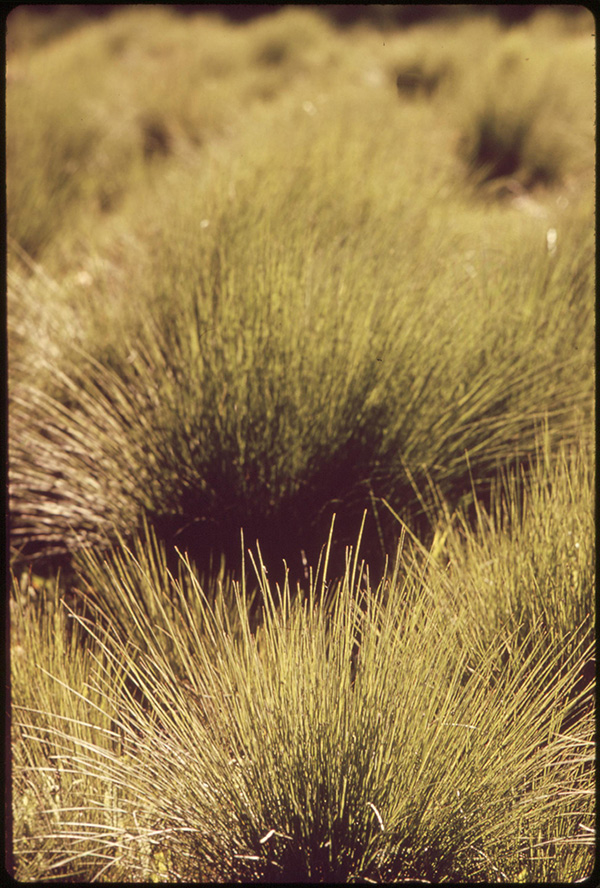
The centerpiece of the design is this beautiful image of vegetation from the U.S. National archives.
On top of that, there’s one of the sweet old charts compiled by Offset Designs, the octagon-shaped badge shape from Ghostly Pixels, and one of Make Design Co’s burst in the background. Most of these elements have some texture magic happening in the layer masks, and we’ll get to that part soon.
First, place the plant image in your canvas, and make it at least 17″ wide. This will allow us to frame it in a circle without its black film border to show.

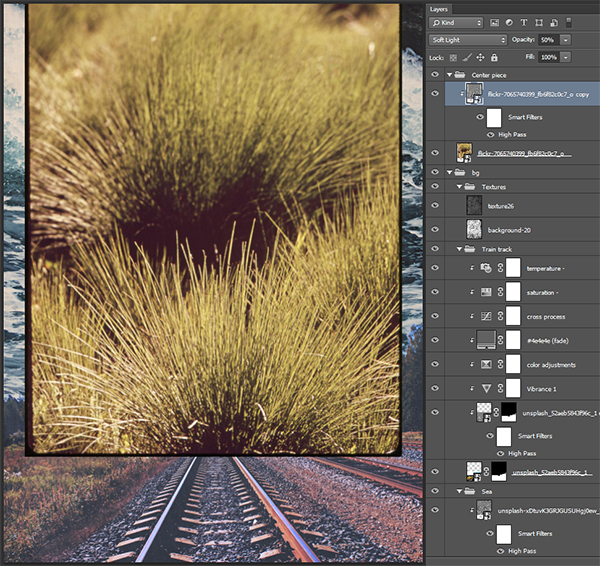
Second step, let’s sharpen it using the high pass filter, just like we did for the background. Also, give the center piece layers their own layer group, for better organization.
Next, we’re going to create the circular mask around the image. Use your elliptical marquee tool (M) (do a long click on the marquee tool to access it if necessary) to draw a 16″ wide circle.
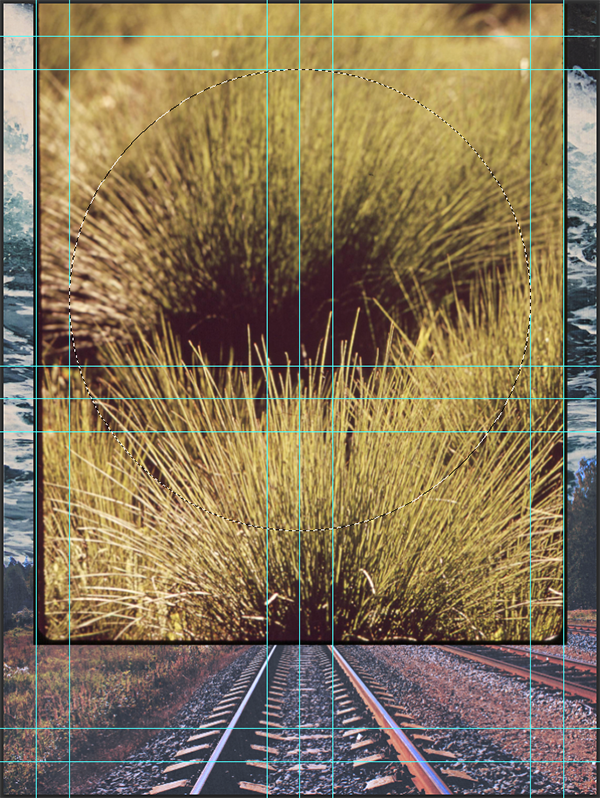
Once your selection is made, nudge it at the center of your piece, and make sure to highlight the original plant image layer.
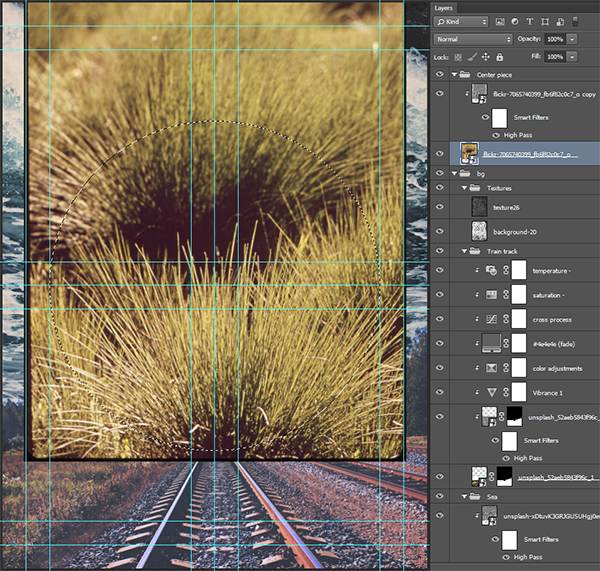
Next, simple create a layer mask with that selection. It’s the same process than when we created a layer mask for the background train track image.
Make sure that the image and its layer mask can move independently from each other, by disabling the chainlink that links the layers’ thumbnails.

Adding the ornaments
The first element we’ll add to the piece is the 03.eps chart from Offset Design’s pack. I personally open my EPS files in Ai, and paste them in Ps as smart objects to retain their vector properties if needed.
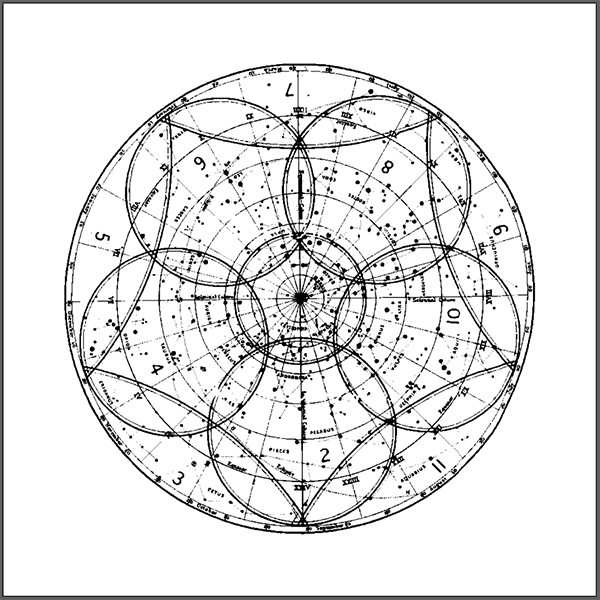

Size the chart to fit the circle of the center image. Zoom in if necessary.
Once the chart is properly sized, switch its color to white. You can either add a color overlay through the layer style panel, or double click on the layer’s thumbnail to be able to edit the original vector element in Ai. I chose the later, because often times editing smart object in Ai makes much more sense.
The next piece of the puzzle is Ghostly Pixels’ octagon.eps. I’m using the double thin outline version.

This one is also to be pasted in as a smart object, and to be sized so the inner outline lines up with the edge of the circle. Once sized appropriately, switch its color to white as well.

Finally, we’ll be adding one of Make Design Co.’s star burst to the mix. I found it in the Totally Texture Creation Kit collection (CreativeMarket_TotallyTextureCreationKit_Shapes&Brushes_CS4.ai).
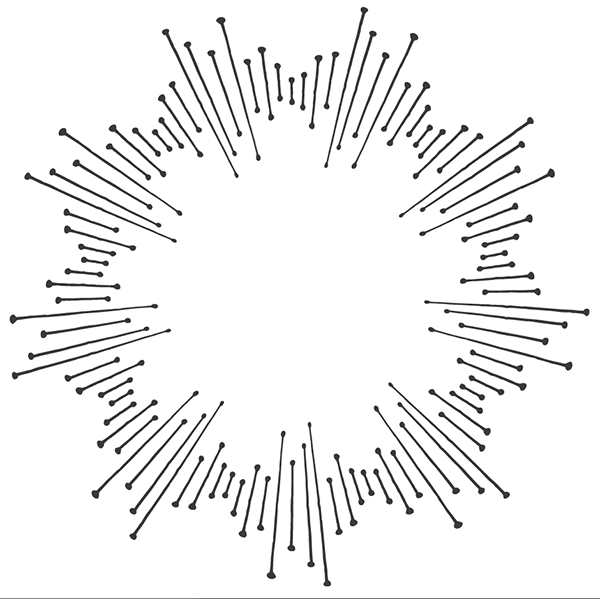
I’ve changed the burst’s color to white as well. Note that I’ve sized it so it extends a bit beyond the edge of the canvas.
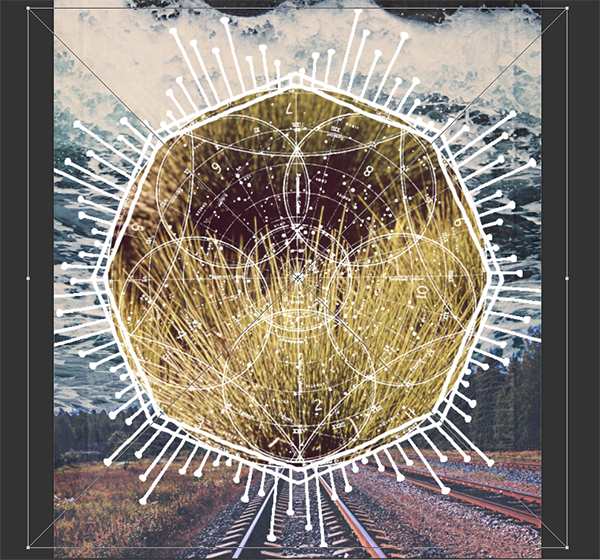
Here’s my layer stack so far for the center piece. The star burst is behind everything else.

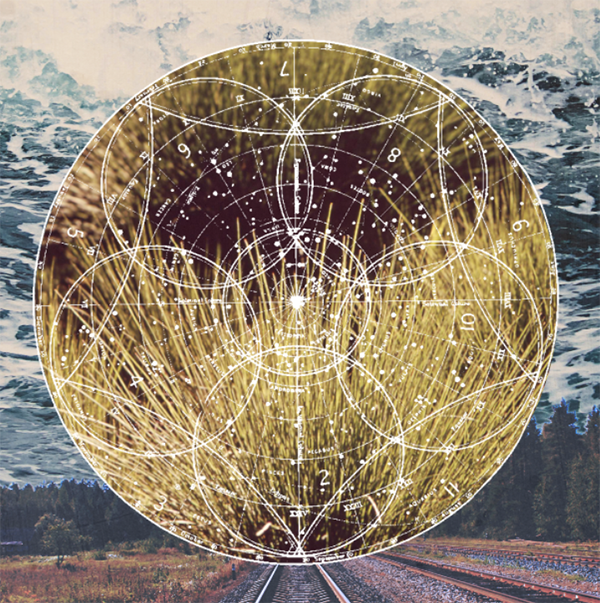
Now that we’ve got our center piece design in place, let’s grunge things out a bit, shall we?
Pasting textures in the layer masks to weather things out
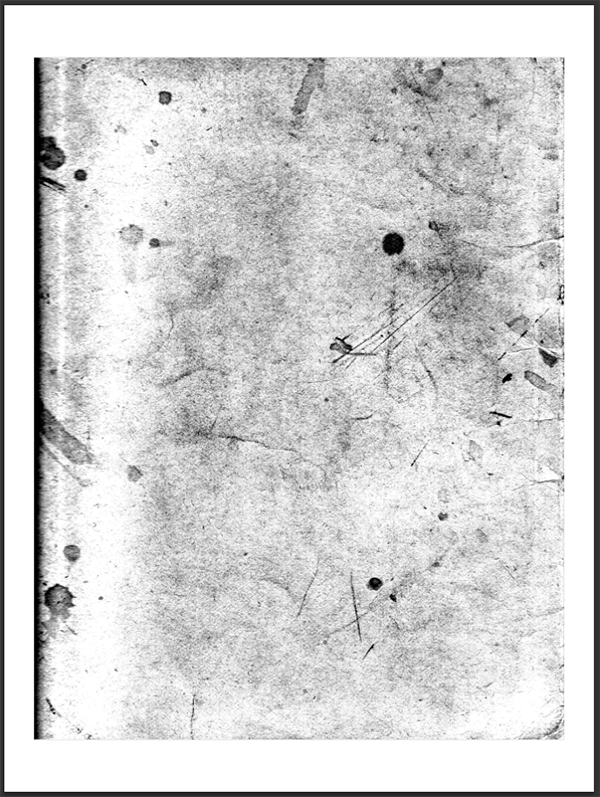
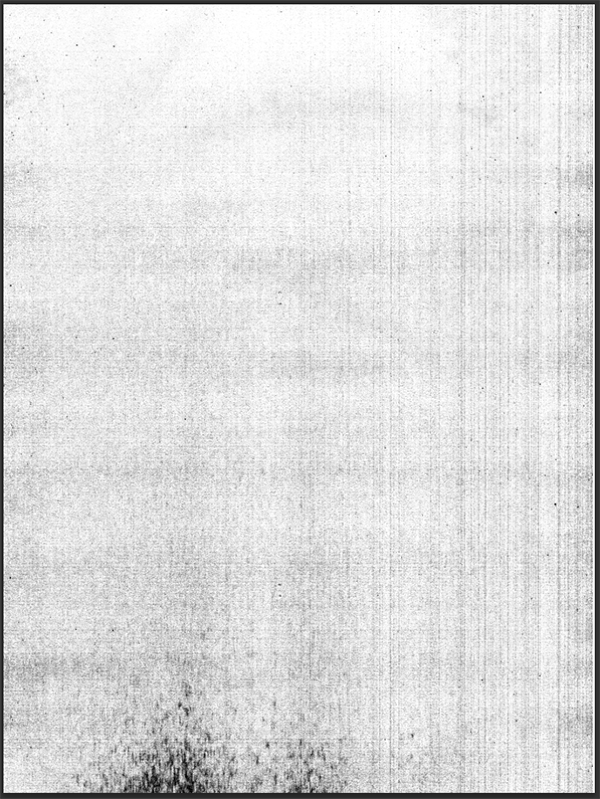
Let’s start by impacting the chart. Add a layer mask to it, and paste photocopy-noise-textures-sbh-006.jpg from The Shop’s Photocopy noise texture pack.
Here’s a preview of what the mask looks like. I placed the texture so the very heavy dark bottom wouldn’t impact the chart too much. Once pasted, remember that you can play with the levels to intensify or mute the impact of the mask on the element.
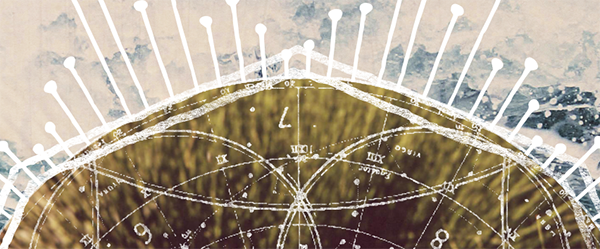
Here’s a close up to show you the subtle effect the texture brings.
Next, we’ll take care of the badge outline. Let’s locate and paste Cruzine’s screentexture26.jpg in the mask, from their flyer photo overlay pack.
Here’s what the texture looks like.
And here’s a close-up of its effect.
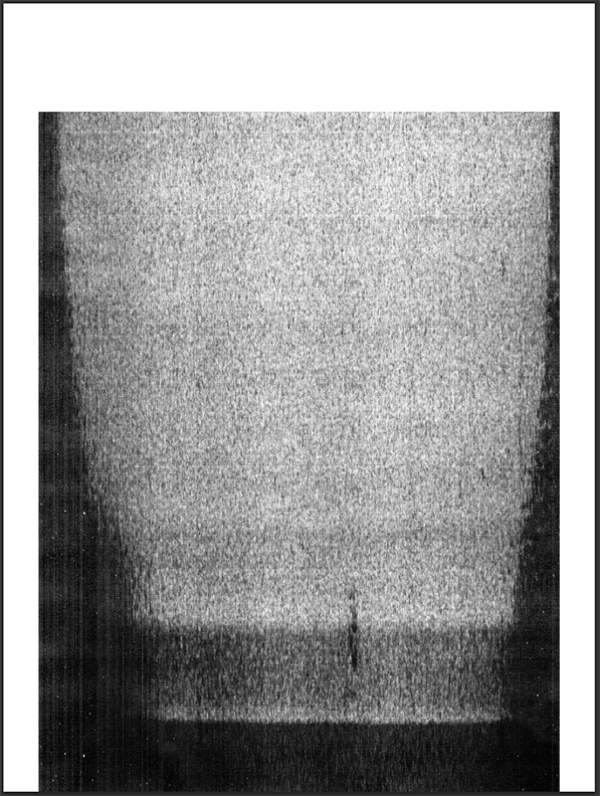
The last element we have to weather is the star burst. I used photocopy-noise-textures-sbh-005.jpg from The Shop’s photocopy noise texture pack. I’ve sized the texture to cover the whole mask, and inverted it before playing with levels just a bit.
The effect of this one is a more visible, especially from up close.
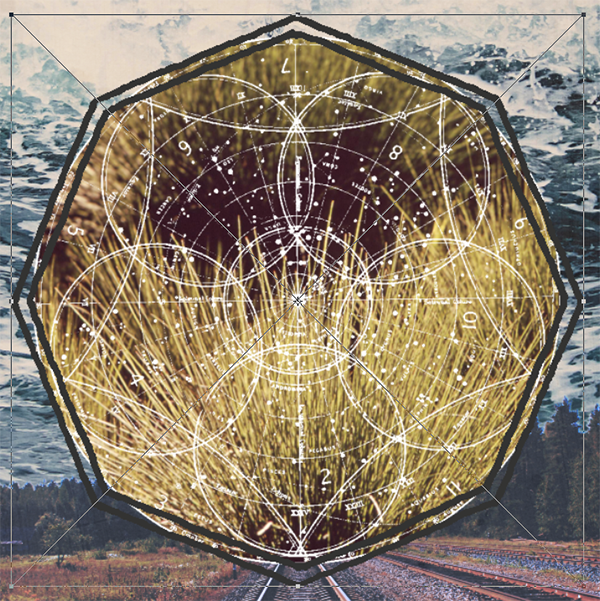
STEP 5: FRAMING THE PIECE
After looking through some of the other Make Design Co. resources, I spotted this simple ornament in the CreativeMarket_Curls&Banners4_Master.ai file.
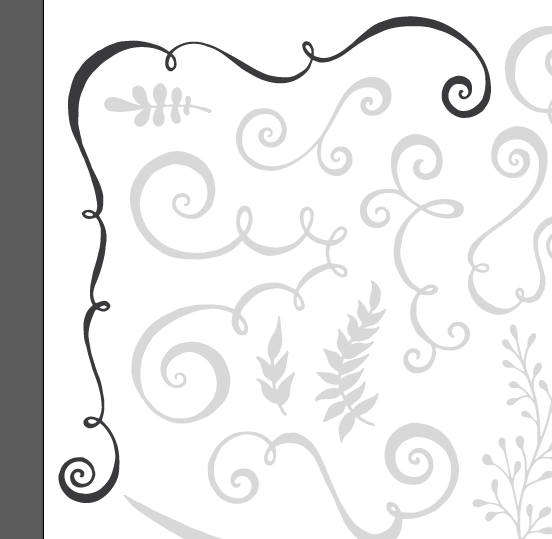
After pasting it four times in my document, change the elements’ color to white, and flipped it around a few times, I made a rudimentary frame with it. You can see the elements highlighted in yellow below below.
Here’s a close-up of one of the corbers, so you can see how it’s aligned compared to the rulers (still highlighted in yellow).

Keeping the frame white makes it very subtle to the eye. It encloses the piece, yet still lets it breathe.

The finishing touch for the frame was to give it its own layer group, to give this layer group a layer mask, and to paste photocopy-noise-textures-sbh-005.jpg in it. The texture was sized slightly bigger than the canvas, and rotated of 180°.

STEP SIX: TYING THE PIECE TOGETHER WITH A LAST TEXTURE PASS
This is the last leg! In order to fully tie the piece together, I used a few more textures. I followed the same process than earlier: placing the texture, sizing it appropriately, desaturated it, and played with levels.
The first texture I’ve used here is Cruzine’s texture20.jpg from the flyer photo overlays series. It fills the whole canvas.
Its blend mode is set to Soft light @ 35% opacity.
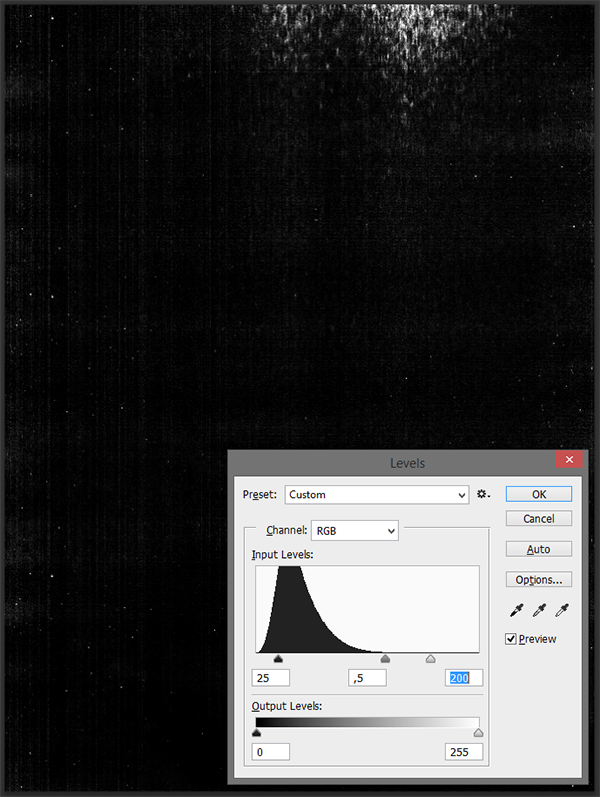
Next on the list os The Shop’s metal-dumpster-textures-012-sbh.jpg from the metal dumpster texture pack. It covers the whole piece, and has had its levels altered quite aggressively. I like the “paint smears vibe” this texture can give.
Once put on Soft light @ 25% opacity, it helps to darken the piece and its mood quite nicely.
Next, and from the same pack, is metal-dumpster-textures-044-sbh.jpg. I simply placed, sized, and sharpened the texture a bit. I didn’t touch its color or contrast at all. Once set to Soft light @ 25% opacity, it brings just enough of its rust and blue hues to the piece to make it look a bit dirty or dusty.
Our next to last texture is photocopy-noise-textures-sbh-005.jpg. Its job is to add some subtle artifacts to the piece.
I placed it on Screen @ 50% opacity.
And finally, the icing on the cake: a subtle halftone effect. I’m quite a sucker for these, and was super happy to see that the bundle gives us quite a few great options to choose from.
After some tinkering, I used Ghostly Pixels’ Texture-01.png from the halftone textures series. I used the PNG version because it’s faster to manipulate, but the EPS would work just as well. Since the texture isn’t very visible on the piece, I’ve highlighted it in yellow again.
After placing it to cover the whole document, sharpening it, and inverting it, I used color dodge @ 25% opacity to fade it “just enough” with the piece.
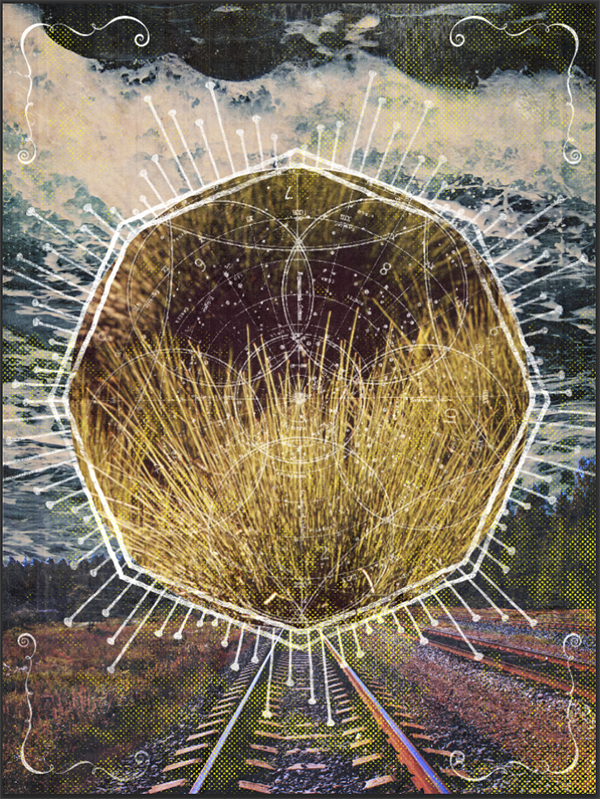
And we’re done! If you feel so inclined, mock your new piece up:
I hope you had as much fun going through this tutorial as I had writing it. I hope this convinced you of the incredible potential of the numerous resources included in the Ultimate Vintage and Retro Design Bundle.
Questions? Comments? Ideas? Share them below in the comments! I’ll be watching for the next few days. Or tweet at me, @simonhartmann.
Until next time, cheers!
Be the first to comment