WHAT WE’RE CREATING:
Hello fellow Design Cutters! Renee reporting from sunny Las Vegas. I’m so excited to bring you my first Design Cuts tutorial. I have some pretty big shoes to fill, following on from the very talented Pam.
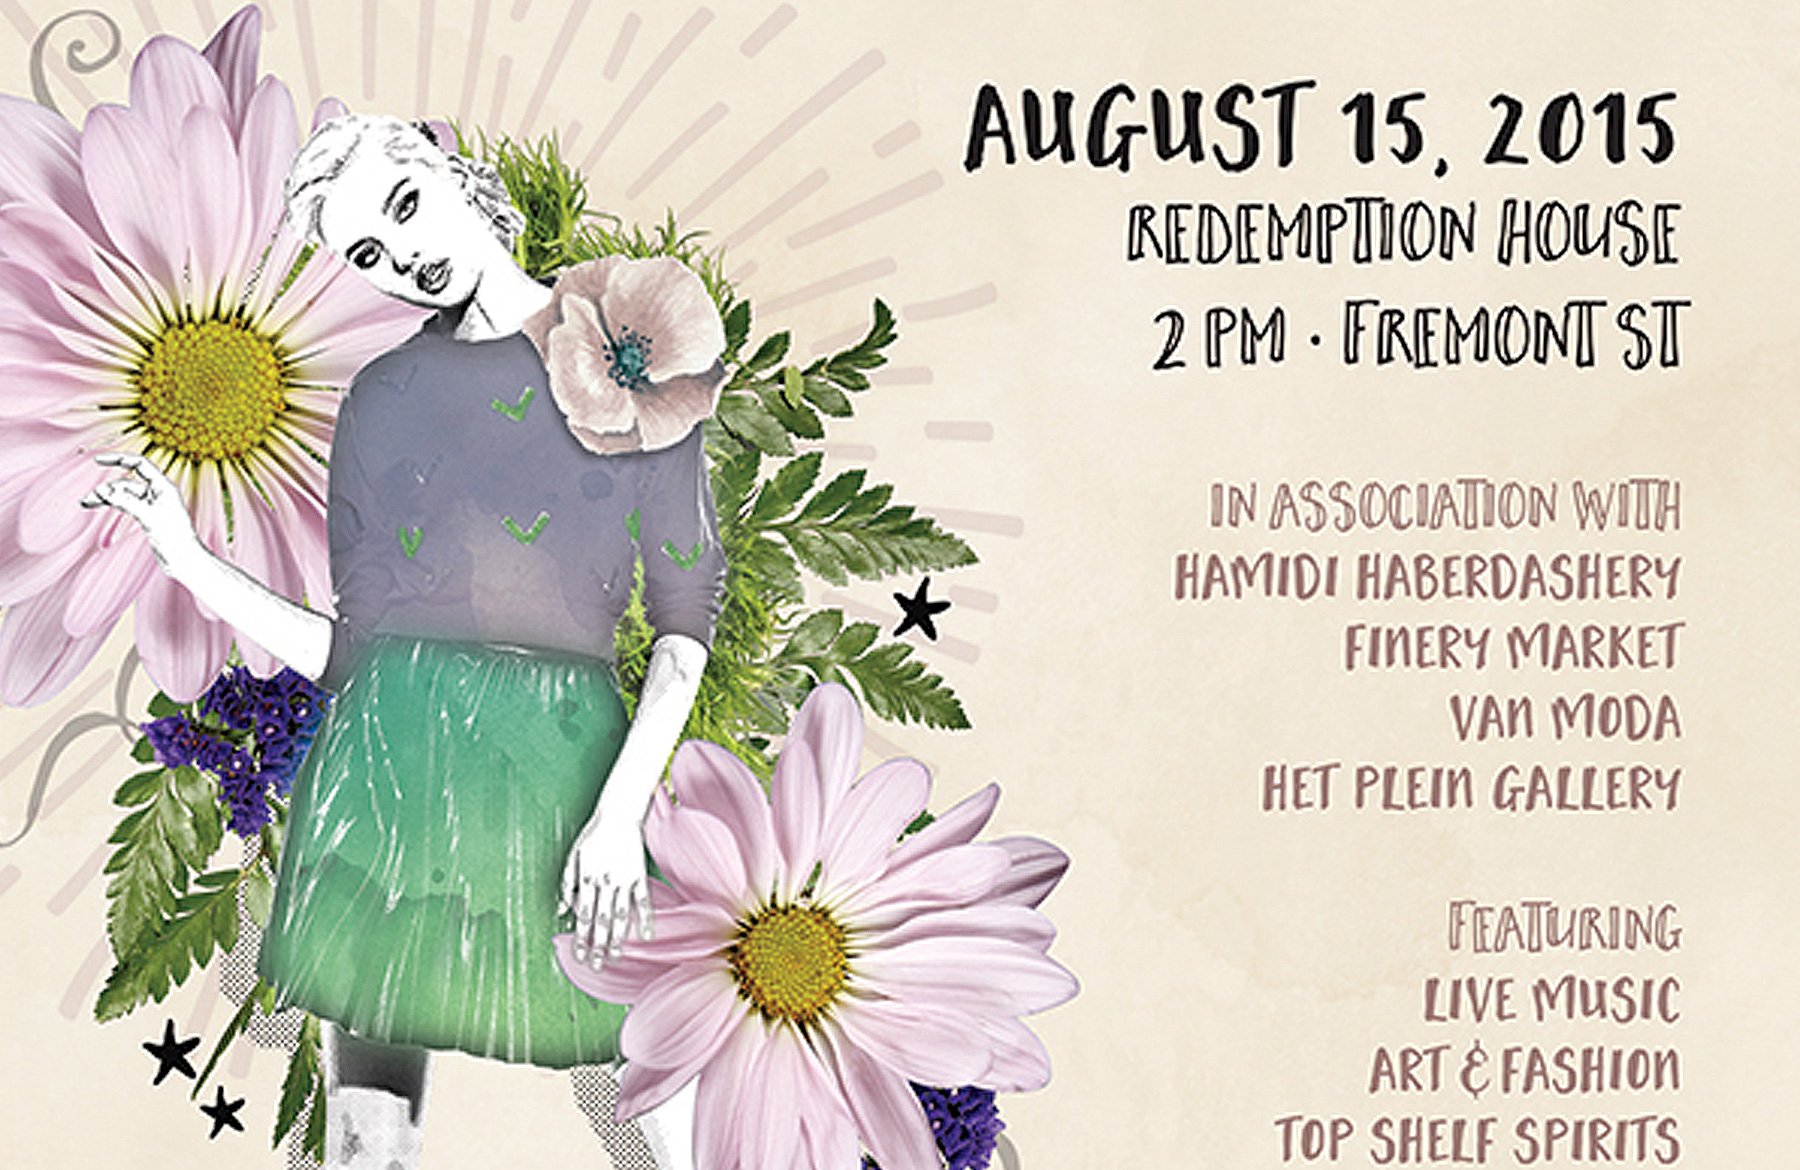
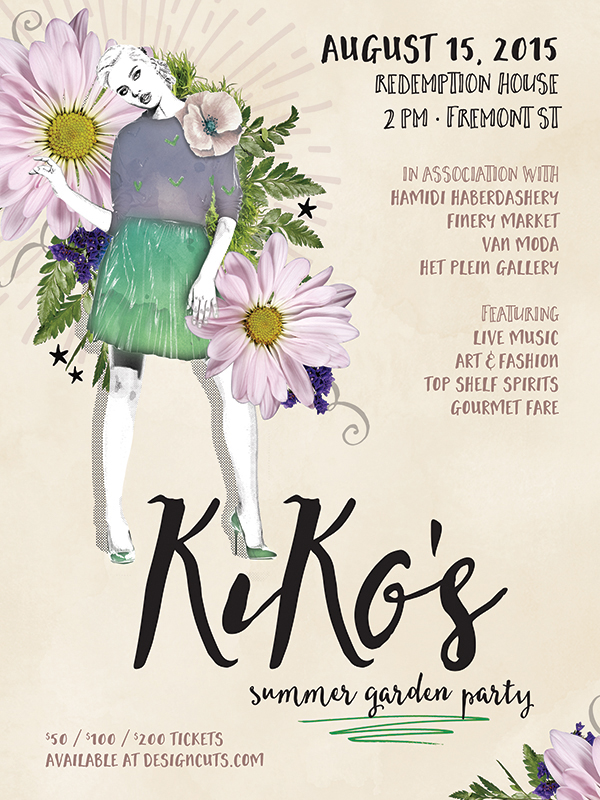
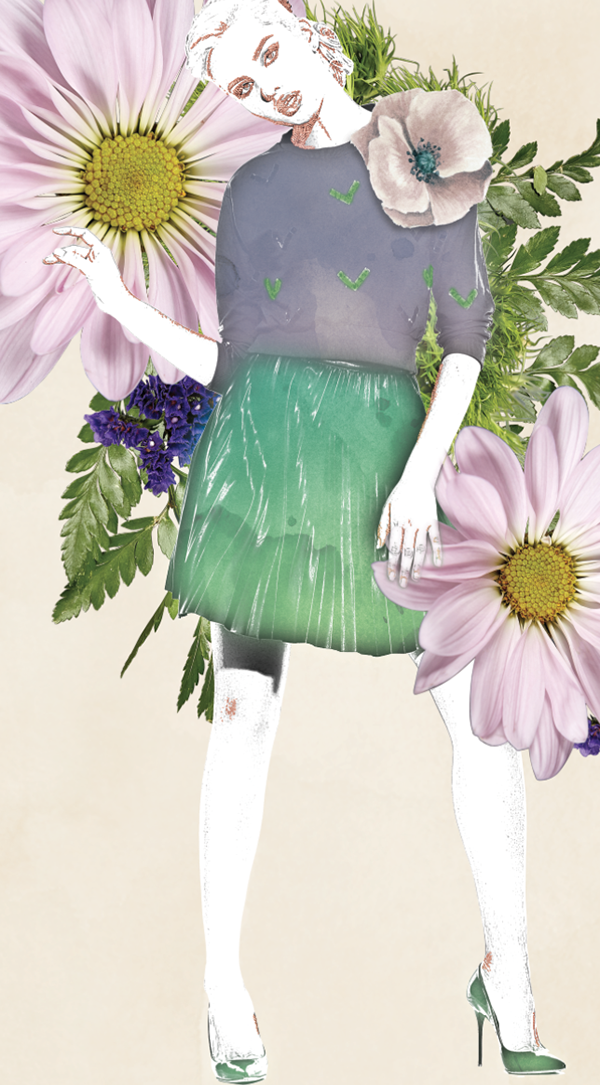
Today’s lesson will show you how to design a mega creative garden party poster, full of hand-drawn elements, watercolour effects and beautiful typography.
Let’s jump right in!
Follow along with this tutorial: Download the freebies
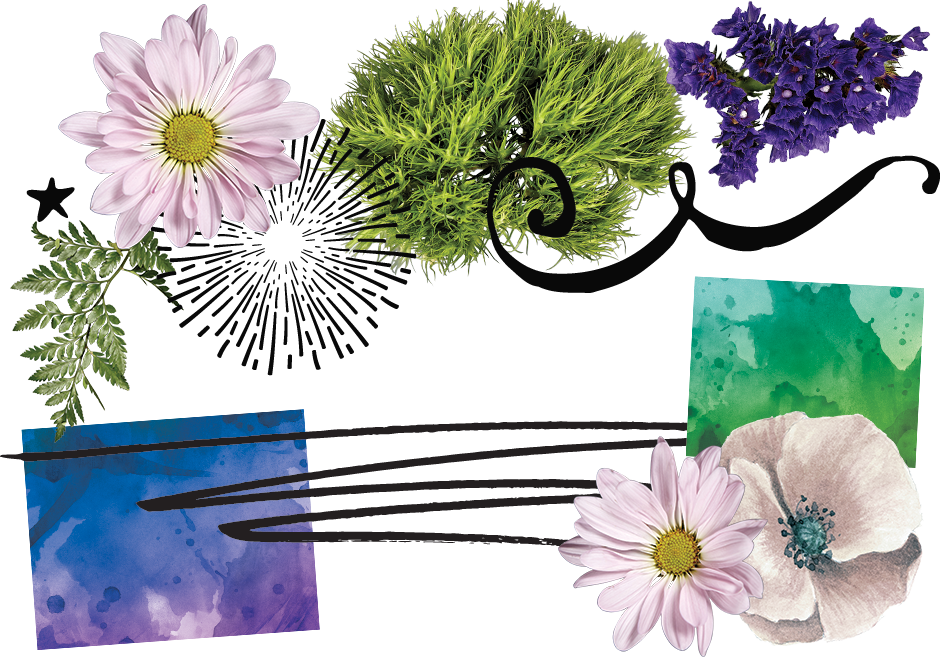
This week we have a really stellar freebie pack of vectors and textures courtesy of our designers. Remember, this freebie is just a tiny sample taken from the amazing collection: The Inspirational Artistic Design Bundle at just $29 (an incredible 91% off). This bundle will truly take your creativity to a new level!
Step 1:
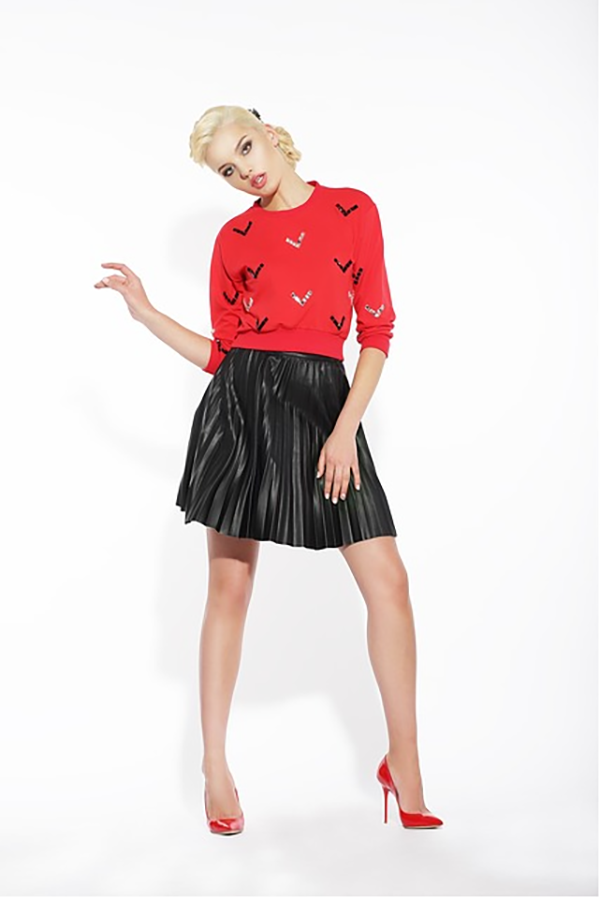
First, we’ll need to download this model photo from pixabay.
Open the photo in Photoshop. We’re going to take advantage of the rough qualities of sketches and watercolor to use some quick selection techniques that might normally be too imprecise.
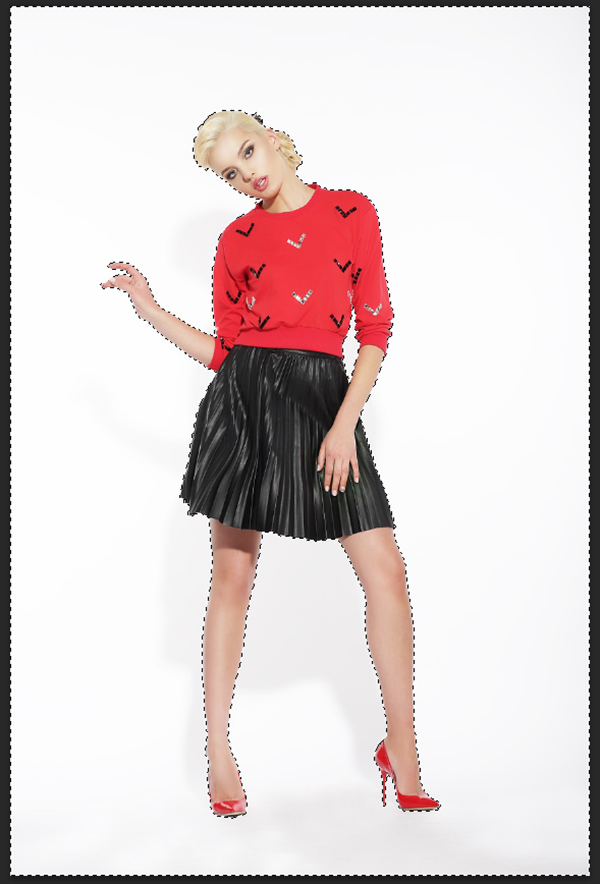
Having said that, use your Magic Wand (W) to select the white background areas.
Go to Select > Inverse to move the selection from the background to the model.
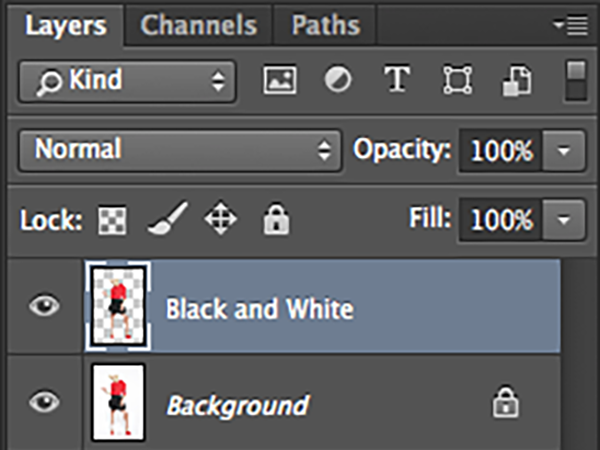
With our model selected, hit cmd/ctrl + j to create a new layer from our selection. Name the new layer “Black and White”.
With the new layer selected, go to Image > Adjustments > Black & White. Under Presets, choose Blue Filter and click Ok.
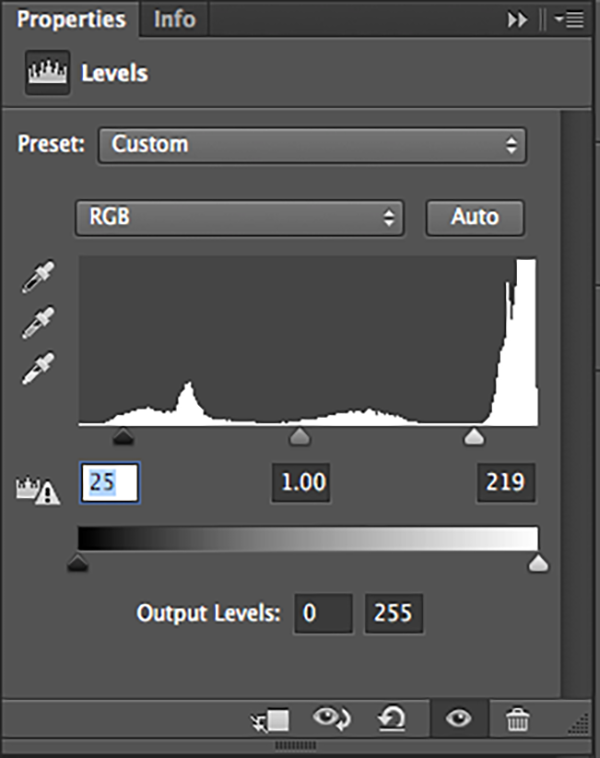
Now we want to pump up our levels a bit. On the Adjustments panel, select Levels.
Adjust the shadow input level to 25 and the highlight input level to 219.
Turn off the Background Layer so we have a transparent background.
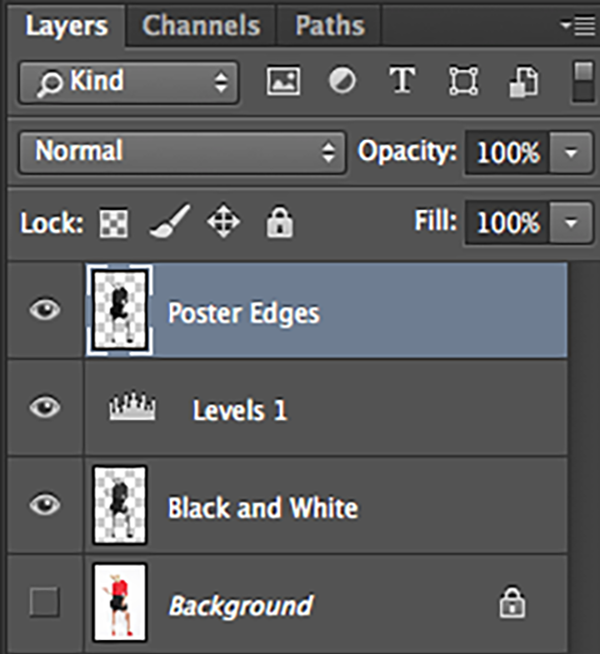
With our Black and White layer selected, press cmd + shift + opt + e (or ctrl + shift + alt + e on a PC) to create a new layer from all visible layers – an easy way to rasterize all effects without destroying your original layers.
Name this layer Poster Edges.
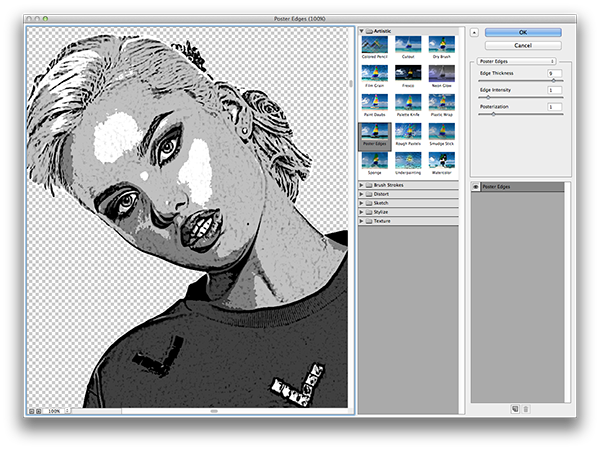
With the Poster Edges layer selected, go to Filter > Filter Gallery. Under Artistic, choose Poster Edges and use Edge Thickness of 9, Edge Intensity of 1 and Posterization of 1. Click Ok.
Now set the Blend Mode of this layer to Color Dodge.
Save as Model.psd and close the file. We’ll use this one soon.
Step 2:
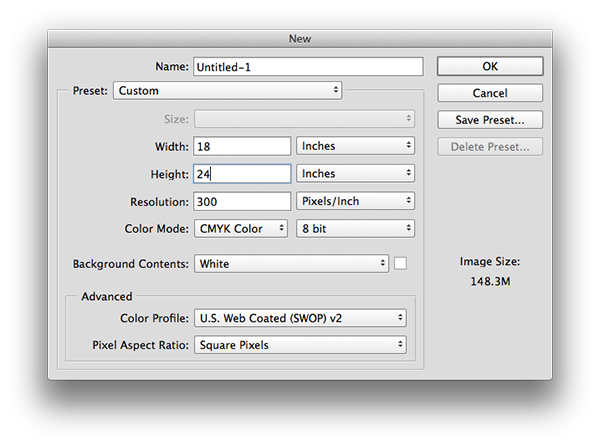
Now we’ll start in on our poster layout. Create a new file in Photoshop with our usual 18″ x 24″ poster settings.
We’ll start by getting our background in order. Select your foreground color and change it to 4/7/16/0.
Click on your Background layer and hit opt/alt + backspace to fill with our new color.
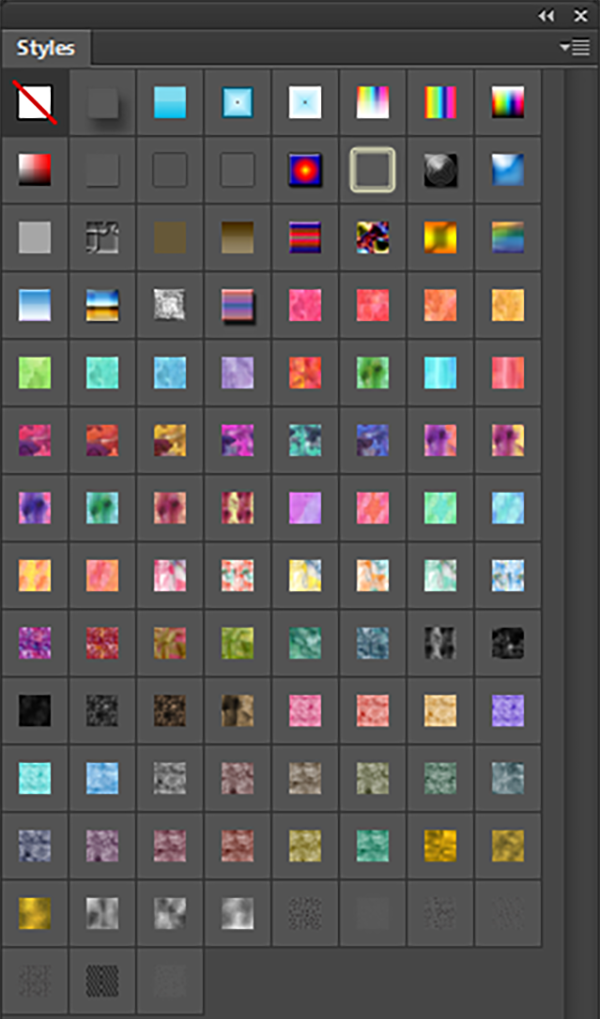
We’ll layer our background texture using styles from Make Media Co’s Watercolor Media Kit. We’ll start by loading the styles.
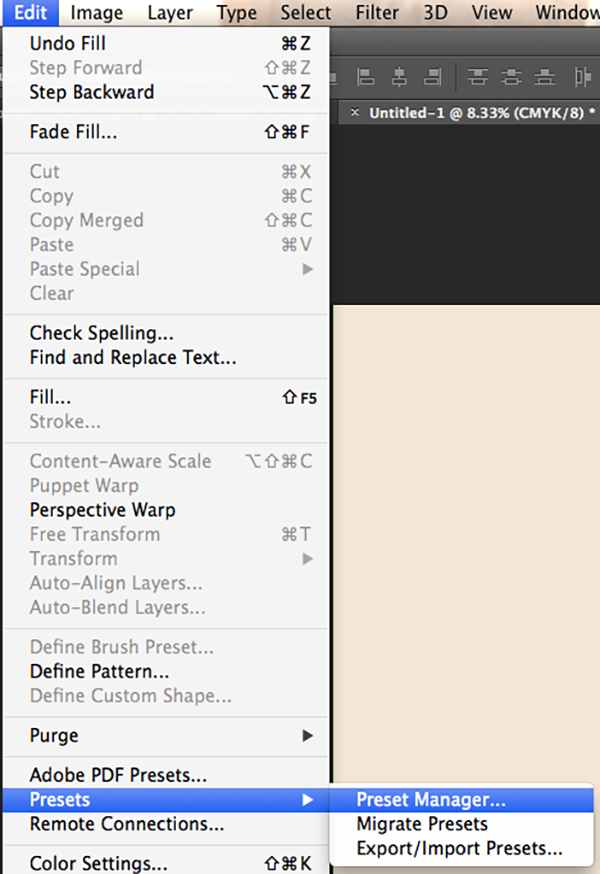
Go to Edit > Presets > Preset Manager.
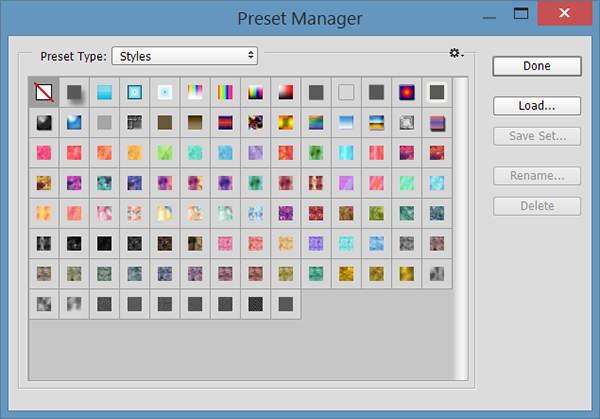
In the Preset Type drop down menu, select Styles. Click Load and navigate to WatercolorMediaKit_StylesSample.asl, then hit Done.
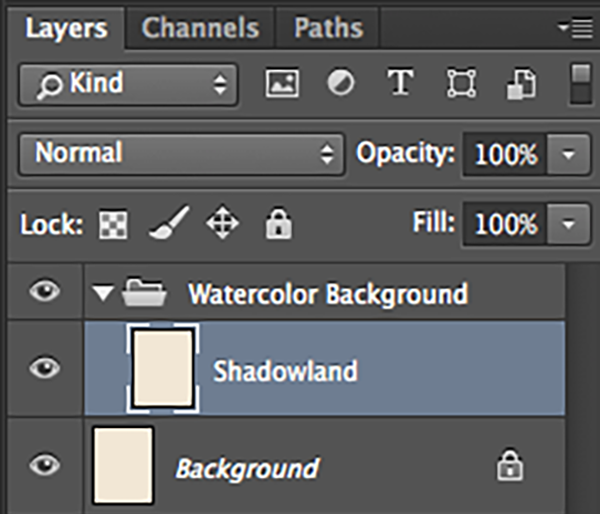
Create a new folder and name it Watercolor Background. Click on the New Layer icon and name the layer Shadowland. Fill the layer with the foreground color using alt/opt + backspace.
With this layer selected, click on Shadowland in your Styles palette. (If you don’t see your Styles palette, go to Window > Styles.)
Double click on Pattern Overlay to bring up the Layer Style options and change the scale to about 870% so we don’t see obvious repeating patterns.
We’ll need to edit the Blending Mode and Opacity which means we’ll need to rasterize the style. Go to Layer > Rasterize > Layer Style.
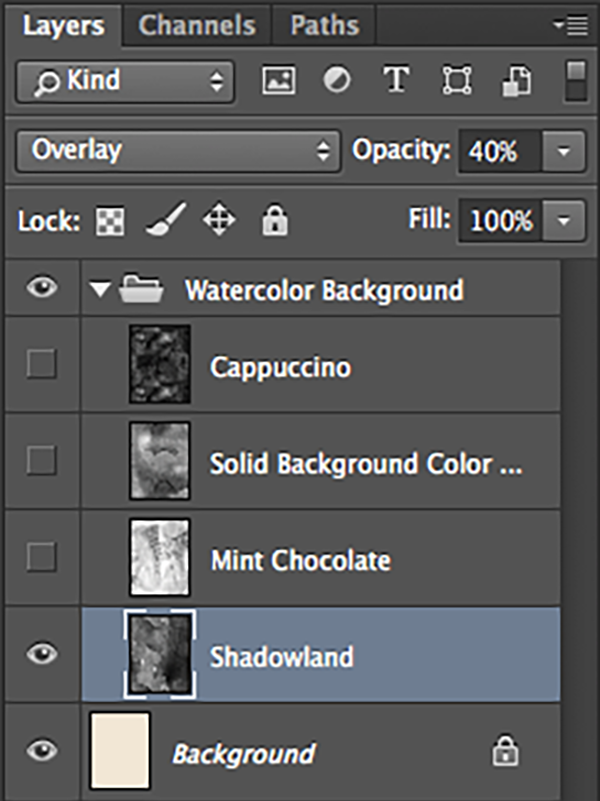
Set the Blending Mode to Overlay and reduce Opacity to 40%.
Now, we’re going to repeat the same process with Mint Chocolate, Golden Plum and Cappuccino, but we’ll add a desaturation step.
For the Mint Chocolate layer, change the pattern scale to 900%. Rasterize the Layer Style, then go to Image > Adjustments > Desaturate (or use cmd/ctrl + shift + u). Set the Blend Mode to Overlay and reduce Opacity to 30%.
For Golden Plum, scale the pattern to 1000% before rasterizing, desaturating, setting the Blend Mode to Overlay and reducing the opacity to 50%.
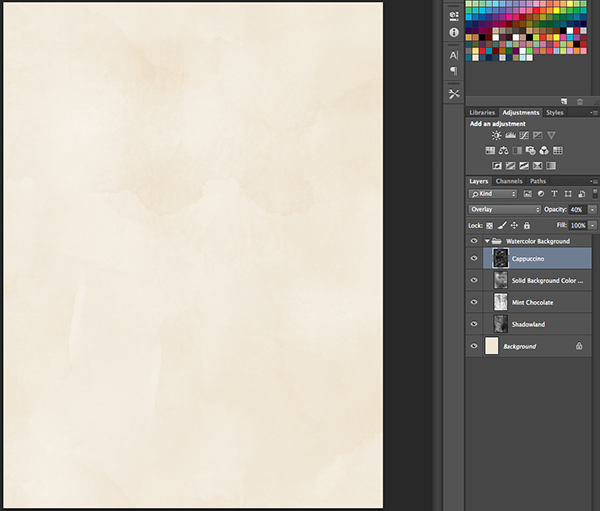
For Cappuccino, we’ll use a pattern scale of 1000%, then rasterize, desaturate, set the Blend Mode to Overlay and reduce the opacity to 40%.
Step 3:
Now on to the model!
Place the model photo we created earlier and scale to 24%. Make sure Maintain Aspect Ratio is selected when scaling.
Position her in the top left corner.
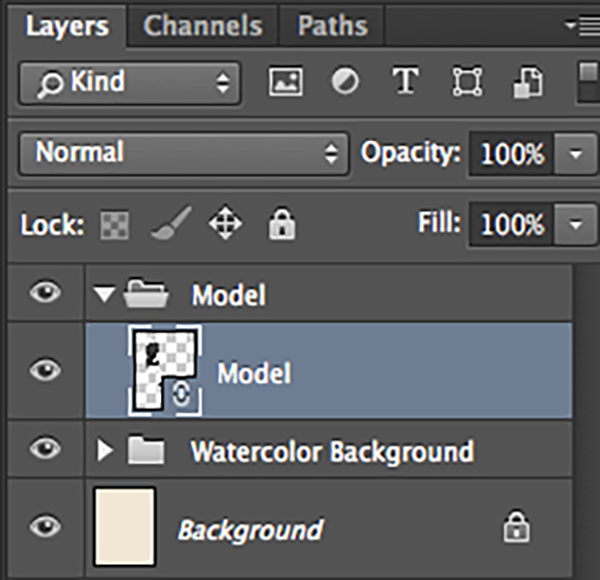
Create a new folder named Model and drag the Model layer into it.
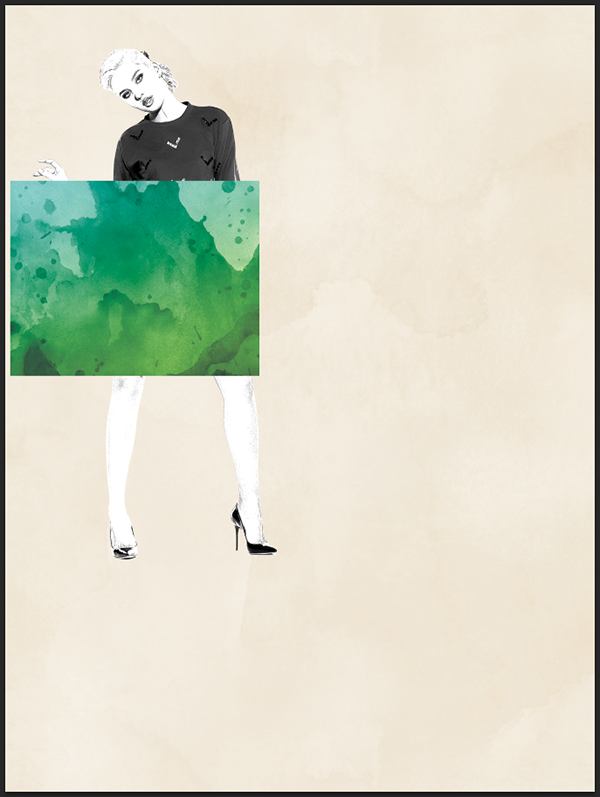
Place 9.jpg from Design Spoon’s Watercolor Textures and drag on top of the skirt.
Now turn this layer off so we can see our model to make a mask for the watercolor texture.
We want soft, inexact edges, so use your Magnetic Lasso tool (click and hold on the Lasso tool to bring up the flyout menu and choose the Magnetic Lasso) to roughly select the skirt area. If the selection area gets wildly out of control, you can use your regular Lasso tool while holding shift to add areas or opt/alt to deselect areas.
Once you have a rough outline of the skirt area, go to Select > Modify > Feather. Enter 50 px and hit ok.
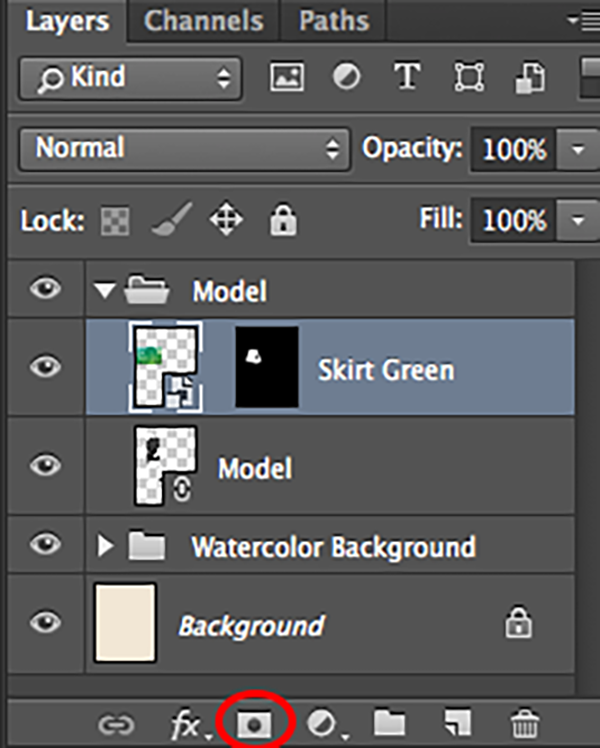
With the area still selected, turn on your watercolor layer, click on it once to make it the current layer and click on the Create Mask icon in the bottom of your Layers palette.
Now, change the layer Blend Mode of the masked watercolor to Screen and name the layer Skirt Texture.
We’re going to repeat this same basic process for the shirt and shoes.
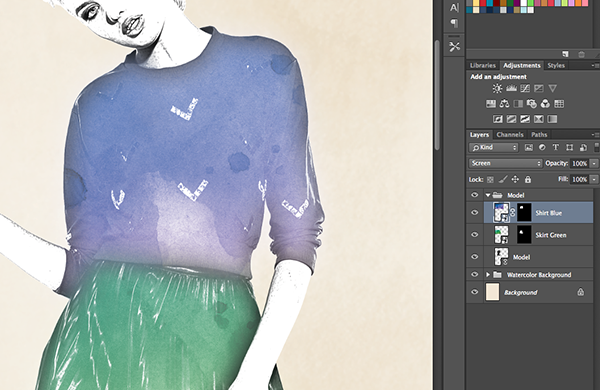
For the shirt, we’ll use 12.jpg. Place it in the poster file, position on top of the shirt area and hide the layer. Use your Magnetic Lasso tool to draw a rough selection of the shirt. Go to Select > Modify > Feather and enter 50 px, then hit enter. Turn the layer back on, select it and choose the Create Mask icon. Then set the texture layer mode to Screen. Name the layer Shirt Texture.
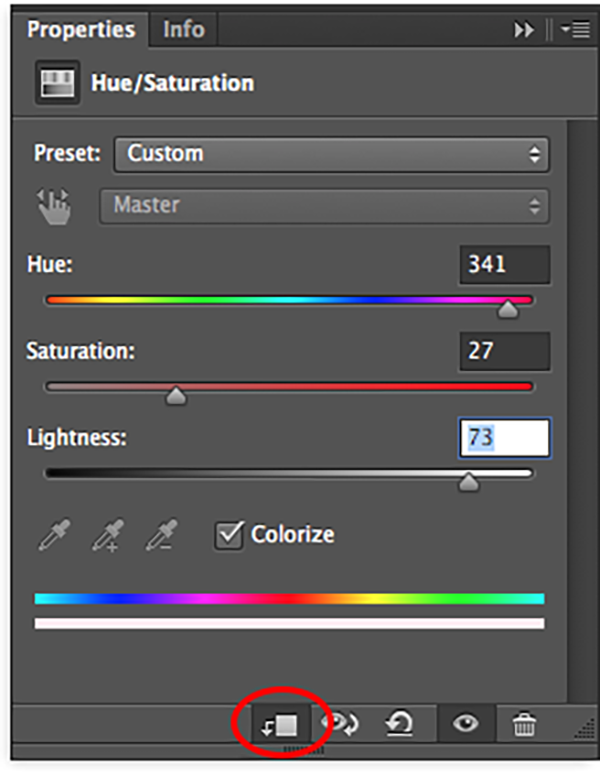
It’s a little too bright, so we’ll add an Adjustment layer to tone it down a bit. Click on Hue/Saturation in your Adjustment panel and change the Saturation to -38 and Lightness to -36. Make sure to turn on Clip to Layer (circled) so it only applies the adjustment to our shirt layer.
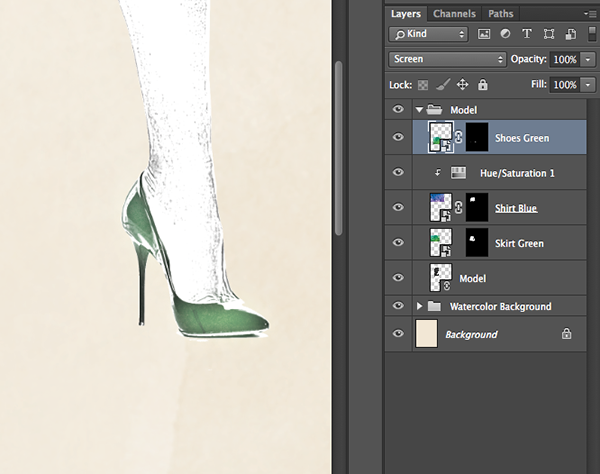
Repeat using 9.jpg for the shoes. Place into the poster, position over the shoes and hide the layer. Use the Magnetic Lasso tool to roughly select the shoes, but this time we’ll feather at 30 px since the shoes are a smaller area and 50 px would be too large. Turn the watercolor texture layer on, select it and create your mask, then set the Layer Mode to Screen. Name the layer Shoe Texture.
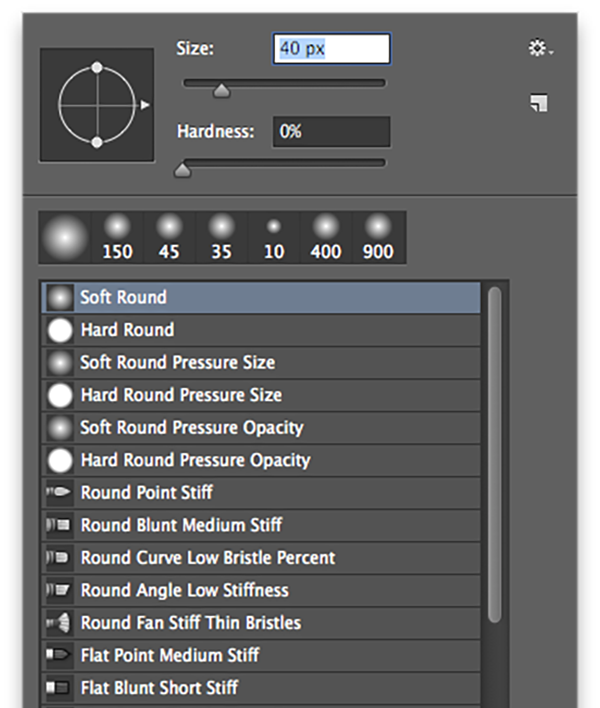
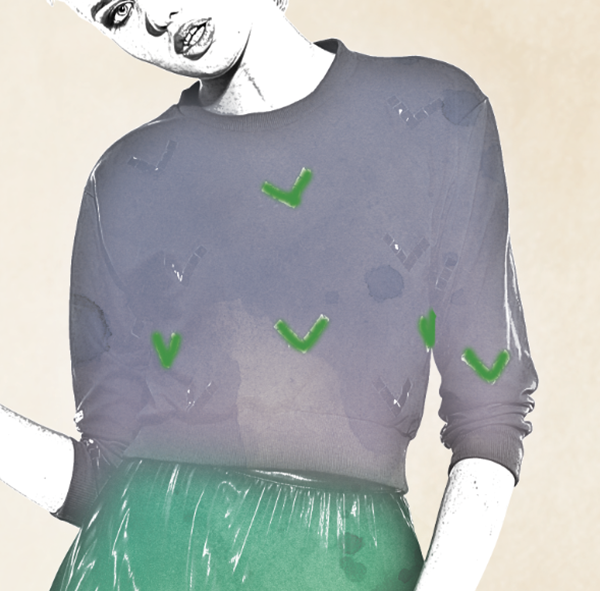
The shirt has some fun arrow detailing, so let’s bring that out by using the green color from our skirt and shoes. Create a new layer and name it Arrows. Select the Brush tool, choose the Soft Round brush and reduce the size to 40px.
Click on your foreground color and change it to 78/19/100/4. Draw over the light arrows. No need to be exact – the roughness adds to the effect.
Change the Layer Blend Mode to Multiply and the Opacity to 70%.
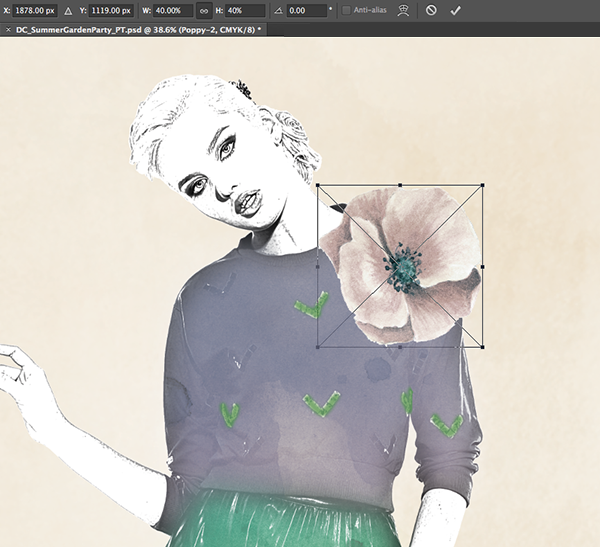
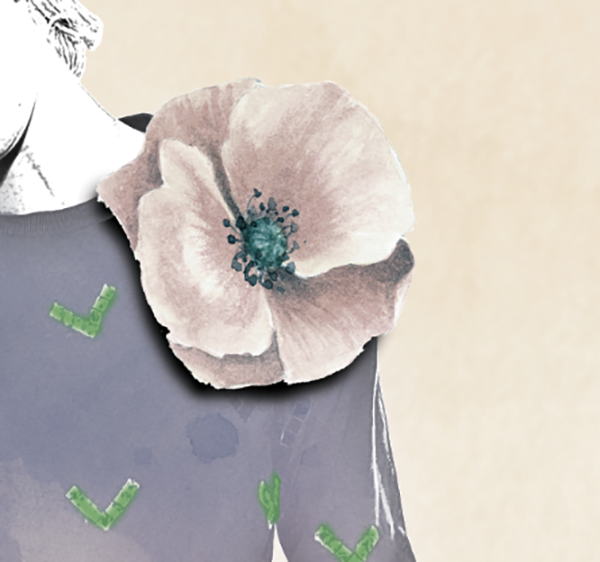
To make the outfit a little more Springy, we’ll add a large flower on her shirt using Lisa Glanz’s Magical Watercolor Floral Poppy 2 from the Freebies pack.
Place in, reduce the scale to 40% and position over top right shoulder of the model.
We want to make the poppy look like part of the original outfit, so we’ll need to add a shadow. Create a new layer under Floral Poppy 2 and name it Poppy Shadow. Using the Soft Round brush set to 60 px, brush black around the bottom left edge of the poppy.
Set the layer blending mode to Multiply and reduce opacity to 30%. I find that Multiply at 30% is a pretty good starting point for most shadows.
Step 4:
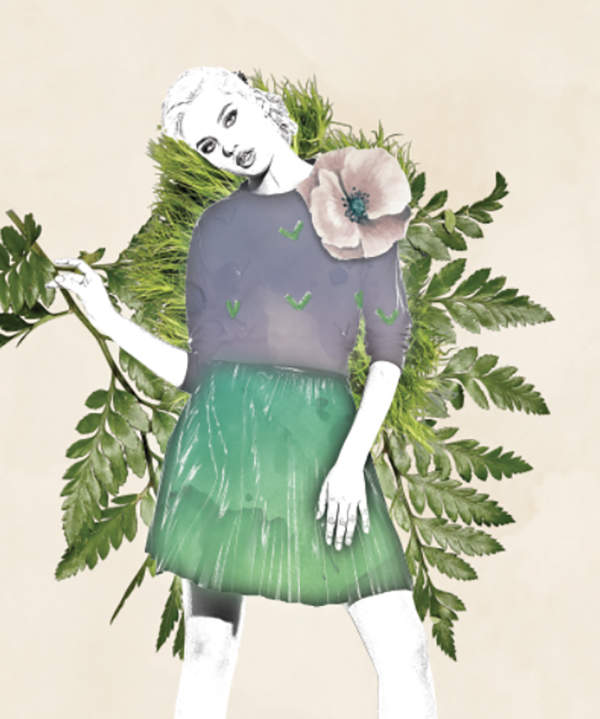
Now we’re going to place in some flowers and foliage from Vintage Design Co’s FlowerType.
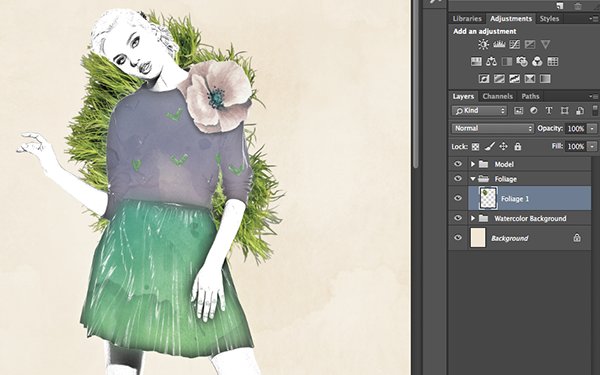
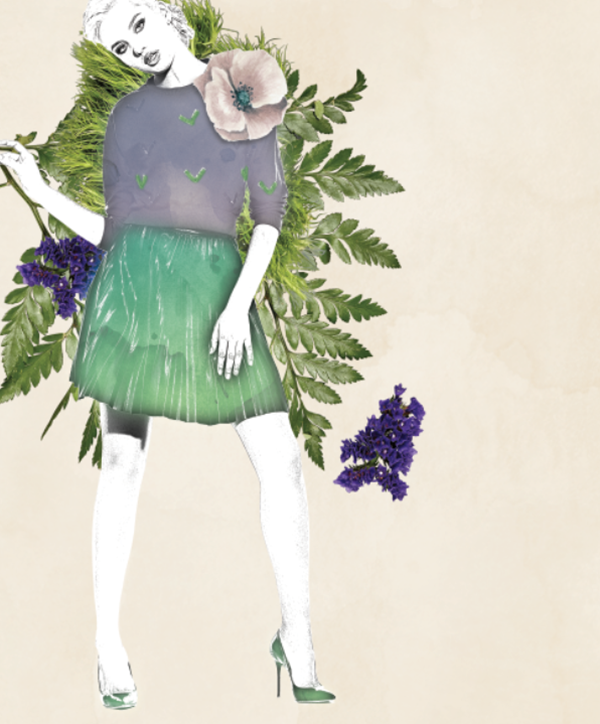
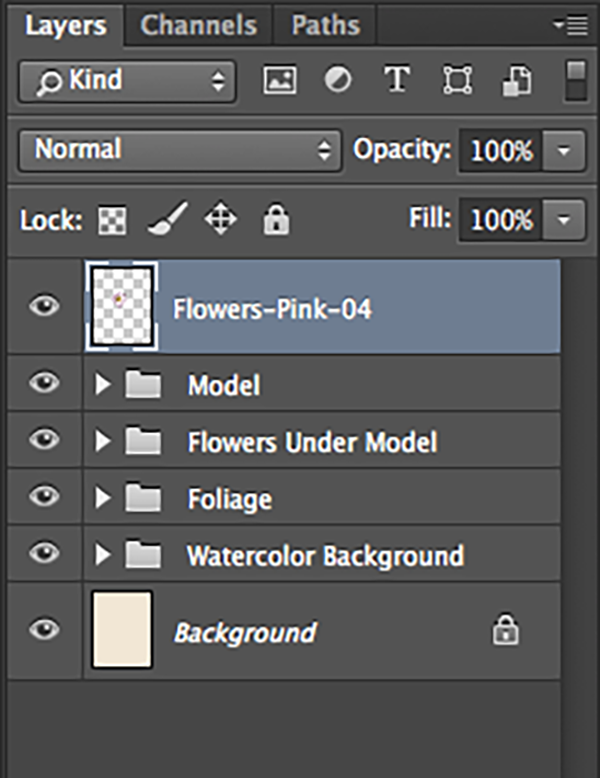
Create a folder named Foliage below the Model folder. Place Foliage-01.psd and position behind the model’s upper body. Then drag the layer into the Foliage folder.
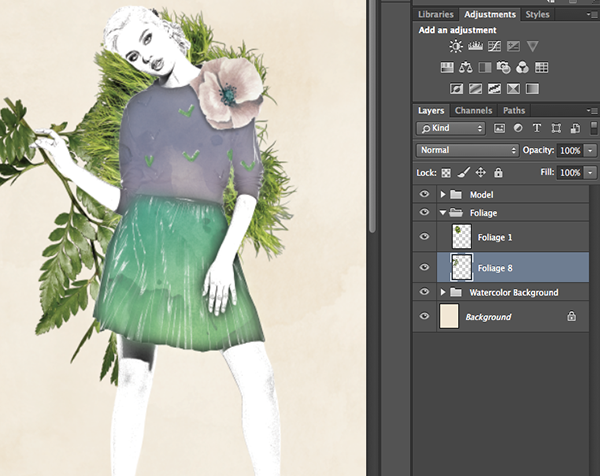
Place Foliage-08.psd in the top right behind Foliage-01.
Copy Foliage-08 and place behind the model on the bottom left.
Create a folder named Flowers Under Model between the Foliage folder and Model folder. Place Flowers-Purple-01.psd and position just below the model’s left arm. Drag the layer into the new folder.
Copy the Flowers-Purple-01 layer and adjust rotation to -30 degrees. Move to the open area at the bottom right of the leaves.
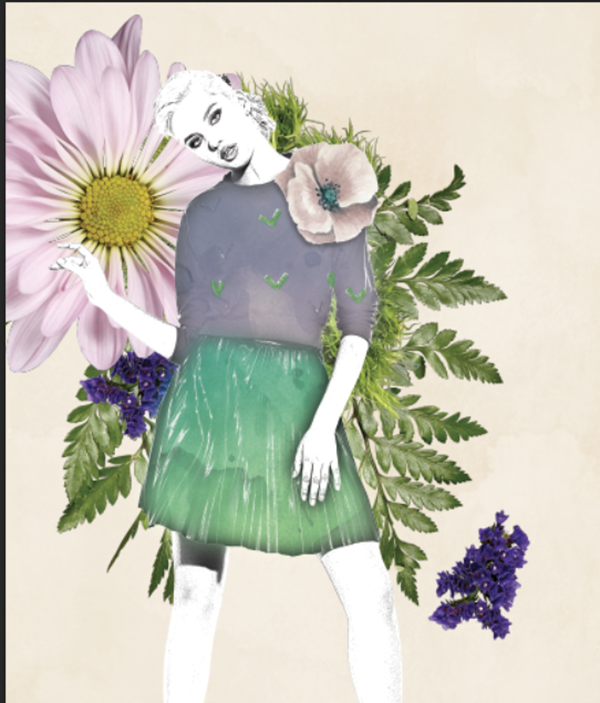
Place Flowers-Pink-01.psd in the top left corner behind the model.
For our last flower, we’ll want Flowers-Pink-04.psd to be placed above the Model folder so it will partially overlap our model image.
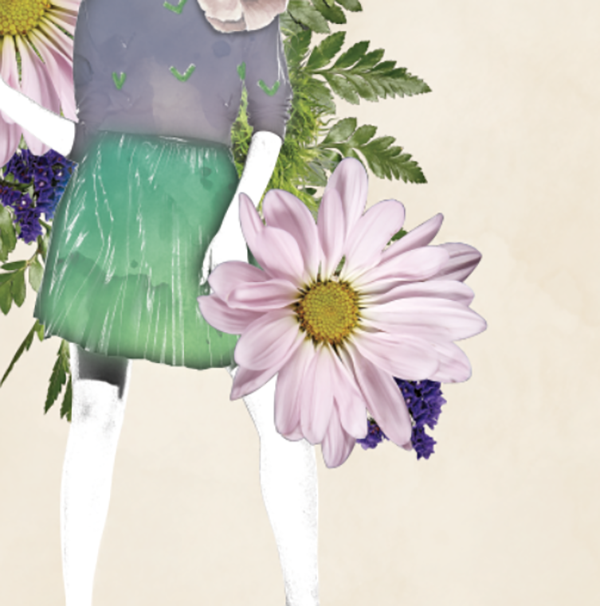
Scale to 75% and set rotation to 160 degrees. Position on the bottom right skirt area.
Hide the layer temporarily.
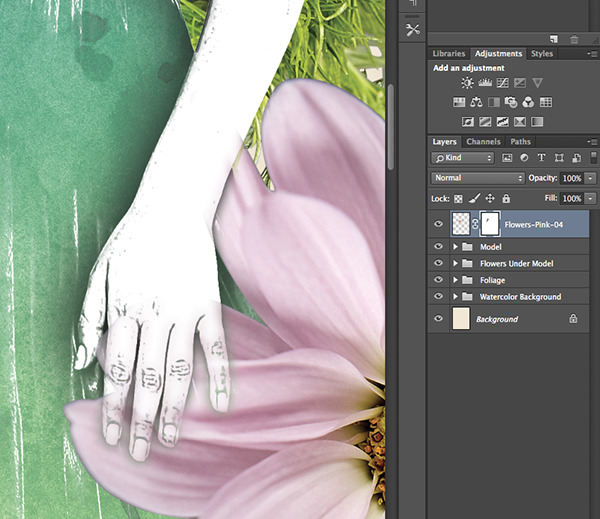
Create a rough outline of the model’s white hand and arm by selecting the Model layer (in the Model folder) and clicking in the white area with your Magic Wand.
Go to Select > Modify > Feather and enter 10 px. Click OK. Then go to Select > Inverse.
With this selection in place, turn back on the Flower Pink 4 layer, click on it so it’s selected and click the Create Mask icon.
Step 5:
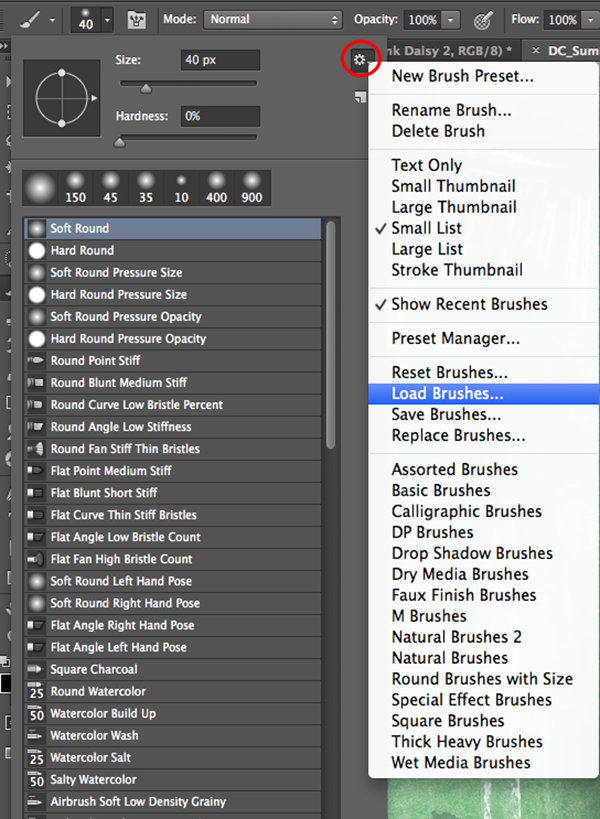
To add some additional sketch effect to our model, load the Alex Dukal Screentone brushes in the freebie pack. Do this by opening your Brush options panel, clicking the Settings icon and choosing Load Brushes. Then navigate to the Alex Dukal Screentones file in the freebies pack.
This part of the process is somewhat subjective, but it’s hard to go wrong with these incredible screentone brushes.
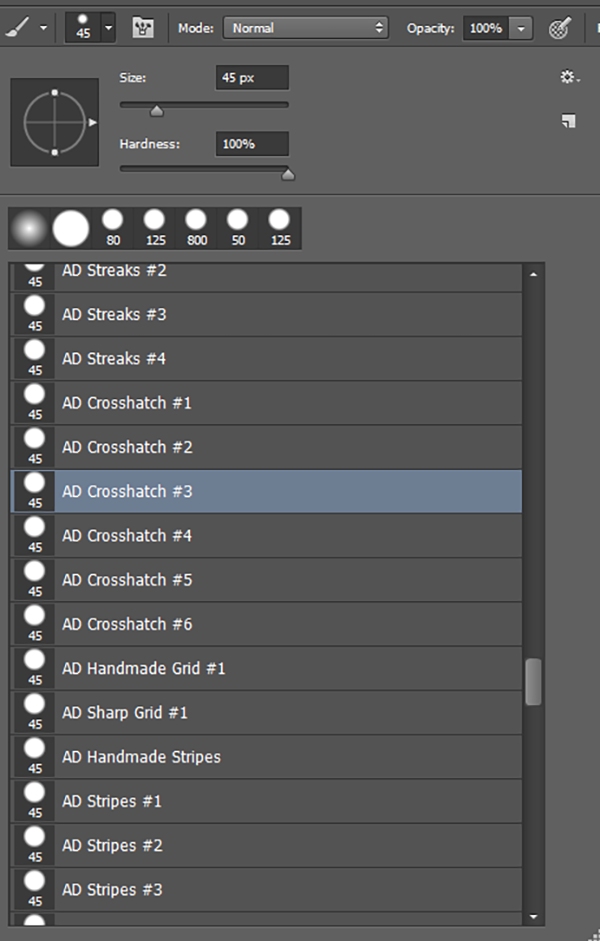
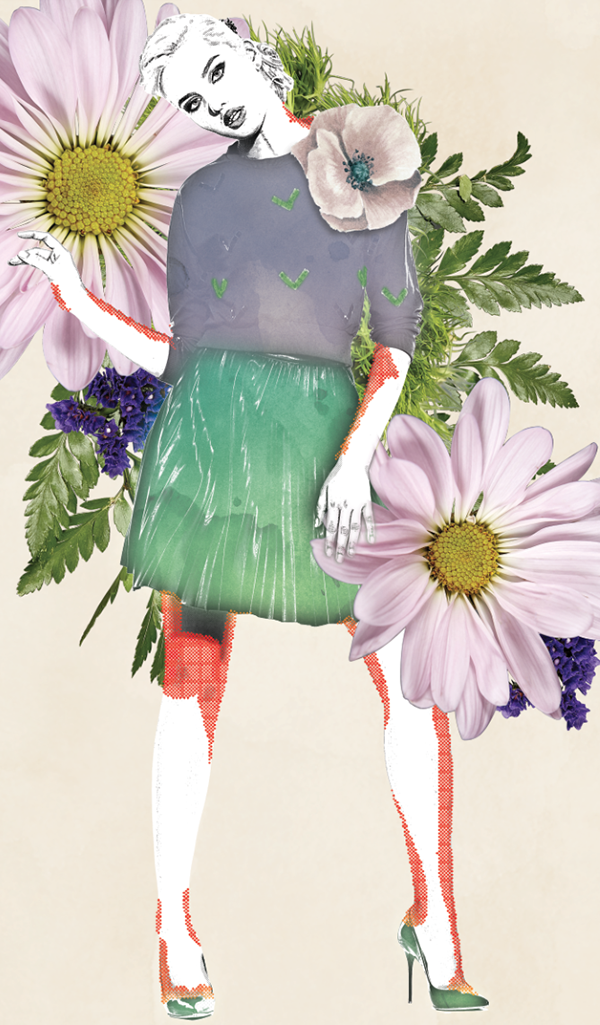
Create a layer in the Model folder called Crosshatch 3. Select your Brush tool and scroll down to AD Crosshatch 3.
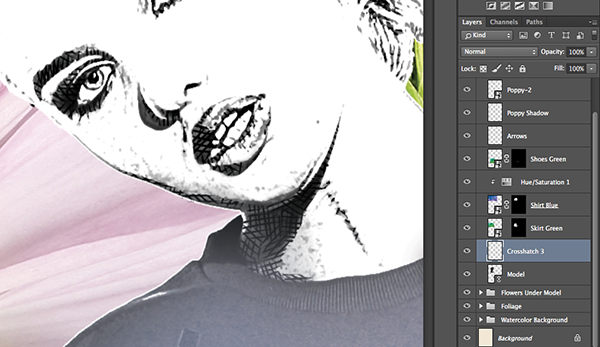
Use this over the darkest areas of the model.
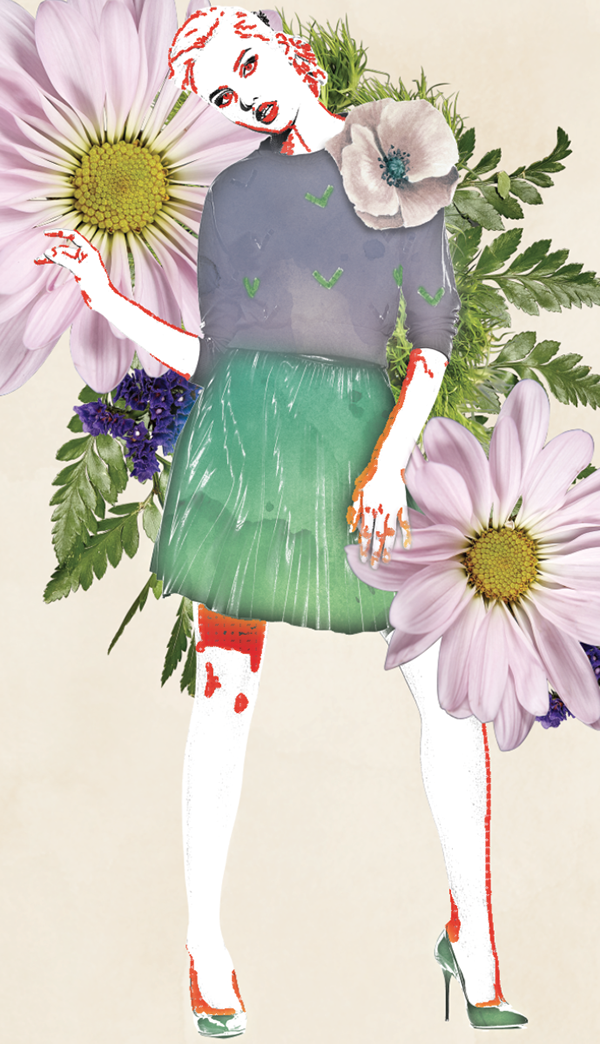
This shows a rough idea of my dark crosshatch areas highlighted in red.
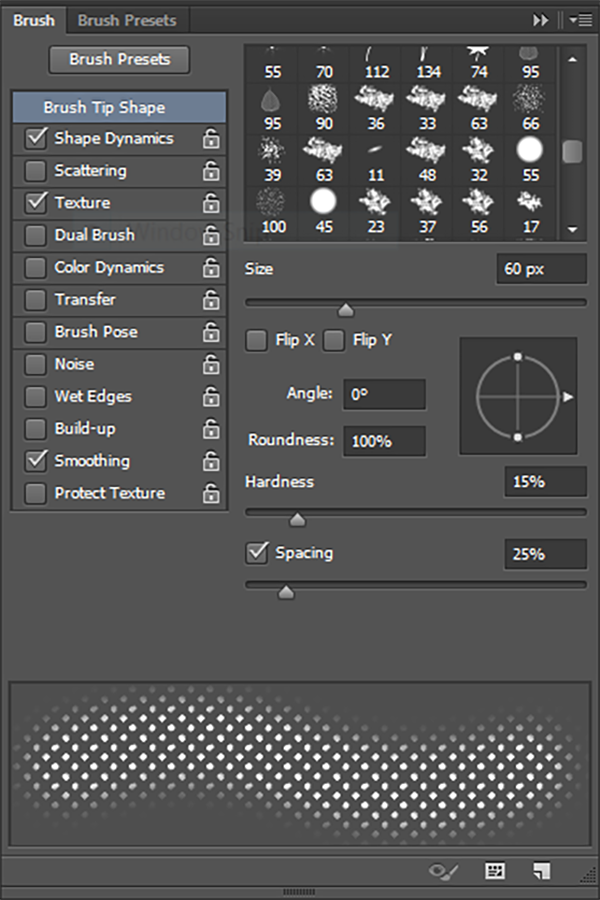
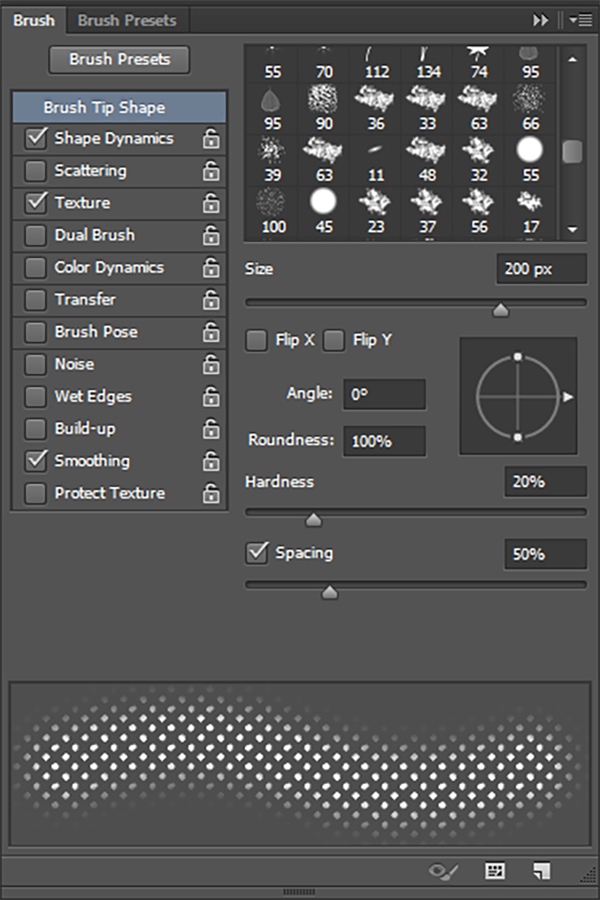
Create a new layer called Ad Magtone 30. Select your Brush tool and scroll down to Ad Magtone 30. Open your Brush options panel (Go to Window > Brush if you can’t find it). Change the Brush size to 60 px, Hardness to 15% and Spacing to 25%.
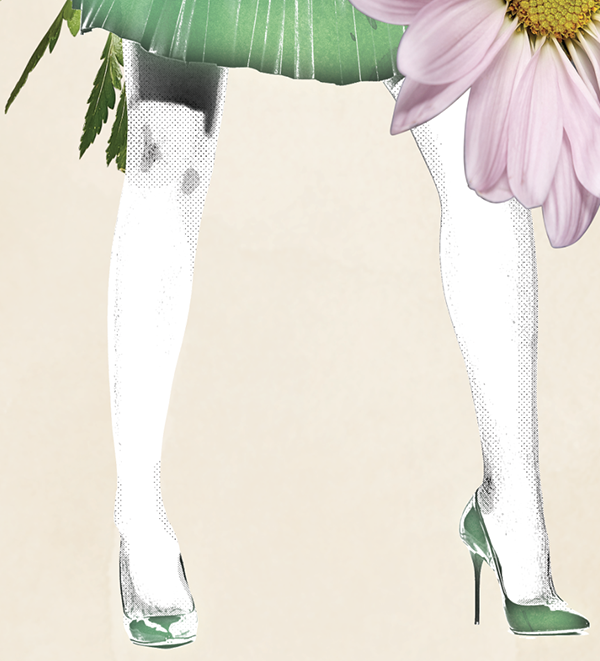
Brush over the midtones of the model’s shadows.
These are the areas I brushed over:
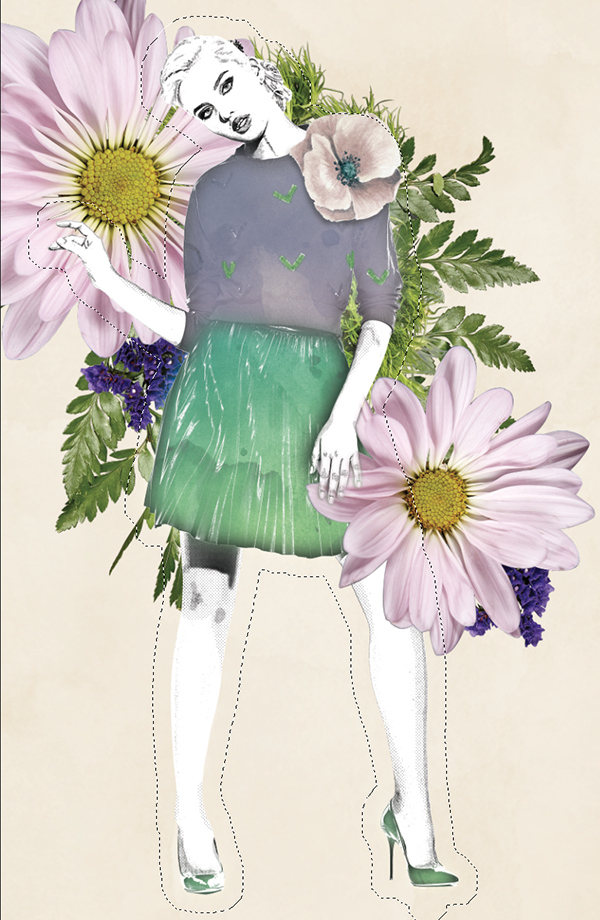
For the lightest areas of shadow, we’ll use Ad Magtone 10 with Brush options settings at Size 60%, Hardness 100% and Spacing 60%.
I took a few more liberties with this brush because I really wanted to have some clearly visible areas of this pattern.
This is the rough area I brushed over:
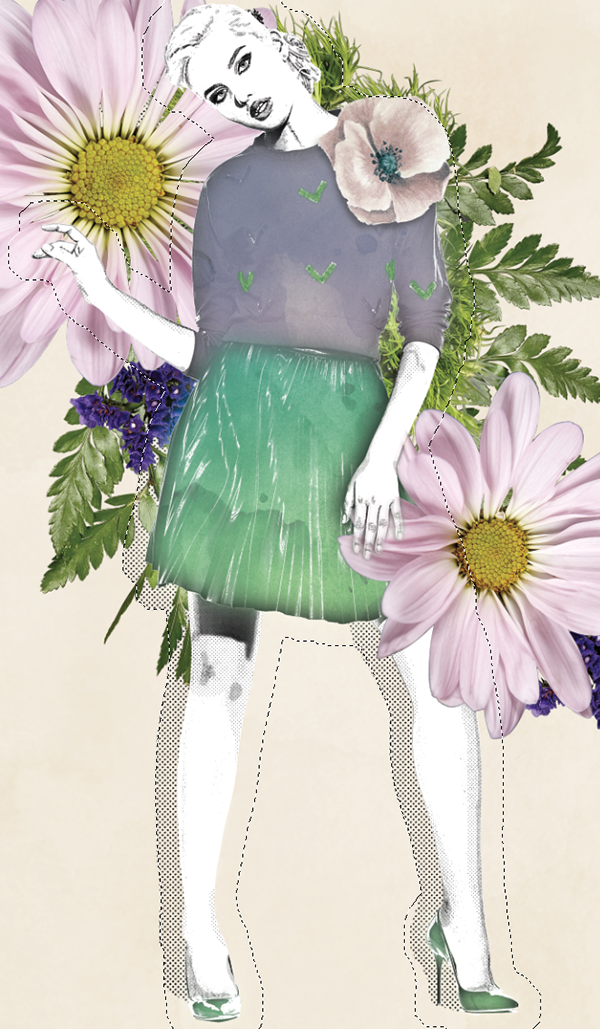
Now we want to make a selection using the model. Hold cmd/ctrl and click on the Model layer thumbnail to create the selection. Then go to Select > Modify > Expand and enter 100px.
With your Brush tool, scroll down to Ad Magtone 30, open your Brush options panel and set to Size 200, Hardness 20% and Spacing 50%.
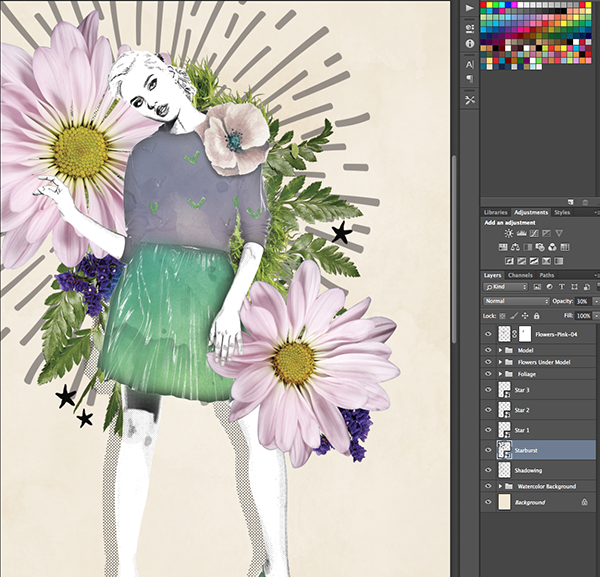
Create a new layer between the Watercolor Background folder and Foliage folder. Name it Shadowing.
Brush along the left side of the model from under her arm to the bottom of her left foot and along the left side of her right leg. Our selection will keep us from straying outside our intended area.
Step 6:
We’ll add some extra detailing around our flowers using some shapes from Nicky Laatz’s Mammoth Watercolor collection.
We’ll start with the star from the freebies vector file.
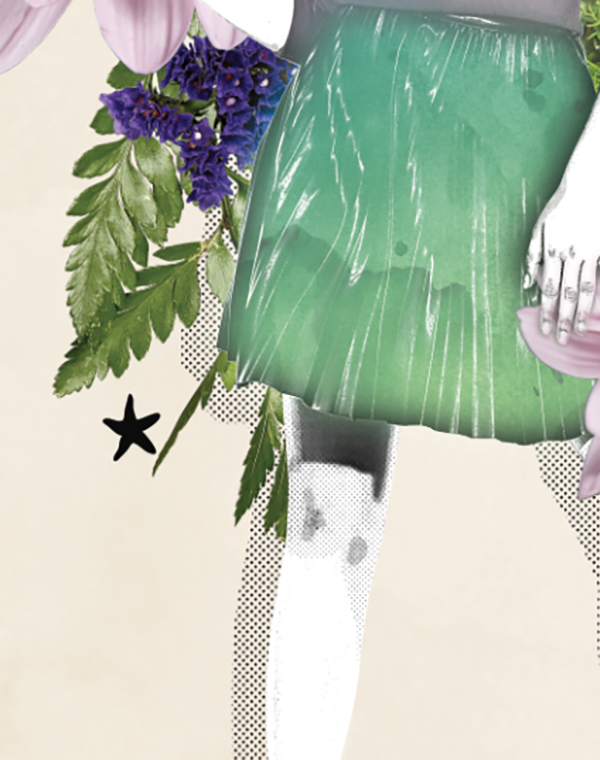
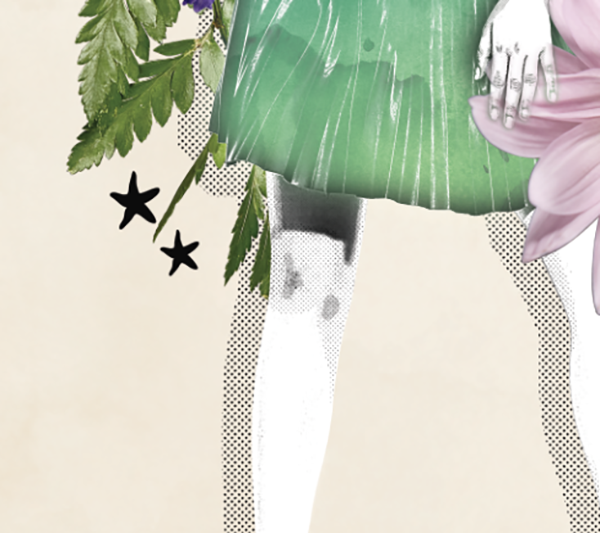
Copy the star from the Illustrator file and place in to our poster as a smart object. Increase the scale to 300%. Then place just to the bottom left of the model’s skirt and rename the layer Star 1.
Copy the star layer, reduce size by about half and place just below and to the right of the current star. Name this layer Star 2.
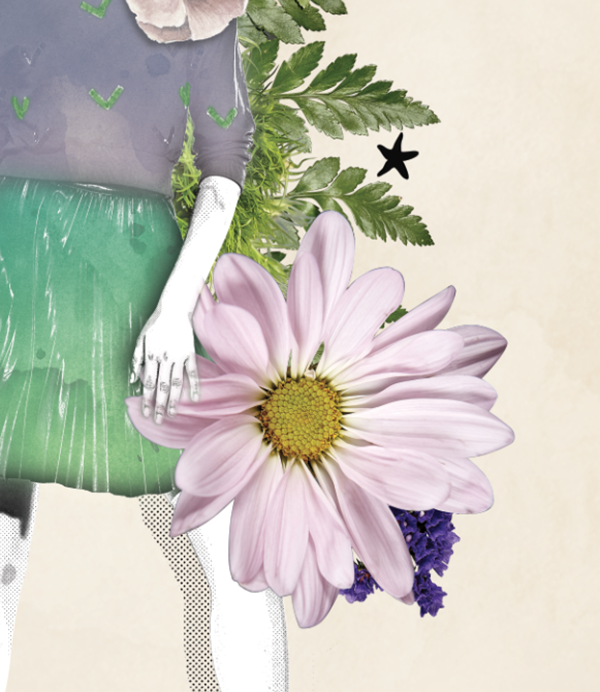
Copy the original Star 1 layer. Go to Edit > Transform > Rotate and enter 12 degrees. Place to the right of the model’s right elbow. Name the layer Star 3.
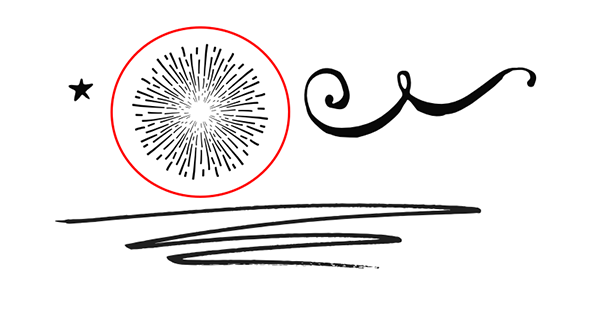
Copy the Starburst from the freebies vector file.
Place into the poster as a smart object and increase the size by 1030%. Place in the top left behind the model. Reduce the layer opacity to 30%. Name the layer Starburst and drag it below the star layers.
In your Adjustments panel, click on Hue/Saturation. Select Colorize and change the settings to Hue 341, Saturation 27 and Lightness 73. Make sure the Clip to Layer option is selected so the adjustment layer only affects our starburst.
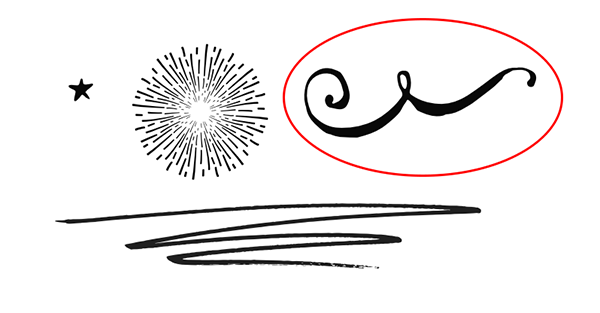
Copy the flourish from the freebies vector file.
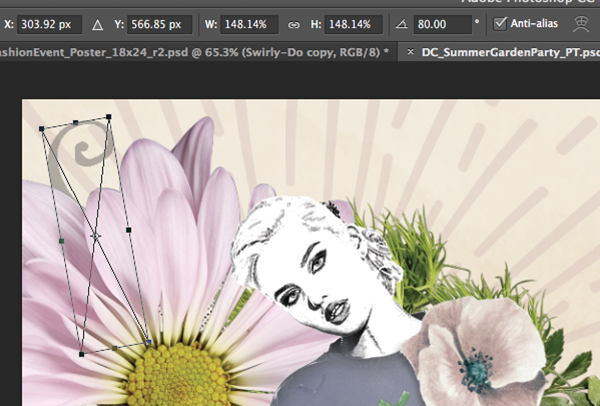
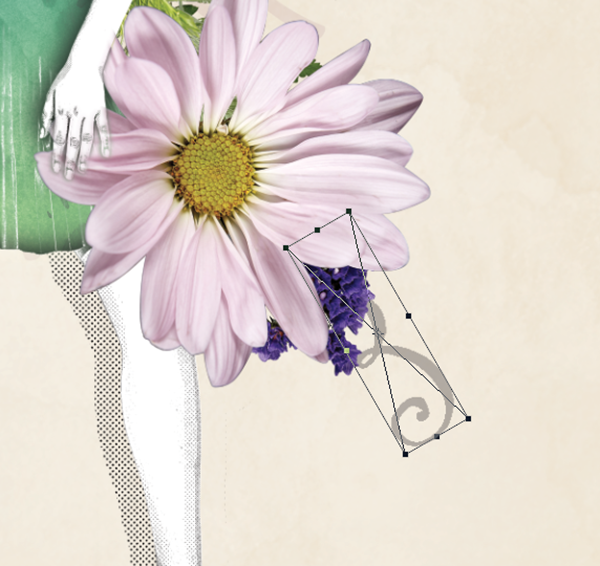
Place in above the Starburst layer. Rotate about 140 degrees and increase the size 150%. Position at the bottom left of the top pink flower, then set the layer Opacity to 20% and name the layer Flourish.
Copy the Flourish layer and navigate to Edit > Free Transform to change the rotation to 80 degrees. Place in the top left, just barely peeking out from behind the pink flower.
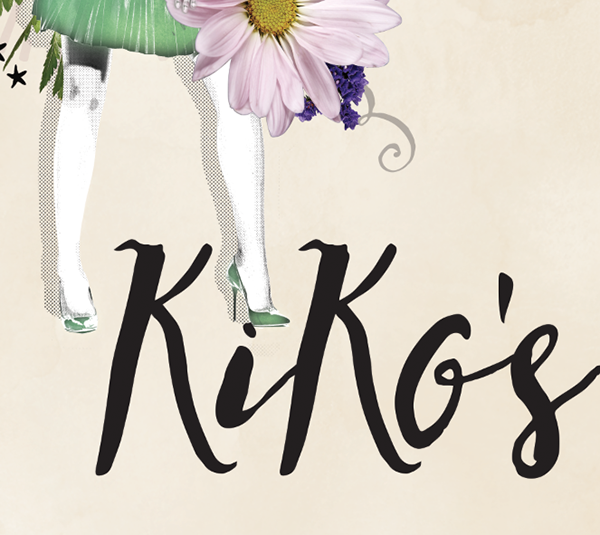
Copy the Flourish layer one more time and change the rotation to -120 degrees. Place at the bottom right so it comes out from under our purple flowers.
Create a folder named Illustrations and drag your star layers, starburst layer and flourish layers into it.
Step 7:
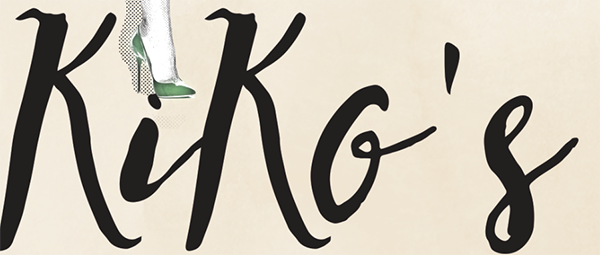
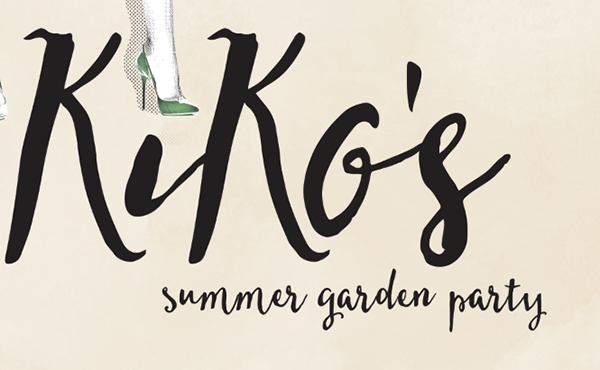
Copy time! Create a new folder and name it Main Copy. Type “KiKo” in Nicky Laatz’s Soulbeams at 528 pt in black.
NOTE: This font is only available within the main bundle, not today’s freebie pack. If you don’t have access to the main bundle, you can find an alternative font here or use one from your own collection.
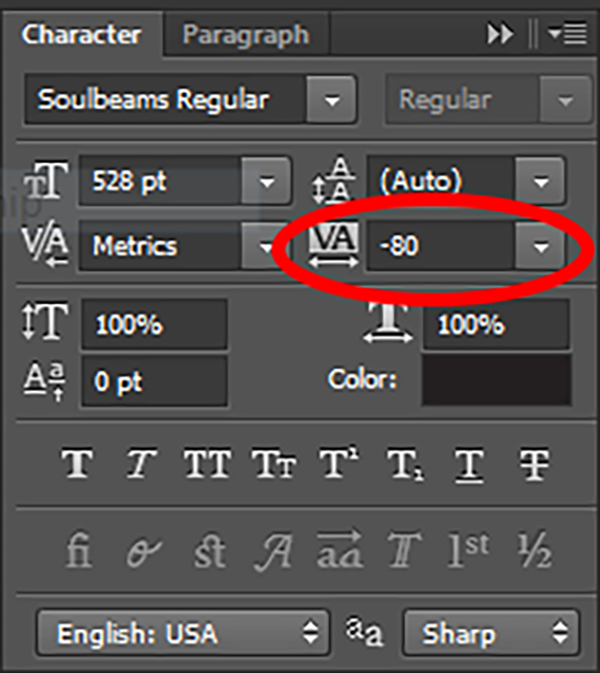
This leaves a little bit of awkward space, so tighten up the tracking on the second “K” to -20 and change it to -80 for the “o” and apostrophe.
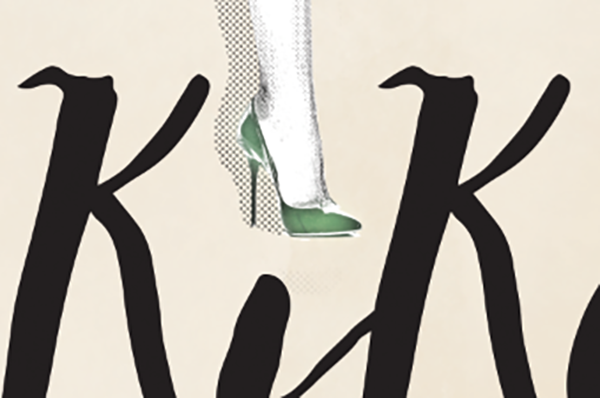
Position so that the model’s foot is just barely squishing the dot on the “i”. Drag the layer into the new folder.
Click the Create Mask icon. Select your Hard Round Brush and hit “x”, then “d” to set your foreground color to black. Brush over the dot on the “i” to mask it out.
Type “summer garden party” in Nicky Laatz’s HoneyCream at 46 pt in black. Place below KiKo and offset to the right.
NOTE: This font is only available within the main bundle, not today’s freebie pack. If you don’t have access to the main bundle, you can find an alternative font here or use one from your own collection.
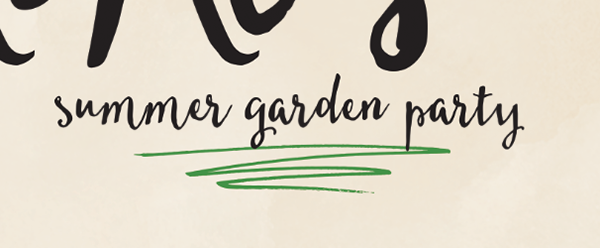
Now, copy the Marker Stroke from Design Spoon in the freebie vector file.
Place in below summer garden party and increase the scale 150%. Name the layer Handmade Stroke.
Click on the Layer Style icon (the “fx” at the bottom of your Layers panel) and choose Color Overlay. Set the color to 78/19/100/4 and click ok.
Step 8:
So far, our images and copy are creating a nice line for the eyes to follow from top left to bottom right. To continue that visual, we’ll add some subtle florals to the bottom right of the poster.
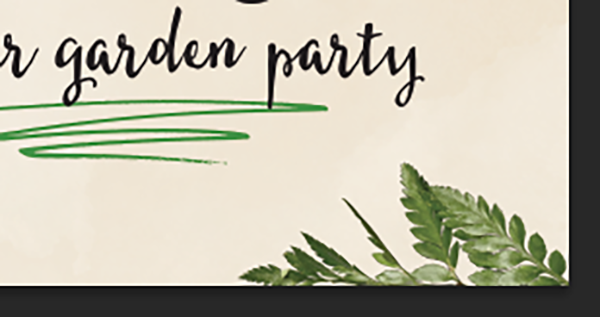
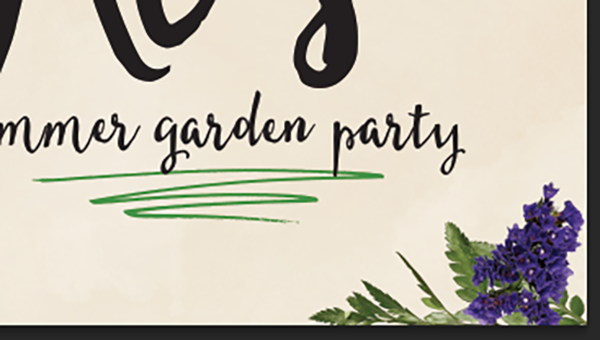
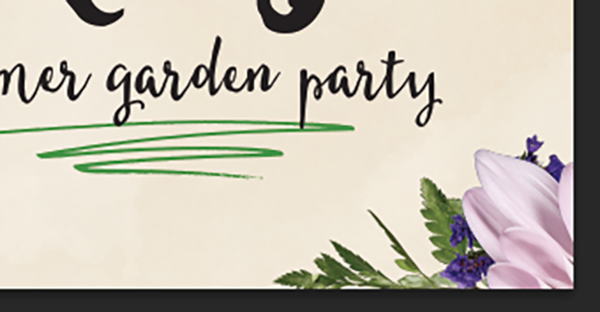
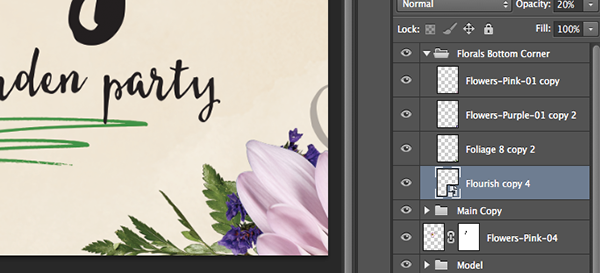
Create a folder called Florals Bottom Corner. Copy Foliage-08 from our Foliage folder, scale to 80% and set rotation to 110 degrees. Position so just the top half of the leaves are visible.
Drag the layer into the new folder.
Copy Flowers-Purple-01.psd from the Flowers Under Model folder and position in the bottom corner.
Now copy Flowers-Pink-01 from the Flowers Under Model folder and position so just the top left edge of the flower is showing.
Lastly, we’ll copy and paste in our Flourish copy layer in Illustrations and position along the right side so it just barely shows. Make sure to drag this layer to the bottom of the folder so it sits under our other elements.
Step Nine:
We’re almost done with our layout! We just need to add in our supporting copy.
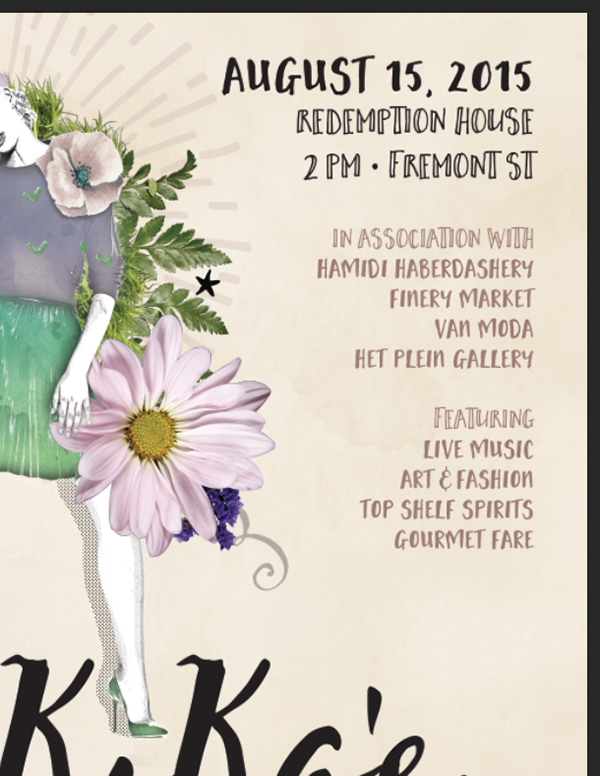
Create a folder called (surprise!) Supporting Copy. In Lemon Biscuit at 42 pt using a color of 37/51/48/7 and paragraph align right, type the following:
August 15, 2015
Redemption House
2 pm . Fremont St
In Association With
Hamidi Haberdashery
Finery Market
Van Moda
Het Plein Gallery
Featuring
Live Music
Art & Fashion
Top Shelf Spirits
Gourmet Fare
Select the first line with the date and change the font to Lemon Biscuit at 80 pt and the color to black. Select the next two lines of location and time and change to Josephino at 55 pt and the color to black.
NOTE: This font is only available within the main bundle, not today’s freebie pack. If you don’t have access to the main bundle, you can find an alternative font here or use one from your own collection.
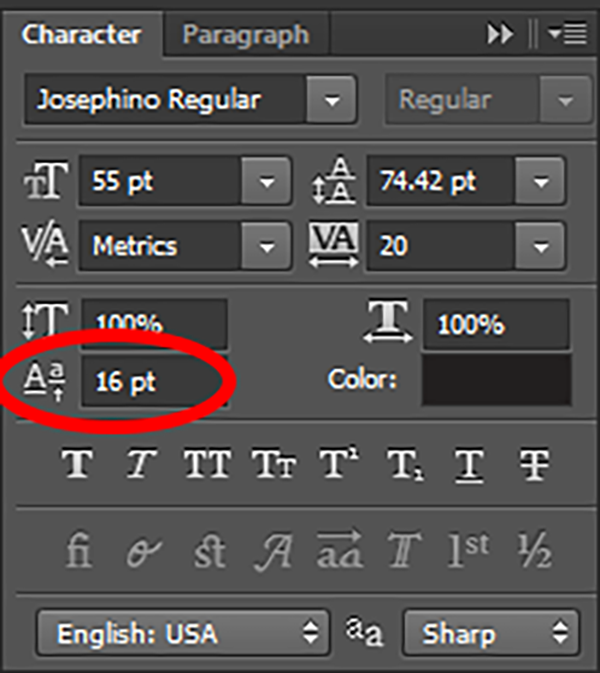
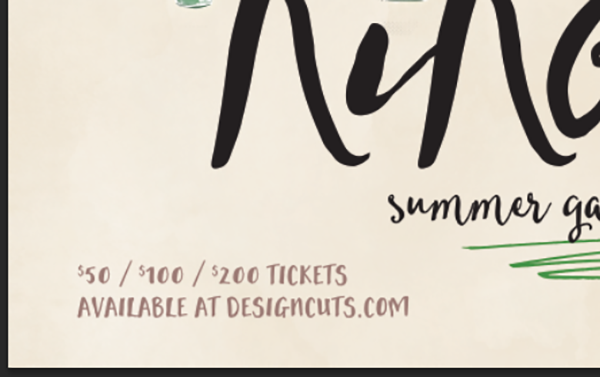
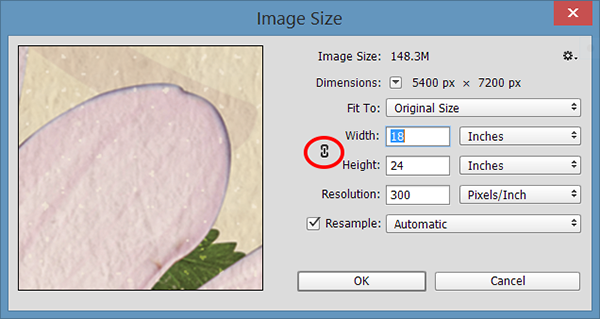
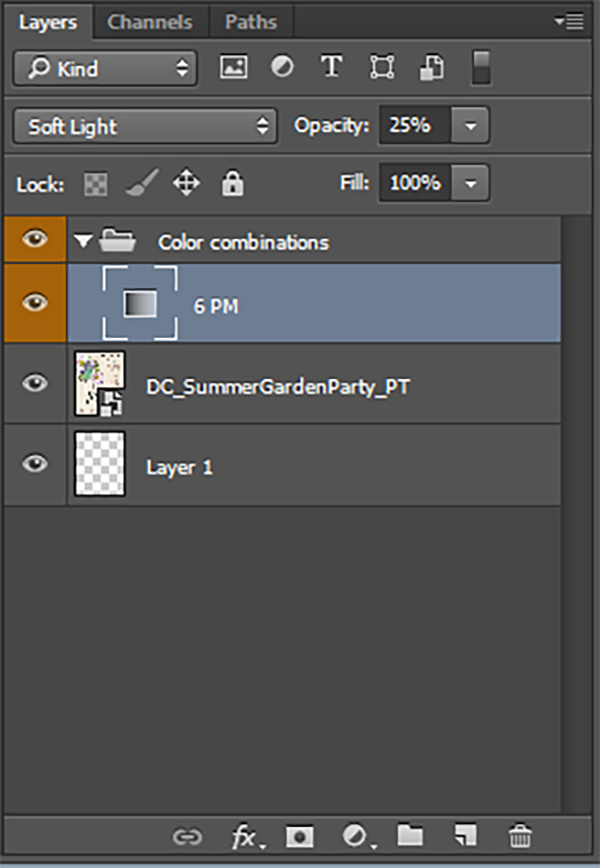
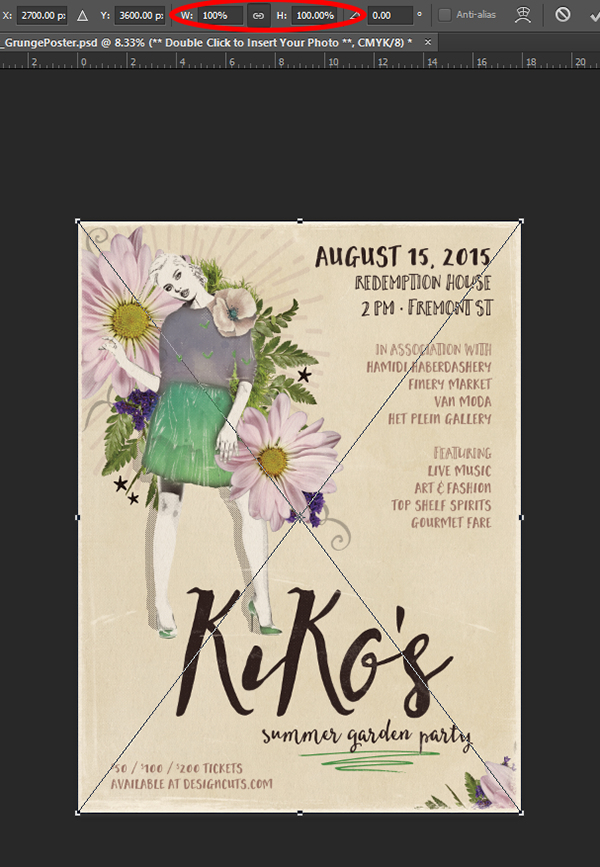
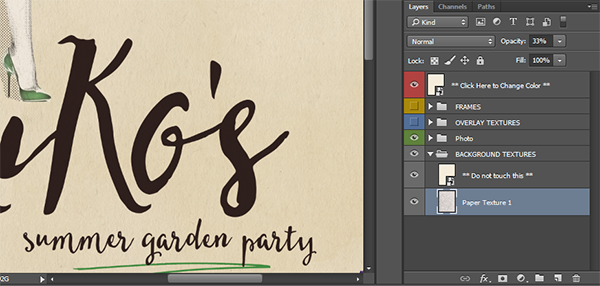
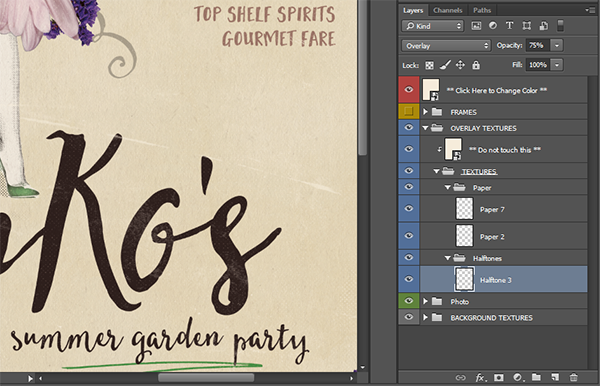
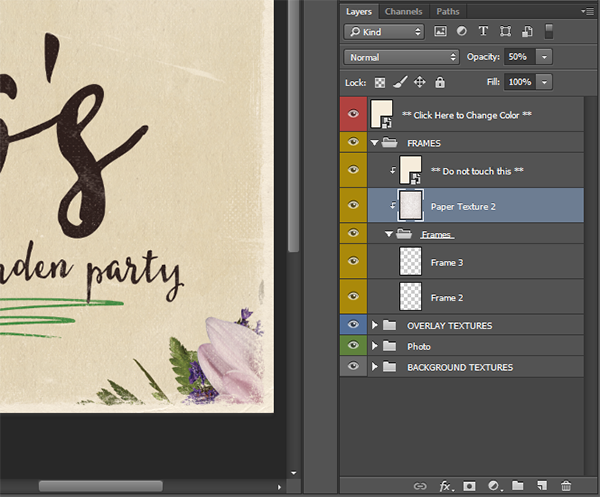
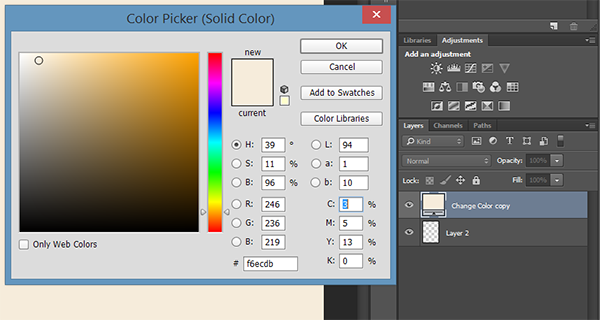
Josephino doesn’t include the bullet point that I need between my time and street, so I’m using a period and applying a Baseline Shift of 16 pts. “In Association With” and “Featuring” will also be Josephino, but at 42 pt. We’ll place this copy block in the top right corner with a fair amount of space around the edges for the grunge frame effect we’ll add in later. In the lower left corner, we’ll type the following in Lemon Biscuit at 42 pt in the same color: NOTE: This font is only available within the main bundle, not today’s freebie pack. If you don’t have access to the main bundle, you can find an alternative font here or use one from your own collection. Our layout is done! We’re just going to take this into Design Spoon’s Grunge Poster Maker to add some final touches. Save your poster file and close it. Open Grunge-Poster-Maker.psd. Start by Saving As and changing the name. I’m using KiKoParty_GrungePoster.psd. Now I don’t have to worry about accidentally saving over my original grunge poster maker. Trust me – I’ve done this! NOTE: This poster maker is only available within the main bundle, not today’s freebie pack. If you don’t have access to the main bundle, not to worry, you should be able to substitute this pack using some freebies of your choice. The first thing we’ll need to do is adjust the size of the poster maker to match our poster settings. It’s a pretty big file, so be warned that this will take a few minutes to process. Go to Image > Image Size. Uncheck Constrain Aspect Ratio and change the size to 18″ x 24″. You’ll see a green folder called Photo with a layer that says **Double Click to Insert Your Photo**. Let’s double click it! Double clicking will open a file called YourPhoto1.psb. Repeat the same Image Size adjustments we made to the main file (Image Size 18″ x 24″) and place our DC_SummerGardenParty_PT file. In the orange Color Combinations folder, turn on the 6 PM layer. The full grunge poster maker file that comes with the bundle has a large variety of color combinations to choose from, but we’ll only need 6 PM for our tutorial. Save and close the file. You should now see your image in the KiKoParty_GrungePoster file, but it will be bleeding off the edge since we’ve messed about with the size. To fix this, go to Edit > Free Transform and change the width and height to 100%. In the Background Textures folder, turn on Paper Texture 1 and change the layer Opacity to 30%. You’ll also see a layer in this folder called **Do not touch this**. We’re going to touch it. But only a little. Change the opacity of this layer to 65%. In the Overlay Textures folder, under Paper, we’ll turn on Paper 2 at 80% Opacity and Paper 7 at 70% Opacity. In the Overlay Halftones folder, turn on Halftone 3, set the Blend Mode to Overlay and reduce Opacity to 75%. Turn off any other Overlay layers if you’re using the Grunge Poster Maker from the purchased bundle. In the Yellow Frames folder, turn on Paper Texture 2 and set the Opacity to 50%. There’s a sub-folder also called Frames. Turn on Frame 2 and Frame 3. Lastly, double click on the layer **Click Here to Change Color**. When it opens, double click on the Change Color layer and set the CMYK build to 3/5/13/0 and click OK. Save the file and close it. And that’s it! We’re done with our fashionable summer garden party poster. Here’s another look at the final piece. I had a blast designing this poster and I hope you’ve picked up a trick or two. Pick up the incredibly fun and useful Inspirational Artistic Design Bundle for 91% off the regular price. I can’t wait to see what you do with it! Make sure to share your creations on our Facebook page. Adiós for now!
$50 / $100 / $200 TicketsStep 10:
























Love this- thx!
Hey Tania,
Thank you so much for your kind words! :D I’m pleased you enjoyed Renee’s tutorial, this is her first tutorial for us and I think you’ll agree, she did an amazing job! :D
Hi. Im really enjoying this tutorial but I have got stuck and wonder if you can help please. I wonder if you could let me know how to use the eps files. I can’t seem to find a way to open them in photoshop. They are something I haven’t come across before!
The other thing that I am sure you may be able to help with is that I am unaware if there is a way to have your tutorial window open as well as Photoshop. At the moment I am clicking between the two programmes on my Mac and having to remember the instructions once I am back into Photoshop.
Thanks.
Hi June! Thanks so much! EPS files can usually be opened or placed in Photoshop, but if you’re having trouble, it could be due to the version I saved the file in. I’m working on making a different (more universal) file format available as soon as possible.
And I know what you mean about clicking back and forth! What a pain! I’d recommend exiting full screen mode in both Photoshop and your browser (the little green dot with a plus sign on the top left of your programs), then dragging the right edge of the Photoshop window over to the left so you can have your browser window open on the right side. Let me know if this works for you!
Hey Renee,
Thank you so much for helping June! :D I really appreciate it :)
June, I hope this has got you up & running okay! I’m popping you over a quick email just to make sure :) but I am really please to hear you enjoyed this tutorial! We would love to see your finished piece from this :)
Hi Renee, Thank you for your reply. I’ve managed to sort out having two windows open side by side with your help! That will make life much easier! However, I still can’t use the eps files. They do open in Photoshop by right clicking and choosing Open with Photoshop. I then get asked to rasterise them. However, I can’t figure out how to use the motives individually. They appear to be all still on one page. I am probably still doing something wrong!
If you don’t have Illustrator, a little “cheat” you can use when there are multiple things on one file like that in Photoshop is to mask out the sections you don’t want showing.
With your Photoshop file open, go to File > Place. Navigate to the freebies vector file and click ok, then hit enter to complete the action once you see it on the file.
To mask the shapes, draw a selection around the item you want to be visible (I usually use my rectangular marquee or lasso tool). Then click on the Add Layer Mask icon at the bottom of your layers palette. It looks like a white rectangle with a gray circle in it.
You can duplicate the original vector layer as many times as needed, then isolate each item with different masks.
I hope this works for you! Keep us posted! :)
Hi Renee
I’ve just seen this from you as Ben emailed me and told me how to do it by using the marquee tool and copy and paste. That worked great and I just wanted to say thank you to you both for your help.
Hi Renee, Greenhorn here and I’m having a challenge with your commands… I am on Photoshop CC on a mac and can’t get your commands to work. In step one I changed your command (cmd ctrl j) to (cmd shif j) and it worked. Now I’m stuck on step 2. Your command (cmd shift opt e) does not work. Can’t figure out another way. Hope you can help. Thanks! KC
Hi Kathleen! For most of the shortcuts, I’ve provided both Mac and PC versions of the commands, so if you see a slash between them, use the first one. For example, if it says Cmd/Ctrl + J, use Cmd + J on your Mac.
For the Stamp Visible command (cmd + shift + opt + e), one alternative is to go to your Layers menu and hold down Option while clicking on Merge Visible. Let me know if this works for you!
Hey Renee,
Thank you kindly for helping out Kathleen! We’re so grateful for your support :)
Kathleen, I hope that this helps you! I’m sending you over a quick email just to be 100% sure :)
Hi Renee,
Thanks to you and Ben for responding. I decided I’d better back up and take some basic training before continuing. I’ve used photoshop for 20 years, but have only had the computer to use the new yearly version this last year. Up until then I think it was the 1997 version. Anyway, shortcuts and much more are new to me. I’m looking forward to coming back after some basics edu. and participating in your tutorial plus the many more that are offered here. Designcuts is a super resource site and I’ve used much from the deals I’ve purchased.
Really appreciate your support and resources.
Kathleen
That’s so exciting, Kathleen! Congratulations on the big upgrade! I think I started on Photoshop 4 or 5. A lot has changed, but you’re going to have so much fun learning all the new capabilities.
I highly recommend downloading this cheat sheet of shortcuts. It’s so handy: https://helpx.adobe.com/photoshop/using/default-keyboard-shortcuts.html
Have fun and always feel free to let us know if you have any questions!
This is an awesome bundle and tutorial, however, I can’t open the vectors because I’m still using CS5. Any way to change that?
Hi Elesha! Thanks for the heads up. I’m working on making a different file format available as soon as possible!
Hey Elesha,
Thank you so much for commenting and for your kind words! I’m so pleased you’re enjoying this tutorial and the Inspirational Artistic Design Bundle! :D
Renee, thank you so much for your help! I really appreciate your support :)
Same here. Love what I’ve done so far so I’d love to know when another file format is available if possible.
Hey Jenny, great news! This has just been updated within the freebie file, so all the vectors should be backwards compatible, and in greater variety of file types.
Super neat mixed-media techniques! Thank you for sharing them, Renee. And welcome to the DC community.
Thank you, Simon! I’m so glad you enjoyed it. I’m thrilled to be part of such a talented, creative community!
Hey Simon,
Thank you so much for commenting, I’m really pleased you enjoyed Renee’s tutorial!
Renee, as Simon said, welcome to the DC community! :D We are so pleased to have you :)