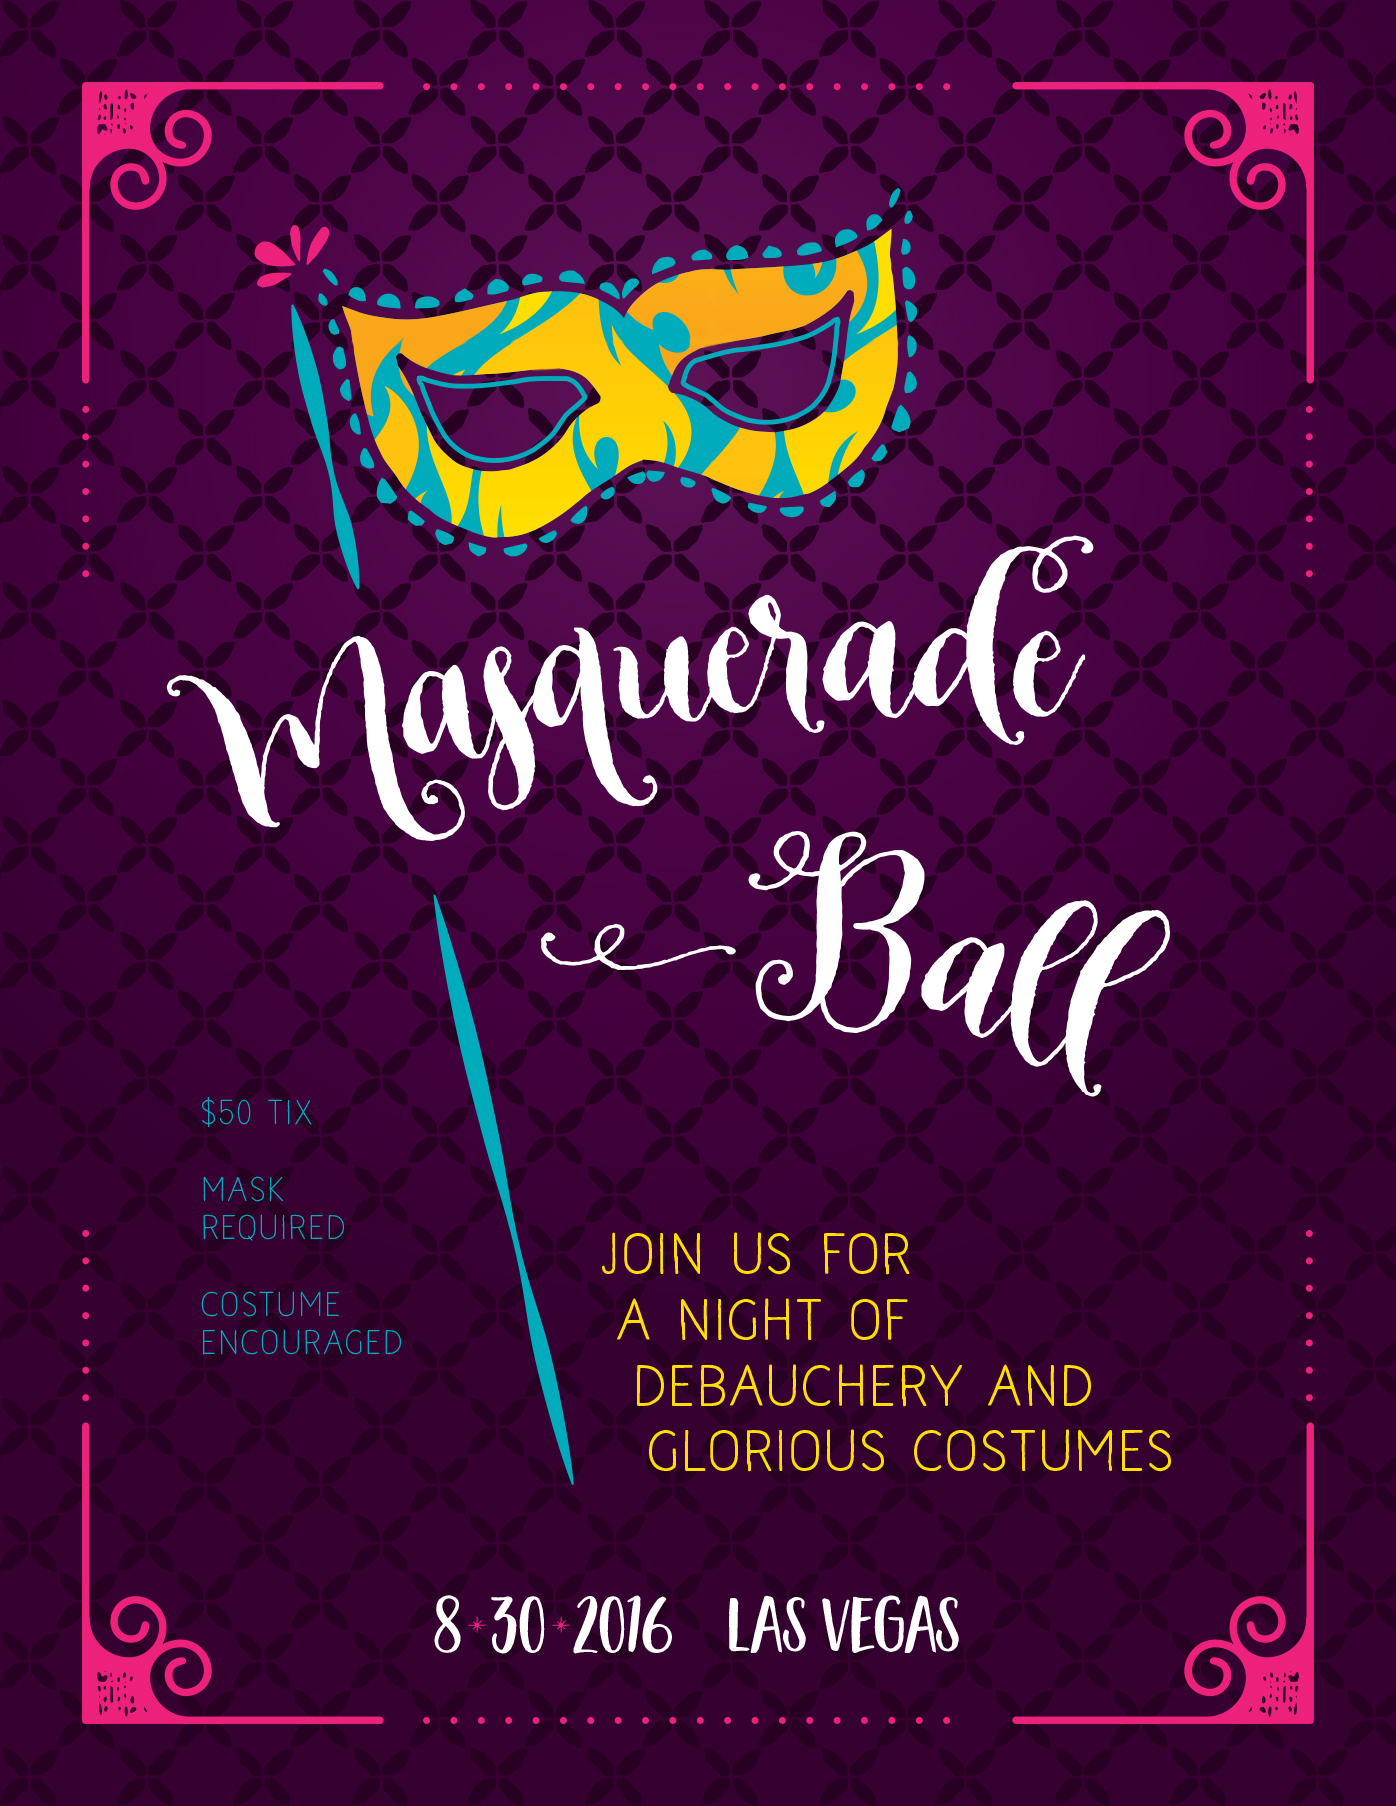
WHAT WE’RE CREATING:
Hello Design Cutters! Renee here with an Illustrator-based tutorial for a modern Masquerade Ball Flyer. We’ll create our layout using awesome fonts and ornaments, plus Illustrator tools like the pattern creator and libraries.
HAVE YOU SEEN OUR NEW YOUTUBE CHANNEL?
Watch the video tutorial below and subscribe to our new YouTube channel for regular updates direct to your inbox.
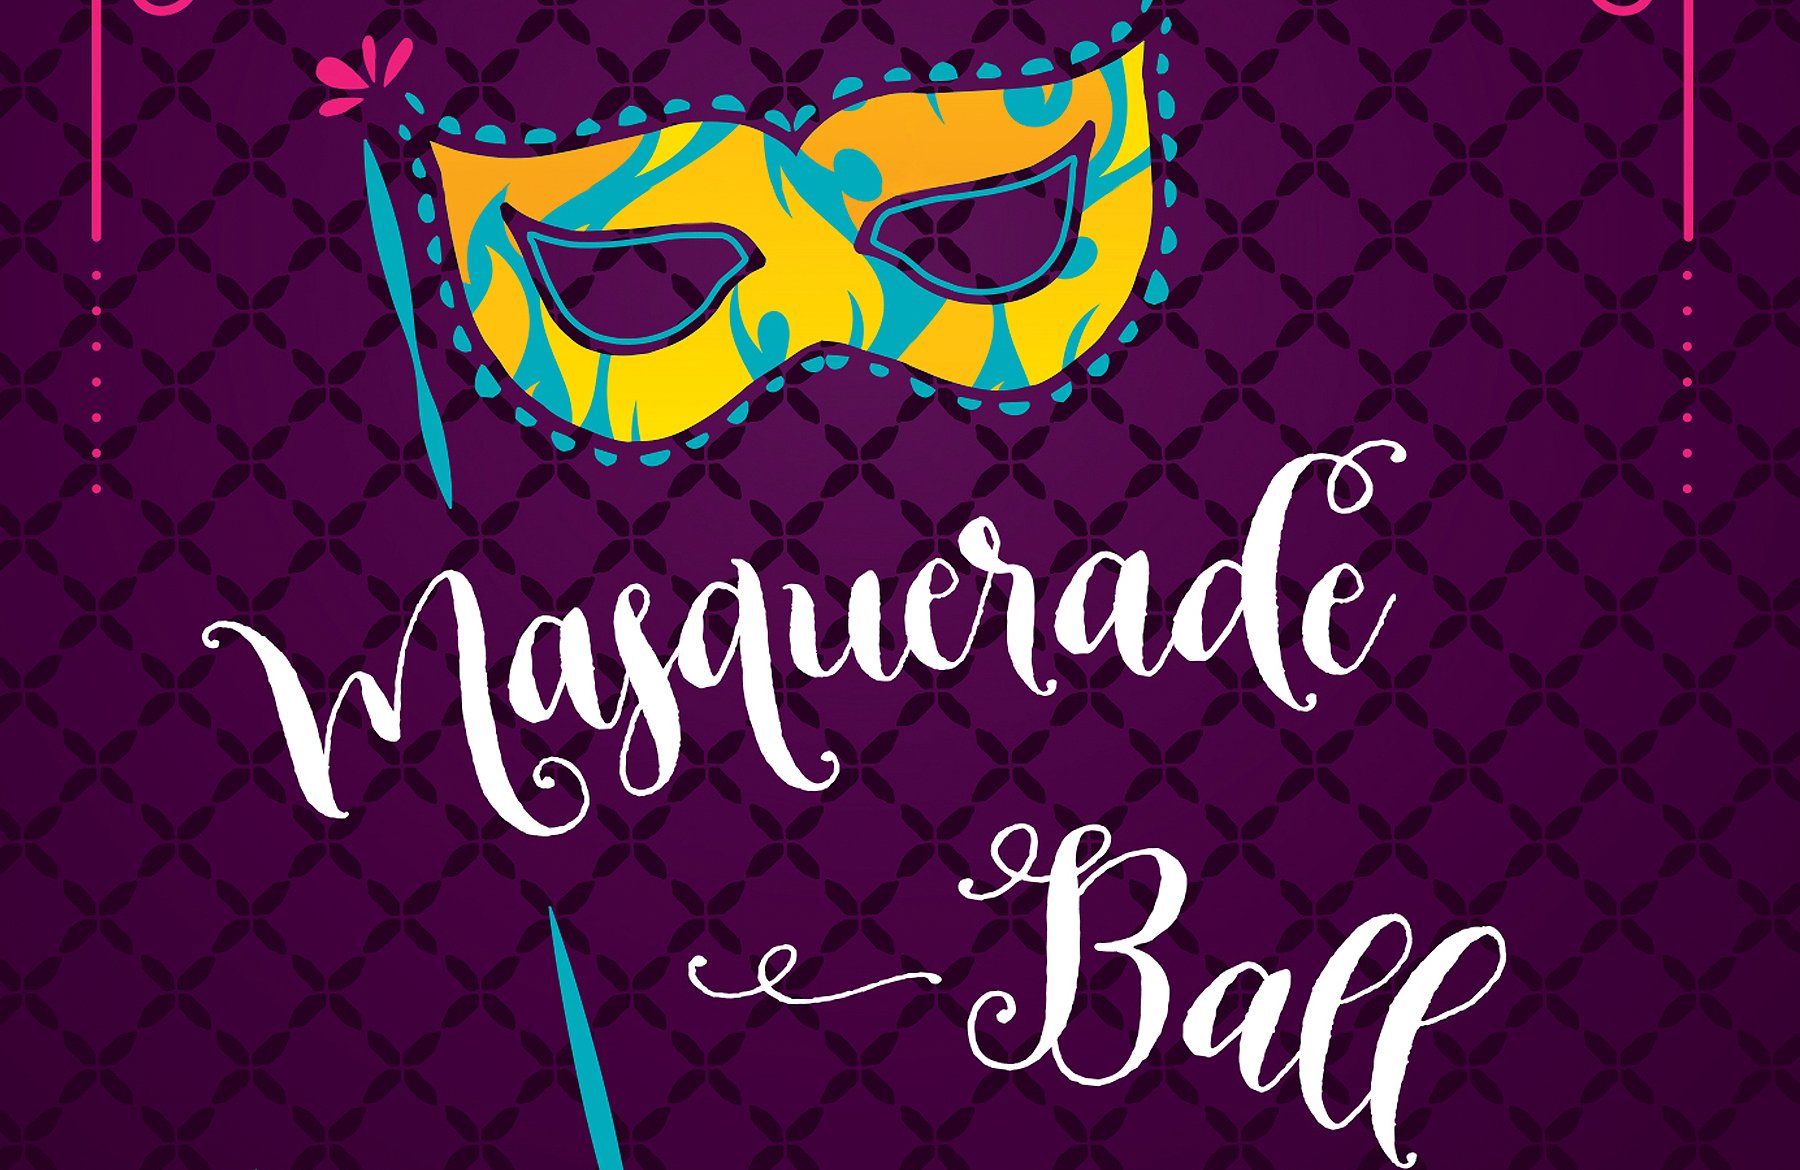
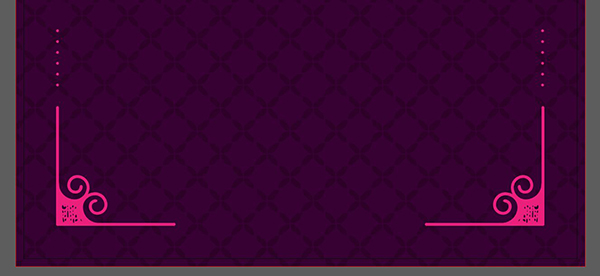
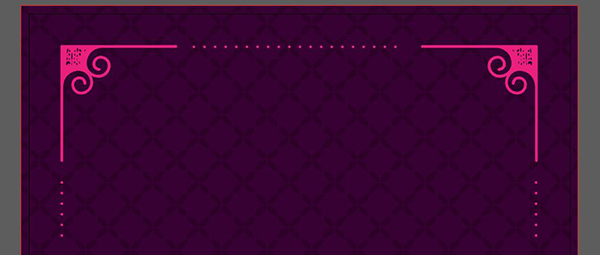
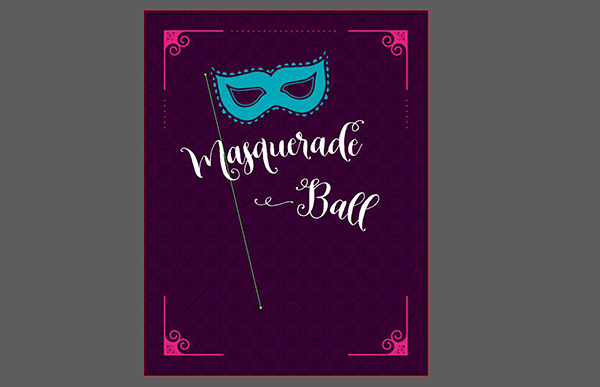
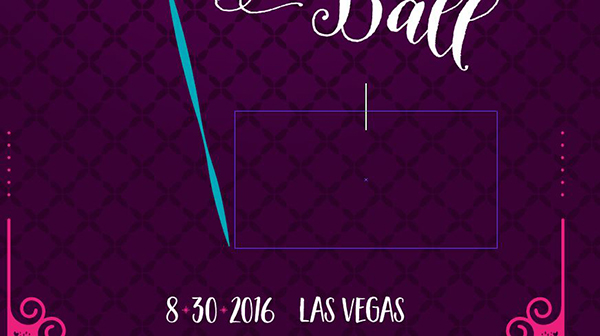
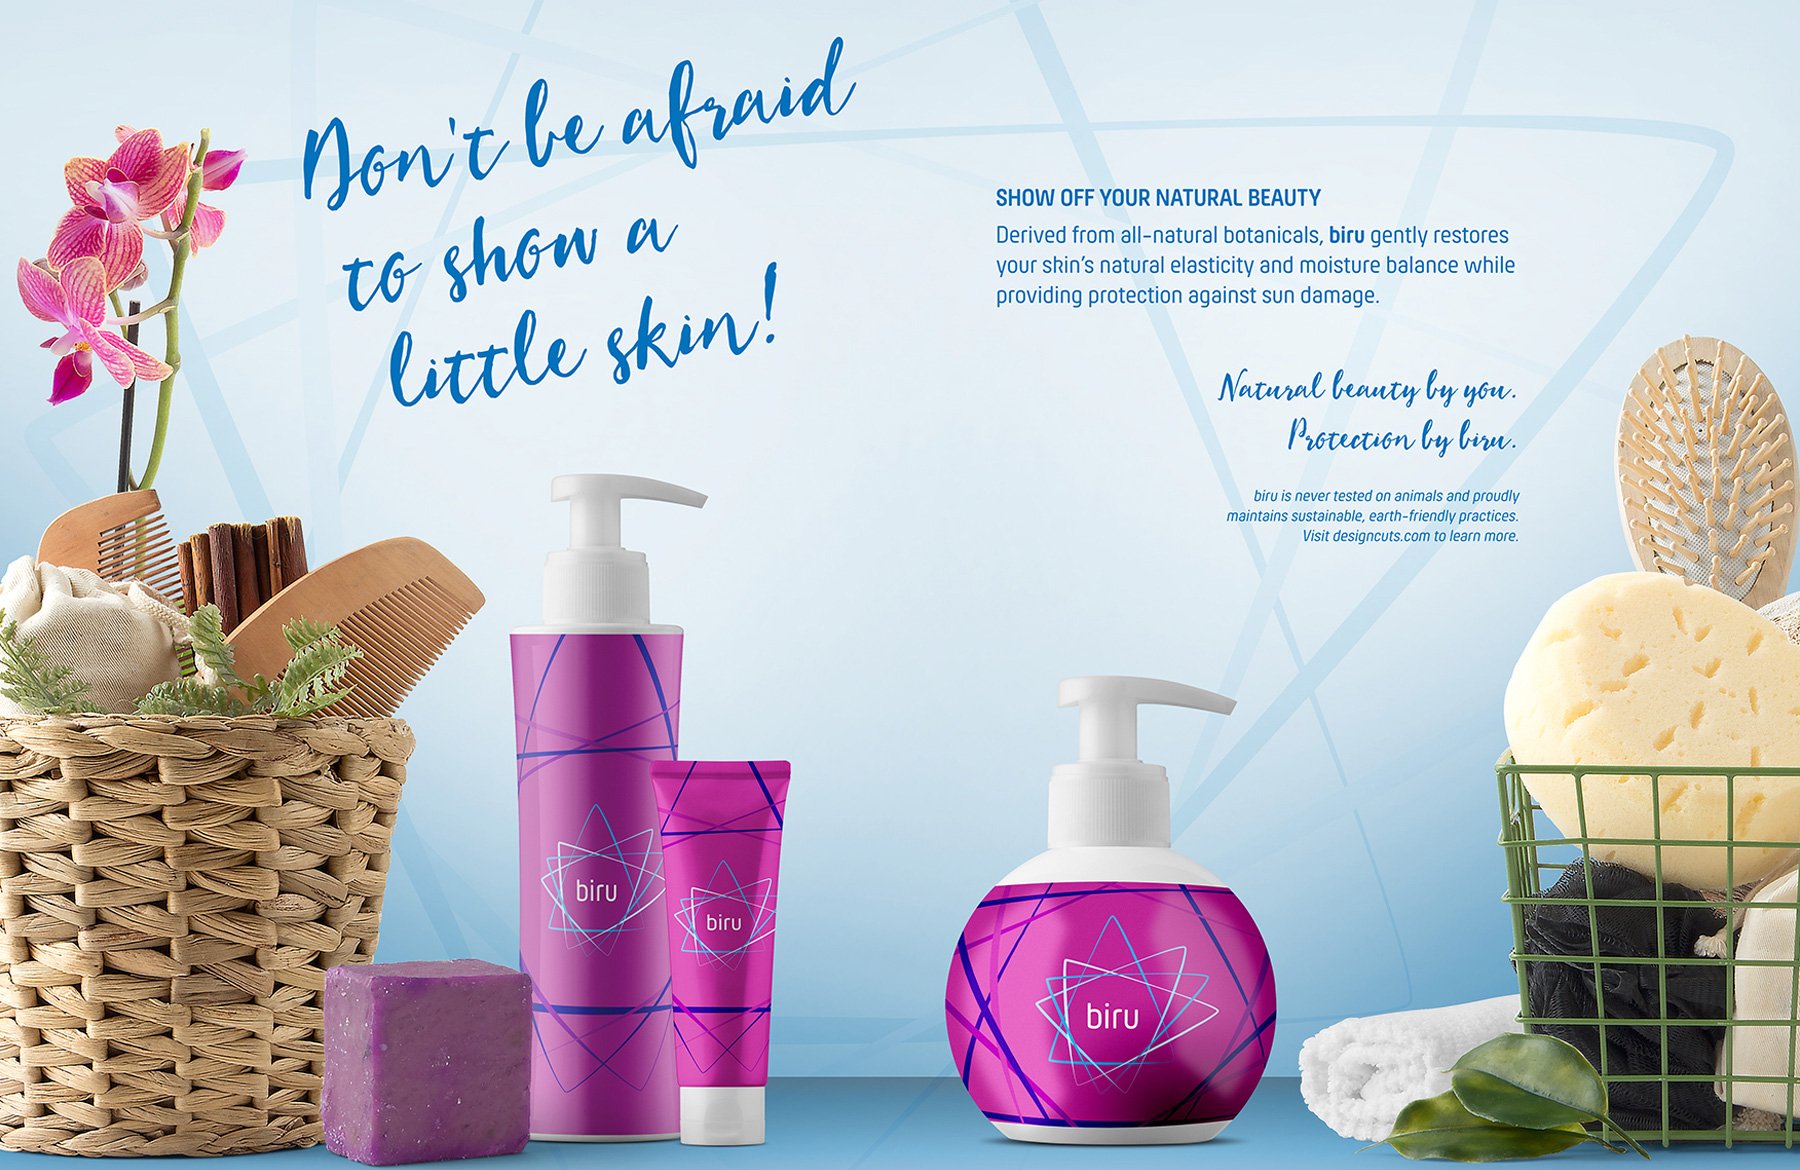
Here’s a look at what we’ll be creating:
Follow along with this tutorial: Download the freebie files
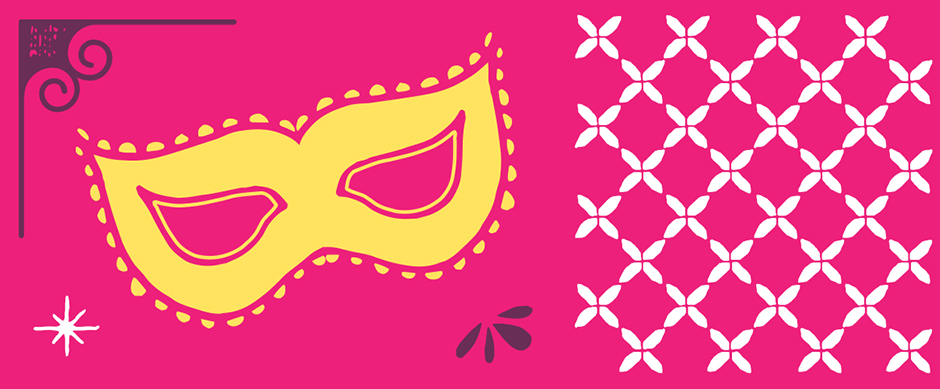
The freebie pack includes ornaments and patterns courtesy of designers Albatross, Callie Hegstorm and Fenotype.
This freebie pack is just a small sample of the resources available in 20 Best-Selling Font Families for just $29 (that’s 98% off). The 20 font families in this collection are currently amongst some of the most popular fonts in the world. You’ll enjoy staggering quality and almost unlimited variety.
Step 1: Background
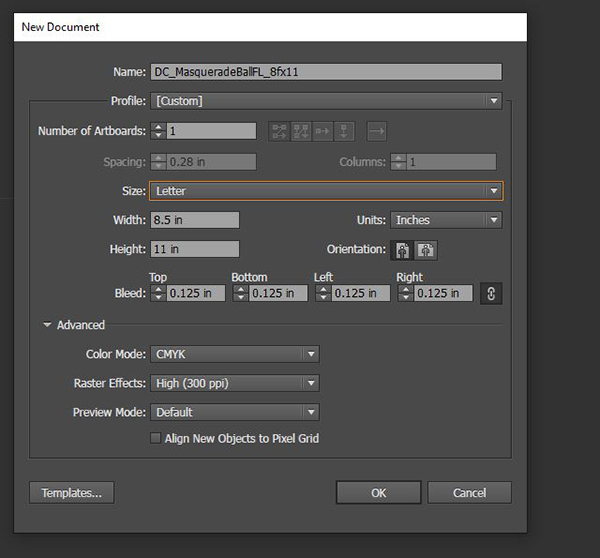
Open Illustrator and go to File > New. In the New Document dialog box, enter a width of 8.5 inches and a height of 11 inches. Under Bleed, make sure the link icon on the far right is selected (to apply our input to all four sides) and enter a Top bleed of .125 inches.
Click OK to create the document.
Save your file.
At the bottom of the Layers palette (Window > Layers), double click the name of the layer, Layer 1, and change it to Background.
Click on the foreground color swatch at the bottom of your toolbar to bring up the Color Picker. In the Color Picker, enter CMYK values of 60/100/22/70. Press Ok.
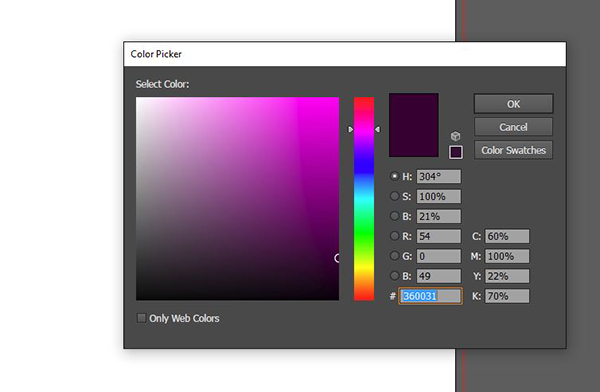
Open the Swatches palette (Window > Swatches) and click the New Swatch icon. Name the swatch Dark Purple and click OK.
Select the Rectangle Tool (m). Click once on the artboard. In the dialog popup box, enter a width of 8.75 inches (8.5 inches plus .125 inches bleed on each side = 8.75). Enter a height of 11.25 inches. Click OK.
To center the rectangle on the artboard, open your Align palette (Window > Align) and under Align Objects, select the icons for Horizontal Align Center and Vertical Align Center.
Note: If nothing happens when you click the align icons, you may need to change your Align To settings. Click on the arrow just below Align To at the bottom right of the Align palette and select Align to Artboard.
Select your Type tool (t) and click once on the artboard. Type a lowercase v. In your Character palette (Windows > Type > Character), change the font to Inkheart Patterns and the size to 400 pt. Now go to Type > Create Outlines.
(If you haven’t yet purchased the collection: In the freebies folder, navigate to Inkheart’s Pattern. Open the file in Illustrator. With your Selection tool (v), select the patterned square on the artboard. Press cmd + c to Copy, then cmd + w to Close that file. In the main layout file, press cmd + v to Paste.)
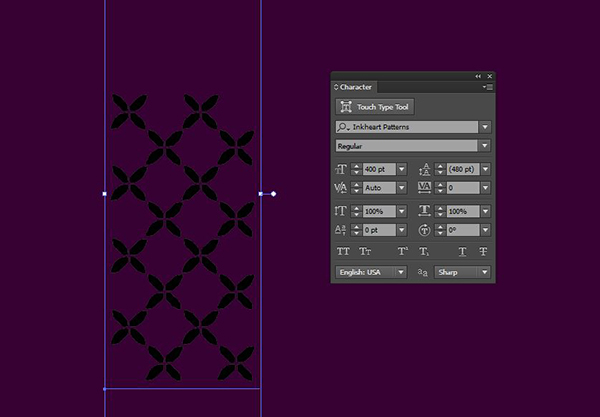
Open your Color palette and change the CMYK build to 60/100/22/80. The difference between the background and pattern will be subtle, but we’ll create more contrast later after we get more of our elements in place.
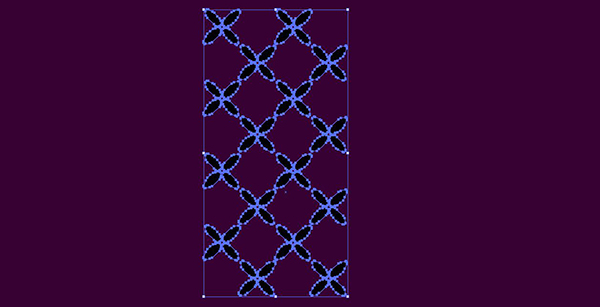
Now we’ll create a repeating pattern. With the outlined purple pattern section still selected, go to Object > Pattern > Make. In the Pattern editor that pops up, name the pattern Purple Xs. At the top of the file, click Done.
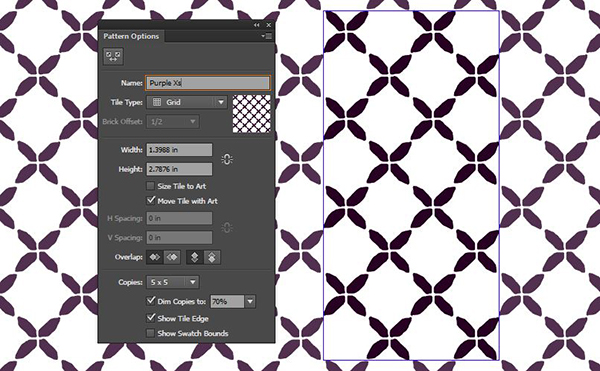
If you take a look at your Swatches palette, you’ll see that the new swatch has been added. Use your Selection tool (v) to select the outlined pattern on the artboard and delete it.
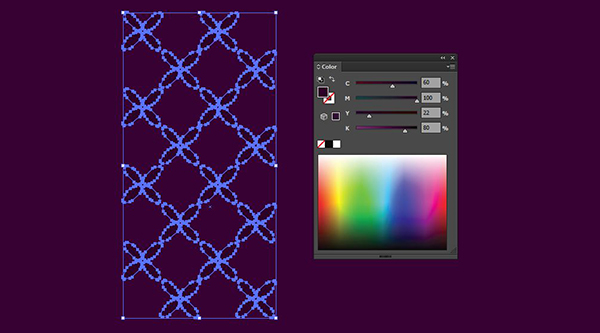
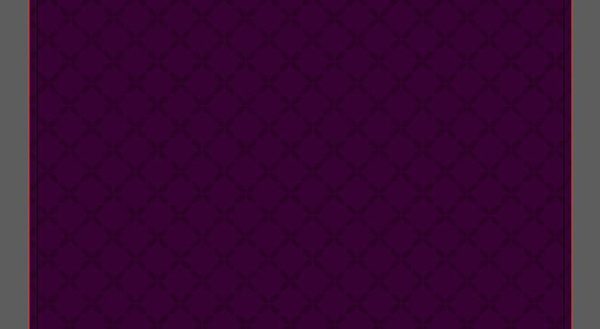
Select the solid purple background and press cmd + c to Copy, then cmd + f to Paste in Place. With the copy still selected, choose the new pattern, Purple Xs, in the Swatches palette.
Now we’ll lock this layer. Open the Layers palette and click the space between the eye icon and the layer name.
Step 2: Border
In the Layers palette, click the Create New Layer icon. Double click the layer name and change it to Border.
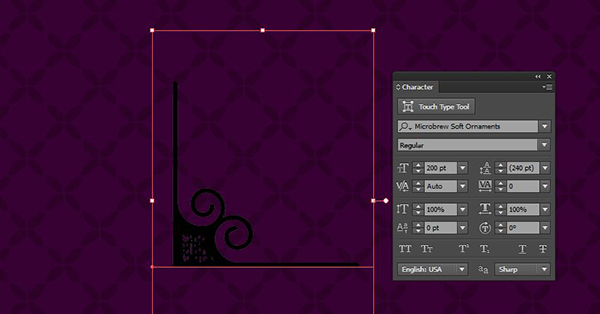
Select your Type tool and click once on the artboard. Type a number 2. In your Character palette, change the font to Microbrew Soft Ornaments and the size to 200 pt. Now go to Type > Create Outlines.
(If you haven’t yet purchased the collection: In the freebies folder, navigate to the Corner file by Albatross. Open the file in Illustrator. With your Selection tool (v), select the corner on the artboard. Press cmd + c to Copy, then cmd + w to Close that file. In the main layout file, press cmd + v to Paste.)

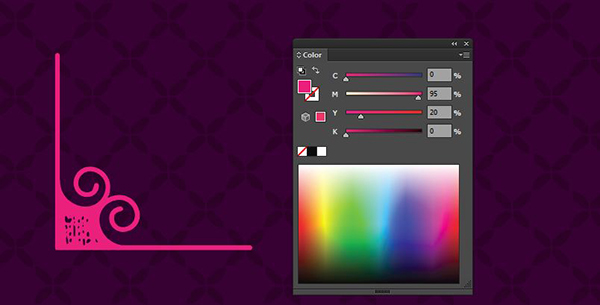
With the corner still selected, open your Color palette and change the CMYK build to 0/95/20/0.
Position in the bottom left of the artboard, about .5 inches from both the left side and bottom.
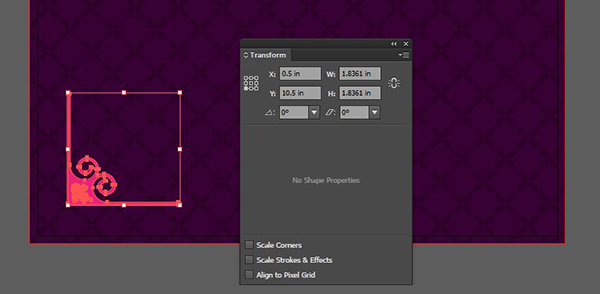
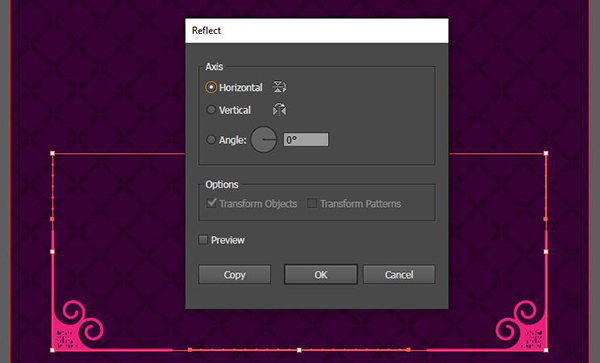
With the corner selected, go to Object > Transform > Reflect. Choose Vertical and press Copy. Hold Shift and use your Selection tool to drag the copy to the right until it’s about .5 inches from the right side of the artboard.
Holding Shift while moving objects will ensure the object moves along the nearest 45 degree angle.
To make sure our corners are centered on the artboard, select both (using the Selection tool and holding Shift) and press cmd + g to Group them. Open your Align palette and select the icon for Horizontal Align Center.
With both corners still selected, go to Object > Transform > Reflect. This time, choose Horizontal and press Copy. Hold Shift while dragging the copies up until they’re about .5 inches from the top of the artboard.
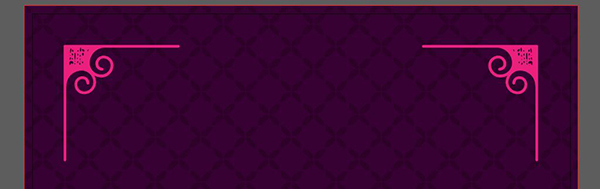
To ensure all four corners are centered on the artboard, select both groups (using the Selection tool and holding Shift) and press cmd + g to Group them again. Open your Align palette and select the icons for both Horizontal Align Center and Vertical Align Center.
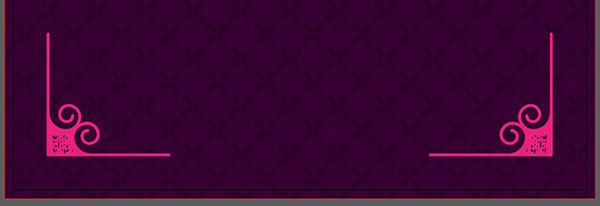
Next up, we’ll add a few dotted lines to finish out our border.
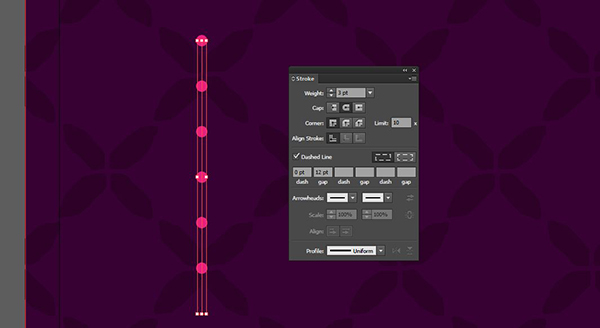
Select your Pen tool (p). Click once just above the top end of the corner piece.

Hold shift and click again about an inch higher to create a second point.
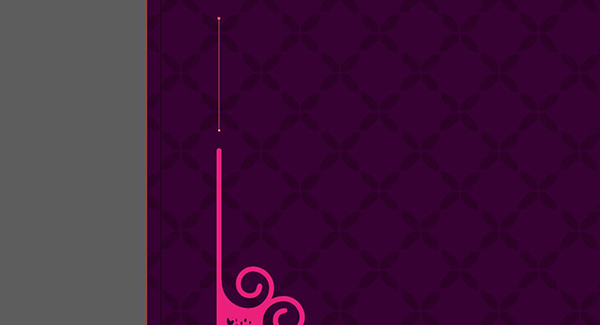
At the bottom of your toolbar, you’ll see that the Fill color of the line is currently the same pink as the corner and the Stroke color is None. Click the little double ended arrow just to the top right of the fill/stroke icons on the toolbar to toggle so the Fill color is now None and the Stroke color is pink.
Open your Stroke palette (Window > Stroke) and increase the Weight to 3 pt. Next to Cap, choose the middle icon for a Round Cap. Click the box next to Dashed Line and change the dash to 0 pt and gap to 12 pt. And that’s how you make an easy dotted line in Illustrator!
Switch to your Selection tool. Hold down opt + shift, then click and drag the line to the right to create a copy. Position the copy above the bottom right corner.
Let’s draw one more dotted line between the two bottom corners. Select your Pen tool again and click once about .5 inches to the right of the rightmost end of the left corner. Hold Shift, then click again about .5 inches from the leftmost end of the right corner.
With the line still selected, go to your Align palette and click the Horizontal Align Center icon.
Select all three dotted lines (by holding Shift and clicking on them with the Selection tool). Press cmd + g to Group. Go to Object > Transform > Reflect. Choose Horizontal and press Copy.
Use your Selection tool while holding Shift to drag the copies up to the same relative position at the top of the artboard.
Now we’ll lock this layer. Open the Layers palette and click the space between the eye icon and the layer name.
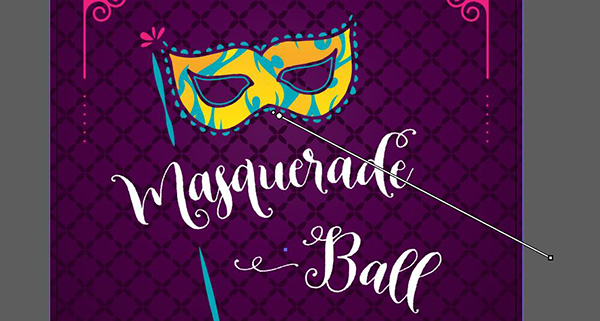
Step 3: Title Art
In the Layers palette, click the Create New Layer icon. Double click the layer name and change it to Title Art.
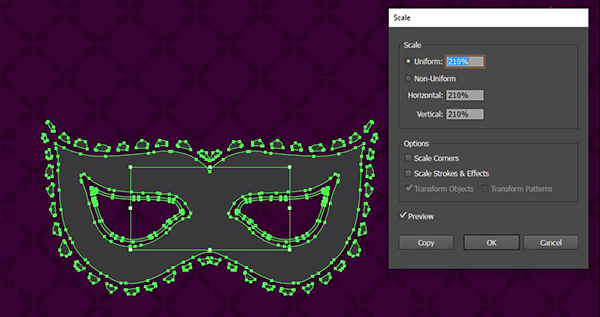
Navigate to Callie Hegstorm’s Cheers Vector file and open it in Illustrator. Select the mask and press cmd + c to Copy. Paste it into the main layout file using cmd + v.
With the mask selected, go to Object > Transform > Scale and enter a Uniform scale of 210%, then press OK.
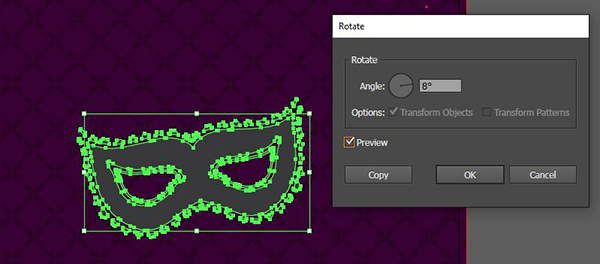
Now go to Object > Transform > Rotate. In the dialog box, enter a rotation of 8 degrees and press OK.
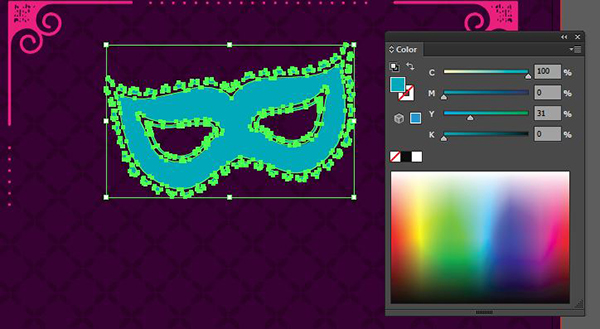
Position the mask toward the top left of the artboard. Open your Color palette and change the Fill color to 100/0/31/0.
Let’s go ahead and get our main title in before we make any more decisions on our mask.
Select your Type tool and click once on the artboard. Type Masquerade.
In your Character palette, change the font to Cheers Regular at 140 pt and the Fill color to White.
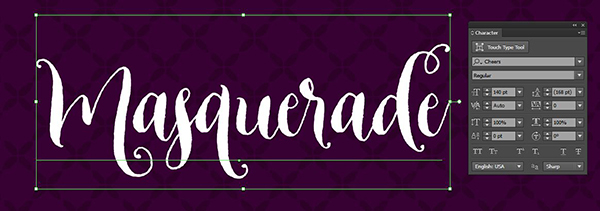
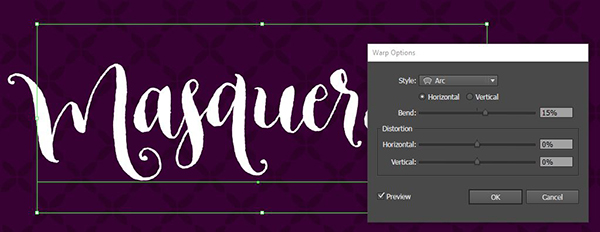
With the text still selected, go to Effect > Warp > Arc. Enter a Horizontal arc of 15% and press OK.
Position the word Masquerade just below the mask. Let’s add a little rotation to mimic the angle of the mask. Go to Object > Transform > Rotate. When the dialog box opens, simply press OK since our previous settings (8 degrees) should already be in place.
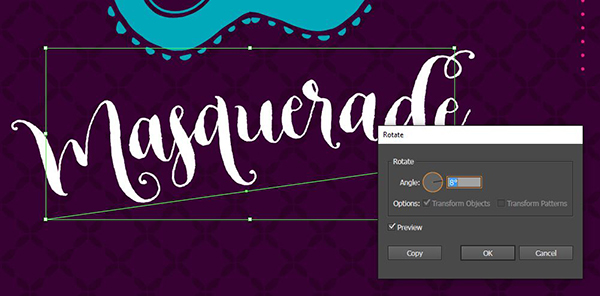
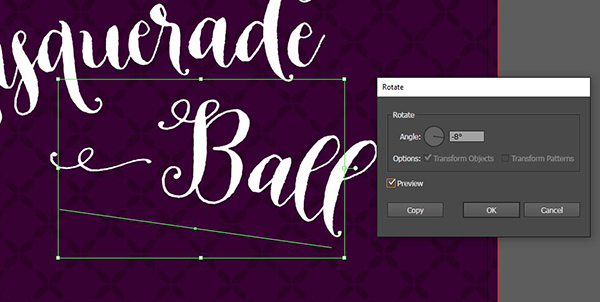
Select your Type tool again. Click once on the artboard under and slightly to the right of Masquerade and type Ball. Your font should already be Cheers at 140 pt, so just change the color to white.
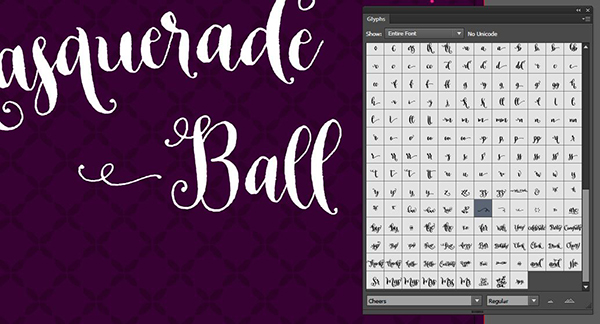
Next, let’s add a little ornament to the front of the word Ball since it’s so much shorter than Masquerade and will help add some balance. Use your Type tool to click once and place the cursor before the B in Ball. Open your Glyphs palette (Window > Type > Glyphs). Scroll down until you see this little ornament and double click to add it.
Switch to your Selection tool, then go to Effect > Warp > Arc. We should still have a 15% horizontal arc set, so just press OK.
Next, go to Object > Transform > Rotate. This time, enter a rotation of -8 degrees and press OK.
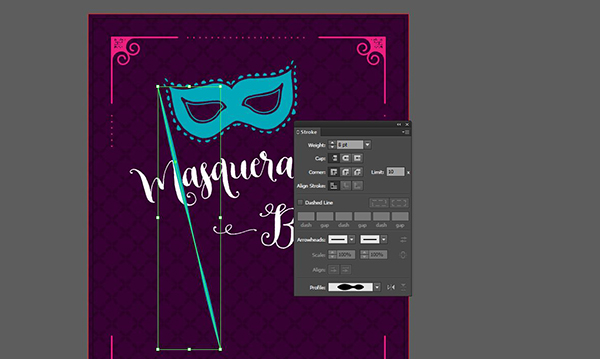
Now we can add a handle to our mask. Grab your Pen tool. Click once just to left of the top of the mask for your first point.

Click again at the bottom of the artboard, just left of center, so the path follows the right leg of the M in Masquerade.
Use your Eyedropper tool (i) to sample the teal of the mask, then click the double headed arrow above the fill/stroke on your toolbar to toggle the teal from Fill to Stroke color.
Open your Stroke palette and increase the weight to 8 pt. At the bottom of the Stroke palette, next to Profile, choose Width Profile 2.
Obviously, we don’t want our mask handle running right through the event title, so we’ll cut a little piece out to make room for the words. With your Pen tool, click once on the handle just above the M in Masquerade and once just below it.
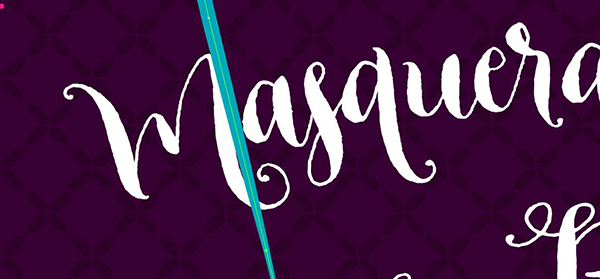
Switch to your Direct Selection tool (a). Click on a blank space so nothing is selected. Then, click once on the line segment between the two points we’ve just made. Press Delete.

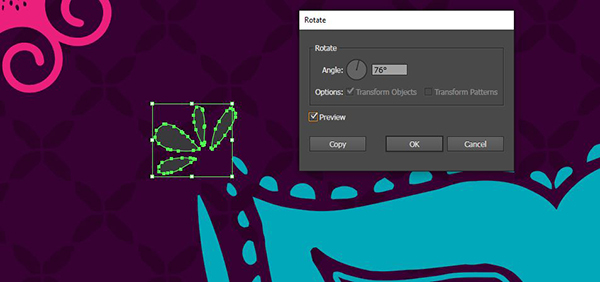
Let’s add a little embellishment to our mask. Go back to the Cheers vector file from Callie Hegstorm and copy the ornament using cmd + c. Paste it into the main layout file with cmd + v.
Drag the ornament to the top left where the mask meets the handle. Go to Object > Transform > Rotate and enter a rotation of 76 degrees. Click OK.
Use the Eyedropper tool to sample the hot pink color from the corner piece.

Now select your Group Selection tool. It can be accessed by holding down on the Direct Selection tool icon in the toolbar until you see the flyout menu.
With your Group Selection tool, click once in the middle of the biggest section of the mask.

Press cmd + c to Copy, then cmd + f to Paste in Place.
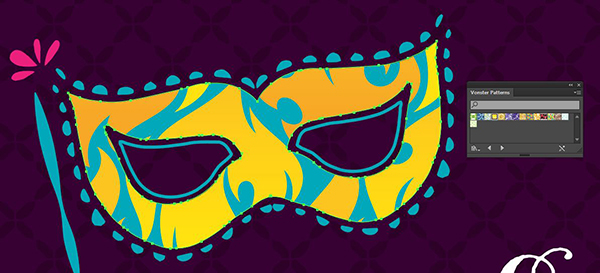
Open your Swatches palette and click on the single downward arrow at the top right to access the flyout menu. Choose Open Swatch Library, then Patterns, then Decorative, then Vonster Patterns. When the Vonster Pattern library opens, choose Blazer (hover over the pattern icons to see the names).
Now we’ll bring a little more attention to our mask by adding a bright spot behind it.
Lock the Title Art layer and unlock the Background layer. Use your Selection tool to select the top image on the background layer, the pattern. With it selected, press cmd + 2 to Lock it. Now click again to select the solid purple background.
Open your Color palette and change the CMYK build to 60/100/22/35. Open your Swatches library and click the New Swatch icon. Name the new swatch Bright Purple.
Now open your Gradient palette. I find it’s easiest to pull the palette out separately from the rest of the panels so it stays visible when I’m accessing my other palettes. Now open your Swatches palette. Drag the thumbnail of the Dark Purple swatch from the Swatches palette to the far right side of the Gradient Slider.
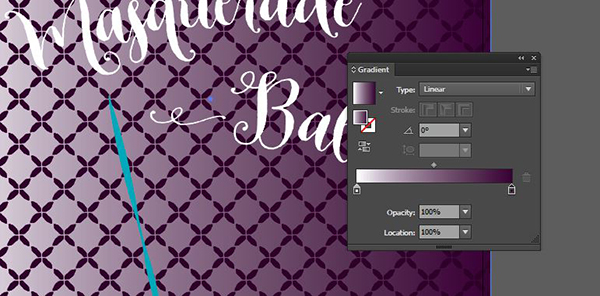
Now drag the thumbnail of the Bright Purple swatch to the left side of the Gradient Slider.
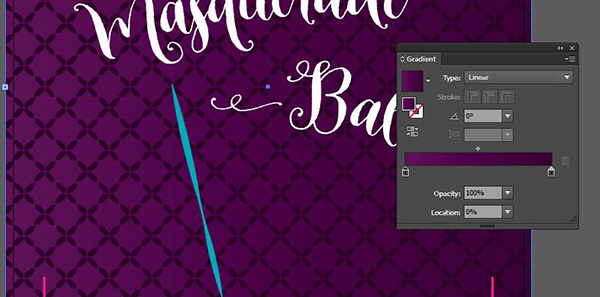
On the Gradient palette, change the Type to Radial.
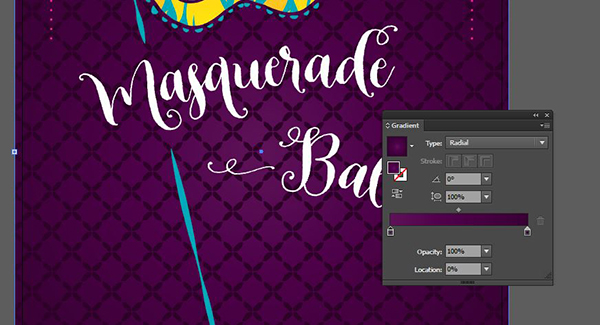
Select your Gradient tool (g). Draw from the center of the mask out past the edge of the artboard.
Now we can lock the Background layer.
Step 4: Supporting Copy
Create a new layer above all the others and name it Supporting Copy.
Select your Type tool and click once at the bottom middle of the artboard, just above the pink dotted line. Type: 8@30@2016 Las Vegas. I’ve left a couple of extra spaces between the date and location for separation.
In the Swatches palette, change the fill color to White. In the Character palette, change the font to Garden Grown Caps at 32 pt. In the Paragraph palette, select Align Center.
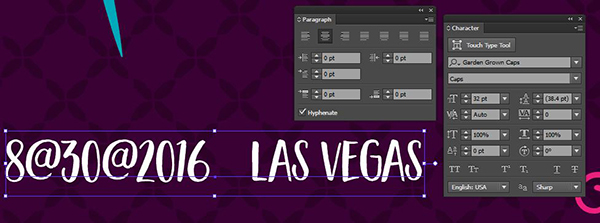
Use your Type tool to highlight the first @. Use your Eyedropper tool to sample the bright pink of one of the corner pieces. Now open your Character palette and change the font to Inkheart Ornaments at 46 pt.
(If you haven’t purchased the bundle yet, go into the Fenotype Inkheart Sparkle freebie file and copy the sparkle, then paste it into the main layout. Add a space between the day, month and year in your event date and position the sparkle in the empty space between each. You’ll also want to change the color to bright pink by sampling the corner piece with the Eyedropper tool.)
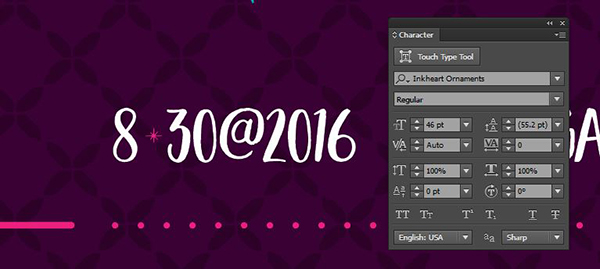
Use your Type tool to select the pink sparkle. Press cmd + c to Copy. Now highlight the second @. Press cmd + v to replace it with the copied sparkle.

To make sure your event date and location is centered, select it with your Selection tool, then click on Horizontal Align Center in the Align palette.
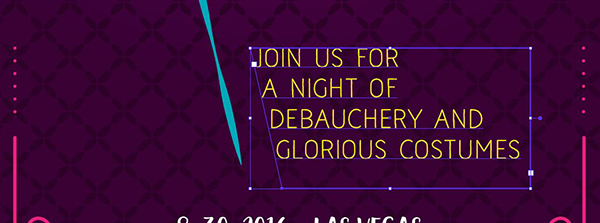
Select your Type tool. This time, we’ll draw a text box. Click and hold to the right of the mask handle and under Masquerade Ball. Drag to the right and down to create a text box.
Type: Join us for a night of debauchery and glorious costumes
In your Character palette, change the font to Naive Line Sans Bold at 24 pt. Change the Tracking to -20. In your Color palette, change the CMYK build to 0/10/100/0.
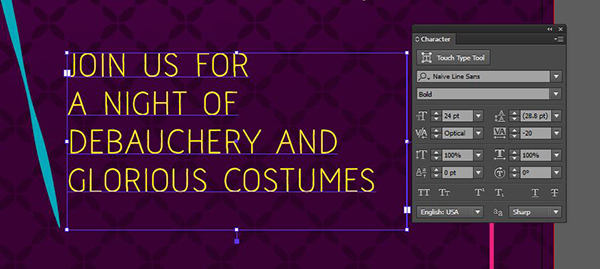
Let’s follow the line of our mask handle for the left side of our copy. To do that, grab your Direct Selection tool (a). Select the bottom left point of the text box, then hold shift and press your right arrow several times – until the left side of the text box follows the same angle as the mask handle.
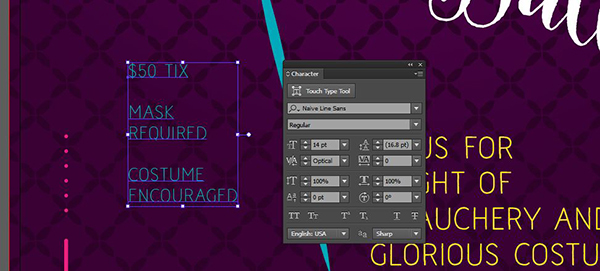
Select your Type tool again and click once to the left of the mask handle, but a little higher this time – about the same height as where the event title ends.
Type:
$50 tix
Mask
Required
Costume
Encouraged
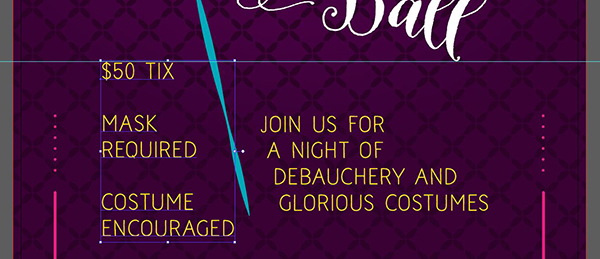
Use the Eyedropper tool to sample the teal of the lace edge of the mask (if you sample the handle, you’ll end up with a teal stroke and we want a teal fill).
In your Character palette, change the font to Naive Line Sans Regular at 14 pt.
And with that, we’re done! We have a bright, modern take on a masquerade ball flyer using ornaments and fonts from this week’s bundle plus some of Illustrator’s pre-loaded resources.
Remember, whether it’s your outcome for this tutorial or something new you’ve made, we’d love to see your designs on our Facebook page.
Please leave a comment if you have any questions or suggestions. I always look forward to hearing from you!
And there’s still time to check out 20 Best-Selling Font Families to grab 247 of the most popular fonts in the world right now for only $29.

GREAT tutorial Rebecca!
You are engaging, conversational and knowledgeable. The Trinity of instructional videos, in my humble opinion.
I’ve been a Photoshop guy for many years, and have only recently begun to use Illustrator as a design tool.
This tutorial, and this site have really helped me get into Illustrator and has given me a new perspective on design.
Thank you all for everything you are doing.
Hey Don,
Thanks so much for the awesome feedback on Renee’s tutorial and we are so pleased you have enjoyed it :). I will definitely pass your kind words onto her!
That is great to hear you are branching into AI- how are you finding it? Please do let us know if you ever have any AI or other design related queries as we are always here and more than happy to help!
Great tutorial!! One question though. The instructions say often to Copy then Paste in Place. The short cut you give is COMMAND F. However, this is the shortcut for paste in Front. Paste in Place is SHIFT COMMAND V. Which command were we supposed to actually do? I did the Paste in Place (Command Shift V) and it worked. Other than that, it was a lot of fun creating this poster!! Thanks!!
Hey Marty,
Thank you so much for getting in touch! I am so sorry for any confusion caused but thank you so much for letting us know about this! It should indeed be the Paste in Place shortcut and rest assured, we are in the process of amending this now :)
Thanks again, Marty! It’s great to hear you had fun putting this one together, I’m really pleased you enjoyed it :) If you have another other questions or if there is ever anything I could assist you with please do get in touch. I’m always happy to help!
Thank You Sooooooooo much Renee & DC for bringing this tut here!
Really glad that am very much near to Renee’s this design!
Renee asked to post artwork to Facebook but I don’t have that account!
Instead I post my link here itself & also to the Official DC twitter account, please feel free to look at this:
( I seriously want Renee to watch my work! )
https://www.behance.net/gallery/33503279/Mardi-Gras-Flyer-Design
Truly
Pranaytony
behance.net/pranaytony
pranaytony.harekrishna@gmail.com
Hey Praynaytony,
Thank you so much for your incredibly kind words! It’s great to hear you enjoyed this tutorial and I love the way you have incorporated these techniques into your own work! I’ll be sure to pass this over to Renee so that she can check it out as well :) Excellent work!
Thanks again for your amazing support, the whole team & I really appreciate it :)
Good work
Thank you so much, Muneer! I’m really pleased you enjoyed this tutorial :)
Love this. I learn something new every time! Thank you, Renee and Design Cuts!
Hey Rebecca,
I am so pleased that you like this tutorial and learnt something new!
Thanks so much for taking the time to let us know :)