WHAT WE’RE CREATING:
Yesterday we’ve launched The Complete Acrylic Design Toolkit with our friend and awesome designer, Chris Spooner. It contains loads of design resources to help you create awesome artwork using a variety of colourful paint textures, Photoshop Brushes, vectors and a fancy Smart .PSD, so in today’s tutorial Chris will take you through the process of creating a poster design for a fictional summer music festival using a small selection of these items, which you can download for free in order to follow along.
HAVE YOU SEEN OUR NEW YOUTUBE CHANNEL?
Watch the video tutorial below and subscribe to our new YouTube channel for regular updates direct to your inbox.
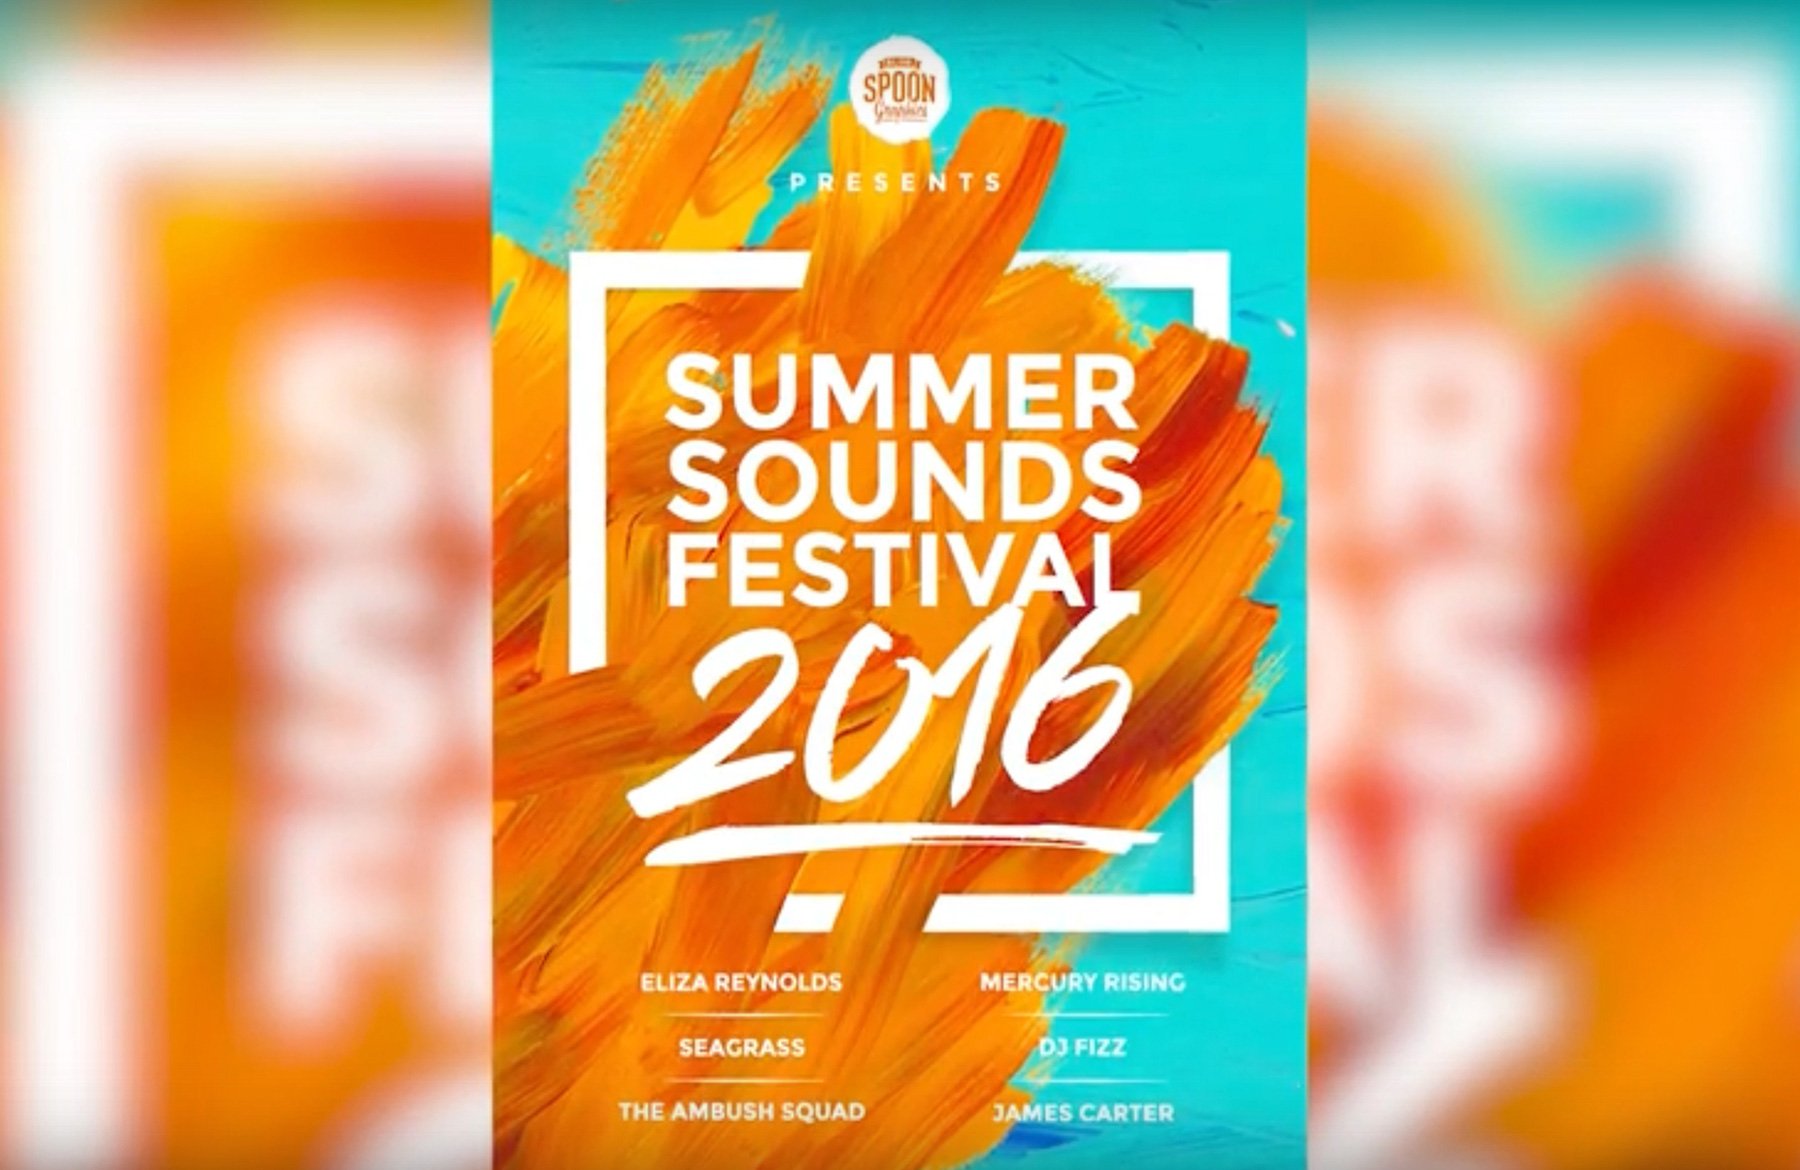
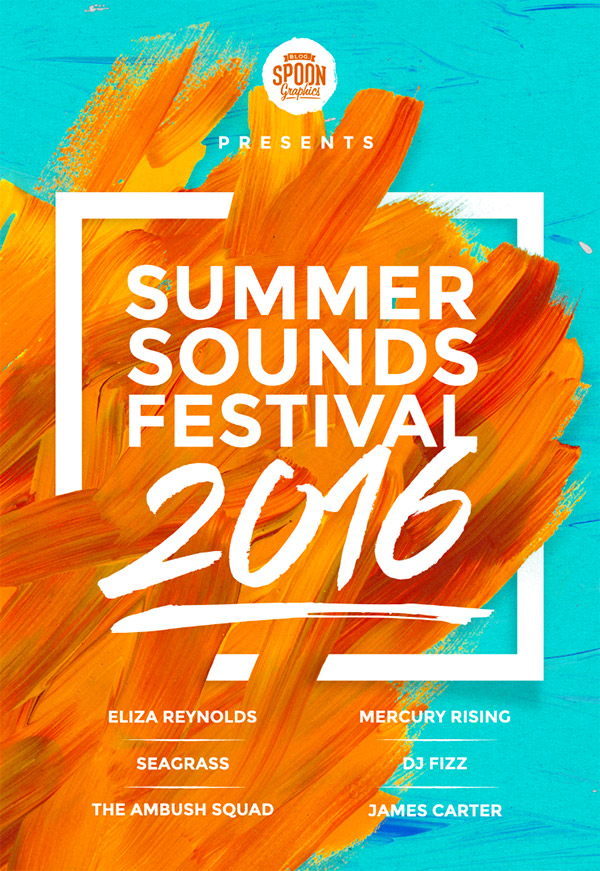
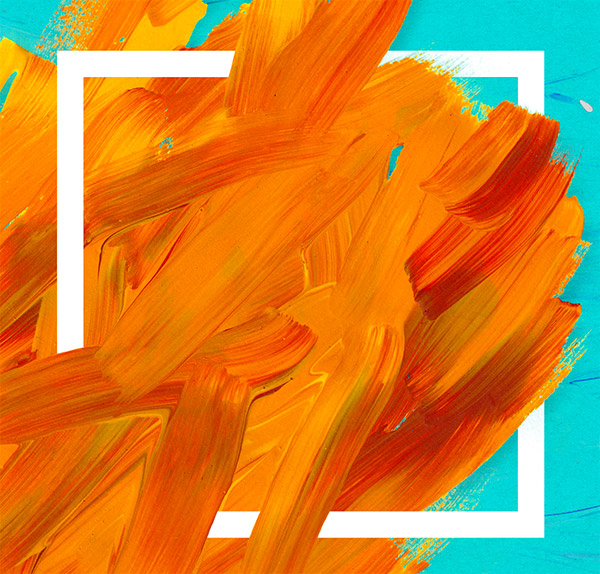
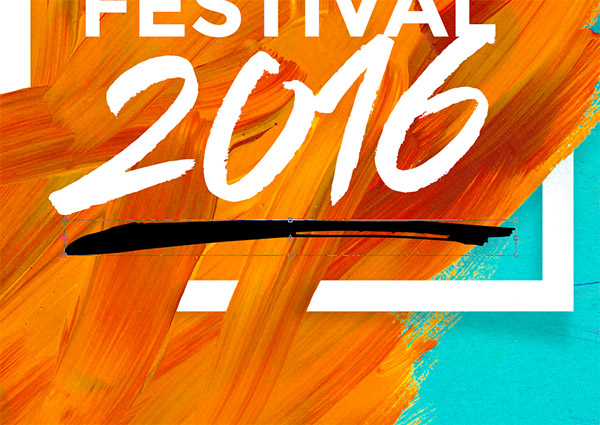
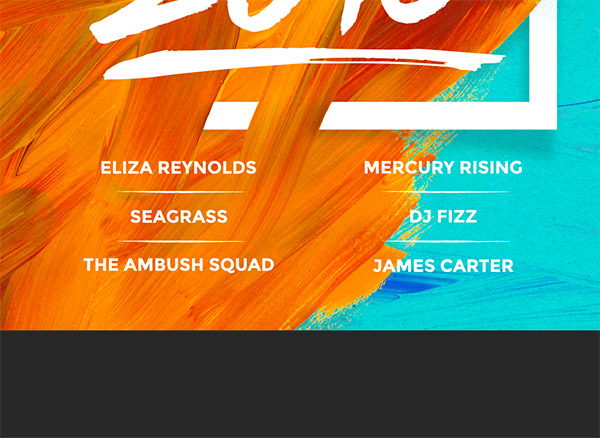
Here’s a quick look at the final outcome. Feel free to be as creative as you want and don’t forget, you can always share your work on our Facebook Page, Twitter or Instagram. We’d love to see your creations.
Follow along with this tutorial: Download the freebie files
This freebie is a small sample from our Complete Acrylic Design Toolkit. It includes 3 gorgeous, colourful acrylic paint textures, an acrylic paper texture, and various brush strokes and elements in .Ai and .EPS format.
The artwork we’ll be creating uses two acrylic paint textures from the pack, along with samples from the brush strokes, brushed circles and brushed underlines vectors. We’ll combine these resources with some typography and shapes in Adobe Photoshop to produce this bright and colourful poster design for the fictional Summer Sounds Festival.
Let’s get started!
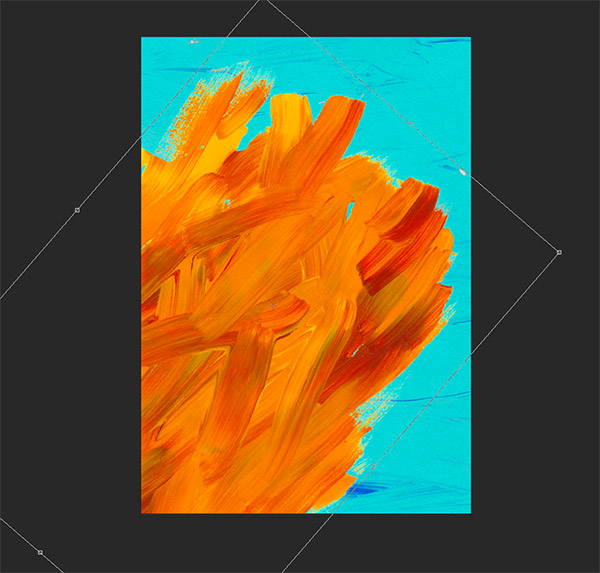
Begin by opening up the red texture from the sample pack named Mercury Rising in Photoshop. Double click the Background layer to make it editable, then press CMD+T to Transform.

Scale up the texture while holding the ALT and Shift keys until the painted area fills the entire canvas. Hit CMD+I to Invert this layer to switch the red colouring to a bright blue. Alternatively, a Colour Overlay layer style could be used to specify an exact colour.
Open the supplied paper texture in Photoshop, press CMD+A to Select All, followed by CMD+C to Copy. Switch back to the main working document and press CMD+V to Paste. Change this layer’s blending mode to Multiply, then go to Image > Adjustments > Desaturate to remove the colour. Reduce the opacity to around 60% to reduce the impact of the texturing.

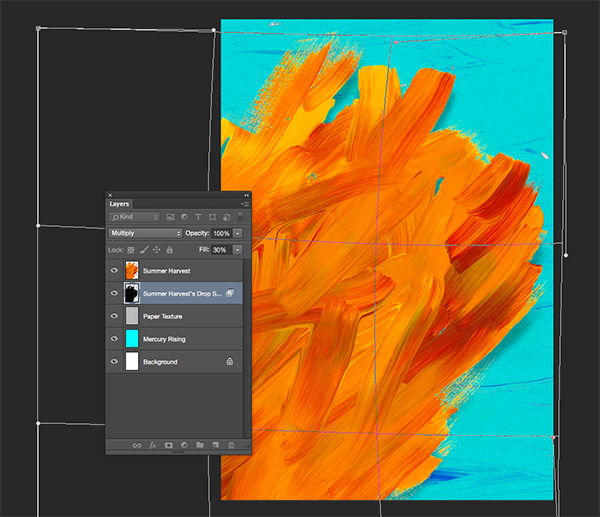
Open the acrylic paint texture named Summer Harvest. These .PNG versions from the pack are already clipped from their backgrounds, so they can be used in all kinds of ways in your projects. Copy and Paste the texture into the main document. Press CMD+T to Transform, then rotate, scale and position the texture so it creeps onto the canvas from the lower left corner and spans out diagonally.
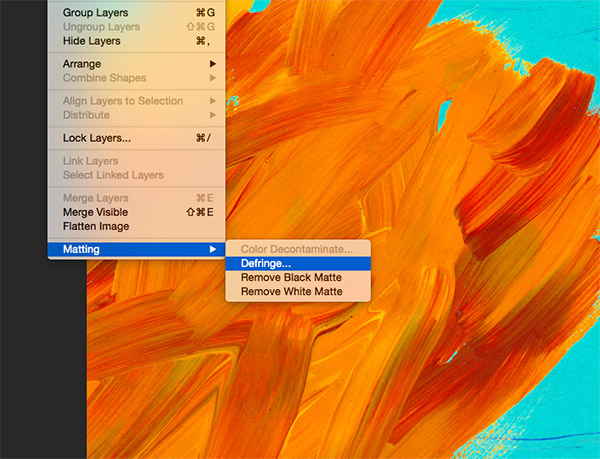
A little bit of haloing might be visible when these .PNG textures are placed on a darker background. Go to Layer > Matting > Defringe and enter 1px to eliminate this.
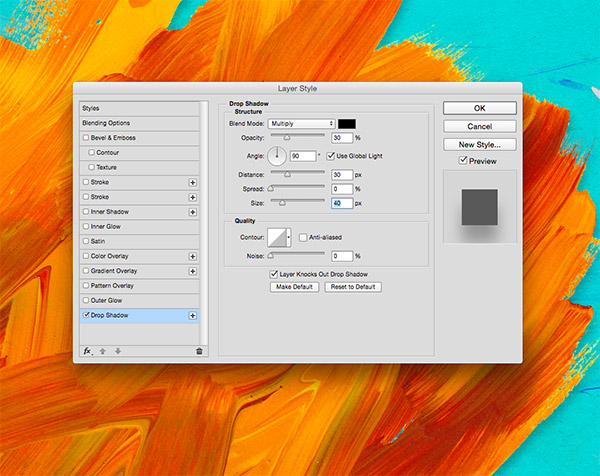
Double click the texture layer to add a Drop Shadow layer style. Set it up using Black, Multiply, around 30% opacity, 90 degrees angle, 25px distance, zero spread and around 50px in size.
Right click the Drop Shadow from within the Layer stack and select Create Layer.
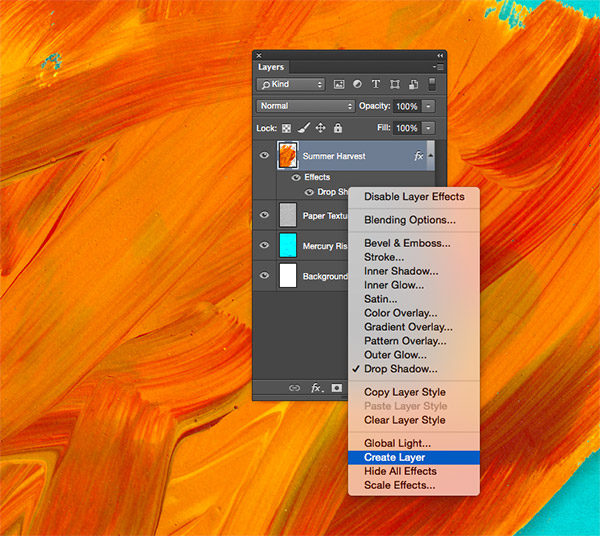
Press CMD+T to Transform, then right click and select Warp. Bend and adjust the shadow to give it a more natural appearance, as if the paint is lifting away from the background. Hit Enter to confirm the changes, then reduce the Fill amount to around 15% to further tone down the visibility of the shadow.
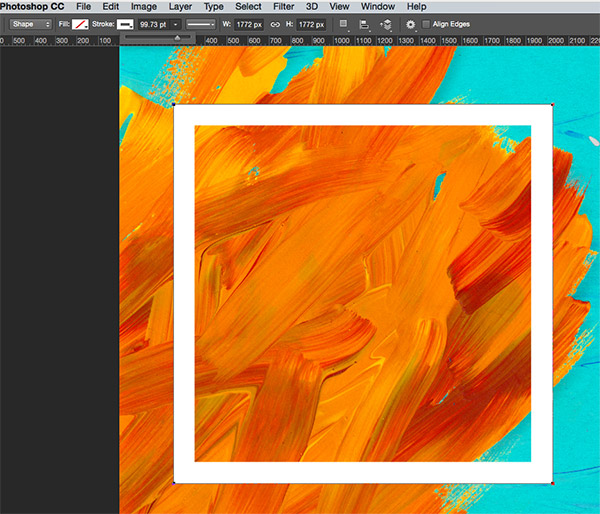
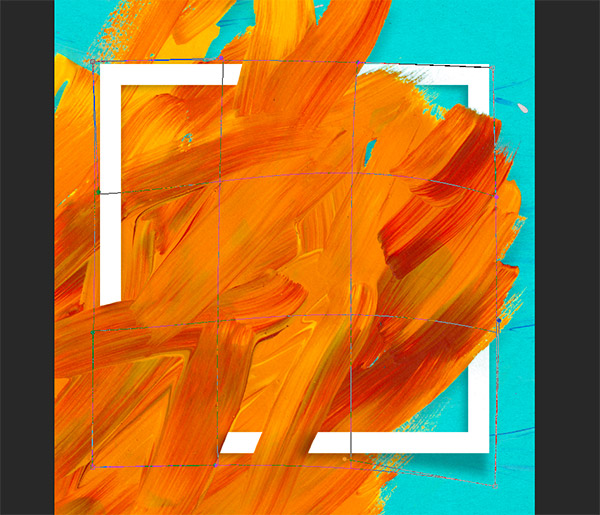
Select the Rectangle tool, then create a new layer. Drag out a shape from the centre by holding the ALT key, and hold Shift to keep the proportions constrained to form a square. Clear out any fill it might have, then set up a white stroke from the top toolbar. Adjust the size of the stroke to around 25pt. Move this shape to snap centrally onto the canvas.
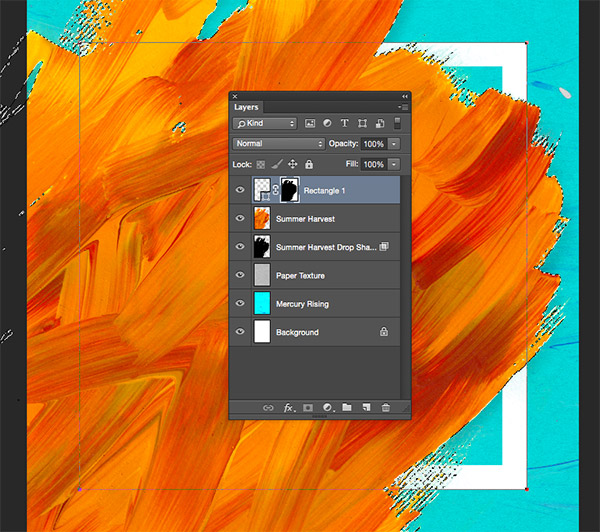
Add a Layer Mask to the rectangle layer, then hold the CMD key while clicking on the thumbnail of the Summer Harvest texture layer to loads its selection. Select the Rectangle’s layer mask in the layers panel, then use the shortcut ALT+Backspace to fill this selection with black, and thus effectively erasing this portion of the shape.
Grab the Brush tool, then set up a tip with a hardness of around 75%. Switch the foreground colour to white, then begin painting on the artwork to bring back the rectangle shape from the layer mask. Pick out a brush stroke from the texture, then paint up to this line with white. Adjust the brush tip to achieve more accurate control, or press the X key to switch the foreground and background colours to toggle between erasing and restoring the artwork from the mask.
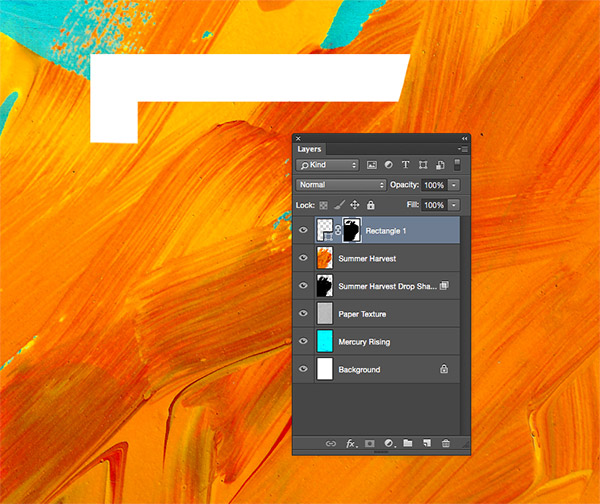
Follow the square around and restore specific areas between two prominent brush strokes from the texture to give the impression that the square weaves in and out of the painting.
Double click this rectangle layer and add the same Drop Shadow. Repeat the process of right clicking and selecting Create Layer, then transforming it with a warp to produce a more realistic shadow effect.
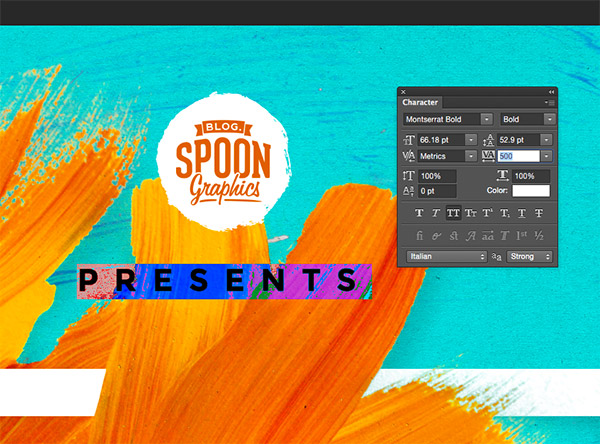
Use the Type tool to add some text within the centre of the square. I’m using a nice free geometric font named Montserrat in Bold. Hold the Alt key while dragging the text element to make a duplicate, then edit the wording to spell out the name of the fictional festival.
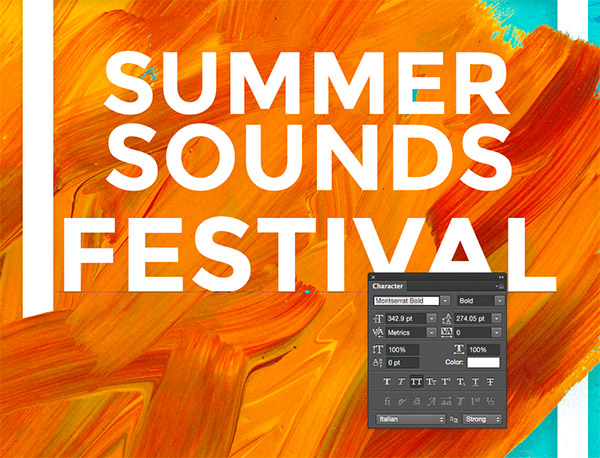
Use the shortcut CMD+T to transform and scale the text elements so they’re all the same width.
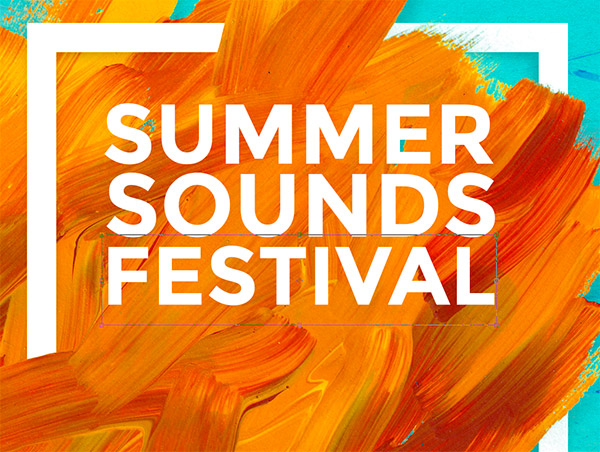
For the word 2016 I’m using a premium brush stroke font named Have Heart. Skew this text slightly so it flows up and overlaps the other text slightly.

To reinforce the 2016 brush script, copy the brushed underline vector shape from the sample pack and paste it into the Photoshop document. Scale and position it to sit underneath the 2016 wording, then press CMD+I to switch the black fill to white.
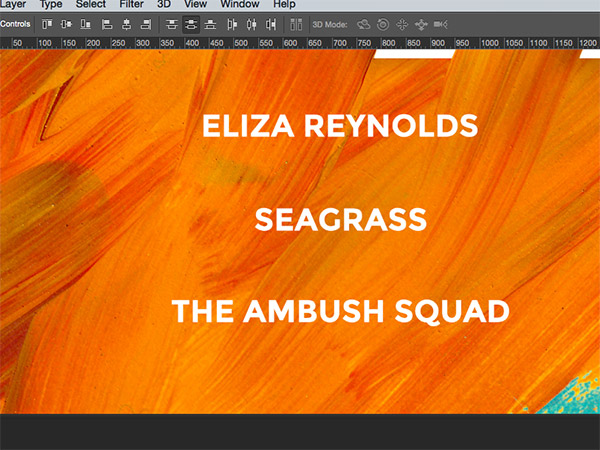
Copy one of the sans-serif text elements and scale it down so it can be used to type out the list of fictional artists playing at this fictional summer sounds festival.
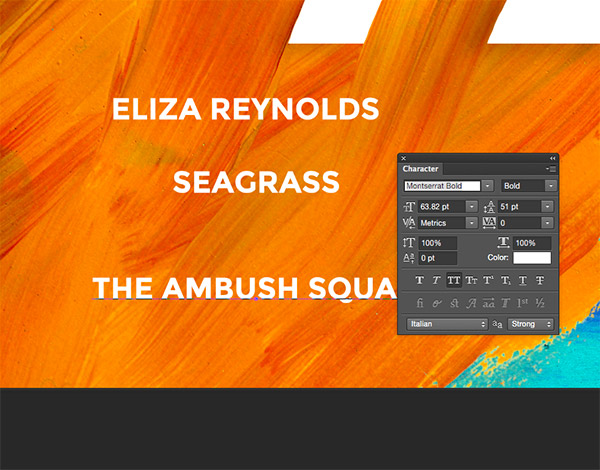
Select all of these new text elements and use the align buttons in the toolbar to line them up centrally, and distribute the spacing evenly between them.
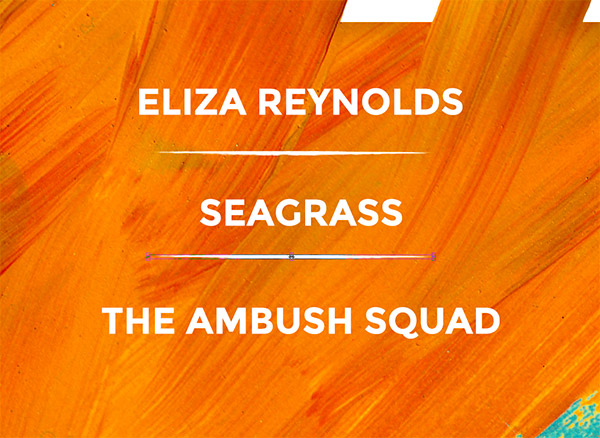
Copy the rough vector brush stroke from the sample pack and paste it into the Photoshop document. Squash it down to form a thin line, then use it as a divider between the text elements.
Hold Shift and select each text element and divider shape, then hold the ALT key to drag out a duplicate set for the other side. Edit the wording to list more fictional artists, then select all the elements and snap them centrally to the canvas.
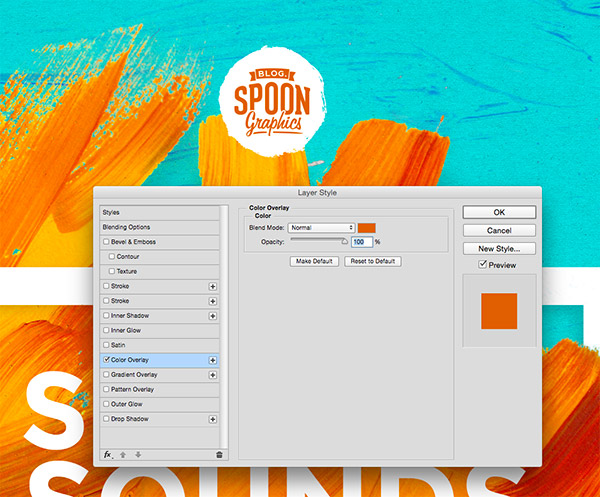
Copy the brushed circle vector shape and paste it at the top of the design. Scale it to size and use the CMD+I shortcut to Invert the colour from black to white.
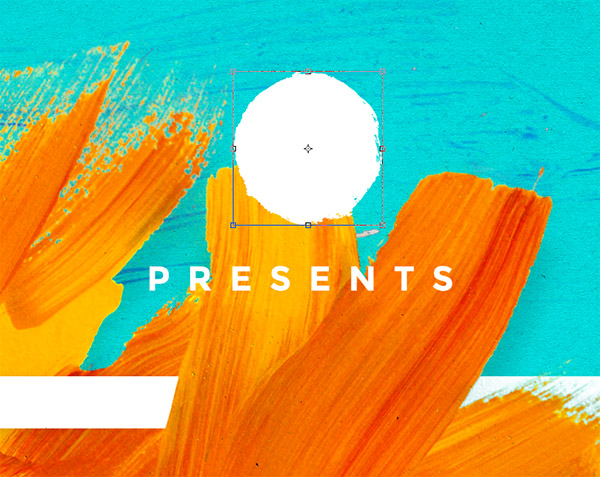
Use this brushed circle to house a logo, which can be given a Color Overlay with an eyedropped colour from the paint texture to help it fit into the design.
Use another text element to type out the word ‘Presents’ underneath. Scale it down but increase the tracking to around 500 to give it more presence.
The final artwork makes clever use of the acrylic paint textures to create an abstract poster design for our fictional summer sounds festival. We’ve seen how the .JPEG versions of the textures are great for backgrounds, while the .PNG versions are really handy for overlaying onto other elements without the white background getting in the way. The collection of vector shapes in the pack can be used alone, or combined with the textures to complement the painted theme.
You can get The Complete Acrylic Design Toolkit here and enjoy all the goodies it comes with, including a Smart PSD while allows you to paste in your artwork and have it instantly converted into an acrylic painting. Happy designing, Design Cutters!

Great tutorial! Quick question, what format do you suggest for export? Thanks!
Hey Chloe, thanks for your comment and we are so happy that you found this tutorial really useful.
The format really depends on what you are wanting to use this for, but my suggestion would be either JPEG or TIFF. I have popped you over an email to help with this further :)
Great tutorial so far!
Only problem is I got stuck at the layer mask selection. I don’t quite get how the summer harvest layer was transferred to the rectangle layer mask. I held down the command key and selected the summer harvest layer thumbnail, I then selected the rectangle layer mask and nothing happened, next i pressed alt and backspace and still nothing happened I’ve tried several times the selection doesn’t load.
I use windows, please help. Thanks :)
Hey Naa,
Thanks so much for leaving us a comment, I’m so sorry to hear you are stuck but rest assured I should be able to help you with this!
I have popped you over an email that should be able to get you moving again :)
Hey, I have the same problem too! Can you help me?
Hey Brian,
Oh no I am so sorry to hear that you’re stuck, rest assured I should be able to get you moving again!
I have popped you an email that should help :)
Loved working on this AND this color combo was perfect for a poster I did, looking forward to playing with other colors and working with this toolkit more! Good stuff!
Thanks so much Kevin,
We’re really glad you’ve enjoyed this and I hope that you were able to pick up some handy tips too :)
Hi! This is an awesome tutorial!
Is there a specific name for the technique used where you seem to weave the texture/vector through the text?
Thank you so much! I love every single aspect of this website and the stuff you do here!
Elizabeth
Hey Elizabeth,
Thank you so much for your comment! We’re so pleased to hear that you enjoyed this tutorial :) I’m really sorry but afraid we’re not 100% sure if there is a specific term for this technique that Chris is using in this tutorial but I can certainly reach out to him and enquire this for you? Please do let me know and I will happily reach out on your behalf :)
I hope this helps, and thanks again for your incredibly kind words, Elizabeth! We really appreciate your support and if there is ever anything I could assist you with please do get in touch. I’m always happy to help!
Super Tutorial and I love the fact that you demonstrate the use of all the designer resources throughout all tutorials. Brilliant.
Thank you so much for your kind words, Clarajev! I’m really pleased you enjoyed this tutorial :)