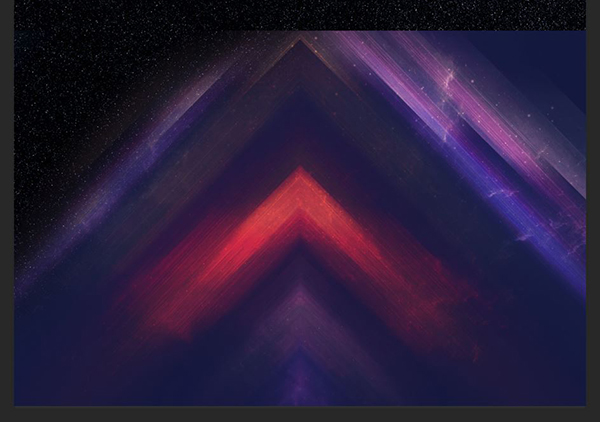
WHAT WE’RE CREATING:
Hello designers! Renee here with a Photoshop-based tutorial for a fun, retro-futuristic record store. We’ll create an out-of-this-world poster by picking apart a few icons (in Illustrator), utilizing beautiful textures and creating our very own starry sky.
HAVE YOU SEEN OUR NEW YOUTUBE CHANNEL?
Watch the video tutorial below and subscribe to our new YouTube channel for regular updates direct to your inbox.
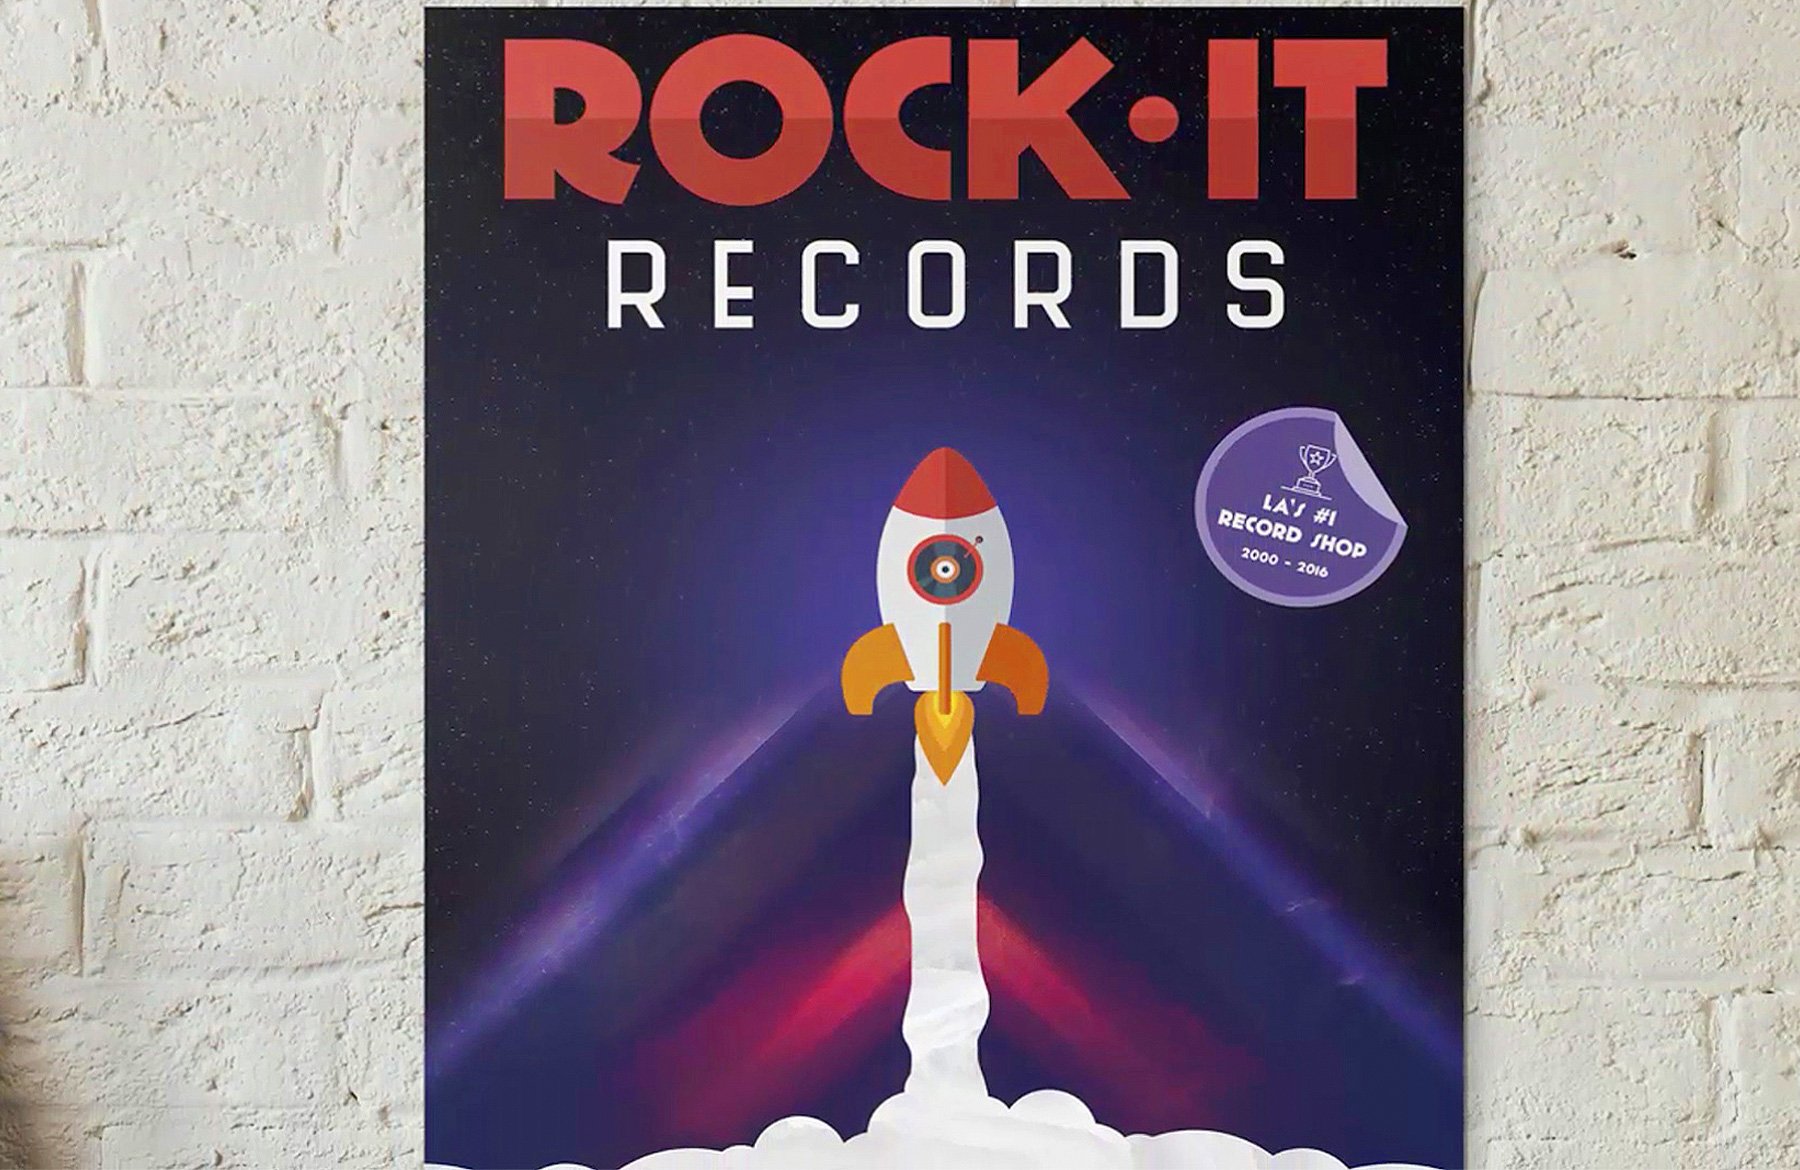
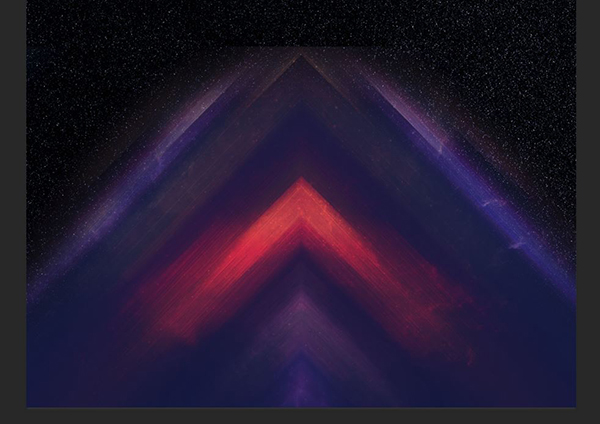
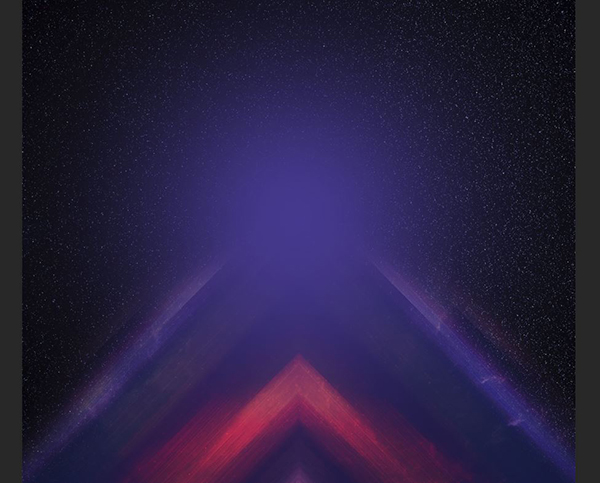
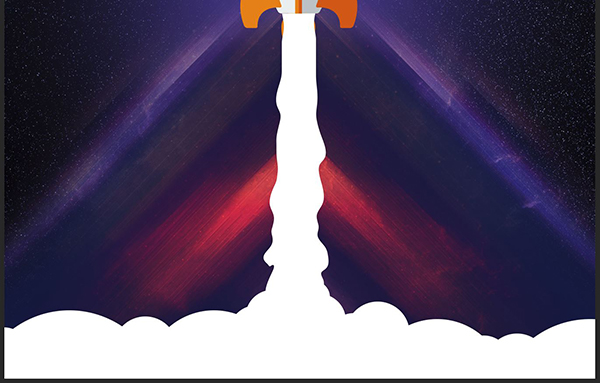
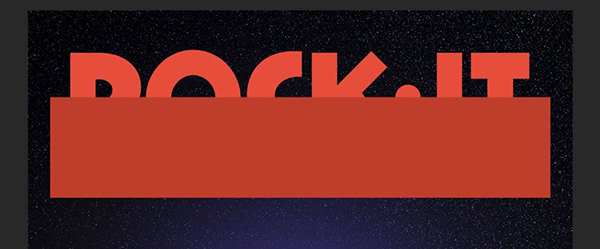
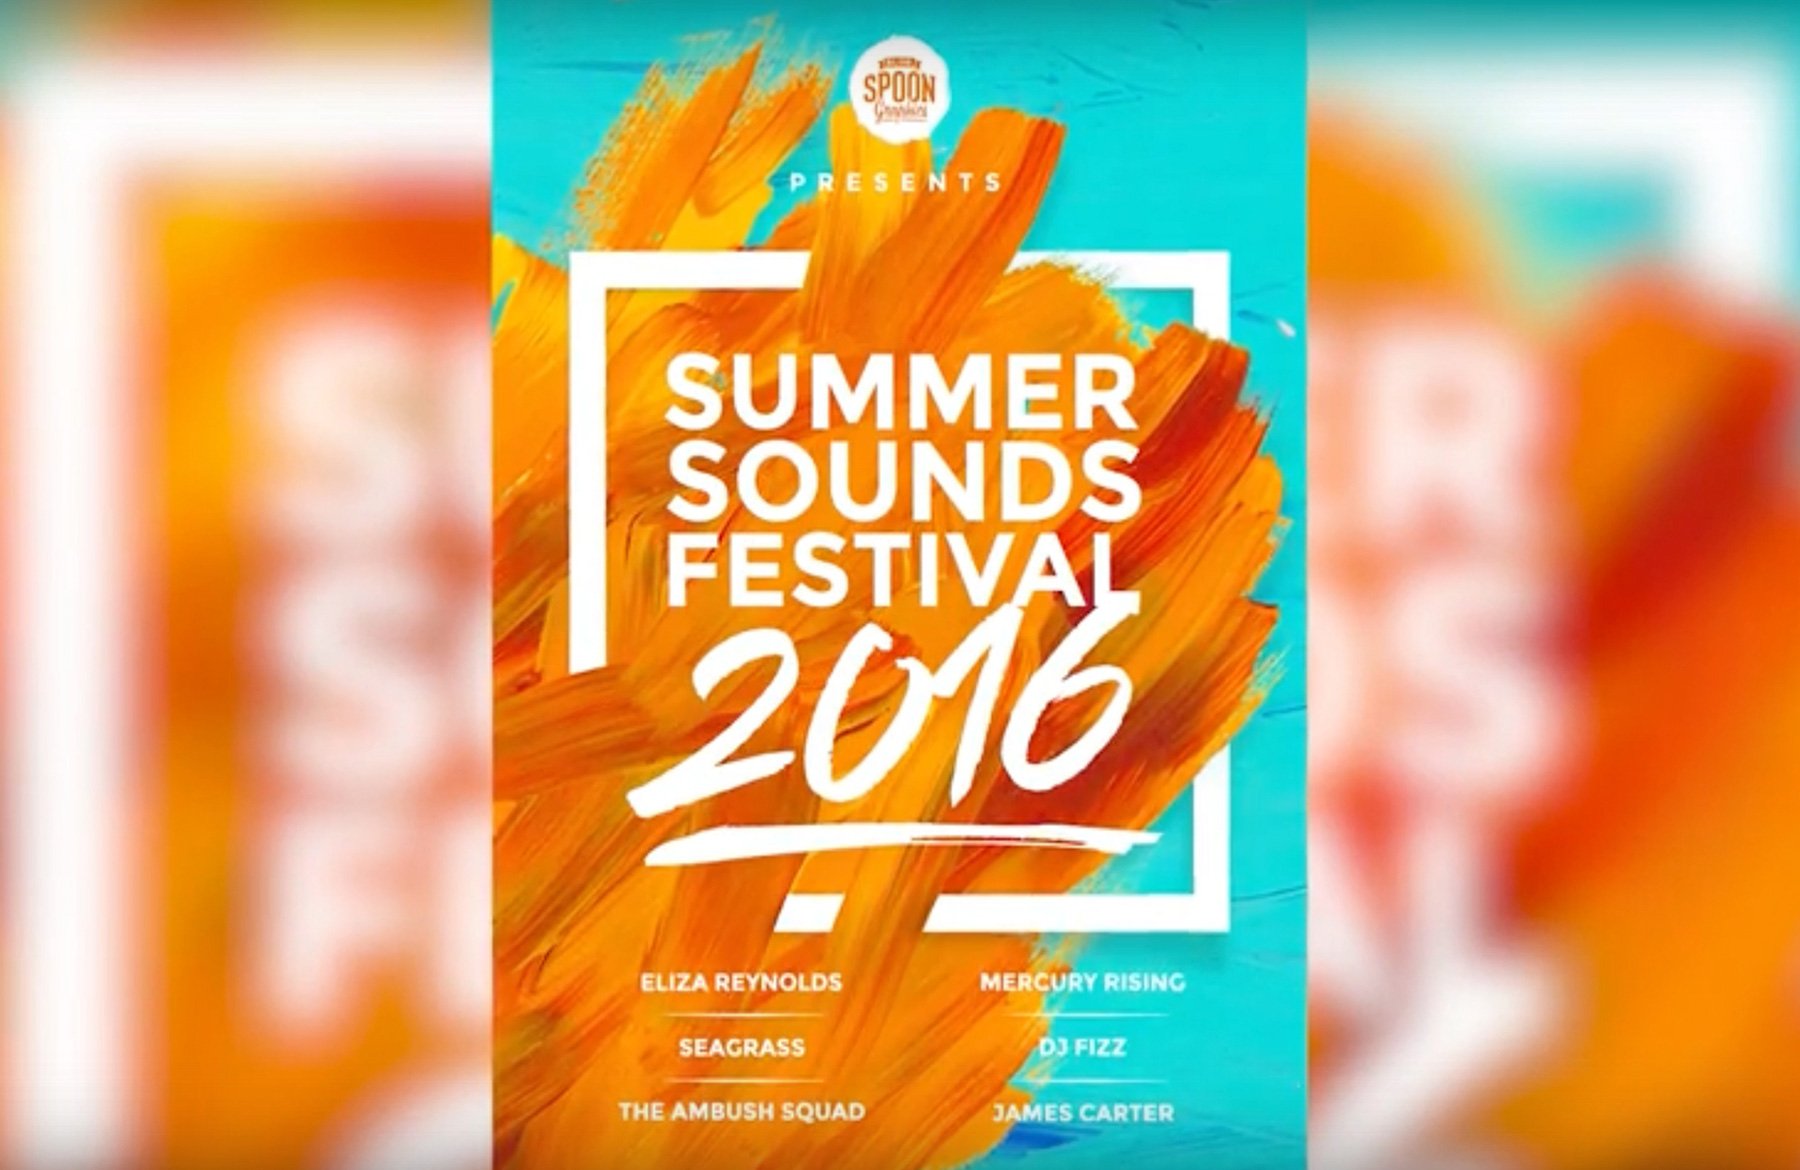
Here’s a look at what we’ll be creating:

Follow along with this tutorial: Download the freebie files
The freebie pack includes gorgeous textures and icons from the talented designers at BIBI Arts, Flat Icons and Rule by Art.
This freebie pack is just a tiny sample of the resources available in The Modern Designer’s Bundle: 1000s of Professional Resources for just $29 (that’s an impressive 99% off). This collection features an unbelievable selection of vectors, icons, infographics, mockup templates, proposal documents, resume templates, invoices, textures, backgrounds and more.

Key Commands
Just a quick note concerning key commands. I’ll use Mac key commands in the tutorial. If you’re following along on a PC, simply substitute the following:
cmd = ctrl
opt = alt
del = backspace
Step 1: Star Background
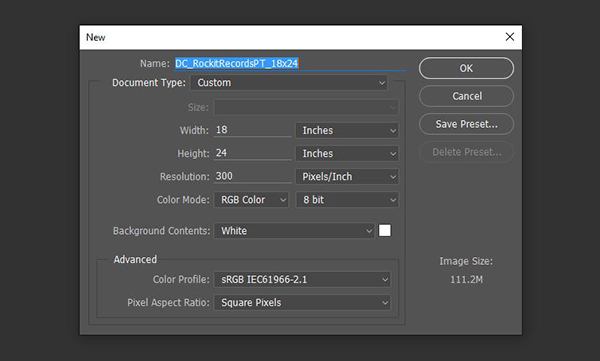
Open Photoshop and go to File > New. In the New Document dialog box, enter a width of 18 inches and a height of 24 inches. Next to Resolution, enter 300 dpi and use a Color Mode of RGB.
To print this poster on most presses, we would most likely need to convert it to CMYK. For now, working in RGB will give us access to more effects and a full range of bright colors that will translate nicely for web usage.
Click OK to create the document.
Save your file.
At the bottom of the Layers palette (Window > Layers), click the Create A New Layer icon. Double click the layer name, Layer 1, and rename it Stars.
At the bottom of your Tool palette, click the foreground color swatch to bring up the Color Picker pop-up. We want a very dark blue. In the window, enter RGB values of 4/11/27. Press Ok.
Now press opt + del to fill the layer with the new foreground color.

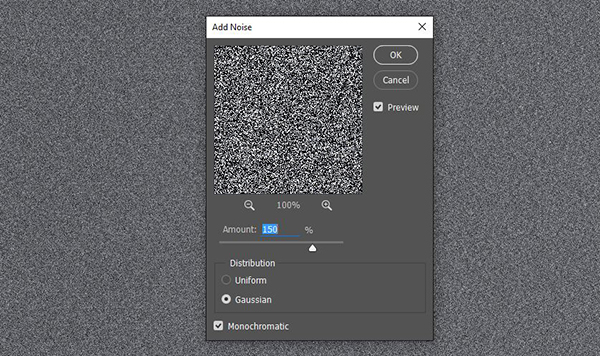
Go to Filter > Noise > Add Noise. In the dialog box, enter an amount of 150%. Select Gaussian and Monochromatic, then press OK.
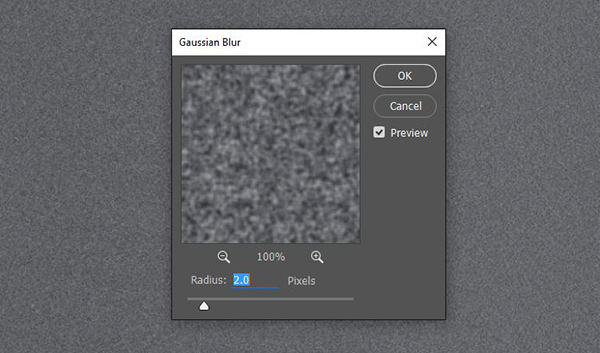
Go to Filter > Blur > Gaussian Blur. Enter a Radius of 2.0 pixels and click OK.
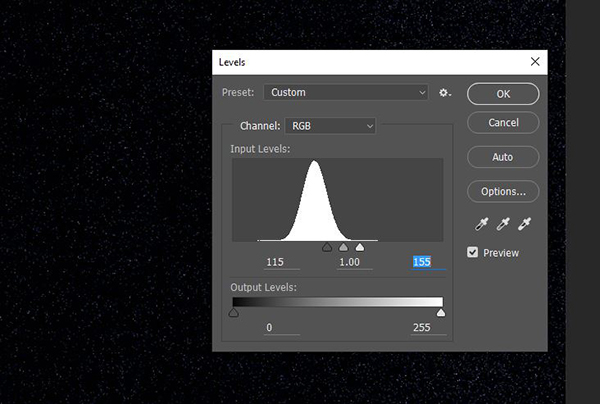
Now go to Image > Adjustments > Levels. In the dialog box, bring the sliders closer together until a starry sky starts to emerge. Press OK when done.
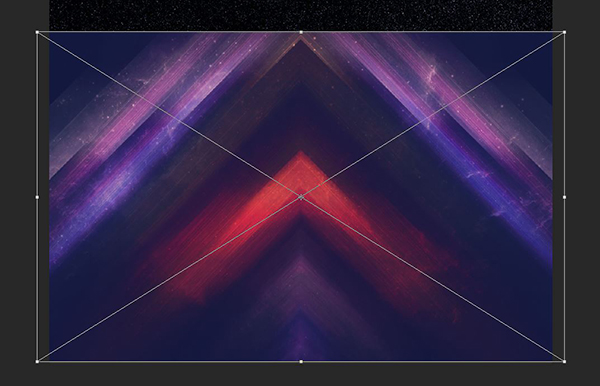
Step 2: Background Action
We’ll add a little excitement to our background by laying in some additional elements.
Go to File > Place Linked and navigate to the Freebies folder. In the BIBI Arts folder, select Motion-SKY-3.jpg and press Place.
Hold shift (to maintain aspect ratio) and use the corner handle to increase the size until the image is just a little bigger than the artboard. Press enter when done.
At the bottom of the layers palette, click on the Add Layer Mask icon.
Select your Brush tool (b). At the top left of the artboard, click on the small arrow to the right of the brush thumbnail to access the Brush Preset Picker. In the dialog box, choose the first brush, Soft Round. At the top of the artboard, make sure your Opacity is set to 100%. Increase the Brush size to 2000 px by repeatedly pressing the right bracket key (]) on your keyboard.
On the artboard, brush across the top left side of the Motion SKY image.
Then brush over the top right side of the image.
In your Layers palette, click the Create A New Layer icon. Name the new layer Purple Glow.
Click the Foreground Color swatch at the bottom of your toolbar to bring up the Color Picker. Enter RGB values of 64/62/145. Press OK.

With your Brush tool still selected, press the right bracket key (]) several times until the brush size is 5000 px.
Position the center of the brush over the top of the Motion SKY image and click once.
In your Layers palette, select the Purple Glow layer and drag it below the Motion SKY layer.

Step 3: Rocketship
In the Freebies folder, navigate to the Flat Icons folder, then open the .AI or .EPS file named Irresistable_Rocketship in Illustrator.
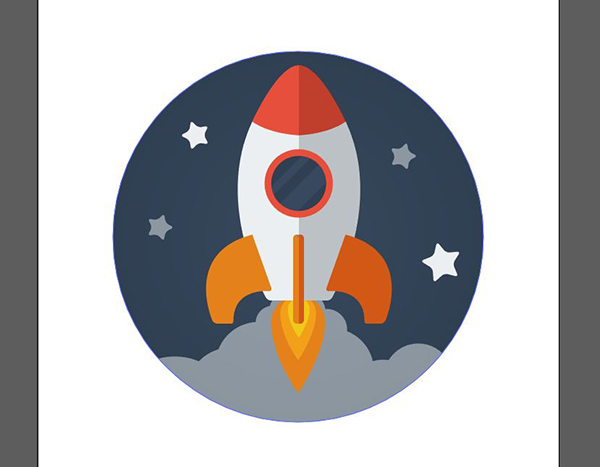
Use your Selection Tool (v) while holding shift to select the stars, cloud and background color. Press del so we’re left with just our rocketship.

Now open the file named AwesomeAudio_Turntables in the same folder.
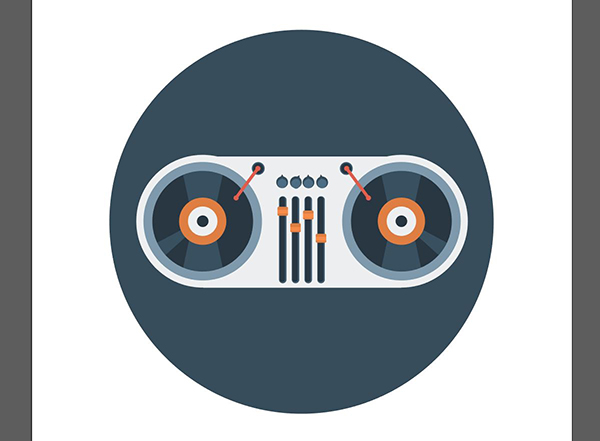
Drag your Selection Tool from the top right to the edge of the faders and all the way down. See the selection area outlined in red below.
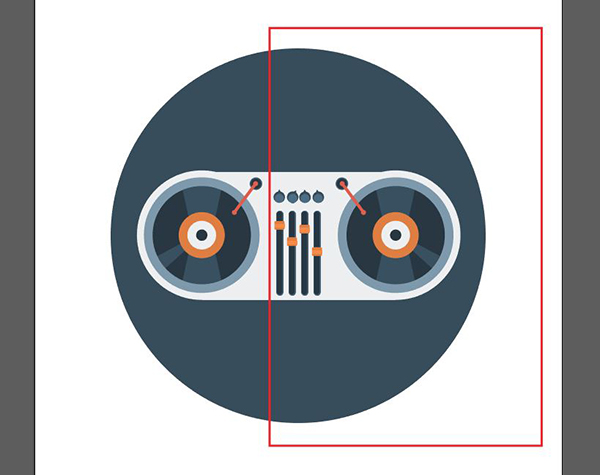
Press delete.

Hold shift and use your Selection Tool to select the two outermost circles around the outside of the record. Press delete to remove them.

Press cmd + a to Select All. Press cmd + g to Group the pieces together, then press cmd + c to Copy.
In the rocketship file, press cmd + v to Paste.

Hold shift and use the corner handles to reduce the size of the pasted in record group until it’s the same size as the dark window area on the front of the rocketship.

Now we can bring our awesome audio rocketship into Photoshop. Press cmd + a to Select All, then cmd + c to Copy.
Go back to Photoshop and press cmd + v to Paste.
Position the rocketship at the apex of the upside down V and press enter.
In the Layers palette, drag the rocketship layer to the very top and rename it Rocketship.

Next, we’ll add some exhaust to our rocketship.
In your Layers palette, click the Create A New Group icon. Name the group Exhaust. Inside the group, create a new layer.
Select your Elliptical Marquee tool (M or hold down the Rectangular Marquee tool until you see the flyout menu and choose the circle).
Press d to set your foreground color to black and background color to white, then press x to toggle so white is your foreground color.
Now that we have all that set up, we can finally draw a circle! Hold shift and drag across the artboard until you have a circle selection of about 4.25” in diameter.

Press opt + del to fill the selection with our white foreground color. Then, press cmd + d to Deselect.

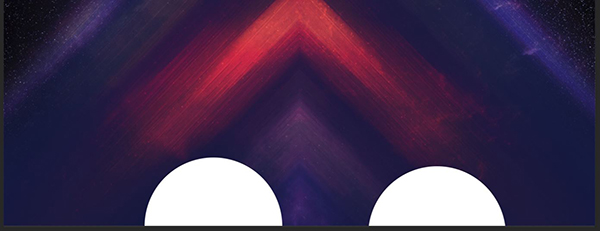
We’re going to build up our wall of exhaust along the bottom of the poster in a ridiculously unscientific way.
Use your Move tool (v) to position the circle along the bottom of the poster so it’s only about half visible.

In the Layers palette, drag the white circle layer down into the Create A New Layer icon to duplicate it. Drag the duplicate circle to the right on the artboard with your Move tool.
Duplicate the layer again. Go to Edit > Free Transform and use the corner handles (while holding shift to maintain aspect ratio) to enlarge the circle a bit, until it’s not quite 6 inches in diameter. Position this on the bottom right.

Duplicate the large circle and position the copy on the far left.

Copy one of the original circles and this time, reduce the size to about 2 inches in diameter. Sprinkle a few copies of the smaller circle around to fill in the gaps between larger circles.

For the last part, we’ll just use our paintbrush. The main reason for not using the brush to do the whole thing is that this way, we can make adjustments to the majority of the elements if we don’t like the placement.
Create a new layer in the same folder. Select your Brush tool. In the Brush Presets palette, select the second brush, Hard Round. Reduce your Brush size to 500 px by pressing your left bracket key ([) several times.
Fill in the empty space in the middle of the artboard, then use single clicks of the Brush to begin building up the middle area. See the white areas below for the new brushed areas.

Reduce your Brush size to 300 px and add a final three clicks to the middle of the exhaust group.

Next, we’ll connect our billowy exhaust to the rocketship. Select the Rectangle Tool (u). At the top of the artboard, select Shape. Set your Fill color to White, Stroke to None and the Stroke Width to 0 px.
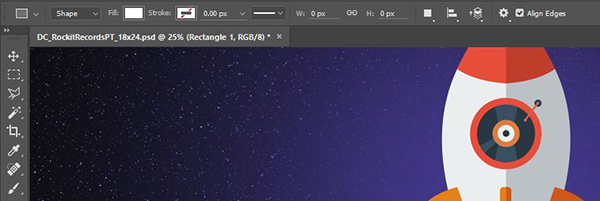
Draw a rectangle that’s a little narrower than the bottom of the rocket and connects the rocket to the clouds below.

Go to Filter > Liquify. In the pop-up box, choose Convert to Smart Object.
When the Liquify window opens, choose the top tool, the Forward Warp Tool (w). On the right under the Brush Tool Options, set the Size to 300 px and the Pressure to 100%.
Click and drag down a few times on each side of the rectangle to create little blobs on each side. Make sure to move in a downward direction.

Click OK to return to the artboard.
In the Layers palette, move the Rocketship layer above the Exhaust group. Move your rocketship up just a little by pressing the up arrow key 3 or 4 times to hide the top of the warped white rectangle behind the flame at the bottom of the rocketship.

Lastly for this section, we’ll add some texture to our exhaust clouds.
Go to File > Place Linked. Navigate to the Rule by Art folder and choose 25.tif. Press Place.
Hold down shift and use the corner handles to enlarge the image until the texture area completely covers the exhaust area.

At the bottom of the Layers palette, click the FX icon and choose Color Overlay. In the dialog popup, select a Blend Mode of Color and Opacity of 100%. Click the color swatch and choose White. Then press OK.
At the top of the Layers palette, change the Opacity to 25%.

In the Layers palette, open the Exhaust folder. Hold cmd + shift and click the thumbnail of each layer inside the Exhaust group to create a selection around the entire exhaust area.
With the selection in place, release the cmd and shift keys, then click once on the 25 layer to make sure it’s the active layer. At the bottom of the Layers palette, click the Add Layer Mask icon.

Once again, drag the Rocketship layer to the very top of the Layers palette so it’s above the 25 layer.
Step 4: Logo and Contact Info
Next, we’ll create a simple text-based logo for our record shop. We’re going to use two fonts that are readily available online—Science Fair Regular by skomii and Geomancy Extra Bold by Natasha Fernandez-Fountain.
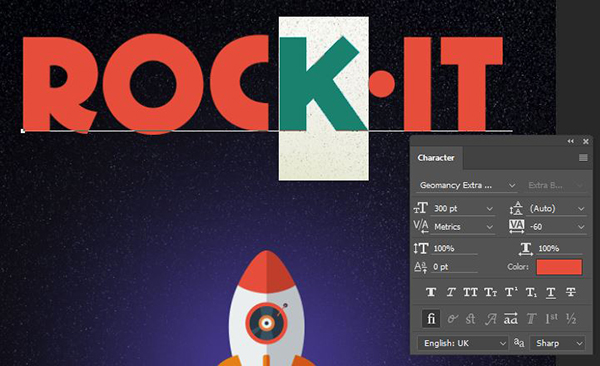
Select your Horizontal Type Tool (t) and click once at the top of the artboard. Type: ROCK•IT.
Open your Character palette (Window > Character). Change the font to Geomancy Extra Bold at 300 pt. Click the color swatch and in the Color Picker pop-up, use the Eyedropper to sample the brighter red at the top of the rocketship. Click OK and position ROCK•IT in the top middle of the artboard.

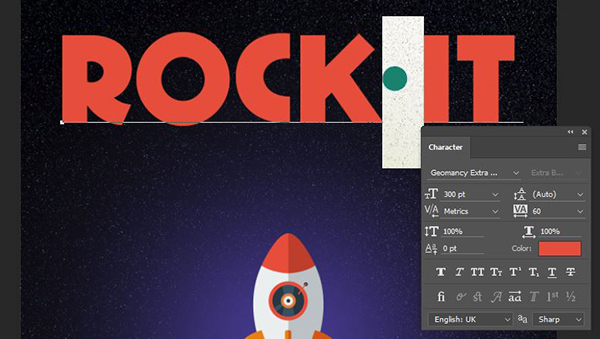
The bullet point doesn’t really look centered, so we’ll move it a little closer to the K. Select the K in ROCK. In the Character palette, set the Tracking to -60.
Now select the bullet point and increase the Tracking to +60.
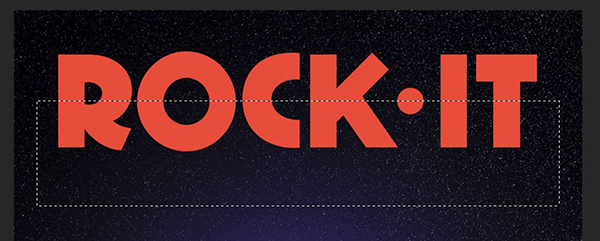
In the Layers palette, click the Create A New Layer icon. Name the layer RockIt Dark.
Select your Rectangular Marquee Tool (m) and draw a rectangle horizontally across ROCK•IT so it bisects the bullet point. The exact height and width aren’t important as long as it covers the entire bottom half of the word.
At the bottom of the tool palette, click the Foreground color swatch. In the Color Picker, use the eyedropper to sample the darker red at the top of the rocketship. Press OK.
Press opt + del to fill the rectangular selection with the Foreground color. Then press cmd + d to Deselect.
In the Layers palette, hold cmd and click on the T on the left of the ROCK•IT layer to create a selection around the letters.
Release cmd and click once on RockIt Dark to make sure it’s the active layer. At the bottom of the Layers palette, click the Add Vector Mask icon.

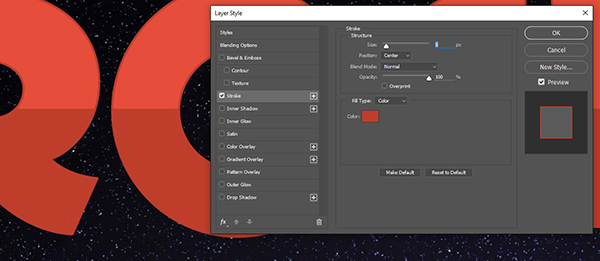
In the Layers palette, click once on the ROCK•IT layer to make it active. At the bottom of the palette, click the FX icon and select Stroke.
In the dialog box, enter a Size of 8 px, Position of Center and Blend Mode Normal. Fill Type should be Color. Click on the color swatch and use the eyedropper to sample the darker red color at the bottom half of the letters. Press OK.
This adds a more finished looking edge to our letters.
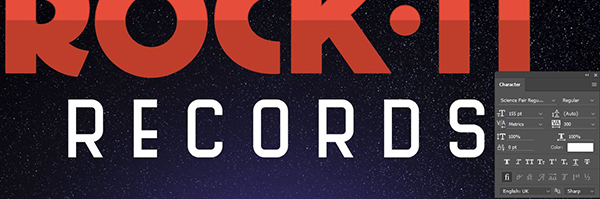
Select your Horizontal Type Tool (t) and click once on the artboard. Type: records.
In the Character palette, change the font to Science Fair Regular at 155 pt. Increase the Tracking to 300 pt. Change the Color to White and center the word below ROCK•IT.
In the Layers palette, hold shift and select all three logo layers (ROCK•IT, RockIt Dark and records). At the bottom of the palette, click the Create A New Group icon. Name the group Logo.
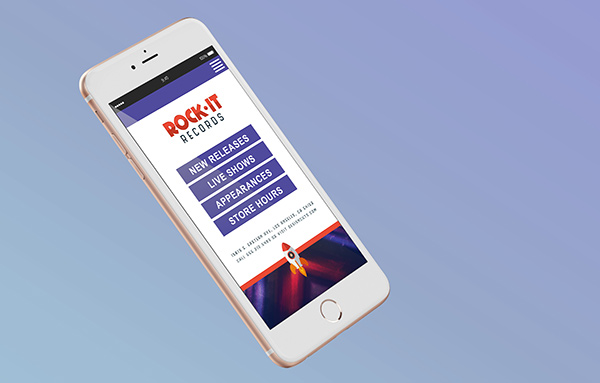
Select your Horizontal Type Tool again and click once at the bottom of the artboard. Type: 16019 S. Eastern Ave, Los Angeles, CA 54153 555.212.5483 designcuts.com.
In the Character palette, change the font size to 20 pt. Click the color swatch and in the Color Picker, use the eyedropper to sample the dark blue from the record in the middle of the rocketship.
Position in the center of the bottom of the artboard.

Step 5: Badge
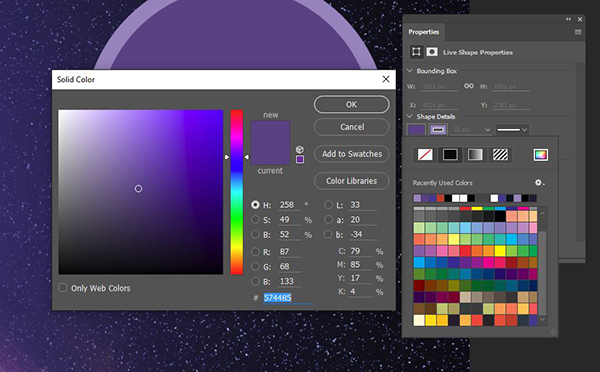
In the Layers palette, create a new group and name it Badge. Create a new layer in the group. Select your Ellipse Tool (u). Hold shift and draw a circle on the middle right section of the artboard until it reaches about 3.5 inches in diameter.
As soon as you release, you should see your Properties palette open. In the Properties palette, click the fill color swatch, then click the Color Picker icon on the top right of the popup swatch palette and enter RGB values of 87/68/133 – a color from our background V image.
Next, select the stroke color swatch, click the Color Picker icon and enter RGB values of 151/135/190.
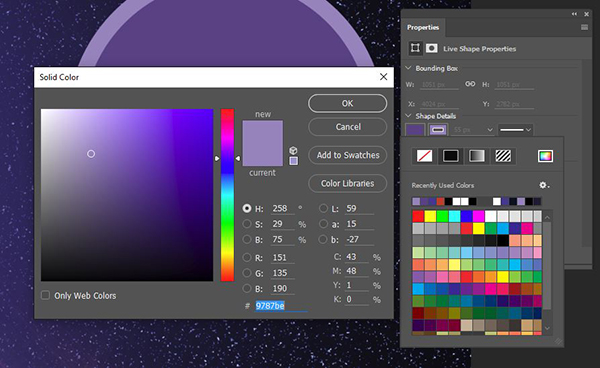
For the Stroke Weight, enter 55 px. Click the drop down menu next to the square icon on the far left and choose the center icon to Center Align the stroke on the path.

Drag the Ellipse layer to the Create a New Layer icon to duplicate it. Then go to Layer > Rasterize Shape. Rename the layer Foldover.
Select your Polygonal Lasso Tool (L or hold down the regular Lasso Tool icon until you see the flyout menu and select Polygonal Lasso Tool).
With this tool, you can easily draw straight lines. Simply click where you want your segments to begin or end. We’re going to draw a triangle at the top right of our badge. I’ll click once at the top left, once at the middle right, once at the bottom right, then again on the first point to close the selection.
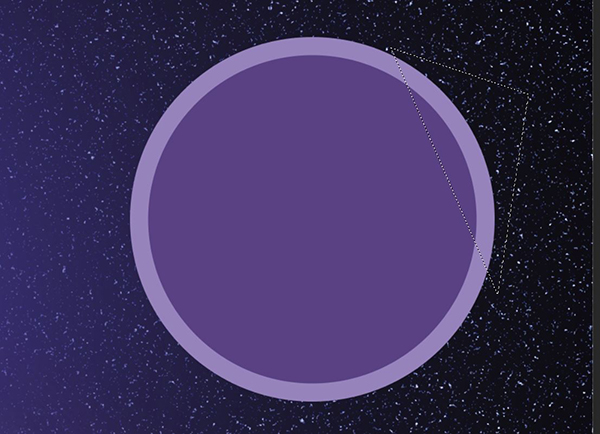
With the selection in place, go to Select > Inverse. Press del.
Click once on the Ellipse layer to make it active. At the bottom of the Layers palette, click the Add Layer Mask icon.
Things won’t look too different just yet, but if you toggle the Ellipse and Foldover layers on and off, you can see that we’ve separated the elliptical shape into two pieces.
Click on the Foreground Color swatch at the bottom of your toolbar and enter RGB values of 189/179/214. Select your Foldover layer. Press shift + opt + del to change the fill color to the new foreground color.

Go to Edit > Free Transform. Hold shift and use the corner handles to rotate the Foldover piece 180 degrees.
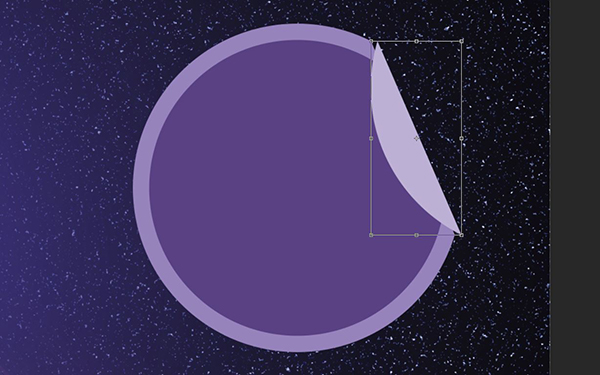
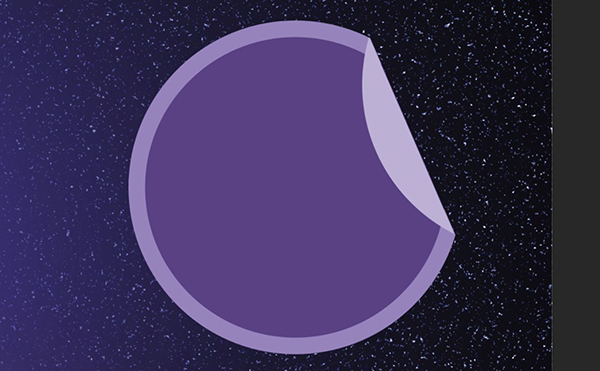
Press enter to complete the transformation, then use the arrow keys on your keyboard to position the piece flush with the cut edge of the elliptical shape.
Select the Type Tool (t). Click once inside the badge area and type:
LA’S #1
RECORD SHOP
2000 – 2016
Select your Move tool. Then open your Character palette and change the font to Geomancy Extra Bold at 28 pt with Tracking at 0. Click the color swatch and change the fill color to White.
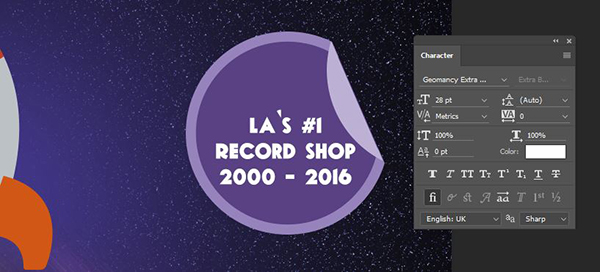
Use your Type Tool to select just the last line, 2000 – 2016. With this line selected, change the font size to 18 pt and the Leading to 35 pt.
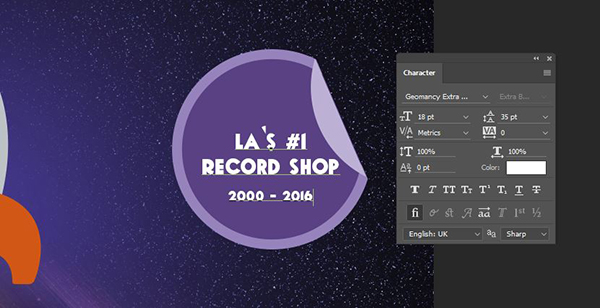
The apostrophe next to LA looks a little crazy, so we’ll calm that down a bit. Use your Type Tool to select just the apostrophe. In your Character palette, set the Baseline Shift to -8 pt. Since that puts us awfully close to the S after the apostrophe, change the Leading to 60.

We’re still pretty far away from the A on the left side of the apostrophe, so select the A using your Type Tool and in the Character palette, change the Leading to -160.

In the Freebies folder, navigate to the Bloomua folder and open BloomuaFuturo_Trophy in Illustrator.
Use the Selection Tool (v) to select the trophy, then press cmd + c to Copy.
Go back to the layout file in Photoshop. Press cmd + v to Paste. In the popup dialog, choose Smart Object and press OK.
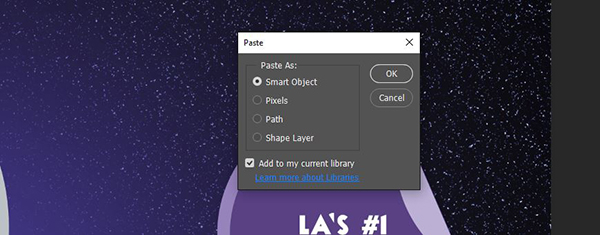
Center above the copy and press Enter to complete.
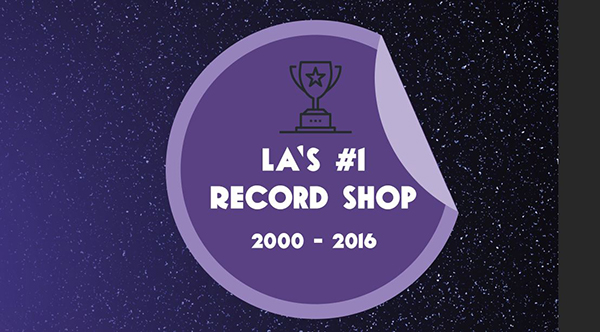
In the Layers palette, click the FX icon and choose Color Overlay. Set the Blend Mode to Normal, Opacity 100%, then click the color swatch and choose White. Press OK.

In your Layers palette, hold shift and select both the trophy layer and the LA’s #1 layer. With both selected, go to Object > Transform > Rotate.
Use the corner handles to rotate both to the right about 15 degrees. Click OK when you’re done. Then use the arrow keys on your keyboard to center everything in the badge.

And we’re done! We have a fun, retro-futuristic record shop identity ready for blast-off.
Remember that whether it’s your outcome for this tutorial or something new you’ve made, we’d love to see your designs on our Facebook page.
Please leave a comment if you have any questions or suggestions. I always look forward to hearing from you!
And there’s still time to check out The Modern Designer’s Bundle: 1000s of Professional Resources to fill your library of resources with a ton of exceptional quality vectors, icons, infographics, mockup templates, proposal documents, resume templates, invoices, textures, backgrounds and more.
Working on this fun tutorial, but stuck on this step:
“In the Layers palette, open the Exhaust folder. Hold cmd + shift and click the thumbnail of each layer inside the Exhaust group to create a selection around the entire exhaust area.
With the selection in place, release the cmd and shift keys, then click once on the 25 layer to make sure it’s the active layer. At the bottom of the Layers palette, click the Add Layer Mask icon.”
Working with cs5, not sure what I am doing wrong. When clicking the 25 layer the selection of the exhaust area disapears and clicking the add layer mask doesn’t do anything then. Anyone able to help me out?
Thanks in advance. Going to turn them into invitations to my sons 6th space birthday party :-)
Hey Danielle,
Thanks for getting in touch and thanks so much for joining in with our tutorial. I’m really sorry to hear you’re having some trouble with this step – fear not, I am on the case!
I’m just going to test this out on my side and I’ve sent you a quick email to get some more information from you and help get you up and running again! I hope it helps, and please don’t hesitate to contact me should you have any other questions. I’m always happy to help!
It’s awesome to hear this design will make an awesome invitation to your son’s birthday party! Rest assured, we’ll have you up and running in no time :)
Hi Ben,
I just send you an email. Problem solved. Thanks.
I tried a work around for this step by saving the 25.tiff with it’s effects as a .jpg and making the layers in the exhaust map as a shape and using the clipping mask function. It worked. Just now I tried to re-do the steps in the tutorial and I found what I did wrong, I didn’t click the thumbnail but the text besides the thumbnail in the layers. Therefor it didn’t work.
Fantastic, thanks for letting me know, Danielle! I’m really pleased to hear everything is working smoothly for you!
If you do have any other questions or need help in any way, please do let me know. I am always happy to help :).
Fantastic tutorial! I learn so much about design, photoshop and illustrator by doing these. I followed along and my poster turned out great. So appreciate this aspect of Design Cuts.
Hey Leann,
Thank you so much for your kind words! It is fantastic to hear that you enjoyed this tutorial and have learned some new skills from it :) I would absolutely love to take a look at your poster design if you ever wanted to share your work?
Thanks again for your kind words, Leann. We really appreciate your support :) If there’s ever anything I can help you with or if you had any suggestions for a future tutorial please do get in touch.
Deze was was heel leuk om te maken ,ik hou van retro,super,super “Thanks”
Hey Monique,
Thank you so much for getting in touch, it’s fantastic to hear you had fun following this tutorial :)
Thanks for your kind words, if you have any suggestions for another retro tutorial please do let me know!
This is so cool & also even helps out to the newbies who are starting Photoshop!
Thank You for Renee & also DC!
I’m really pleased you like this one, Pranaytony! Thank you so much for your kind words :)
Wow! Awesome step-by-step tutorial. Thanks. I will try it on my end and see how if I can get close to your great design. :)
Hey Ivailo,
Thank you for leaving us such an awesome comment!
I am so happy that you like the look of this step by step guide :)
We would absolutely love to see how you get on with your Record Store Poster when your done with it Ivailo.
Good luck and happy designing!
Thanks, Sarah!