
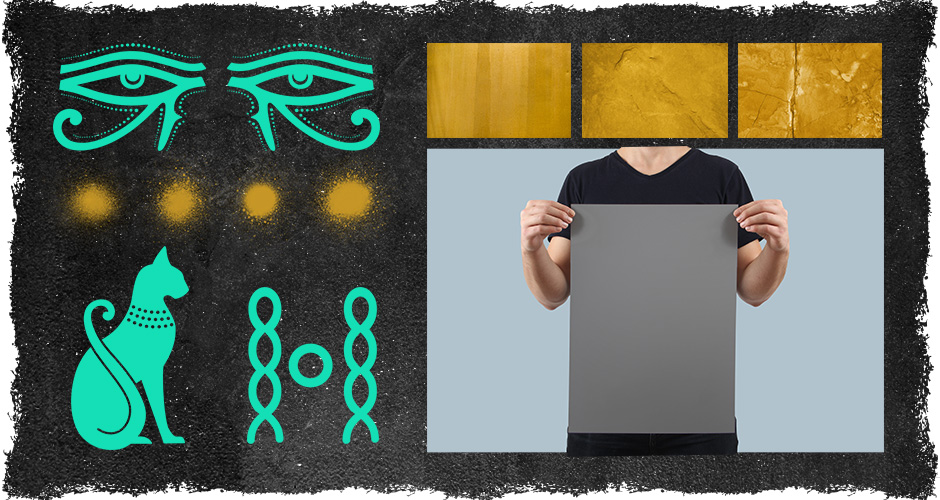
In this tutorial I will be showing you how to design an Egyptian themed gig poster with a street art style in Photoshop. We will using a handful of Egyptian Hieroglyphs from Skybox Creative along with a cool vector screen-print texture from The Artifex Forge and some fun spray splashes from Pixel Buddha’s Spray Art Painter’s Toolkit. All of these awesome resources and more are now available in The Versatile, Artistic Design Bundle. If you are ready to get rocking then let’s fire up Photoshop and get started!
HAVE YOU SEEN OUR YOUTUBE CHANNEL?
Watch the video tutorial below and subscribe to our YouTube channel for regular updates direct to your inbox.
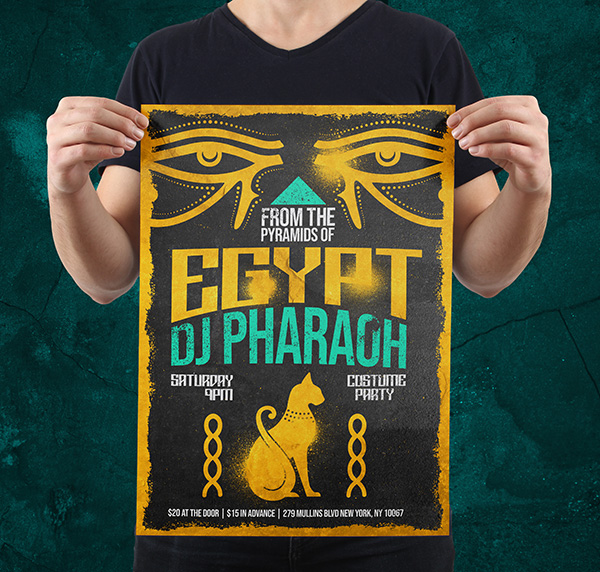
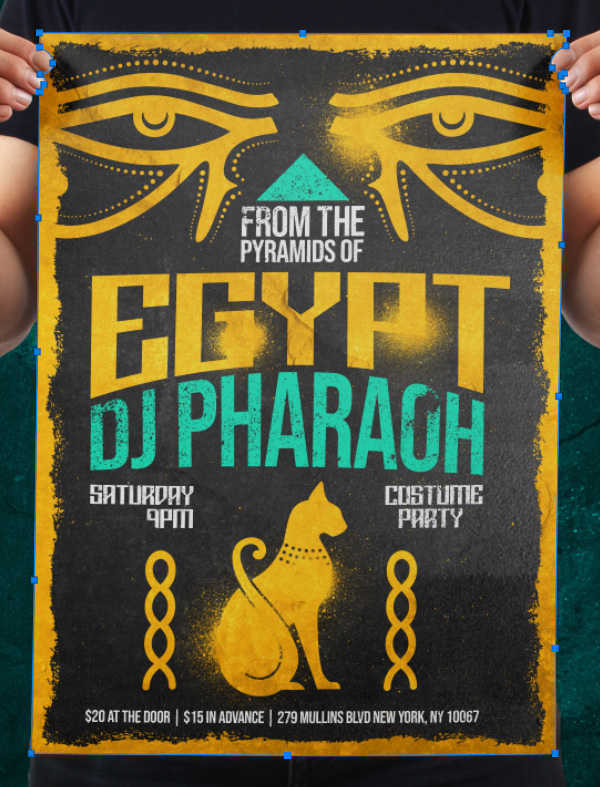
Here’s a look at what we’ll be creating:
Follow along with this tutorial: Download the freebie files
This freebie pack is just a taste of what you can expect to find in the The Versatile, Artistic Design Bundle for just $29 (that’s 99% off). This is our most varied and versatile artistic design bundle yet!
Step 1: Egyptian Gig Poster Design
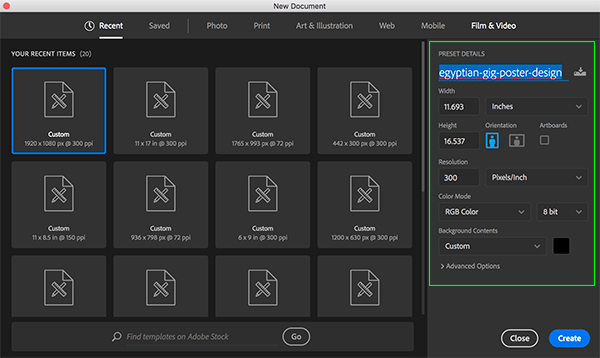
Let’s begin by opening Photoshop and creating a New Document. Make the document ’11.693”x16.537”’ with a ‘Resolution’ of ‘300’, ‘Color Mode’ of ‘RGB’, and the ‘Background Contents’ set to ‘Black’ and then give your file a name – here I am naming the file ‘egyptian-gig-poster-design’ before we go and click ‘Create’ from the lower right corner. The reason for the random size will be revealed later in the tutorial!
Once you have created your new document double click on the ‘Background’ layer with the small lock icon next to it.
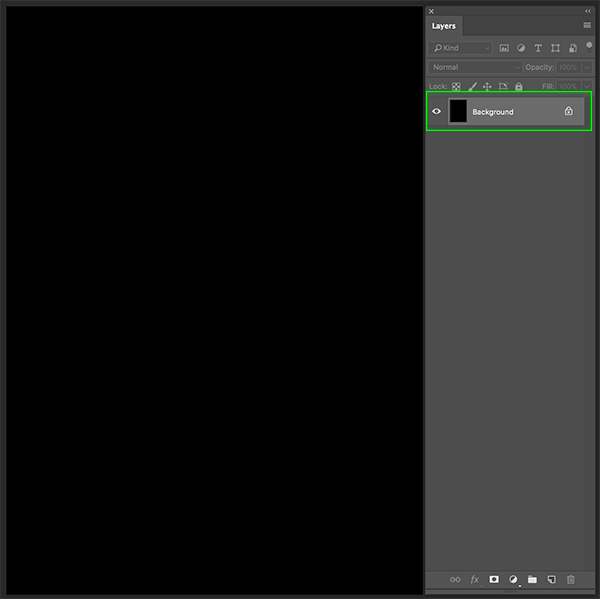
When the ‘New Layer’ dialog box appears, let’s enter ‘BACKGROUND’ for the new name and then click ‘OK’ or press ‘Return’ on the keyboard.
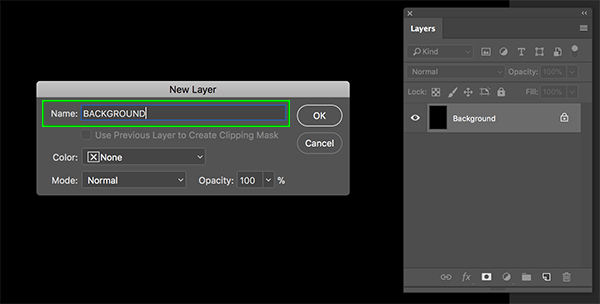
You will notice that now we have gotten rid of the lock next to the layer and the new name is appearing in the Layers Palette.

Step 2: First Egyptian Texture
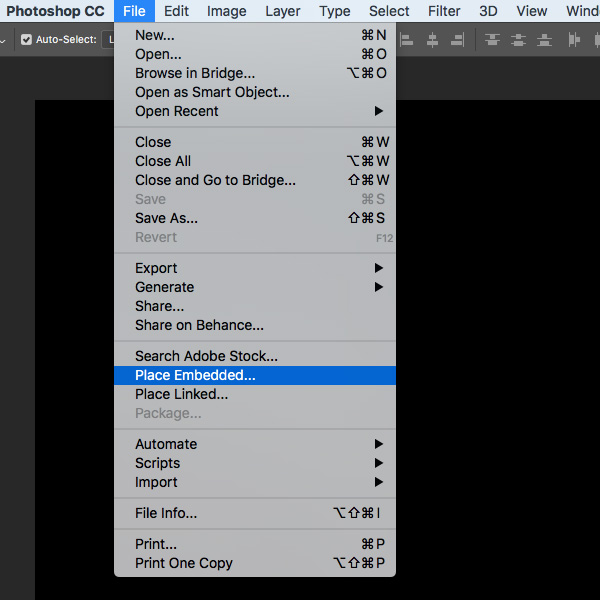
Now let’s go to the File menu and choose ‘Place Embedded…’ as shown here:
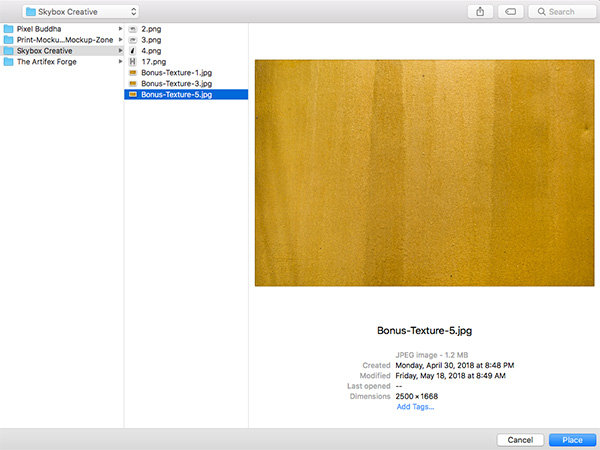
Navigate to the ‘Bonus-Texture-5.jpg’ image from Skybox Creative in the freebies folder for the tutorial and then choose ‘Place’ from the lower right corner to import the image.
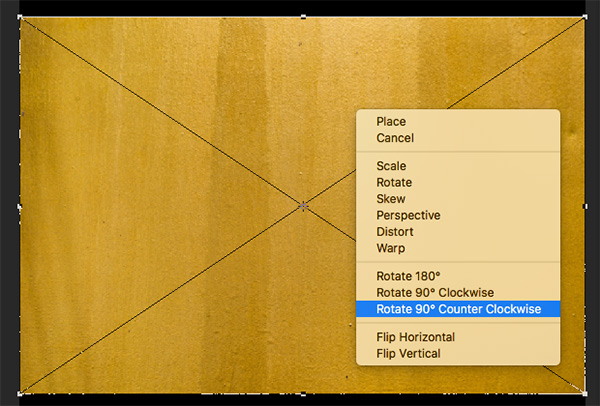
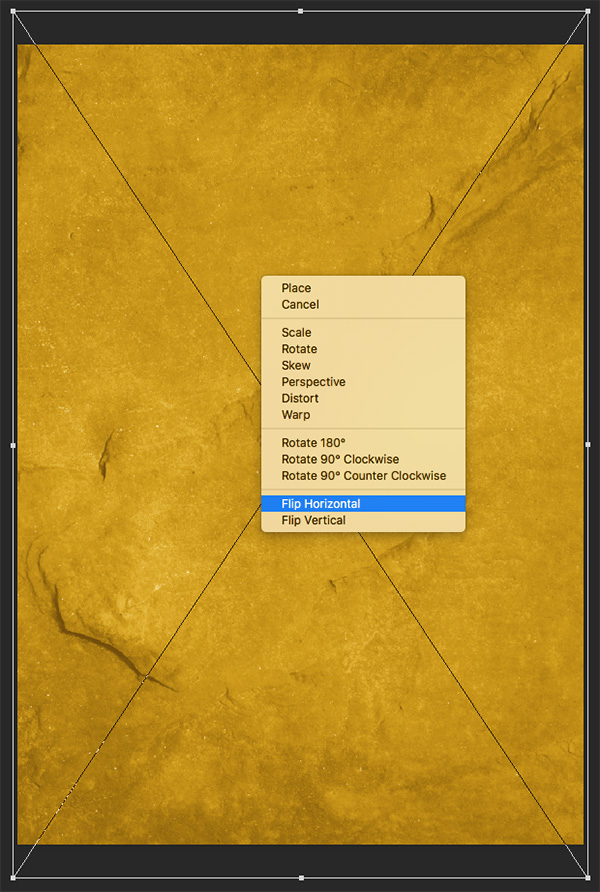
Once the image is brought in, it will automatically be a Smart Object with the name of the file. Before we press ‘Return’ to place the image, let’s go ahead and hold the Control key before clicking on the texture to reveal a dropdown menu. From the menu, choose ‘Rotate 90º Counter Clockwise’ as shown in the image below:
Now that we have rotated the texture, hold the Alt/Option+Shift keys and drag outwards to scale it up until it fills the entire canvas. As you can see, the texture image will have a vertical orientation rather than horizontal. Before committing to these changes, let’s hold the Control key and click again, this time choosing ‘Flip Horizontal’ so we can flip it the opposite way.
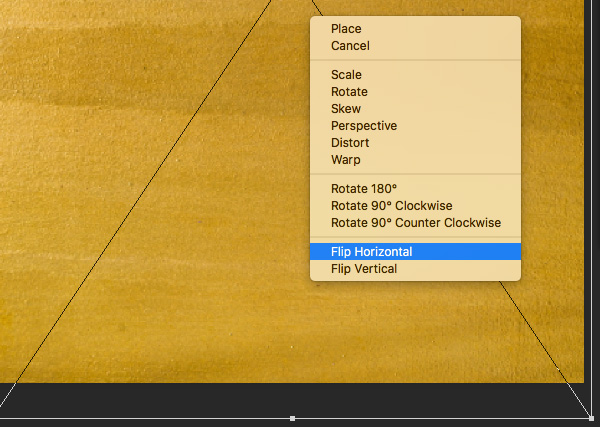
And we will do this one more time and choose ‘Flip Vertical’ just so you can see a few more of the options we have here to change our textures position.
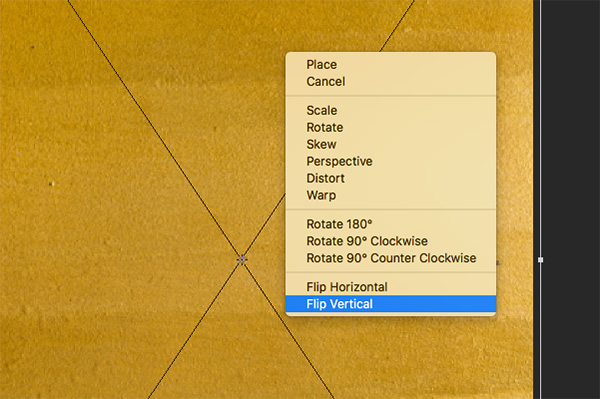
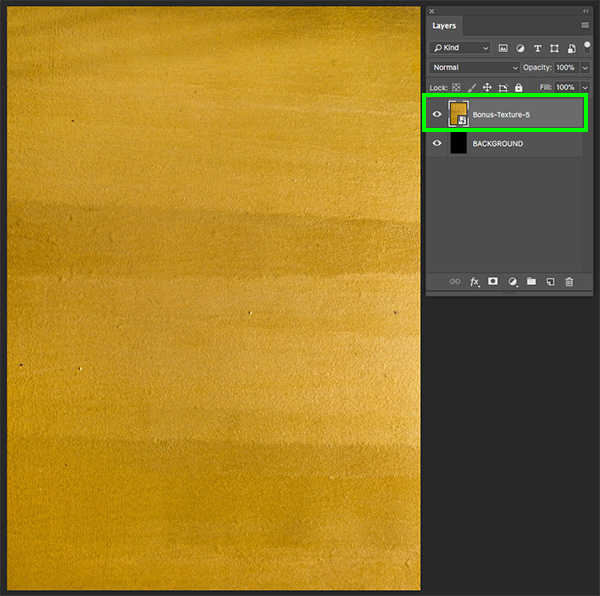
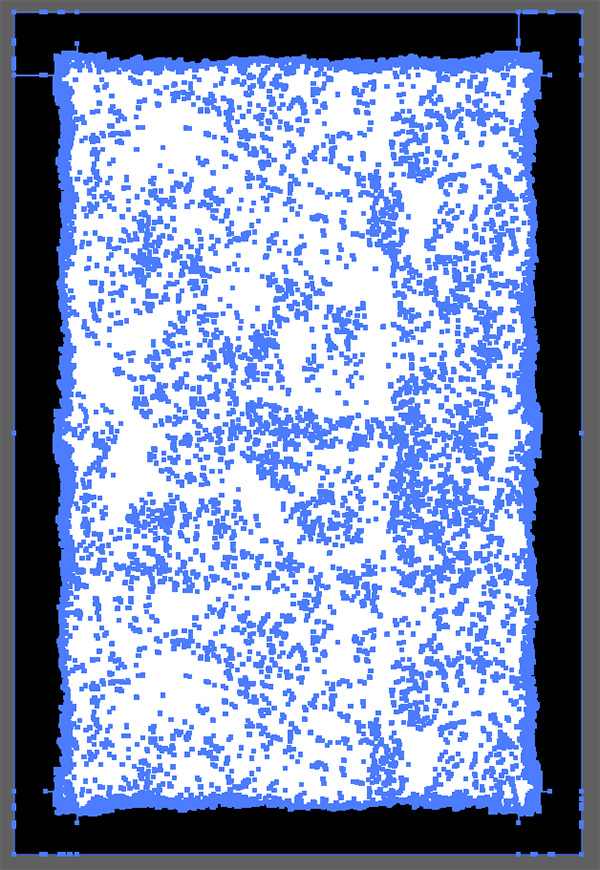
Once you have applied these transformations, move the texture up a bit and then press ‘Return’ to apply the changes. Your texture should now look something like this:
Step 3: Second Egyptian Texture
Now let’s go to the File menu and choose ‘Place Embedded…’ once again.

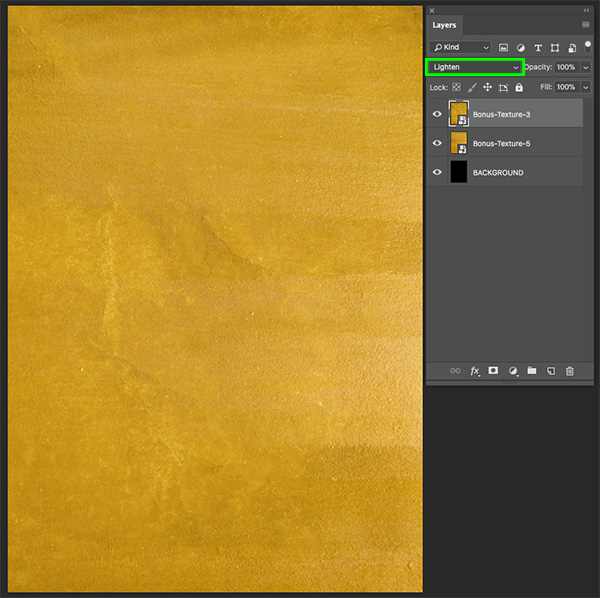
Navigate to the ‘Bonus-Texture-3.jpg’ image from Skybox Creative in the freebies folder and choose ‘Place’ to import this texture.

After importing the texture, hold the Control key and click anywhere inside of the bounding box and choose ‘Rotate 90º Counter Clockwise’ like we did with our first texture.
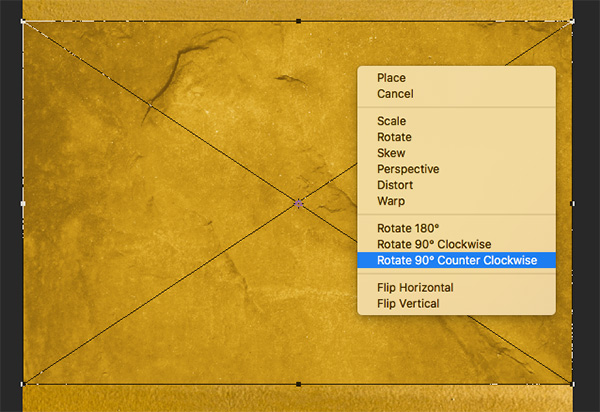
Next, hold the Alt/Option+Shift keys and drag outwards from any of the four corners to scale this texture up until it fills the entire canvas, and then hold the Control key once again before clicking on the image. Once the dropdown menu appears, choose ‘Flip Horizontal’ as shown below:
Now that we have transformed the second texture, let’s change the Blend Mode from ‘Normal’ to ‘Lighten’ to create a nice blended effect. Your textures should now look like the image shown here:
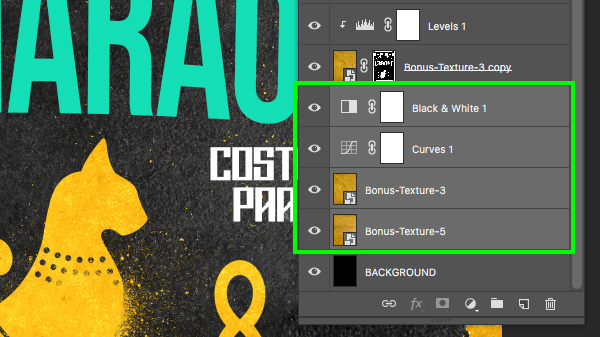
Step 4: First Adjustment Layer
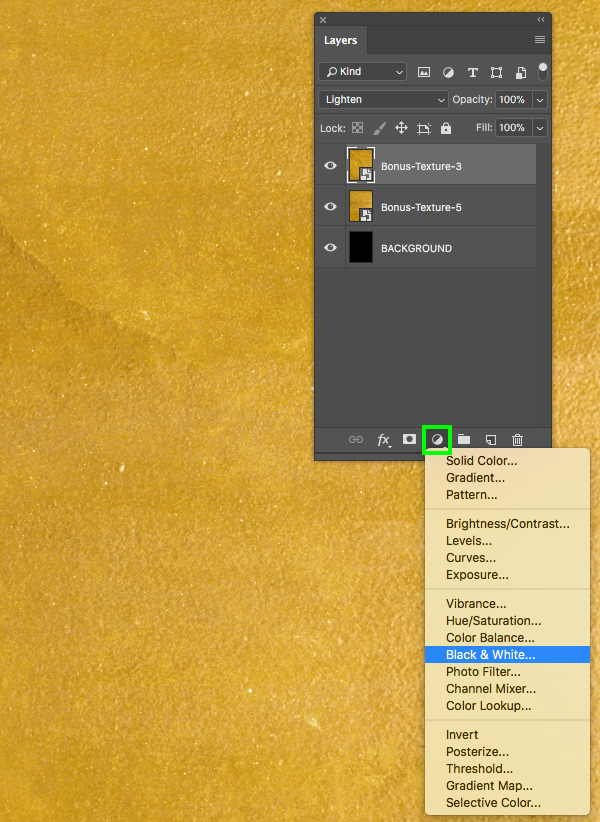
With the top texture Smart Object layer selected, click on the Adjustment Layer icon at the bottom of the Layers Palette and choose ‘Black & White…’ from the menu that appears.
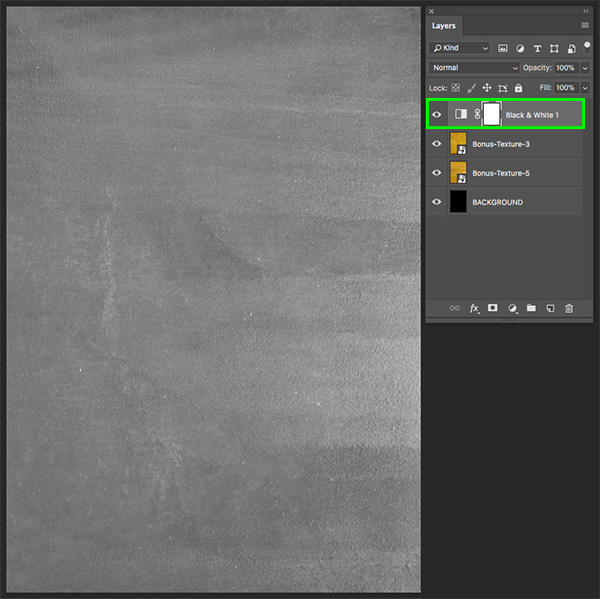
Now you should see a Black & White Adjustment Layer at the top of your palette, making all of the layers below black and white.
Step 5: Second Adjustment Layer
With the Black & White Adjustment Layer selected, click on the Adjustment Layer icon once again, and this time choose ‘Curves…’ from the list.

Once the Curves Adjustment Layer has been added, press Command/Ctrl and the left bracket key to move the layer down one position so that it’s below the Black & White Adjustment Layer. You could also do this by clicking and dragging the layer down one position. After that, go to the Properties panel and add a single point in the upper left corner of the bottom square in the grid. To be more specific, the ‘Input’ setting for the point should be set to ‘190’ and the ‘Output’ should be set to ’61’ as shown in the image below:
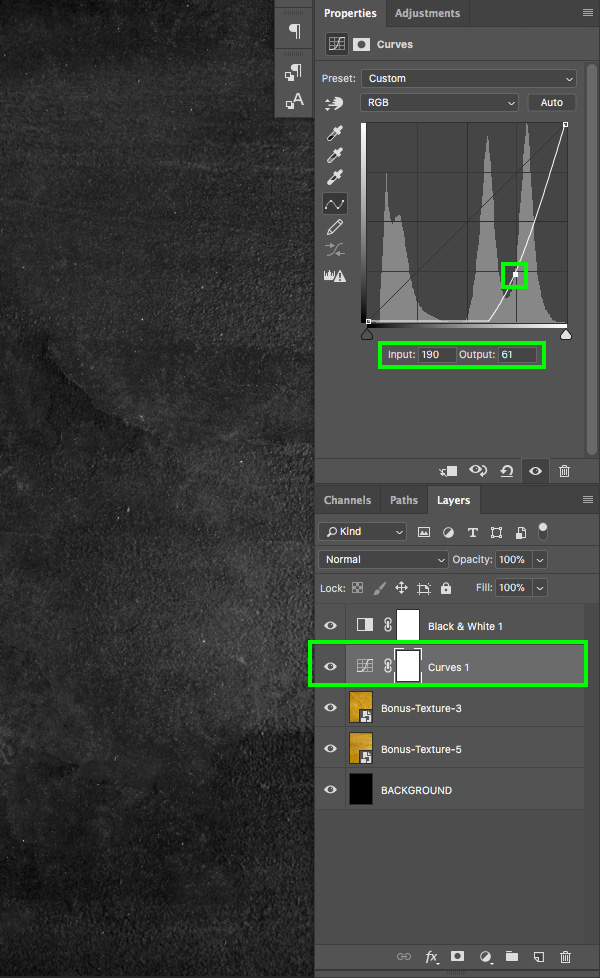
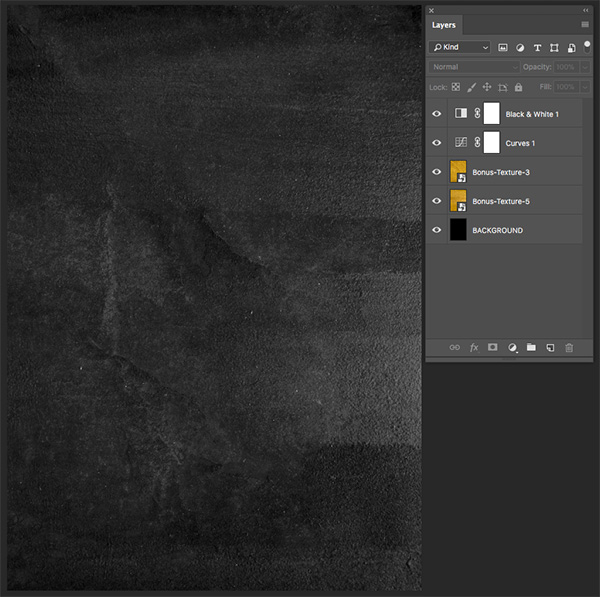
We have now desaturated the textures and boosted the contrast pretty significantly. Your image should now look like this:
Step 6: Egyptian Text
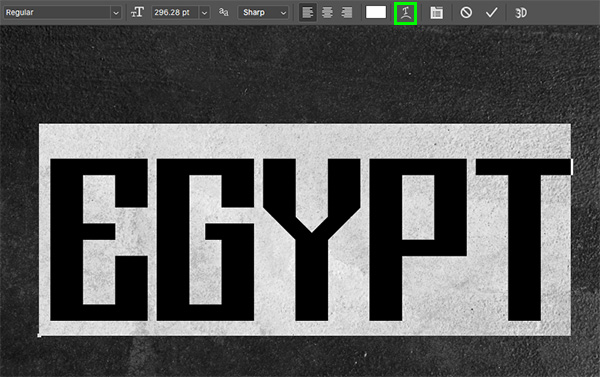
Next, create a new layer at the top of the Layers Palette by pressing Command/Ctrl+Alt/Option+Shift+N on the keyboard. From here, press ’T’ to get the Type Tool and click your cursor on the canvas before typing out the word ‘EGYPT’ in all caps. Open your Character Panel by going to the Window menu and choosing ‘Character’ from the menu. For the typeface I am using a free font called ‘RigorMortis’ that can be downloaded here from DaFont.com. Let’s make the text solid white and then change the size to about ’296.28 pt’ and set the tracking amount to ‘-60’ as shown here:

After changing the settings of the text, use the Type Tool (T) to click inside of the text box two or three times until the entire word is highlighted. From here, click on the ‘Create warped text’ icon from the top toolbar, indicated by the green highlight box in the image below:
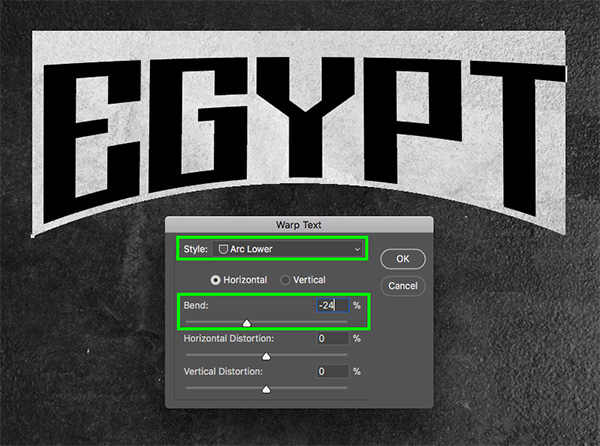
Once the dialog box appears, change the ‘Style’ to ‘Arc Lower’ and then change the ‘Bend’ value to ‘-24’ before pressing ‘Return’ or clicking ‘OK’ to apply the changes.
Step 7: DJ Pharaoh
Next, create another new layer at the top of the Layers Palette by pressing Command/Ctrl+Alt/Option+Shift+N on the keyboard. From here, press ’T’ to get the Type Tool and click your cursor on the canvas and type out ‘DJ PHARAOH’ in all caps. Open your Character Panel again if it isn’t open and change the typeface to another free font called ‘Bebas Neue’ that can be downloaded here from DaFont.com. Set the size of your text to ’185 pt’ and the tracking to ‘-20’. Once you have done that, click on the color swatch so we can modify the fill.
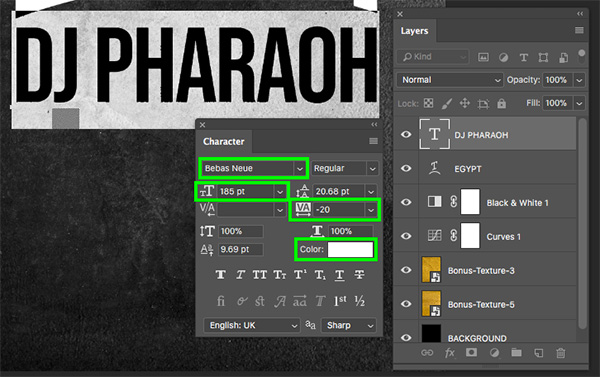
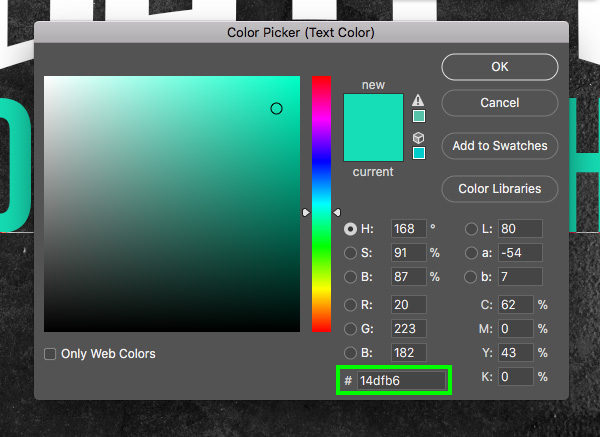
When the ‘Color Picker (Text Color)’ dialog box appears, change the hex value to – ‘#14DFB6’ and then press ‘OK’ to apply the change.
Highlight the text and then click on the ‘Create warped text’ icon in the top toolbar once again.
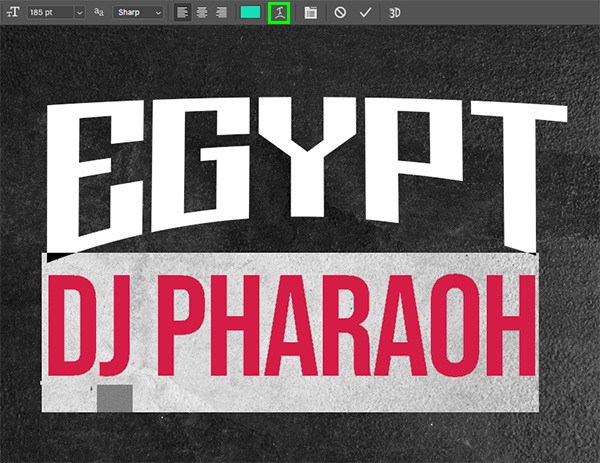
For the settings here, let’s make the ‘Style’ set to ‘Arc Upper’ and then change the ‘Bend’ value to ’28’ before pressing ‘OK’ to apply the changes.

Step 8: Tweaking the Text
You may notice that after we warp our ‘DJ PHARAOH’ text that the left side seems a little bit higher. We want the text to be centered beneath the word ‘EGYPT’ but we also want the amount of space to be consistent, and the arc to be more uniform. To fix this, let’s first select the text layer and then press Command/Ctrl+T to initiate a Free Transform. From here, hold the Control key and drag upwards from the middle, bottom handle of the text box to squish the text and make it a bit shorter.
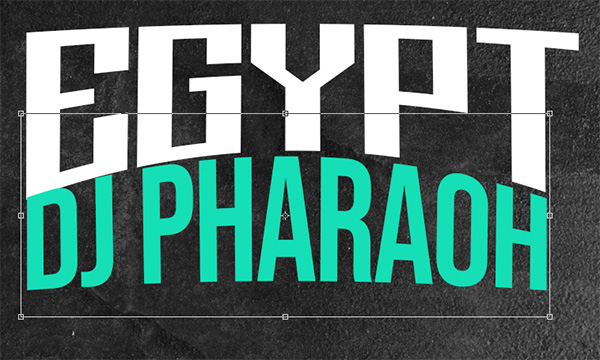
Click inside of the text box two or three times to highlight the text again, and then return to the ‘Create warped text’ icon so we can modify a few of the settings. What we want to do now is change the ‘Bend’ to ‘+32’ and then make the ‘Horizontal Distortion’ set to ‘+7’ before clicking ‘OK’ to apply the new settings.
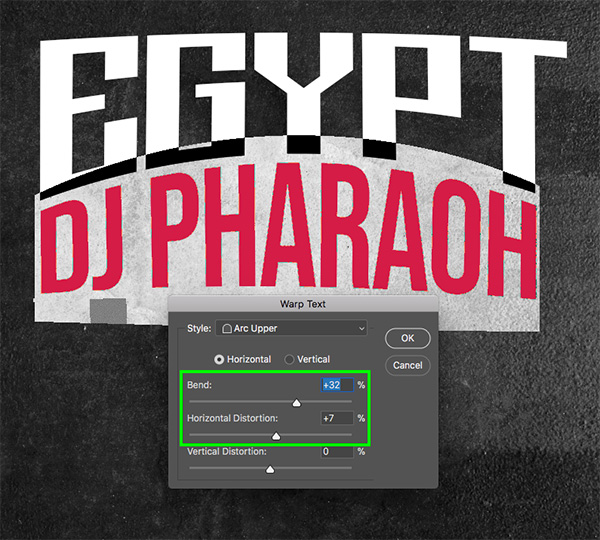
Now your text should fit nicely beneath the ‘EGYPT’ text as shown below:
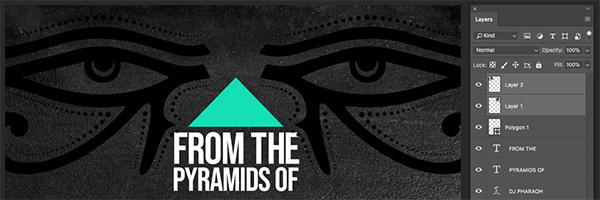
Step 9: From the Pyramids
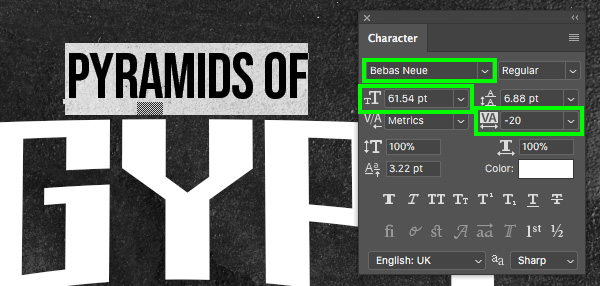
Let’s add a new layer above our previous text layers and then switch back to the Type Tool (T). Type out the words ‘PYRAMIDS OF’ in all caps using the ‘Bebas Neue’ typeface once again. This time, change the size to ’61.54 pt’ and the tracking to ‘-20’ before placing the text above the letter ‘Y’ in the word ‘EGYPT’ so that it appears centered.
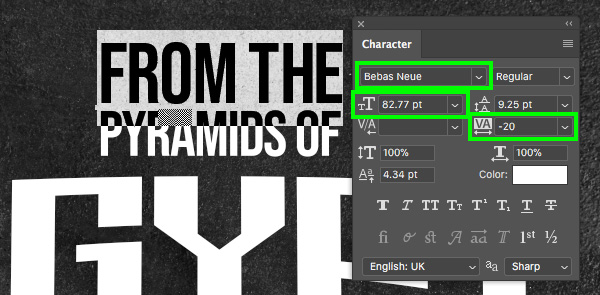
Select the layer and press Command/Ctrl+J to duplicate it, and then press ‘V’ to switch to the Move Tool. From here, hold the Shift key and the up arrow until the duplicate text layer is sitting above the original layer. Now we will use the Type Tool (T) to click inside of the text box and change it to say ‘FROM THE’. Here we will use the same typeface with the same color and tracking, but the size should be ’82.77 pt’ so that we can make it justified above the line of text below.
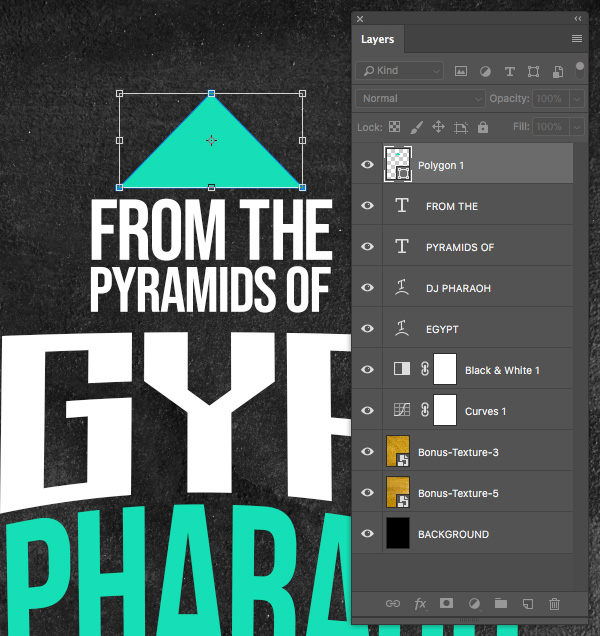
Step 10: Polygons
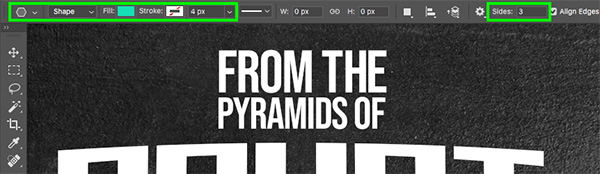
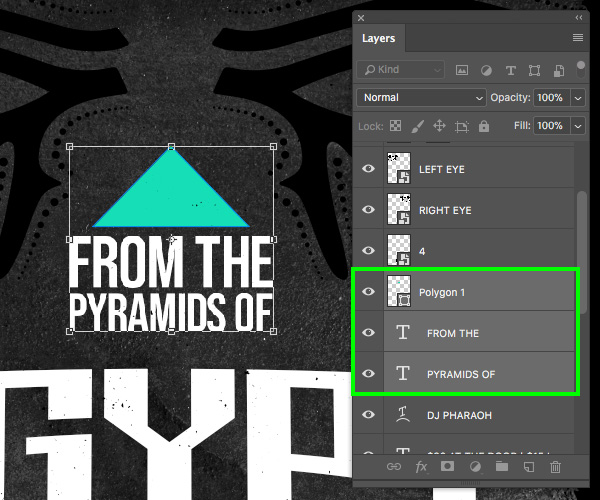
Next, hold the Shift key and tap the letter ‘U’ on the keyboard to scroll through the shape tools until you have the Polygon tool selected. From here, check the settings in the top toolbar and change the number of sides to ‘3’. After that, make sure that the ‘Stroke’ is set to none, and then click on the ‘Fill’ color swatch.
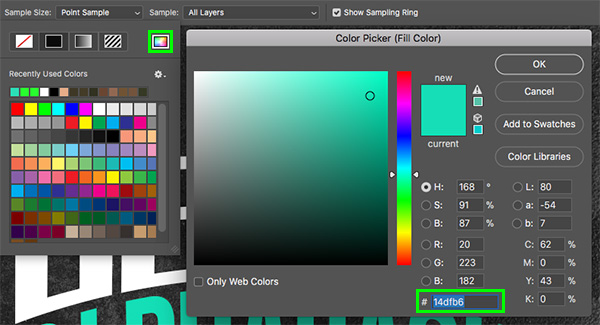
Once the menu expands, click on the small color spectrum icon in the upper right corner of the dialog box. You will now see the ‘Color Picker (Fill Color)’ dialog box where we can enter the hex value – ‘#14DFB6’ and then press ‘OK’ to apply the changes.
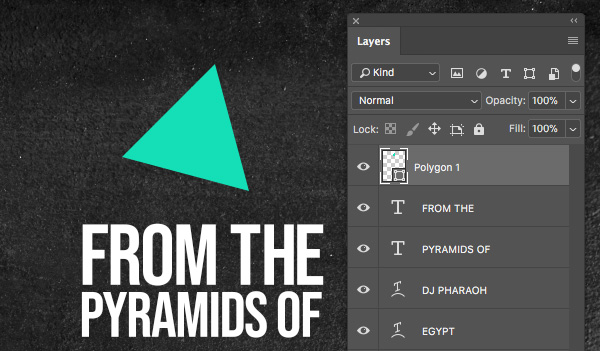
From here simply hold the Shift key and drag out your shape. You should now see the aqua colored triangle appear on the canvas although it may look a little bit tilted like the image shown below:
After creating the triangle shape, press Command/Ctrl+T to initiate a Free Transform, and then rotate the shape counter clockwise by moving your cursor over any of the four corners of the bounding box and moving your mouse towards the left until the bottom edge is straight like this:
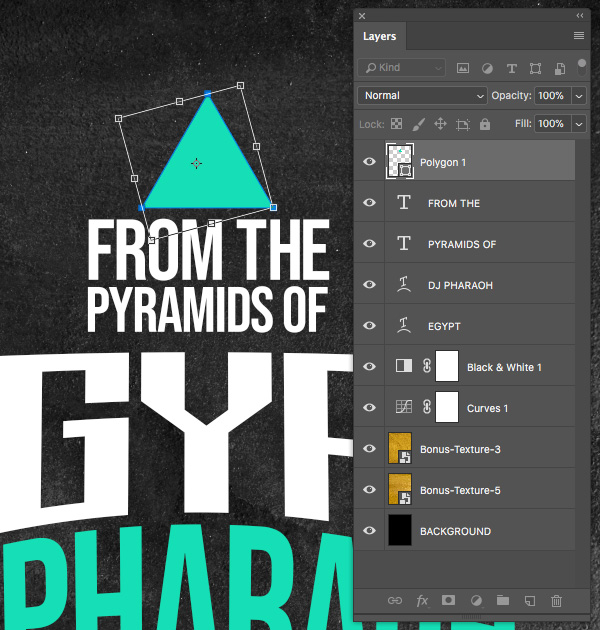
Once the bottom edge of the triangle is going straight across the text, press ‘Return’ to apply the changes. From here, press Command/Ctrl+T once again, and this time move your cursor over the left or right handle around the bounding box and drag outwards while holding the Alt/Option key to make the triangle wider until it looks like this:
Step 11: Eyes of Egyptians
Go to the File menu and choose ‘Open…’ before navigating to the freebies folder for the tutorial. Once inside, locate the Skybox Creative assets and choose ‘2.png’ and then while holding the Shift key press the down arrow to also select ‘3.png’ just below it. Once both of these images have been selected, press the ‘Return’ key or click ‘Open’ from the bottom right corner.

After opening both of these images, place them next to each other, or on top of each other, just beside your main document.
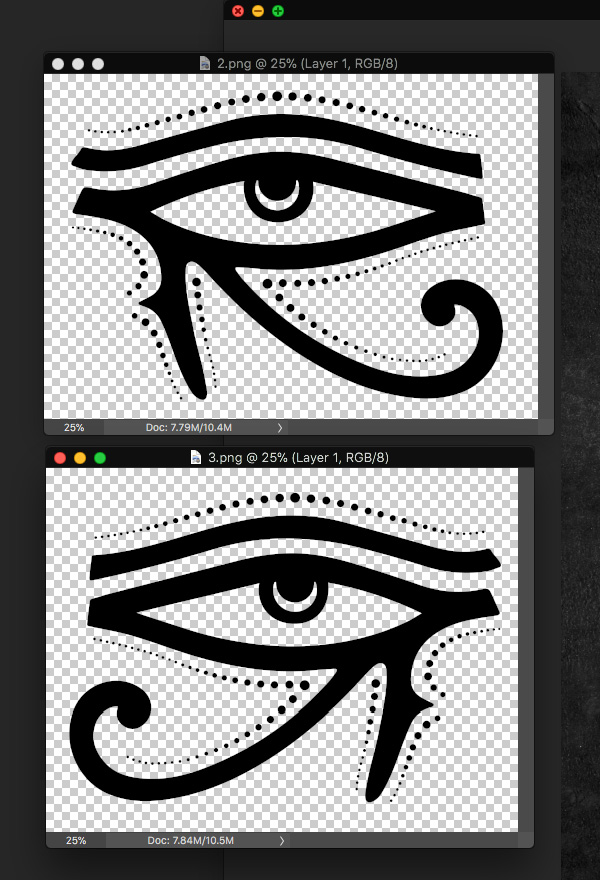
Select the first eye, and then hold the Shift key and drag it into your working document. Do the same for the second eye and you should then have both of them in your document one on top of the other as shown below:
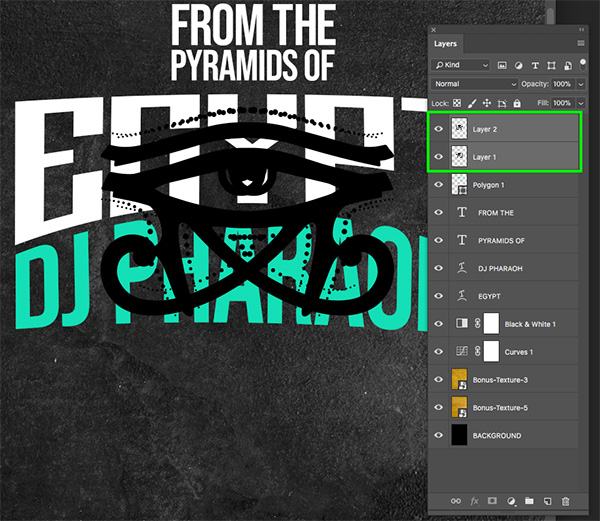
Move both of the eyes to the top of your Layers Palette and place the left eye over towards the left of center, and the right eye over towards the right side so it looks like this:
Step 12: Spacing the Eyes
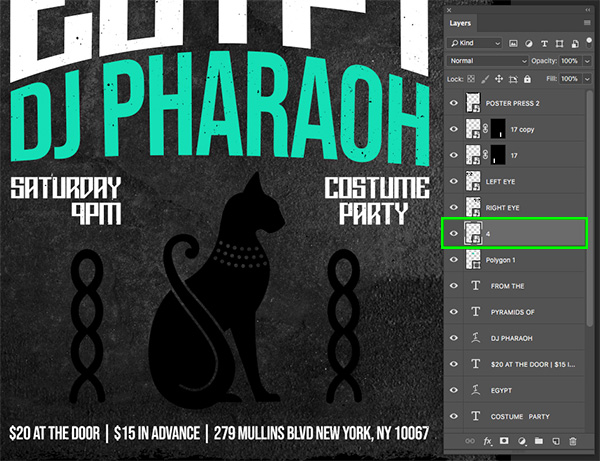
Since the eyes are pretty close to the top of the canvas, let’s move everything else down to give it a bit of space. Select the top layer, hold the Shift key, and then click on the ‘EGYPT’ text layer. From here, hold the Shift key and tap all of these layers down a few times. After that, select only the eyes and move them up a few times to give the text some breathing room.

Once you have placed the eyes and are happy with the size and positioning, hold the Control key and click on the first eye in the Layers Palette before choosing ‘Convert to Smart Object’. After that, double click the layer name to change it to either ‘LEFT EYE’ or ‘RIGHT EYE’ and then repeat for the second.

Step 13: Egyptian Cat
Return to the File menu and choose ‘Place Embedded…’ from the list.
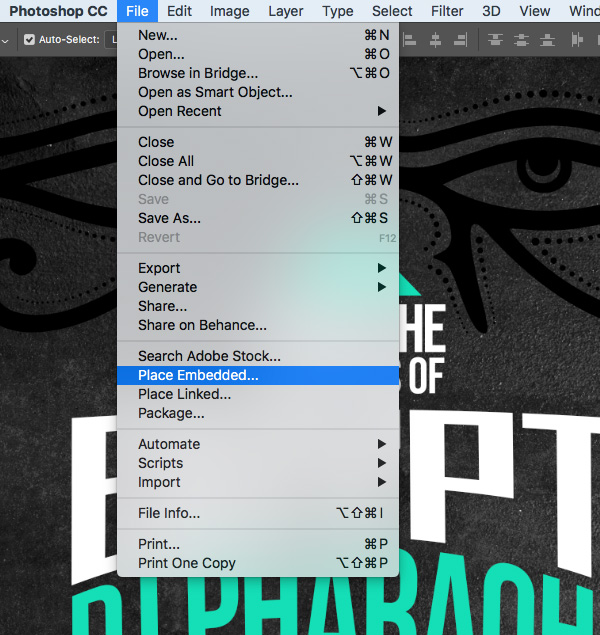
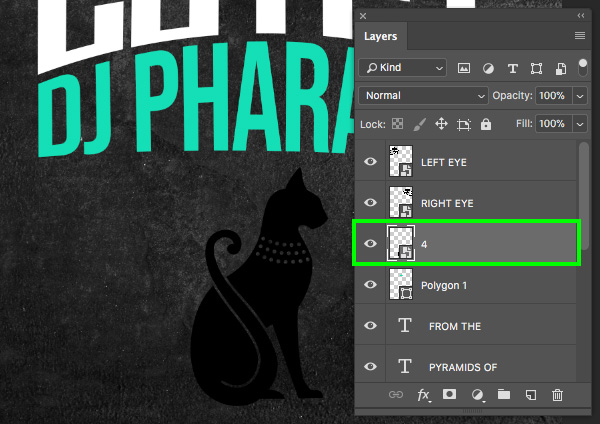
Locate the ‘4.png’ image inside of the Skybox Creative folder with the other freebies and then choose ‘Place’ from the bottom right corner of the dialog box.
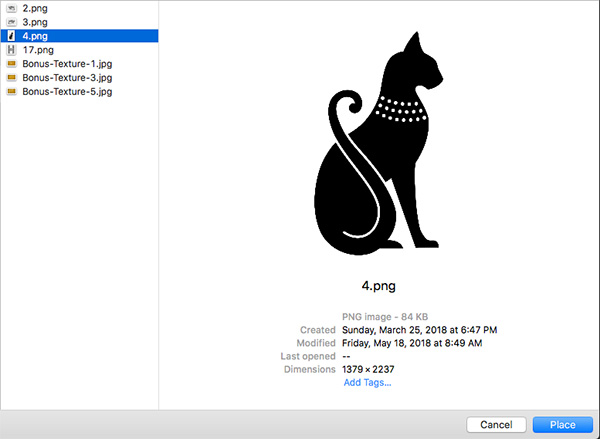
Place the cat vector below the text and use the image below as a guide for the size and placement.
Step 14: Ancient Hieroglyphs
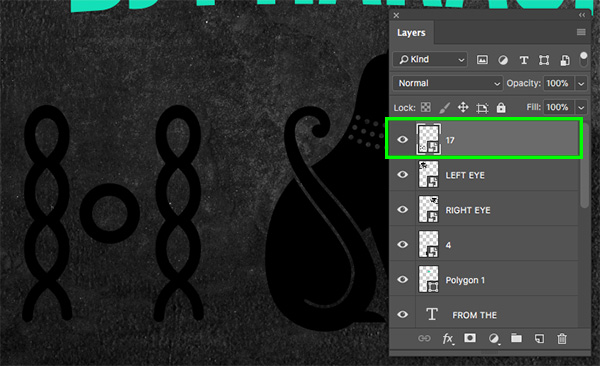
Return to the File menu and choose ‘Place Embedded…’ from the list again. This time locate the ’17.png’ image inside of the Skybox Creative folder and then choose ‘Place’ from the bottom right corner of the dialog box.
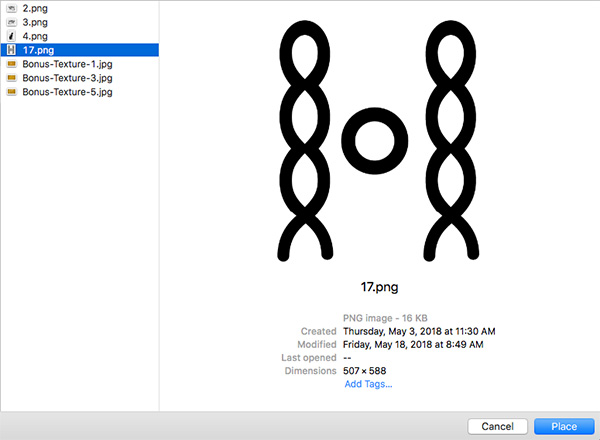
Scale the image accordingly and place it to the left of the cat as shown here:
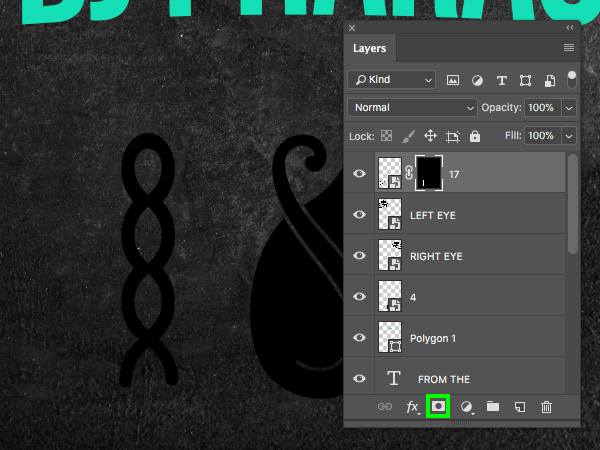
Press ‘M’ to switch to the Marquee Tool and then click and drag out a rectangle around the right column of the Smart Object in the workspace like this:

After making your selection, click on the ‘Add layer mask’ icon at the bottom of the Layers Palette to leave only the right column we selected visible.
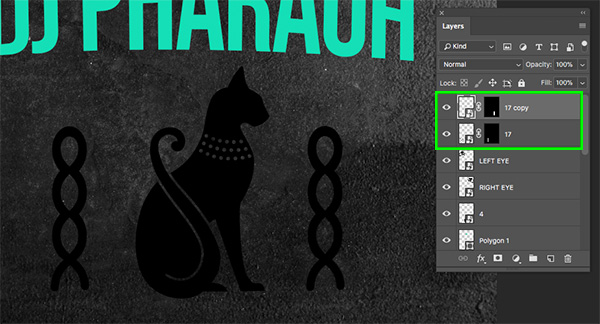
Now that we’ve masked our Smart Object layer, select the layer and press Command/Ctrl+J to duplicate it. From here, hold the Shift key and drag the copy to the opposite side of the cat as shown below:
Step 15: Poster Press
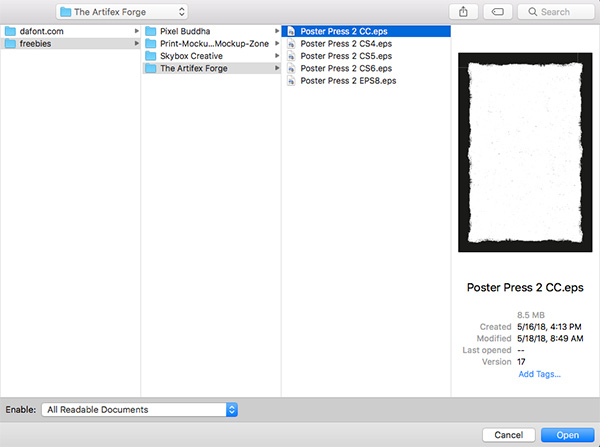
Next, let’s open Adobe Illustrator and then open the ‘Poster Press 2 xx.eps’ file from Artifex Forge inside of the freebies folder for this tutorial. You will notice that inside of the folder there are several versions of the file so choose the version that corresponds with your version of Illustrator.
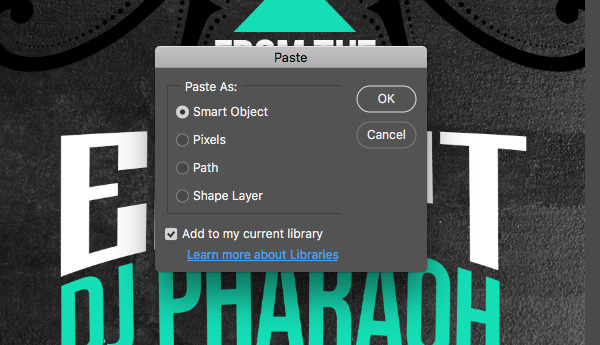
Once the file is open, press Command/Ctrl+A to Select All and then copy it by pressing Command/Ctrl+C on the keyboard.
Return to Photoshop and press Command/Ctrl+V to paste the grunge border and choose ‘Paste As: Smart Object’ before pressing ‘OK’ to proceed.
Hold the Alt/Option+Shift keys and drag outwards from any of the four corners of the bounding box to scale it up until there is only a thin portion of the border along the top and the bottom like this:
Before we commit to the changes, let’s move our cursor over either the left or right handles of the bounding box and drag outwards while holding only the Alt/Option key to scale it out to both sides evenly. The goal here is to leave an equal amount of the border showing on all four sides so you end up with something like this:
Step 16: Send the Deets
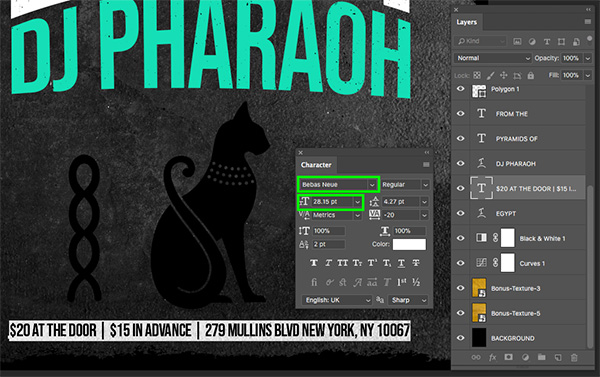
Create a new layer and switch to your Type Tool (T). Type out ‘$20 AT THE DOOR | $15 IN ADVANCE | 279 MULLINS BLVD NEW YORK, NY 10067’ using the Bebas Neue typeface. Let’s change the size to about ’28.15’ with a solid white fill and place it centered along the bottom of the image as shown below:
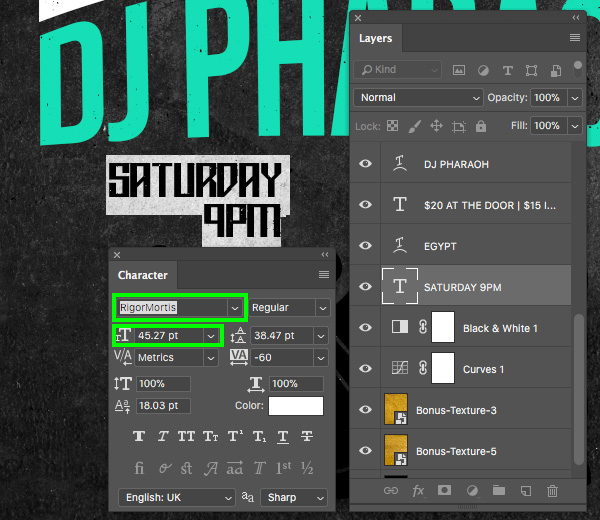
Make another new text layer and this time use the RigorMortis typeface at ’45.27 pt’ size to type out ‘SATURDAY’ on one line, and then ‘9PM’ on the second line. For this we will still want to have a solid white fill color and we also want it to be right justified. To do this, simply click inside of the text box and highlight both lines of text, and then press Command/Ctrl+Shift+R on the keyboard. Place this text below the ‘DJ PHARAOH’ copy as shown here:
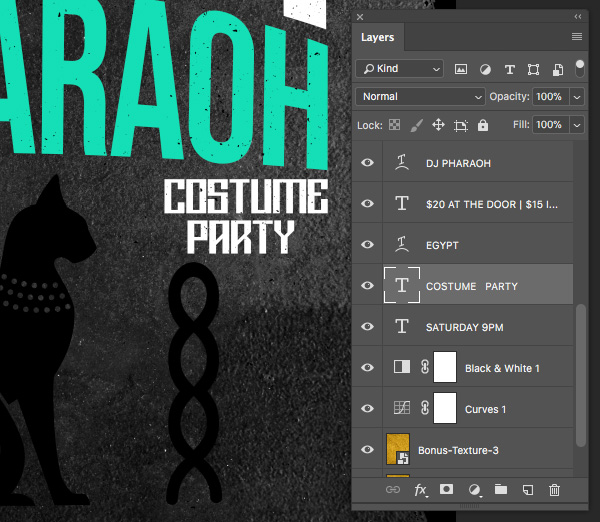
Press Command/Ctrl+J to duplicate the layer and then press Command/Ctrl+T to do a Free Transform. Hold the Shift key and slide this copy over to the right side and then press ‘Return’ to place it. Click inside of the text box and highlight both lines of text before pressing Command/Ctrl+Shift+L on the keyboard to make this text left justified. From here we can change it to say ‘COSTUME’ on the first line, and then ‘PARTY’ on the second. Place your text cursor just before the word ‘PARTY’ and press the space bar a few times just to indent the text a bit as shown below:
Step 17: Room to Breathe
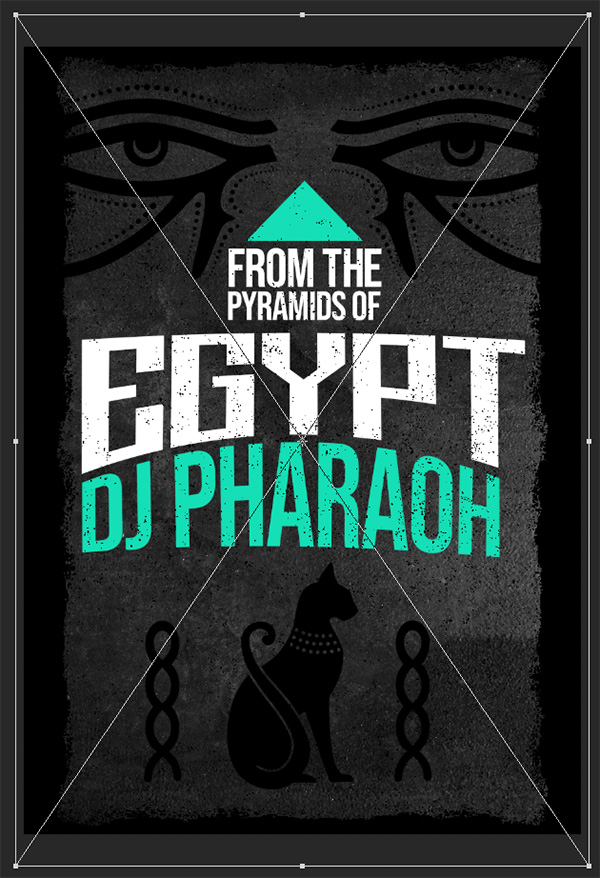
Now that we have most of our elements in place we will need to adjust the spacing a bit further. First, select the ‘Polygon 1’ layer which is our aqua colored triangle / pyramid shape. After that, hold the Shift key and select the two layers of text below so all three layers are selected at the same time. Next, hold the Alt/Option+Shift keys and drag inwards from any of the four corners of the bounding box to scale the three layers down together. Once you have done that, press ‘Return’ to apply the transformation and then tap the layers up a few times.
Select the ‘DJ PHARAOH’ text, hold the Command/Ctrl key and then click on the ‘EGYPT’ text along with both of the white text layers below it. Once these four layers are selected, tap the up arrow several times to move these four layers up closer to the blue pyramid above.

Now we have given a bit more space to the elements place below our text. From here, select the ‘4’ Smart Object and press Command/Ctrl+T to do a Free Transform. Hold the Shift key and drag outwards from the upper left or upper right corner of the bounding box to scale it up and recenter it below the text.
Step 18: Spray Paint
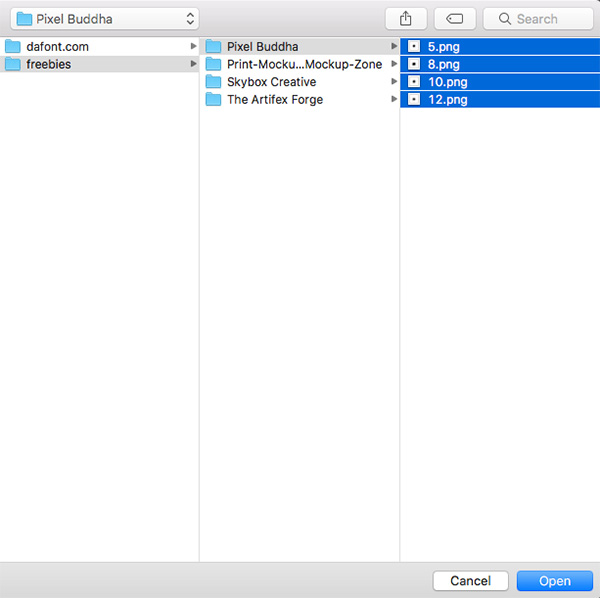
Next, let’s go to the File menu and choose ‘Open…’ and navigate to the Pixel Buddha subfolder in the freebies for this tutorial. Select the first png file in the folder, and then hold the Shift key and select the last image so all four png files are selected before choosing ‘Open’ from the lower right corner of the dialog box.
Place the four images next to each other alongside your main document.
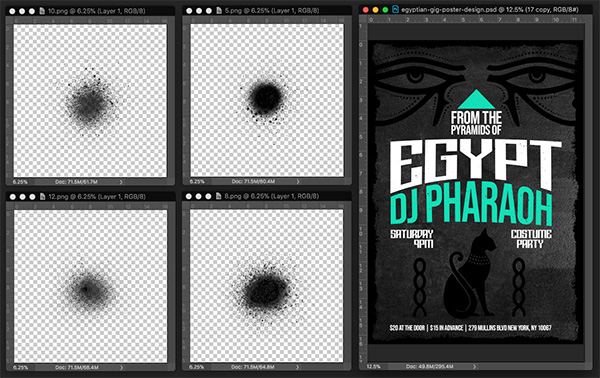
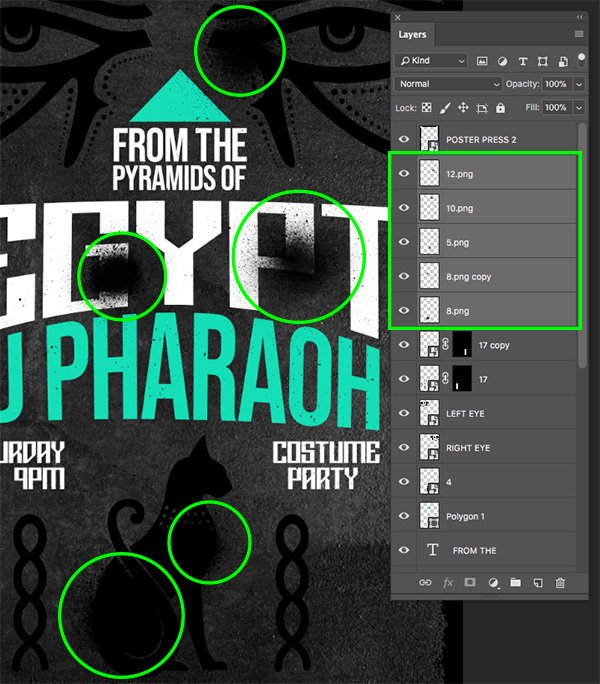
From here we will begin clicking and dragging each of the four spray paint splatters into our document and using the Free Transform (Command/Ctrl+T) to scale them down by dragging inwards from any of the four corners of the bounding box while holding the Shift key. Feel free to experiment with the size and placement of each of these splatters. You may even wish to duplicate one or two of them, rotate them, and just have some fun placing them throughout the design on top of all of the other layers. The image below shows where I’ve placed each of mine.
Step 19: Prepping
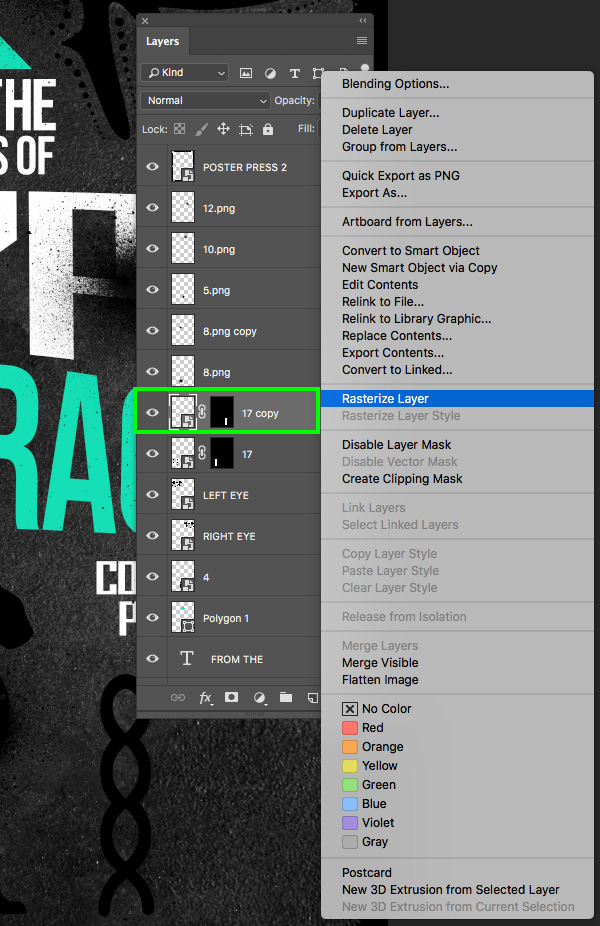
Before we move on we need to make a few quick adjustments. Select the ’17.png’ layer and click on it while holding the Control key. When the dropdown menu appears we want to choose ‘Rasterize Layer’ from the list.
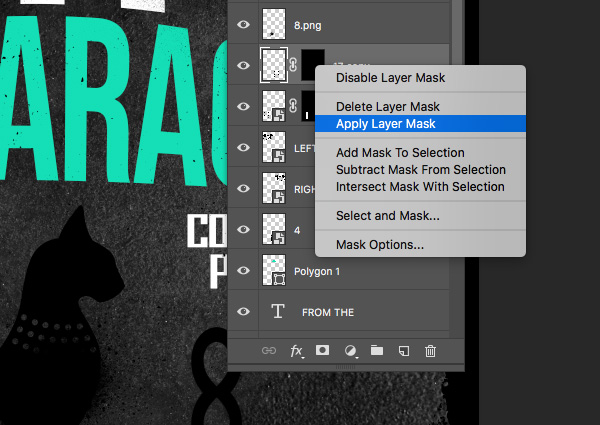
After rasterizing the layer, hold the Control key and click again, this time choosing ‘Apply Layer Mask’ from the menu.
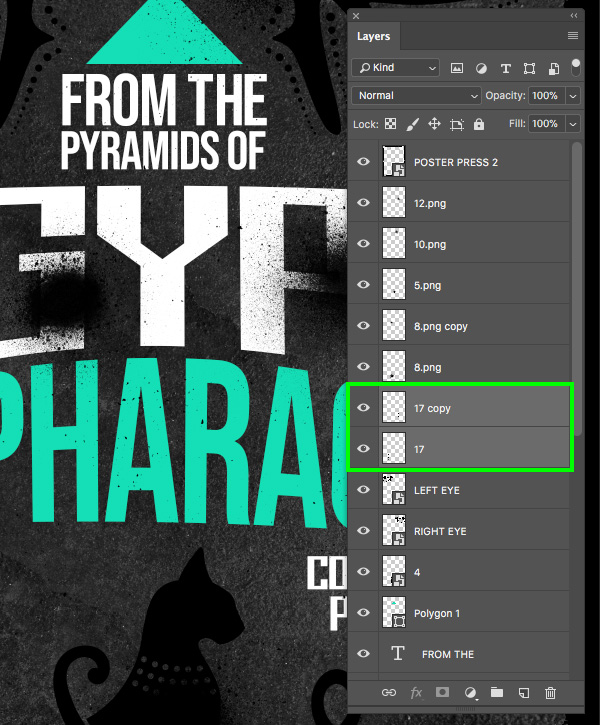
Repeat these last two steps for the second copy of the ’17.png’ layer so you wind up with two merged, rasterized layers as shown here:
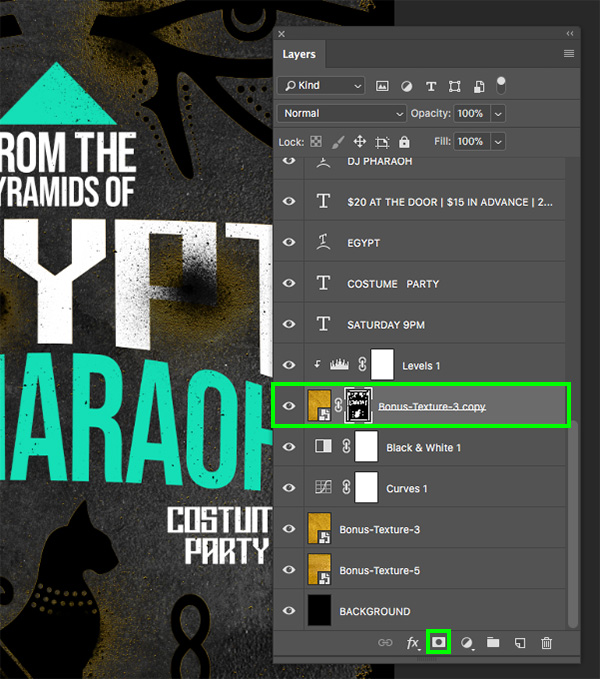
Step 20: Gold Background
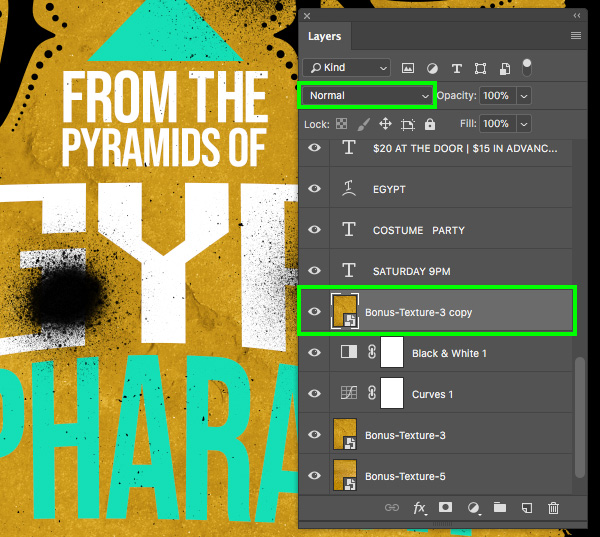
Scroll down in your Layers Palette to find the ‘Bonus-Texture-3’ Smart Object layer and then press Command/Ctrl+J to duplicate it. Move this copy up a few spots in the Layers Palette so that it is above the two Adjustment Layers and then change the Blend Mode from ‘Lighten’ back to ‘Normal’ as indicated below:
With the newly duplicated background layer selected, hold the Alt/Option key and then click on the Adjustment Layer icon at the bottom of the Layers Palette before choosing ‘Levels…’ from the list.
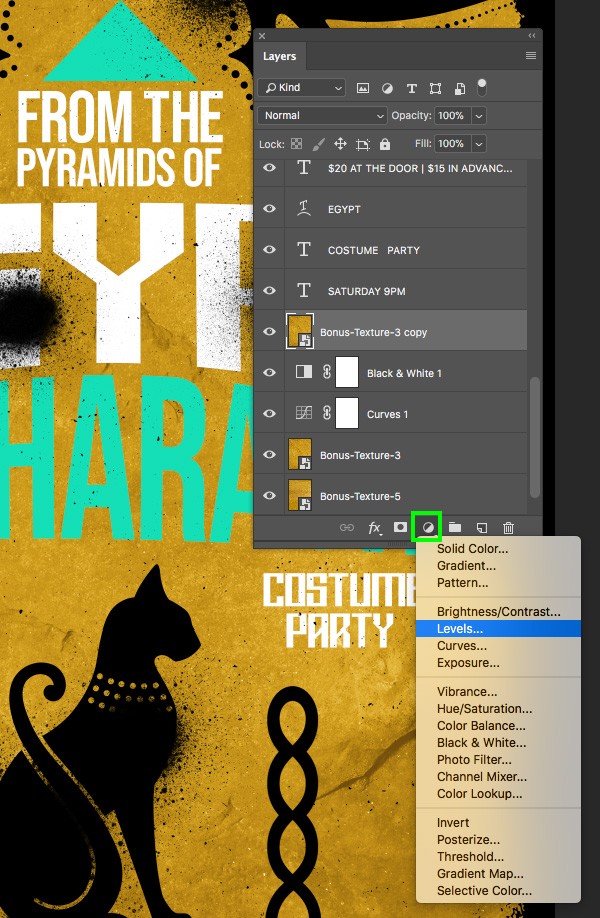
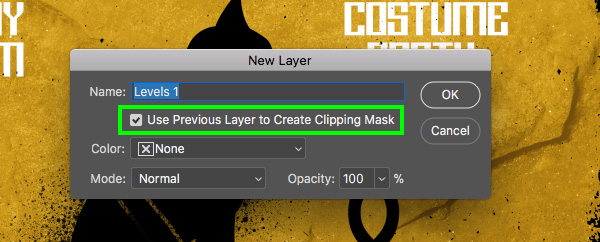
When the ‘New Layer’ dialog box appears, check off the option that says ‘Use Previous Layer to Create Clipping Mask’ and then click ‘OK’ to proceed. This will ensure that we have a Clipping Mask applied to the texture that will only affect that specific layer and nothing else.
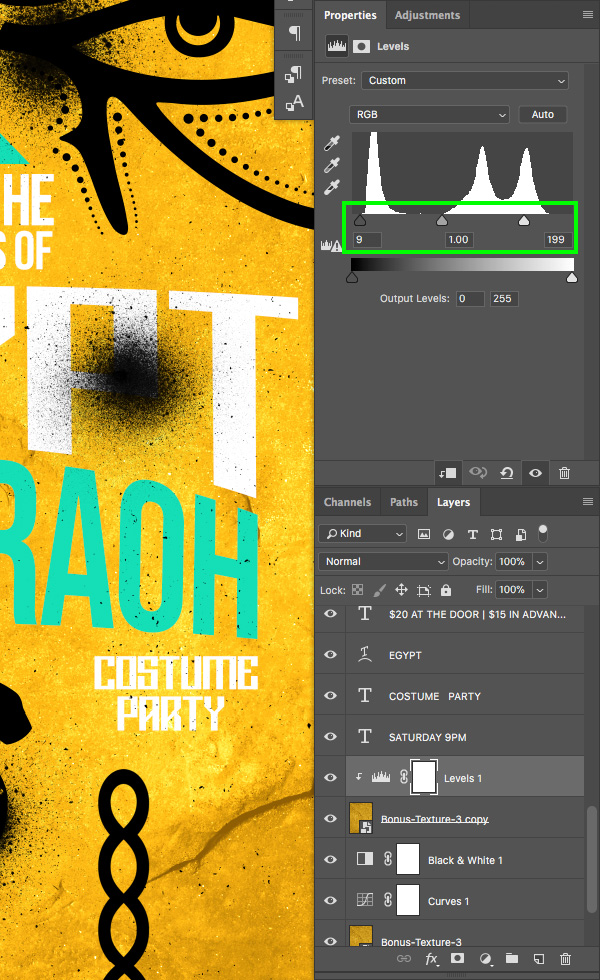
Now in the Properties panel let’s move the left slider in so the ‘Input’ is set to ‘9’ and move the right slider towards the center until the ‘Output’ is set to about ‘199’ as shown below:
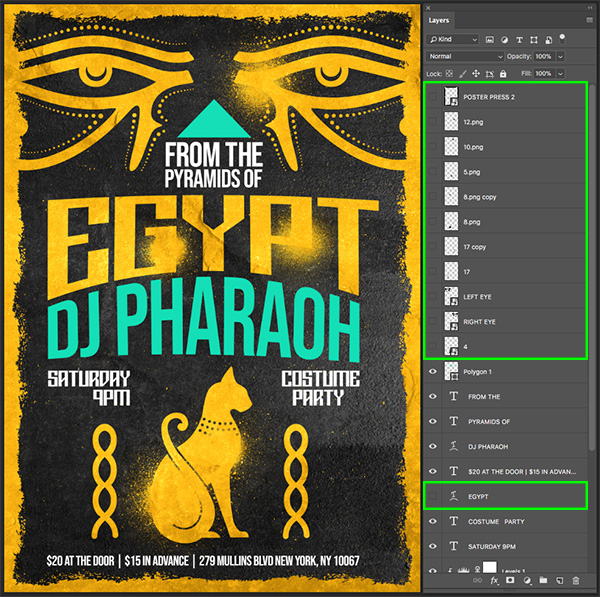
Step 21: Gold Mask
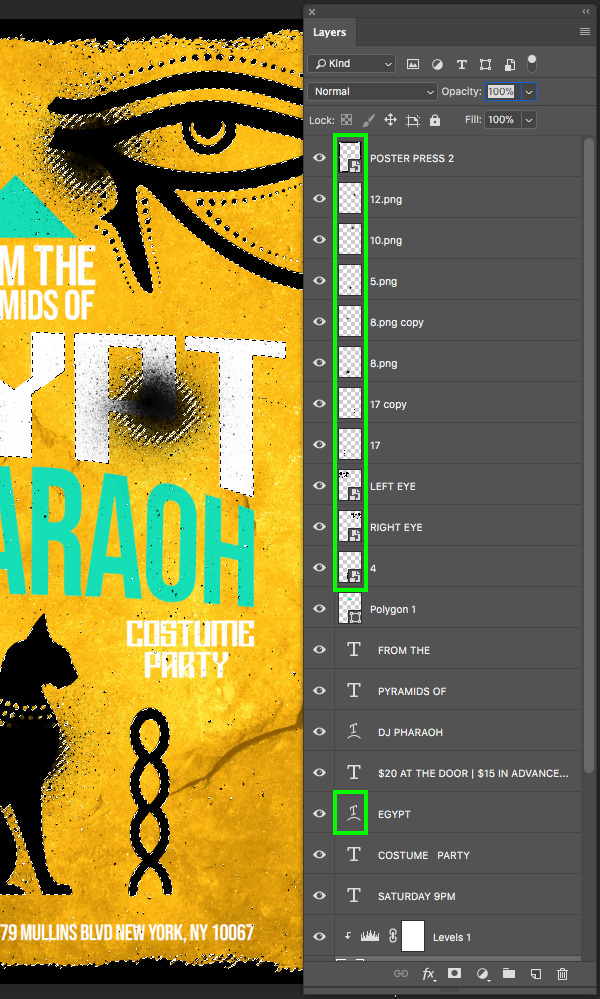
What we want to do now is make selections for all of the objects that we have placed that we want this gold background to show through. To start, hold the Command/Ctrl key and select the layer thumbnail icon of the very top Smart Object layer – this should be your ‘Poster Press 2’ Smart Object. You should notice that you have the marching ants indicating that the selection has been made. From here, hold the Command/Ctrl+Shift keys together and click on the layer thumbnail icons of all of the spray paint layers, Egyptian illustration layers like the eyes, the cat, the columns, and then let’s also select the thumbnail icon for the ‘EGYPT’ text layer.
With all of the selections now active, select the gold background Smart Object layer and then click on the ‘Add layer mask’ icon from the bottom of the Layers Palette.
Now all we have to do is go back and turn off the visibility of all of the layers we had selected to reveal the gold knockout / stencil effect.
Step 22: Secondary Text
Next, move the ‘EGYPT’ text layer that is now turned off below your other text layers. Select the ‘Polygon 1’ layer, hold the Shift key and select the bottom text layer – this should be the ‘SATURDAY 9PM’ layer as shown here:
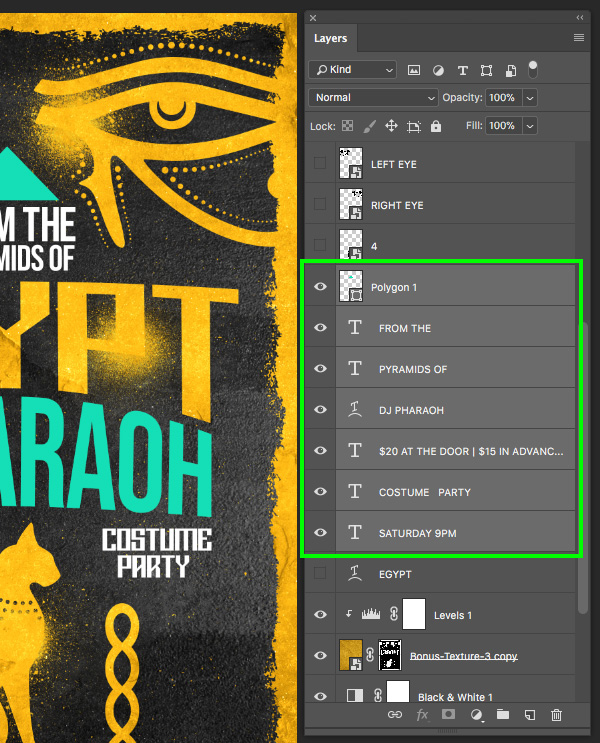
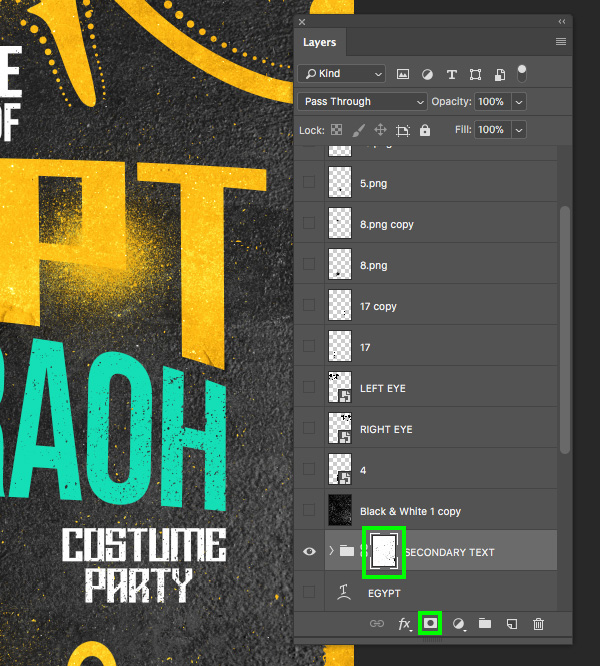
With your polygon and text layers selected, press Command/Ctrl+G to put them into a group folder and then double click the ‘Group 1’ text in the Layers Palette and change the name to ’SECONDARY TEXT’ as shown below:
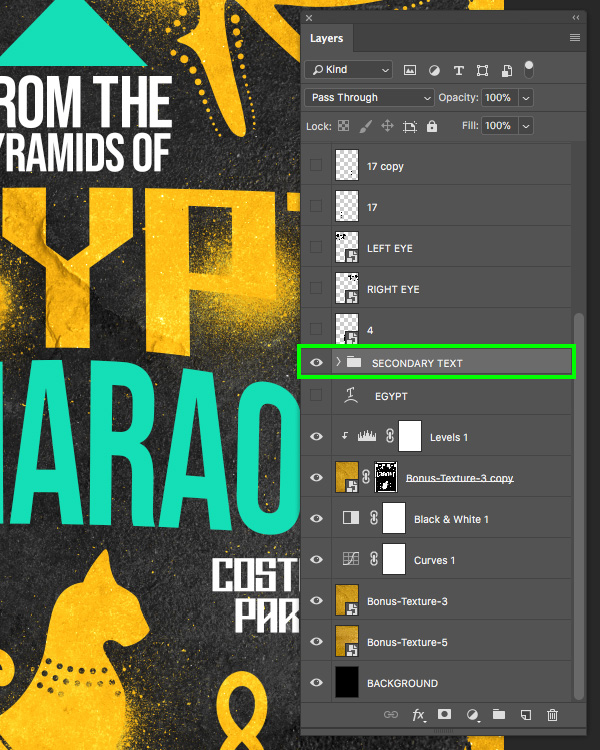
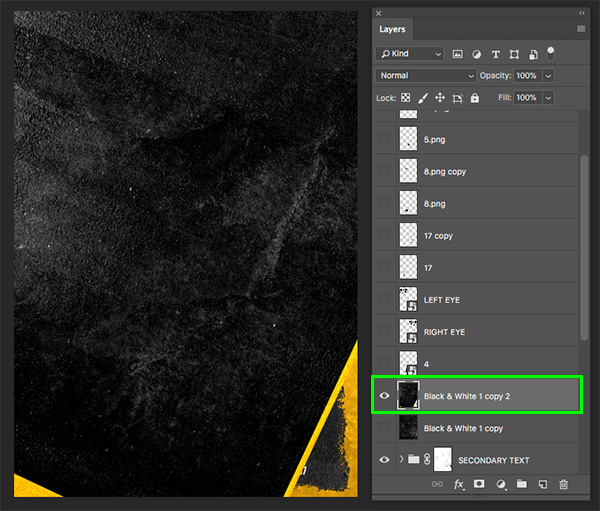
Step 23: Extra Grunge Prep
Select the Black & White Adjustment Layer, hold the Shift key, and then select the bottom ‘Bonus-Texture-5’ layer as shown below:
With these layers selected, press Command/Ctrl+J to duplicate them above the originals.

While your layers are still selected, press Command/Ctrl+E to merge them together into a single layer.
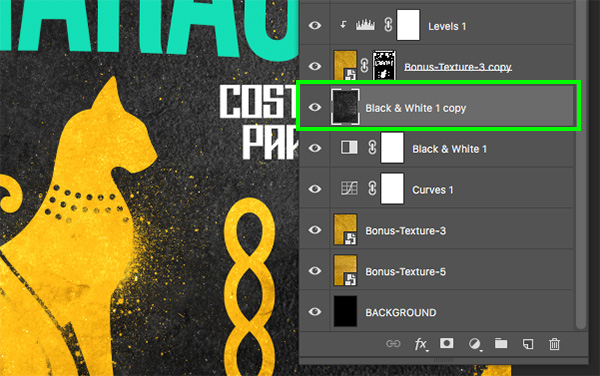
After that, move this merged B&W layer above the ‘SECONDARY TEXT’ folder as shown below:
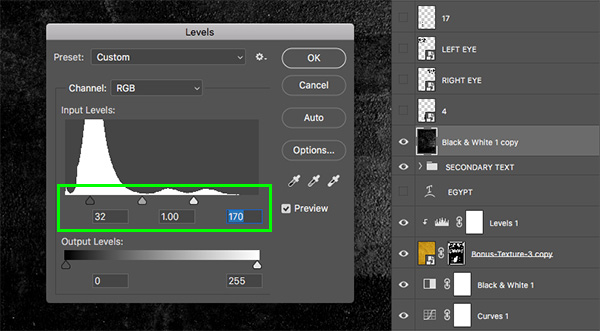
Now press Command/Ctrl+L to bring up a Levels Adjustment and move the left slider inwards so the ‘Input’ is set to ’32’ and move the right slider towards the middle until it’s set to ‘170’ and then press ‘OK’ to apply the changes.
Step 24: Grunge Mask
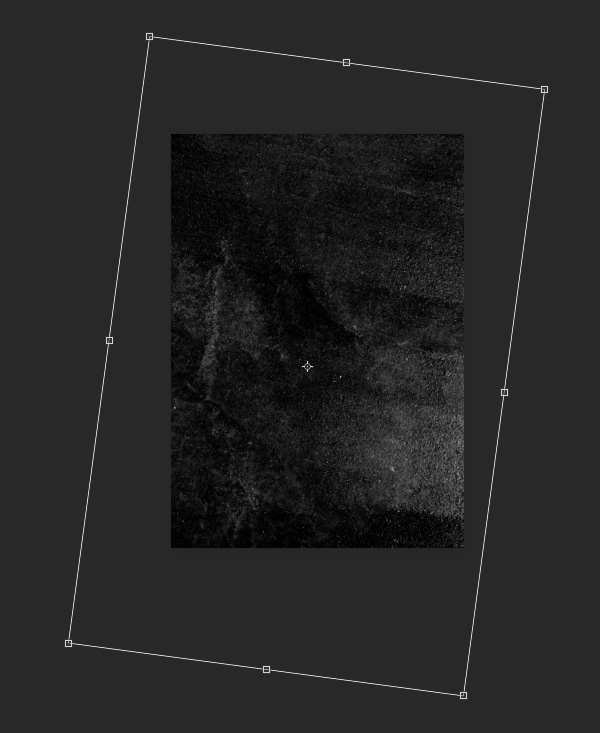
Let’s select our merged B&W background image and press Command/Ctrl+T to do a Free Transform. Make the layer larger by holding the Alt/Option+Shift keys and dragging outwards from any of the four corners of the bounding box and then rotate the image clockwise a bit as shown here:
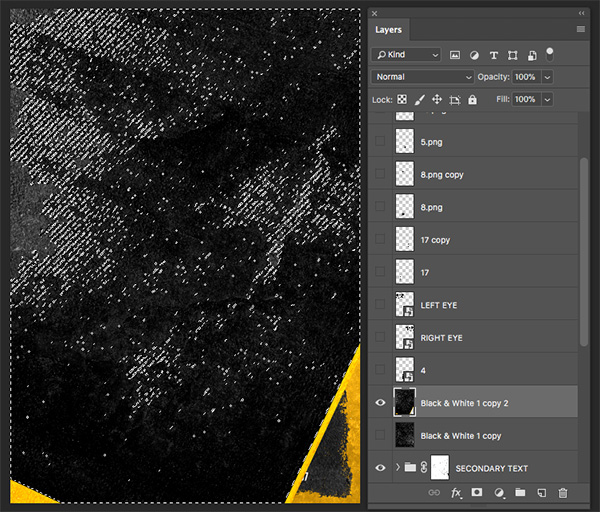
Next, press ‘W’ on the keyboard to get your Magic Wand Tool and then click on any of the white / gray area on the texture.
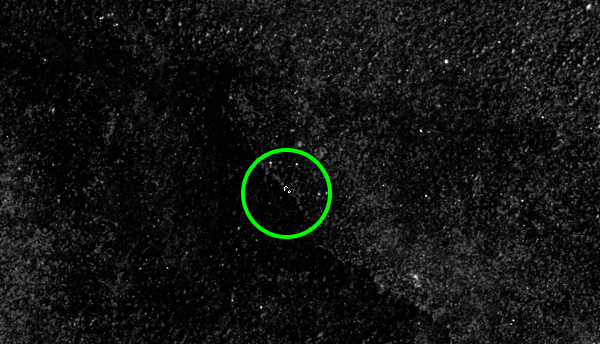
Once you’ve selection a portion of the texture, go to the Select menu and choose ‘Similar’ from the dropdown to select all of the similarly colored pixels in the image.

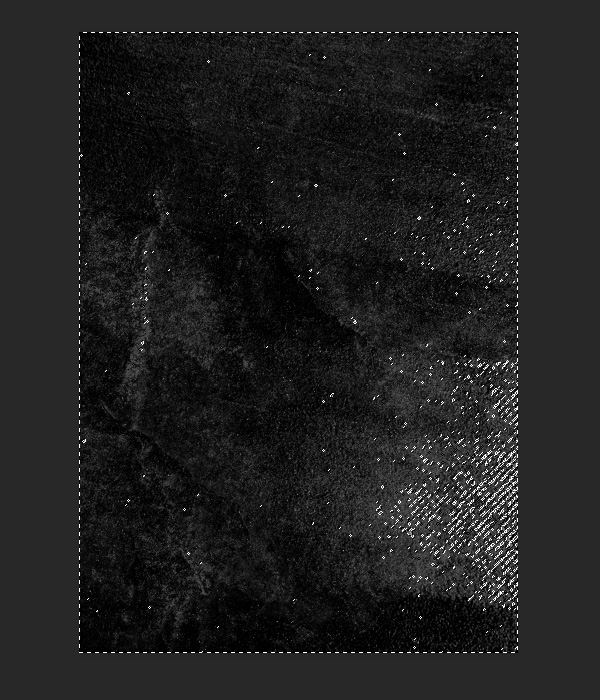
You should now have a selection like this:
With the selection still active, turn the visibility of this B&W texture layer off. After that, select the ‘SECONDARY TEXT’ folder and then click on the ‘Add layer mask’ icon from the bottom of the Layers Palette. You should now see that our text has a bit of a distressed look to it and is hidden in the spots where we made our selection.
Step 25: Weathered Away
Let’s go ahead and duplicate our B&W background image once again, and turn the visibility of the layer back on. We can move this layer, maybe make it a bit larger, and rotate it just to change it up.
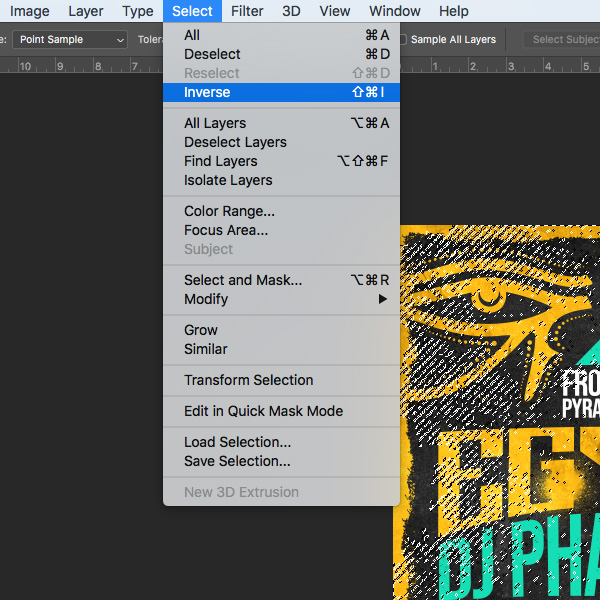
Use the Magic Wand Tool (W) again to select a darker portion of the image, and then go to the Select menu and choose ‘Similar’ once again.
From here, go to the Select menu and this time let’s choose ‘Inverse’ to invert the selection. Once you have done that, you can turn the visibility of the texture layer off.
Since we already have a layer mask applied to our ‘SECONDARY TEXT’ folder, all we need to do is select the mask, make sure that we have a solid black foreground color selected, and then press Alt/Option+Delete on the keyboard to add the selection to the mask. This will further push the effect and add even more grit and weather to the text inside of the folder.

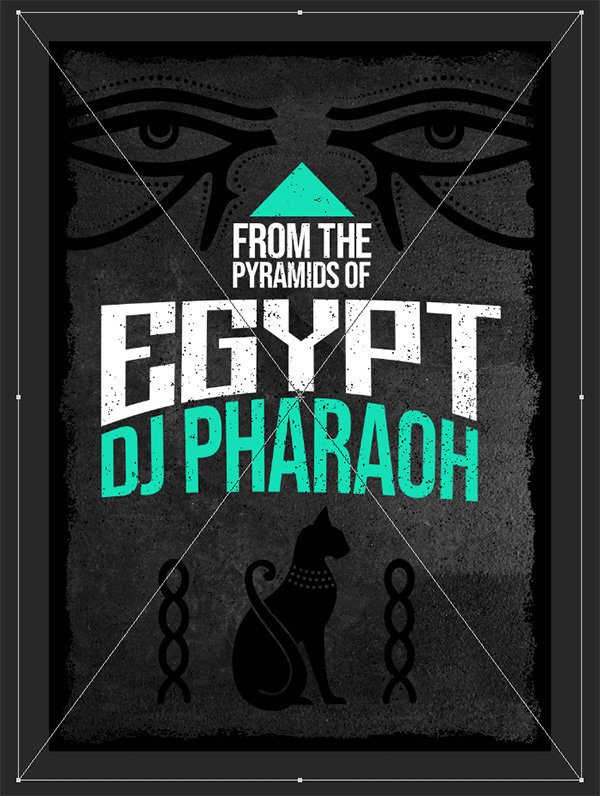
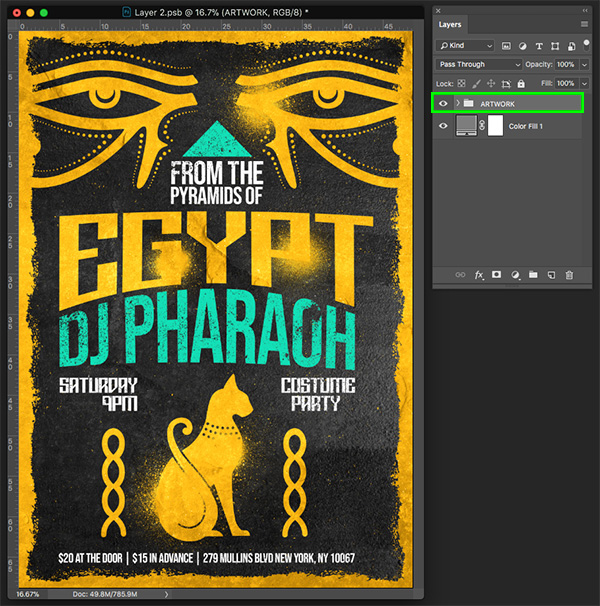
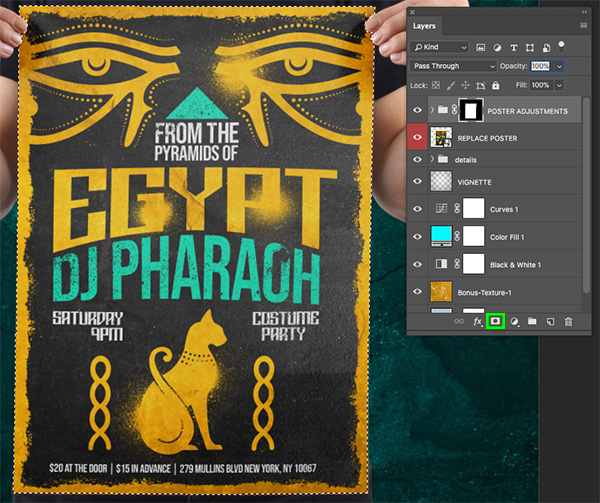
From here, select the very top layer in your Layers Palette, hold the Shift key and select the bottom ‘BACKGROUND’ layer. Once all of your layers are selected, press Command/Ctrl+G to put them into a single folder and then double click the ‘Group 1’ text and change the name of the folder to ‘ARTWORK’. Our gig poster design is now ready to go! Let’s put it into a nice looking mockup to make this look even better.

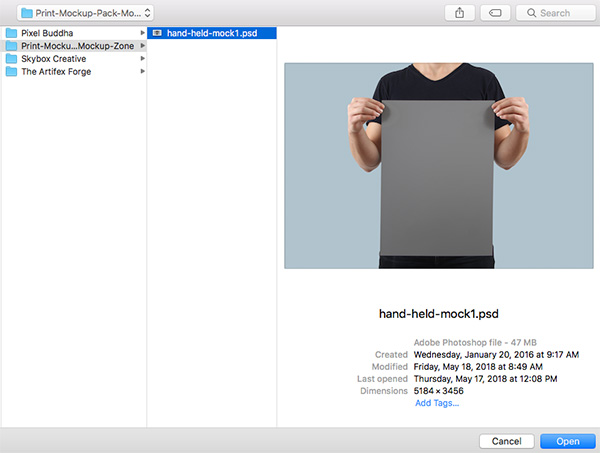
Step 26: Poster Mockup
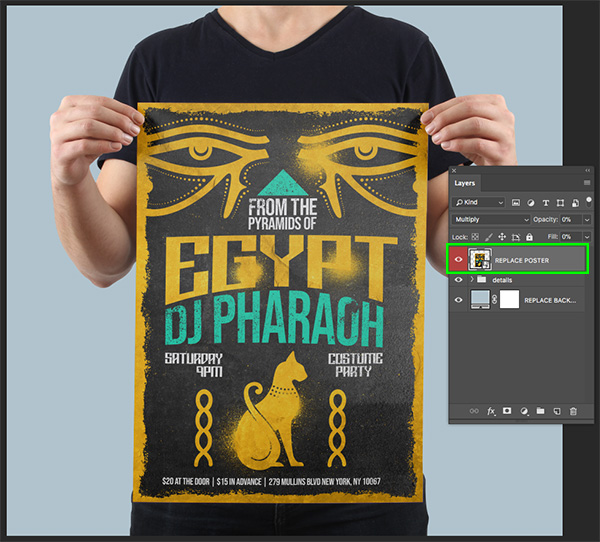
Next we will open the ‘hand-held-mock1.psd’ file from the Print Mockup Pack by Mockup Zone. This is just one of many extremely fun and professional looking mocks from the full package available in the Design Cuts Marketplace.
When the file opens in Photoshop, notice the first layer highlighted in red, which is a Smart Object named ‘REPLACE POSTER’ as shown below:

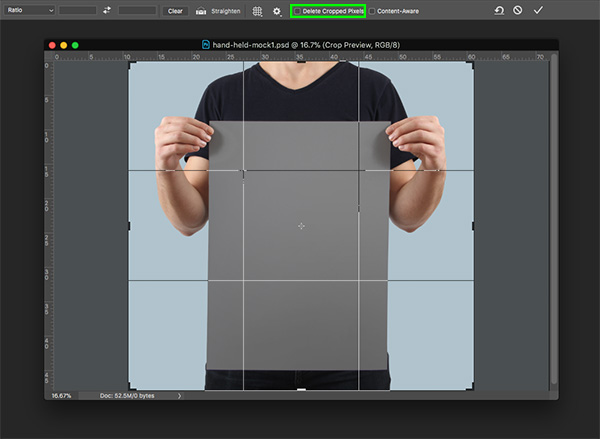
Before we go inside this layer to replace the image with our own poster design, let’s quickly crop the mockup a bit. Press ‘C’ on the keyboard to get the Crop Tool and then check to make sure the ‘Delete Cropped Pixels’ option along the top toolbar is unchecked. After that, move your cursor over either the left or right side of the bounding box and move inwards while holding the Alt/Option key. After cropping the sides closer to the figure in the center, press ‘Return’ to apply the changes.
Step 27: Replacing the Poster
Now we will double click the ‘REPLACE DESIGN’ Smart Object layer and the artwork will open in a new window. Here all we need to do is open our flat poster design and drag the entire ‘ARTWORK’ folder into the file while holding the Shift key and your poster should land perfectly in the center of the Smart Object. After placing our artwork into the file, press Command/Ctrl+S to save the file and then Command/Ctrl+W to close the tab.
After your file is finished saving and you’ve closed out of the window, you should see the poster design updated in the main mockup file as shown below:
Step 28: Background Texture
Go to the File menu and choose ‘Open…’ and then navigate to the ‘Bonus-Texture-1.jpg’ file inside of the Skybox Creative assets and then choose ‘Open’.

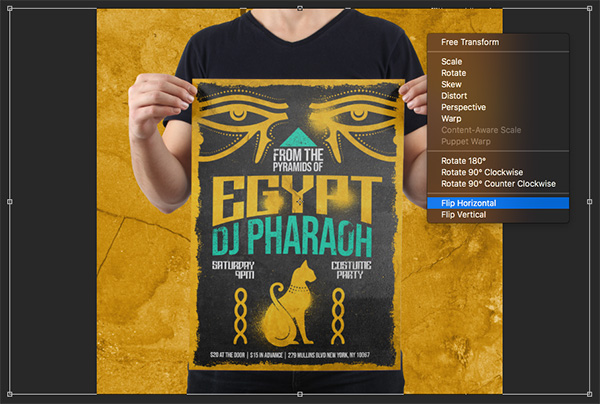
Click and drag the texture into your mockup file and place it just above the background fill color. Press Command/Ctrl+T and scale it up until it fills the canvas, and then click on the texture while holding the Control key and choose ‘Flip Horizontal’. Once you have done that, press ‘Return’ to apply the changes.
Select the background texture and then click on the Adjustment Layer icon at the bottom of the Layers Palette. From here, choose ‘Black & White…’ from the list.
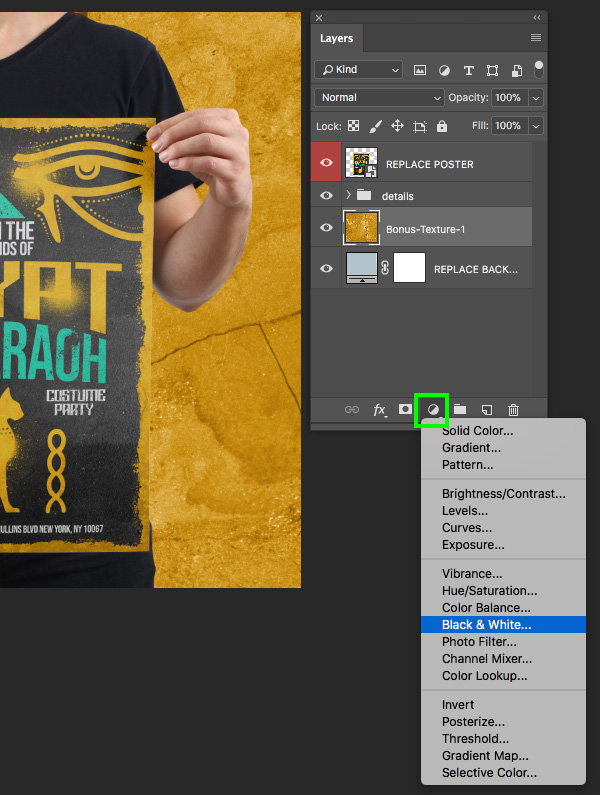
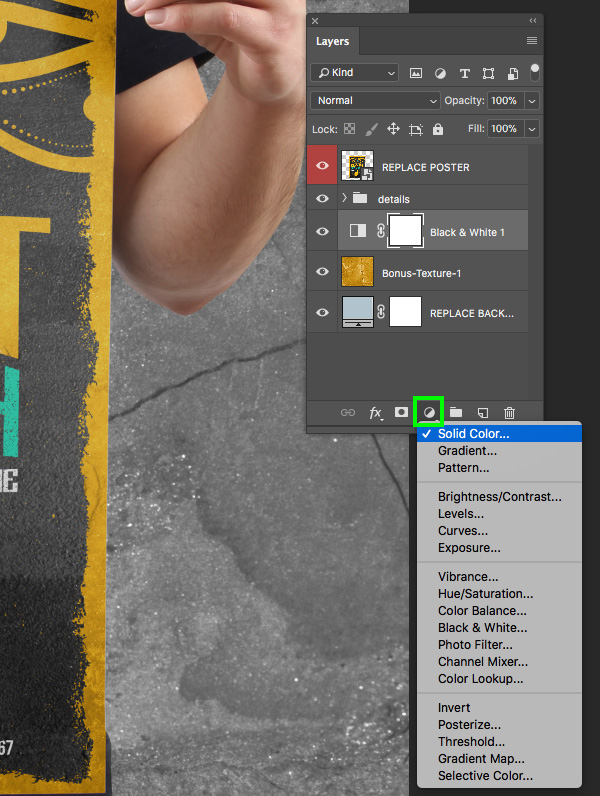
Now select the Black & White Adjustment Layer and click on the Adjustment Layer icon once again. This time, we want to add a ‘Solid Color…’ layer.
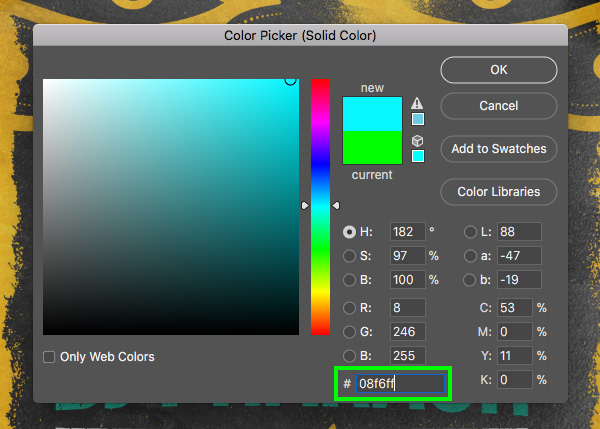
For the fill color let’s enter the hex value ‘#08F6FF’ and then press ‘Return’ or click ‘OK’ to apply the color changes.
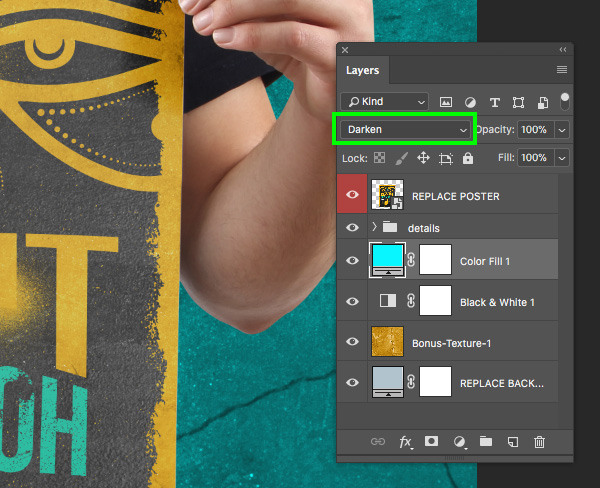
Change the Blend Mode of the solid fill layer from ‘Normal’ to ‘Darken’ as shown here:
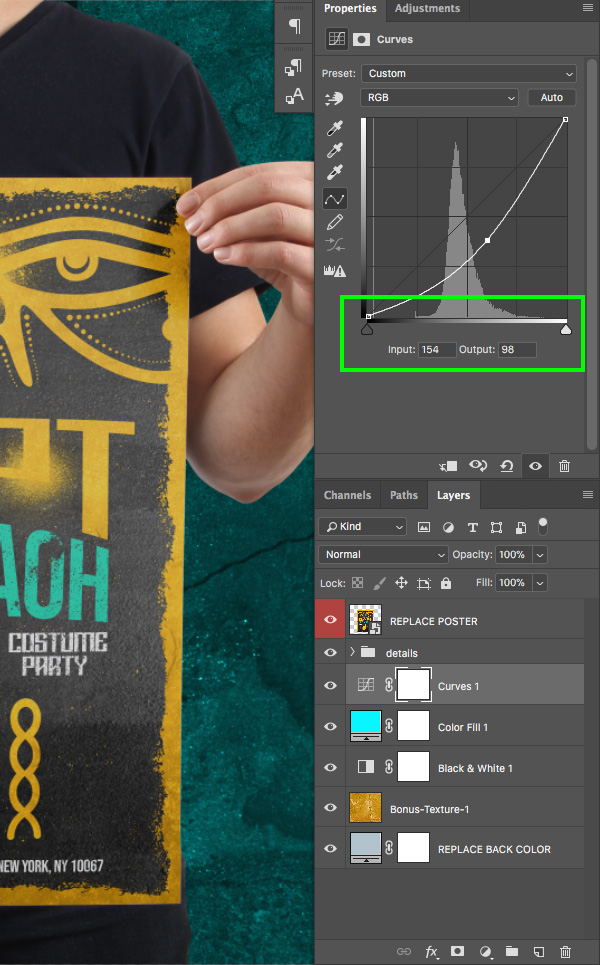
Now we will return to the Adjustment Layer icon and add a ‘Curves…’ layer.
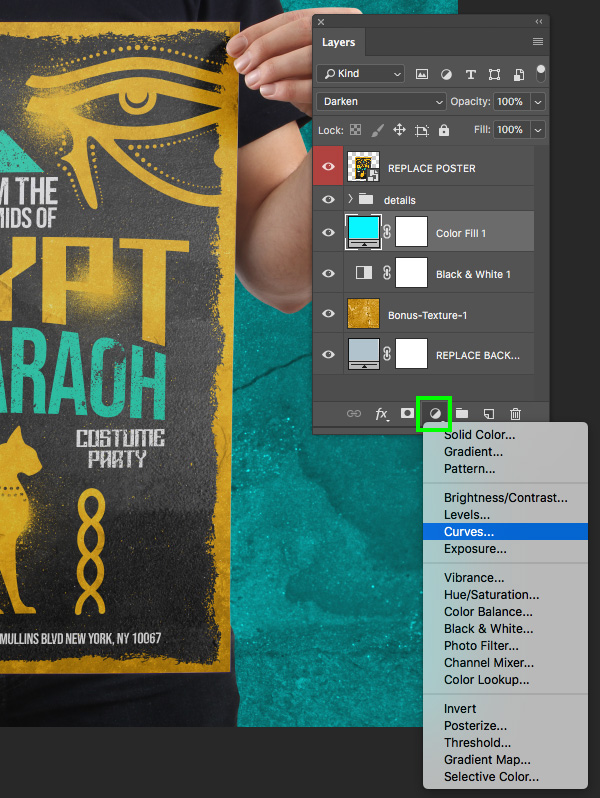
In the Properties area let’s add a single point to the center of the grid and change the ‘Input’ to ‘154’ and the ‘Output’ should be set to ’98’ as shown in the image below:
Step 29: Vignette Effect
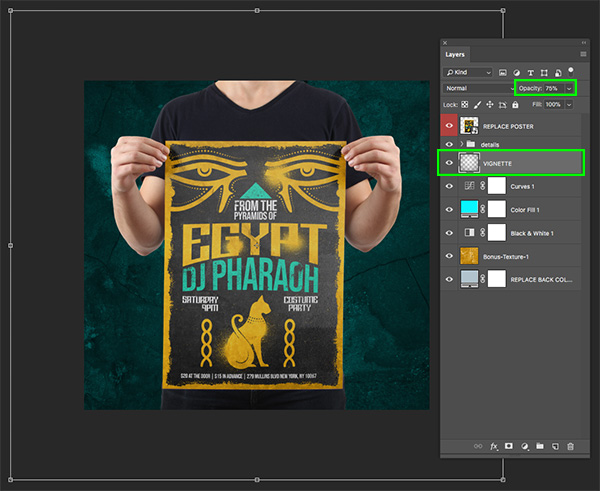
Press ‘G’ on the keyboard to switch to the Gradient Tool and then check the settings in the top toolbar to select a radial gradient that fades from solid black to transparent. Here we will also check off the ‘Reverse’ option highlighted below:

Click and drag from the center of the image outwards to create the inverted radial gradient and then drop the opacity down to about ’75%’. Let’s also apply a Free Transform and scale the gradient up a bit and place it just below the ‘details’ folder in the Layers Palette.
Step 30: Poster Adjustments
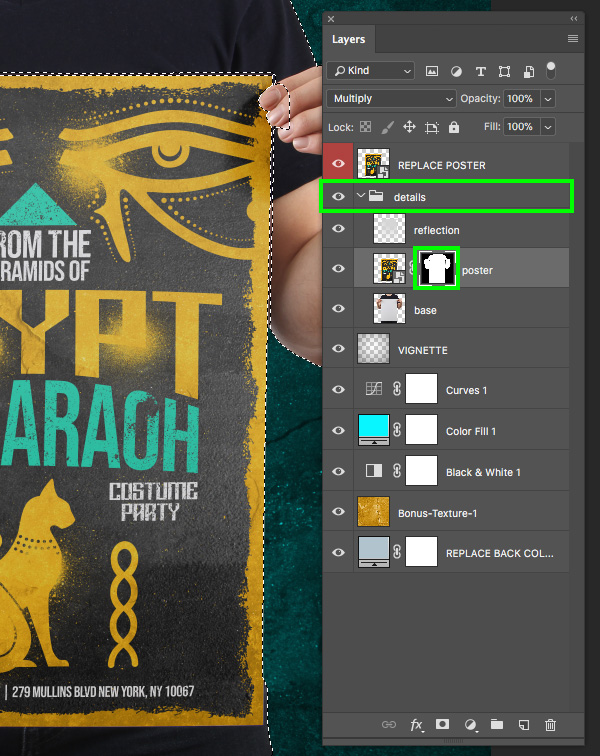
Expand the contents of the ‘details’ folder in the Layers Palette and then hold the Command/Ctrl key and click on the layer mask thumbnail icon of the ‘poster’ layer to activate a selection around it.
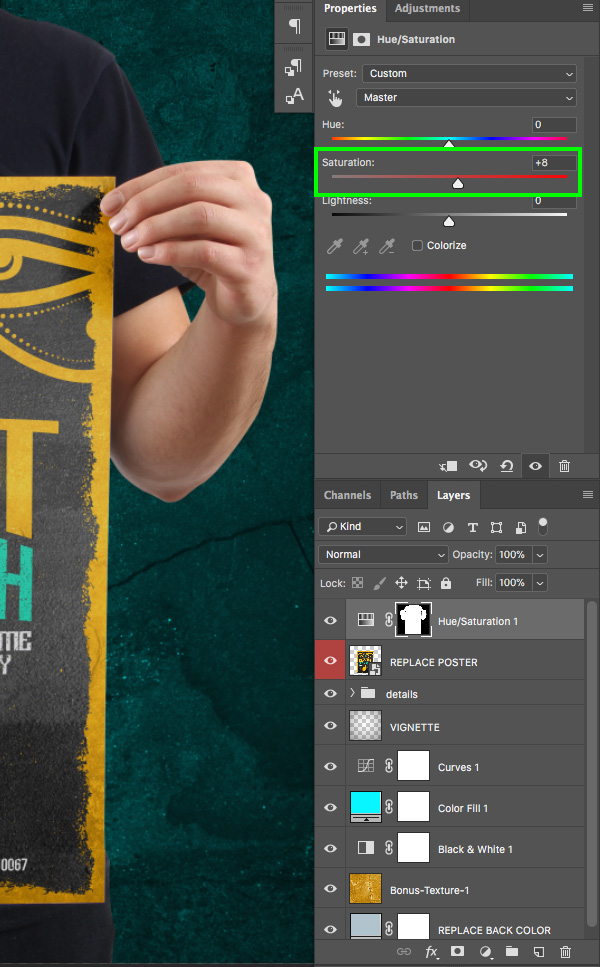
Next, select the ‘REPLACE POSTER’ Smart Object layer and then click on the Adjustment Layer icon at the bottom of the Layers Palette and choose ‘Hue/Saturation…’ from the list.
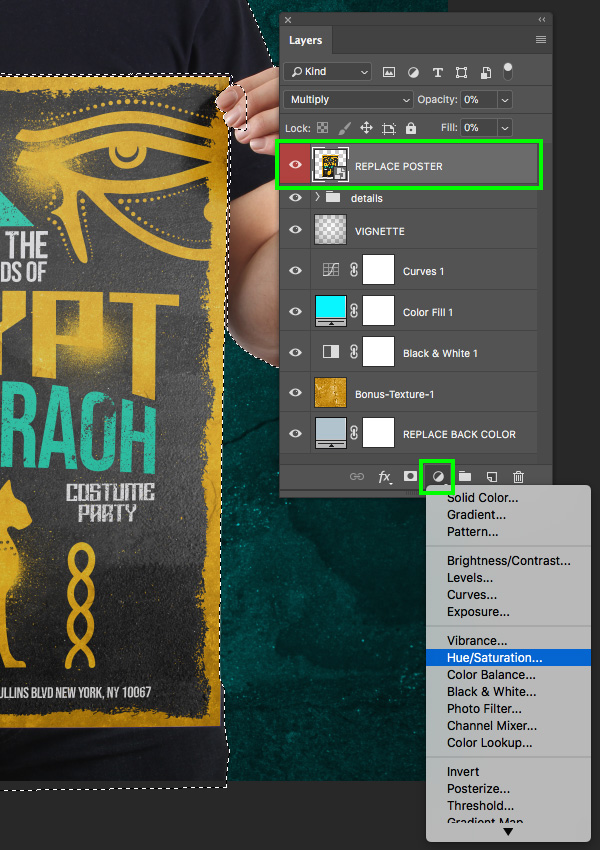
For the settings, move the ‘Saturation’ slider to about ‘+8’ to increase the saturation and brightness of the colors.
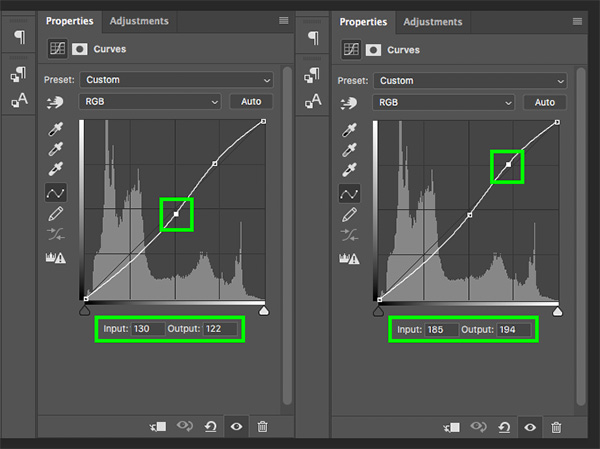
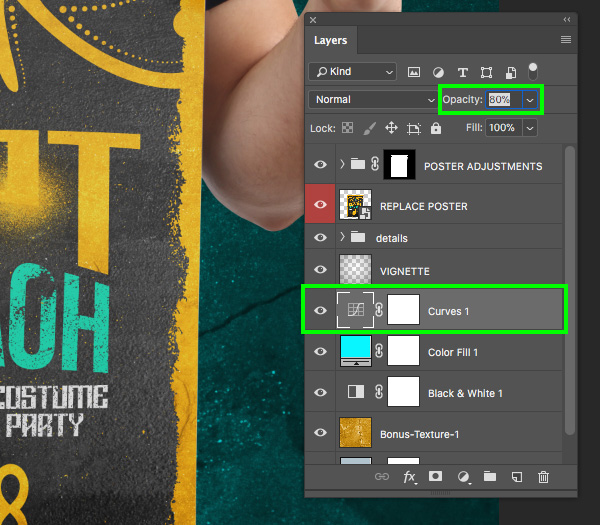
Use the same selection of the ‘poster’ layer to apply a Curves Adjustment Layer above the Hue/Saturation Adjustment. Here we will create two points along the grid – the first should have an ‘Input’ of ‘130’ and an ‘Output’ of ‘122’ and the second point will be higher up with an ‘Input’ of ’185’ and ‘Output’ of ‘194’.
Step 31: Isolating the Adjustments
Select the top Curves Adjustment Layer, hold the Shift key, and then select the Hue/Saturation Adjustment Layer just below it. With both layers selected, press Command/Ctrl+G to put them into a new folder and double click the ‘Group 1’ text to rename the folder ‘POSTER ADJUSTMENTS’ as shown below:

Press ‘P’ to switch to the Pen Tool and then zoom in and begin tracing around the fingers on the hand of the model. What we want to do here is isolate the poster itself as our first selection that we used to create the last two Adjustment Layers included the model, which we do not want for this. When using the Pen Tool it is important to zoom in so you can follow the path around the fingers and the inside of the poster. When you are making your points, remember to click and hold the cursor down to make curved lines before releasing the mouse. You can also hold the Alt/Option key and grab the ends of the handles to modify the direction of your subsequent points. This is a fairly basic, but useful way to practice.
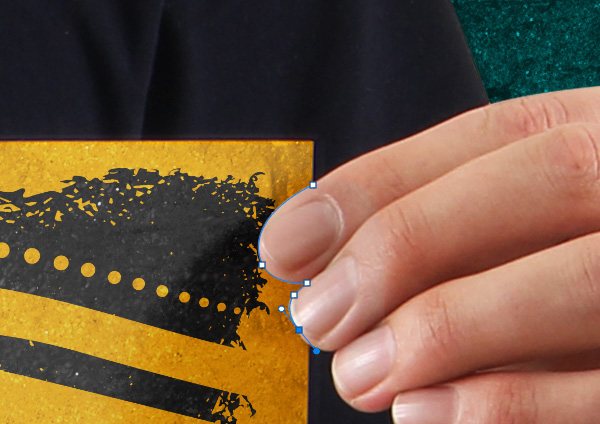
Continue to trace the poster all the way down and around, until you come back up to the opposite hand.
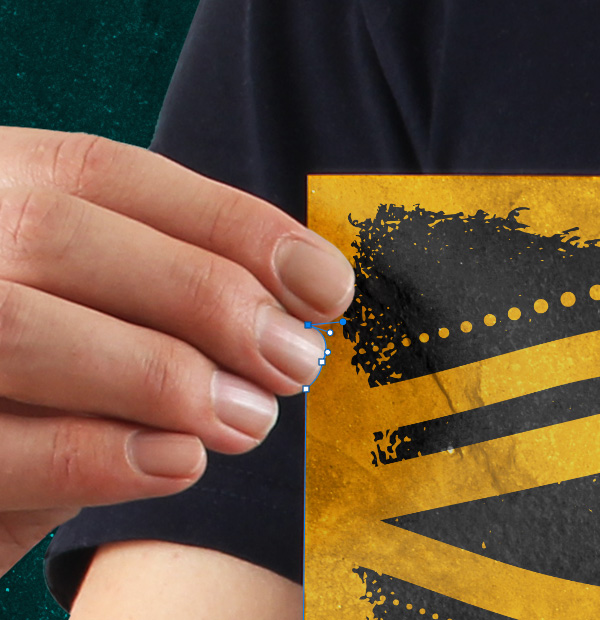
Close the path and complete the shape so you have the following:
After closing the path, press the Command/Ctrl+Return keys together to activate a selection from your new path around the poster. After that, make sure you have the ‘POSTER ADJUSTMENTS’ folder selected and then click on the ‘Add layer mask’ icon to isolate the Adjustment Layers inside of the folder to just the poster by itself, without the model.
Step 32: Finishing Touch
Select the Curves Adjustment Layer that is above the blue background and then reduce the opacity of the layer to about ’80%’ by pressing the number ‘8’ on the keyboard. This will just turn down some of the contrast a bit as a finishing touch.
We have now completed our Egyptian themed gig poster design! To make our poster we used a variety of elements from The Versatile, Artistic Design Bundle. This all new bundle is bursting at the seams with creativity and quality. Each pack is totally different from the last, giving you the ability to create everything from cute watercolour designs, to grungy masterpieces, kids storybooks, slick vector branding and more. This is the kind of bundle to spark your imagination and make you want to invent new projects simply to use all your new creative resources!
Remember that whether it’s your outcome for this tutorial or something new you’ve made, we’d love to see your designs on our Facebook page.
Please leave a comment if you have any questions or suggestions. I always look forward to hearing from you!
There’s still time to check out The Versatile, Artistic Design Bundle featuring everything from cute watercolours, to intricate ink effects, spray paint, vintage etchings, halftones, fonts, clean shapes, and much more for an unbeatable price of $29!
Great work. It’s very professional. Thank for this tutorial.
Thank you so much for your comment Lorenzo and we are so glad to hear that you enjoyed our tutorial.
We hope that you picked up some great tips and tricks on this one that will be really helpful for your own design projects too :)
GREAT!!!. REALLY HELP ME MASTERING PHOTOSHOP.
This is amazing news Candra, we’re so happy to be a part of your creative journey :)
Thank you for this masterpiece. And the bundle, The Versatile, Artistic Design Bundle , that I purchased from you contained very good stuff.
Thank you!
Aww thank you so much for leaving us a comment Jan-Ove, we really appreciate your awesome support!
I hope that you get lots of use out of all of your new resources.
Awesome! I always learn so much from your excellent tutorials, thank you very much. :-)
Aww thank you so much for your comment Kristen, we really appreciate your support :)
We hope that you had great fun working through this one!
This is one of the most amazing tutorials!
So helpful :)
Thanks!
Yay thank you so much for your comment Vidit, this means so much to us :)
We hope that you picked up some great tips on this one!