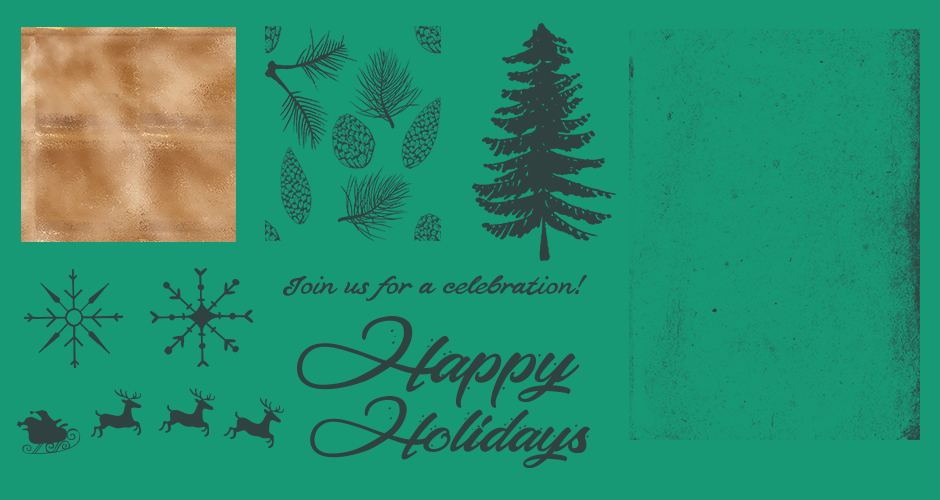
In this design tutorial I will be showing you how to create a fun and whimsical flyer design for a Christmas Party in Photoshop. We will be using some beautiful winter elements from Lara’s Wonderland along with a grungy texture from Vector Hut and a few extras to help spice up our festive party flyer!
HAVE YOU SEEN OUR YOUTUBE CHANNEL?
Watch the video tutorial below and subscribe to our YouTube channel for regular updates direct to your inbox.
Here’s a look at what we’ll be creating:
Follow along with this tutorial: Download the freebie files
This freebie pack includes hand-picked samples of some of the highest quality textures, patterns, and illustrations from the full bundle.
The freebie pack is just a sample of what you will find in the The Vibrant Textures, Patterns and Backgrounds Bundle for just $29 (that’s 99% off). This bundle is a diverse and vibrant collection of best-selling designs, from geometric patterns to gorgeous artistic textures from around the world. This is our most vibrant collection yet and will cover you for a vast range of design projects.
Step 1: Christmas Flyer Design
Let’s begin by opening Photoshop and creating a New Document. Let’s make sure that our document size is set to 4” wide by 6” tall with a resolution of 300, Color Mode of RGB, and set the Background Contents to ‘White’ and give your file a name – here I am using the name ‘christmas-party-flyer’. Once you have set the parameters go ahead and click ‘Create’ to make your document.
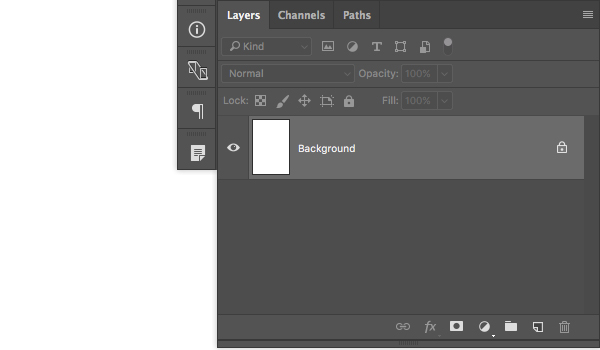
Once we create our new document we should have one single layer named ‘Background’ that appears with a small lock icon next to it.
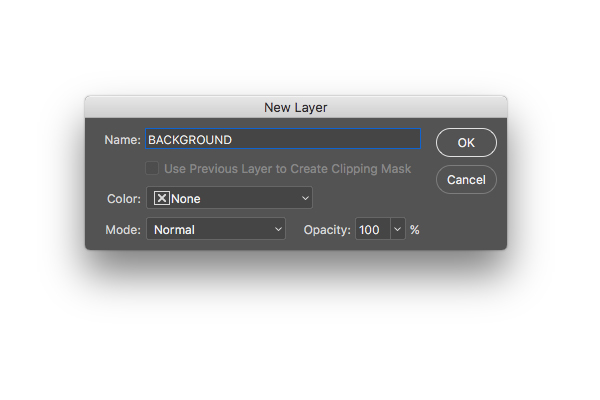
Double click on the layer and when you are prompted with a dialog box asking you to name the layer we will change it to ‘BACKGROUND’. Once you have done that, press ‘OK’ to apply the changes and unlock the layer.
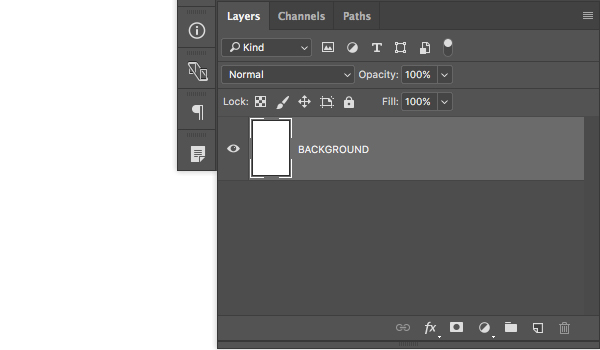
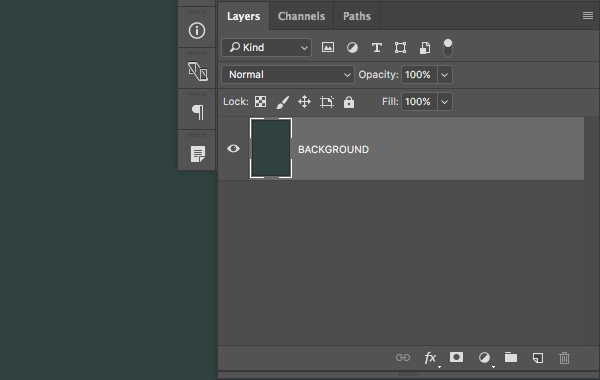
Once you have unlocked and renamed the layer, your Layers Palette should look like this:
Step 2: Coloring the Background
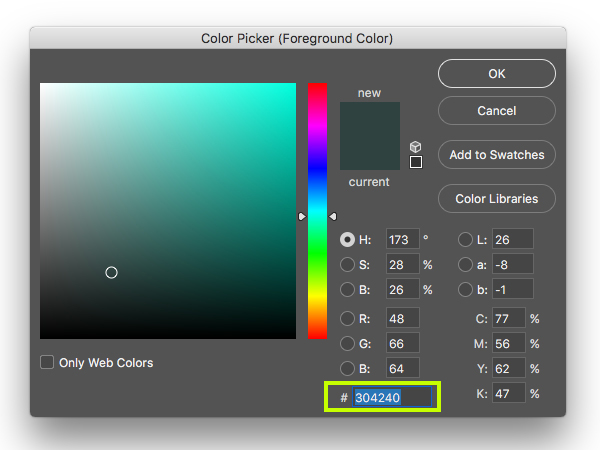
The next thing we want to do is click on the foreground color in the toolbar and change it to a dark teal color. Here we will enter a hex value of #304240 as shown in the image below:
After you have selected your foreground color, press ‘OK’ and then with your ‘BACKGROUND’ layer selected, press Alt/Option+Delete on the keyboard to fill the layer with your foreground color.
Step 3: First Adjustment Layers
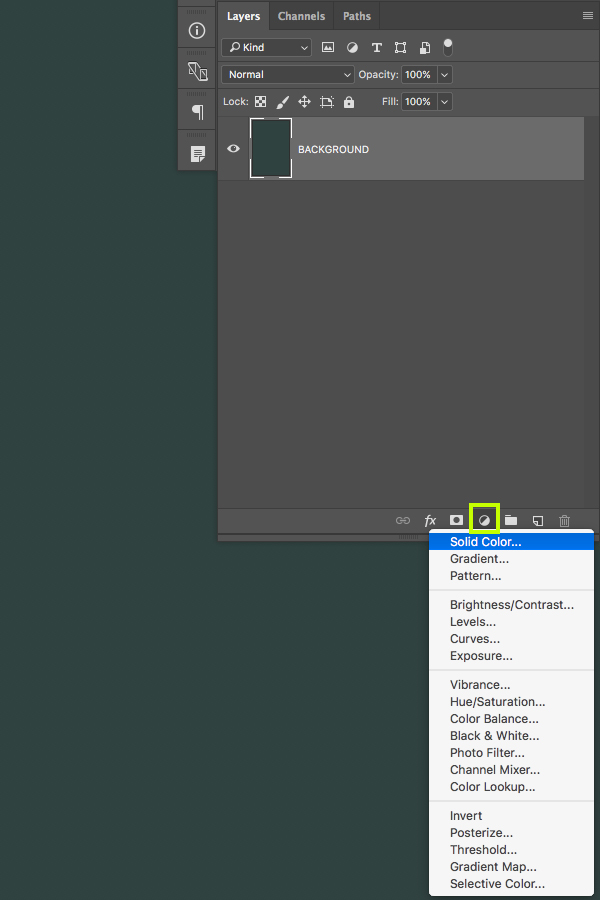
Next, click on the Adjustment Layer icon found at the bottom of the Layers Palette and choose ‘Solid Color…’ from the top of the list.
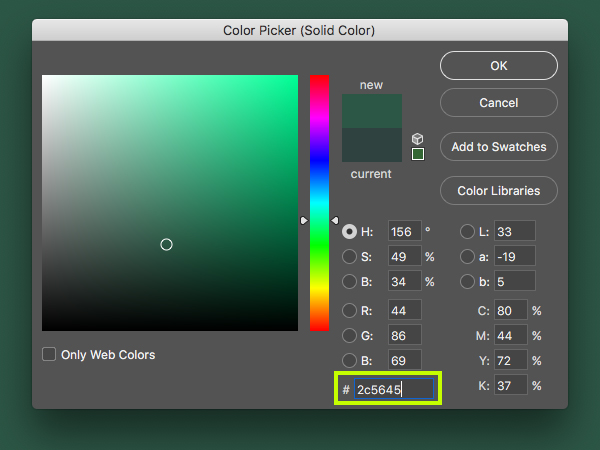
For the fill color, enter a hex value of ‘#2C5645’ and then press ‘OK’ to apply the changes.
After applying the Adjustment Layer, change the Blend Mode to ‘Color’ as shown below:
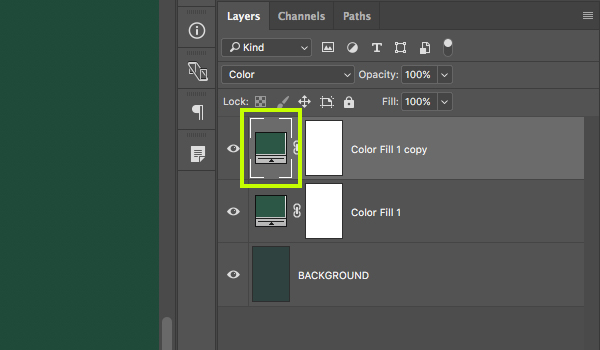
Select the Adjustment Layer and press Command/Ctrl+J to duplicate it, and then double click the Layer Thumbnail highlighted in the image below:
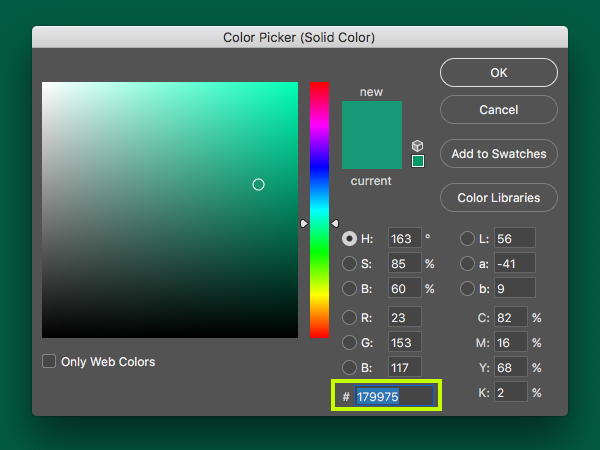
You will now want to change the fill color to the hex value ‘#179975’ as shown below:
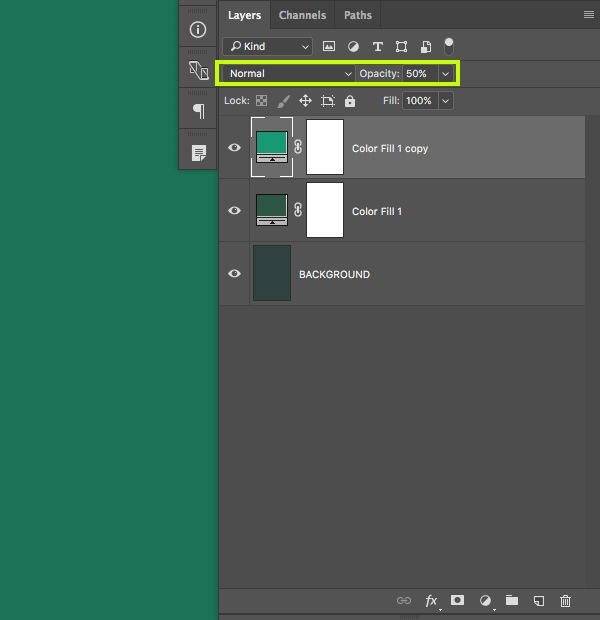
Press ‘OK’ to apply the changes and then switch the Blend Mode of the layer to ‘Normal’ and reduce the opacity of the layer to ’50%’ like this:
Step 4: Adding Some Grunge
Go to the freebies folder for this tutorial and open the ‘Paper Texture (45).png’ file from Vector Hut in Photoshop.
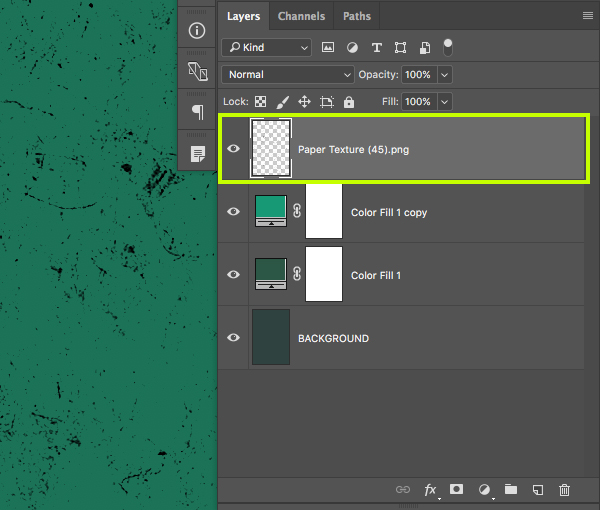
Click and drag the texture into your working document and place it at the top of your Layers Palette. From here, double click on the layer name and enter the name of the file as shown below:
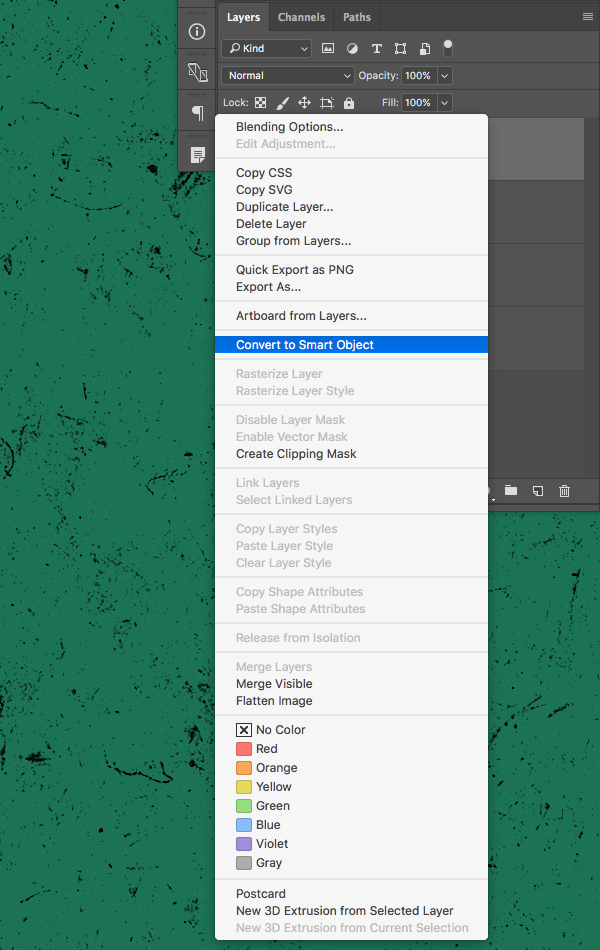
After you’ve brought the texture into your document and changed the name, hold the Control Key and click on the layer to reveal a dropdown menu. From this menu, select ‘Convert to Smart Object’ as shown in the image below:
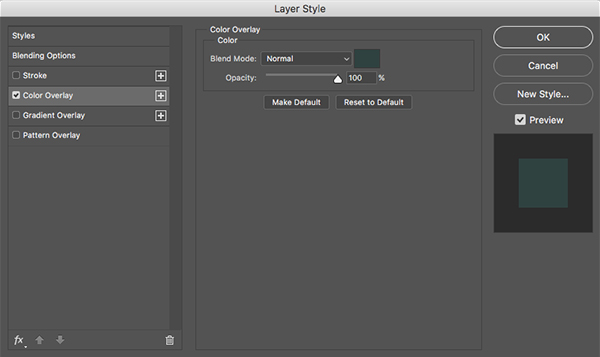
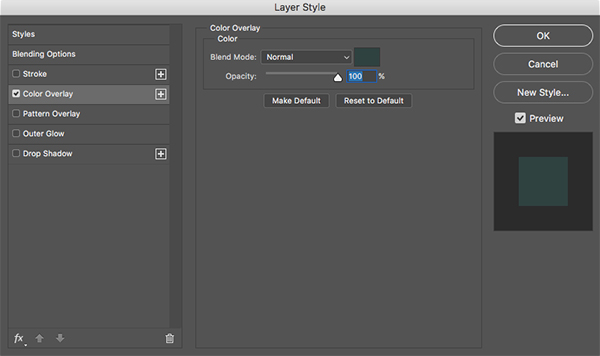
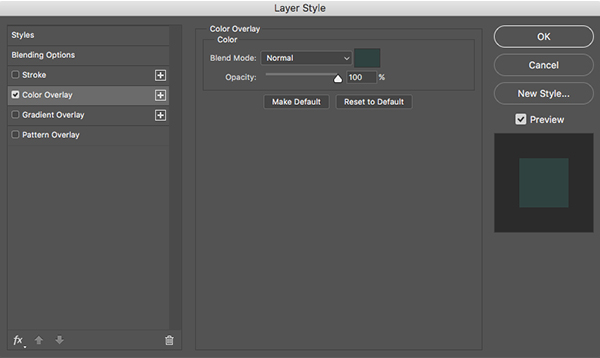
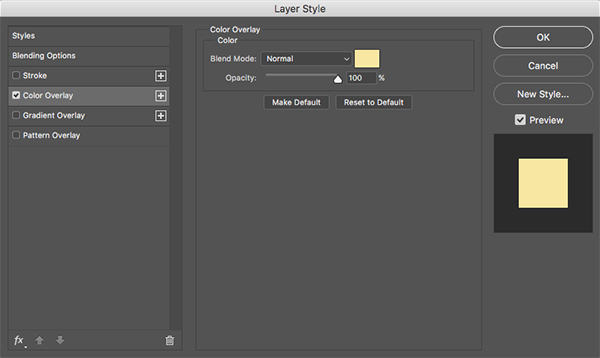
After converting the layer into a Smart Object, double click on the layer to bring up the Layer Style Dialog Box and check off the ‘Color Overlay’ option.
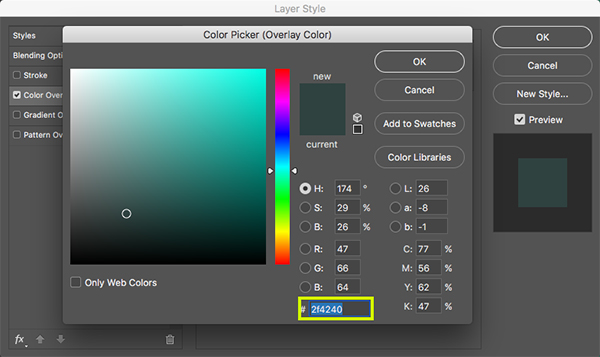
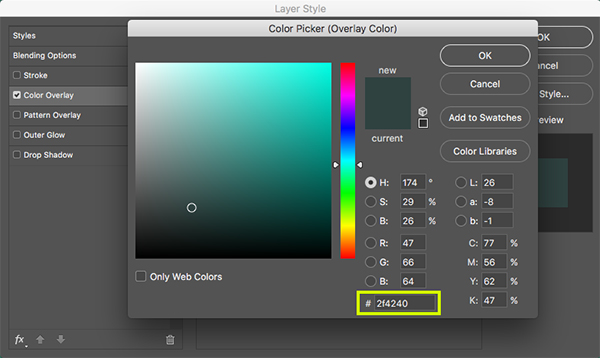
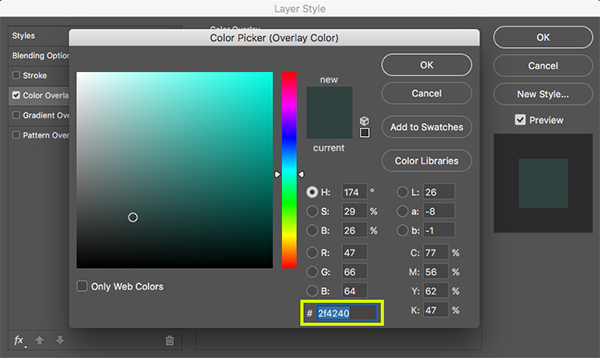
For the fill color we will enter a hex value of ‘#2F4240’ and then press ‘OK’ to apply the changes.
You should now have your Smart Object texture layer at the top of your Layers Palette with a Color Overlay Layer Style applied. From here the next thing we want to do is reduce the opacity of the layer to ’50%’ to make the texture a bit more subtle.
Step 5: Pinecone Pattern
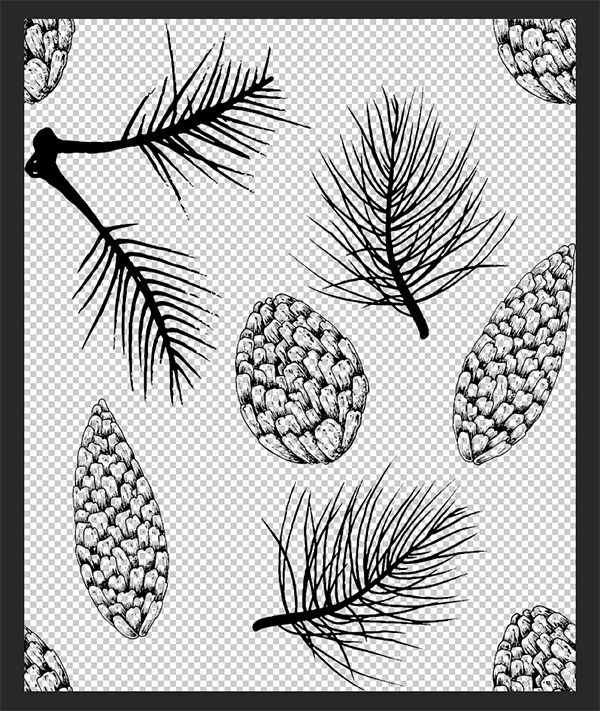
Next, open the ‘pine-ensemble-01.png’ file from the freebies folder in Photoshop.
Click and drag the pinecone pattern into your working document and double click on the ‘Layer 1’ text to change the name to ‘pine-ensemble-01.png’ like the file name and place it at the top of the Layers Palette.
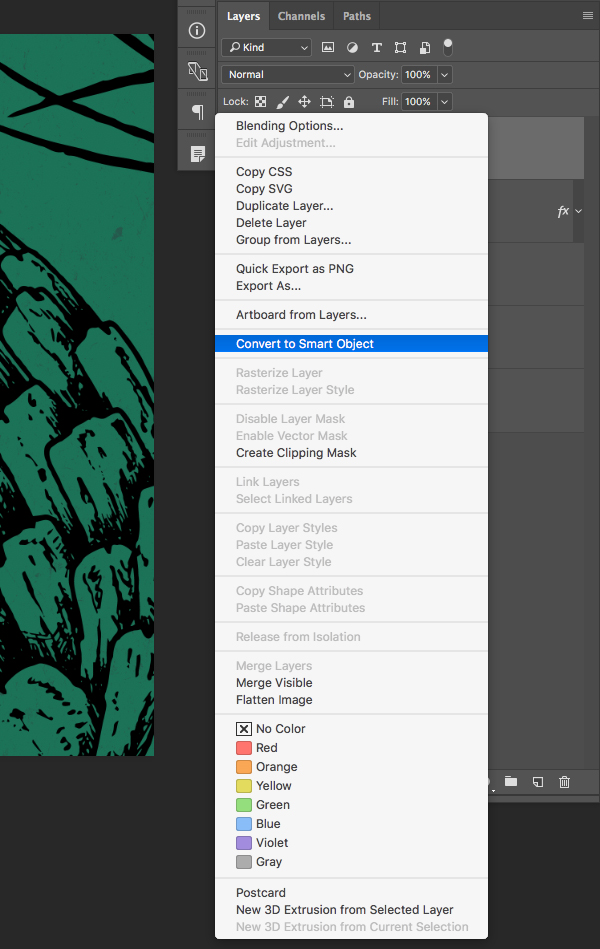
Hold the Control Key and click on the layer to reveal the dropdown menu, and then choose ‘Convert to Smart Object’ as shown below:
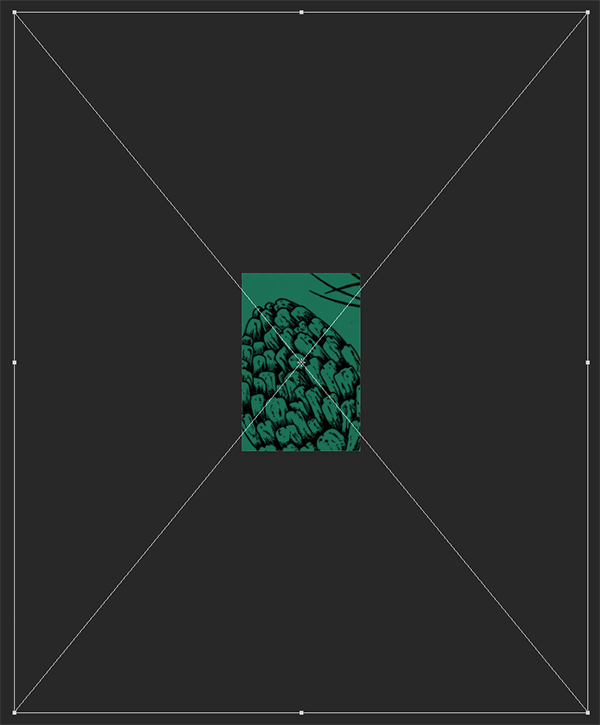
Once you’ve converted your layer into a Smart Object, press Command/Ctrl+T to initiate a Free Transform. Initially you won’t be able to see the entire bounding box, so in order to zoom out and fit the bounding box to your screen press Command/Ctrl+0 on the keyboard.
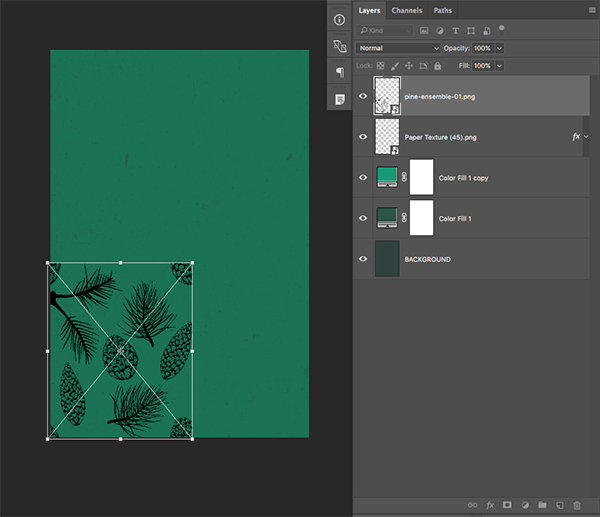
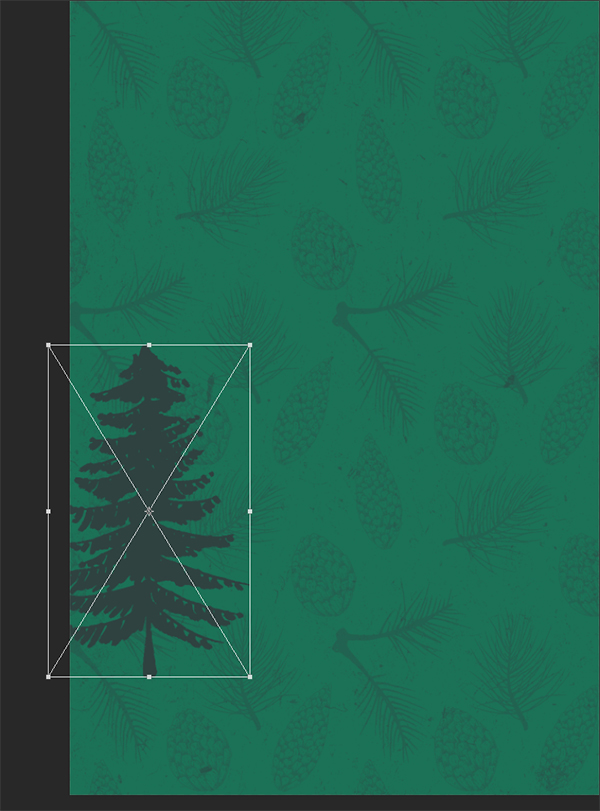
Since our layer is now a Smart Object, we can resize it as much as we like and we don’t need to worry about any rasterization or quality loss like we would if the image were a basic raster layer. Now that we can see the bounding box around the pattern, hold the Alt/Option+Shift keys and drag inwards from any of the four corners of the bounding box to scale the pattern down from the center while constraining the proportions of the layer. For this we want to scale the pattern down and place it into the lower left hand corner of the document as shown below:
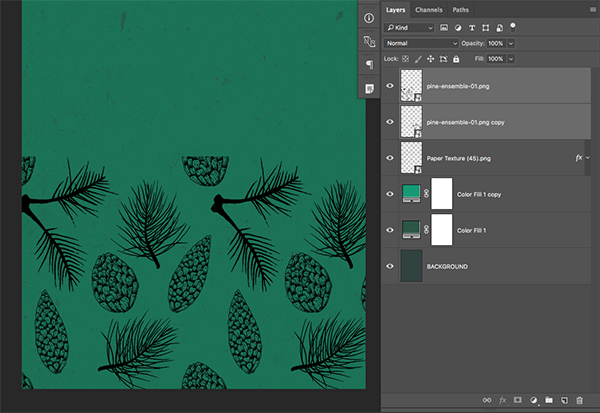
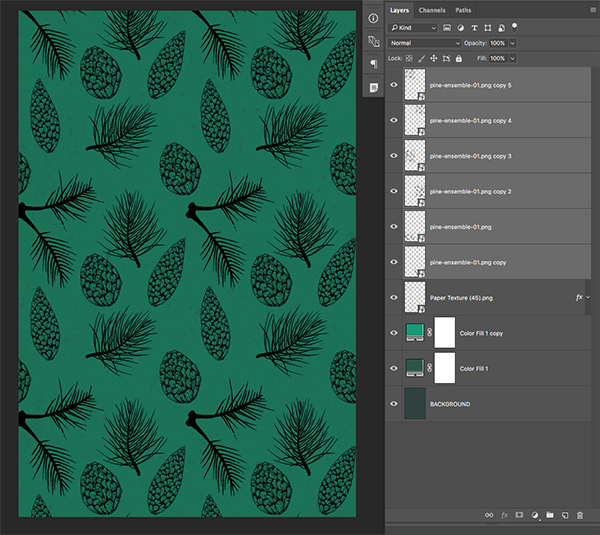
After scaling the first pattern Smart Object Layer down, press Command/Ctrl+J to duplicate the layer, and then press Command/Ctrl+T with the duplicate layer selected to initiate another Free Transform. From here we will hold the Shift Key and slide the duplicate copy over to the right until it matches up with the right edge of the original layer. It should now look like a seamless pattern going across the bottom of the canvas.
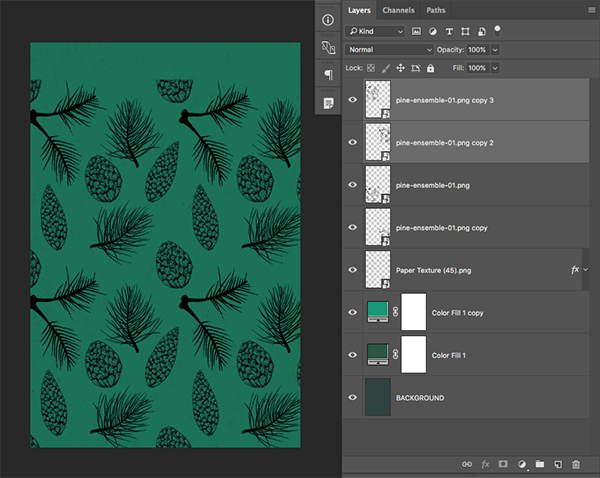
Next, hold the Shift Key and click on each of the two Smart Object Layers so they are selected at the same time. From here, press Command/Ctrl+J to duplicate both of these layers. Once you’ve done that, select both of the duplicate layers while holding the Shift Key and then press Command/Ctrl+T to initiate another Free Transform, and then slide both copies upwards so that both layers align with the two below them as shown here:
Repeat this once again so that you have two more copies above the previous two until your whole canvas is filled with the pattern. Once you have the seamless pattern in place, select the very top copy in the Layers Palette, hold the Shift Key, and then select the bottom copy of the pattern so all six copies are selected simultaneously.
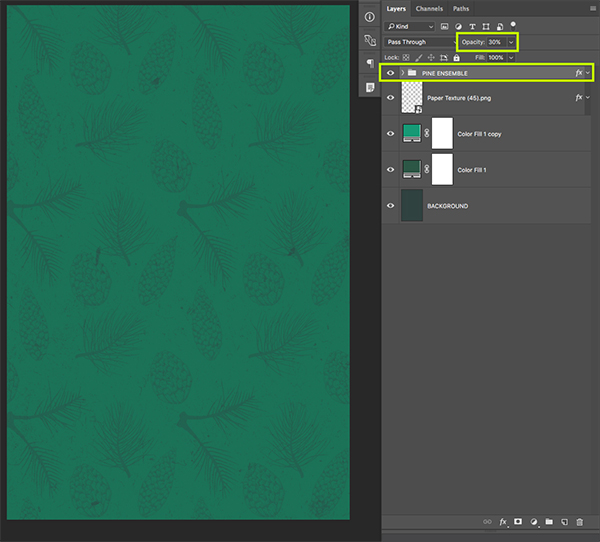
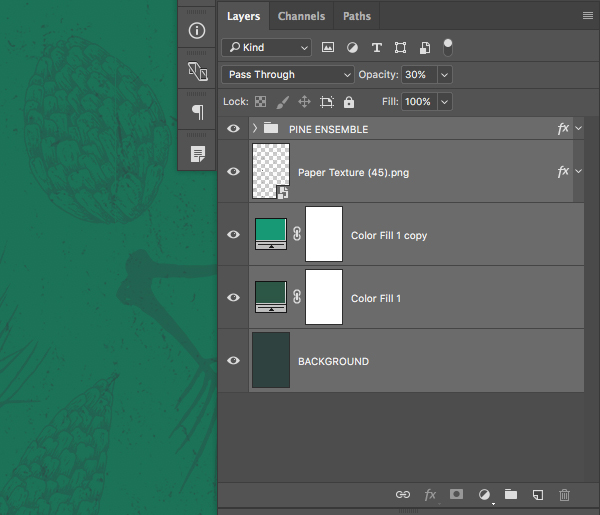
With all six copies of the pattern selected, press Command/Ctrl+G on the keyboard to put them into a new Group Folder. Double click on the ‘Group 1’ text and change the name to ‘PINE ENSEMBLE’ before holding the Control Key and dragging the small ‘fx’ icon from the ‘Paper Texture (45).png’ layer onto the folder to apply the same color overlay and layer style to the group. Doing this will change the fill color and the opacity of the folder. From here, select the folder and then press the number ‘3’ on the keyboard to reduce the opacity of the entire folder to ’30%’. Your image should now look like this:
Step 6: Grouping the Groups
Select the ‘PINE ENSEMBLE’ Group Folder in your Layers Palette and then hold the Shift Key and select the very bottom layer in your Layers Palette – this should be the ‘BACKGROUND’ layer. You should now have all of your layers selected at the same time as shown here:
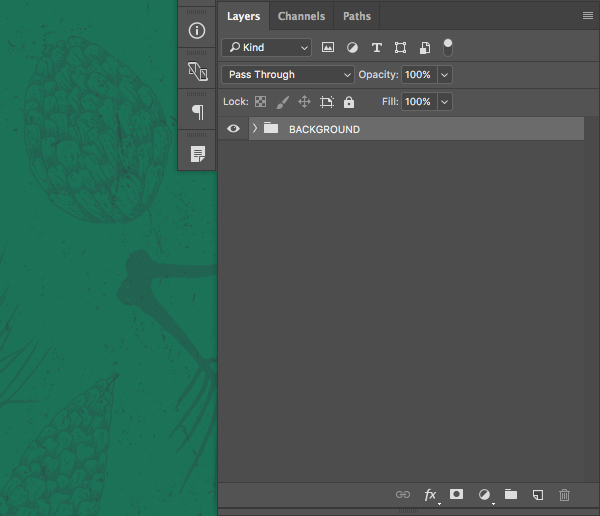
With all of your layers selected, press Command/Ctrl+G to put them all into a new Group Folder. Double click on the folder name and change it to ‘BACKGROUND’ so that all of your layers and folders are now contained inside of this folder.
Step 7: Planting Trees
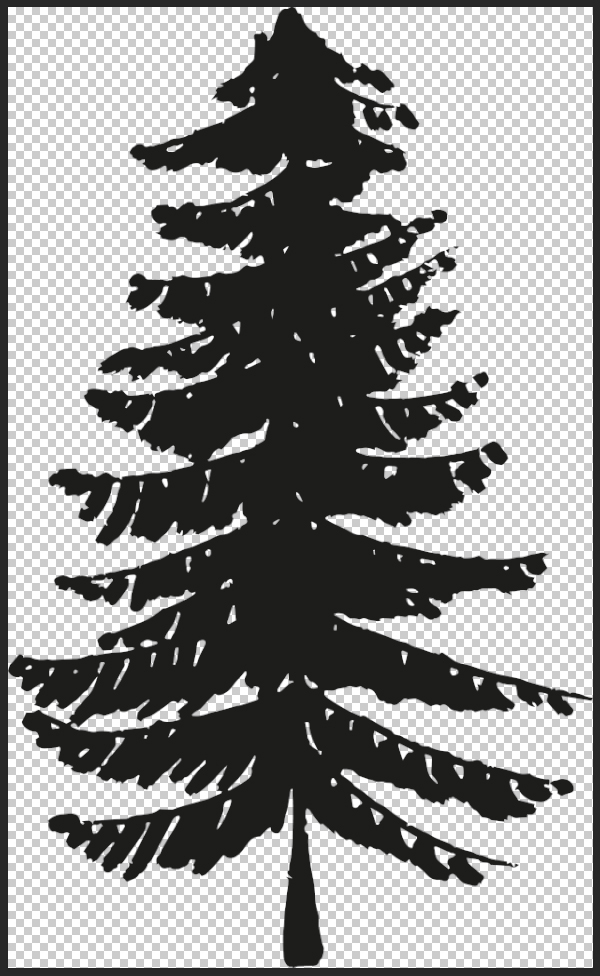
Open the ‘tree 5.png’ file from the freebies folder in Photoshop.
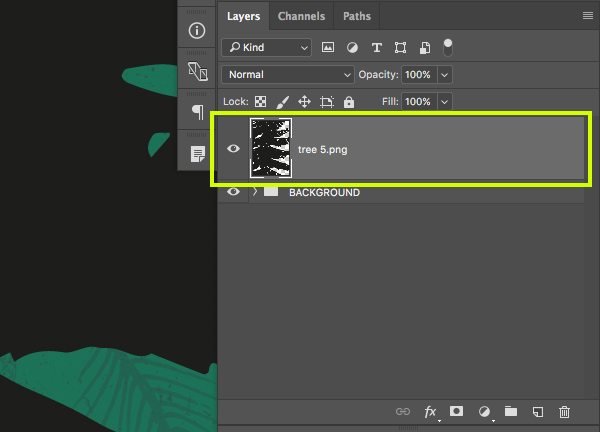
Click and drag the tree image into your document and double click the ‘Layer 1’ text to change it to the file name as shown below:
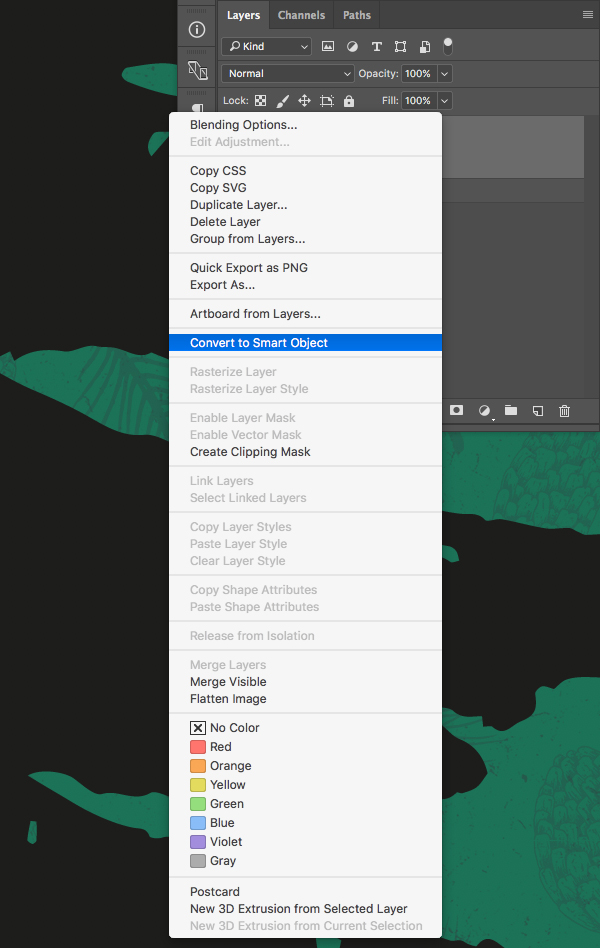
Hold the Control Key and click on the layer before choosing ‘Convert to Smart Object’ from the dropdown menu that appears.
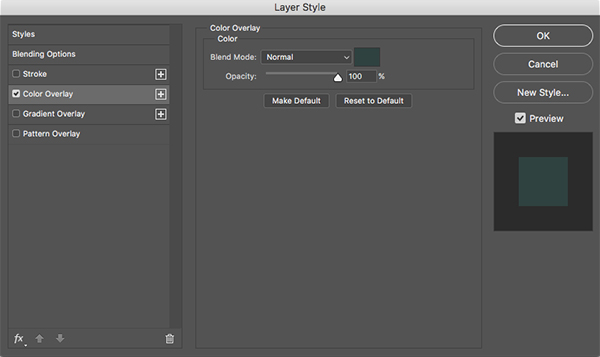
Double click on the Smart Object layer to bring up the Layer Style options and check off ‘Color Overlay’.
For the fill color, let’s once again use the hex value ‘#2F4240’ from earlier. After that, press ‘OK’ two times to apply the changes and close out of both dialog boxes.
Step 8: Trees on Trees
Select the tree Smart Object layer and press Command/Ctrl+T to apply a Free Transform. Once again, if you can’t see the bounding box around the shape, press Command/Ctrl+0 to zoom out and fit it to your screen. Once you have done that, drag inwards from any of the four corners of the bounding box while holding the Alt/Option+Shift Keys to scale it down proportionally from the center until it’s about the same size as the one shown below:
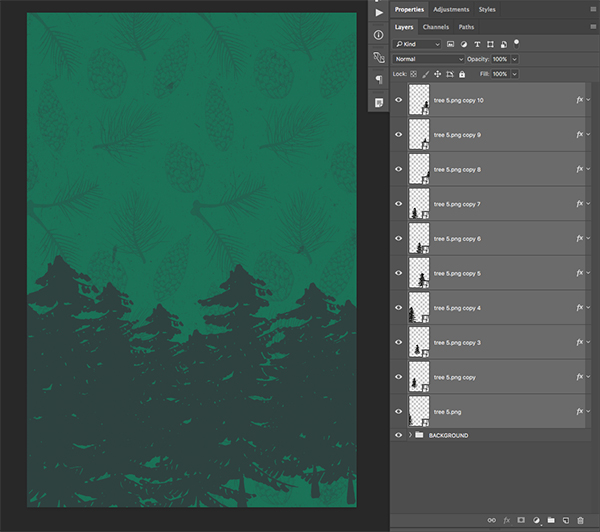
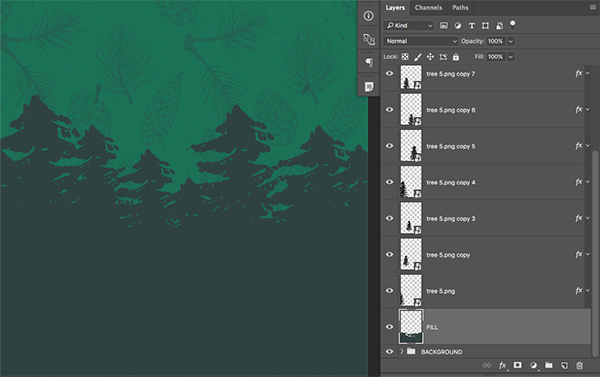
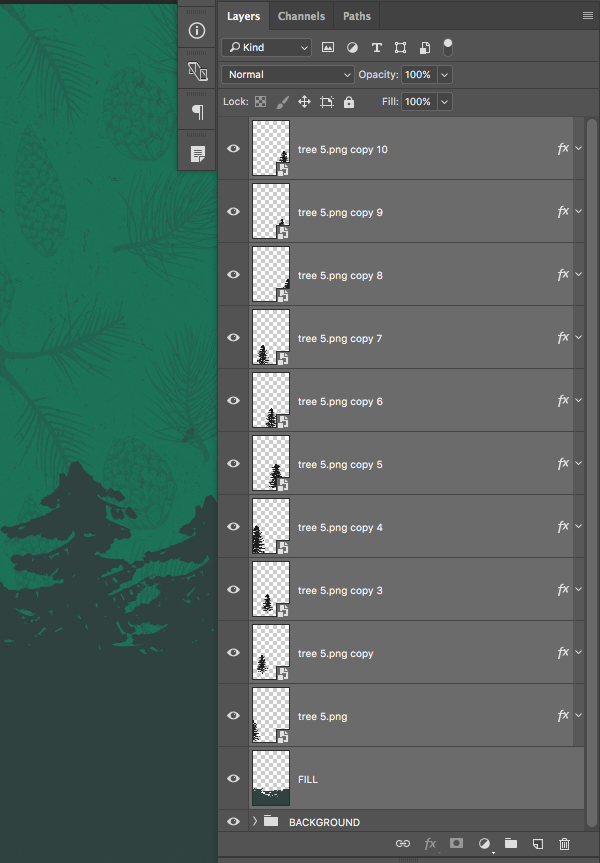
Next, press Command/Ctrl+J to duplicate the layer and make this copy larger and move it next to the original tree layer. Repeat this 8 or 9 more times so you have a row of trees going across the image at different heights and sizes. You should end up with something like this:
Step 9: Filling Empty Spaces
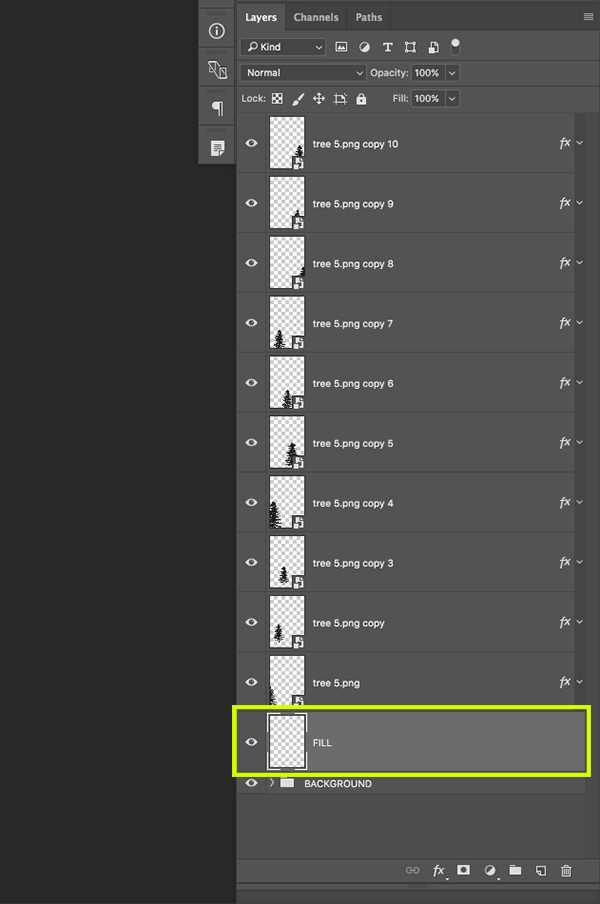
Once we have all of our trees in place, press Command/Ctrl+Alt/Option+Shift+N on the keyboard to create a new layer. Conversely, you could also just click on the ‘Create a new layer’ icon at the bottom of the Layers Palette. Once you have done that, move the new layer just below the original copy of your tree so it’s all the way at the bottom. Double click on the ‘Layer 1’ text and change it to ‘FILL’ as shown in the image here:
Press ‘B’ on the keyboard to switch to your Brush Tool and make sure that you have a hard round brush at 100% opacity. Your settings should look like this:
What we want to do next is make sure that our foreground color is the same as the color of the trees. To do this you can just hold the Alt/Option Key to toggle over to your Eyedropper Tool (I) and then click on one of the trees to sample the color, and then release the Alt/Option Key to return to the Brush Tool. After that, begin painting in along the bottom half of the trees to fill in any gaps. Here is how this should look when you are finished painting:
Once you’ve covered up all of the spaces on the bottoms of the trees we will select the ‘FILL’ layer and then hold the Shift Key and select the very top layer, which should be one of the copies of the tree. You should now have all of the trees and solid color layer selected at the same time.
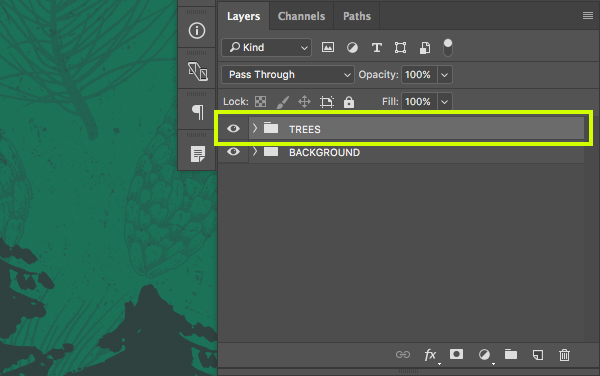
From here, press Command/Ctrl+G to put all of these layers into a new Group Folder. Double click on the ‘Group 1’ text in the Layers Palette and change the name of the folder to ‘TREES’ or something similar of your choice. You should now have a ‘BACKGROUND’ folder as well as a ‘TREES’ folder just above it.
Step 10: Let it Snow!
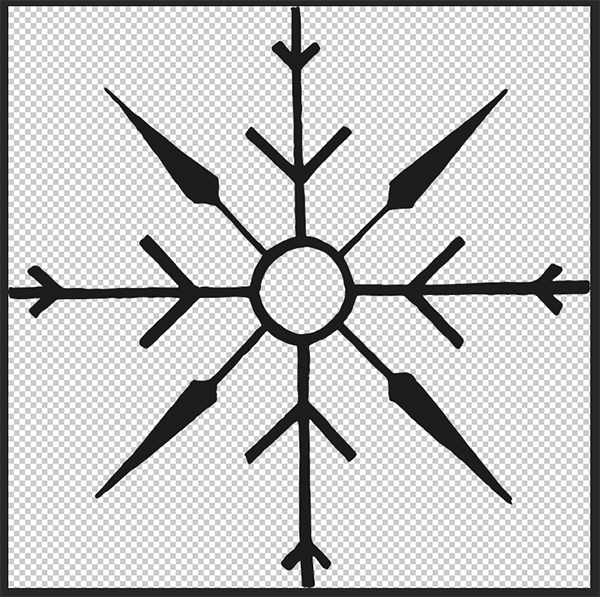
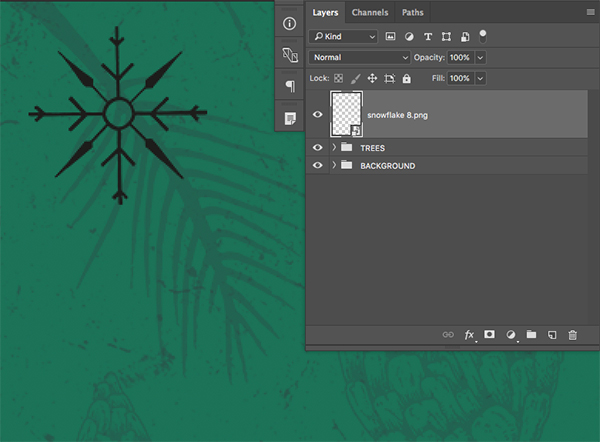
Next, open the ‘snowflake 8.png’ file from the freebies folder for the tutorial.
Drag the snowflake illustration into your document and change the name to the name of the file. After that, hold the Control Key and click on the layer and convert it to a Smart Object. Once you have renamed the layer and converted it, press Command/Ctrl+T to initiate a Free Transform and then click and drag any of the four corners of the bounding box inwards while holding the Alt/Option+Shift keys to scale the snowflake down so that it’s pretty small in the upper left hand corner of the design.
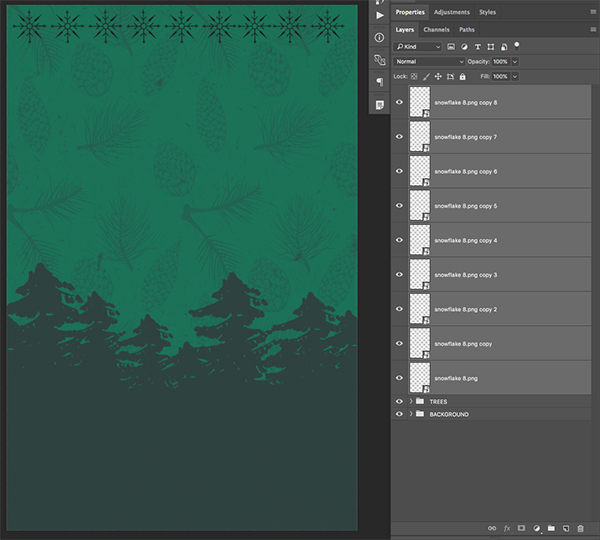
Press Command/Ctrl+J to duplicate the snowflake and then hold the Shift Key and slide the copy over to the right. Repeat this 8 or 9 times until the snowflakes go all the way across the top of the image like this:
After you have a row of snowflakes, select the top copy in your Layers Palette, then hold the Shift Key and select the very bottom or the original copy. You should now have all of the copies of the snowflake selected at the same time. Once again press Command/Ctrl+T and this time drag inwards from the lower right corner of the bounding box while holding the Shift Key to scale all of the snowflakes down together. Once you are happy with the size of the snowflakes press the ‘Enter’ key to apply the changes. The goal here is to reduce the size of these so we can add more copies going across.
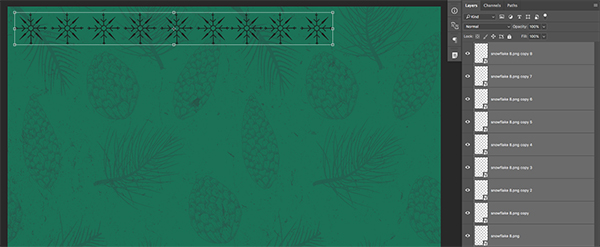
After applying the transformation has been made, create a few more copies going across so that you end up with about 15-16 of them in a single row like this:
What we want to do next is make sure that the snowflakes are evenly spaced out. To do this, select all of the snowflakes in your Layers Palette and then notice the ‘Align’ tools running along the top toolbar at the top of the screen. We want to select the icon that says ‘Distribute Horizontal Centers’ as highlighted in the image below:
Step 11: Colorful Snowflakes
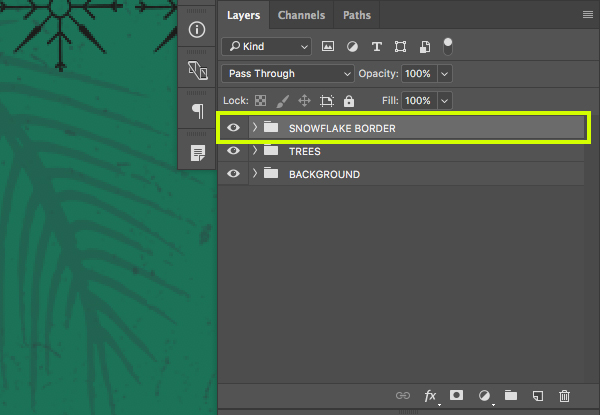
Now that we have distributed all of the snowflakes evenly across the top of our image we can place them into a new folder. With all of your snowflakes still selected in the Layers Palette, press Command/Ctrl+G and rename this new folder ‘SNOWFLAKE BORDER’ as shown below:
Double click on the Group Folder to open the Layer Style box and check off the ‘Color Overlay’ option.
Here we want to apply the same fill color that we used for our trees – ‘#2F4240’.
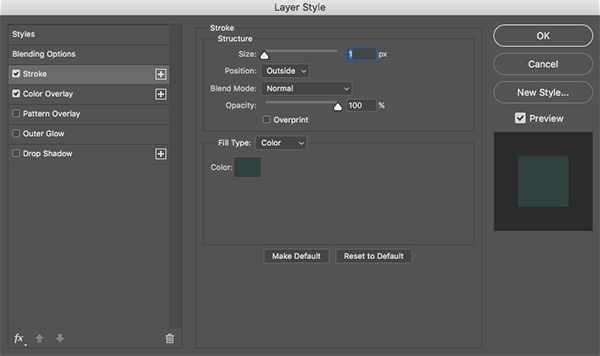
Once you have applied the fill color press ‘OK’ once to close out of the color picker. From here, check off the ‘Stroke’ option to apply that style as well. For the settings here we simply want to add a ‘1px’ stroke to the outside of our shape using the same fill color. This will make each of the snowflakes appear a bit bolder and heavier as we don’t want the lines to be too thin since they can get lost after scaling them down a bit. After making those adjustments press ‘OK’ to apply the changes and close out of the dialog box.
You should now have a Group Folder with the small ‘fx’ icon next to it as shown below:
Step 12: Time and Place
Create a new layer at the top of your Layers Palette and press ’T’ on the keyboard to switch to the Type Tool. Click along the bottom of your design and type out ‘ELF FACTORY | 446 NICHOLAS BLVD | NEW YORK, NY 10011’ and use a clean sans serif typeface. In this case I am using ‘Avenir’ set to a style of ‘Black’ and for the size it should be around ‘5.13pt’. We also want to space the letters out by changing the tracking value to ‘260’ which you can see in the expanded view of the Character Panel in the image below:
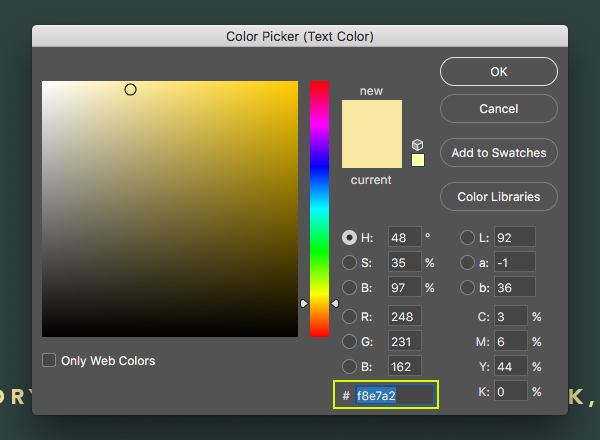
Double click inside of the text box to highlight all of the copy and make sure you have a fill color with a hex value of ‘#F8E7A2’ as shown below:
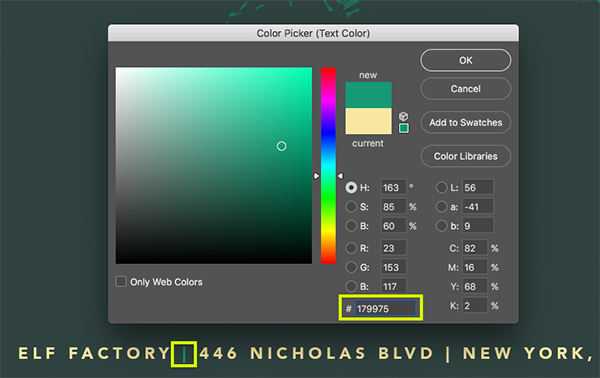
Grab the Type Tool (T) once again, and this time just highlight the vertical piping between the location and street address. Change the fill color of this character to ‘#179975’ as shown here:
Repeat this step once more for the second vertical pipe in the address so you end up with this:
Step 13: Snowcaps
Open the ‘snowflake 6.png’ file from the freebies folder in Photoshop.
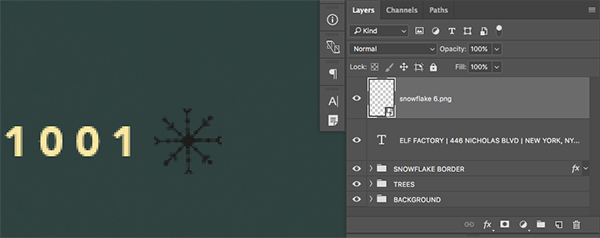
Click and drag this snowflake illustration into your document and change the name of the layer to the file name before converting it into a Smart Object. Press Command/Ctrl+T to initiate a Free Transform and then scale the snowflake down so that it’s nice and small just at the end of the address copy from the previous step. Remember to hold the Alt/Option+Shift keys while scaling the shape down to constrain the proportions of the shape and scale it from the center.
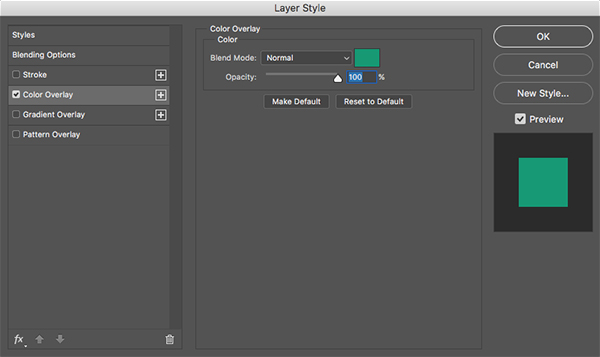
Double click the layer to open the Layer Style panel and check off the ‘Color Overlay’ option.
For the fill color we will use the same teal color that we used for the vertical piping in the text – ‘#179975’. Once you’ve applied the correct color, press ‘OK’ two times to close out of both dialog boxes and apply the changes.
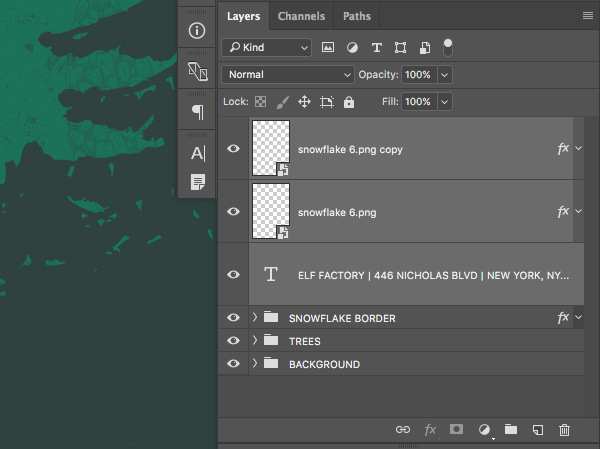
Select the snowflake illustration and press Command/Ctrl+J to duplicate it one time. Hold the Shift Key and drag this copy of the snowflake over to the start of the line of copy. You should end up with something like this:
Select the top snowflake illustration, and then hold the Shift Key and select the text layer so that all three of these associated layers are selected simultaneously in your Layers Palette as shown here:
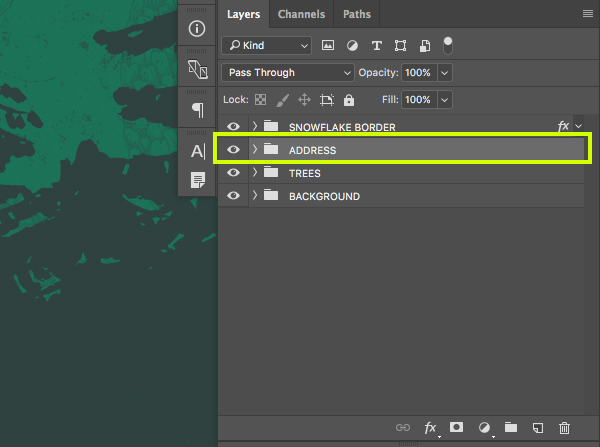
With these three layers selected, press Command/Ctrl+G to put them into a Group Folder. Change the name of the folder to ‘ADDRESS’ and then move it down one position in the Layers Palette so that it is below the ‘SNOWFLAKE BORDER’ folder in the order that it appears.
Step 14: Secondary Type
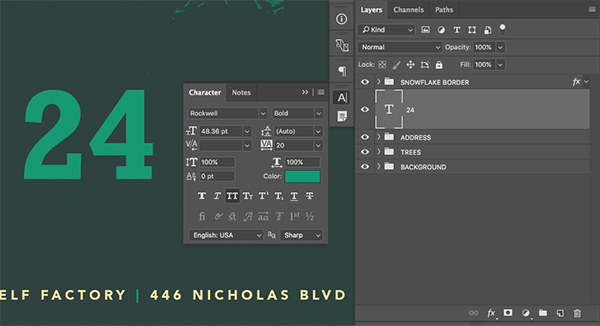
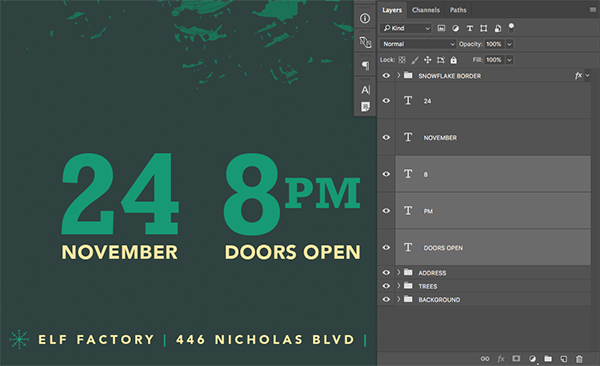
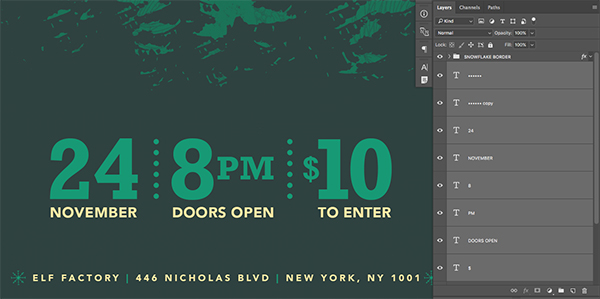
Create a new layer and grab your Type Tool (T) and then type out the number ’24’ using ‘Rockwell’ in the ‘Bold’ style at about ’48 pt’ in size. This is a standard font that should already be on most computers, but if not, any slab serif will do. For the fill color we want to use the same hexadecimal value that we used earlier on for our teal color (#179975).
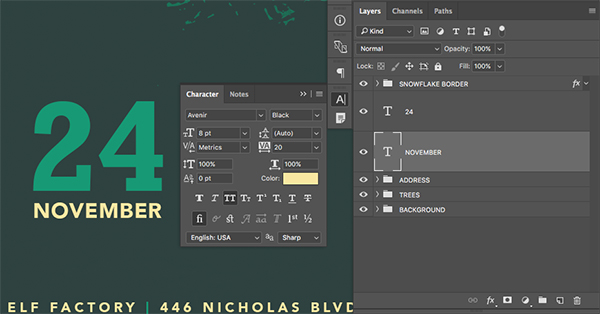
Create another new layer and use your Type Tool (T) to type out the word ‘NOVEMBER’ in all caps. This time we want to use ‘Avenir’ in the ‘Black’ style set to about ‘8 pt’ in size. The color of this text will be ‘#F8E7A2’ and we want to place it just below the number ’24’ as shown below:
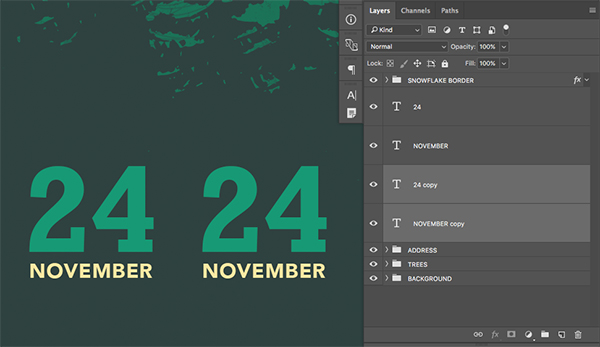
After placing both text layers, hold the Shift Key and select them both so that they are selected at the same time. From here, press Command/Ctrl+J to duplicate them. Select both of the duplicate layers and then hold the Shift Key and drag both of them over to the right like this:
Next, click inside of the number ’24’ with the Type Tool (T) and change the number to ‘8’ and then replace the word ‘NOVEMBER’ with ‘DOORS OPEN’. Once you have done that, select the number ‘8’ and duplicate that by once again pressing Command/Ctrl+J and then slide it to the right of the original layer and use the Type Tool (T) to change the text to say ‘PM’. After that, press Command/Ctrl+T and drag inwards from any of the four corners of the bounding box while holding the Alt/Option+Shift keys to scale the ‘PM’ down from the center, placing it in the horizontal center point of the larger text. Your image should now look like this:
Now we want to select the ‘8’ along with the ‘PM’ and the ‘DOORS OPEN’ text layers by clicking each of the layers while holding Command/Ctrl+Shift on the keyboard. Once these three layers are selected make another copy of them by pressing Command/Ctrl+J. From here, hold the Shift Key and drag these over to the right. We now want to change the number ‘8’ to ’10’ with the Type Tool (T). You may notice that by default there is a pretty big gap in between the ‘1’ and the ‘0’ in ’10’ so in order to fix this we will click in between the two numbers with the Type Tool (T) and then decrease the spacing by holding the Alt/Option Key and tapping the left arrow a few times.
Next, change the ‘PM’ to a ‘$’ symbol and move it to the left of the number ’10’. We also want to change the ‘DOORS OPEN’ text to ‘TO ENTER’ so we end up with this:
Step 15: Making the Rules
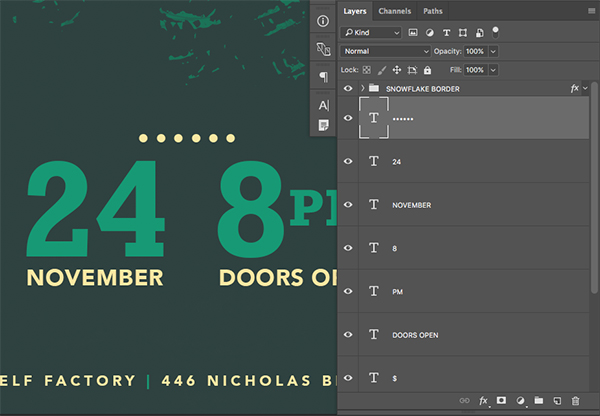
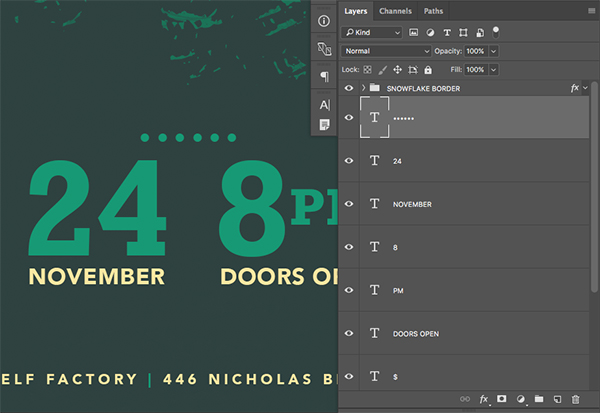
Select one of the beige text layers and duplicate it. Move the layer above the existing text or off to the side to separate it before switching back to the Type Tool (T) and double clicking inside the text to highlight it. Hold the Alt/Option Key and tap the number ‘8’ to create a bullet. Create about six of these bullets so you have a dotted line like the image shown below:
Double click inside of the dotted line text box to highlight the bullets and then change your foreground color to ‘#179975’ so the bullets now match the color of the large teal text.
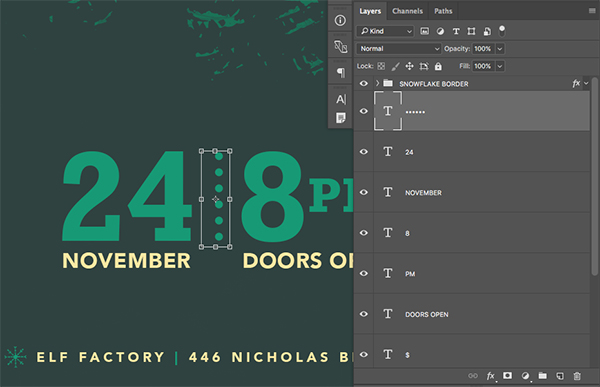
Press Command/Ctrl+T to initiate a Free Transform and then hold the Shift Key and rotate the bullets 90º so they run vertically instead of horizontally across. Place the vertical dotted line between the ’24 NOVEMBER’ and the ‘8PM DOORS OPEN’ text like the image below:
Select the dotted line border and duplicate it by pressing Command/Ctrl+J and then hold the Shift Key and drag it over towards the right to separate the ‘8PM DOORS OPEN’ text and the ‘$10 TO ENTER’ copy. Your text should now look like this:
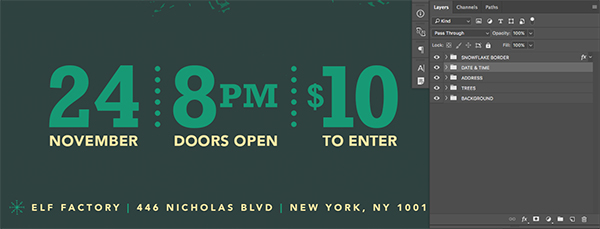
Hold the Command/Ctrl+Shift keys and click on each of the layers so the entire group is selected at the same time, and then press Command/Ctrl+G to put them into a new folder. Change the name of your new folder to ‘DATE & TIME’ so all of these layers are together.
Step 16: It’s a Celebration!
Open the ‘Celebration_Text_CC.eps’ file in Adobe Illustrator. I have also saved these outlined text files for other previous versions of Illustrator as well, so if you have an older version then open that file instead.
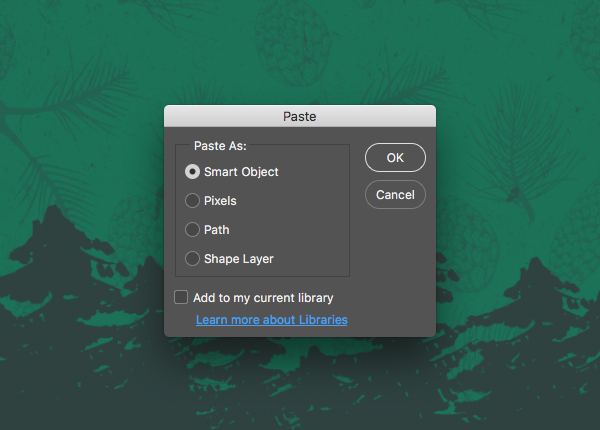
Press Command/Ctrl+A to ‘Select All’ and then press Command/Ctrl+C to copy all of the text. From here, return to Photoshop and press Command/Ctrl+V to paste the file. You will then be prompted with a dialog box asking how you want to paste the text, so choose the first option that says ‘Smart Object’ and then press ‘OK’.
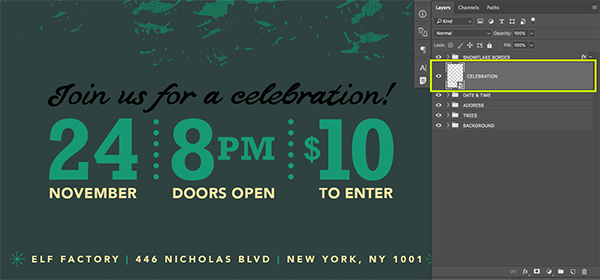
Once your text appears, hold the Alt/Option+Shift keys and drag inwards from any of the four corners of the bounding box to scale the text down until it matches the width of the entire ‘DATE & TIME’ folder. Double click on the layer name and change it to ‘CELEBRATION’ and then press ‘Enter’ to apply the changes.
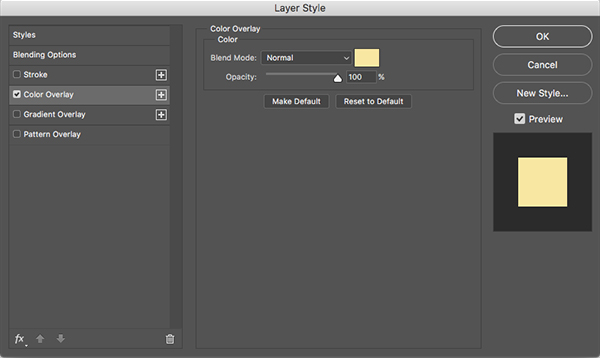
Once you have positioned your text accordingly, double click on the layer to bring up the Layer Style options. From here, check off the ‘Color Overlay’ option.
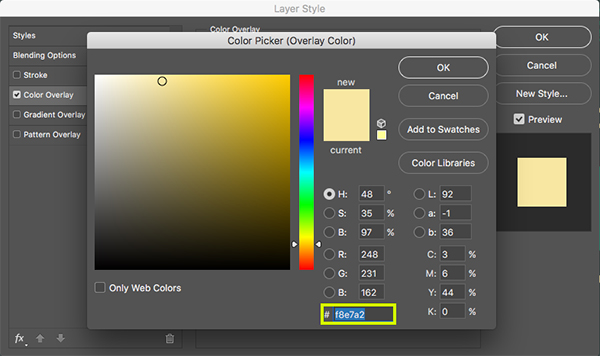
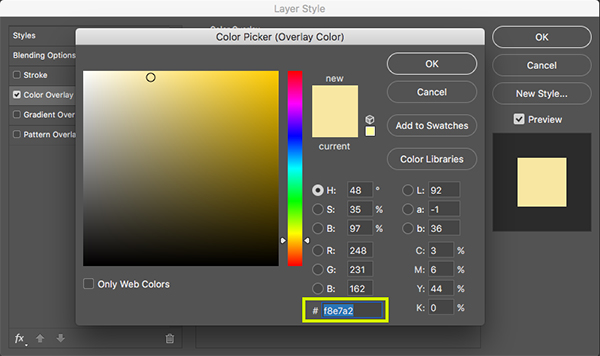
For the fill color enter a hex value of ‘#F8E7A2’ as shown below:
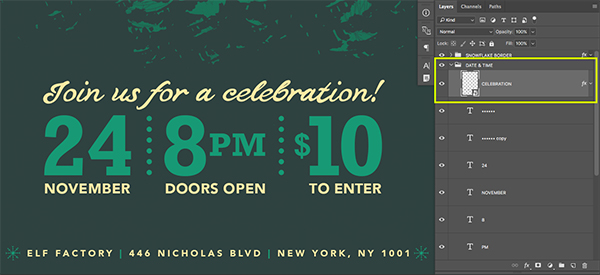
Press ‘OK’ two times to apply the changes and close out of both of the dialog boxes. Next, click on the small arrow next to the ‘DATE & TIME’ folder to reveal the layers inside, and then drag the ‘CELEBRATION’ Smart Object layer into the folder as shown here:
Step 17: Riding the Sleigh
Next, open the ‘Sleigh_CC.eps’ file in Adobe Illustrator. Again, if you have an older version of Illustrator then open the corresponding EPS file instead.
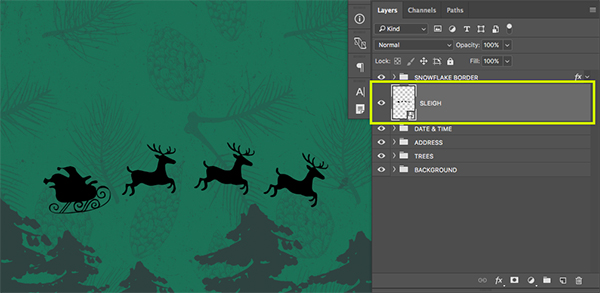
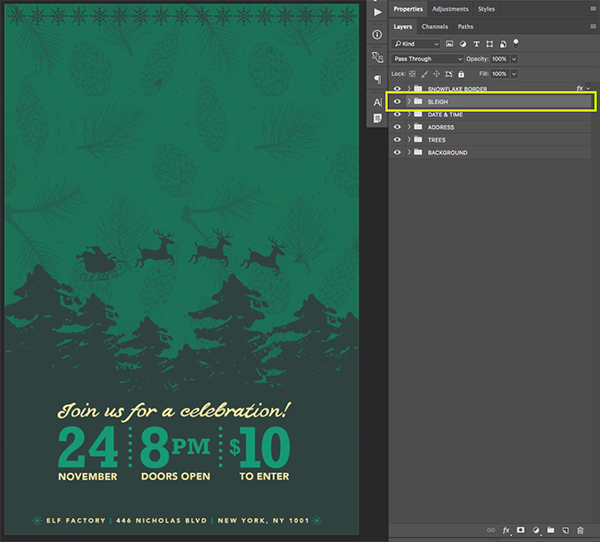
Press Command/Ctrl+A to ‘Select All’ and then press Command/Ctrl+C to copy the sleigh. From here, return to Photoshop and press Command/Ctrl+V to paste the file. Here we will once again choose to paste this as a ‘Smart Object’ and then press ‘OK’. Scale the layer down a bit and place it above the trees before pressing the ‘Enter’ key to apply the changes. From here we will double click on the layer name and rename the layer ‘SLEIGH’ as shown here:
After scaling the sleigh down and renaming it we want to double click the layer to bring up the Layer Style box once again and then check off the ‘Color Overlay’ option.
For the fill color enter a hex value of ‘#2F4240’ and then press ‘OK’ two times to close out of both dialog boxes and apply the changes.
Select the ‘SLEIGH’ layer and then press Command/Ctrl+G to place it into a new folder and give it the same name. Your image should now look like this:
Step 18: Happy Holidays
Next, open the ‘Happy_Holidays_Text_CC.eps’ file from the freebies folder in Adobe Illustrator. Press Command/Ctrl+A to ‘Select All’ and then copy it by pressing Command/Ctrl+C.
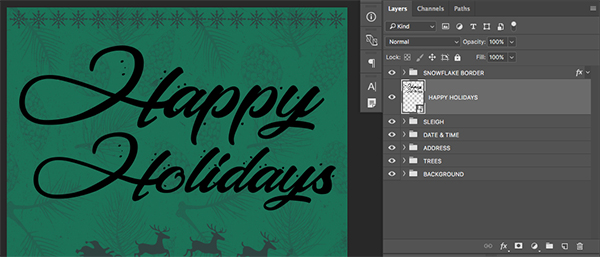
Return to Photoshop and press Command/Ctrl+V to paste the layer as a Smart Object. After pasting the layer, resize it so that it fits comfortably in the top-center part of the image with a bit of breathing room on both sides. Once you have done that, rename the layer to ‘HAPPY HOLIDAYS’ as shown below:
After scaling and renaming the text, double click the layer to bring up the Layer Style box and check off ‘Color Overlay’.
For the fill color enter a hex value of ‘#F8E7A2’ and then press ‘OK’ two times to close out of both dialog boxes and apply the changes.
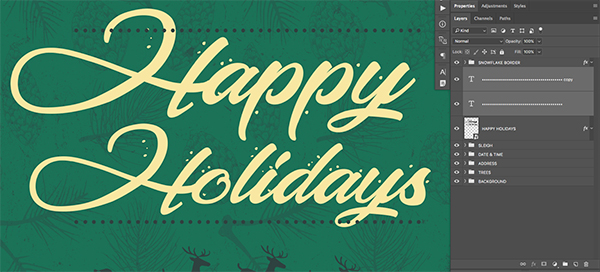
Your text should now look like this:
Step 19: Dividers
Create a new layer and switch over to your Type Tool (T) before holding the Alt/Option Key and pressing the number ‘8’ on the keyboard to make a bullet. Do this several times until you have about 20-30 of them and then double click inside and change the fill color to ‘#2F4240’. Also, make the bullets fairly small and increase the tracking like we did when we created the vertical dividers on our ‘DATE & TIME’ text from earlier. The goal here is to make the dividers span the width of the ‘HAPPY HOLIDAYS’ text until your divider looks something like this:
Select your divider layer and press Command/Ctrl+J to duplicate it before holding the Shift Key and sliding it up above the word ‘HAPPY’ as shown below:
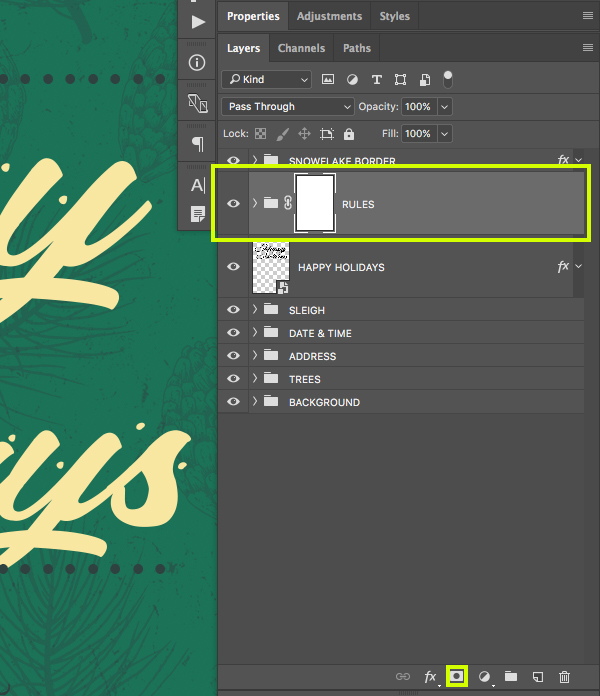
Hold the Shift Key and select the top divider layer, and then select the one just below it so they are both selected at the same time. After that, press Command/Ctrl+G to place them into a new folder and rename it ‘RULES’. Once you have done that, click on the ‘Add Layer Mask’ icon at the bottom of the Layers Palette to add a mask to the folder.
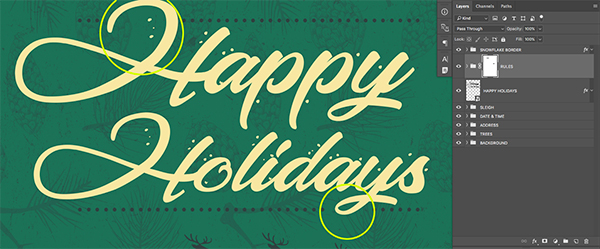
Press ‘B’ on the keyboard to switch to your Brush Tool and make sure that you have a hard round brush selected at full opacity. We also want to make sure that we have a solid black foreground color so if you need to you can press ‘D’ to reset the default colors, and then use the letter ‘X’ to toggle between the background and foreground colors until black is the foreground color. From here what we are going to do is brush over any of the bullets that interfere with the letters in our ‘HAPPY HOLIDAYS’ text. In this case we will need to brush over a few of the bullets on the first ‘H’ in ‘HAPPY’ as well as a few of the bullets around the letter ‘Y’ in ‘HOLIDAYS’ as indicated in the image below:
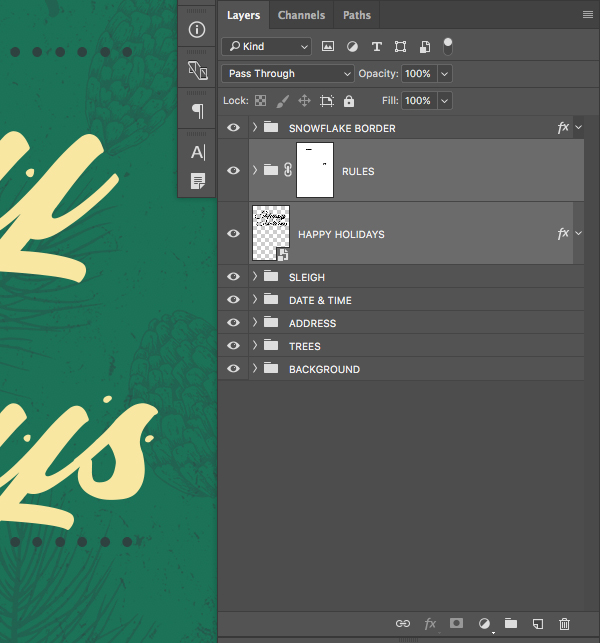
Once you have brushed out and masked the bullets, select the ‘RULES’ folder, hold the Shift Key, and then click on the ‘HAPPY HOLIDAYS’ Smart Object below. From here, press Command/Ctrl+G to put them into a new folder and rename it ‘HAPPY HOLIDAYS’.
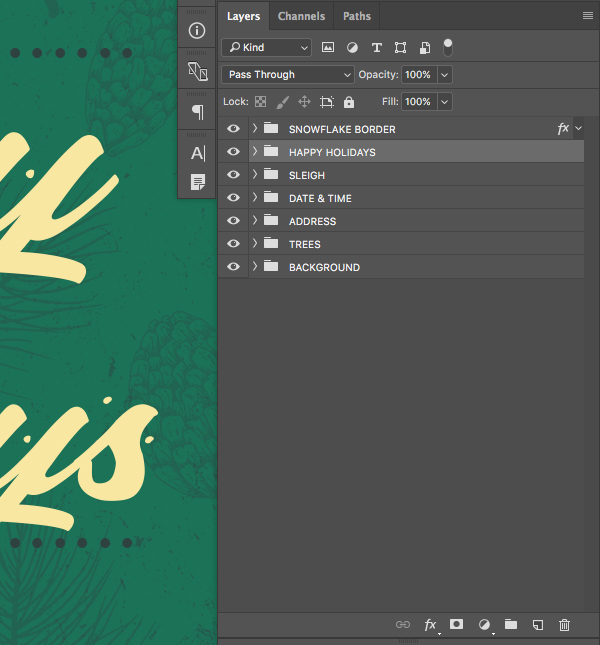
Your Layers Palette should now look like this:
Step 20: Rolls Gold
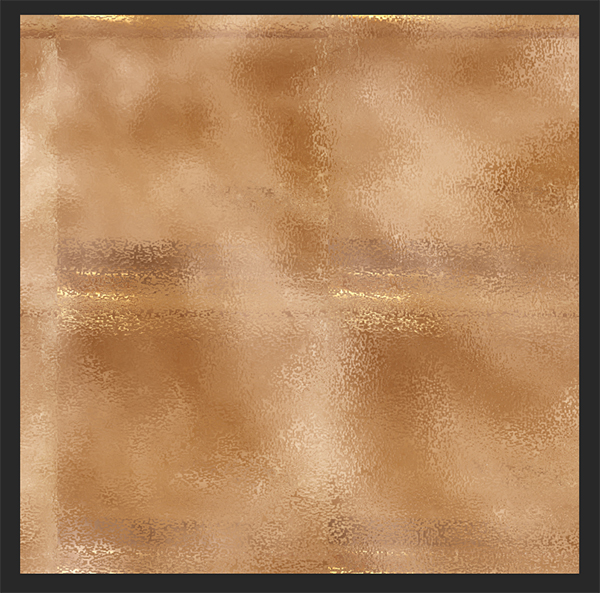
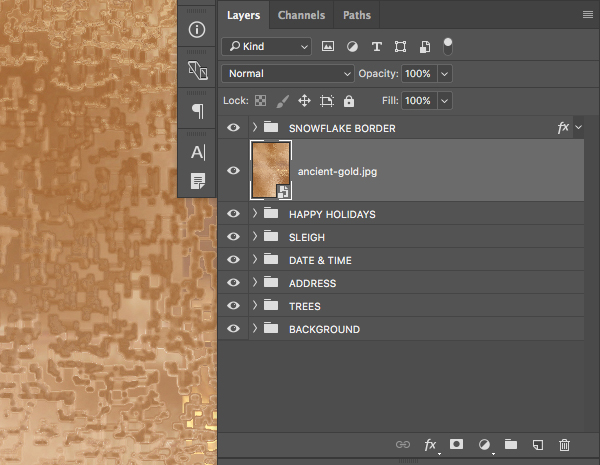
Open the ‘ancient-gold.jpg’ file from the freebies folder in Photoshop.
Click and drag the gold texture into your document and then convert the layer into a Smart Object and rename it with the name of the file.
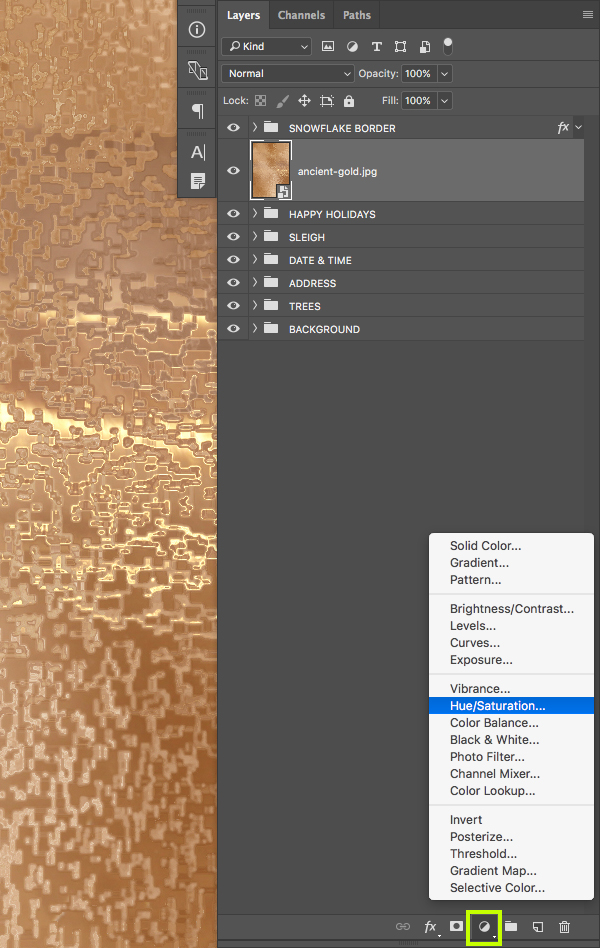
Hold the Alt/Option Key and click on the Adjustment Layer icon at the bottom of the Layers Palette before selecting ‘Hue/Saturation…’ from the menu.
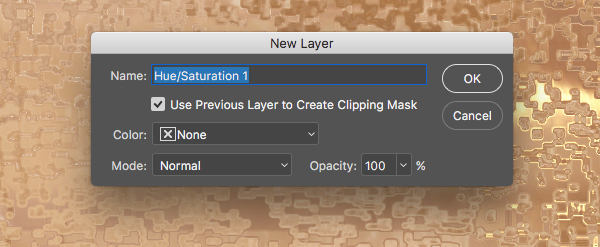
You will then be prompted with a dialog box where you want to check off the option that says ‘Use Previous Layer to Create Clipping Mask’ before clicking ‘OK’ to apply the change.
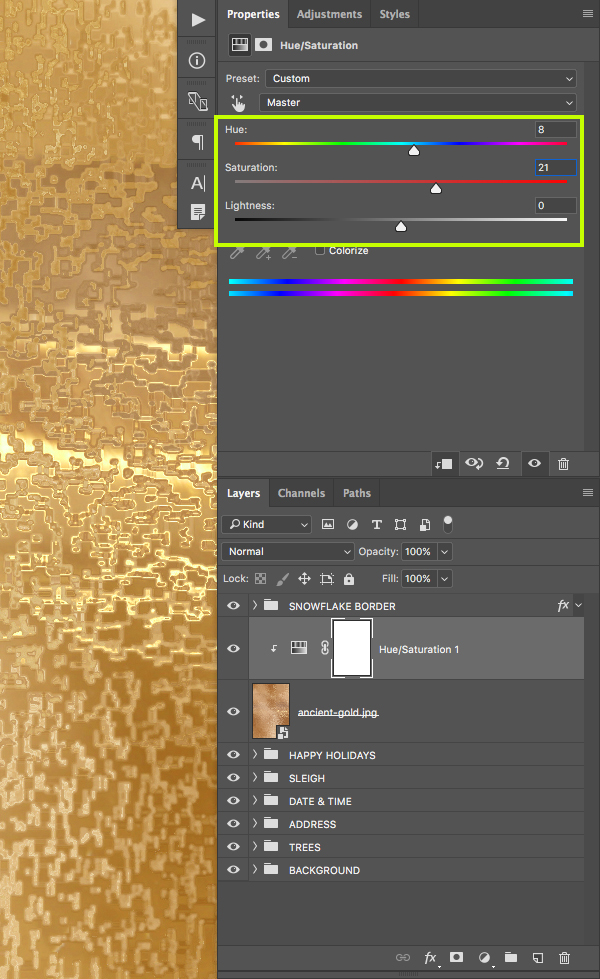
You should now have your Hue/Saturation Adjustment Layer just above the gold texture layer and it will have a Clipping Mask applied to it so that it only affects the texture layer below. For the properties, change the ‘Hue’ to ‘8’ and the ‘Saturation’ to about ’21’ as indicated below:
Step 21: Golden Age
Select the ‘ancient-gold.jpg’ layer and then return to the Adjustment Layer icon at the bottom of the Layers Palette. This time, choose ‘Solid Color…’ from the menu that appears.
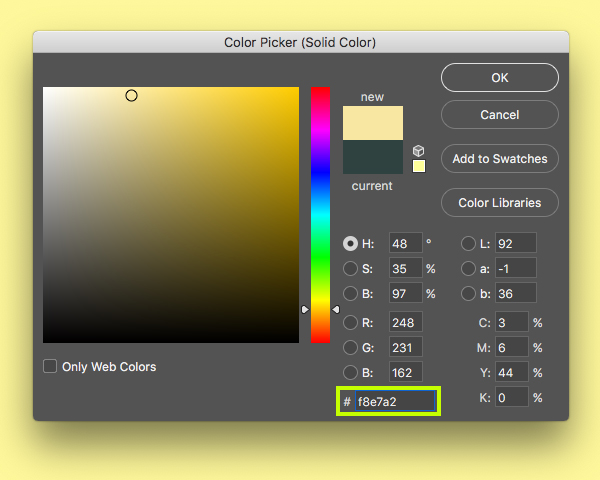
For the fill color use the hex value ‘#F8E7A2’ as shown in the image below:
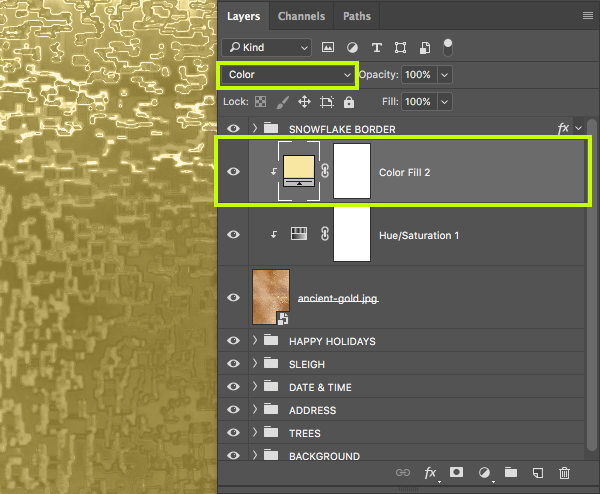
Press ‘OK’ to apply the change and then the new Adjustment Layer will be added with a Clipping Mask automatically applied. Initially, this layer will be placed underneath the ‘Hue/Saturation’ layer, but we want to move it just above it. To do that you can simply press the Command/Ctrl+] keys or manually drag the Adjustment Layer up one position in the stack. From here, change the Blend Mode of the layer to ‘Color’ as shown below:
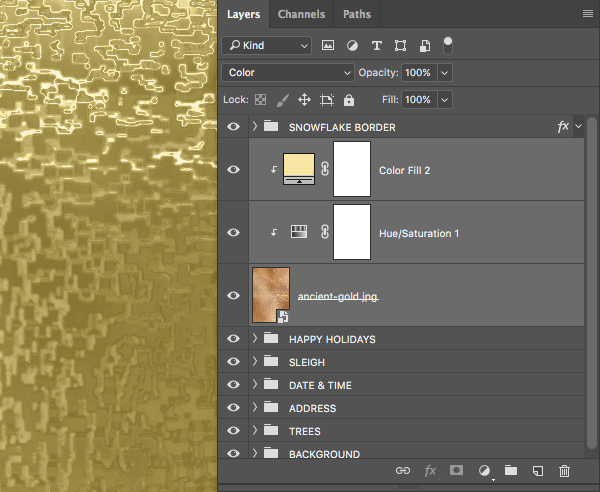
Select the ‘Color Fill 2’ layer and then hold the Shift Key and select the ‘ancient-gold.jpg’ layer so all three of these layers are selected at the same time.
Press Command/Ctrl+G to place these three layers into a new folder and rename it ‘GOLD’ as shown here:
Step 22: Masks of Gold
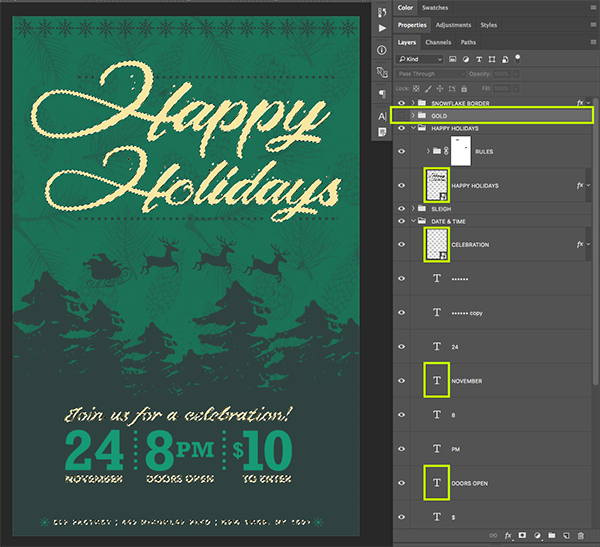
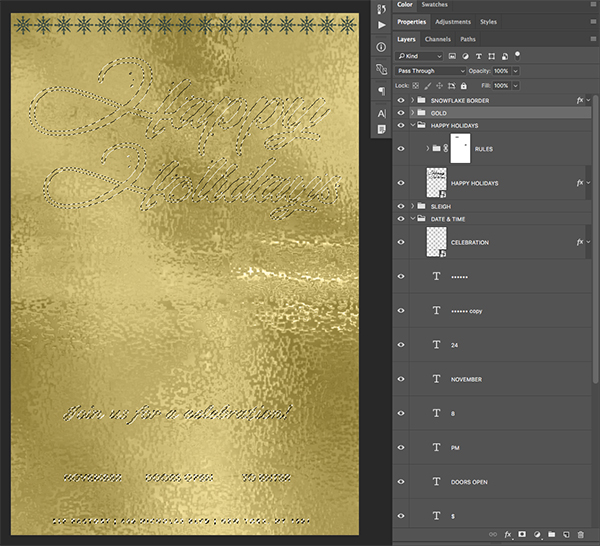
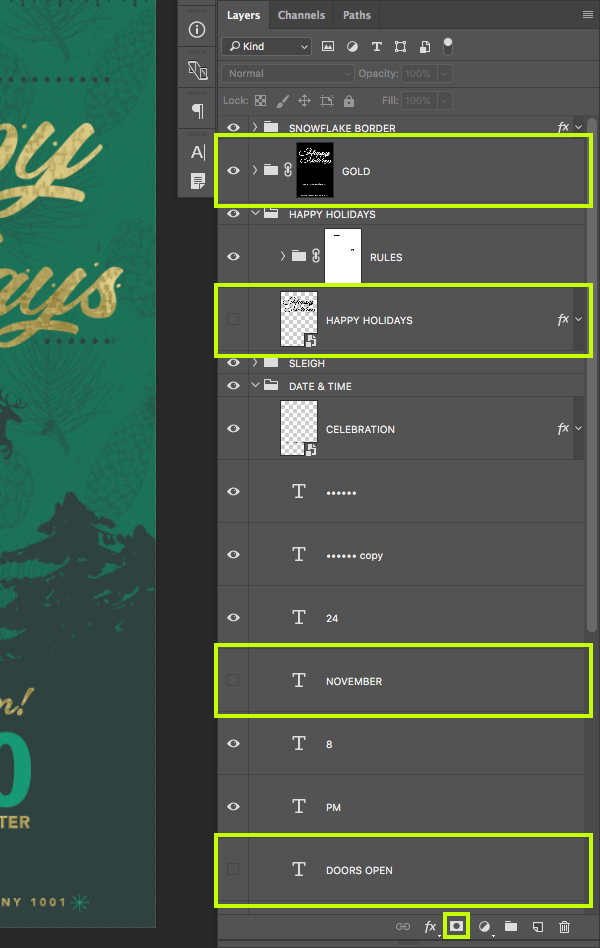
The next step is a little bit tricky, but what we want to do is turn off the visibility of the ‘GOLD’ folder and then hold the Command/Ctrl+Shift keys and click on all of the layer thumbnail icons for the layers that are filled with our light beige color. In order to do this you will have to expand the contents of all of the group folders and scroll down to select the ‘HAPPY HOLIDAYS’ Smart Object layer along with the ‘CELEBRATION’ layer, ‘NOVEMBER’ and ‘DOORS OPEN’ along with ‘TO ENTER’ and the ‘ELF FACTORY…’ layers. You should then see the marching ants around all of your beige colored text indicating the selection. Remember, you only need to click on the layer thumbnails, not the layer names.
With all of the selections active, turn the visibility of the ‘GOLD’ folder back on.
From here, click on the ‘Add Layer Mask’ icon at the bottom of the Layers Palette. This will now mask the gold texture so that it only appears in the areas occupied by our beige text. We will now turn off the visibility of all of those layers that we selected so we don’t have any weird outlines below the gold texture. Notice the visibility of all of these layers is now off in the image below:
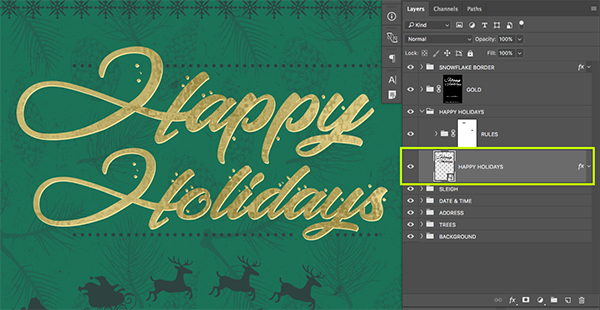
So now that we have the gold texture applied to our text the only layer we want to turn back on is the ‘HAPPY HOLIDAYS’ Smart Object layer. Once you have turned that layer back on, tap it over to the right two times and down one or two times to create a bit of an offset or beige drop shadow look. This will help create a nice effect that adds a bit of depth and bring the focus back to our text.
We have now completed our Christmas Party Flyer! We created this using only a small handful of these awesome curated textures and elements, so just imagine what you could do with the full bundle that will give you access to this huge collection of design elements! This collection is sure to help you take your work to the next level! I can’t wait to see what you guys do with it!
Remember that whether it’s your outcome for this tutorial or something new you’ve made, we’d love to see your designs on our Facebook page.
Please leave a comment if you have any questions or suggestions. I always look forward to hearing from you!
There’s still time to check out The Vibrant Textures, Patterns and Backgrounds Bundle featuring a massive collection of patterns, textures and backgrounds all for an unbelievable price of just $29!



























I learned a lot from this tutorial! Thank you!
That’s fantastic news Debi!
We hope you enjoyed it too :)
Love, love this!
Woohoo! Thats what we love to hear :)
Thanks, this was fun a fun tutorial. I don’t often do design type work (usually photo manipulations/comps) so this showed me some tricks and taught me a few things.
Hey Gary,
Thanks so much for the comment on this one and that is so wonderful to hear- feedback like that really makes our day :).
We hope the tricks come in handy for future designs and please do feel free to share anything that you create as we would love to see what you are working on!
What a fun tutorial!! Learned some new techniques and love the result. Thank you!!
Aw we love to hear that and we would love to see your finished piece if you were keen to share :)
Mine looks pretty much like yours, but I’d be glad to share just to show that this is a totally do-able tutorial. Where or how to share? Facebook? A question: What is the font used for the “Happy Holidays”? I looked through the dafont.com Christmas list, but didn’t see it there.
Again, many thanks for this and all the tutorials and the freebies.
Hey Debie,
Thanks for coming back to me and we would love to see your work :).If you want to email it over to me or you can share it on our Facebook page- whichever you prefer!
So I have popped you over a quick email with the direct links for the fonts used in this one so you can grab them for future work :).
Many thanks…send email back your way. :-)
Yay! I have just replied to you Debie and nice work on the tutorial :)
nice
Thank you :)