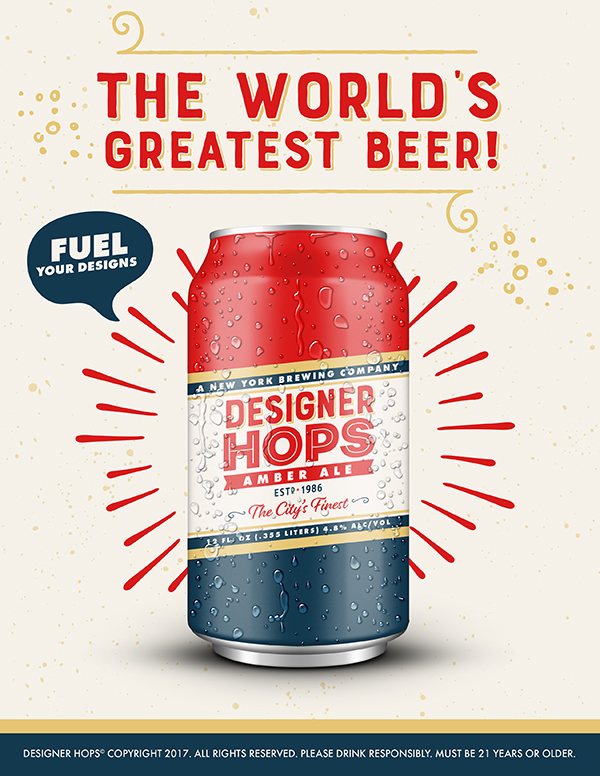
In this design tutorial I will be showing you how to create a typography driven beer label with Illustrator that we will then be applying to a free beer can mockup in Photoshop. Once we have our beer can mocked up we will then design a cool and refreshing poster to complement our beer can!
HAVE YOU SEEN OUR YOUTUBE CHANNEL?
Watch the video tutorial below and subscribe to our YouTube channel for regular updates direct to your inbox.
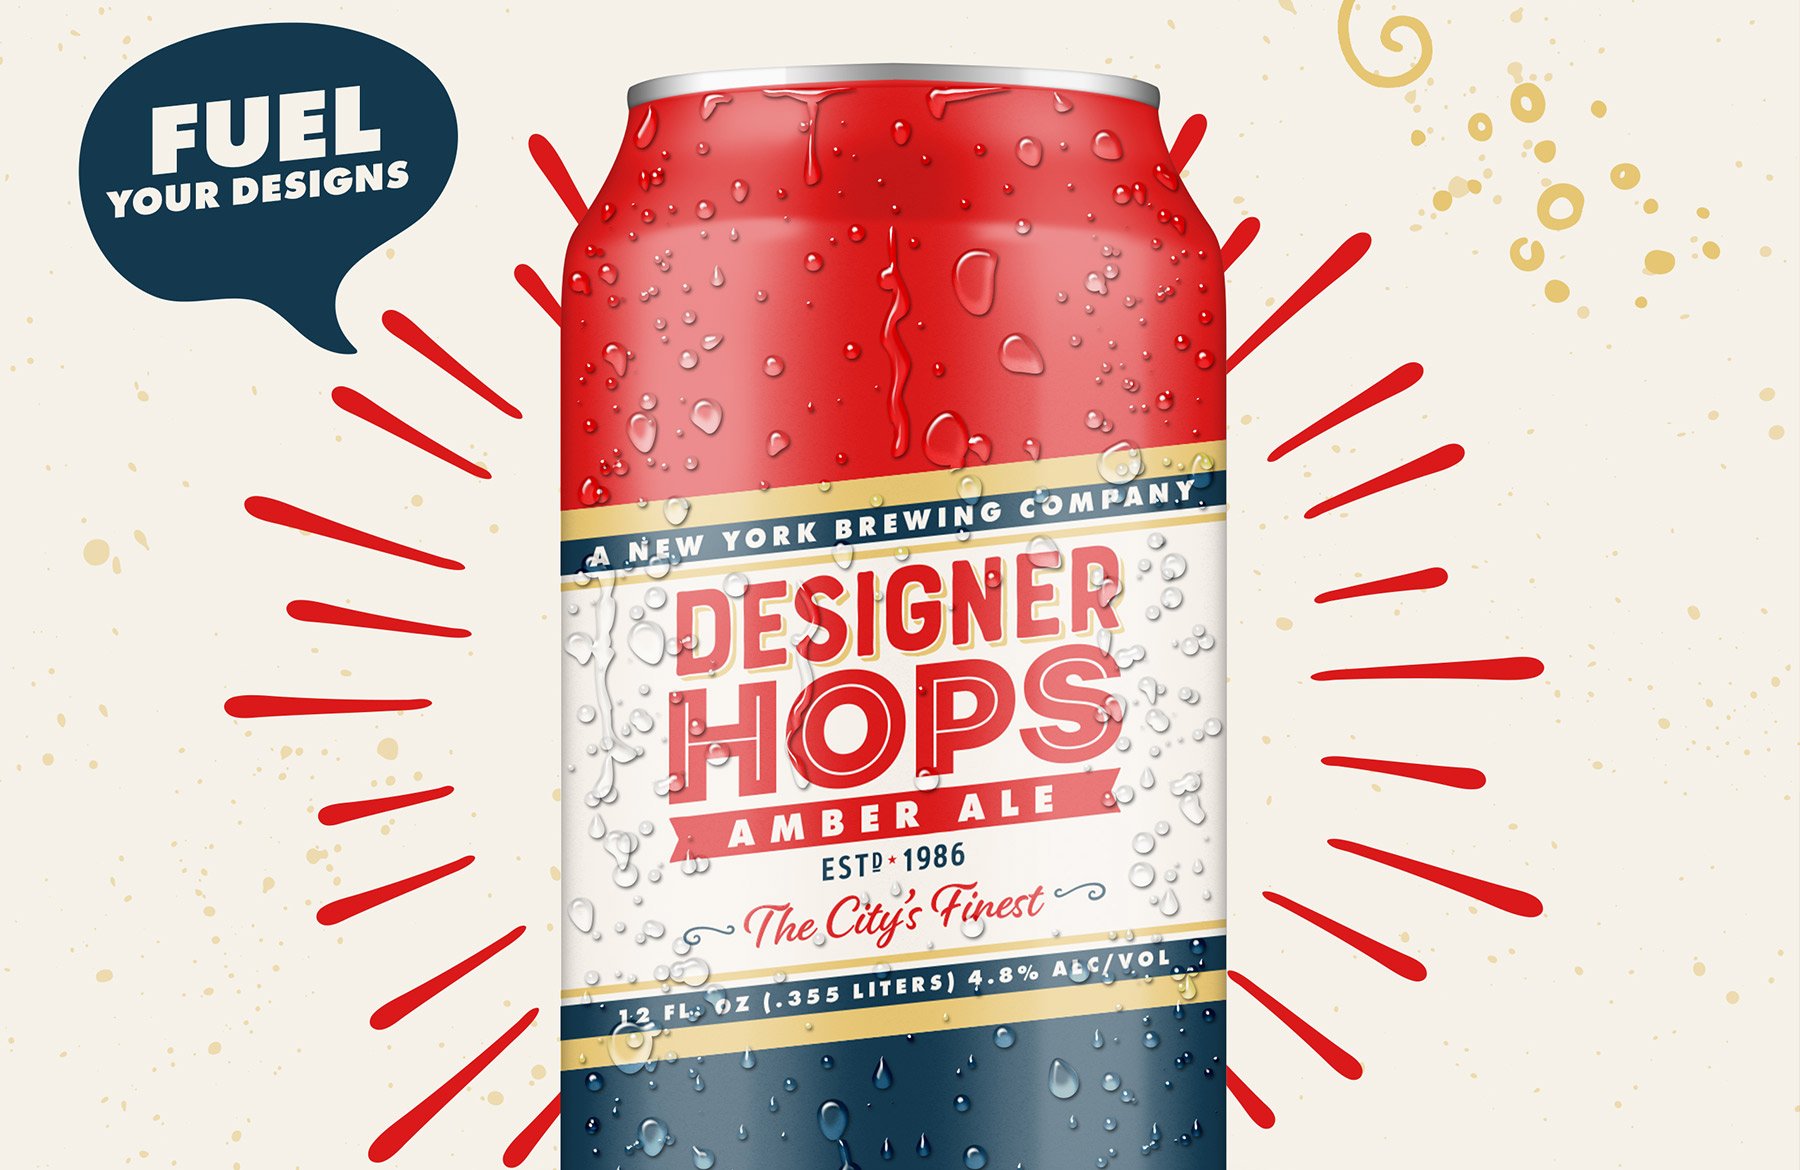
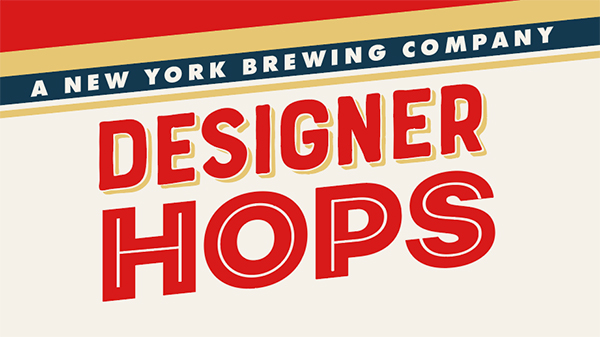
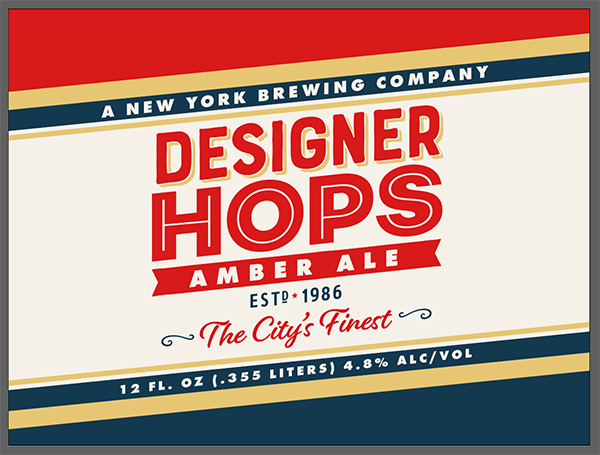
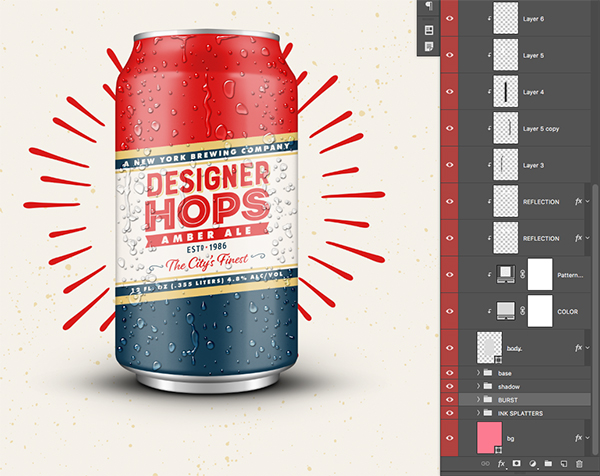
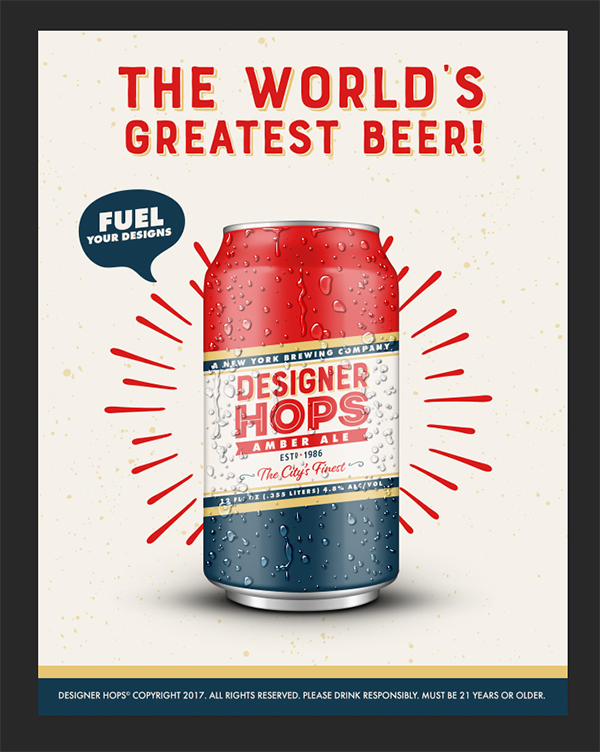
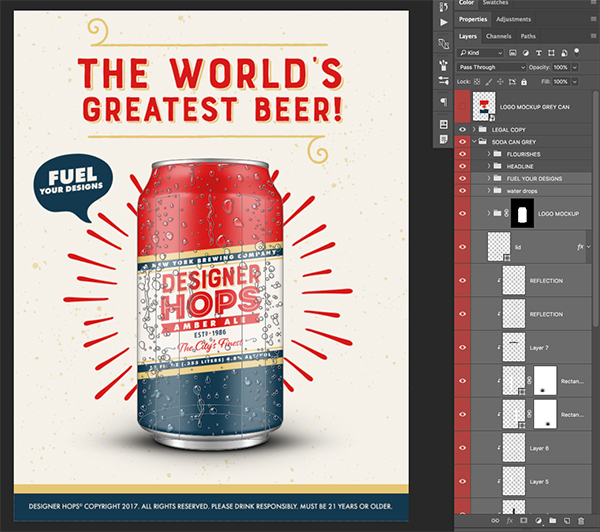
Here’s a look at what we’ll be creating:
Follow along with this tutorial: Download the freebie files
This huge freebie pack includes samples of some of the world’s leading fonts families along with extra flourishes, ornaments, and vector graphics.
The freebie pack is just a sample of what you will find in the The Influential Font Lover’s Library for just $29 (that’s 99% off). This bundle contains some of the world’s leading font families such as Futura and Bourton Hand. This collection is a must-have for every font lover and is the complete font solution with over 470 industry leading fonts at a never-seen-before price!
Step 1: Designer Hops Beer Poster
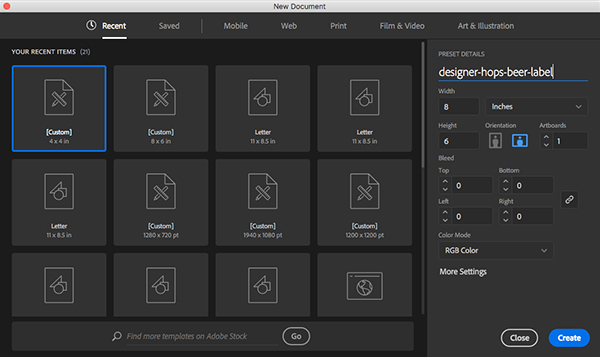
Begin by opening Adobe Illustrator and create a New Document. Let’s name our New Document ‘designer-hops-beer-label’ and set it to be 8 inches wide by 6 inches tall with 1 Artboard and leave the Color Mode set to RGB as shown in the image. After setting that up, go ahead and hit ‘Create’ on the lower right or simply press the Enter Key to create your file.
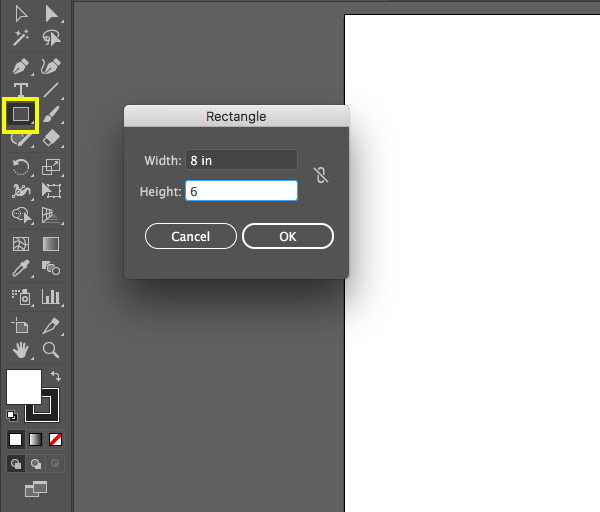
Once your New Document has been created, press ‘M’ on the keyboard or select the Rectangle Tool from the toolbar on the left side. Next, double click your mouse anywhere on the canvas to bring up the Rectangle Dialog Box. We want to make our rectangle the same size as our document so that it fills the entire space, so enter a width of ‘8 inches’ and a height of ‘6 inches’ before pressing ‘OK’ to apply the changes.
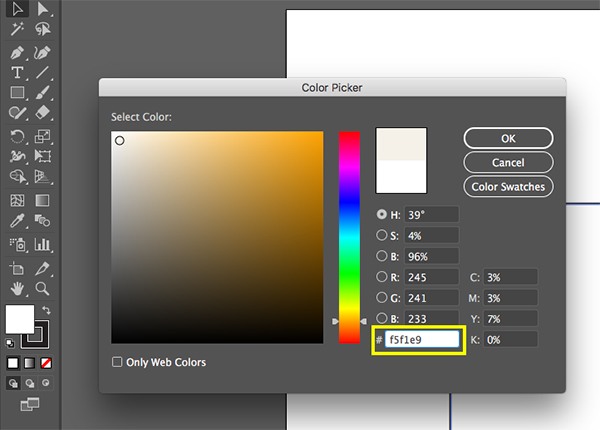
At the bottom of the toolbar on the left you will notice the fill and stroke colors. Double click on the fill color and enter a hex value of #F5F1E9 and then press ‘OK’ to apply the changes.
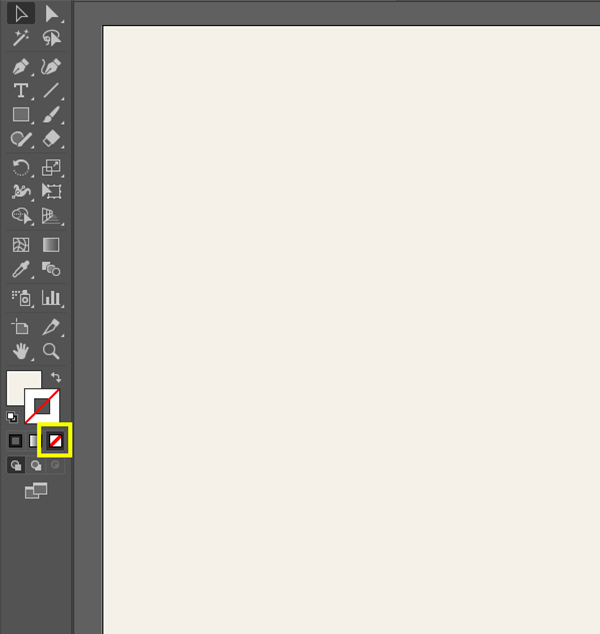
Next, press ‘V’ or grab your Selection Tool and move the rectangle so that it lines up with the outer boundaries of your Artboard and covers the entire area. From here we want to toggle between our fill and stroke color, so to do that we can either click the small arrow icon next to the fill and stroke colors or simply press the ‘X’ key to toggle between them. Once you have your stroke in the foreground, click on the small white box with a red strike through it to indicate that you want ‘none’ for the stroke color. It should now look like this:
Step 2: Layers on Layers
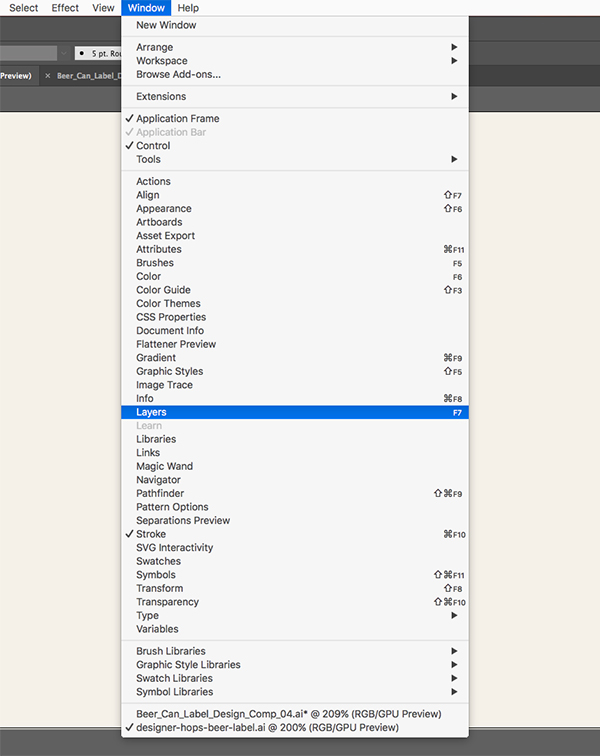
We now want to view our Layers Panel, and we can do so by either pressing ‘F7’ or by going to the Window Menu and choosing ‘Layers’ from the dropdown list.
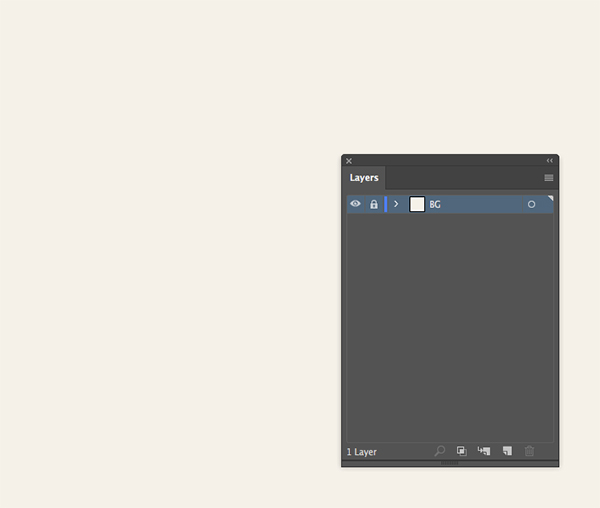
You should now see that we have only one layer, appropriately named ‘Layer 1’ in the Layer Panel. Double click on the ‘Layer 1’ text to rename the layer. Let’s give it a name of ‘BG’ for now and then click just to the left of the layer name to lock the layer. You should see a small lock icon appear to confirm that the layer has been locked.
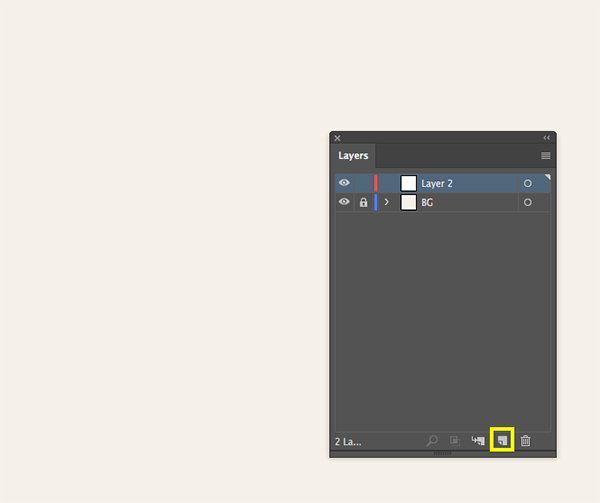
Next, click on the New Layer icon found at the bottom of the Layer Panel to add another layer.
Step 3: Red Stripe
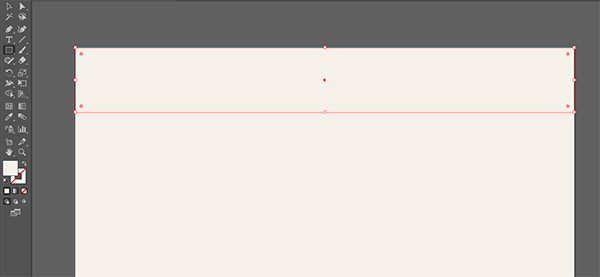
On our newly added layer we now want to add another rectangle. Grab the Rectangle Tool (M) once again, and then click and drag out a rectangle along the top of your document that spans the entire width, but only comes down about an inch or two from the top like this:
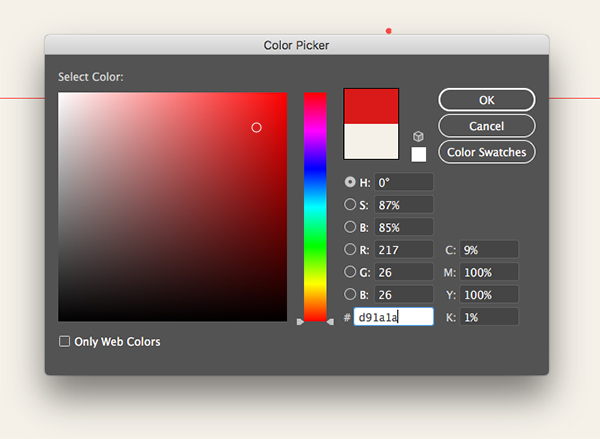
Double click on the fill color once again, and this time enter a hex value of #D91A1A as shown below:
You should now have a red box going across the top of your document like the image shown here:
Step 4: Duplicating Shapes
Switch to your regular Selection Tool (V) and select the red rectangle along the top of your document. Hold Alt/Option+Shift on the keyboard and then click and drag the red rectangle downwards to drag out a copy of the shape. Drag it down until the bottom of the original shape lines up with the top edge of the duplicate like this:
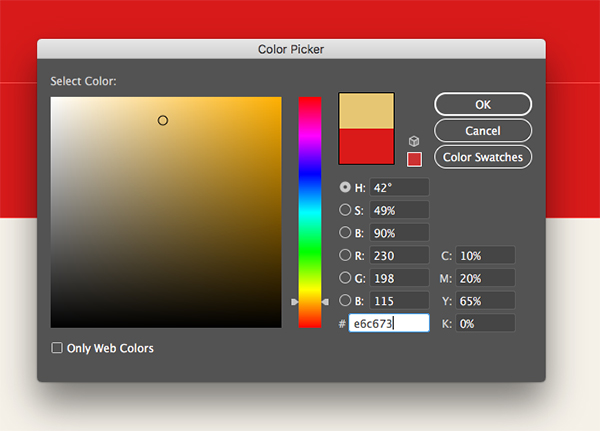
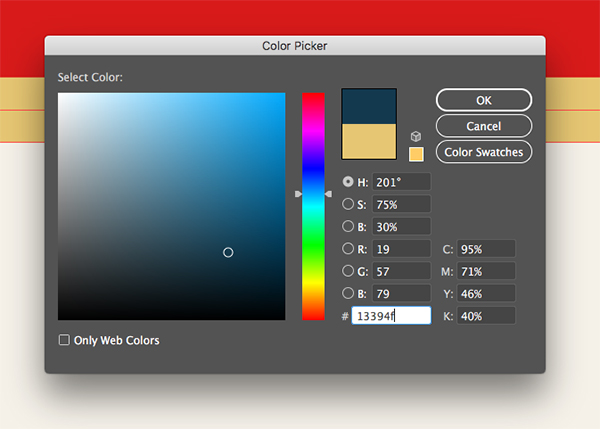
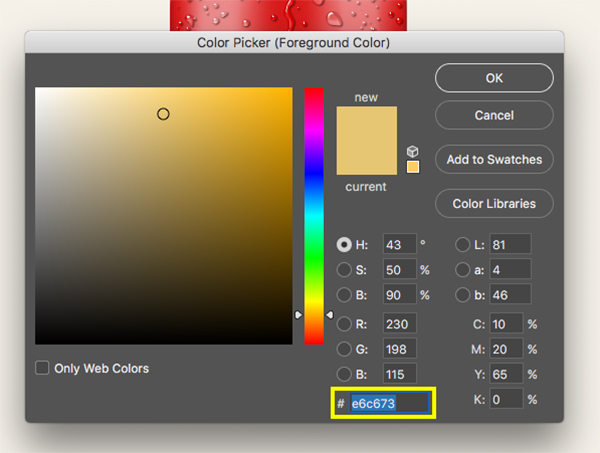
Double click on the fill color and change the hex value to #E6C673 as shown below:
Press ‘Enter’ or select ‘OK’ to apply the color changes. Next, use your Selection Tool (V) once again and move your cursor over the bottom / middle of your gold bar and drag upwards so that the shape becomes shorter in height. Your shapes should now look like this:
Step 5: Shapes on Shapes on Shapes
Switch over to the regular Selection Tool (V) and select the gold colored rectangle. Hold the Alt/Option+Shift Keys and drag another copy down just below the original.
Double click on the fill color and change the hex value to a navy color such as #13394F before pressing ‘OK’ to apply the changes.
Drag one more copy of the gold rectangle down while holding Alt/Option+Shift and place it below the navy bar with a bit of space between the two shapes like this:
Use your Selection Tool (V) to move the bottom, middle handle of the bounding box upwards resulting in a shorter gold rectangle. Your shapes should now look like the image shown here:
Step 6: Flip It Good
Use your Selection Tool (V) to click and drag around all four of the rectangles along the top of your document as shown here:
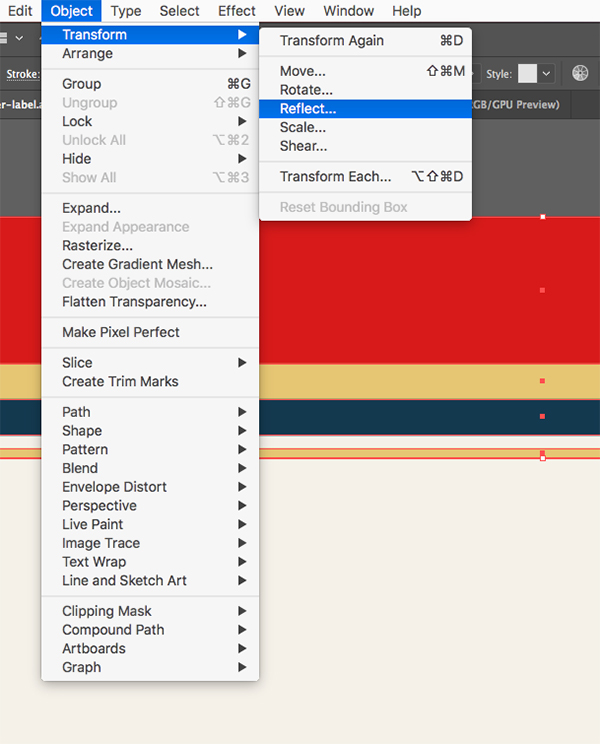
Press Command/Ctrl+C to copy the shapes, and then press Command/Ctrl+F to Paste In Front. This will make sure that a copy of all four shapes is placed right on top of the originals. From here, go to the Object Menu and choose Transform > Reflect as shown in the image below:
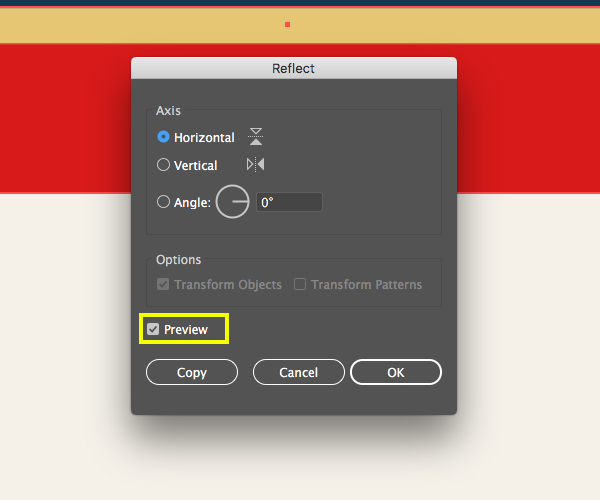
You should now be prompted with the Reflect Dialog Box where you will want to make sure to check off the option on the bottom that says ‘Preview’ to ensure that we can preview the changes. Next, make sure that the Axis is set to ‘Horizontal’ and then press ‘OK’ to apply the changes.
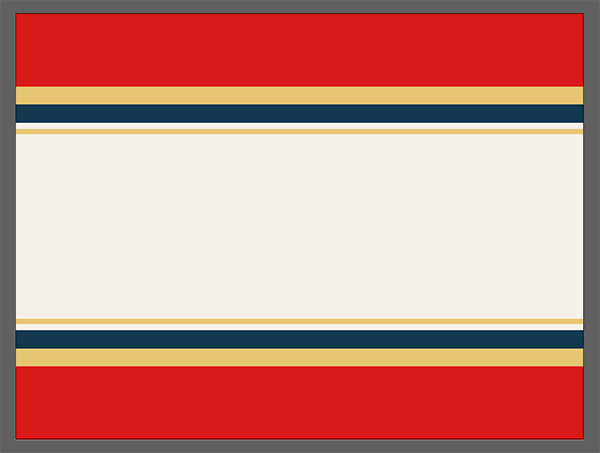
You should now have a flipped copy of all four of these shapes placed directly on top of the originals beneath. Before clicking off of the shapes and deselecting them, make sure that all four of the new shapes are selected and hold the Shift Key before tapping the down arrows until the shapes are placed along the bottom edge of your Artboard like this:
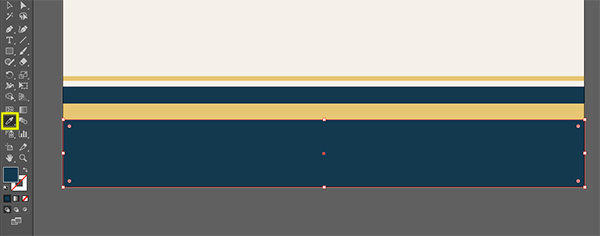
Select the very bottom rectangle (currently the tallest red rectangle along the bottom edge of the Artboard) and then grab the Eyedropper Tool (I) from the toolbar on the left. While the shape is still selected, use your Eyedropper Tool (I) to select the navy blue color from any of the other blue shapes in the image to sample that color.
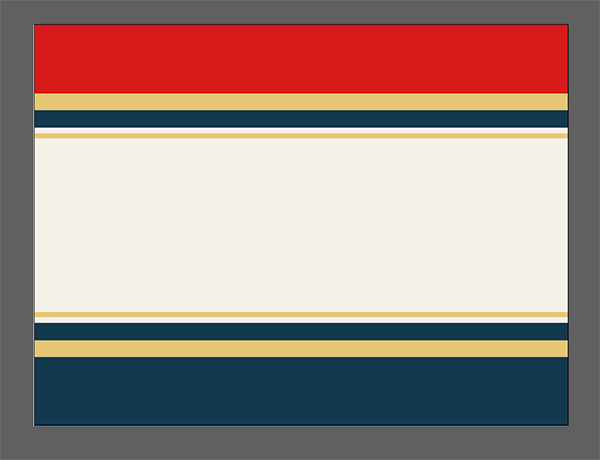
Once you have sampled the navy color for the bottom rectangle, all of your shapes should look similar to the image below:
Step 7: Making Our Shapes Dynamic
We will now use our Direct Selection Tool (A) to click and drag around the left edge of our rectangles on the top and bottom – every point except for the corners as shown here:
Hold the Shift Key and tap the down arrow 5-6 times so your shapes are now angled like the image below:
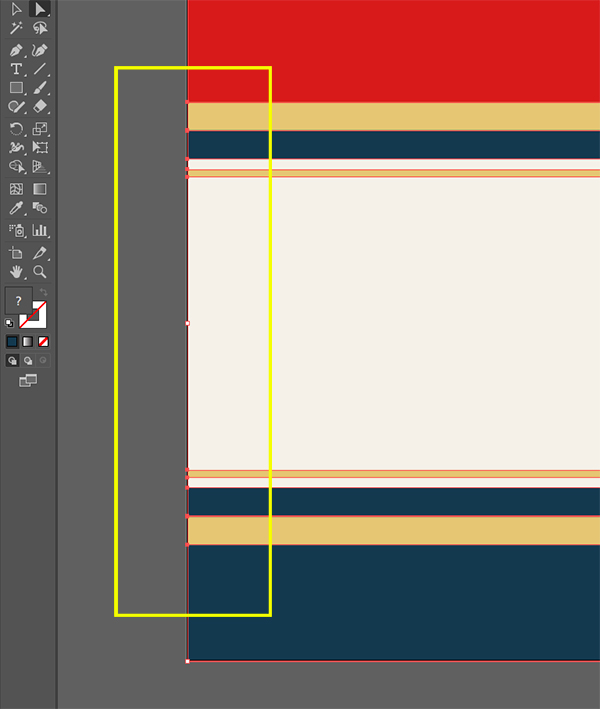
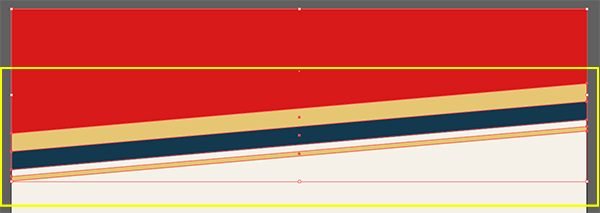
Now use the Direct Selection Tool (A) once again to click and drag around all of the points for the top group of shapes except for the top left and right corners as indicated by the yellow box in the image below:
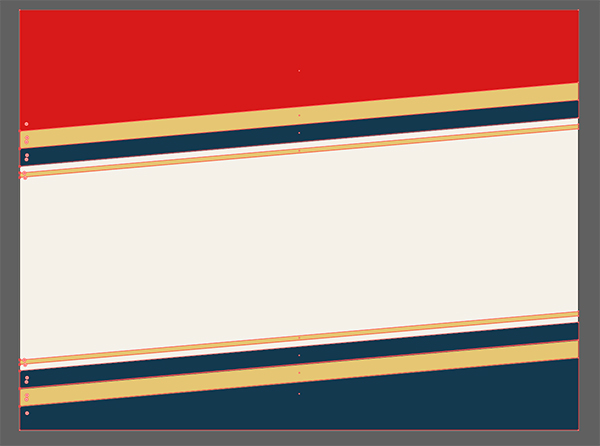
Hold the Shift Key and tap the up arrow another 4-6 times so you end up with something like this:
Step 8: Shapes and Text
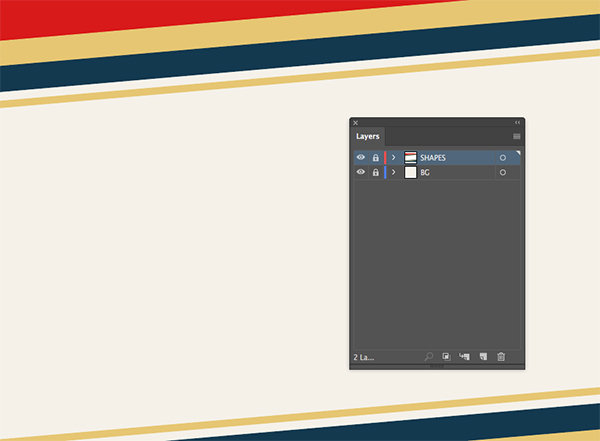
Double click on the layer name to change the name of the layer with all of our rectangles to ’SHAPES’ and then click on the small lock icon to lock the layer.
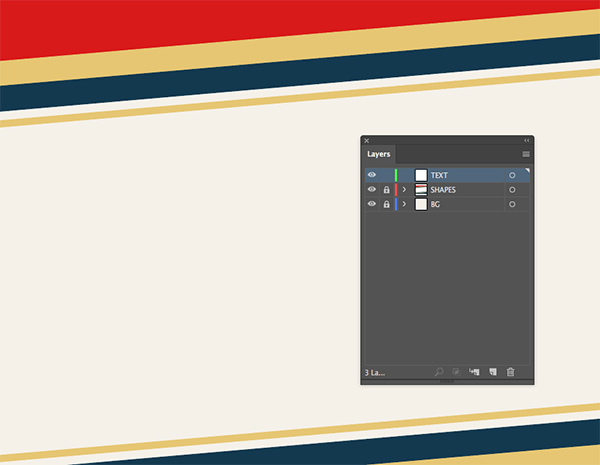
Add another layer to the top of the panel and change the name of this layer to ’TEXT’ and you should now have three layers on top of each other like the image shown below:
Step 9: Designer Hops
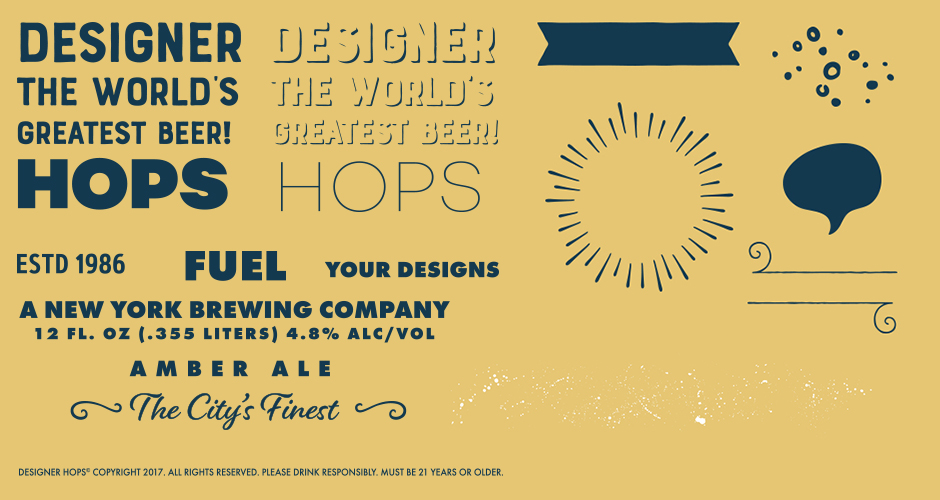
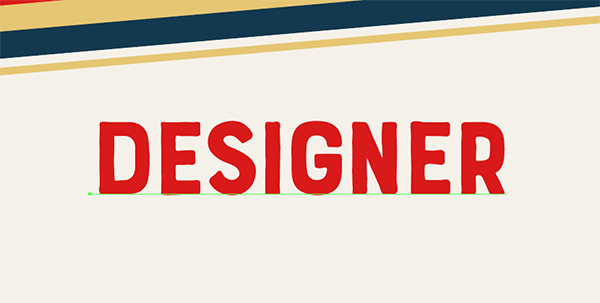
Next we will begin laying out the text for our beer label. Open the outlined text EPS file and copy the base ‘Designer’ text.
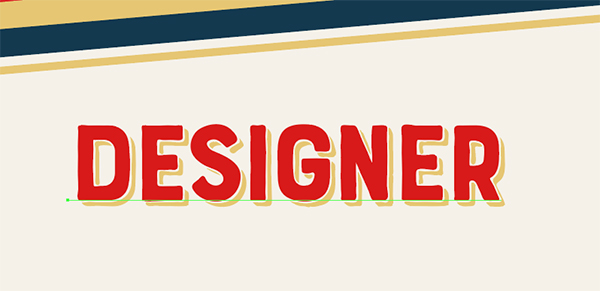
Paste the text into your document by pressing Command/Ctrl+V and then use the Eyedropper Tool (I) to sample some of the red color from the top rectangle shape. Your text should now look like this:
Next, bring in the extruded drop version of the ‘Designer’ text from the EPS file and paste it just behind your base text. This time we will use the Eyedropper Tool (I) to sample some of the gold color from the rectangular bars so that your text looks like this:
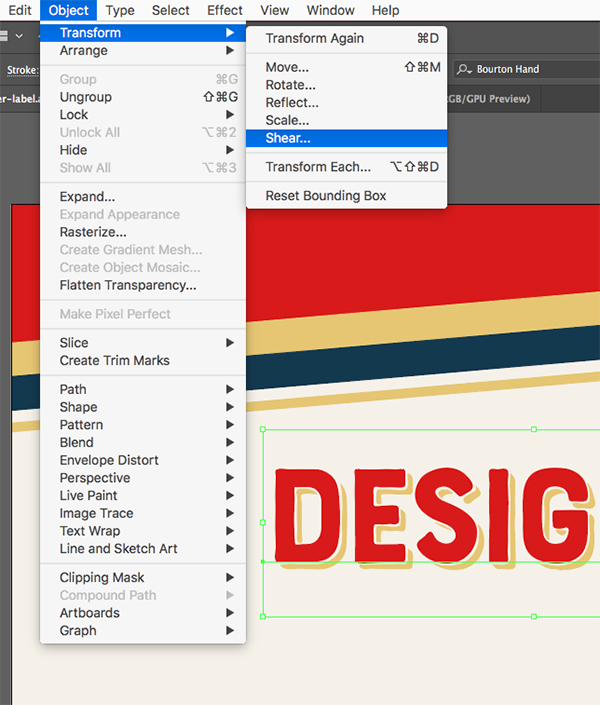
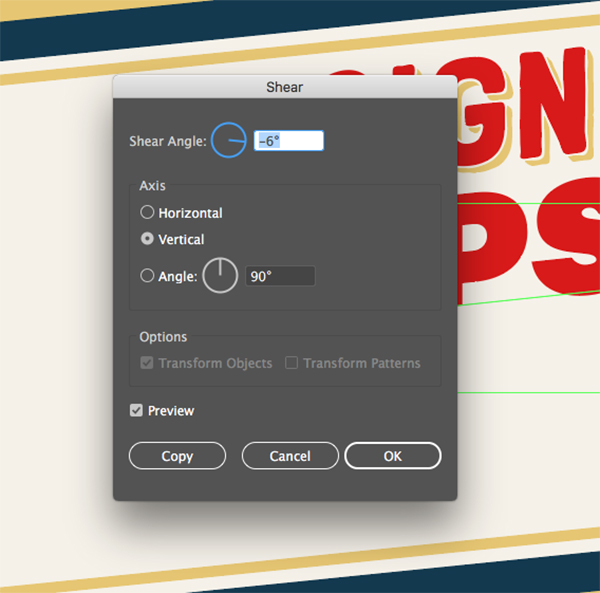
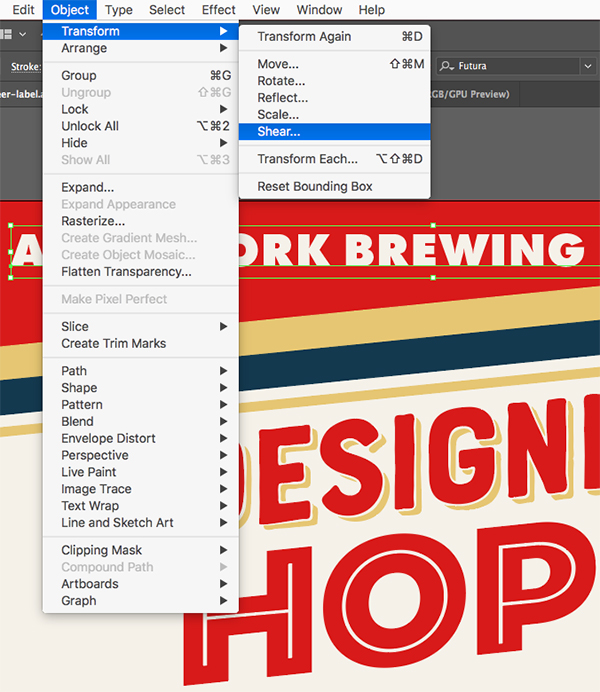
Switch to your Selection Tool (V) and click and drag around both copies of the text (the Base style as well as the Drop Extrude Solo copy behind it). From there, press Command/Ctrl+G on the keyboard to group both copies together. Now that we have grouped our text together we will go to the Object Menu and this time choose Transform > Shear from the menu.
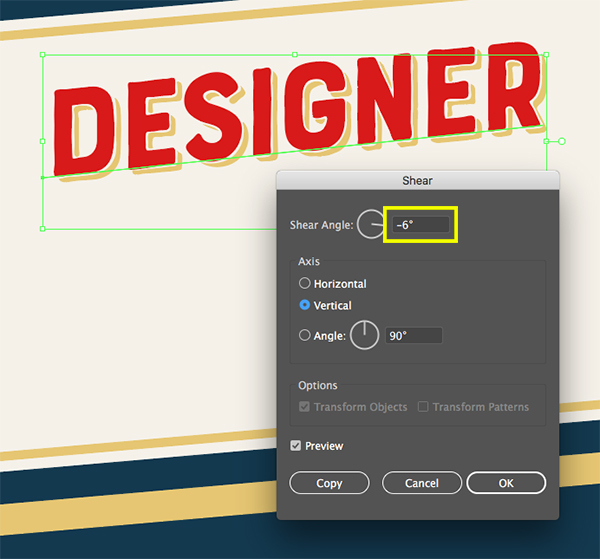
When the Shear Dialog Box appears, make sure that the ‘Preview’ box is checked off and set an Axis of Vertical. Then, enter a Shear Angle of -6 degrees as indicated by the yellow box in the image.
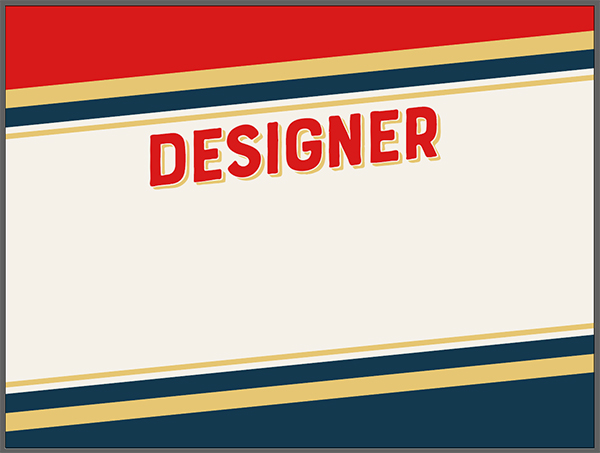
Press ‘OK’ to apply the shear and your text should now follow the same angle as the rectangular shapes above and below it. If the angle of the shapes are off and it doesn’t line up with the text, simply unlock the ‘Shapes’ layer and then use your Direct Selection Tool (A) to click and drag around all of the points on the left hand side (except for the corners) and then use the arrow keys to tap all of the points either up or down until the angles match. Once you have made those adjustments everything should be lined up like this:
Step 10: Hopping Around
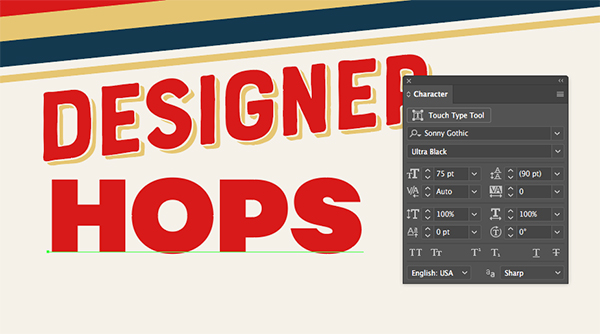
Return to the outlined text file and grab the word ‘Hops’ in the extra bold typeface. Paste this below the ‘Designer’ text and then sample some of the red color so your text looks like this:
Next, with your ‘Hops’ text still selected, go to the Object Menu and choose Transform > Shear from the menu once again.
It should automatically remember the last settings we used, but just in case, make sure that your settings look like this:
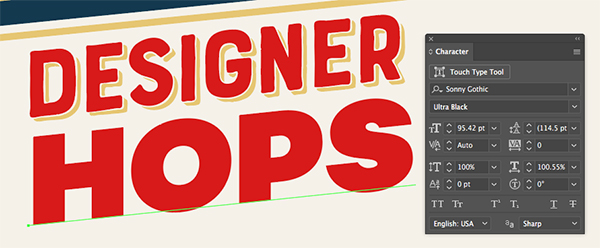
Apply the Shear Transformation by pressing ‘OK’ in the dialog box. Next, press ‘V’ to get your Selection Tool and then move your cursor over the lower right corner of the bounding box around the text. Hold down the Shift Key and drag downwards to scale the text up until it is the same width as the ‘Designer’ text on the line above. Your type should now look like this:
Step 11: Inline Text Effects
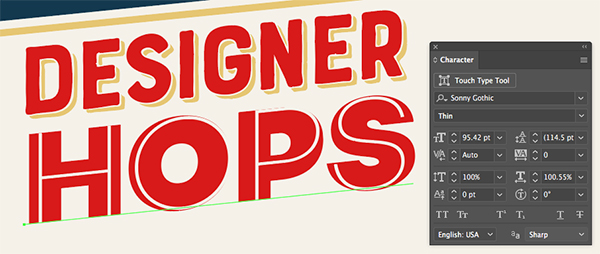
Next, grab the thin version of ‘Hops’ and bring it into your document. Once you’ve done that, use the Eyedropper Tool (I) to sample some of the light background color.
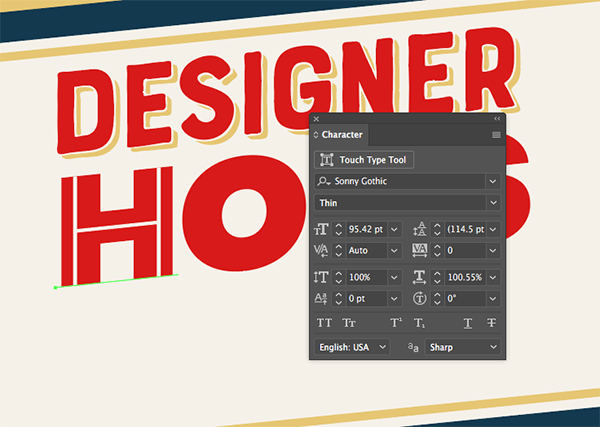
In order to create the effect we want, we will need to work on one letter at a time. Each of the letters for the thin version have been separated and ungrouped so you can control them individually. Let’s begin by just focusing on the first letter.
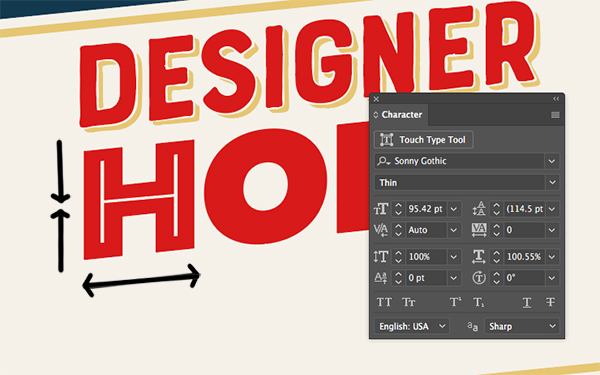
Select the thin ‘H’ with your Selection Tool (V) and then use the handles around the bounding box to make the height shorter by clicking and dragging downwards from the top handle, or upwards from the bottom handle. We also want to make the letter a bit wider so that it sits nicely inside each of the vertical lines of the letter. Use the image below as a reference:
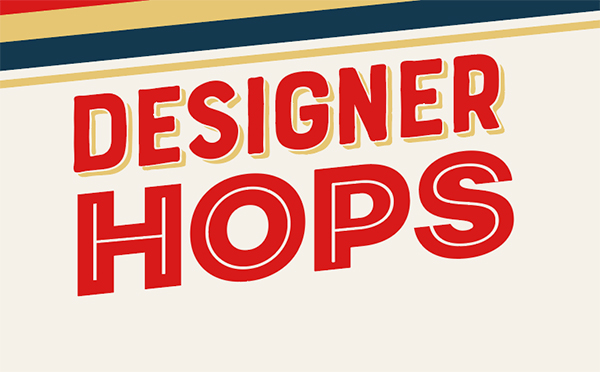
Once you are happy with the placement of the first letter, move onto the next. You can use the handles on the bounding box of the letter to stretch and squeeze the shape so that it fits nicely inside of the original red letter behind it. Repeat this process for the remaining two letters and you should end up with something like this:
Step 12: Disclaimer
Grab the ‘A New York Brewing Company’ text from the outlined EPS file and paste that into your working document.
Use the Eyedropper Tool (I) to sample some of the light, off-white color from the middle area.
Next, return to the Object Menu and choose Transform > Shear and use the same settings as before to angle the text so that it follows the same direction as the shapes behind it.
After applying the Shear, move the text above the ‘Designer Hops’ text and place it on top of the navy blue rectangle as shown below:
Next, return to the outlined text file and grab the copy that reads ’12 FL. OZ…’ and paste that into your document. We will be placing this text into the bottom blue bar and applying the same shear transformation that we have applied to our previous lines of text.
Step 13: Adding the Ribbon
Next we will open up the Bourton Hand Ornament EPS file from the freebie folder for the tutorial and copy it by pressing Command/Ctrl+C.
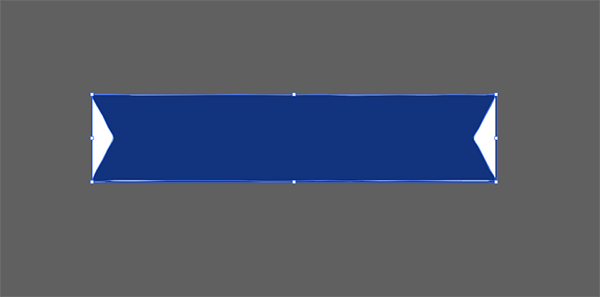
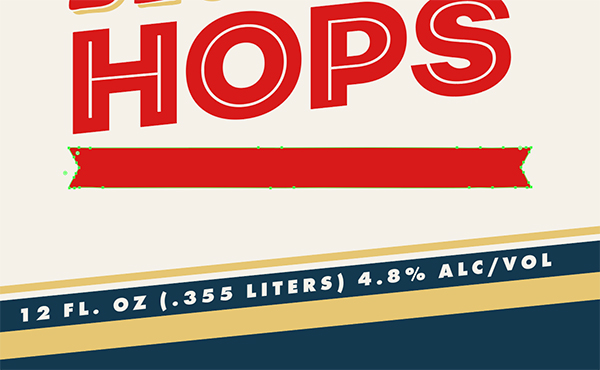
Close out of the window by pressing Command/Ctrl+W and then paste the ribbon into your working document by pressing Command/Ctrl+V on the keyboard. Next, use your Direct Selection Tool (A) to click and drag around the right side of the ribbon to select the points, and then hold down the Shift Key and tap the right arrow several times. Do the same thing around the left side of the ribbon and extend it the opposite way to make it longer on both sides like this:
Use the Eyedropper Tool (I) to sample some of the red color from the top of the Artboard to change the color of the ribbon.
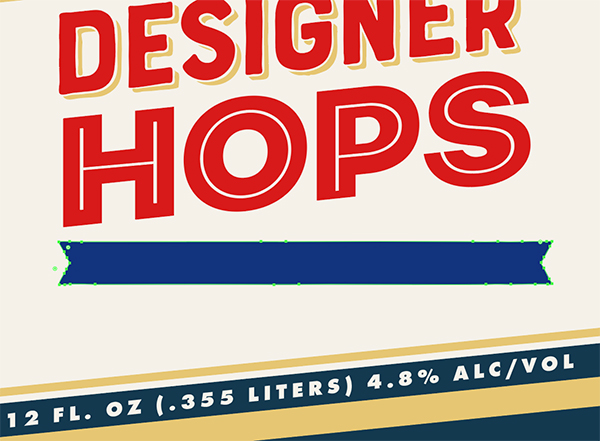
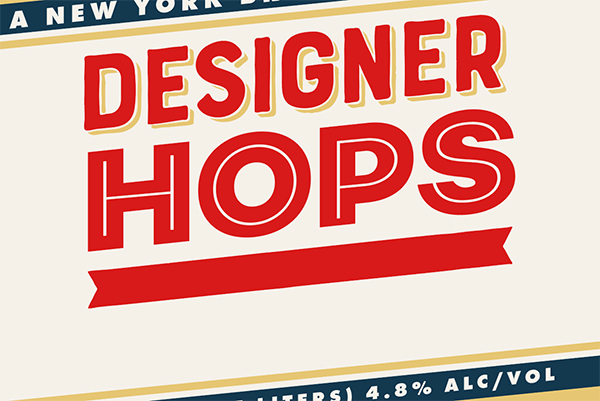
Go to the Object Menu and once again choose Transform > Shear applying the same settings as before to apply the transformation. Move the ribbon down so that it’s just below the ‘Hops’ text and your ribbon should now look like this:
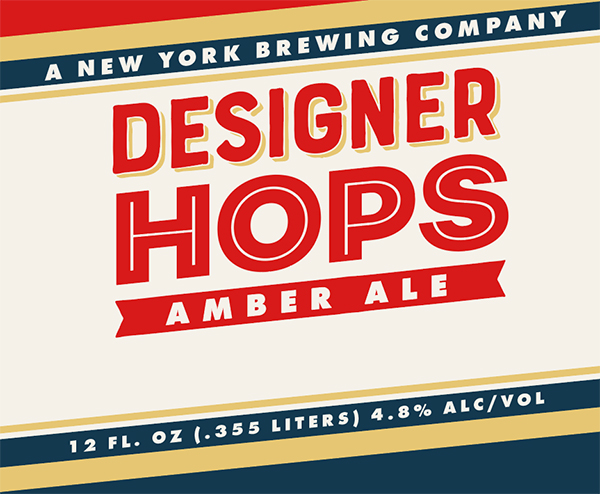
Return to the text EPS file and this time copy the ‘Amber Ale’ line of text and paste it into your document. Use the Eyedropper Tool (I) to sample the background color before applying the same Shear adjustment to the text and placing it on top of the ribbon. You may also need to adjust the size of the text by moving your cursor over any of the four corners of the bounding box around the text and dragging inwards while holding the Shift Key to constrain the proportions.
Step 14: Established in 1986
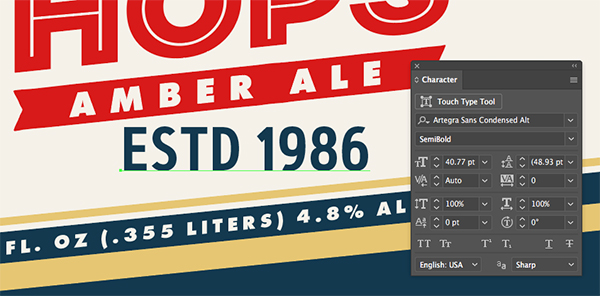
Copy the ‘ESTD 1986’ text from the outlined EPS file and bring it into your label design document.
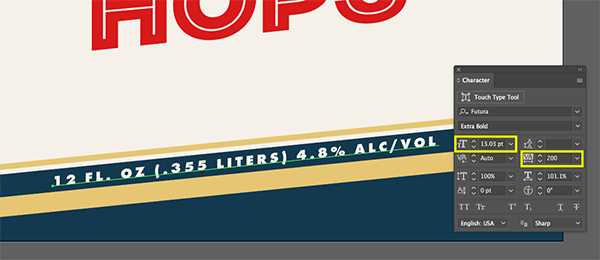
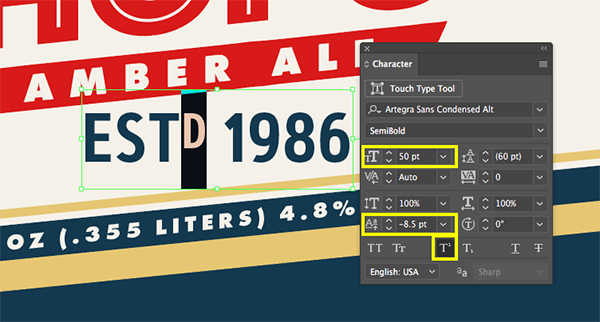
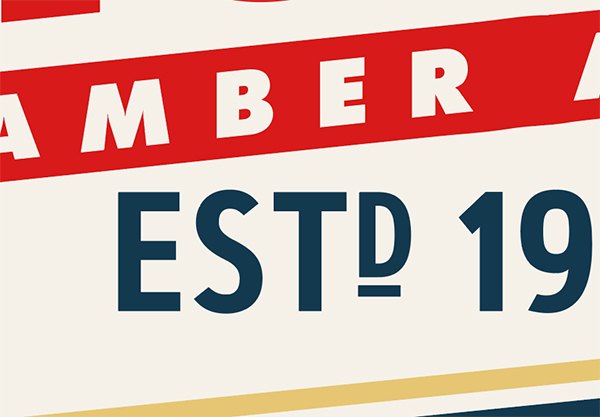
We will now ungroup the outlined text by pressing Command/Ctrl+Shift+G on the keyboard. You can now select the letter ‘D’ from the copy. Select this letter by itself and then reduce it in size by holding the Shift Key and dragging inwards from any of the four corners of the bounding box. The idea here is to create a superscript effect that you would normally create by selecting the icon shown in the Character Panel below:
After making those adjustments, switch to your Rectangle Tool (M) and draw out a small rectangle that will serve as an underline below the letter ‘D’ as shown here:
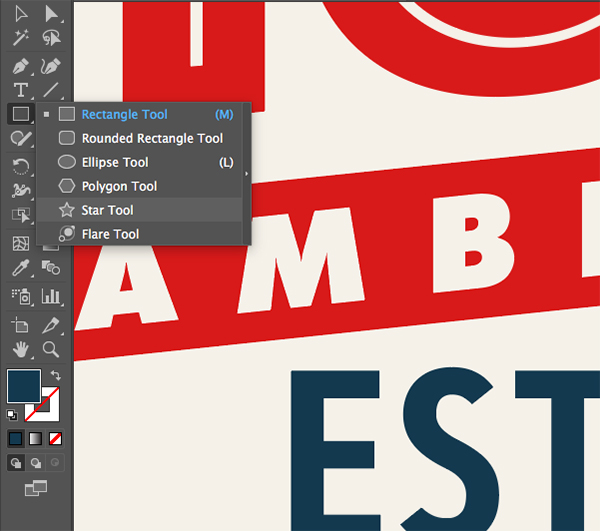
Add a bit of space between the ‘ESTD’ and the ‘1986’ to make room for the next part. You may need to nudge the rectangle over as well so that it stays below the ‘D’ since we want to keep those elements together. Next, click and hold on the Rectangle Tool (M) to reveal the other shape options nested inside. We can now select the Star Tool as shown below:
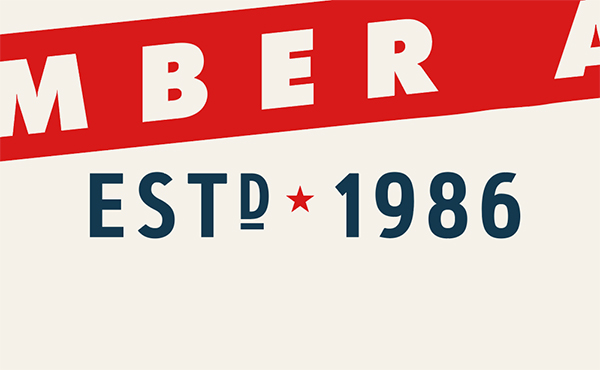
Hold the Shift Key and drag out a small star shape before placing it in between the ‘ESTD’ and ‘1986’ text. Next, use the Eyedropper Tool (I) to sample a red color from the top of the Artboard to make the star red. We can now use our Selection Tool (V) to click and drag around this entire lockup before pressing Command/Ctrl+G on the keyboard to group it together. Your lockup should now look like this:
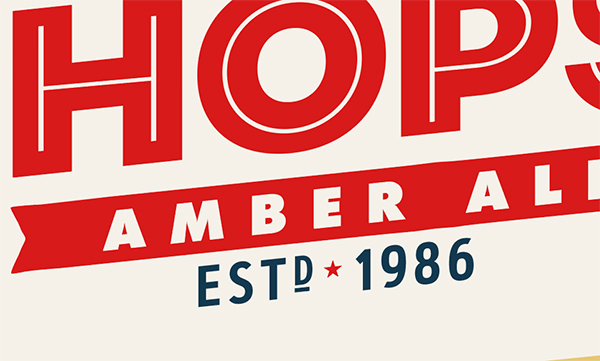
Go to the Object Menu and choose Transform > Shear before applying the adjustment that we have been using for our other elements within the design. After applying the adjustment your label design should now look like this:
Step 15: The City’s Finest
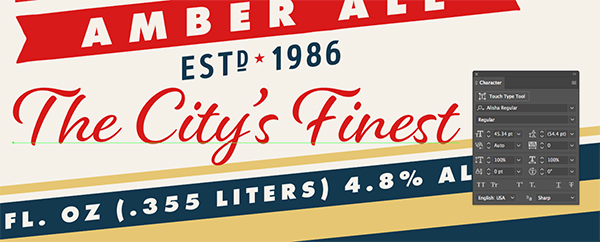
Grab ‘The City’s Finest’ phrase from the outlined EPS file and then use the Eyedropper Tool (I) to sample some of the red color to change the color of the text to red.
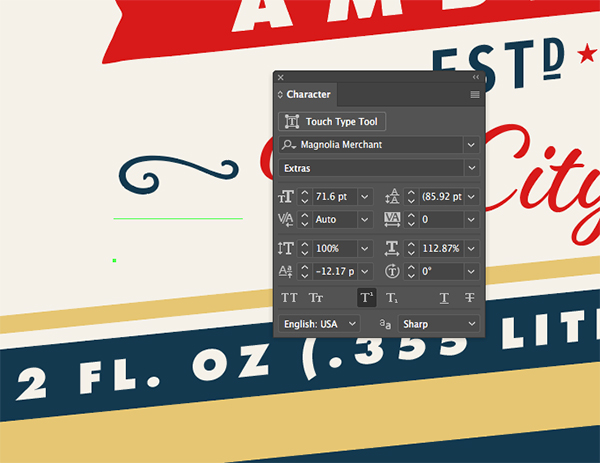
Next, select the flourish from the outlined EPS file that was created using the ‘Magnolia Merchant’ with the ‘Extras’ style. We will then want to use the Eyedropper Tool (I) to change the color of this flourish to navy blue. Your text should now look like this:
Hold the Alt/Option+Shift keys and drag a copy of the flourish over to the opposite side of the ‘City’s Finest’ text as shown here:
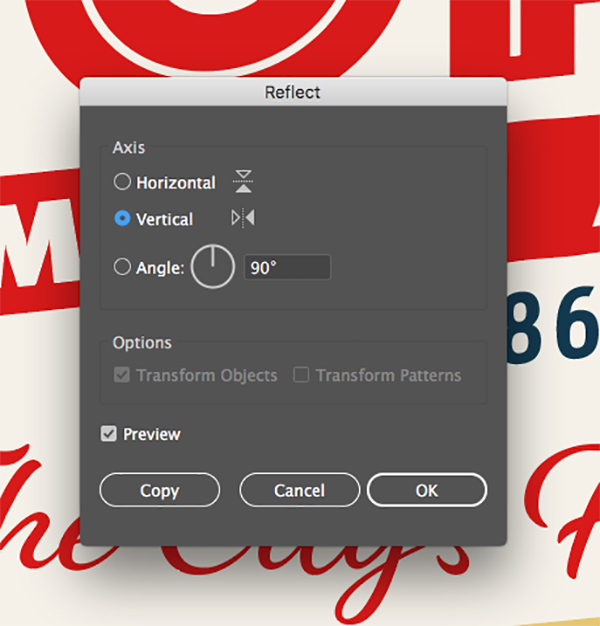
Select only the second navy flourish on the right side and go to the Object Menu before choosing Transform > Reflect. When prompted with the dialog box make sure you choose a Vertical Axis and then hit ‘OK’ to apply the changes.
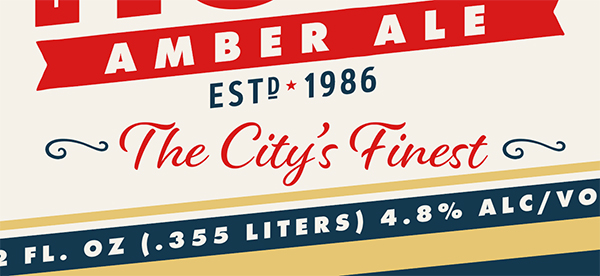
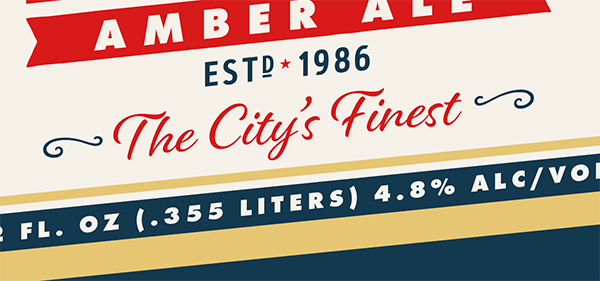
You should now have a mirror image of the flourish on the opposite side. Use your Selection Tool (V) to click and drag around the red text and both flourishes before pressing Command/Ctrl+G to group the three pieces together. From here, return to the Object Menu and choose Transform > Shear and apply the same settings that we have been using to angle the whole group. Your text should now look like this:
Step 16: Adding an Outline
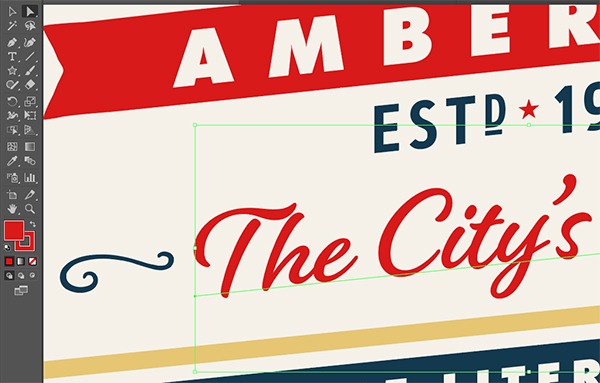
Switch to your Direct Selection Tool (A) and select only the ‘City’s Finest’ text (not the flourishes on the sides). From here, you should see that you have a solid red fill color but no stroke at the bottom of the toolbar. We now want to click on the red color swatch showing for the fill and drag and drop it onto the empty stroke swatch to add a red outline.
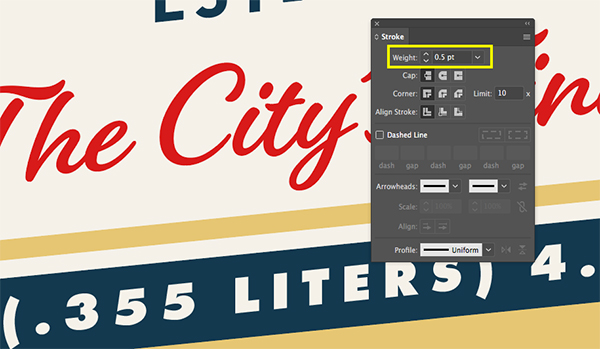
Next, open the Stroke Panel on the right side of the interface. If you don’t see it you can go to the Window Menu and choose ‘Stroke’ from the menu. Once the panel appears, simply change the weight of the stroke to ‘0.5 pt’ as shown below:
Adding this bit of an outline is a good way to make the script appear slightly heavier or more bold. Once you have done that remember to save your work since our label design is now complete! Next we will be applying our design to a beer can mockup which will serve as the focal point of our poster.
Step 17: Working with a Template
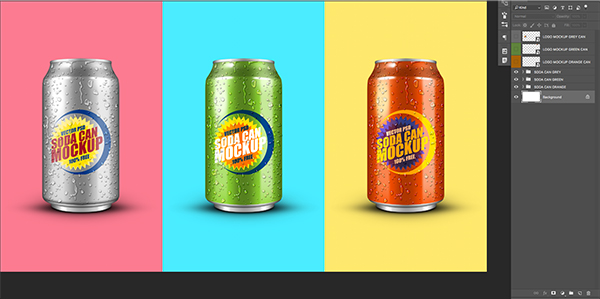
Next, jump over to Photoshop and open the soda can mockup PSD. This can be downloaded over at Graphics Fuel. Please note that this is not a free download but you can use any free soft drink mockups in its place!.
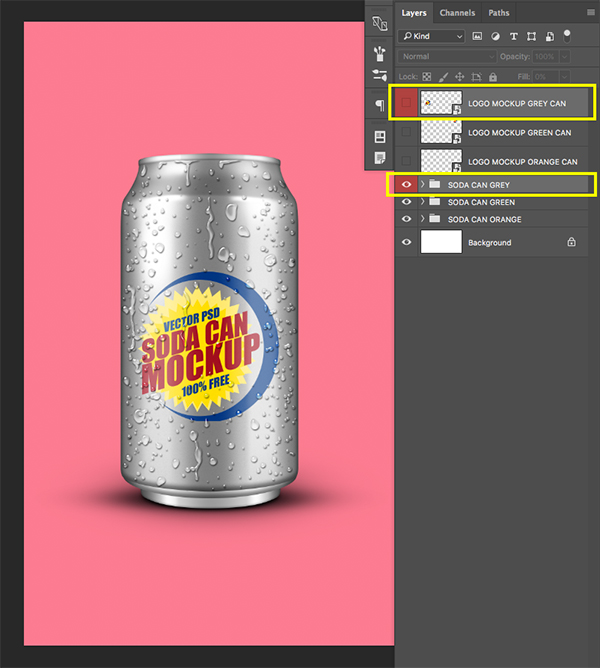
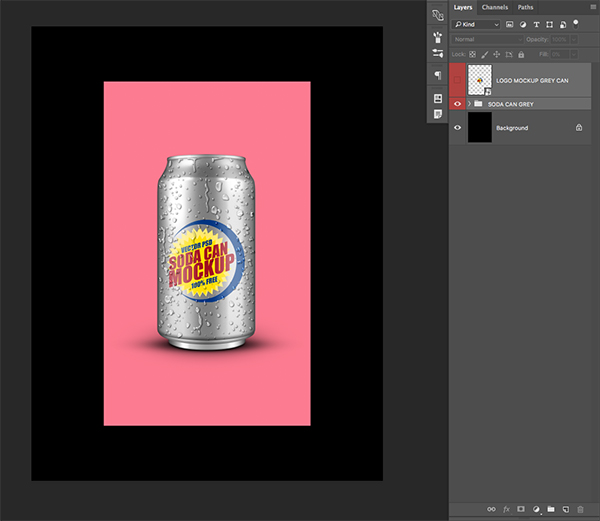
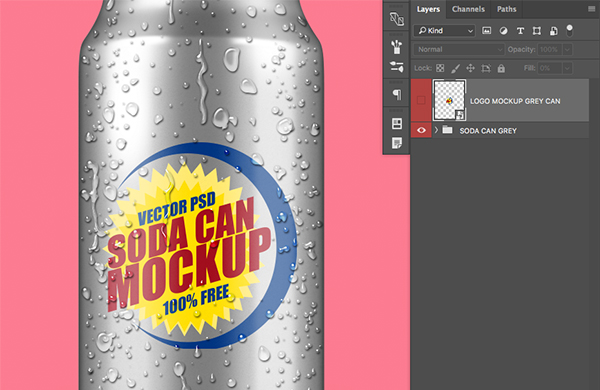
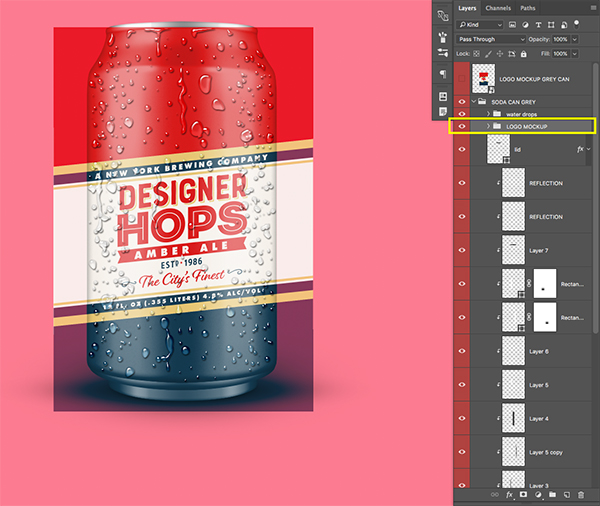
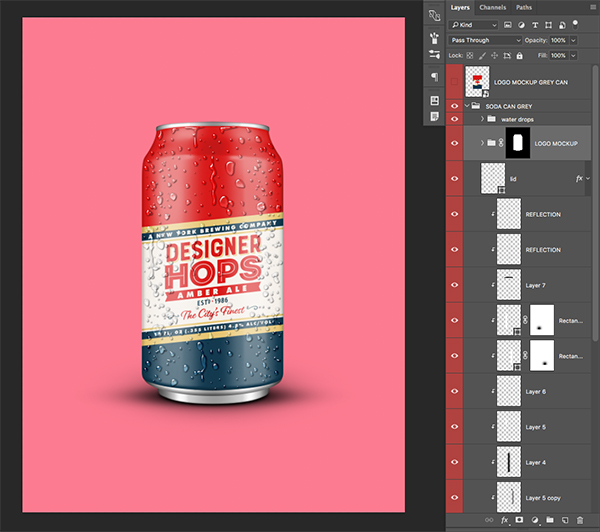
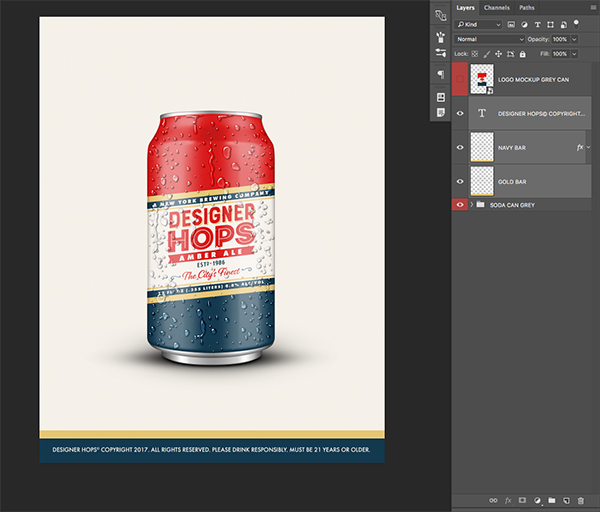
Once you have the file open, we want to turn off all of the layers folders except for the ‘Logo Mockup Grey Can’ and ‘Soda Can Grey’ layers highlighted below:
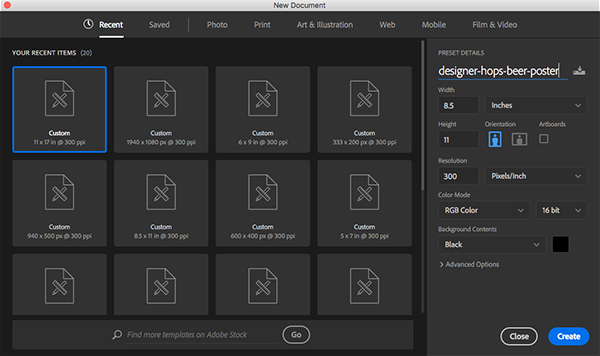
Go to the File Menu and choose ‘New’ or press Command/Ctrl+N to create a New Document. Let’s make our file 8.5” x 11” with a Color Mode of RGB and 300 for the resolution. This is also a good opportunity to give our new file a name so let’s call it ‘designer-hops-beer-poster’ and then hit ‘Create’ in the lower right as shown below:
Once we have our new file setup, return to the mockup PSD and drag the two folders/layers over into your new file to bring them over. After that you can close out of the full mockup file since we will only be using the layers in our new document.
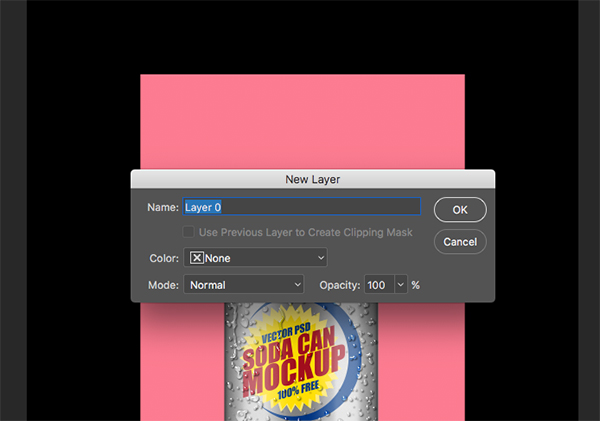
Now that we have our folders and layers in our new file, double click on the black ‘Background’ layer to unlock it. When prompted with the dialog box simply press ‘OK’ to bypass this and unlock the layer. We can now select the ‘Background’ layer and delete it by dragging it to the trash bin icon in the lower right of the Layers Palette.
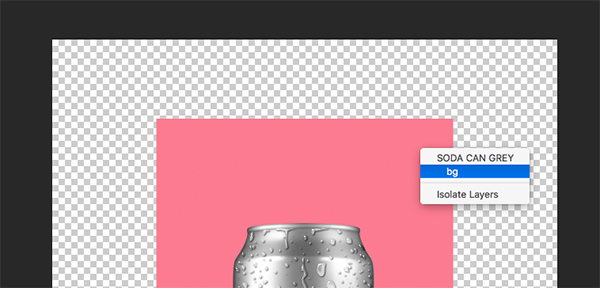
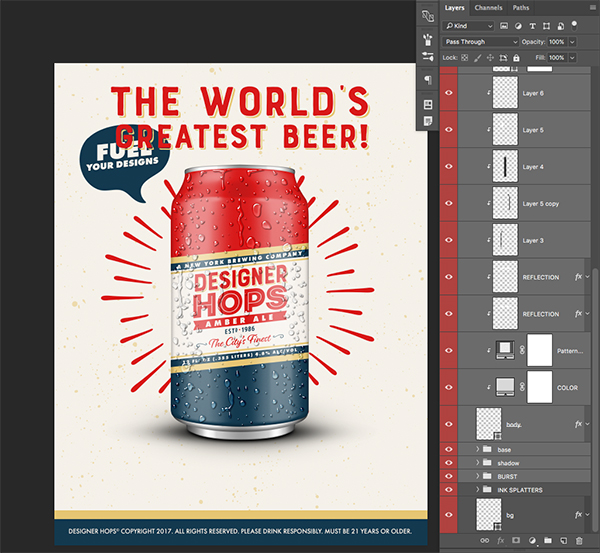
We should now see a grey and white checker pattern in the background that let’s us know we have successfully removed the original black background. From here, select your Move Tool from the toolbar and then hold down the Control Key and click on the pink background. This should bring up a menu like the one shown here where we can then target the ‘bg’ layer.
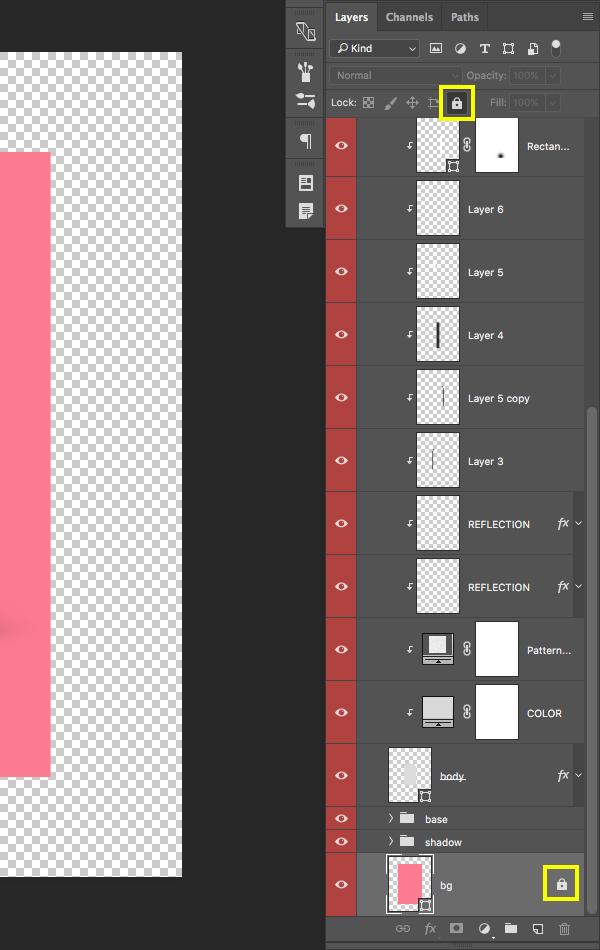
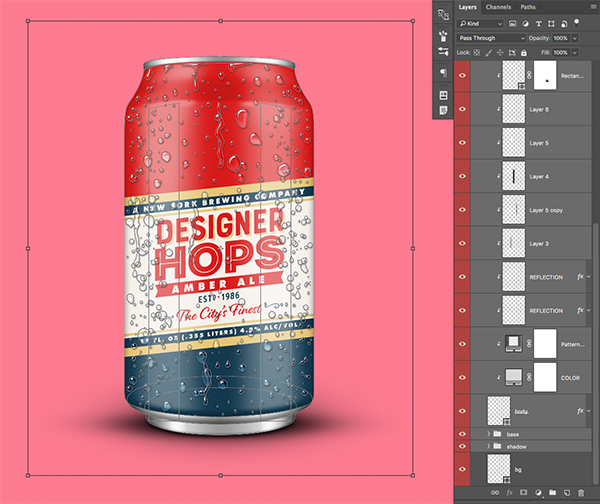
You should now see the ‘bg’ layer revealed in the Layers Palette. Notice that currently the layer has a small lock icon next to it. In order to unlock it we will need to click on the lock icon at the top of the Layers Palette as indicated by the highlighted box in the image below:
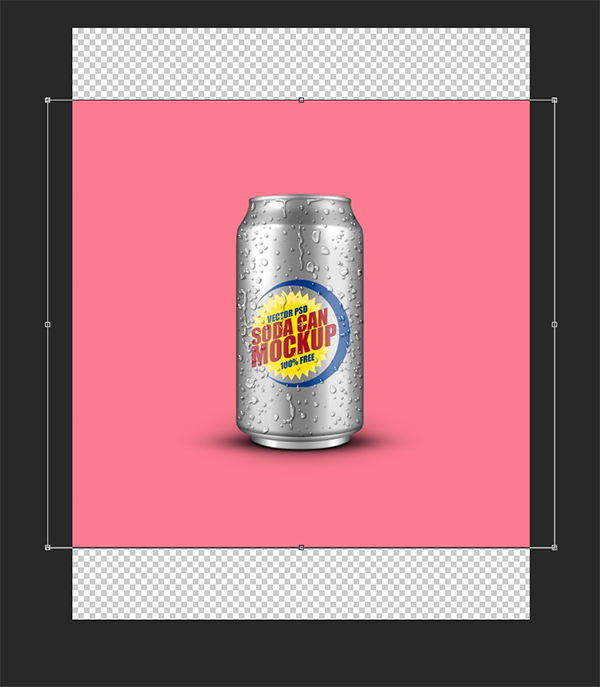
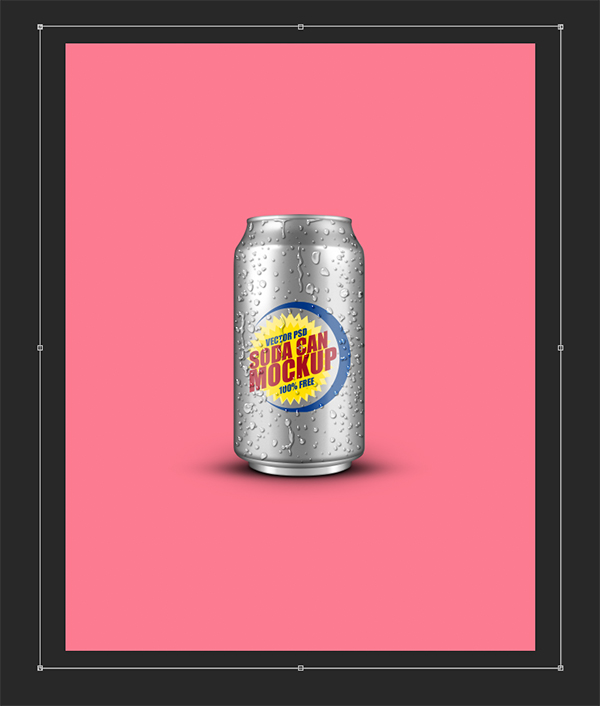
Once you have unlocked the ‘bg’ layer we can select it and then press Command/Ctrl+T on the keyboard to initiate a Free Transform. Move your cursor over either the left or right side of the bounding box of the pink rectangle shape, and then hold the Alt/Option key and drag outwards to extend the width of the layer so it spans across the background.
Before applying the changes, move the cursor over either the top or bottom of the bounding box and extend the shape by dragging outwards while holding the Alt/Option key. The pink ‘bg’ layer should now fill up the entire background and once it does, go ahead and apply the changes by pressing ‘Enter’ or ‘Return’ on your keyboard.
Step 18: Prepping the Artwork
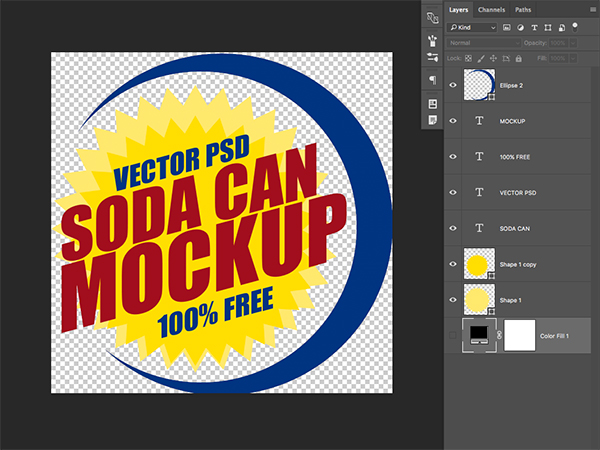
We can now double click on the top ‘Logo Mockup Grey Can’ Smart Object Layer in our document.
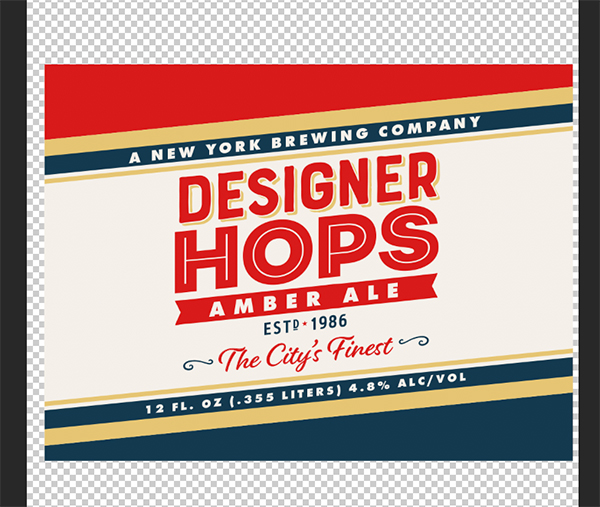
After double clicking the Smart Object, the label artwork should appear in a new tab like this:
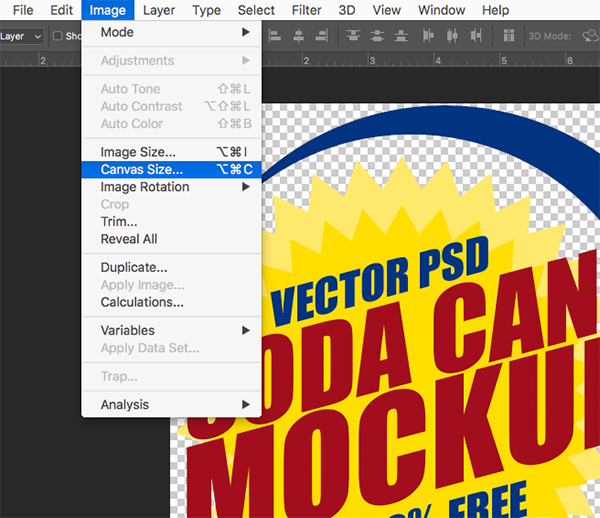
From here, go to the Image Menu and choose ‘Canvas Size’ as shown below:
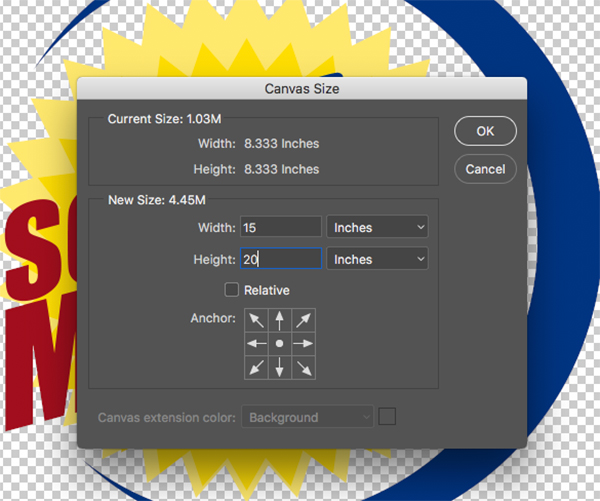
When the dialog box appears let’s enter a width of ’15 inches’ and a height of ’20 inches’ before pressing ‘OK’ to extend the canvas size.
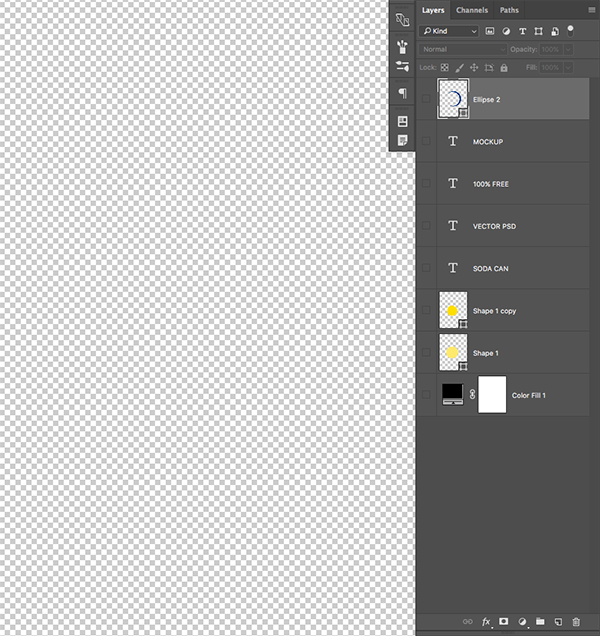
After making the canvas larger, let’s turn off the visibility for all of the other layers that make up the label artwork like this:
Step 19: Applying the Label
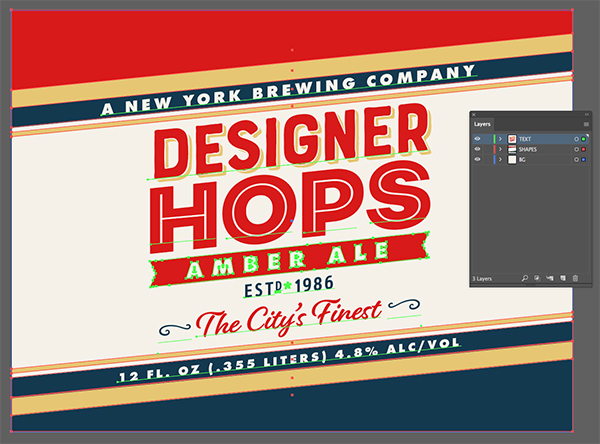
Jump back over to your label design in Illustrator and make sure to unlock all of the layers in the Layer Panel. After that, press Command/Ctrl+A to Select All or simply click and drag around the entire label with your Selection Tool (V). Next, press Command/Ctrl+C on the keyboard to copy all of the artwork.
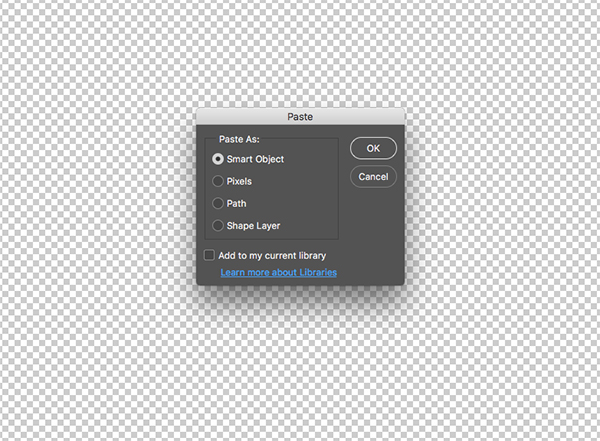
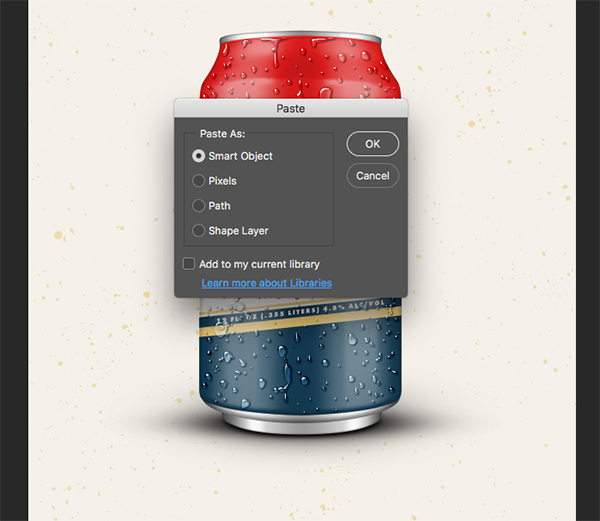
Return to Photoshop and make sure you are still in the tab where your label art will go before pressing Command/Ctrl+V to paste the artwork. You will be prompted with a dialog box asking how you want to paste the artwork so we want to choose ‘Paste As: Smart Object’ and then press ‘OK’ to paste it in.
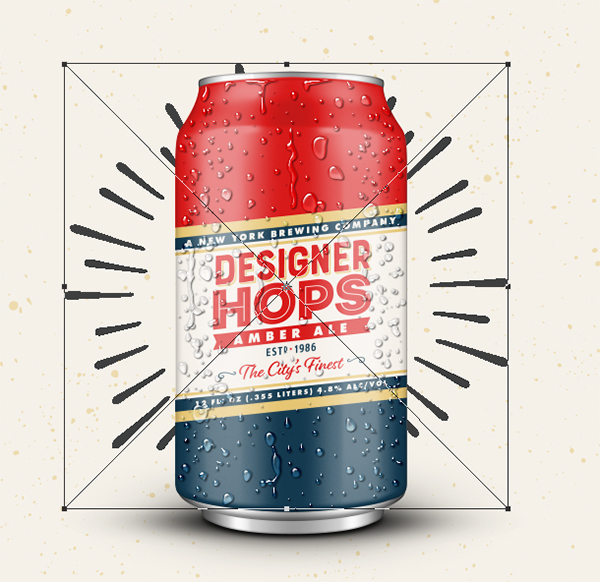
Once pasting your artwork you will need to scale it up by first pressing Command/Ctrl+T and then holding the Shift Key and dragging outwards from any of the four corners of the bounding box around the label until it spans almost the entire width of the document as shown here:
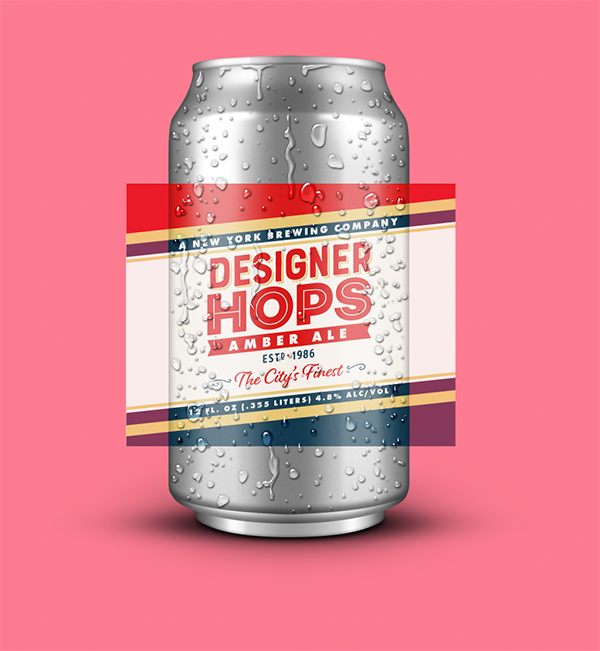
After resizing the label art, press the ‘Enter’ key to apply the changes, and then Command/Ctrl+S to save it. Now when you close this tab you should see the updated can mockup with your artwork applied. Don’t worry if it’s not fitting right just yet, we will be fixing this in the next step!
Step 20: Adjusting the Label
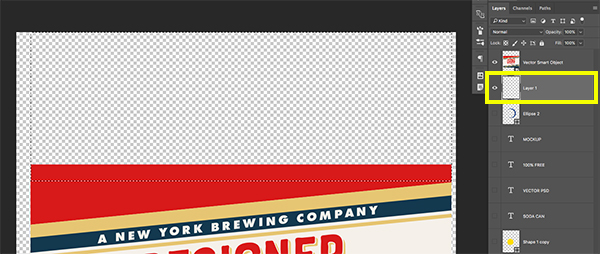
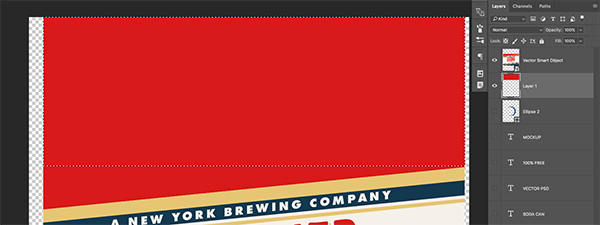
Return to the label artwork Smart Object and create a new layer. Place this layer just below your label artwork and then grab your Rectangular Marquee Tool (M) and drag out a rectangle that matches the width of your artwork and overlaps the top slightly as shown here:
While your selection is still active, press and hold the Alt/Option Key to toggle the Eyedropper Tool (I) and while holding click on the red color from the top of the label art. From here, make sure your new layer is selected in the Layers Panel and press Alt/Option+Delete on the keyboard to fill the selection with your foreground color which, in this case will be red. You should now have something like this:
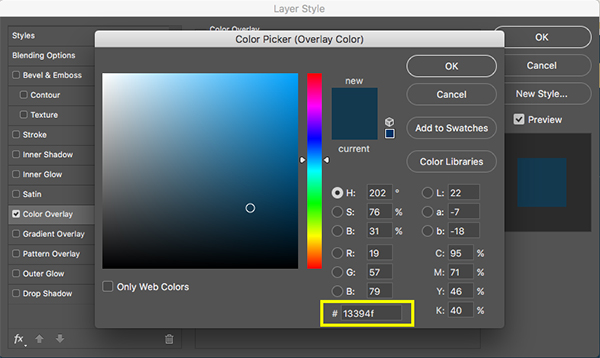
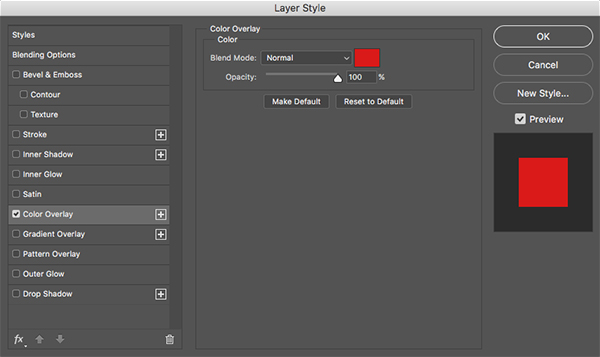
Select your red rectangle layer and make a copy of it by pressing Command/Ctrl+J to duplicate the layer. Next, double click on the layer to bring up the Layer Style Dialog Box and check off the ‘Color Overlay’ option as shown here:
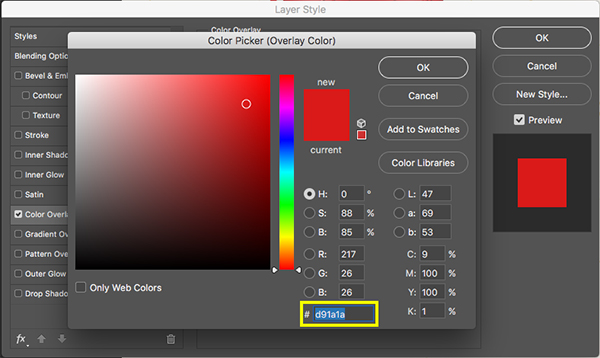
For the hex value let’s go with our navy color #13394F before pressing ‘OK’ to apply the changes and exit out of the dialog box.
Next, move this layer to the top of the Layers Palette. Press Command/Ctrl+T to initiate a Free Transform Command and then hold the Shift Key and drag the shape downwards so that it overlaps the bottom of the label artwork. Your layers should now look like this:
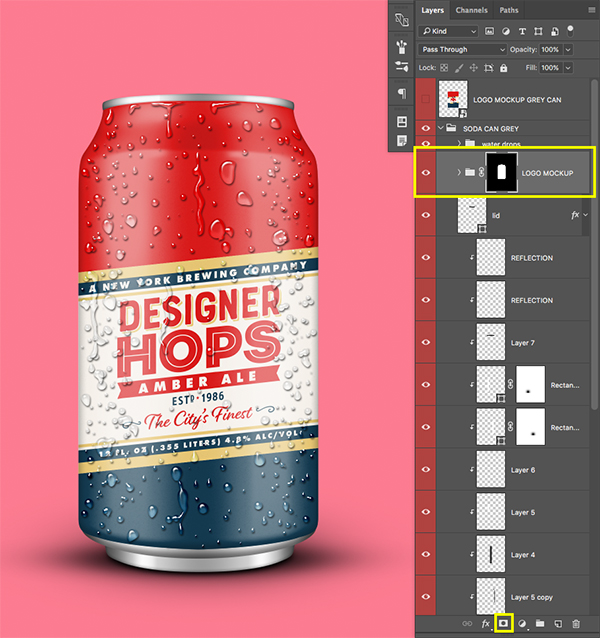
Press Command/Ctrl+S to save the document and return to the updated mockup. Expand the ‘Soda Can Grey’ folder and locate a folder towards the top of the group called ‘Logo Mockup’ and then select the folder. Tap this folder up a few times using the up arrow so that the entire body of the can is filled with the label artwork and color. The whole top of the can except for the lip should now be red, and the bottom below the label should appear blue to make the design look seamless on the body of the can.
Step 21: Masking the Artwork
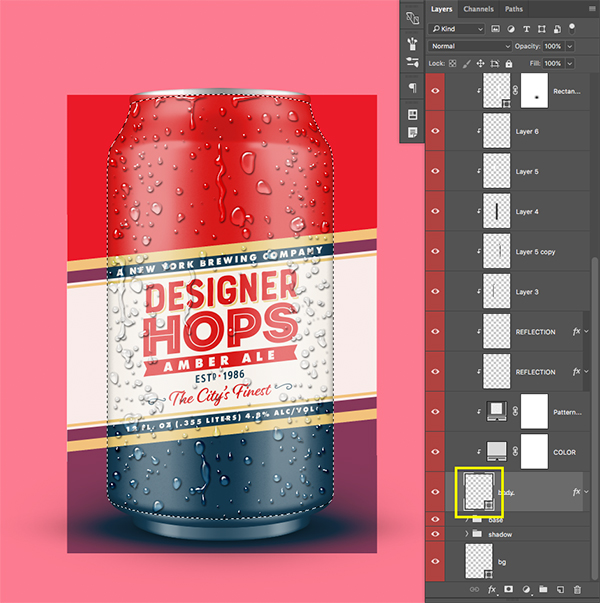
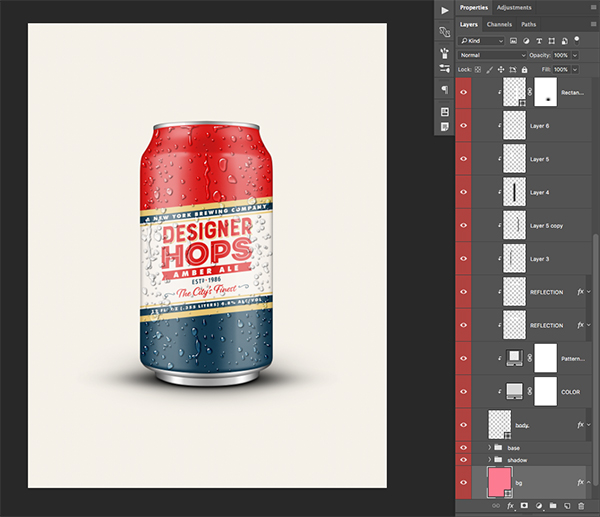
Still inside of the ‘Soda Can Grey’ folder, scroll down and locate the layer named ‘body’ as indicated by the yellow box in the image below:
Hold the Command/Ctrl Key and click on the layer thumbnail icon of the ‘body’ layer which, should activate a selection around the shape of the whole can. You should see the marching ants around the can shape indicating that your selection is active. While this selection is still active, scroll up and select the ‘Logo Mockup’ folder and then click on the ‘Add Layer Mask’ icon found at the bottom of the Layers Palette. Your artwork should now be contained within the body of the can like this:
Step 22: Adjusting the Can
Inside of the ‘Soda Can Grey’ folder, select the very to layer/folder called ‘water drops’ and then hold the Shift Key, scroll all the way down, and select the group folder named ‘shadow’ so that all of the layers except for the ‘bg’ layer are selected at the same time. Next, press Command/Ctrl+T on the keyboard to initiate a Free Transform Command. Hold Alt/Option+Shift on the keyboard and then drag outwards from any of the four corners of the bounding box to make the can larger so that it occupies more space in the center of the image.
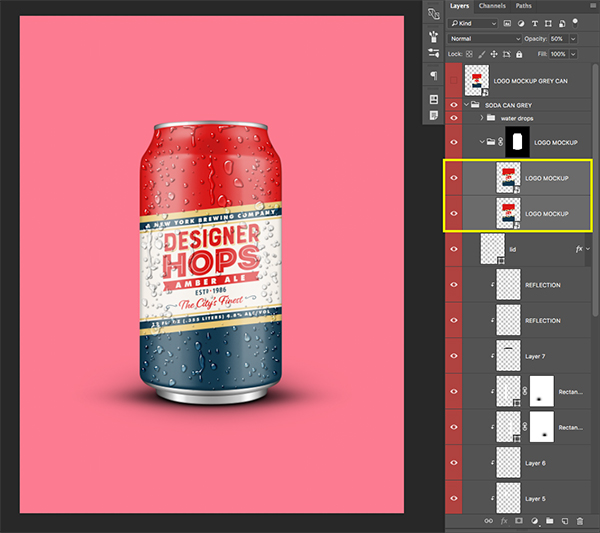
Once you are happy with the size and placement of the can and all of it’s folders and groups, press the ‘Enter’ key to apply the changes. Next, select the ‘Logo Mockup’ folder and expand it to reveal the two layers inside.
Hold the Shift Key and select both of the layers inside of the ‘Logo Mockup’ folder and then hold the Shift Key and tap the up arrow key 5-7 times so that the label is more centered on the can. You should now have something like this:
Step 23: Background Color
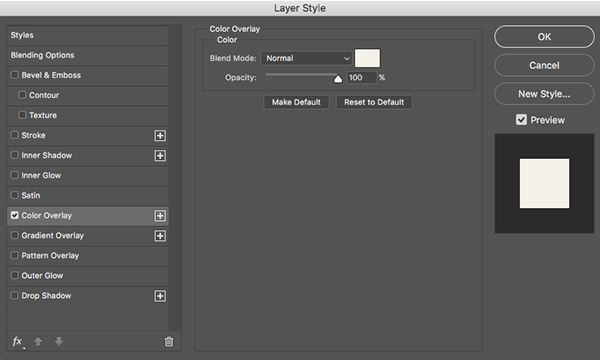
Select the ‘bg’ layer and double click it to bring up the Layer Styles. Check off the ‘Color Overlay’ option as shown below:
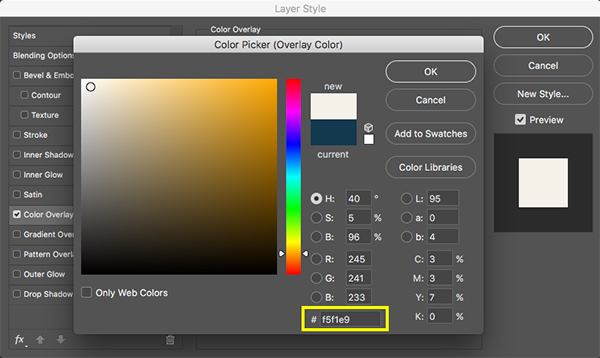
For the fill color we will be using the hex value #F5F1E9 as shown here:
Apply the changes and close out of the Layer Style menu and your design should now have a new background color that matches the lightest part of the label design.
Step 24: Creating the Footer
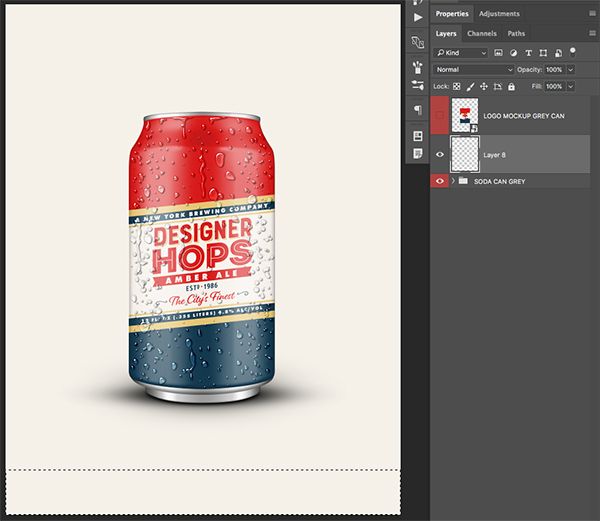
Create a new layer just above the ‘Soda Can Grey’ folder and then use your Rectangular Marquee Tool (M) to draw out a rectangle that spans the entire width of the design along the bottom as shown here:
With your rectangular selection still active, click on the foreground color and change it to #E6C673 and then press ‘OK’ to apply the changes.
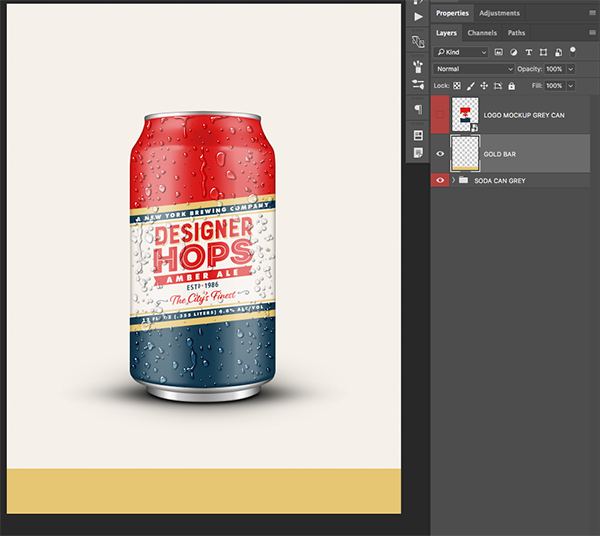
Press Alt/Option+Delete on the keyboard to fill the rectangle with the gold color.
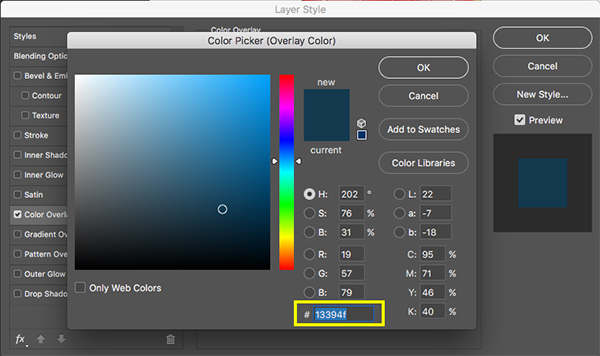
Select the rectangle shape and press Command/Ctrl+J to make a copy of it. Next, double click on the copy to bring up the Layer Styles Dialog Box and check off the ‘Color Overlay’ option.
For the fill color we will use the hex value #13394F as shown below:
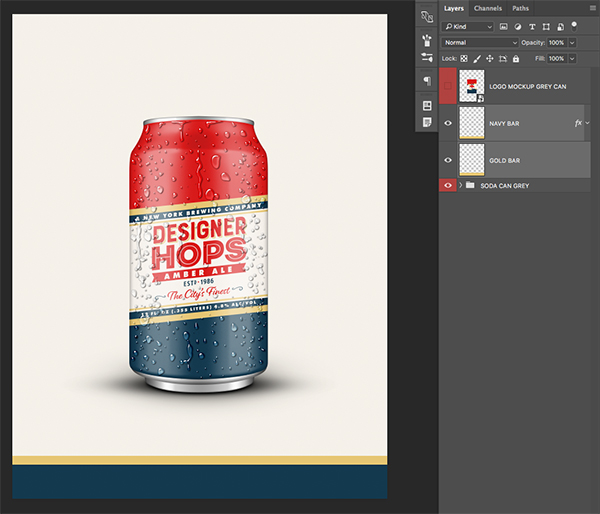
Press ‘OK’ to apply the changes and close out. Next, select the top rectangle, which should now be filled with our solid navy blue color, and then hold the Shift Key and tap the down arrow a few times to reveal some of the gold bar behind it. You should now have something like the image shown here:
Step 25: Legal Copy
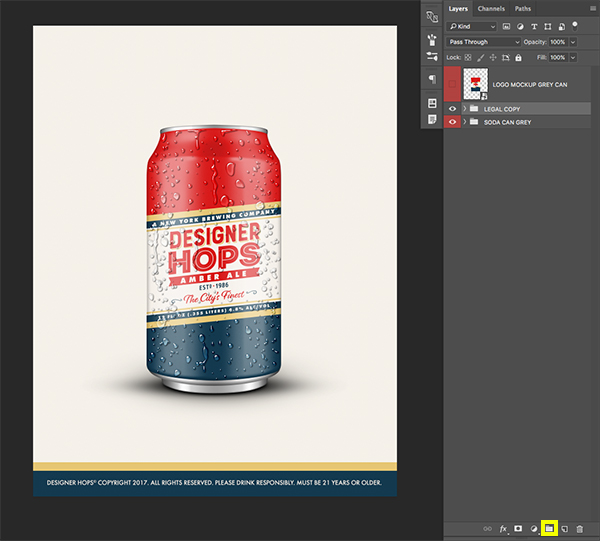
Return to the outlined text EPS file and select the legal copy from the bottom before copying it. Jump back over to Photoshop and paste the legal copy as a Smart Object. Double click the legal copy and apply a ‘Color Overlay’ using our gold as the fill color (use the Eyedropper to sample some of the light background color to change the color of your text). From here, hold the Shift Key and select the text layer, and then select both the gold and navy blue bars below so all three layers are selected together.
With all three of your layers selected, click on the small folder icon at the bottom of the Layers Palette to put them into a Group Folder and change the name of the folder to ‘Legal Copy’ or something similar. You may also want to move the whole group down a bit so it takes up less space along the bottom. You can do this by simply selecting the whole ‘Legal Copy’ folder and tapping the down arrow on the keyboard a few times until you are happy with the size and placement of these elements. You should end up with something like this:
Step 26: Ink Splatters
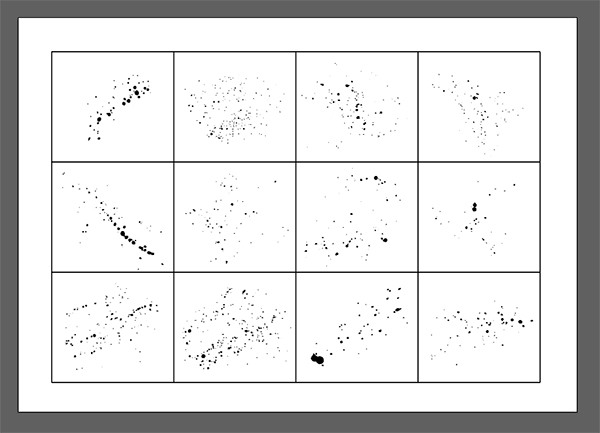
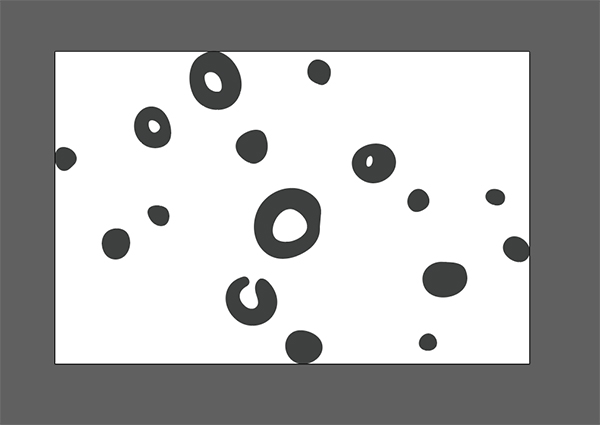
Open the ‘Ink-Splatters.ai’ file from the freebie folder for the tutorial in Illustrator.
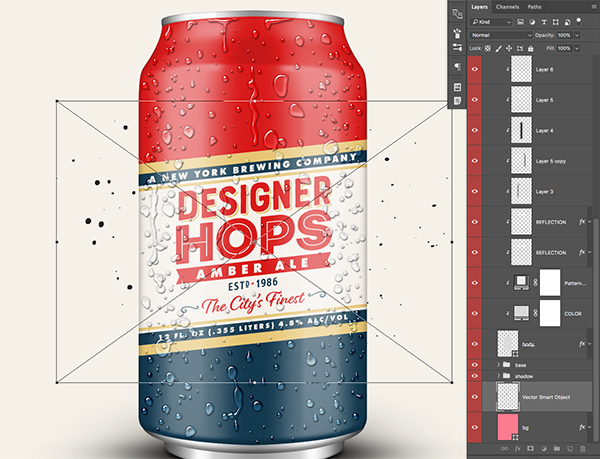
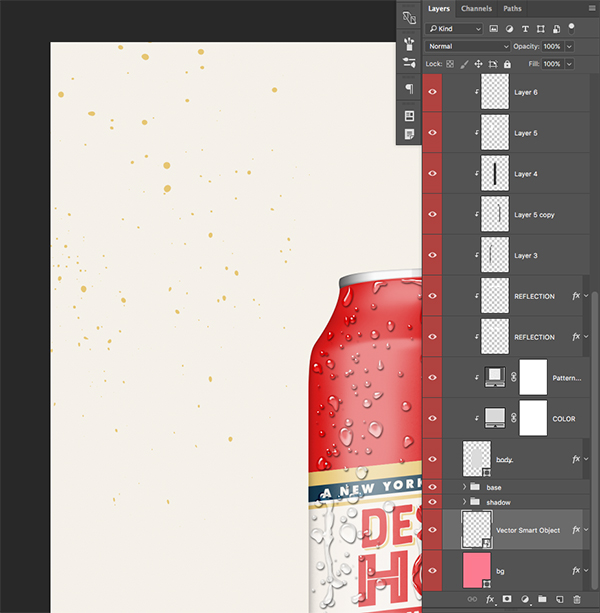
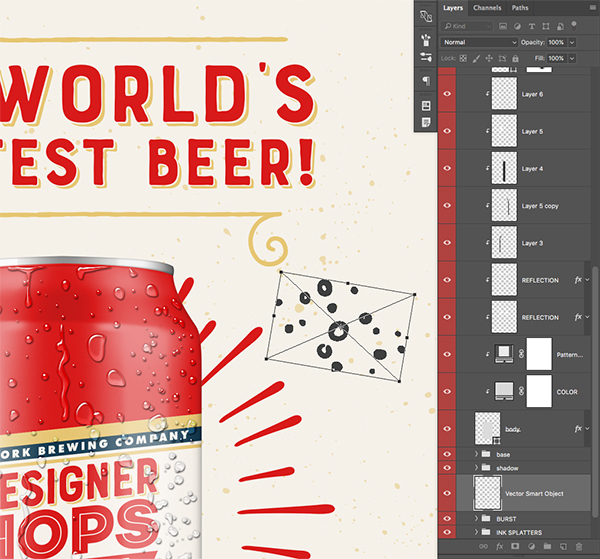
Select one of the splatters and copy it by pressing Command/Ctrl+C and then come over to Photoshop and paste it just above the ‘bg’ layer as a Smart Object.
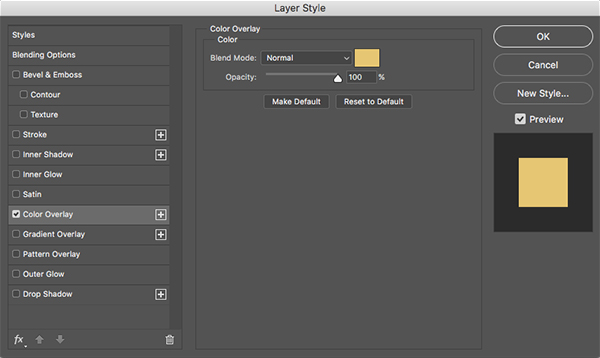
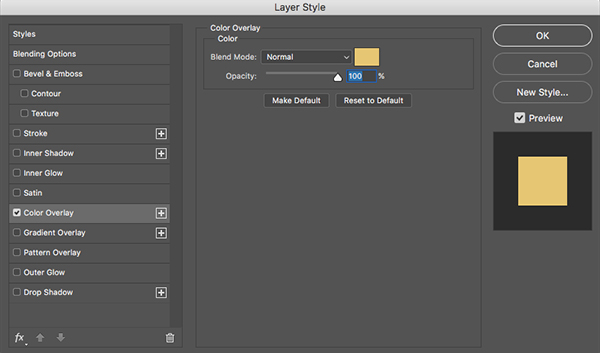
Double click on the layer to bring up the Layer Style Dialog Box and check off the ‘Color Overlay’ option as shown here:
Change the hex value to the gold color #E6C673 and then press ‘OK’ to apply the changes.
Use the Free Transform Command to scale the ink splatter up and rotate it before placing it in one of the corners of the background like this:
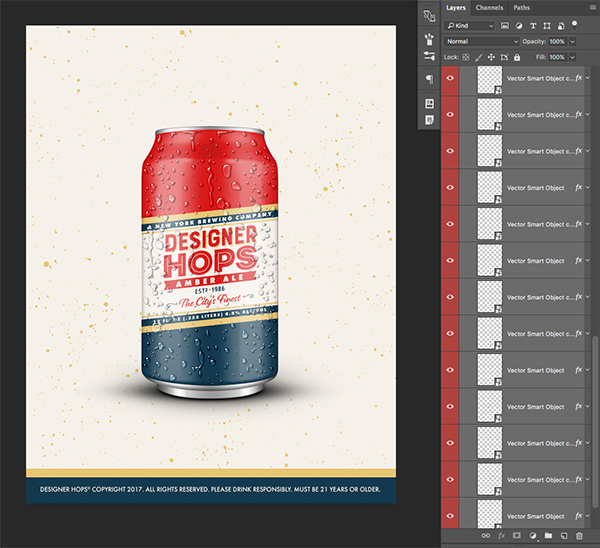
Repeat this process using a few more of the ink splatter vectors from the Illustrator file and make them all the same gold color. You will also want to vary the size, rotation, and placement to make them appear more random. Once you are happy with the placement and size of your ink splatters, select the very first one in your Layers Palette and then hold the Shift Key and click on the last copy so they are all selected simultaneously as shown here:
With all of your ink splatters selected together, press Command/Ctrl+G to place them into a Group Folder and call it ‘Ink Splatters’ or use a similar name that works for you. Press the number ‘5’ on the keyboard to change the opacity of the entire group to 50% and then check to make sure that the entire folder is behind everything except for the ‘bg’ layer in your Layers Palette.
Step 27: Adding a Burst
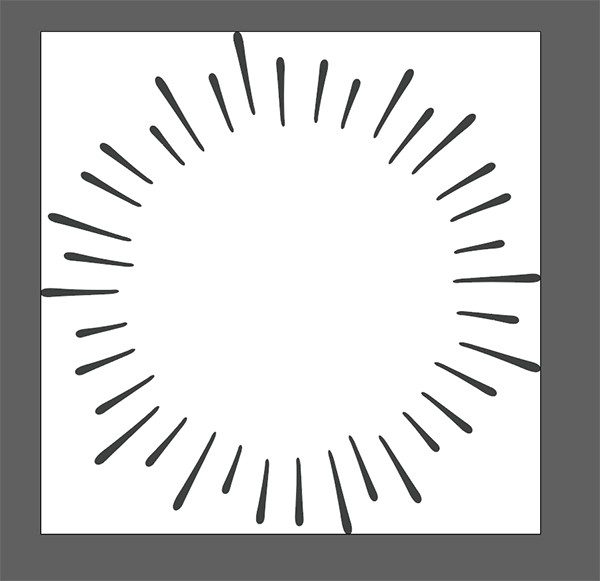
Open the ‘Jack_and_Zoe_Extras_47.eps’ file from the freebies folder in Illustrator.
Select the burst and copy it, then paste it into your Photoshop file as a Smart Object.
Use the Free Transform Command to scale and place your burst behind the can mockup, just above the ‘Ink Splatters’ folder.
Double click on the burst layer to bring up the Layer Styles and check off the ‘Color Overlay’ option as shown below:
Enter a hex value of #D91A1A and press ‘OK’ to apply the changes.
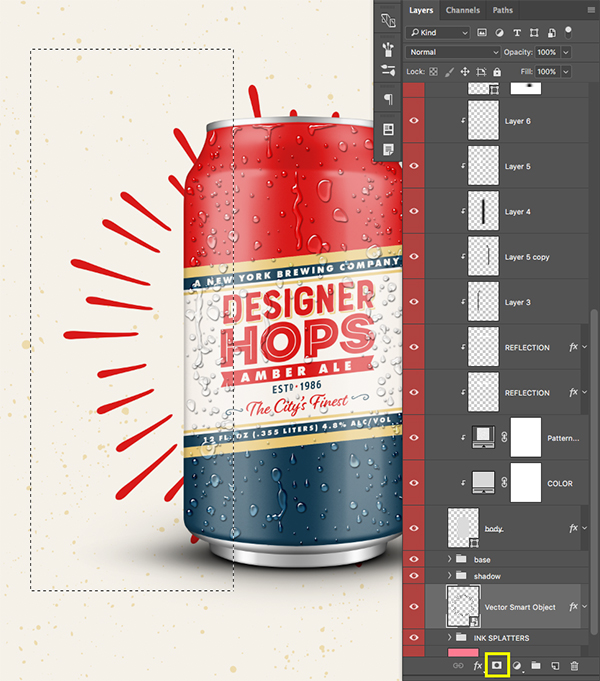
Grab your Rectangular Marquee Tool (M) and drag out a vertical rectangle over the left part of the burst, behind the can. Next, click on the ‘Add Layer Mask’ icon at the bottom of the Layers Palette.
You should now just see the left side of the red burst showing behind the can mockup.
Step 28: Rinse and Repeat
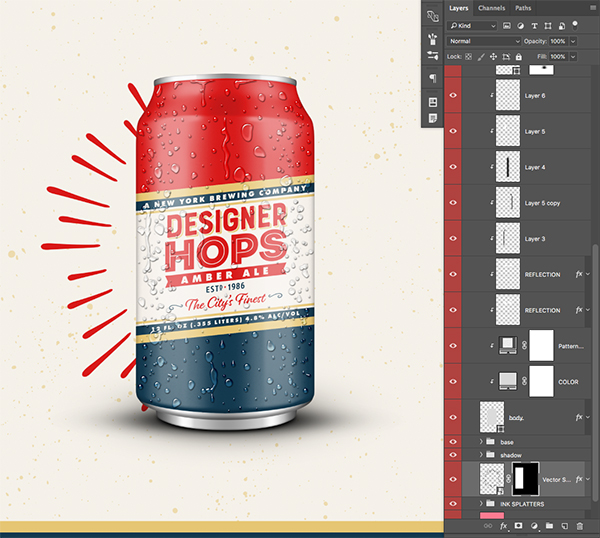
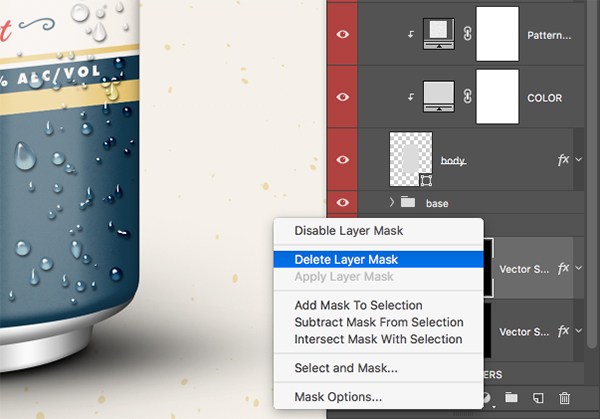
Select the red burst layer and press Command/Ctrl+J to duplicate the layer. Next, hold the Control Key and click on the layer mask. When the dropdown menu appears, choose ‘Delete Layer Mask’ as shown here:
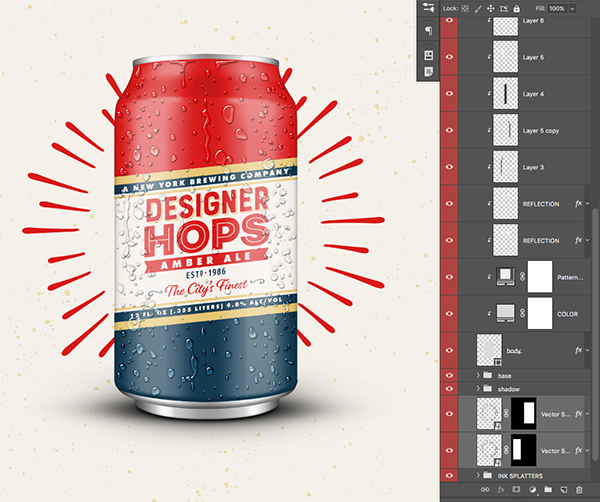
Place this layer towards the right side of the can, and when you are happy with the size and placement of the shape go ahead and drag another rectangle around it before applying a new mask.
Select both of the burst layers while holding the Shift Key and then press Command/Ctrl+G to place them into a folder called ‘Burst’ or you can give it a similar name of your choosing.
Step 29: Comic Bubble
Next, open the ‘Jack_and_Zoe_Extras_108.eps’ file in Illustrator and copy it by selecting the shape and then pressing Command/Ctrl+C.
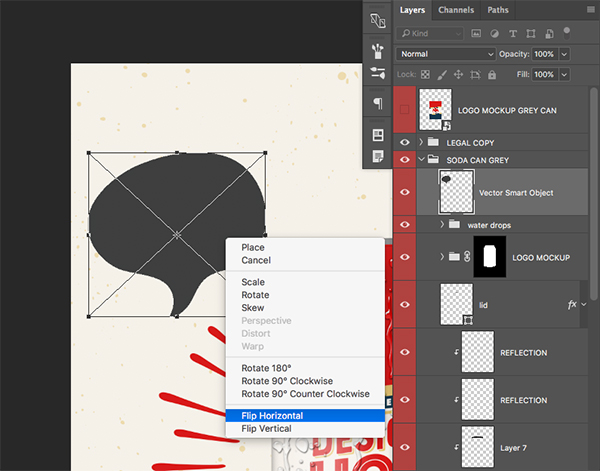
Return to Photoshop and paste the shape as a Smart Object by pressing Command/Ctrl+V and then choosing ‘Smart Object’ from the ‘Paste As’ dialog box. After pasting the shape into your document, place the layer at the very top of the ‘Soda Can Grey’ folder. Select the layer and press Command/Ctrl+T to initiate a Free Transform and then hold the Control Key and click on the shape to reveal a dropdown menu. From here, select the ‘Flip Horizontal’ option to flip the bubble the opposite way.
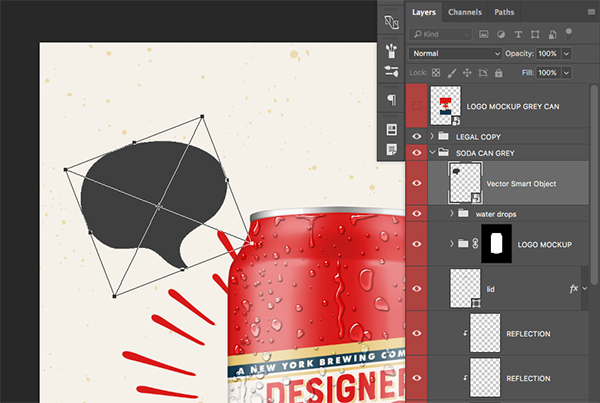
While you still have the bounding box around the bubble shape, rotate it counter clockwise by moving your cursor over one of the corners and rotating the shape. Use the image below as a guide for the size and placement.
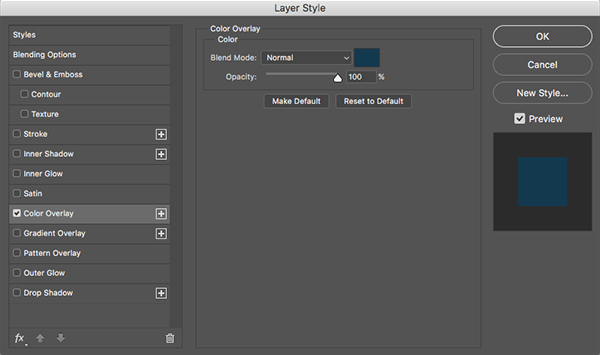
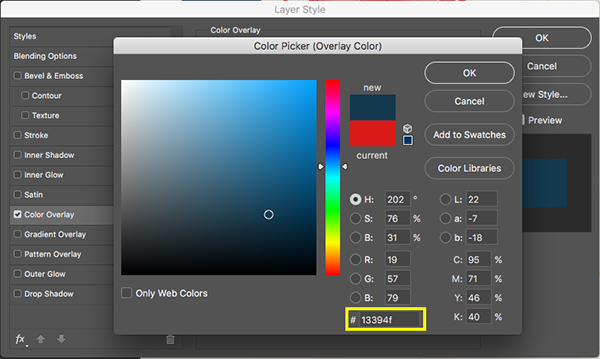
After applying the transformation, double click on the shape and apply a ‘Color Overlay’ inside of the Layer Style Dialog Box.
For the fill color we will use our navy once again (#13394F). After that, press ‘OK’ to apply the changes and close out of the dialog box.
Step 30: Fuel Your Designs
Return to the outlined text EPS file and now select the word ‘Fuel’ from the document. We are going to copy this by pressing Command/Ctrl+C and then return to Photoshop before pasting it (Command/Ctrl+V) as a Smart Object. Double click on the layer and apply another ‘Color Overlay’ effect, again using the Eyedropper to sample from the light background color.
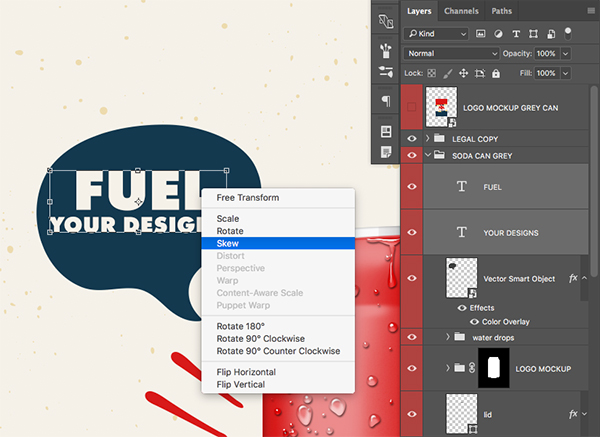
Return to Illustrator and grab the ‘Your Designs’ text which we will copy and then paste back over into Photoshop as a Smart Object. Apply the same ‘Color Overlay’ using the Layer Styles Dialog Box and fill it with the off-white background color. We will want to also make this type smaller below the ‘Fuel’ text so that it fits nicely inside of the bubble. Once you are happy with the size and placement of both lines of text, hold the Shift Key and select both layers in your Layers Palette. From there, press Command/Ctrl+T to initiate a Free Transform, and then click on either line of text while holding the Control Key to reveal the dropdown menu. From the list that appears, we want to choose ‘Skew’ from the list.
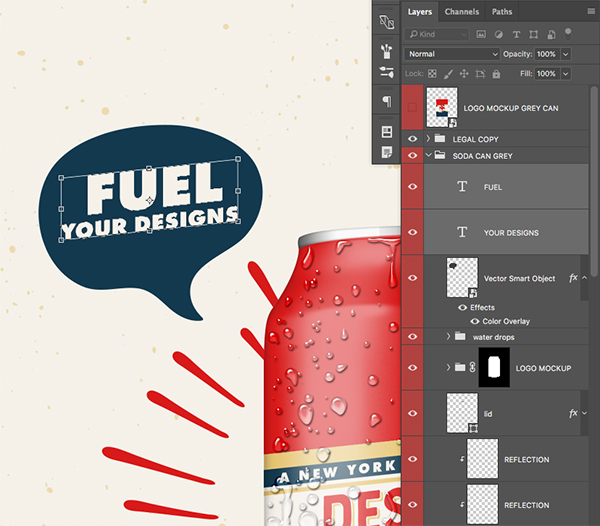
Once you see the bounding box around the text and have selected ‘Skew’ from the dropdown menu, move your cursor over the right side of the bounding box and move your mouse upwards until the text is at an angle of 6 degrees to match the angle of the text on our beer can label. Once you are happy with the placement, press ‘Enter’ to apply the transformation.
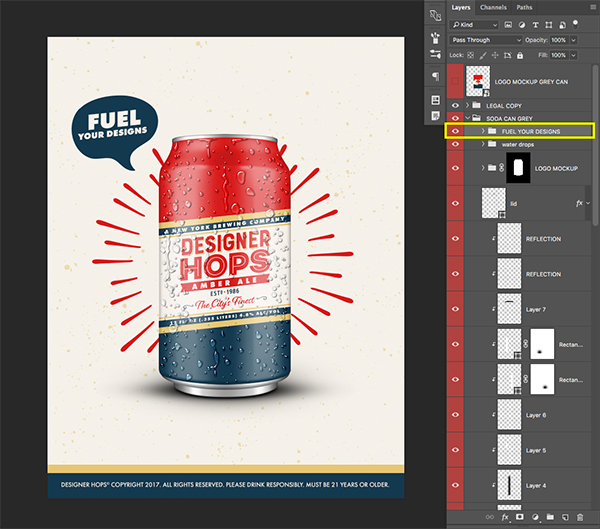
After applying the transformation, hold the Shift Key and select the top text layer, and then select the comic bubble so all three of the layers are selected together. From there, press Command/Ctrl+G to place the layers into a folder and call it ‘Fuel Your Designs’ so it will be easy to identify in the Layers Palette. Your image should now look like this:
Step 31: The World’s Greatest Beer!
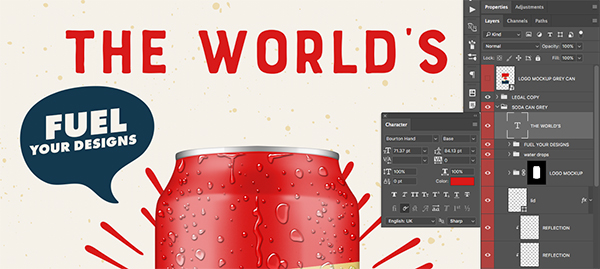
Jump back into Illustrator and select ‘The World’s’ outlined text using the Bourton Base typeface. Copy this by pressing Command/Ctrl+C and then return to Photoshop and paste it as a Smart Object. Double click on the layer to bring up the Layer Styles Dialog Box and apply a ‘Color Overlay’ using the Eyedropper to sample some of the red color from elsewhere in the design.
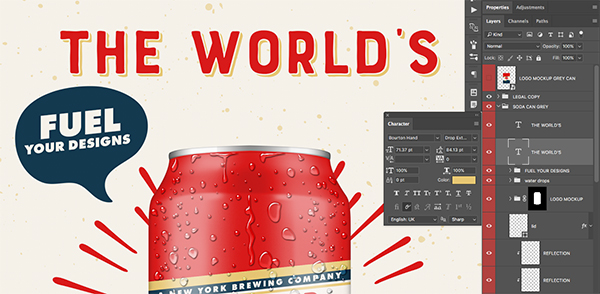
After placing the main headline, return to Illustrator and select the drop shadow version of the text before copying and pasting it into Photoshop. Make sure that this layer sits just below the red, base text and then change the color to the gold (#E6C673) via the Layer Styles Dialog Box. You should now have something like this:
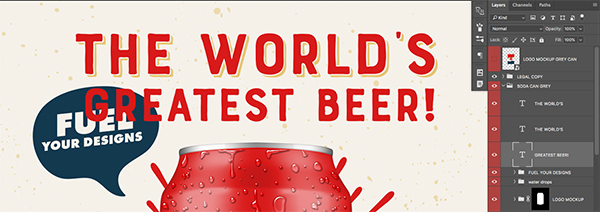
We will now want to repeat that process to copy and paste the second line of text reading ‘Greatest Beer!’ into Photoshop. Apply the same Layer Style with a red fill and then place the base below ‘The World’s’ copy.
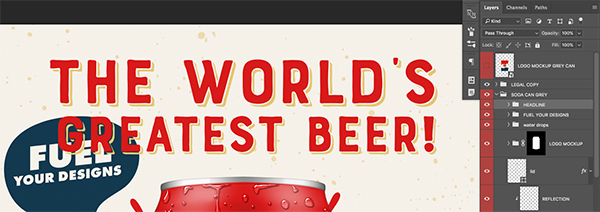
Next, bring in the shadow version of the ‘Greatest Beer!’ text and paste it into Photoshop as a Smart Object. We will want to then place this layer directly below our red base text. Double click on the layer to bring up your Layer Styles and check off the ‘Color Overlay’ option before entering the same gold hex value of #E6C673 for the fill color. Press ‘OK’ to close out and apply the changes, and then hold the Shift Key and select all four Smart Objects that make up the headline so they are selected at the same time. After that, press Command/Ctrl+G to put them into a folder and name it ‘Headline’ and you should now have something like this:
Step 32: Room to Breathe
Next, select the folder just below the ‘Headline’ folder, which should be the comic bubble folder called ‘Fuel Your Designs’ and then scroll all the way down and select the ‘Burst’ folder, just above the ‘Ink Splatters’ folder as shown here:
With all of these layers and folders selected, hold the Shift Key and tap the down arrow several times until the headline has some breathing room below it. I also went ahead and reduced the size of the ‘Fuel Your Designs’ group by using a Free Transform Command and scaling the entire group down a bit more. You should now have something like this:
Step 33: Headline Ornaments
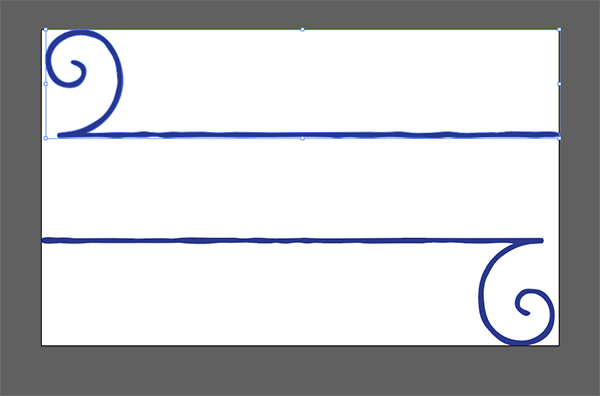
Next, open the ‘Bourton_Hand_Flourish.eps’ file from the freebies folder for this tutorial inside of Illustrator. We are just going to be selecting the top piece here and then copying it by pressing Command/Ctrl+C.
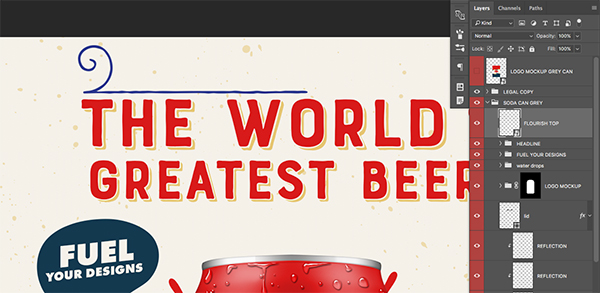
Jump back into Photoshop and paste the layer as a Smart Object and place it at the very top of the ‘Soda Can Grey’ folder. Position the flourish at the top left of the headline as shown below:
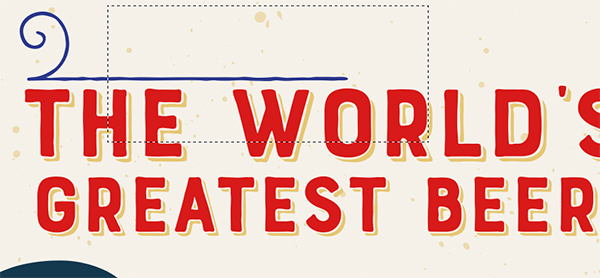
Select your Rectangular Selection Tool (M) and draw a rectangle around the straight part of the flourish, and then press Command/Ctrl+J to duplicate this piece onto a new layer above the flourish Smart Object.
Hold the Shift Key and tap the right arrow to extend this line further to the right. Create another copy as needed until the width of the flourish matches the width of the headline.
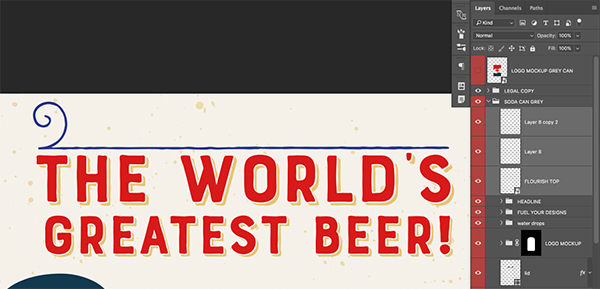
Select all of the copies and the original flourish Smart Object while holding the Shift Key to ensure that they are all selected at the same time, and then press Command/Ctrl+E on the keyboard to merge them all together into a single layer and rename it ‘Flourish Top’ as shown below:
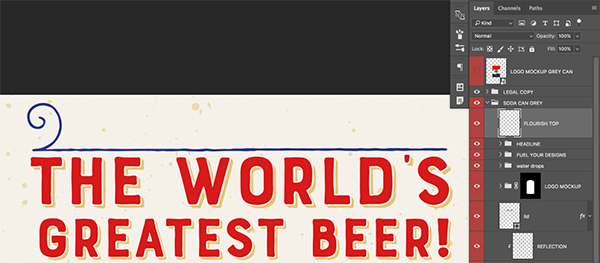
Double click on the ‘Flourish Top’ layer to bring up the Layer Styles Dialog Box and apply a ‘Color Overlay’ as shown here:
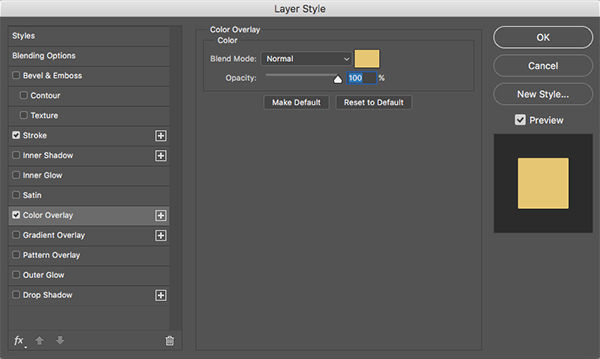
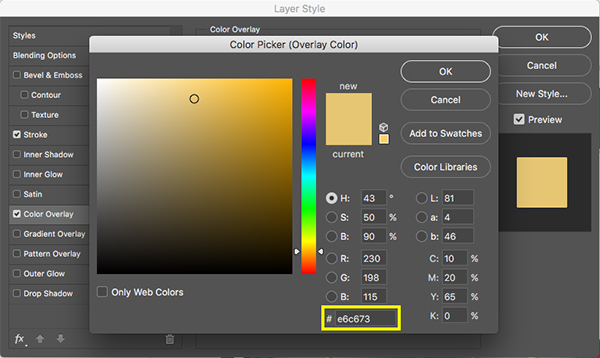
For the fill color we want to go with our gold, which is #E6C673.
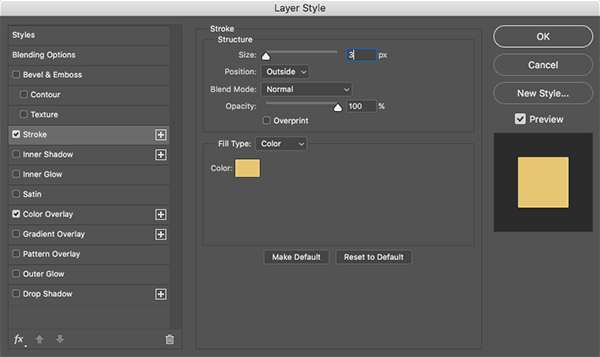
While we still have our Layer Styles open, check off the ‘Stroke’ option and apply a gold stroke that matches the fill color. Set the Size to ‘3’ and the Position to ‘Outside’ before pressing ‘OK’ to apply the changes.
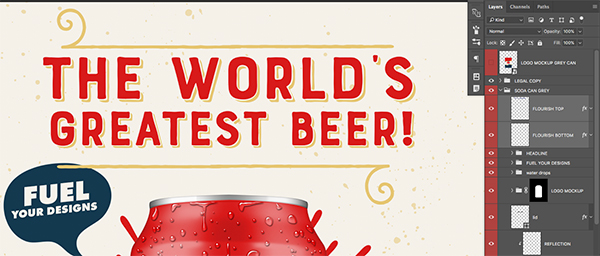
Next, select the ‘Flourish Top’ layer and make a copy of it by pressing Command/Ctrl+J on the keyboard. Change the name of this copy to ‘Flourish Bottom’ and then press Command/Ctrl+T to initiate a Free Transform. Move your cursor over the top right of the bounding box and rotate the flourish so that it’s upside down. From here, move the layer below the headline as shown in the image;
Select the ‘Fuel Your Designs’ folder, and then hold the Shift Key and select the ‘Burst’ folder just above the ‘Ink Splatters’ and ‘bg’ layer. From here, hold the Shift Key and tap the down arrow to add a little more space around the headline. This will allow us to then add a bit of space between the headline and both of the flourishes above and below it. Your image should now look like this:
Step 34: Adding Some Bubbles
Next, open the ‘Jack_and_Zoe_Extras_48.eps’ file in Illustrator and copy it.
Back in Photoshop we will then paste our bubbles as a Smart Object just above the ‘Burst’ folder. Rotate the bubbles slightly and use the image below as reference for the size and placement.
Double click on the Smart Object to apply a ‘Color Overlay’ Layer Style using the same gold color we have been using throughout, and then hit ‘OK’ to apply the changes.
Make another copy of the bubbles by pressing Command/Ctrl+J and then rotate it and place it on the opposite side towards the left of the headline. Once you are happy with the size and placement of the bubbles, select them both while holding the Shift Key and place them into a folder called ‘Bubbles’ or use a similar name that works for you.
We have now completed our Designer Hops Beer Poster Design! After creating our typographic label design in Illustrator we then used Photoshop to apply it to a realistic beer can mockup before using this is the centerpiece for our poster design. I hope that you have enjoyed this tutorial and hopefully learned some tricks along the way. With so many fonts to choose from, this bundle is sure to provide you with unlimited possibilities for the types of designs you can create. I can’t wait to see what you guys do with it!
Remember that whether it’s your outcome for this tutorial or something new you’ve made, we’d love to see your designs on our Facebook page.
Please leave a comment if you have any questions or suggestions. I always look forward to hearing from you!
There’s still time to check out The Influential Font Lover’s Library featuring some of the world’s leading font families for an unprecedented price of just $29.


















Very useful tutorial especially for Illustrator newbies. Many skills learned here can be applied anywhere else. Thank you!
Hey Mo,
Thanks so much for your feedback and we are so pleased you like this one :).That is awesome as well to hear about the new skills!
great design, useful tips!
Thanks Nina,
We are so happy you liked it and found it useful :)
Can you put a link to the soda can. Not in Photoshop in the US and been looking through pages on Graphics Fuel and can’t seem to find it
Hey Jason,
I am so sorry that you are having trouble finding this!
The free mockup is linked in the tutorial write up, so my apologies if you missed this- here it is again for you to save any further delays:
http://bit.ly/2hQ40Fw
Great stuff. Should come in handy for us. I live in Durango, Colorado and our small town has more micro-breweries per capita than any city in the U.S. Six microbreweries in a town of just 18,000 people. Thanks for some great design ideas.
Woah Eric- I think DC need an outing to Durango as we love a craft brew :).
We really hope you get loads of use out of this one and please do feel free to share anything that you create with us as we would love to see it!
Beautiful
Thanks so much Nech!
Thank you! This tutorial was a lot of fun to create and I’m happy to hear that you like the outcome! :)