WHAT WE’RE CREATING:
Hello design cutters! Renee here with a tutorial for an egg hunt flyer that will come together in Photoshop, but will dabble briefly in Illustrator too. We’ll create our flyer by layering a variety of patterns, textures and brushes.
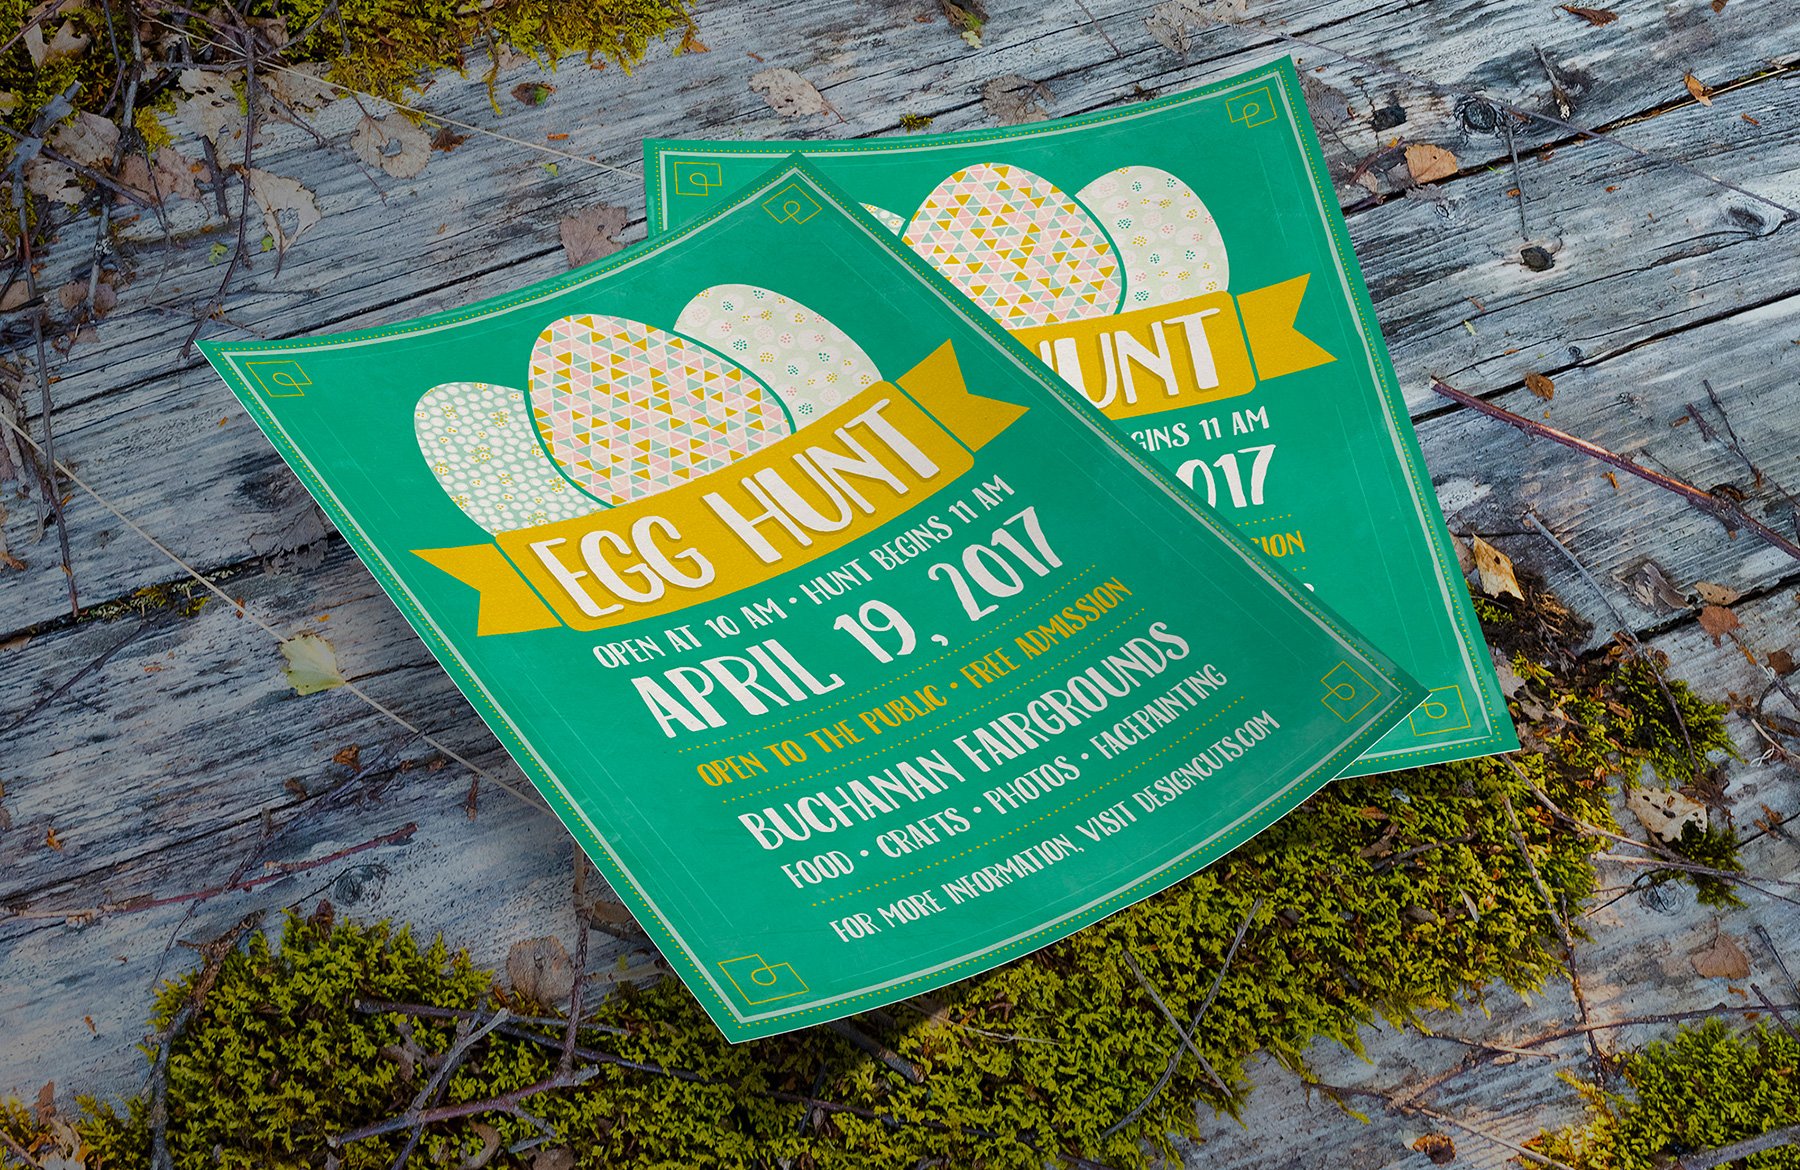
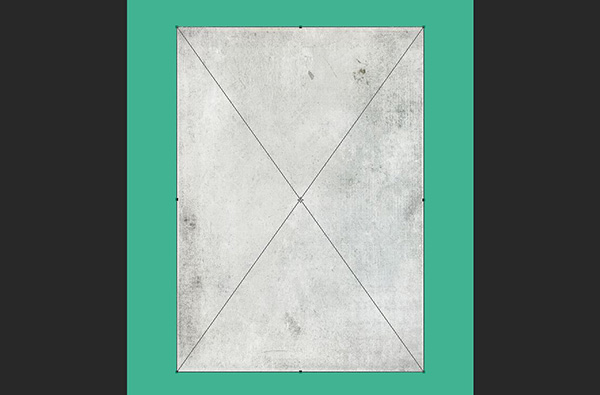
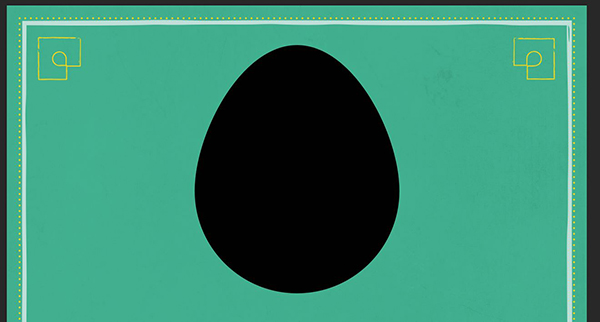
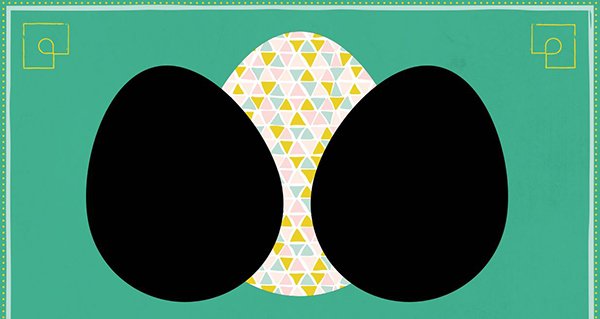
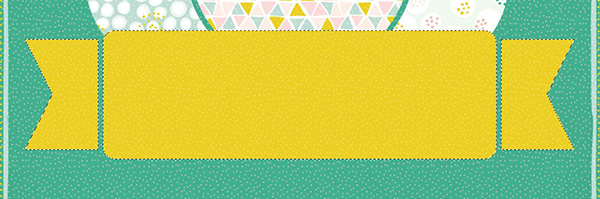
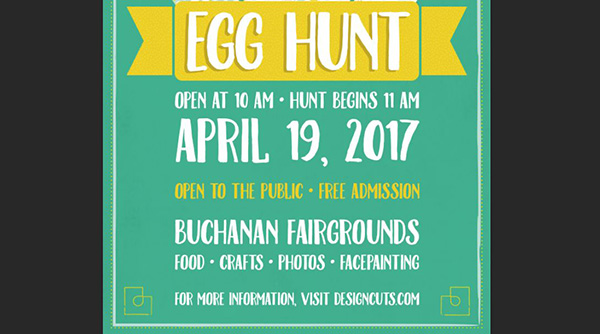
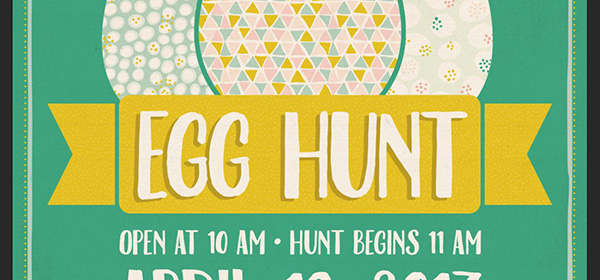
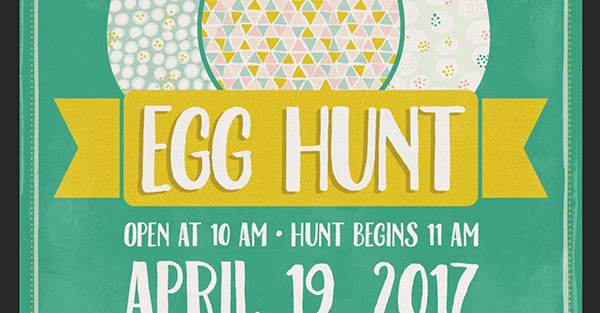
Here’s a look at what we’ll be creating:


Follow along with this tutorial: Download the freebie files
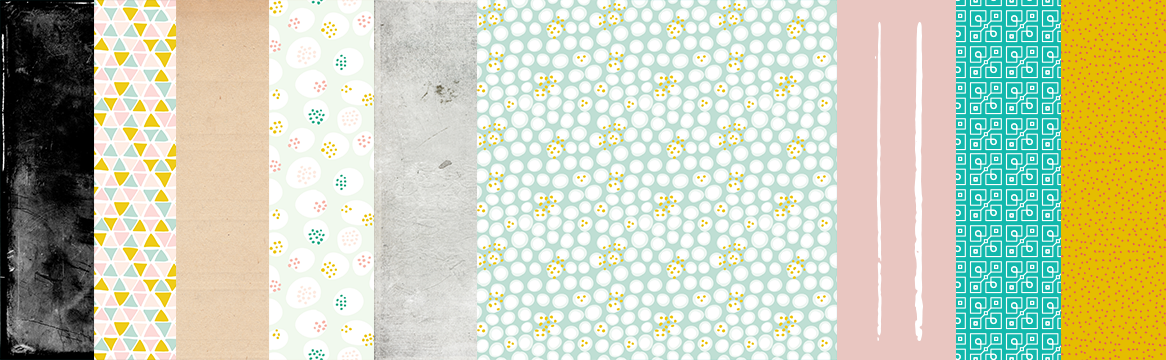
The freebie pack includes a ton of textures, patterns and brushes from Bulbfish Design, Elan Blog Studio, Greta Ivy, Kim Klassen, Misprinted Type and The Paper Town.
This freebie pack is just a tiny sample of the resources available in The Ultimate Textures, Patterns and Backgrounds Bundle for just $29 (that’s 99% off). This bundle is the ultimate time-saver for any designer, bringing you literally thousands of ready-to-use items, right out of the box.
Step 1: Background
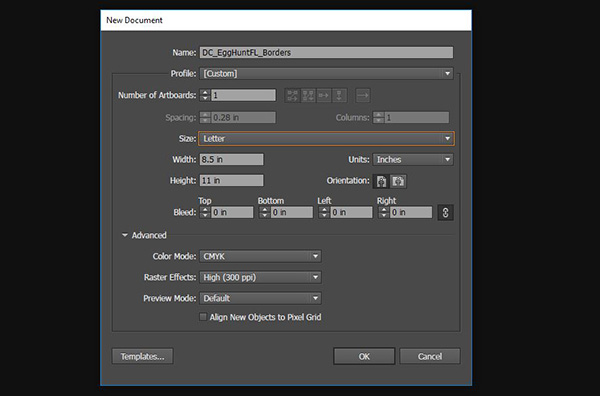
Open Photoshop and go to File > New. In the New Document dialog box, enter a width of 8.5 inches and a height of 11 inches. Set your Resolution to 300 ppi and your Color Mode to RGB.
Click OK to create the document.

Save your file.
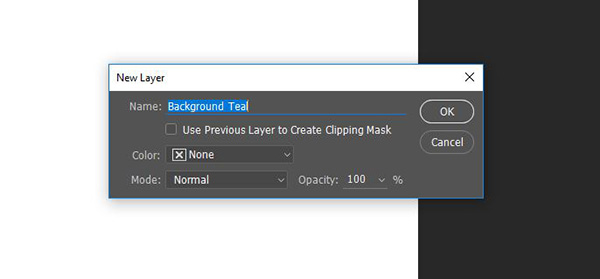
We’ll start with a background color. Go to Layer > New Fill Layer > Solid Color. In the popup box, name your layer Background Teal and press OK.
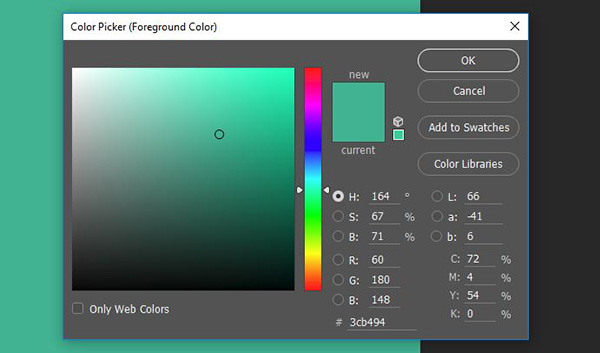
In the Color Picker popup, enter RGB values of 60/180/148 and press OK.
Now we’ll add a subtle bit of texture. Go to File > Place Linked. Navigate to the freebies folder and select Kim-Klassen_studio collection-11. Press Place.
After the placed file appears, hold Shift and use the corner handle to rotate the image 90 degrees to the right.
Hold Shift again and pull the corner handles up and out to increase the size of the image until it fills the artboard completely. Press Enter when done.
At the top of the Layers palette (Window > Layers), change the Blend Mode to Multiply and reduce the Opacity to 15%.

Step 2: Border
Next, we’ll create a border. Open Illustrator and go to File > New. In the dialog box, enter a Width of 8.5 inches and a Height of 11 inches. Press OK.
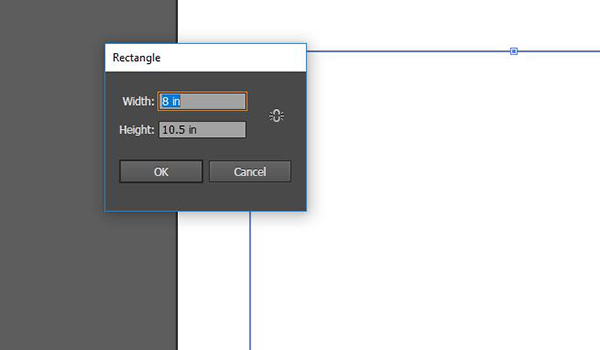
Select the Rectangle Tool (m). Click once on the artboard and in the dialog box, enter a Width of 8 inches and a Height of 10.5 inches. Press OK.
Open the Swatches palette (Window > Swatches) and change the Fill Color to None. Leave the Stroke Color as Black.
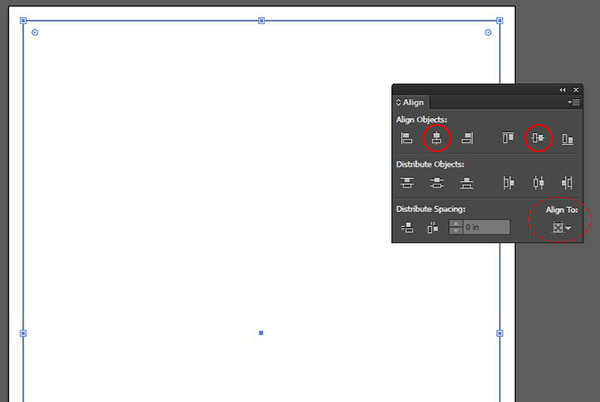
Now open the Align palette (Window > Align). Under Align Objects, select the icon for Horizontal Align Center and Vertical Align Center.
Note: If nothing happens when clicking on the Align icons, click the icon under Align To: and select Align to Artboard.
Click on the artboard with the Rectangle Tool again. This time, enter a Width of 8.125 inches and a Height of 10.625 inches. Press OK.
Use the Align palette to center the new rectangle both horizontally and vertically.
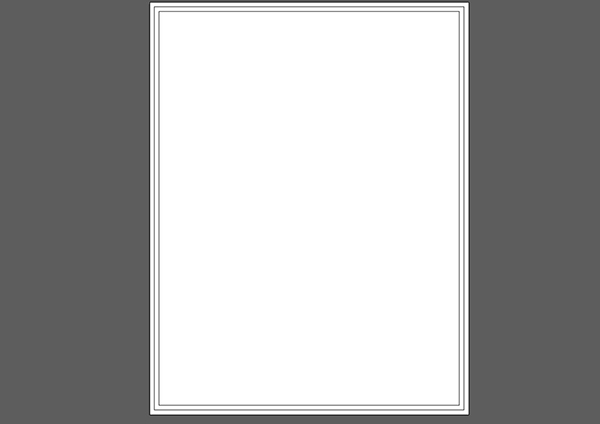
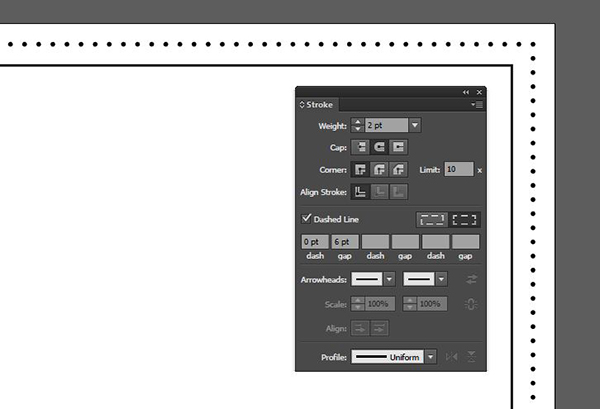
With the outer rectangle still selected, open the Strokes palette (Window > Strokes). Increase the Weight to 2 pt. Next to Cap, select the middle icon for Rounded.
Check Dashed Line. For the first Dash, enter 0 pt. For the first Gap, enter 6 pt.
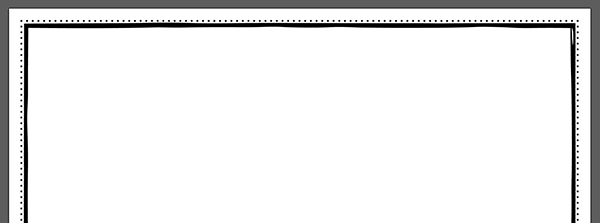
In Finder (or Explorer on a PC), navigate to the freebies folder and open The-Paper-Town_CrayonBrushes in Illustrator.
Press Cmd + A to Select All on the artboard. Press Cmd + C to Copy, then close the file.
Back in the main border layout file in Illustrator, press Cmd + V to Paste. This will import the brush strokes into the new file.
Press Delete to eliminate the two pasted lines and the brush strokes will remain in the Brushes palette.

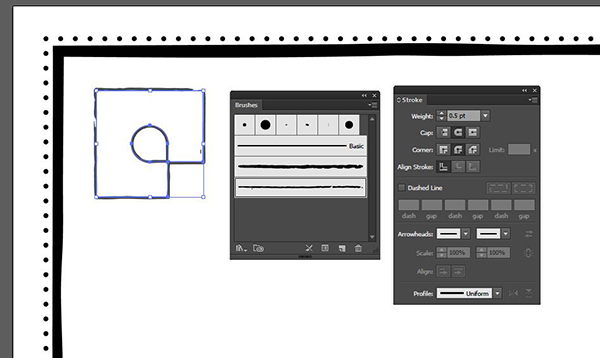
On the artboard, use the main Selection Tool (v) to select the inner rectangle. Open the Brushes palette (Window > Brushes). In the Brushes list, select Crayon11.
From the freebies folder in Finder, open Bulbfish-Design_Pattern_14 in Illustrator.
Instead of using this entire pattern, we’re going to steal one little piece of it to use as an ornament.
Open the Swatches palette. Select the pattern swatch and drag it from the Swatches palette onto the artboard.

In the Toolbar, click and hold on the Direct Selection Tool (white arrow) until the flyout menu appears and then select the Group Selection Tool (white arrow with a plus sign).
With the Group Selection Tool, click once on the top left piece of the pattern.

Press Cmd + C to Copy. Close the file.
In the main Illustrator border file, press Cmd + V to Paste.
At the top of the artboard next to W: (Width), enter .5 inches, then click the link icon between Width and Height to maintain aspect ratio.
Position in the top left corner of the artboard, inside the inner rectangle.
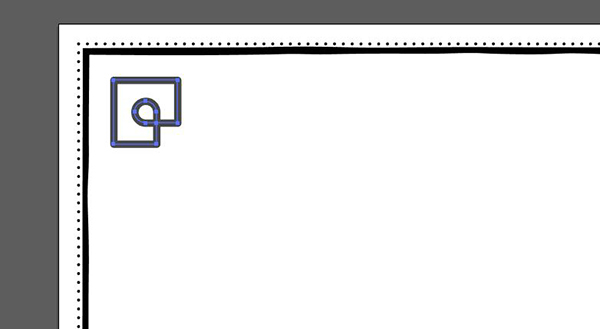
In the Brushes palette, select Crayon02.
In the Stroke palette, reduce the Weight to .5 pt.
With the corner piece still selected, go to Object > Transform > Reflect. In the dialog box, select Vertical and press Copy.
Hold Shift and use the main Selection Tool (v) to move the copy to the same relative location on the top right side of the artboard.
Note: Holding Shift forces the selection to move along 45 degree angles or in this case – a straight line.
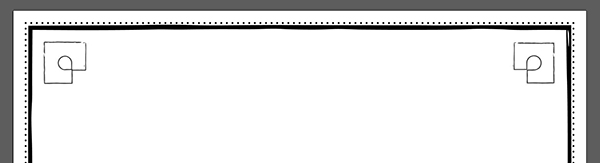
Hold Shift and use the main Selection Tool to select both top corner pieces.
Go to Object > Transform > Reflect. This time, select Horizontal and press Copy.
Hold Shift and use the Selection Tool to drag the copies to the same relative location at the bottom corners of the artboard.

Let’s add a little color, then we’ll move this back into Photoshop.
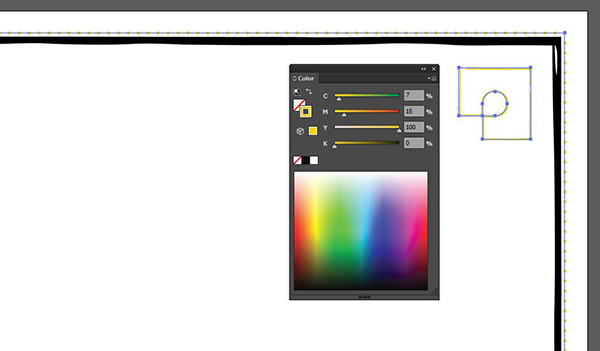
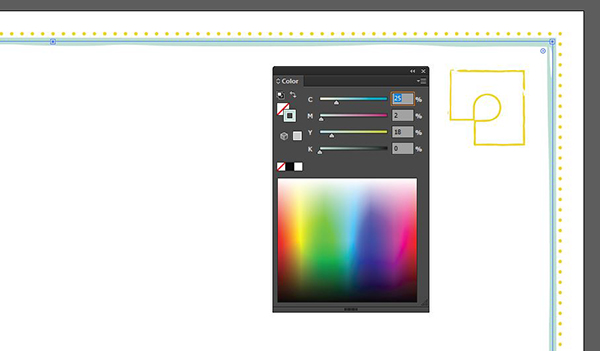
Use the Selection Tool to select the outer dotted rectangle. Hold Shift and also select each of the 4 corner ornaments.
In the Color palette (Window > Color), change the Stroke Color to CMYK 7/15/100/0.
Select the inner, solid rectangle. In the Color palette, change the Stroke Color to CMYK 25/2/18/0.
Press Cmd + A to Select All. Press Cmd + C to Copy.
Go back to the main layout file in Photoshop. Press Cmd + V to Paste. In the popup box, select Smart Object and press OK.
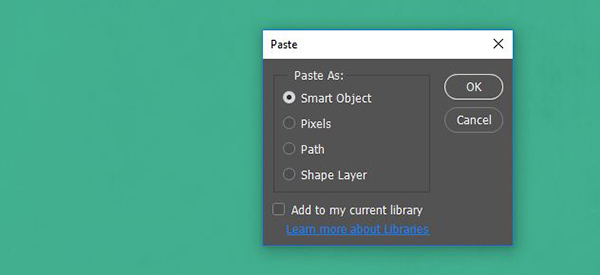
When the pasted border appears, press Enter to complete the placement.
In the Layers palette, double-click the name of the layer, Vector Smart Object, and rename it Border.
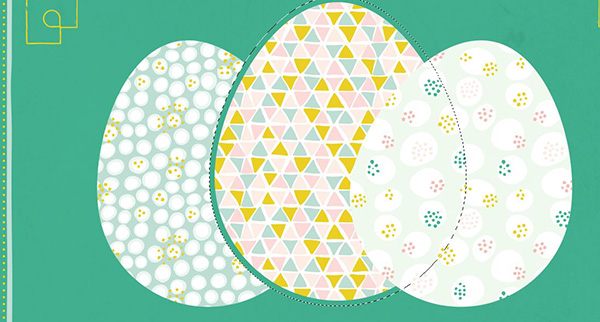
Step 3: Eggs
Now we’ll add our hero elements – the eggs.
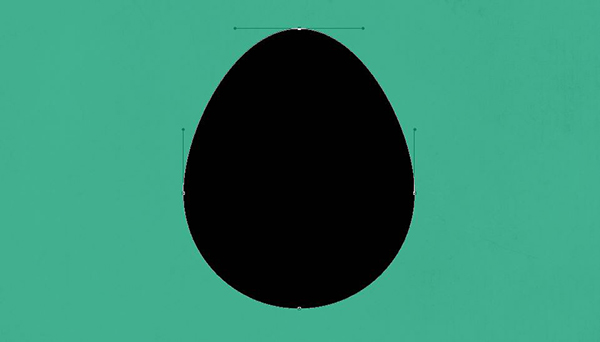
In the Toolbar, select the Ellipse Tool (u).
Note: The Ellipse Tool is available in the flyout menu under the Rectangle Tool.
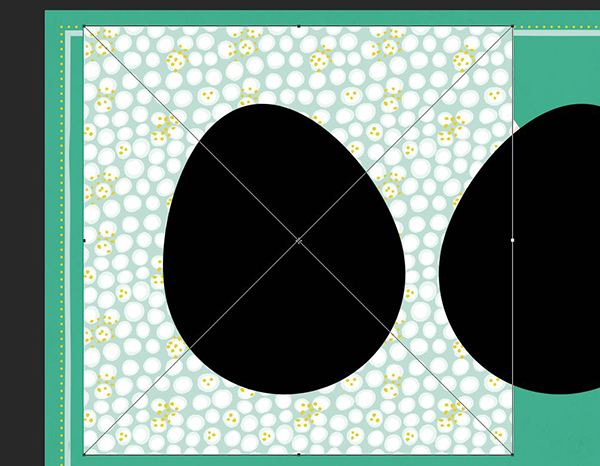
Hold Shift, then click and drag on the artboard to create a circle that’s about 3 inches in diameter.

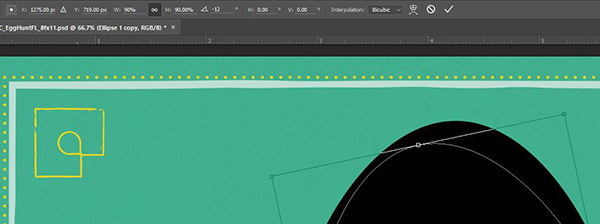
Switch to the Pen Tool (p). Hold Cmd and select the top point on the circle.

Continue to hold Cmd and also hold Shift. Drag the point up until you have created an egg shape.
You may receive a warning asking if you want to turn a live shape into a regular path. Click Yes.
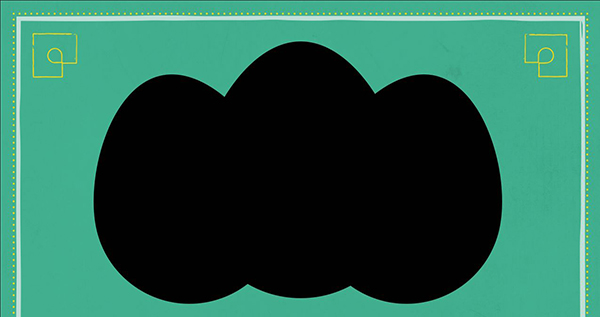
Use the Move Tool (v) to position the egg in the top middle of the artboard.
In the Layers palette, select the Ellipse1 layer and drag it to the Create A New Layer icon at the bottom of the palette to create a copy.
Go to Edit > Free Transform. At the top of the artboard, enter a Width of 90% and click the link icon between Width and Height to maintain aspect ratio. Next to Angle, enter -12 degrees. Press Enter when you’re done.
Use the Move Tool on the artboard to drag the smaller rotated egg to the left of the original and just a little lower.

In the Layers palette, drag the Ellipse 1 Copy layer down to the Create A New Layer icon to duplicate it.
Go to Edit > Transform > Flip Horizontal.
On the artboard, use the Move Tool while holding Shift to drag the third egg to the same relative position on the right side of the large, original egg.
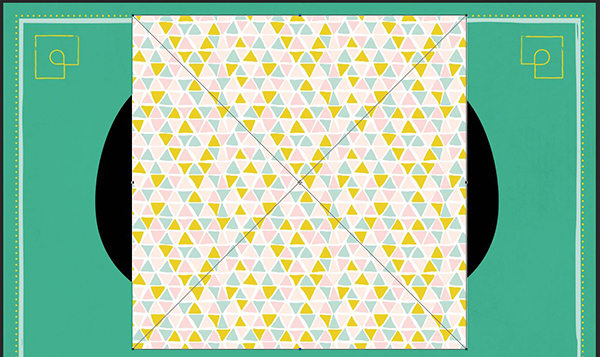
Go to File > Place Linked. Navigate to Elan-Blog-Studio_geometric-patterns-4 in the freebies folder. Press Place.
At the top of the artboard, change the Width to 40% and click the link icon between Width and Height.
Position over the middle egg and press Enter.
In the Layers palette, drag the pattern layer down until it’s just above the Ellipse 1 layer.
Hold Cmd and click the thumbnail on the Ellipse 1 layer to create a selection around it.

In the Layers palette, make sure the pattern layer, Elan-Blog-Studio_geometric-patterns-4, is the active layer. At the bottom of the Layers palette, click the Add Layer Mask icon.
Now turn off the black egg shape by clicking the eye icon to the left of the thumbnail in the Layers palette.
Go to File > Place Linked and select Elan-Blog-Studio_geometric-patterns-20 in the freebies folder. Press Place.
At the top of the artboard, change the Width to 40% and click the link icon between Width and Height.
Position over the left egg and press Enter.
In the Layers palette, drag the new pattern layer up until it’s just above the Ellipse 1 copy layer.
Hold Cmd and click the thumbnail on the Ellipse 1 copy layer to create a selection around it.
Make sure the most recent pattern layer, Elan-Blog-Studio_geometric-patterns-20, is the active layer. At the bottom of the Layers palette, click the Add Layer Mask icon.
Now turn off the black egg shape by clicking the eye icon to the left of the thumbnail in the Layers palette.
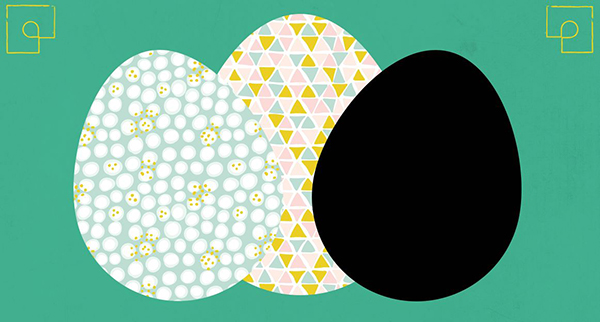
Go to File > Place Linked and select Elan-Blog-Studio_geometric-patterns-18 in the freebies folder. Press Place.
At the top of the artboard, change the Width to 40% and click the link icon between Width and Height.
Position over the right egg and press Enter.
In the Layers palette, drag the new pattern layer up until it’s just above the Ellipse 1 copy 2 layer.
Hold Cmd and click the thumbnail on the Ellipse 1 copy 2 layer to create a selection around it.
Make sure the most recent pattern layer, Elan-Blog-Studio_geometric-patterns-18, is the active layer. At the bottom of the Layers palette, click the Add Layer Mask icon.
Now turn off the black egg shape by clicking the eye icon to the left of the thumbnail in the Layers palette.
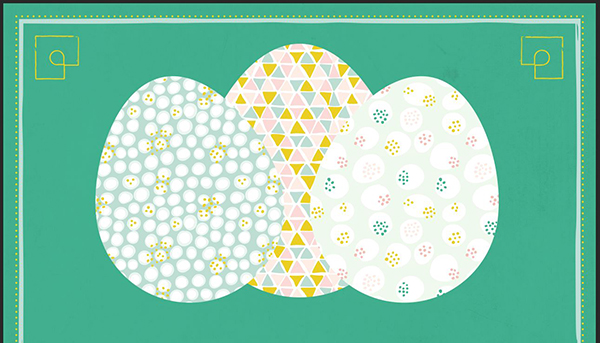
In the Layers palette, hold Cmd and click on the thumbnail image on the Ellipse 1 layer. The layer is currently turned off, but that won’t matter – we’ll still be able to create a selection around it.
Go to Select > Modify > Expand. In the popup dialog box, enter 20 px and press OK.
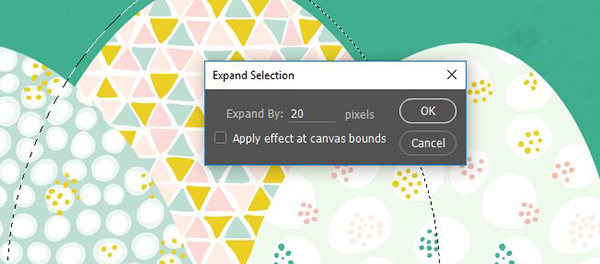
Press d to set your Foreground Color to Black.
In the Layers palette, click once on the layer mask thumbnail on the second pattern layer, Elan-Blog-Studio_geometric-patterns-20. With the layer mask active, press Cmd + Backspace to fill the selected area with black on the layer mask.
Note: On layer masks, white areas are visible and black areas are hidden.
Now click once on the layer mask thumbnail on the last pattern layer, Elan-Blog-Studio_geometric-patterns-18. With the layer mask active, press Cmd + Backspace.
Press Cmd + d to Deselect.
In the Layers palette, select the Ellipse 1 layer. Hold Shift and select the very top layer, Elan-Blog-Studio_geometric-patterns-18. At the bottom of the Layers palette, click the Create A New Group icon.
Double click the name of the group, Group 1, and rename it Eggs.
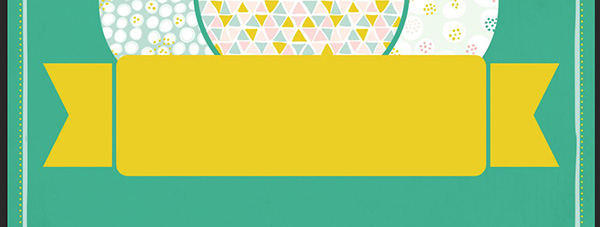
Step 4: Banner
Select the Rounded Rectangle Tool in the same flyout menu where you found the Ellipse Tool earlier.
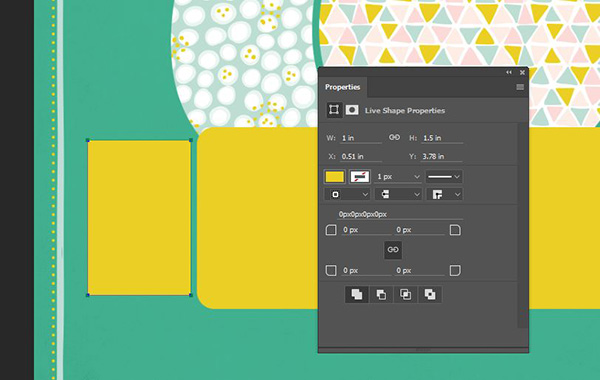
Click on the artboard toward the bottom of the eggs and draw a rectangle that’s about 5.35 inches wide by 1.75 inches high.
Open the Properties panel (Window > Properties) and enter corner radius of 50 pixels. Click the link icon to apply the setting to all four corners.

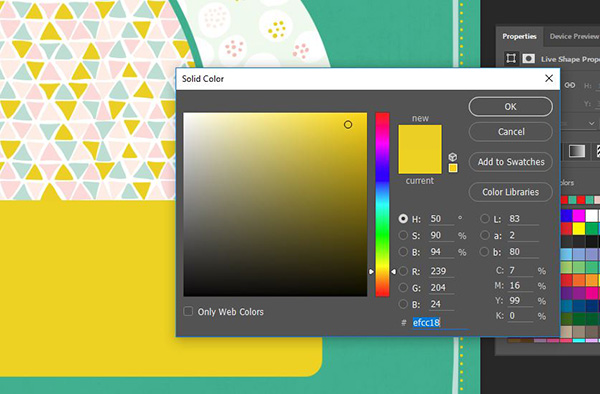
In the Properties panel, click the Fill Color swatch. In the dialog box that opens, click the Color Picker icon. When the Color Picker opens, use the Eyedropper Tool to sample the yellow from the middle egg pattern.
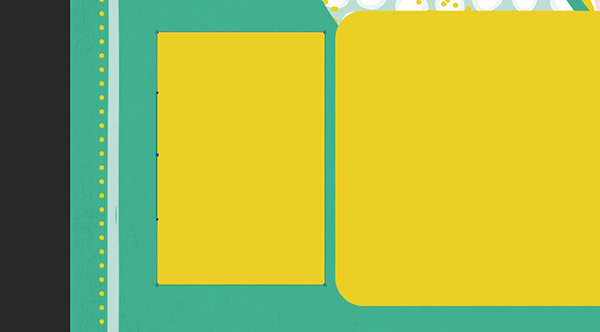
Select the regular (not rounded) Rectangle Tool. Click on the artboard to the left of the rounded rectangle and draw a rectangle that’s about 1 inch wide by 1.5 inches tall. Make sure to leave some space between the rounded rectangle and the new rectangle.
Switch to the Pen Tool (p). Click once in the middle of the left side of the small rectangle to add a point halfway between the top and bottom.
Hold Option and click once on the same point to convert it from a rounded point to a corner point.
Hold Cmd + Shift, then click the point and drag it to the right to create a flag shape.

Switch to the Move Tool.
In the Layers palette, drag the Rectangle 1 layer down to the Create A New Layer icon to duplicate it.
Go to Edit > Transform > Flip Horizontal. Drag the flipped duplicate to the same relative position on the right side of the banner.
From Finder, navigate to Greta-Ivy_pattern-punch-3 in the freebies folder and open it in Illustrator.
Use the Selection Tool to select the shape on the artboard. At the top of the artboard, change the Width to 8.5 inches and press the link icon to maintain aspect ratio.
Press Cmd + C to Copy. Close the file.
Back in the main layout file in Photoshop, press Cmd + V to Paste. In the Paste dialog box, select Smart Object and press Ok. Hit Enter to complete.

At the top of the Layers palette, change the Blend Mode to Screen and the Opacity to 80%.

In the Layers palette, hold Cmd and click on the thumbnail on the Rounded Rectangle 1 layer. Then hold Shift while continuing to hold Cmd and also click on the thumbnails on the Rectangle 1 and Rectangle 1 Copy layers.
Make sure the dots layer (Vector Smart Object) is the active layer and click the Create Layer Mask icon at the bottom of the Layers palette.
In the Layers palette, select the top four layers. At the bottom of the palette, click the Create A New Group icon. Double click the name of the group and rename it Banner.
Step 5: Copy
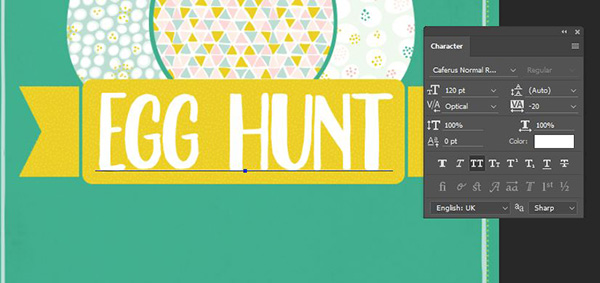
Select the Type Tool (t). Click once on the banner and type: EGG HUNT
Switch to the Move Tool.
Open the Character palette (Window > Character) and change the font to Caferus Normal Regular at 120 pt. Change the Kerning to Optical and the Tracking, the space between letters, to -20.
Click on the Color swatch and change the color to White.
Note: Caferus is a premium font from Flavortype. If you don’t have it, look for a somewhat whimsical, hand drawn font to capture a similar style.
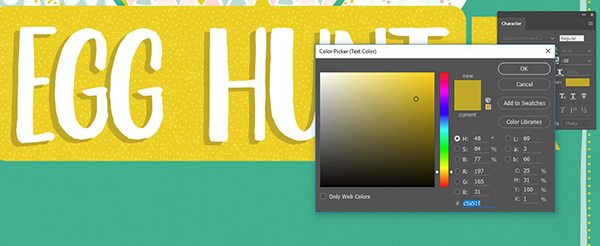
In the Layer palette, duplicate the Egg Hunt layer by dragging it down to the Create A New Layer icon.
Drag the duplicated layer below the original in the Layers palette.
In the Character palette, change the color to an RGB build of 197/165/31.
Use the arrow keys on your keyboard to move the darker duplicate text to the left and below the original.
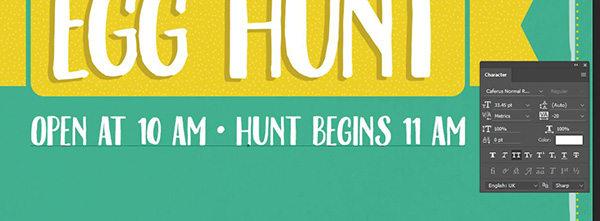
Select the Type Tool. Click once on the artboard under the banner and type: Open at 10 am • Hunt begins 11 am
Switch to the Move Tool.
In the Character palette, continue to use Caferus Normal in White.
For the font size, we want to make this line of copy the same width as the middle part of the banner. Select the Move Tool. Go to Edit > Free Transform.
Hold Shift and use the corner handles to resize the text until it’s the same width as the middle banner section.
In the Layers palette, duplicate the layer by dragging it to the Create A New Layer icon.
On the artboard, drag the duplicate below the original.
Use the Type Tool to select the duplicate text and replace it with: April 19, 2017

Again, we want to make this line of copy the same width as the middle part of the banner. Select the Move Tool. Go to Edit > Free Transform.
Hold Shift and use the corner handles to resize the text until it’s the same width as the middle banner section.

In the Layers palette, duplicate the “Open at 10 am” layer.
On the artboard, drag the duplicate below the date.
Select the text and change it to: Open to the Public • Free Admission
Switch to the Move Tool.
In the Character palette, click on the Color swatch and use the Eyedropper Tool to sample the main yellow from the banner.
Go to Edit > Free Transform. Hold Shift and use the corner handles to resize the text until it’s the same width as the middle banner section.

Continue to repeat the same technique to add the remaining copy. For each line, make a duplicate and resize to be the same width as the middle banner section. The three remaining lines should be white.
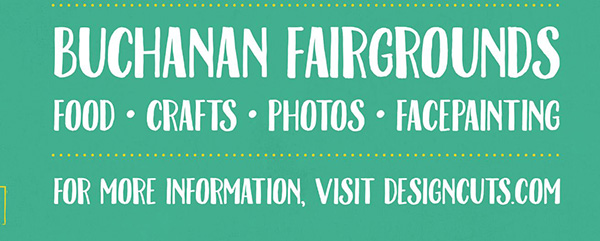
Buchanan Fairgrounds
Food • Crafts • Photos • Facepainting
For more information, visit designcuts.com
Use the Move Tool to create loose groups of text. The first two lines will be a little closer together, the next line will be on its own, the next two together and the last alone.
Now we’ll add little dividers between the sections. It makes it easier to read and digest the information if it’s broken into smaller parts like this.
Go back into the border layout file in Illustrator.
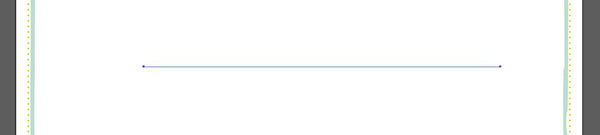
Select the Line Segment Tool (\).
Click once on the artboard and drag to the right to create a line 5.35 inches long (the same width as the middle section of the banner in the Photoshop file).
Select the Eyedropper Tool (i). Sample the outer, dotted rectangle.
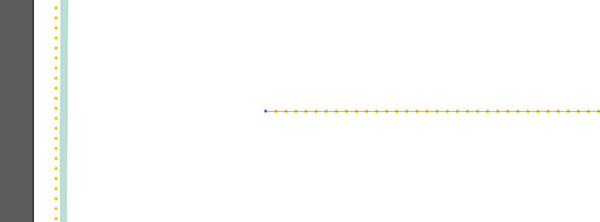
Press Cmd + C to Copy the new dotted line. Close the file after saving.
Back in Photoshop, press Cmd + V to Paste.
Drag the dotted line between the date and “Open to the public…”

Select the Move Tool.
Hold Option + Shift, then click the dotted line and drag down to create a duplicate. Position the duplicate under the “Open to the public…” line.

Duplicate the dotted line one more time by holding Option + Shift, then clicking and dragging down. Position the new dotted line above the very last line of text.
In the Layers palette, select the 8 layers of text and 3 dotted line layers. At the bottom of the Layers palette, click the Create A New Group icon. Double click the name of the layer and rename it Text.
Step 6: Final Touches
We’ll add a few final texture layers to create rich details that really bring this piece to life.
Go to File > Place Linked. Navigate to Greta-Ivy_vintage-paper24 in the freebies folder. Press Place.
Hold shift and pull the corner handles up and out to increase the size of the image until it fills the artboard completely. Press Enter when done.
At the top of the Layers palette, change the Blend Mode to Multiply and the Opacity to 40%.
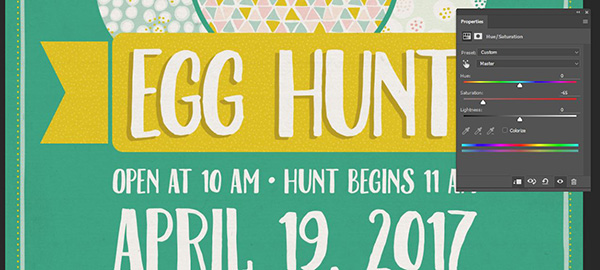
This makes the overall color a little too yellow, so let’s back off the Saturation.
Open the Adjustments panel (Window > Adjustments). Click the Hue/Saturation icon.
In the Properties panel that opens, reduce the Saturation to -65. At the bottom of the Properties panel, click the far left icon to clip the adjustment to only the layer below it.
For our last step, we’ll add one more layer of texture.
Go to File > Place Linked and navigate to Misprinted-Type_Daguerreotype(2)-14 in the freebies folder. Press Place.
Hold shift and pull the corner handles up and out to increase the size of the image until it fills the artboard completely. Press Enter when done.
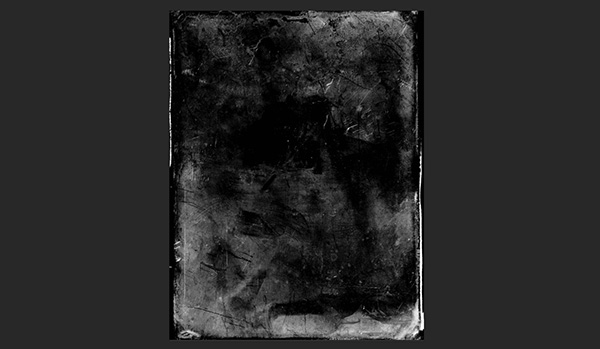
At the top of the Layers palette, change the Blend Mode to Screen and the Opacity to 25%.
And we’re done! We’re ready for spring with a cheery Easter flyer that utilizes complex texture layering, illustration techniques and patterns.
Remember that whether it’s your outcome for this tutorial or something new you’ve made, we’d love to see your designs on our Facebook page.
Please leave a comment if you have any questions or suggestions. I always look forward to hearing from you!
There’s still time to check out The Ultimate Textures, Patterns and Backgrounds Bundle to add that extra touch to your work, elevating it to a whole new level – for only $29.
You guys continue to impress and spoil us! Free tutorials and goodies on top of A+ service. I can’t thank you all enough!
Hey Sadiq,
Thank you so much for such a wonderful comment- this has definitely made our day over here :)
We are so happy to have you as part of our community and please do feel free to share anything that you create as we would love to see what you are working on!
THANK YOU for another awesome tutorial!
Hey Jennifer,
Thank you so much for your kind words! We’re so pleased you enjoyed this tutorial! :)
Great tutorial! Is there a workaround for the Illustrator bits for those who only have Photoshop? I was able to turn the Greta-Ivy_pattern-punch-3 into a pattern, but is there a way to create those dotted lines and rectangles on PSD without resorting to using the brush tool?
Hey Jenny,
Thank you so much for your comment- we are really glad you like this tutorial!
Unfortunately, you would have to do the dots individually if you didn’t use the brush tool I am afraid. I’ve just popped you over an email though to get some more information from you, then I can take a look at this and help you through the Illustrator parts :)
Option 1 Dotted Line/Rectangle
– Use custom shape tool of choice
– Adjust stroke option/line style (dropdown menu contains dot option – Use default settings or adjust dot spacing)
Option 2 Dotted Line
– Create a circle using Ellipse tool, Marquee tool, etc. depending upon if you want raster or vector
– Use Step and Repeat to replicate as many time as needed for line length
Option 3 Dotted Line/Rectangle
– Choose a brush and adjust spacing under brush options
– Click once > hold shift (to constrain to a straight line) and click again where you want the line to end
Option 4 Dotted Line/Rectangle
– Select brush and adjust spacing as desired i.e., set up b4 using pen tool
– Use Pen Tool to create a path
– Go to Paths panel and choose Stroke path with brush
Option 5 Dotted Line/Rectangle
– Select Line Tool/Rectangle Tool and adjust settings in options bar
P.S. If you want more details or screenshots for any of these options, just let me know :)
Hi and thanks again for this. On my PC, I have created the Ellipse but when using the Pen tool and holding down CTRL and SHIFT, nothing happens – I cannot create the egg shape mentioned. Am I doing something wrong?
Hey Trevor,
Thanks so much for your comment and I am really sorry that you are having trouble with this!
I’ve just popped you over an email to get some more information from you, best rest assured I can help with this :)
Could you send the instructions to me too. I’m on a Mac and am having the same problem.
Many thanks
Hey Rosemary,
I am so sorry that you are having trouble! I’ve just sent you an email with regards to this now :)
Thanks for sharing! Cute poster! ?
Hey Muna,
Thank you so much for your kind words, we are so glad you like it :)