WHAT WE’RE CREATING:
In today’s tutorial you’ll be learning how to use some of the great resources available as part of our current deal:
Go Media’s Ultimate Vector Collection (1360 Meticulous Designs) Just $25 – 93% Off
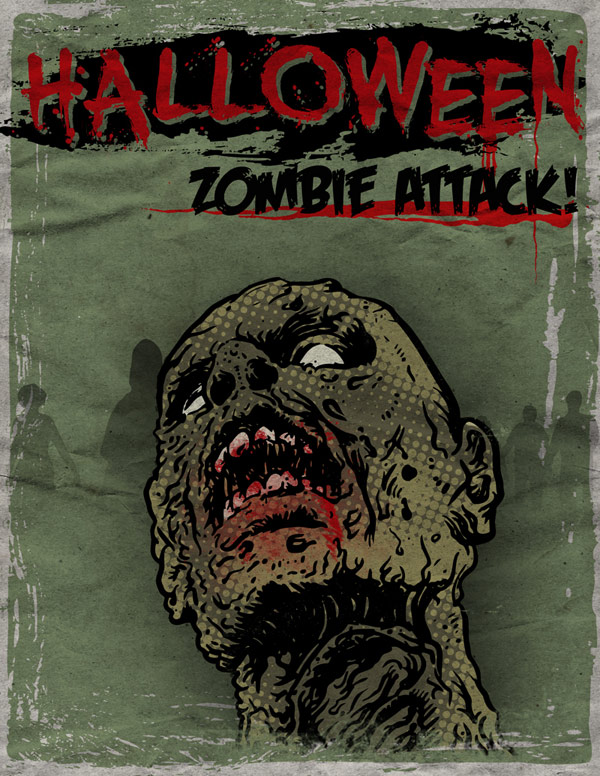
We’ll be looking at how to create an old worn looking horror movie poster. This tutorial uses both the “zombies” vector set, as well as the “blood drips” vector set, both taken from this week’s huge vector deal. We’ll be combining these vectors with some old rough paper textures and Halloween style typography to create a frightening movie poster.
Let’s get started!
NOTE: This tutorial was written by our community member Ben, from Ben Brush Design. The fact Ben offered to write this tutorial for you guys is incredible, and we highly recommend you checking out his site, where he offers awesome design tutorials and freebies. There’s some really great stuff over there.
Step 1:
Open Photoshop and create a new 21.6 x 27.9cm document, at 300 DPI resolution.
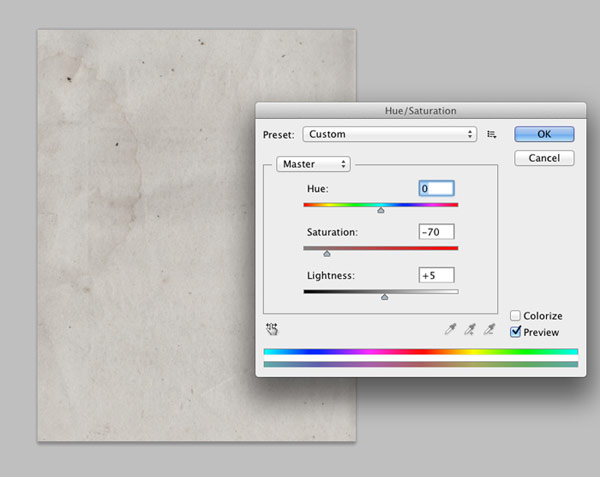
Download this Lost and Taken Paper Texture and place it in the document.
Adjust the Saturation to -70 and the Lightness to +5.
Step 2:
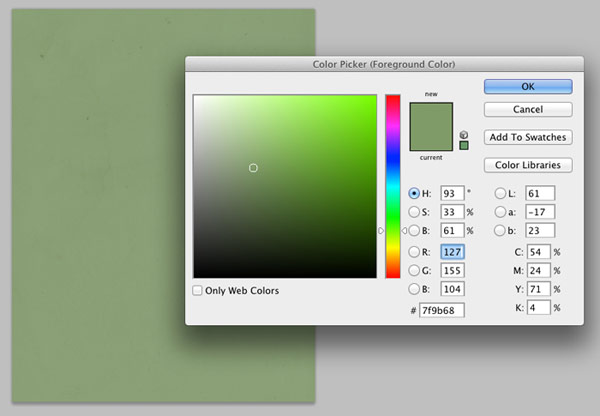
Create a new layer called “Green” and fill it with colour # 7f9b68
Change the blending mode to “multiply” and the opacity to 80%
Step 3 :
Download the “Grunge Frames Vectors” from the freebies folder or use a similar one from your personal resources.
Select the entire layer using Select > All (Cmd+A) and copy the frame.
Create a layer mask for the layer “green” and paste the frame into it so it edges the entire poster.
Step 4 :
Now we’re going to dig into the ‘Zombies’ vector pack, available exclusively from Go Media.
You can grab this pack, along with 1360 quality vectors as part of our current deal. For the next week only, these vectors are available for a HUGE 93% off.
You can preview all 49 vector packs, comprising Go Media’s biggest vector deal ever, by using the link below:
Go Media’s Ultimate Vector Collection (1360 Meticulous Designs) Just $25
If you’ve grabbed these vectors already, you’re all set. If you haven’t yet, we can’t recommend them enough.
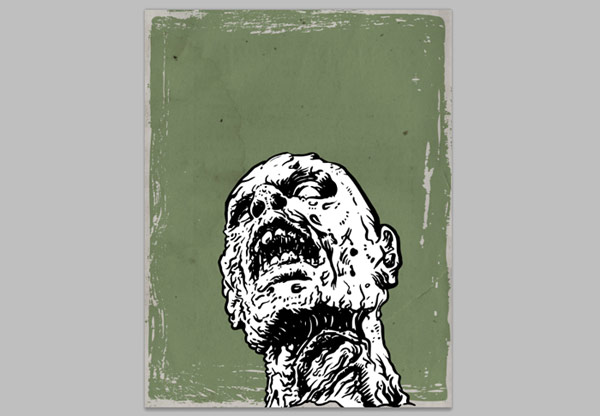
Open the Go Media Zombie pack and import one of the zombie heads as a smart object onto a new layer in Photoshop called “Zombie Head.”
Align the bottom of the zombie’s neck with the bottom of the poster.
Step 5 :
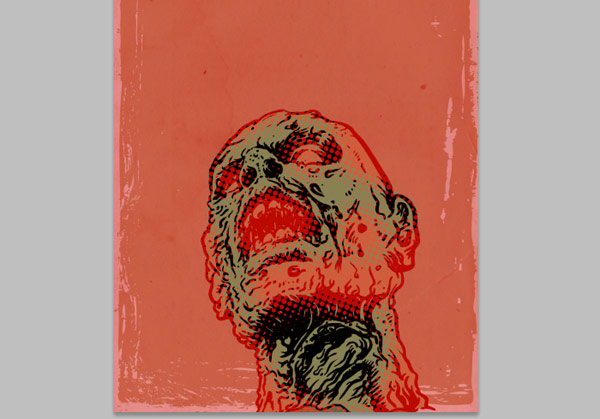
Option+click on the zombie head layer to select the zombie head.
Create a new layer and fill the selection with colour #9d9667 and change the Blending Mode to “multiply” and the opacity to 90%
Repeat this step adding another layer filled with colour #9d966 on top of the layer you just made. Change the Blending Mode to “multiply” again but this time change the opacity to 50%
Step 6 :
Stay on the top layer and with the zombie head selection still live go to “Select > Edit in Quick Mask Mode” or simply press “Q”
Once in Quick Mask Mode use a soft, round brush to paint in some shading on the face. The effect we are going to use will work best if there is lots of soft, semi transparent shading.
Anything painted red in this step will remain light green and what isn’t painted we will darken later.
Once you are happy with your shading we are going to convert it to a halftone pattern. To do this, remain in Quick Mask Mode and use the “Colour Halftone” filter (under Filter > Pixelate)
Set the Max Radius to 30 and all of the screen angles to 22.
This will render the shading into a halftone pattern.
When you exit Quick Mask Mode you will have a selection of the halftone shading.
While still on the top layer containing the green zombie head, use the paintbrush, or Edit > Fill option, to fill this selection with black #000000
Step 7 :
Create a new layer called “Shadow” and place it just below the “Zombie Head” layer. Select the zombie head shape again, and fill it with black.
Change the layers blend mode to “multiply” and the opacity to 90%
Apply a Gaussian Blur with a radius of 250 pixels to this layer to create a shadow behind the head.
Step 8 :
Next we want to add some colouring and details into the zombie’s head. Before we paint them in we will create a nice strong outline for the image by duplicating the original “Zombie Head” layer, and moving this copy above the halftone shading layer. Rename this duplicate layer “Zombie Head Outline”
Change the Blend Mode to “darken” This will hide the white and make the outline nice and dark.
Make a new layer below “Zombie Head Outline” called “Teeth, Eyes, Blood”
Use a brush to paint the teeth and eyes white.
Use some rough textured brushes to paint in blood on the face using Red #a00a0e
Make a layer group called “Zombie Head” and put all of the layers that make up the head into it.
Add a layer mask to the group and use a rough black paintbrush to mask off the zombie neck.
Step 9 :
Import the group of zombie silhouettes from the Go Media Zombie vector pack onto a new layer called “Zombies.”
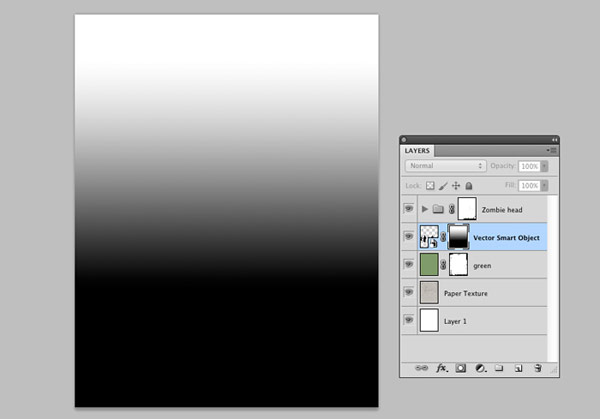
Add a layer mask and use the gradient tool to mask off the bottom of all the zombies, giving them a more ghost-like appearance.
Step 10 :
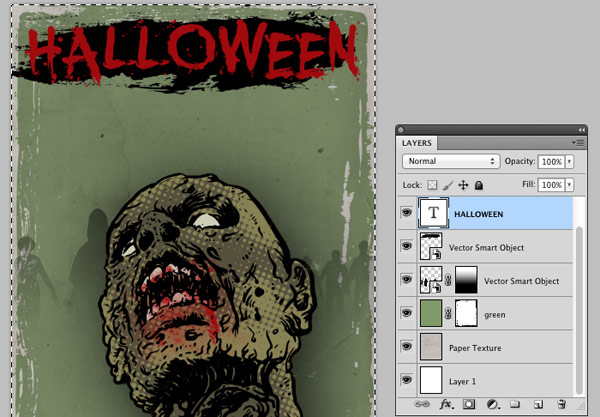
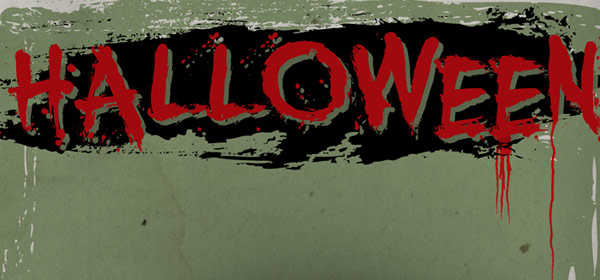
Download the font You Murderer and add your text across the top in the blood red #a00a0e
Add a rough black stroke behind the text. I used a free brush strokes set from Spoon Graphics: Vector Bumper Pack
To create a little drop shadow effect create a layer mask on the black stroke layer. Copy the text you just typed out and paste it onto the layer mask slightly below and to the side of the original text.
Download the ‘Blood Drips’ vector pack from our current Go Media Ultimate Vector Collection Deal (93% Off)
Set the vectors to red (#a00a0e) and import them into Photoshop. Place them just under the lettering.
Step 11 :
Grab the font Feast of Flesh and add some extra lettering to your design. I added another “Blood Drip” as an underline here.
Step 12 :
Next we want to add a final bit of aged paper texture to really make the poster look worn and grungy.
Download this Paper Overlay Texture and put it on a new layer on the very top.
Adjust the saturation to -100 and the lightness to -10
Change the Blend Mode to “multiply” and the opacity to 80%
AND WE’RE DONE
You can view your final outcome below. We hope that you enjoyed this tutorial and would love to hear your feedback on the techniques and outcome.
If you haven’t checked it out yet, be sure to take a look at this week’s deal. The vector packs you’ve just worked with are just a TINY sample of the 1360 beautiful vectors available as part of Go Medias ultimate vector collection. You can preview all 49 vector packs via the link below, although the deal is ending soon, so you’ll need to act quickly to grab them at a 93% discount.
Go Media’s Ultimate Vector Collection (1360 Meticulous Designs) Just $25










Appreciating the dedication you put into your website and detailed information you present.
It’s awesome to come across a blog every once in a while that isn’t
the same unwanted rehashed information. Excellent read!
I’ve saved your site and I’m including your RSS feeds to my Google account.
That’s great news Dorothea and welcome to the Design Cuts community!
We’re so happy you found us :)