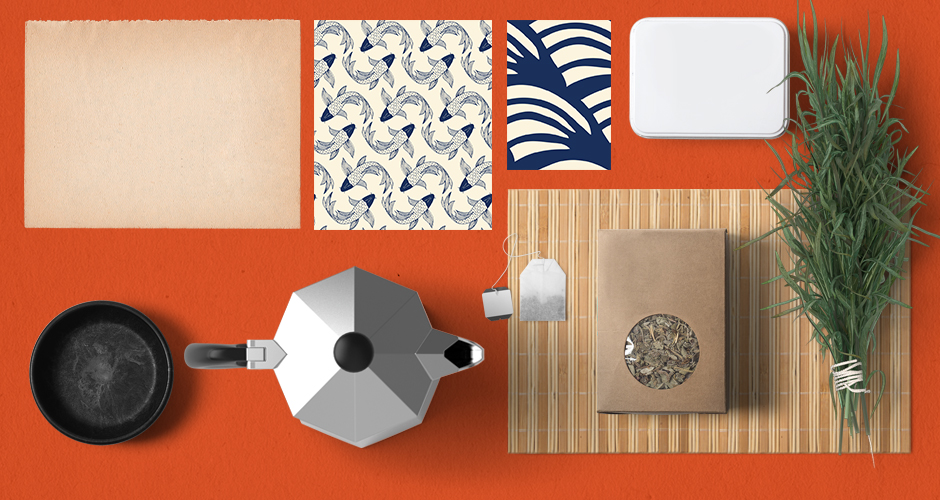
In this tutorial I will be showing you how to create a Japanese tea packaging design and mockup in Photoshop. To do this we will be using a few of the elements from The Spectacular Textures and Patterns Collection including authentic paper textures from Alien Valley and Japanese patterns from YouandiGraphics. We will build out a scene using elements from one of the mockups from the Design Cuts Marketplace to add an extra level of authenticity to our design. If you are all ready to begin then join us and let the ceremonies begin!
HAVE YOU SEEN OUR YOUTUBE CHANNEL?
Watch the video tutorial below and subscribe to our YouTube channel for regular updates direct to your inbox.
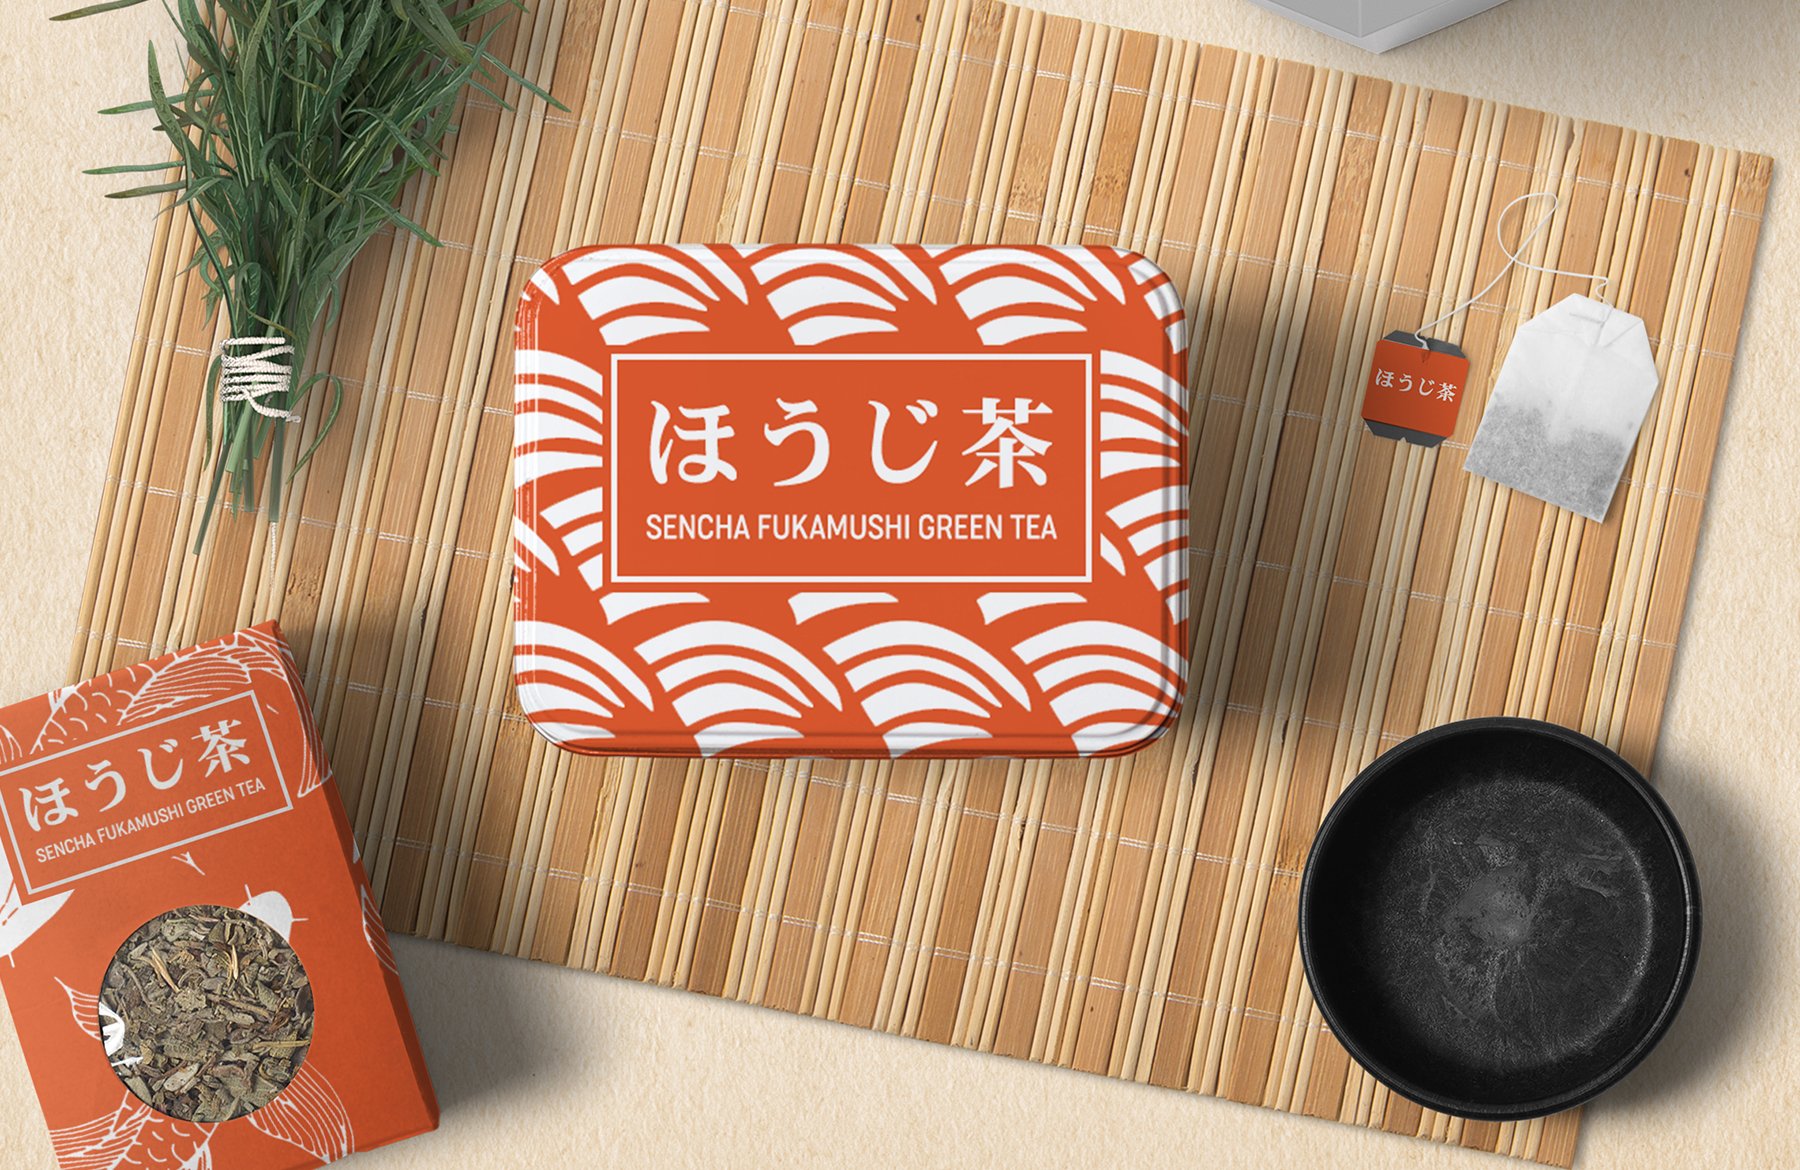
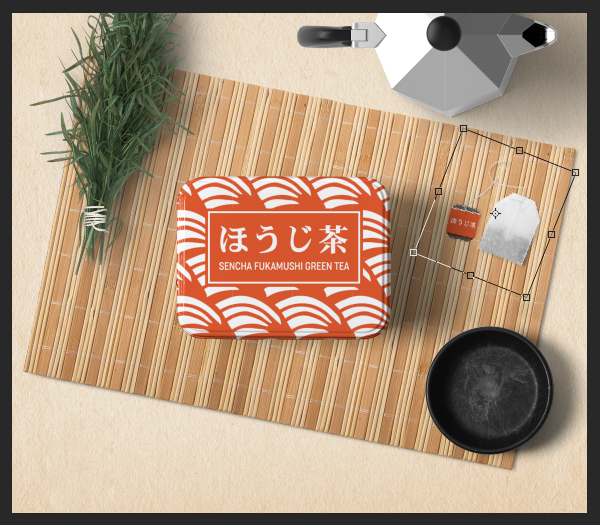
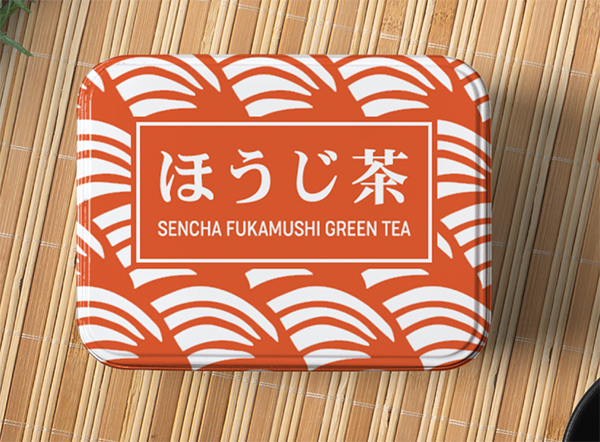
Here’s a look at what we’ll be creating:

Follow along with this tutorial: Download the freebie files
This freebie pack is just a small sample of what you can expect to find in The Spectacular Textures and Patterns Collection for just $29 (that’s 99% off). With this new design bundle you can bring new life to your design projects with this stunning collection of textures and patterns!
Step 1: Japanese Tea Packaging Design
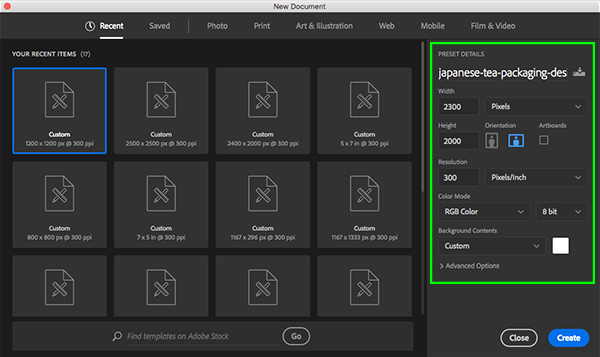
Let’s start by setting up a new document in Photoshop. First, give your document a name – here I am using ‘japanese-tea-packaging-design’. After that, make the document ‘2300 px’ wide by ‘2000 px’ tall with a ‘Resolution’ of ‘300’ and ‘Color Mode’ set to ‘RGB’. Once you’ve applied those settings go ahead and click ‘Create’ from the lower right corner.
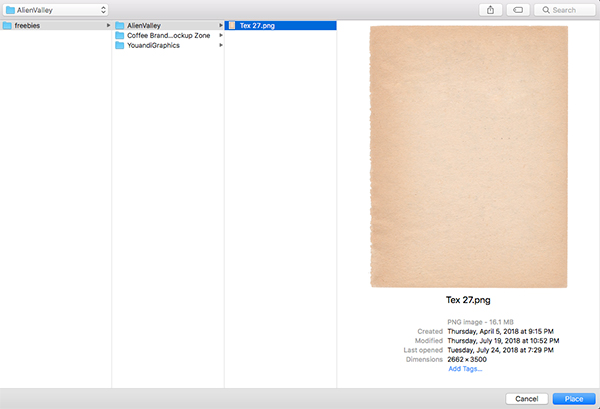
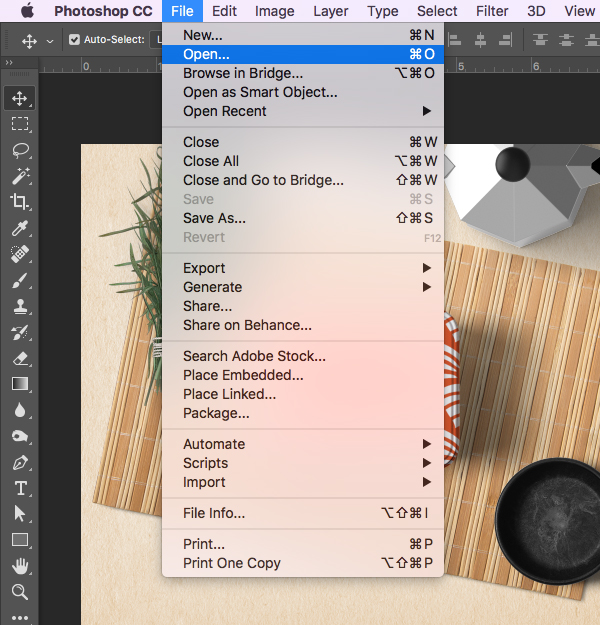
After creating your new document, go to the File menu and choose ‘Place Embedded…’ as shown here:

Navigate to the ‘Tex 27.png’ texture file from Alien Valley in the freebies folder for the tutorial, and then choose ‘Place’ from the bottom right.
After bringing the texture into your document, hold the Control key and click on the texture before choosing ‘Rotate 90º Counter Clockwise’ from the dropdown menu.

Once you’ve rotated the texture, drag outwards from any of the four corners of the bounding box while holding the Alt/Option+Shift keys to scale it proportionally from the center until the texture extends beyond the size of the canvas like this:
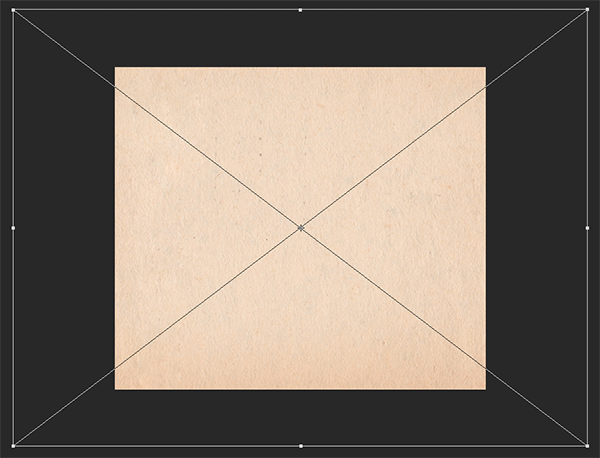
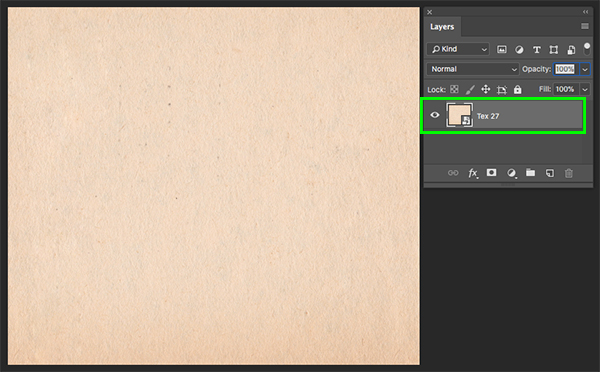
Press ‘Return’ on the keyboard to apply the transformation and place the file. After that, you can delete the solid white ‘Background’ layer so that you are only left with the ‘Tex 27’ Smart Object shown below:
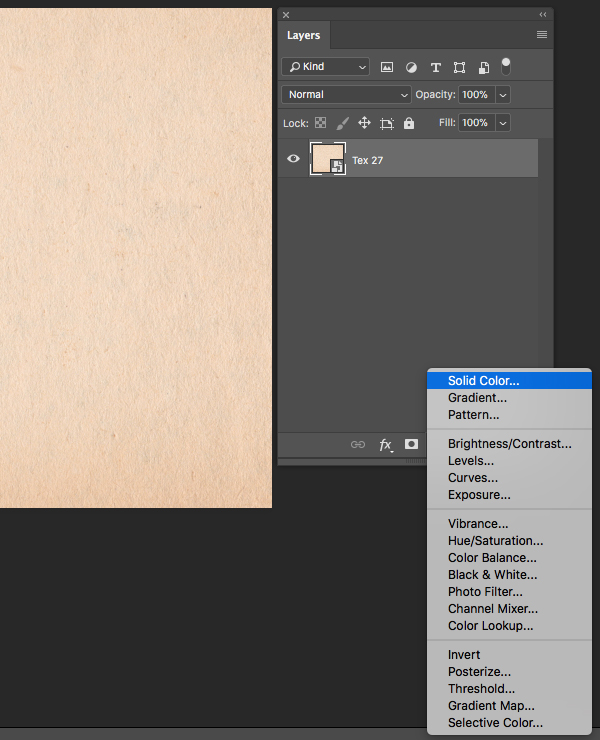
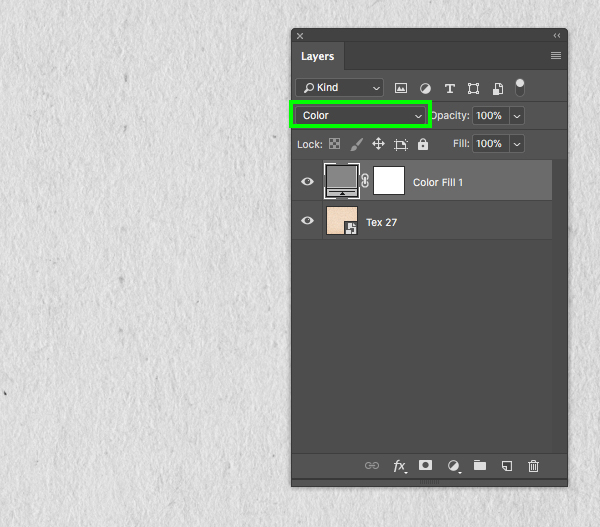
Step 2: Color Adjustment
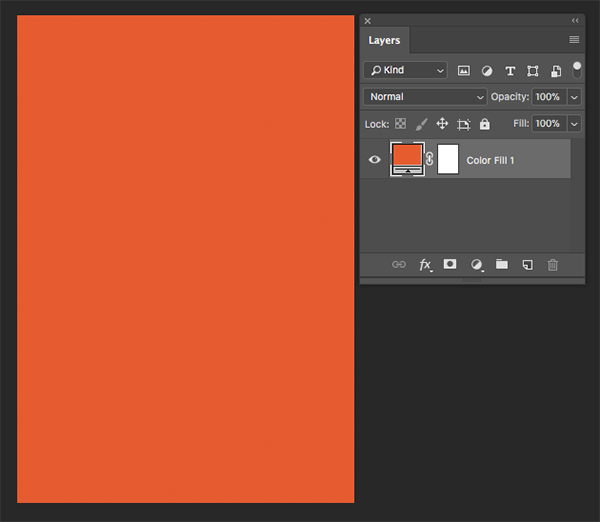
With your Smart Object layer selected, click on the Adjustment Layer icon at the bottom of the Layers Palette and choose ‘Solid Color…’ from the list.
For the fill color use the hex value ‘#868686’ and then press ‘Return’ or click ‘OK’ to apply the color change.
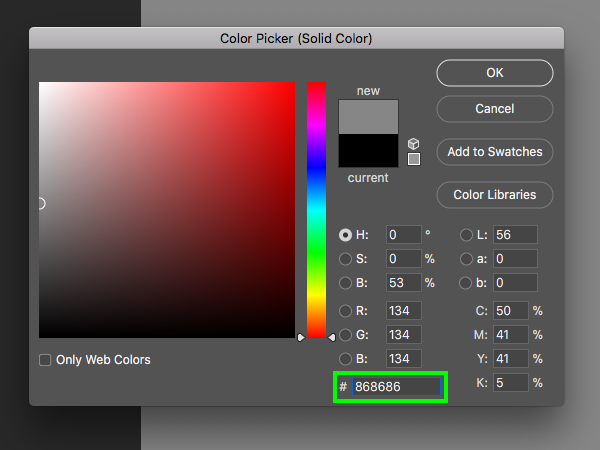
Next, change the Blending Mode of the Adjustment Layer to ‘Color’.
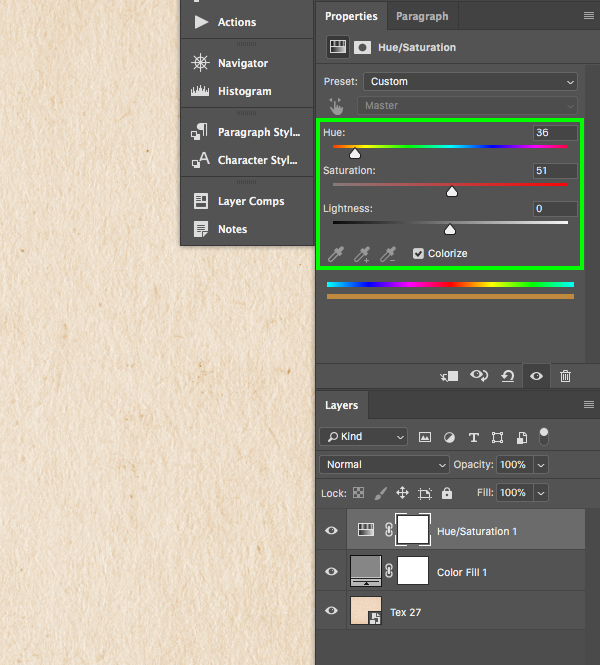
Step 3: Hue/Saturation Adjustment
Select the ‘Color Fill 1’ layer from the previous step and then click on the Adjustment layer icon at the bottom of the Layers Palette once again. This time, choose ‘Hue/Saturation…’ from the list.

In the Properties panel let’s check off the ‘Colorize’ box first, and then set the ‘Hue’ slider to ’36’ and the ‘Saturation’ slider to ’51’ as shown below:
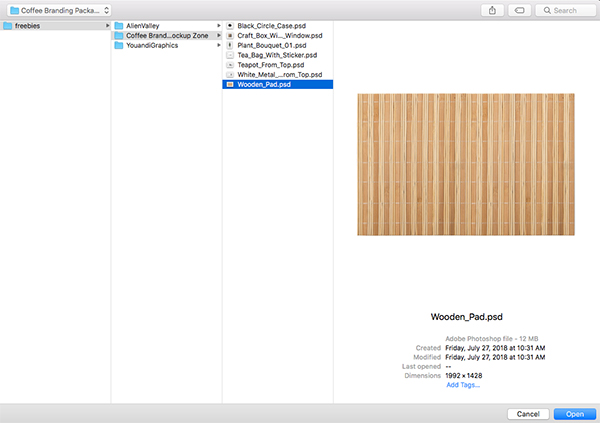
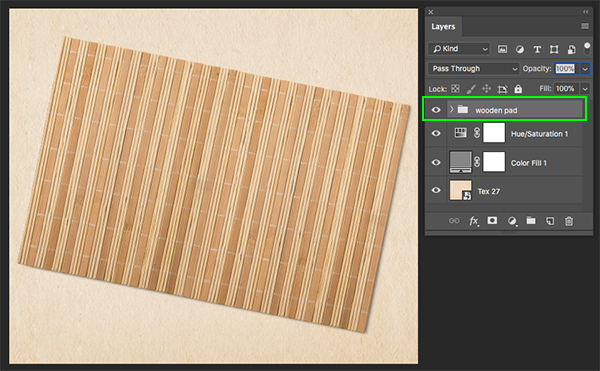
Step 4: Wooden Pad
Go to the File menu and choose ‘Open…’ from the list before navigating to the ‘Wooden_Pad.psd’ file in the freebies folder for the tutorial. Once you have navigated to the file, choose ‘Open’ from the lower right corner. This object along with the other mockup elements we will be using are from the Coffee Branding & Packages Mockup which you can find in the Design Cuts Marketplace.
After opening the file, click and drag the entire ‘wooden pad’ folder into your working document as shown here:
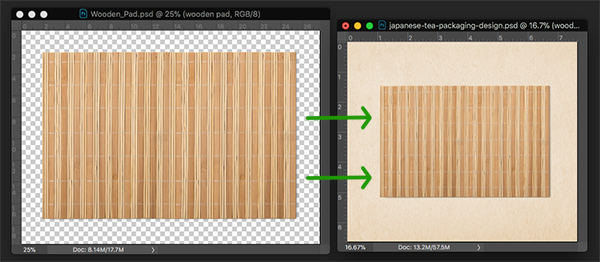
Press Command/Ctrl+T to do a Free Transform and then scale the wooden pad up by dragging outwards from any of the four corners while holding Alt/Option+Shift on the keyboard. Let’s also rotate the mat about 12º clockwise before pressing ‘Return’ on the keyboard to apply the changes. Your document should now look something like this:
Step 5: Adding Objects To The Scene
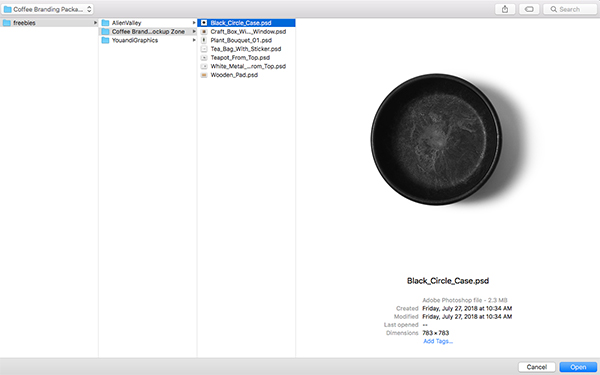
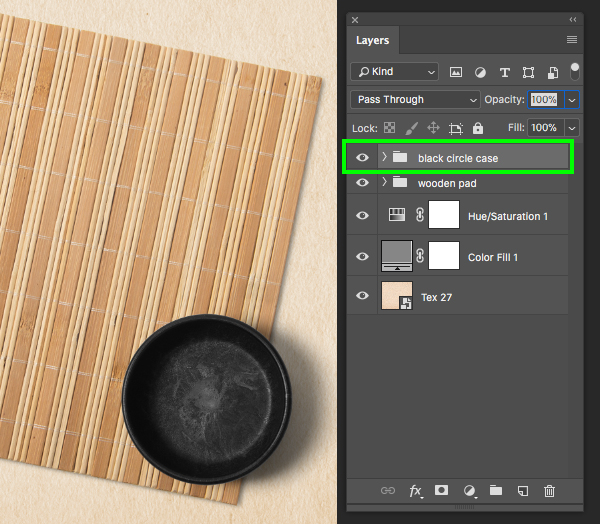
Let’s add a few more objects to the scene on top of the wooden pad to create a more interesting layout. The next object we want to bring in is the black bowl, so first let’s go back to the File menu and choose ‘Open…’ before navigating to the ‘Black_Circle_Case.psd’ and choosing ‘Open’ from the lower right.
Drag the folder into your working document and place it on top of the ‘wooden pad’ folder. Let’s adjust the size and positioning of the black case and place it in the lower right corner of the mat as shown here:
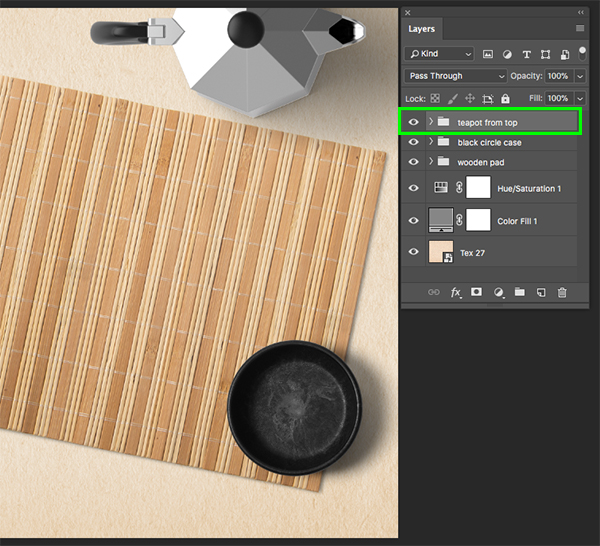
Next, open the ‘Teapot_From_Top.psd’ file and bring this into your document. We want to position the teapot along the top of the image and towards the right so that the teapot is cropped along the top edge as shown here:
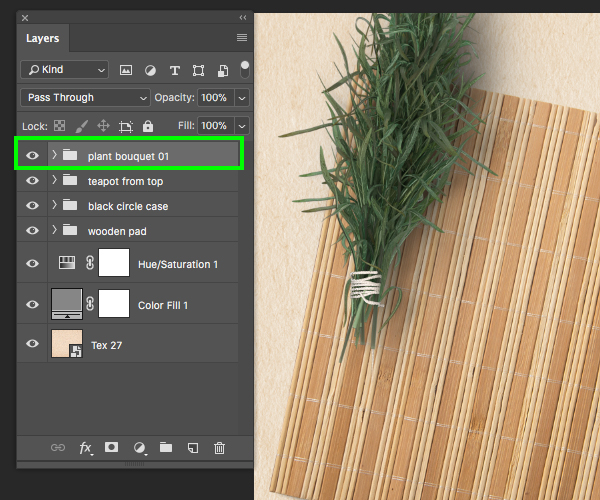
Return to the File menu, choose ‘Open…’ and navigate to the ‘Plant_Bouquet_1.psd’ file from the freebies folder. Let’s drag this folder into our main document and place it above all of the other objects in the scene. Use the Free Transform (Command/Ctrl+T) to scale and rotate the bouquet, placing it over the top left edge of the wooden pad. Use the image below as reference for the size and placement of the bouquet.
Step 6: Creating A Seamless Pattern
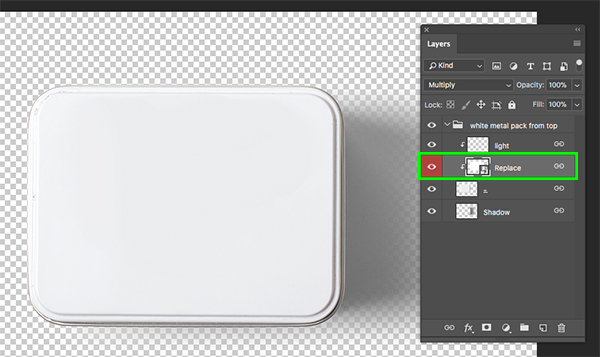
Return to the File menu and navigate to the ‘White Metal Pack From Top.psd’ and choose ‘Open’ from the lower right corner.

After opening the object in Photoshop, click the small arrow to reveal the contents of the folder and then double click on the red highlighted layer labeled ‘Replace’. This will open a new window where we can place our artwork for the package.
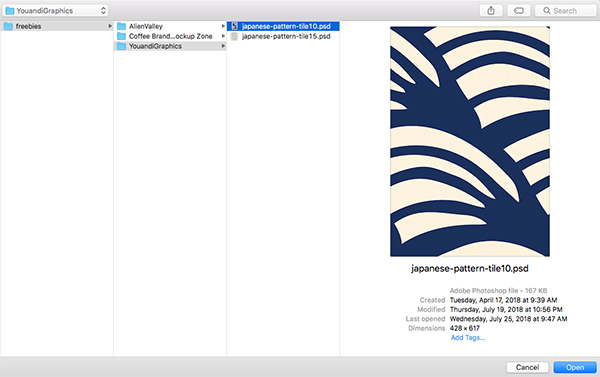
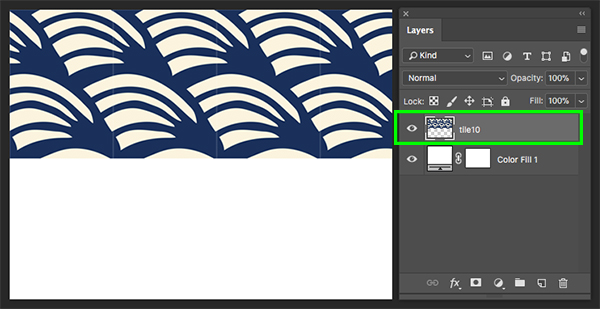
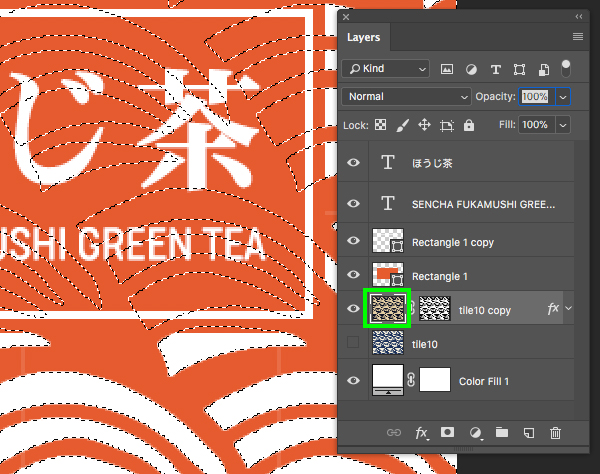
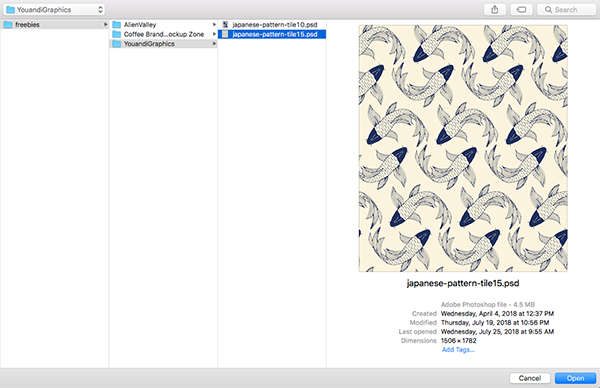
Once you’ve opened the empty artwork file, go to the File menu again and open the ‘japanese-pattern-tile10.psd’ file from the YouandiGraphics freebie folder.
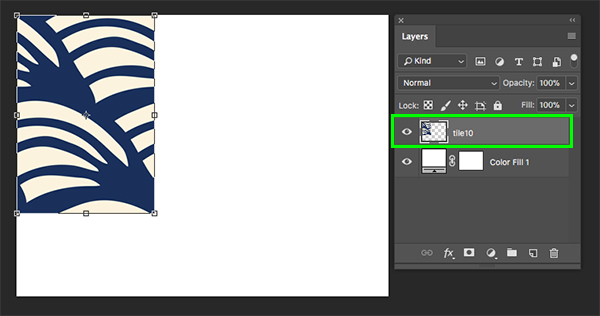
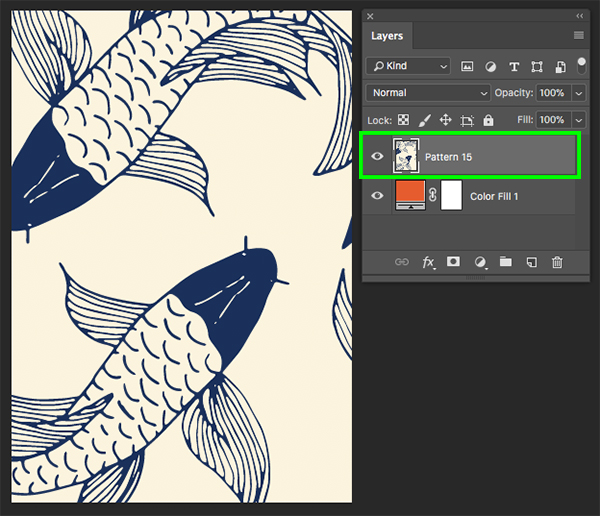
Click and drag the pattern tile into the empty artwork file and scale it down using a Free Transform (Command/Ctrl+T) and dragging inwards while holding the Shift key to scale the proportions. Let’s place this first copy in the upper left corner as shown here:
Select the tile, press Command/Ctrl+J to duplicate it, then Command and the left bracket key to move it down one position just below the original copy. From here, press Command/Ctrl+T and then click and hold the Shift key to slide this duplicate over to the right until it lines up with the original copy. Do this two more times so you end up with four copies of the pattern going across. After you’ve done that, reduce the size of the whole group by selecting the top copy, holding Shift and then clicking on the bottom copy before using the Free Transform again to scale down all four copies together. Remember to also hold the Shift key when you are scaling the whole group to constrain the proportions. You should end up with something like this:
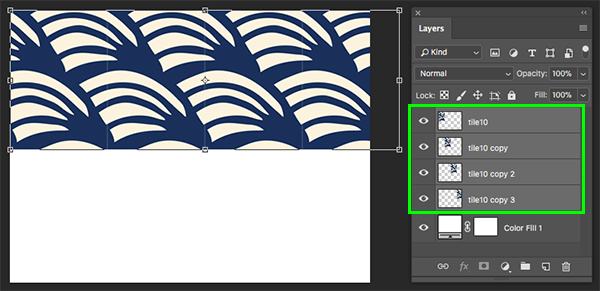
With the whole group selected, press Command/Ctrl+E to merge all four copies together into a single layer.
Select the merged group, press Command/Ctrl+J to duplicate it, and then Command and the left bracket to move it below the original merged group. Once again, press Command/Ctrl+T and then hold the Shift key while dragging downwards until the duplicate group lines up with the original group on top. You should now have something like this:
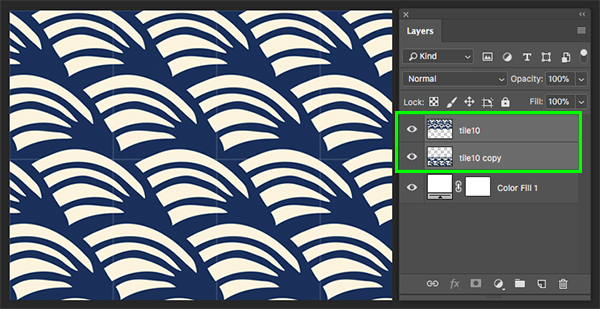
Select both of these merged groups and once again press Command/Ctrl+E to merge them together so you now have one solid group.
Step 7: Masking The Pattern
Select your newly merged pattern group and then press Command/Ctrl+J to duplicate it. Next, select the new copy and press Command/Ctrl+I to invert it. After you’ve inverted the pattern, turn off the visibility of the original layer.
Press ‘W’ on the keyboard to switch to the Magic Wand Tool and then click on one of the black segments inside of the pattern.
After selecting an area of solid black, go to the Select menu and choose ‘Similar’ as shown here:
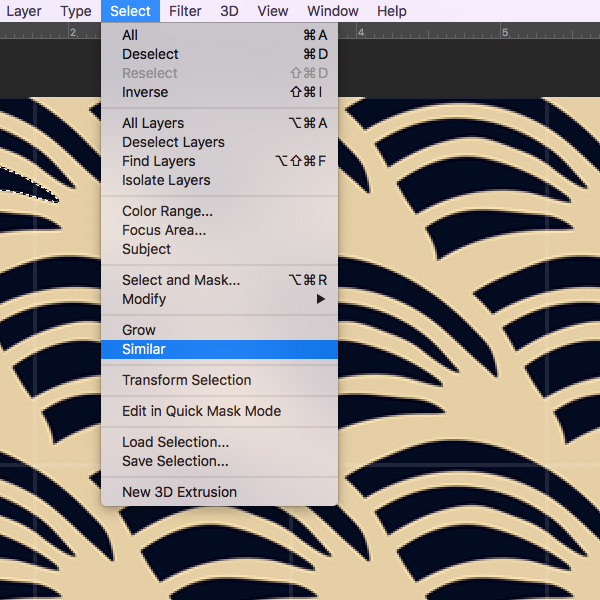
You should now have all of the black segments in the image selected at the same time. After that, go to the Select menu again and this time choose ‘Inverse’ to invert the selection.
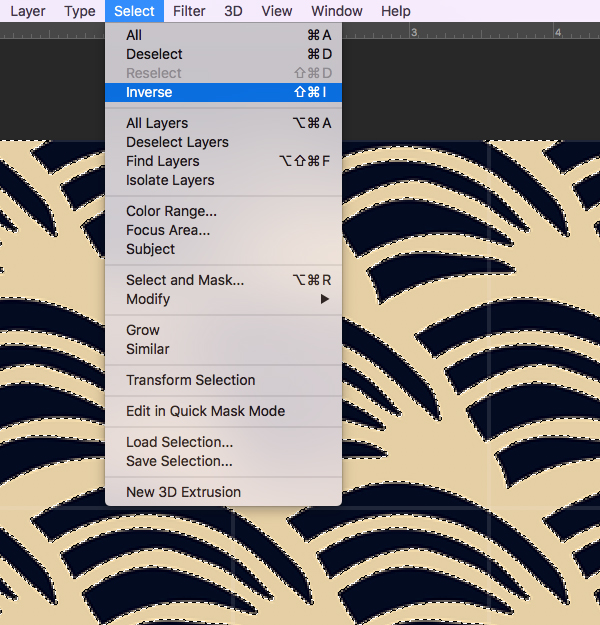
Now that we have inverted the selection we will click on the ‘Add layer mask’ icon at the bottom of the Layers Palette to hide all of the black areas of the pattern.

Step 8: Coloring The Pattern
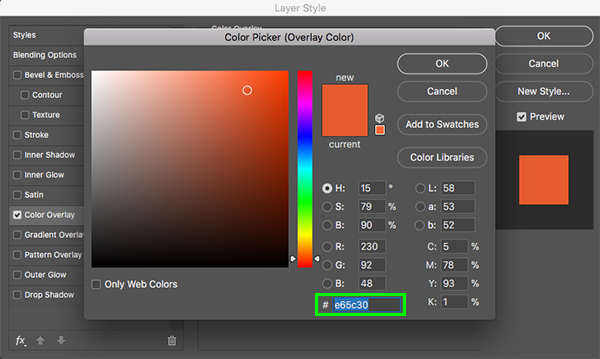
Double click on the masked pattern layer to bring up the Layer Style panel and check off the ‘Color Overlay’ box.
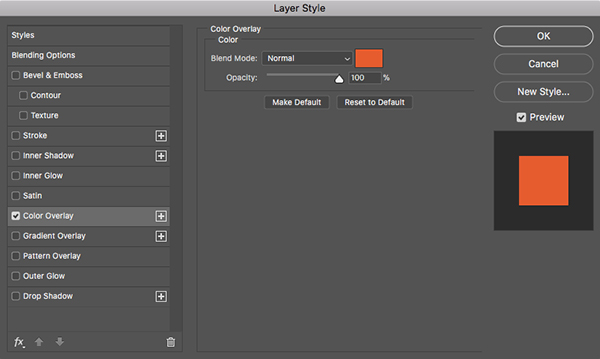
For the fill color let’s use the hex value ‘#E65C30’ and then press ‘OK’ twice to apply the changes and close out of the dialog boxes.
Step 9: Logo Block
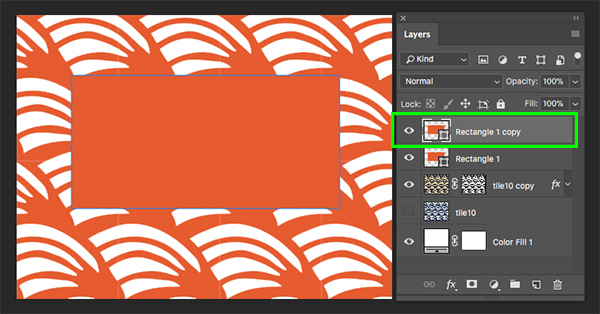
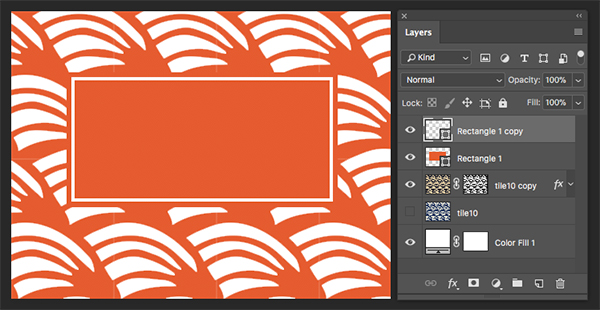
Press ‘U’ on the keyboard to switch to the Rectangle tool. Once you’ve done that, make sure that the ‘Fill’ in the top toolbar is showing the orange color we used in the previous step. After that, click and drag to create an orange rectangle in the center of the orange pattern as shown below:

Duplicate the orange box by pressing Command/Ctrl+J on the keyboard so you have another copy on top.
Press ‘U’ again with the new copy selected and then change the ‘Fill’ color to none.
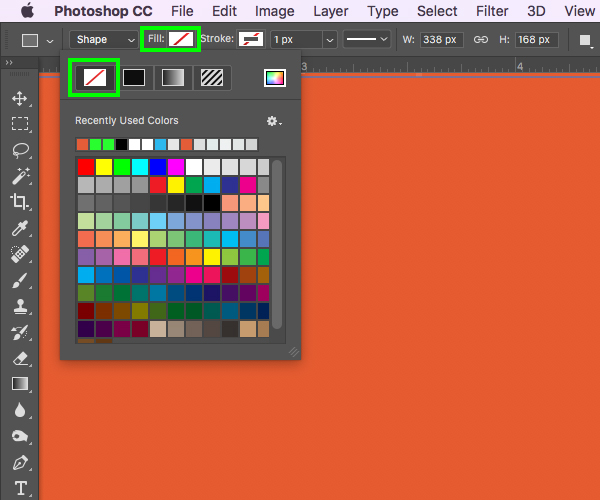
Next, select the ‘Stroke’ and change it to solid white. After that, make the width of the stroke ‘4 px’ and you should now have an outlined copy of your rectangle on top of the solid orange rectangle.
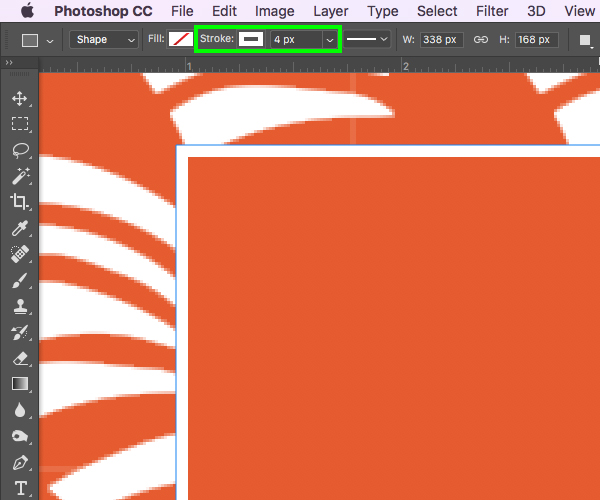
Select the top rectangle with the white outline and then press Command/Ctrl+T to do a Free Transform and bring the white outline inwards so there is an even amount of padding around all four sides. An easy way to do this is to hold the Alt/Option key and drag inwards from either the top or bottom handles of the bounding box to move them in an equal distance on both sides, then do the same for the left and right. Your center rectangle should now look like this:
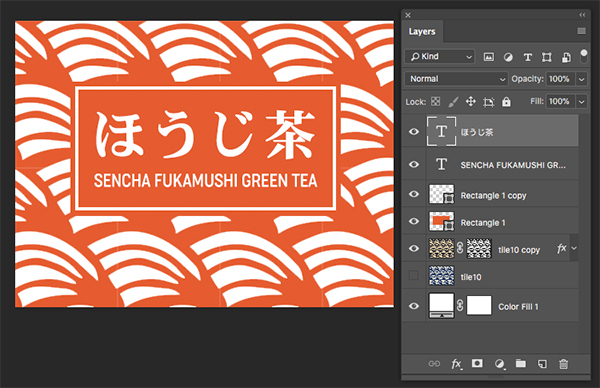
Step 10: Adding Our Type
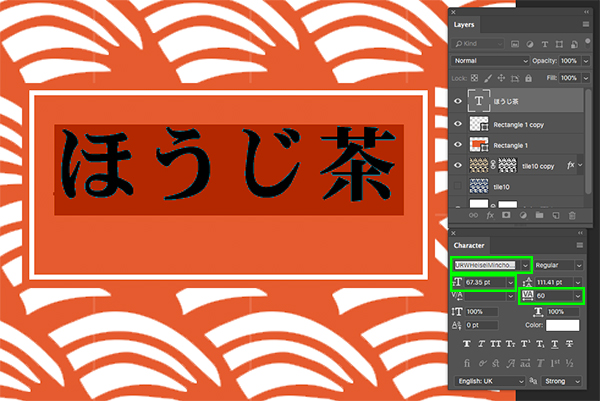
Create a new layer and switch to the Type Tool (T), copy and paste ‘ほうじ茶’ text from ‘Traditional Roast Tea in Japanese.txt’ file from the freebies folder, and place in the center of the orange rectangle – this translates to ‘Traditional roasted tea’ in Japanese. Open your Character Panel by going to the Window menu and choosing ‘Character’. Here I am using the typeface ‘Heisei Mincho’ with a solid white fill. If you don’t have access to this typeface, any similar style in bold will work. What we want to pay attention to is the size and tracking settings in the Character Panel so let’s make the characters about ’67.35 pt’ in size with a tracking setting of ’60’ to add some breathing room.
Create another layer just below the main Japanese text and type out the words ’Sencha fukamushi green tea’ in all caps. Here I am using a light style of a condensed typeface set to about ’21.53 pt’ size with a solid white fill. Any lightweight condensed font will work for this.
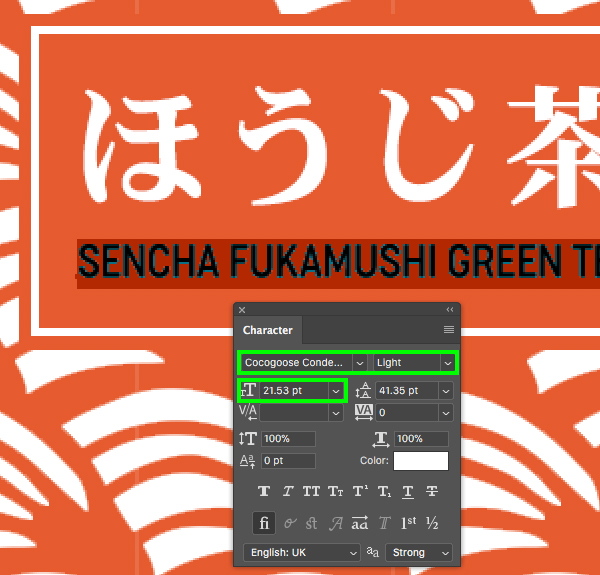
Center the text layers and you should now have a nice looking lockup inside of the rectangle above the pattern like the image shown here:
Press Command/Ctrl+S to save the design and update the Smart Object in the main metal box mockup. You should now be back inside of the main object PSD file.
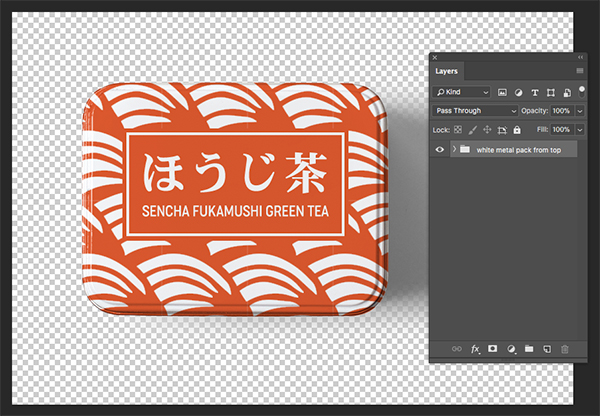
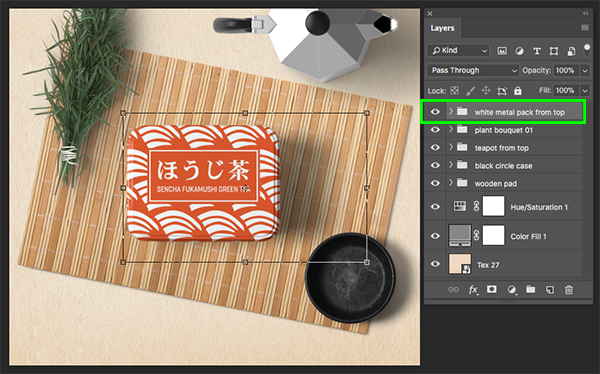
Next, grab the entire box folder and drag it into your working document. Place the folder at the top of the layer stack and then scale it up in the center of the wooden pad using a Free Transform.
Step 11: Tea Time
Return to the File menu and choose ‘Open…’.
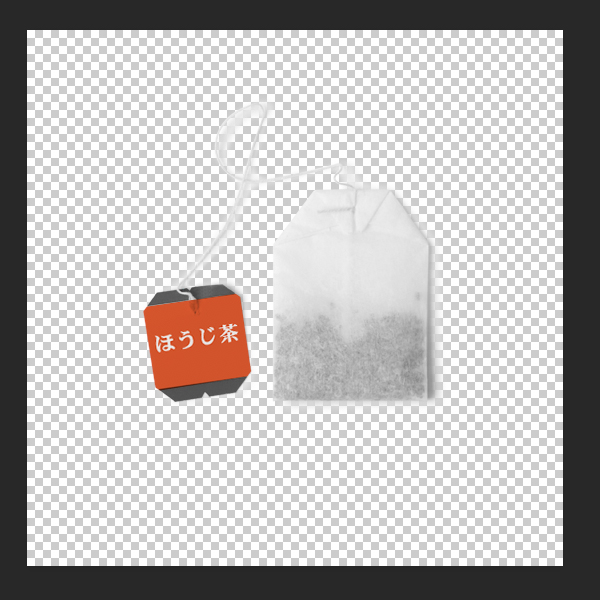
Navigate to the ‘Tea_Bag_With_Sticker.psd’ file from the Coffee Branding Packages Mockup Zone freebies folder and then choose ‘Open’ from the lower right corner to open the file in Photoshop.

Once the file is open, expand the ‘tea bag with sticker’ folder and double click on the red highlighted Smart Object layer that says ‘Replace’.
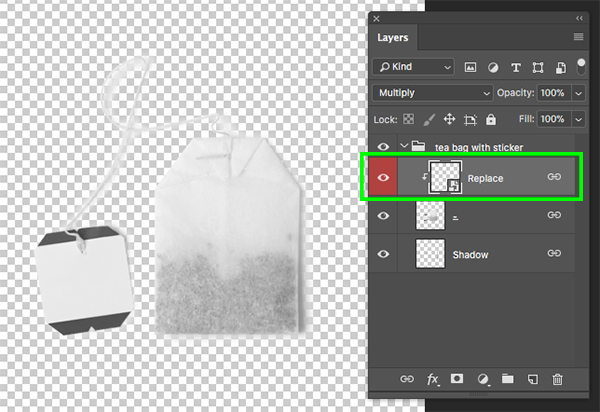
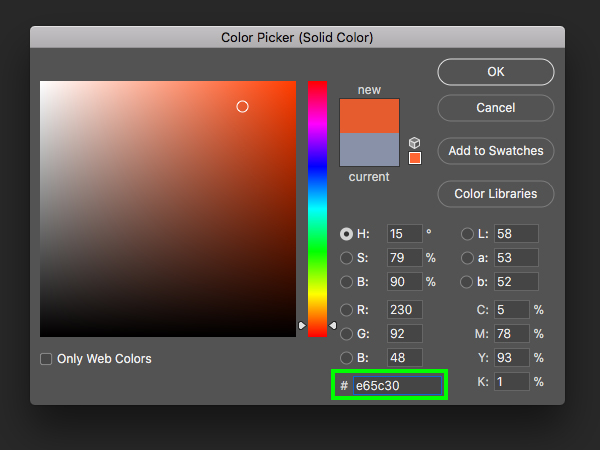
You will now be inside of the Smart Object layer where we can place our artwork. Turn on the visibility of the ‘Color Fill 1’ Adjustment Layer and then double click the color swatch highlighted below:
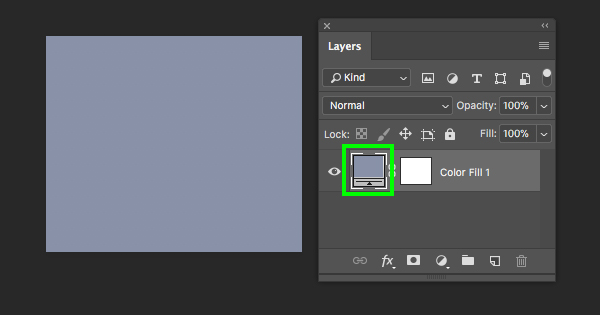
Change the color to the hex value ‘#E65C30’ and then press ‘OK’ to update the Adjustment Layer.
Create a new layer above the color fill and use the same Japanese text from earlier. Reduce the size of the font so that it fits nicely across the middle as shown below:
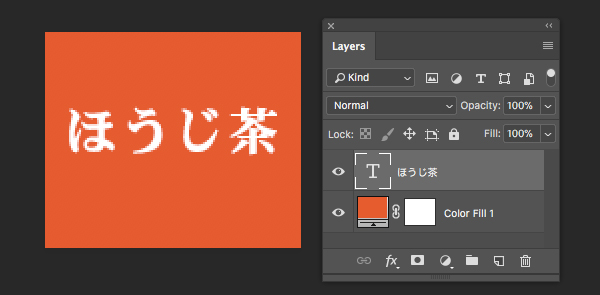
Save the file by pressing Command/Ctrl+S and then close the window by pressing Command/Ctrl+W and you will then return to the main tea bag mockup.
Click and drag the entire folder into your main document and place it just below the metal tea box layer. Press Command/Ctrl+T to do a Free Transform and then scale the tea bag up by dragging outwards from any of the four corners of the bounding box while holding the Alt/Option+Shift keys. Let’s also rotate the tea bag clockwise a bit before pressing ‘Return’ on the keyboard to apply the changes.
Step 12: Quick Fix
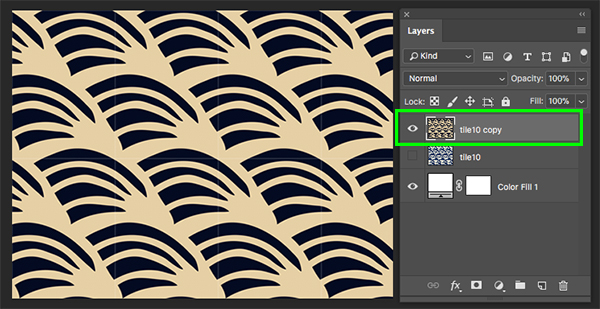
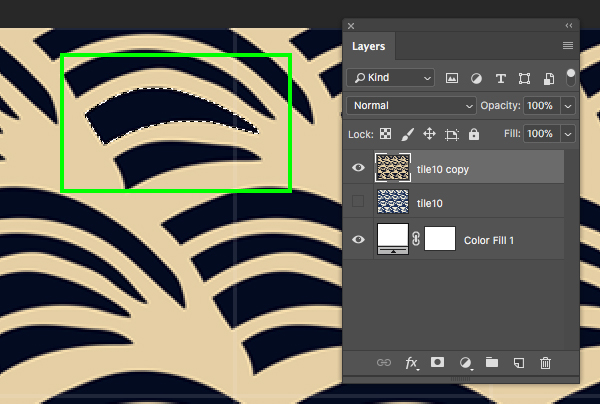
Before moving on I noticed something that we will need to adjust. At the moment there are thin vertical lines in between the segments of our pattern on the metal tea box. Let’s go into the ‘white metal pack from top’ folder and double click on the ‘Replace’ layer.
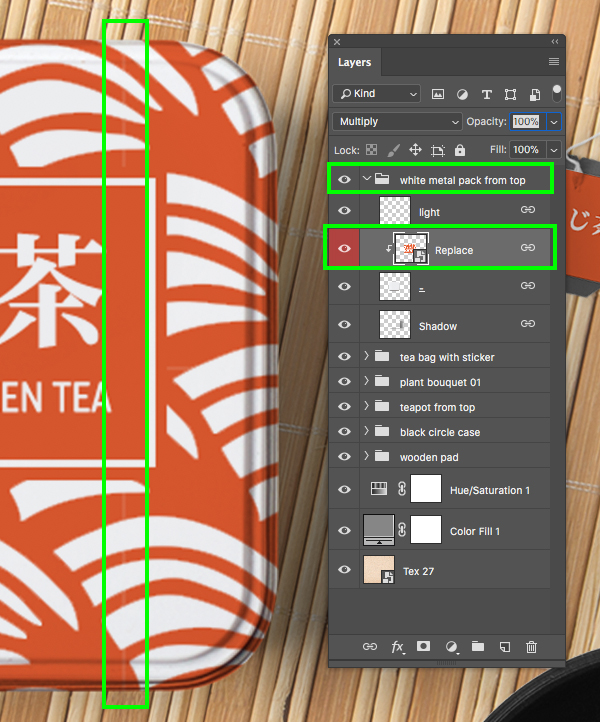
Once inside of the Smart Object, hold the Command/Ctrl key and click the layer thumbnail icon of the ‘tile10 copy’ layer to activate a selection around the shapes. Once you’ve done that, press Alt/Option+Delete on the keyboard to fill the layer with your foreground color. Notice that since we have a ‘Color Overlay’ Layer Style applied, it doesn’t matter what foreground color we have because the Layer Style will overwrite it.
Once you’ve filled in the shapes with color it will get rid of the thin lines so we can now save the file and close out of the window to return to our main document.
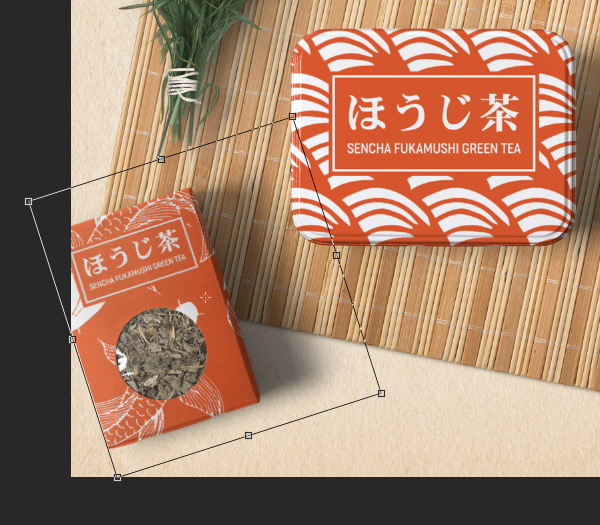
Step 13: Craft Box
Go to the File menu and choose ‘Open…’ before navigating to the ‘Craft_Box_With_Circle_Window.psd’ file and choosing ‘Open’ from the lower right.

After opening the file, expand the contents inside of the main ‘craft box with circle window’ folder and double click on the red ‘Replace’ Smart Object layer.

Once you are inside of the Smart Object layer let’s change the ‘Color Fill 1’ Adjustment Layer to be the same orange color that we used previously – ‘#E65B30’.
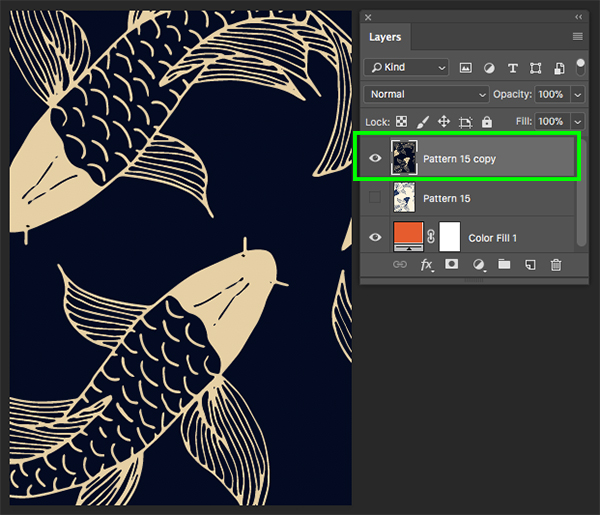
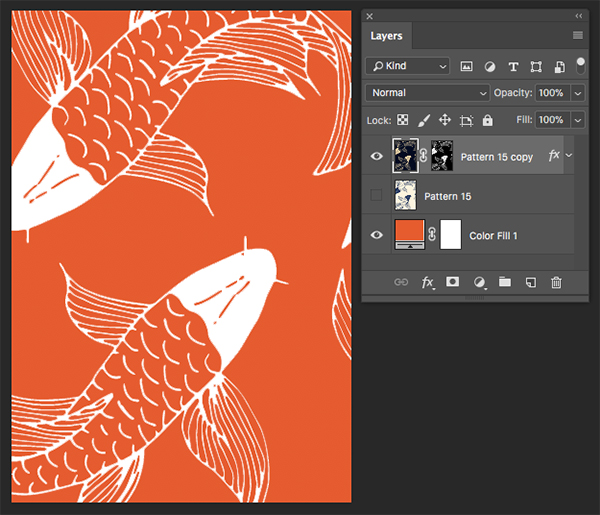
Step 14: Fish Pattern
Return to the File menu again and this time open the ‘Japanese-pattern-tile15.psd’ in Photoshop.
Click and drag the pattern into the empty Smart Object just above the orange Solid Color Adjustment Layer.
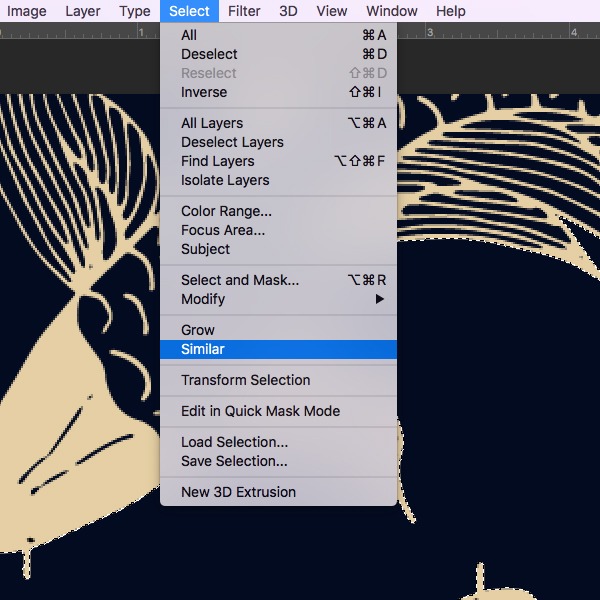
Press Command/Ctrl+J to duplicate the pattern layer and then press Command/Ctrl+I to invert the top copy. Let’s also go ahead and turn off the visibility of the original pattern layer.
Press ‘W’ to switch to the Magic Wand Tool and select an area of black from the inverted pattern. After that, go to the Select menu and choose ‘Similar’ to select all of the other black areas in the pattern.
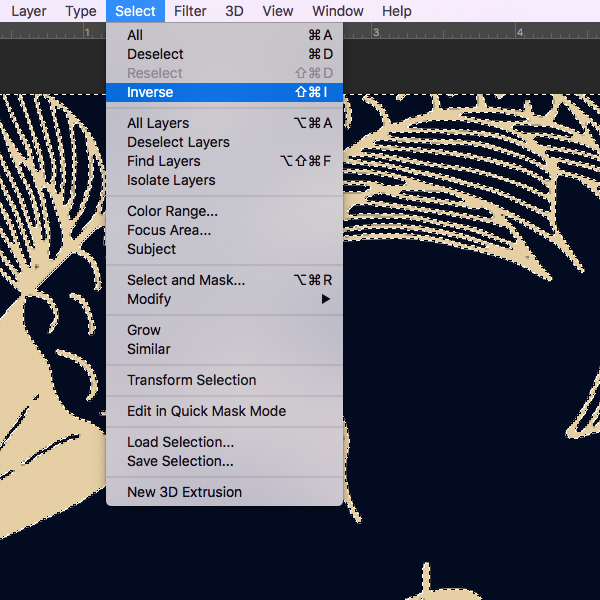
After selecting all of the black, return to the Select menu and choose ‘Inverse’ from the list to invert the selection.
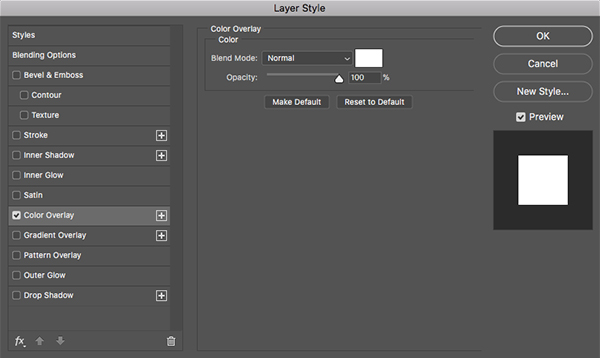
From here, click on the ‘Add layer mask’ icon to leave only the light areas of the fish pattern.

Double click on the masked pattern to open the Layer Style panel and check off the ‘Color Overlay’ box. For the fill color let’s go with solid white before pressing ‘Return’ on the keyboard or clicking ‘OK’ to apply the changes.
You should now have a white fish pattern on the orange background like this:
Step 15: Adding The Logo
Let’s go back inside of the artwork for the metal tin box and grab the logo lockup along with the two rectangular layers. What we want to do is select the top layer, hold the Shift key, and select the bottom rectangle layer, and then hold the Shift key and click and drag the layers over into the Smart Object file with our new fish pattern.

Place the logo lockup in the top portion of the Smart Object and then press Command/Ctrl+S to save the artwork and then Command/Ctrl+W to close the window and return to the main mockup file.

Click and drag the whole group into your working document and then use a Free Transform to scale the box up and rotate it, positioning it in the lower left hand corner of the main mockup like this:
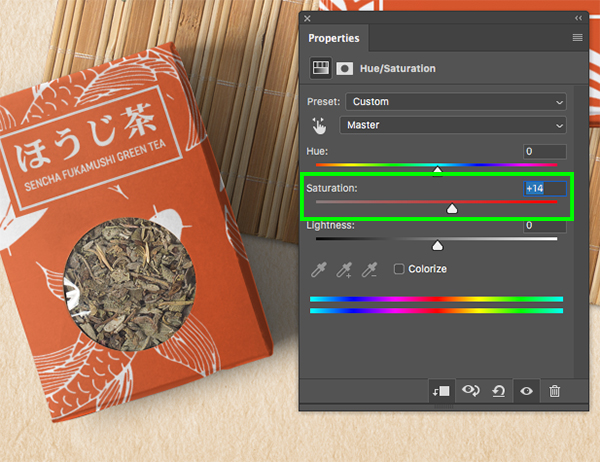
Expand the contents of the craft box folder and select the main box before clicking on the Adjustment Layer icon and adding a ‘Hue/Saturation…’ Adjustment Layer.
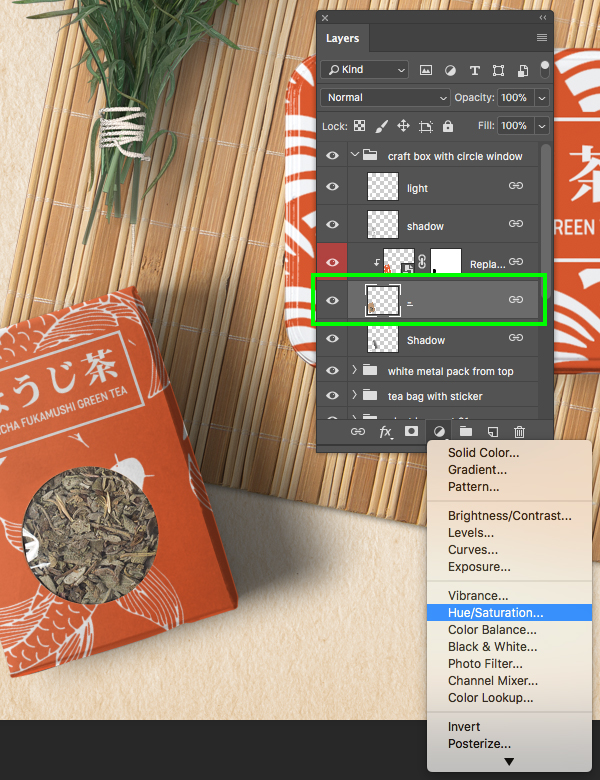
Let’s now increase the saturation by moving the middle slider up to about ‘+14’ in order to boost the red/orange color so it matches the color on the metal box.
We have now completed our Japanese tea packaging design and mockup! To create our design we’ve used a small handful of elements from Alien Valley and YouandiGraphics from The Spectacular Textures and Patterns Collection along with a branding mockup from the Design Cuts Marketplace. This is just one example of how you can use these awesome new textures and patterns guaranteed to add some visual pizzazz to your design work.
Remember that whether it’s your outcome for this tutorial or something new you’ve made, we’d love to see your designs on our Facebook page.
Please leave a comment if you have any questions or suggestions. I always look forward to hearing from you!
There’s still time to check out The Spectacular Textures and Patterns Collection featuring a massive variety of high quality textures and patterns for an unbeatable price of $29!
As always, great little tips and tricks along the way. Thanks for these tutorials. It is fun to work along with them and see what new ideas they might spark.
Aw thank you so much for your lovely comment Lois, your support means so much to us!
We hope that you pick up lots of tips and inspiration from this tutorial to use in your own projects :) Happy Designing!