In this tutorial I will be showing you how to create a typographic label design for Pig & Whistle All Natural Preserves in Photoshop. To do this we will be using a sampling of one of the great new fonts from The Font Guru’s Essential Library. This all-new collection boasts loads of new typefaces from top artists such as Callie Hegstrom, Fenotype, URW, W Foundry and more! We will also be working with a fun vintage illustration courtesy of Graphic Goods that we’ll add to our label before applying the design to a realistic looking jar mockup. The Font Guru’s Essential Library is an absolute must-have for any type enthusiast or designer looking to up their game. If you are all ready to begin then fire up Photoshop and let’s jam!
HAVE YOU SEEN OUR YOUTUBE CHANNEL?
Watch the video tutorial below and subscribe to our YouTube channel for regular updates direct to your inbox.
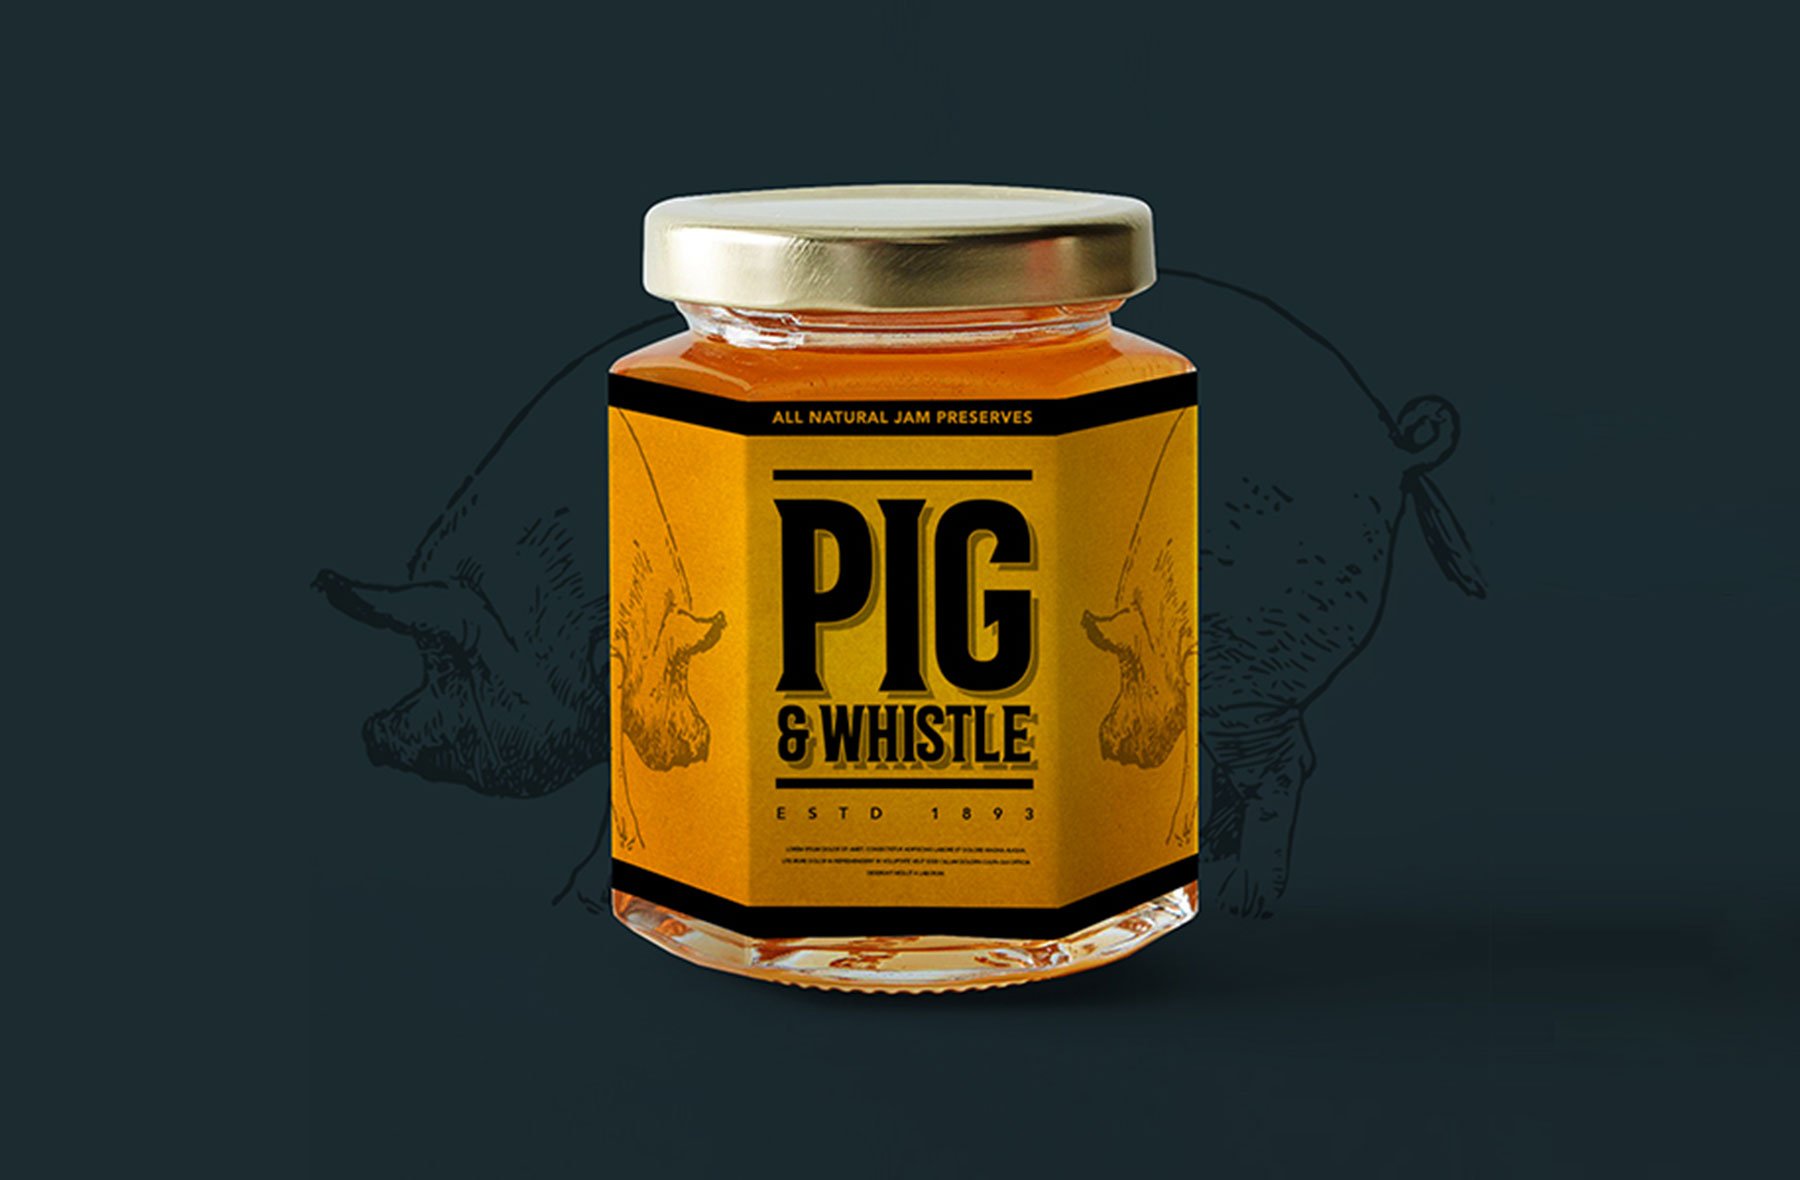
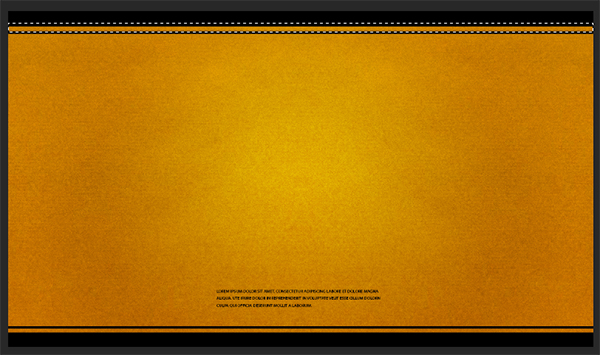
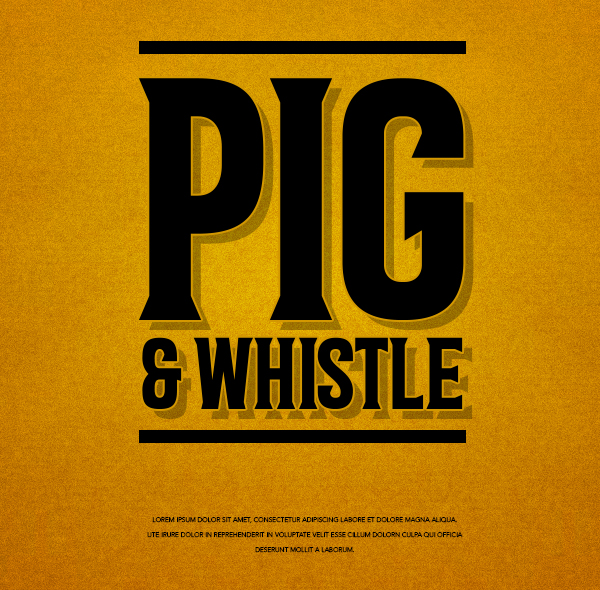
Here’s a look at what we’ll be creating:

Follow along with this tutorial: Download the freebie files
This freebie pack is just a small sample of what you can expect to find in The Font Guru’s Essential Library for just $29 (that’s 99% off). This extensive collection of 320 dynamic fonts offers you the ability to transform your work with top quality display fonts that will blow your clients away!

Step 1: Pig and Whistle Packaging Design
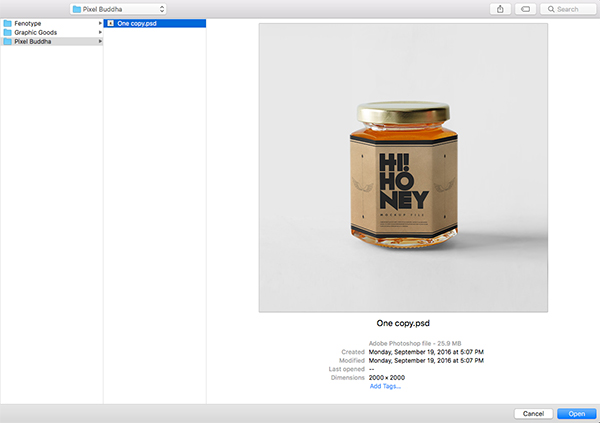
To begin, you will need to download this Honey Jar Mockup from Pixelbuddha. Once you’ve downloaded the file, open it up in Photoshop.
After opening the file, your layers should look like this:

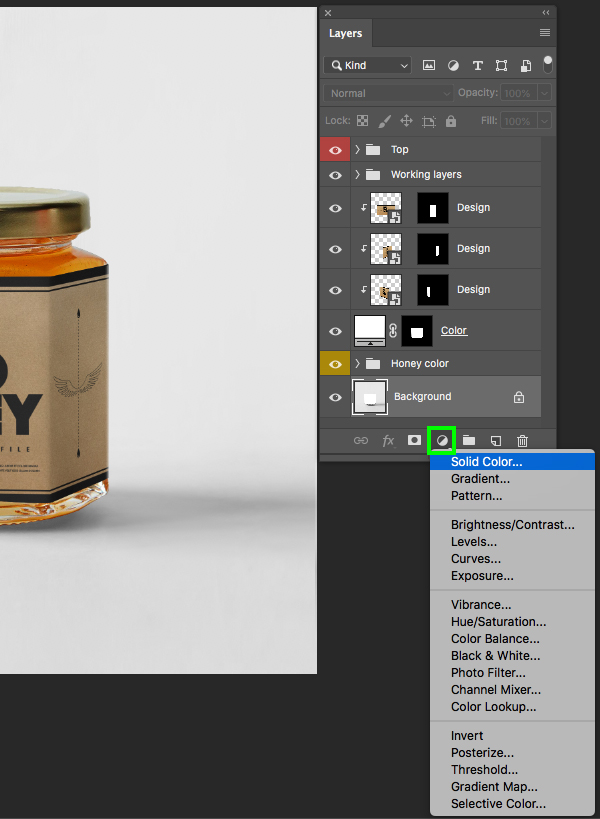
Step 2: Background Color
Select the ‘Background’ layer and then click on the Adjustment Layer icon at the bottom of the Layers Palette before choosing ‘Solid Color…’ from the menu.
For the fill color enter the hex value ‘#1E2F35’ as shown below:
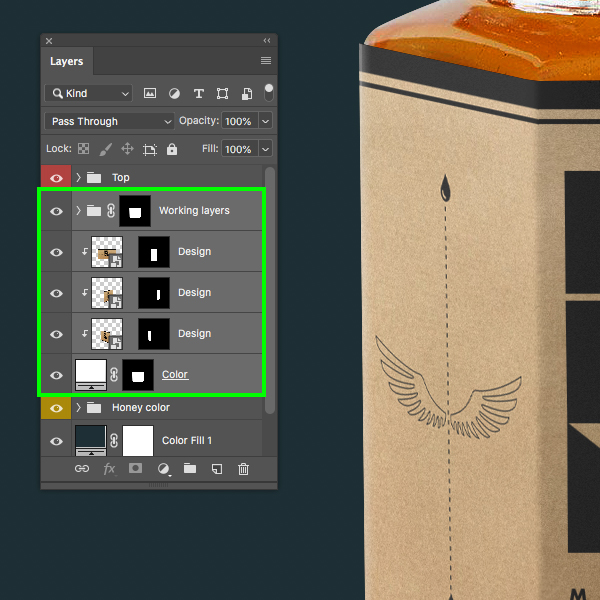
Step 3: Label Fix
Once you’ve changed the background you will notice that some of the label is spilling outside the boundaries of the jar, so to fix this let’s first hold down the Command/Ctrl key and click the layer mask thumbnail attached to the ‘Color’ layer to activate a selection around it. Next, click on the ‘Working layers’ folder to make sure it’s selected or highlighted while your selection remains active.

Click on the ‘Add layer mask’ icon at the bottom of the Layers Palette to use the active selection for the ‘Working layers’ folder and you should now have a much cleaner looking result.

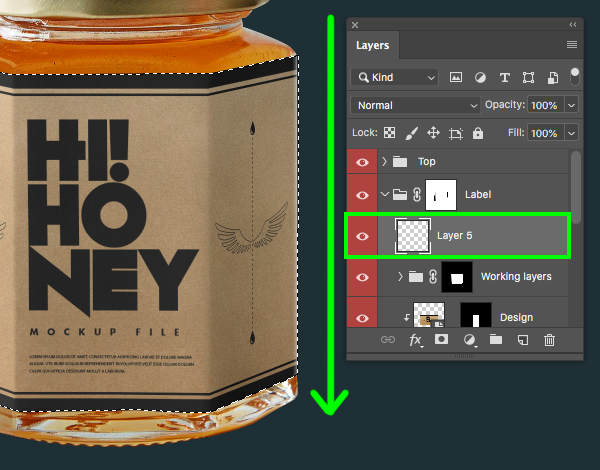
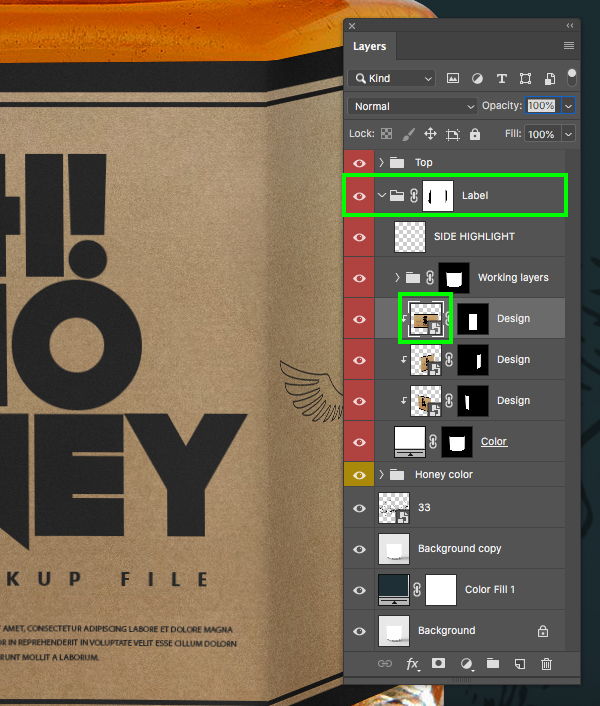
Step 4: Label Trimming
Select the ‘Working labels’ folder, hold the Shift key, and then click on the ‘Color’ Adjustment Layer so all of the layers between these two are selected.
Press Command/Ctrl+G to put all of these layers into a new folder and rename it ‘Label’. Now we can go about fixing the edges of the label that are still sticking out a bit as indicated by the green circle in the image shown below:

Step 5: Using The Pen Tool
Press ‘P’ to switch to the Pen Tool and then click to make a point at the bottom left of the paper label, then move upwards and make a second point that follows the left edge of the jar and goes up to the top. From here, click around the left side of the jar and close the path. Next, hold the Command/Ctrl key and press ‘Return’ on the keyboard to activate a selection from the path we created with the Pen Tool.
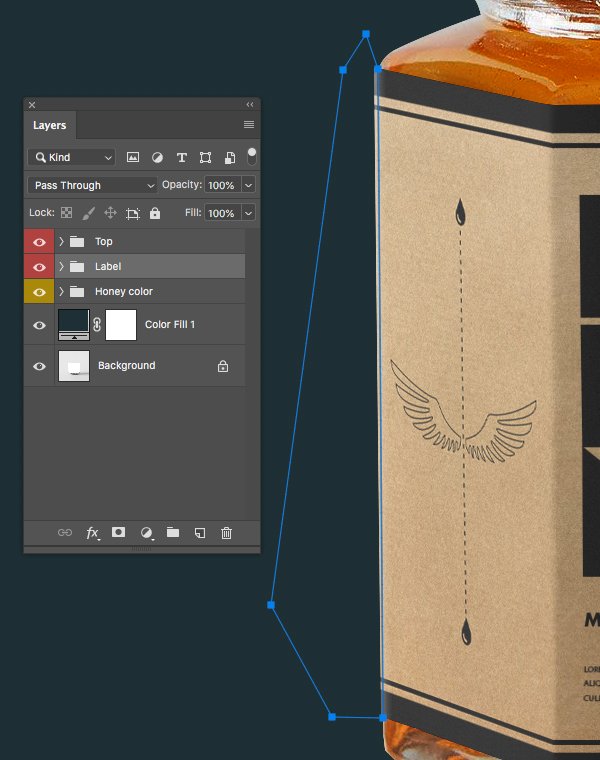
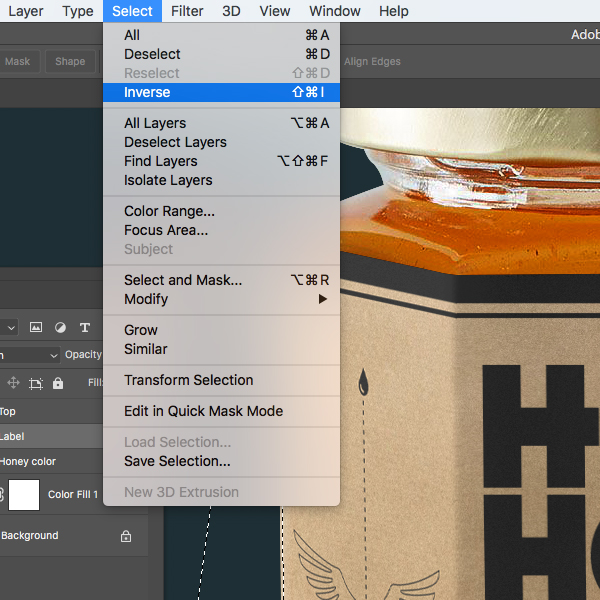
After activating your selection, go to the Select menu and choose ‘Inverse’ to invert it.
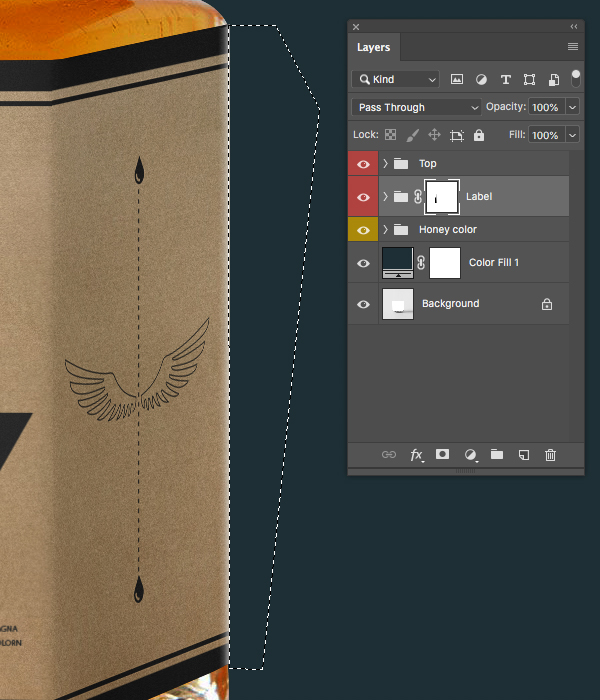
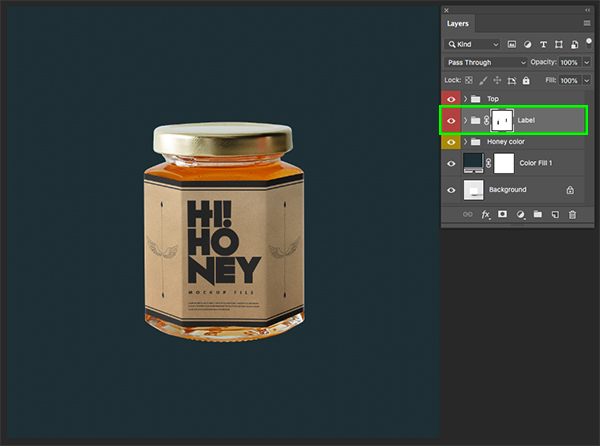
Now that we’ve inverted the selection, make sure that the ‘Label’ folder is still selected and click on the ‘Add layer mask’ icon from the bottom of the Layers Palette.

Use the Pen Tool to trace the edge of the right side and then activate this selection by pressing Command/Ctrl+Return on the keyboard after closing the shape.
Now all we need to do is select the mask attached to the ‘Label’ folder and fill it with solid black. We don’t need to invert this selection because the mask is already applied so let’s press ‘D’ on the keyboard to reset our default colours, make sure that black is the foreground colour, and then press Alt/Option+Delete on the keyboard to fill the selection with your foreground colour. You should now have a clean looking result.
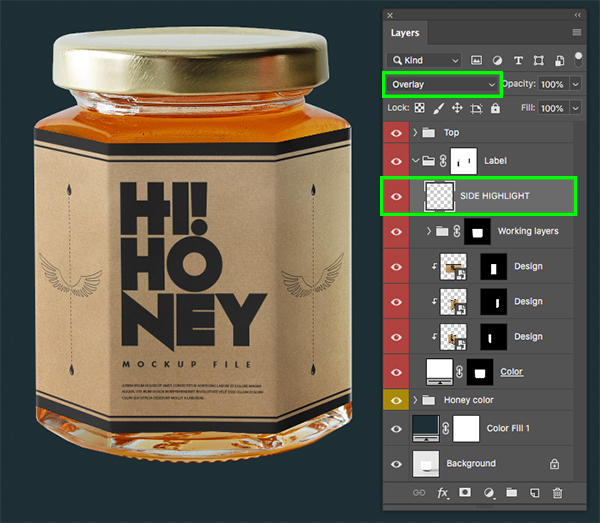
Step 6: Adding Edge Light
Press ‘B’ on the keyboard to switch to your Brush Tool and then increase the size to about ‘400’ and make sure that it’s a soft-edged brush. After that, reduce the ‘Opacity’ to ’20%’ as shown in the image below:

Create a new layer inside the ‘Label’ folder at the very top. Next, hold the Command/Ctrl key and click on the layer mask thumbnail of the ‘Working layers’ folder to use the mask to create a selection. After that, select the new layer that we’ve added. You should also still have the Brush Tool (B) active so we can now select a solid white colour (just press ‘X’ to toggle your foreground and background colours) and click above and outside of the selection and then drag all the way down while holding the Shift key to make sure it comes down in a straight line. Doing this will create a soft highlight along the edge to give us a nice pop of light. Let’s reduce the size of the brush and then do it again to create a smaller, thinner highlight along the edge. It’s okay if you need to do this a couple of times to get it right!
After adding the soft-edged highlights along the right side of the label your jar should look like this:

Press Command/Ctrl+D to ‘Deselect All’ and then rename your layer ‘SIDE HIGHLIGHT’ before changing the Blend Mode from ‘Normal’ to ‘Overlay’.
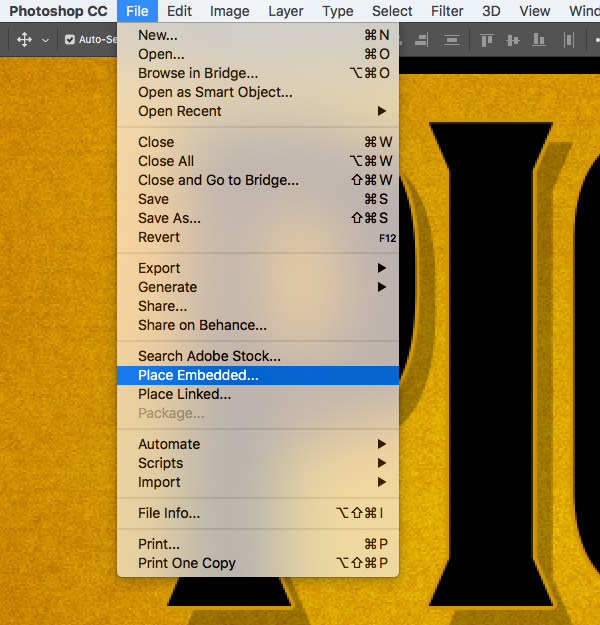
Step 7: Pig Illustration
Next, go to the File menu and choose ‘Place Embedded…’ from the list.
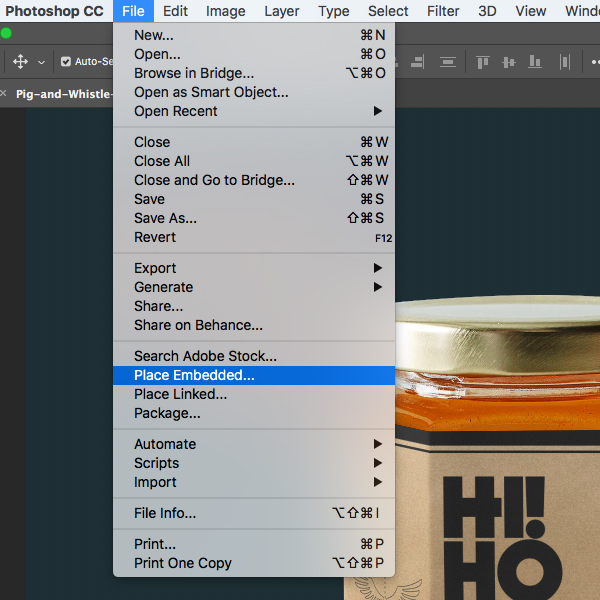
Navigate to the freebies folder and then go to the ‘Graphic Goods’ folder and select the ’33.psd’ layer inside before choosing ‘Place’ from the lower right.

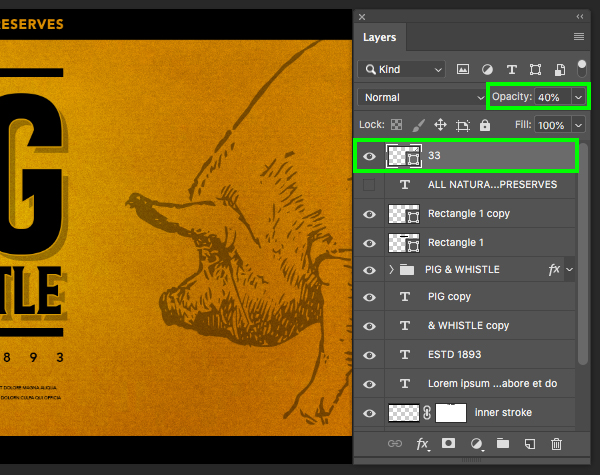
Once you have placed the illustration, move the pig just above the blue ‘Color Fill 1’ Adjustment Layer and then reduce the size by dragging inwards from any of the four corners of the bounding box while holding the Alt/Option+Shift keys. Let’s also drop the opacity of the layer to about ’40%’ and place it behind the jar like this:

Step 8: Crop The Mock
From here, press ‘C’ to switch to the Crop Tool and drag inwards from any of the four corners again while holding Alt/Option+Shift so that all sides are brought in an equal amount at the same time. Once you’ve reduced the size of the crop area to just about the edges of the pig illustration, press ‘Return’ on the keyboard to apply the changes. Doing this will help us to keep the focus on the jar by getting rid of any extra room that we may not need around the product.

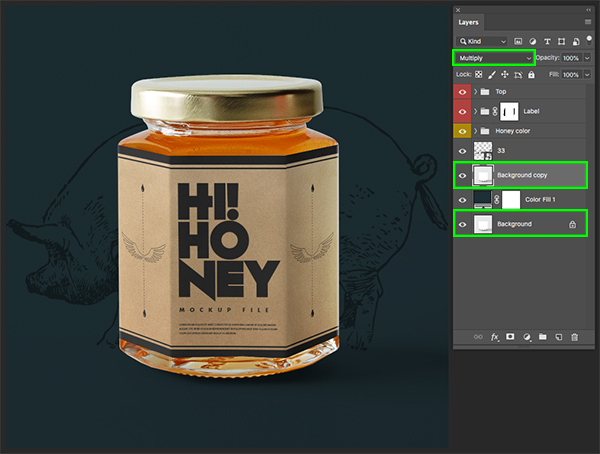
Step 9: Bringing Back The Shadows
Select the ‘Background’ layer from the bottom of the Layers Palette and then press Command/Ctrl+J to duplicate it and move the copy just above the blue ‘Color Fill 1’ Adjustment Layer. Next, change the Blend Mode of the layer to ‘Multiply’ to bringing the shadows beneath the jar back while still allowing the background color to show through. After that, the mockup is pretty much set up so we can now begin to design our label!
Step 10: Label Design Smart Object
Click the small arrow next to the ‘Label’ folder to reveal the contents and then double click on the first ‘Design’ Smart Object layer inside as shown here:
Step 11: Trimming The Fat
Now that we are inside of the flat label artwork let’s select the very top layer, hold the Shift key, and then select the bottom ‘wings’ layer. Next, hold the Command/Ctrl key and also click on the ‘Denny’s logo’ and the ‘element’ layer below so all of those layers are selected together. From here we can simply press ‘Delete’ on the keyboard to remove those layers.
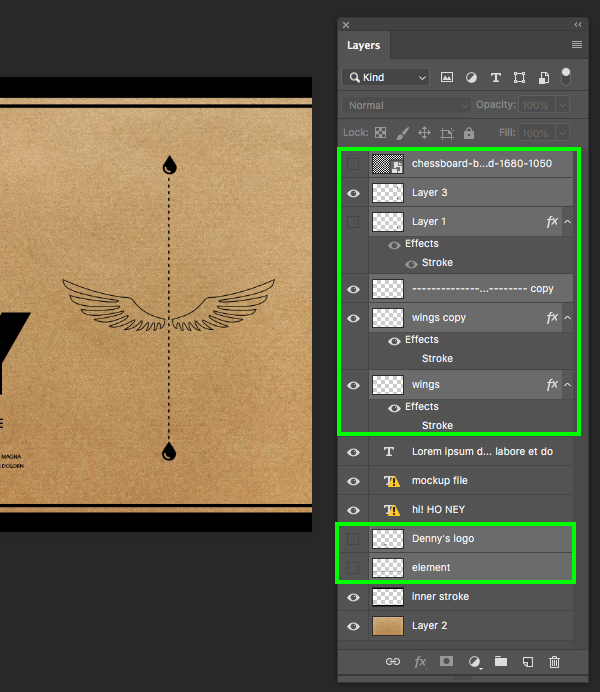
Let’s go ahead and also remove the two text layers shown here:

Step 12: Clean Slate
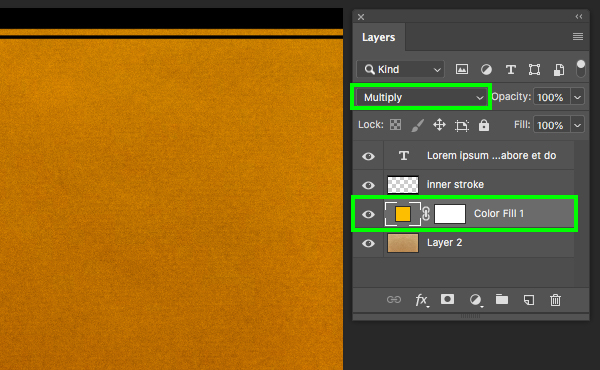
After removing all of the unnecessary layers we have a pretty clean file to work with. Let’s select the ‘Layer 2’ layer at the bottom and then click on the Adjustment Layer icon at the bottom of the Layers Palette. From here, choose ‘Solid Color…’ from the menu that appears.

For the fill color enter the hex value ‘#FDBE00’ and then press ‘Return’ or click ‘OK’ to apply the color changes.

Change the Blend Mode of the Adjustment Layer from ‘Normal’ to ‘Multiply’ to allow the texture to show through.
Step 13: Label Highlight
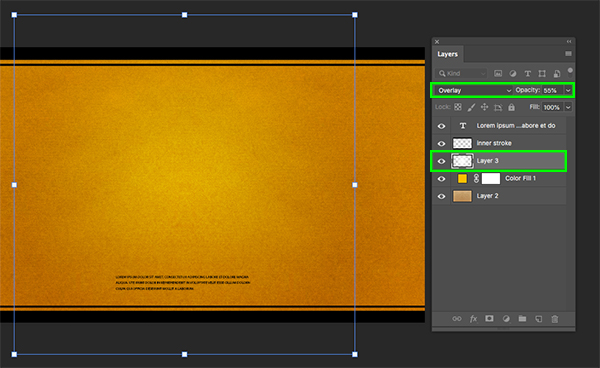
Make sure that you have a solid white foreground color and then press ‘G’ to switch to the Gradient Tool. From here, look at the top toolbar and make sure that you have a Radial Gradient that fades from solid white to transparent as shown in the image below:

Create a new layer just above the ‘Color Fill 1’ Adjustment Layer and then with your Gradient Tool (G) still selected, click and drag from the center outwards to create your gradient. After that, change the Blend Mode of the layer from ‘Normal’ to ‘Overlay’ and reduce the opacity to about ’55%’ to create a nice bright spot in the center of our label as shown here:
Step 14: Black Stripes
Press ‘M’ on the keyboard to switch to the Rectangular Marquee Tool and then select the ‘Inner stroke’ layer. Click and draw a long rectangle that spans the width of the entire label around the opening between the top bars like this:
Make sure that you have a solid black foreground color and then press Alt/Option+Delete to fill the selection with black and create a solid bar along the top.
Repeat this to create a solid black strip along the bottom on the same layer.
Step 15: Mouse Type
Select the ‘Lorem Epsom…’ layer and then switch to your Type Tool (T) and click inside of the text box two or three times to highlight the mouse type at the bottom of the label. From here, open the Character panel (if you don’t already see it, it can be found under the Window menu) and then change the typeface to a clean, bold, sans serif such as ‘Avenir’ set to the style ‘Book’ before changing the size of the text to ‘6.5 pt’ and then making the linespacing ’14.85’. After that, press Command/Ctrl+Shift+C on the keyboard to center the text. Alternatively you could use the Paragraph panel to do this.

Step 16: Piggy Pig
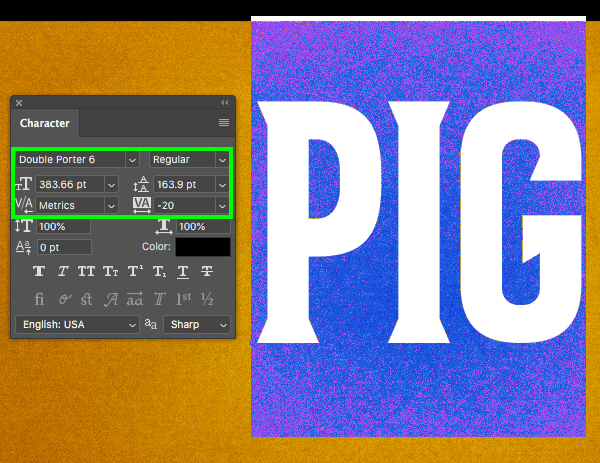
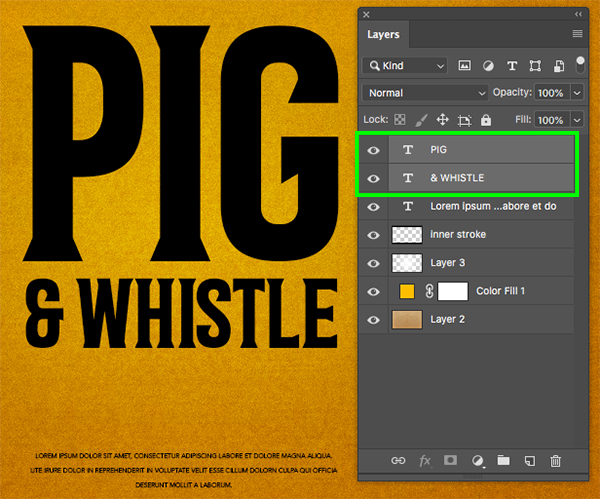
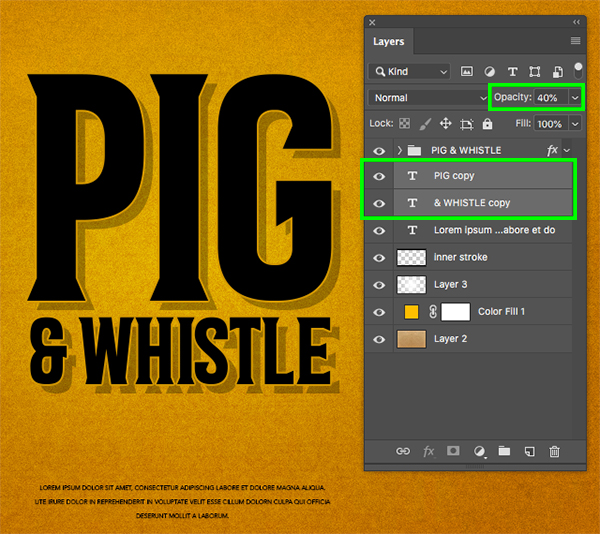
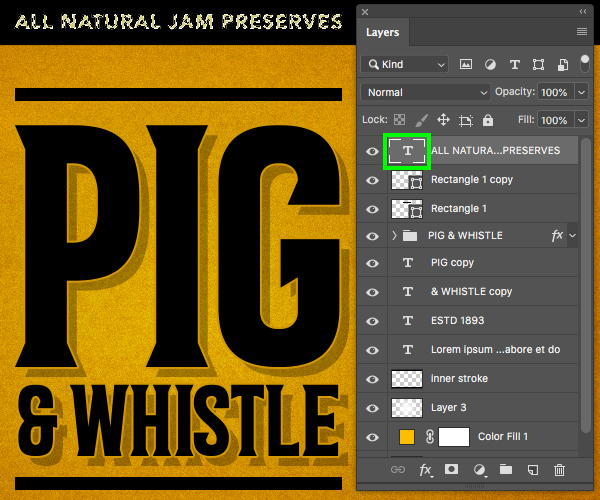
Create a new layer and use the Type Tool (T) to type out the word ‘PIG’ in all caps. Use the Character panel to change the typeface to ‘Double Porter 6’ which is a nice vintage typeface from Fenotype. After that, set the size of the text to about ’383.66 pt’ with a solid black fill in the center of your label.
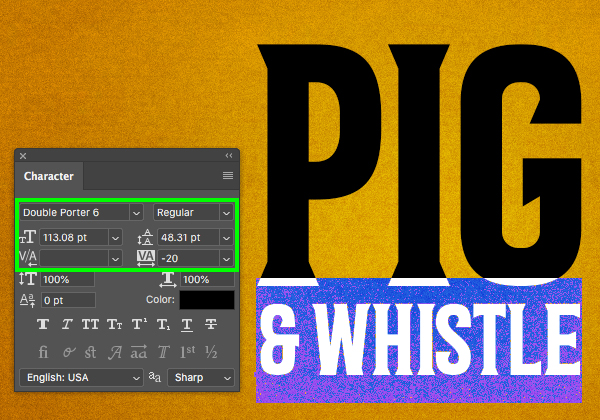
Add another new layer and then create a second line of text that reads ‘& WHISTLE’ in all caps. Use the same ‘Double Porter 6’ typeface as before but make the size ‘113.08 pt’ with the tracking set to ‘-20’ and place the text centered and directly below the word ‘PIG’.
Step 17: Pig Folder
Select the top text layer, hold the Shift key and then click on the second text layer.
With both lines of text still selected, press Command/Ctrl+G to place them into a new folder and double click the ‘Group 1’ text to rename the folder ‘PIG & WHISTLE’ as shown here:

Step 18: Styles
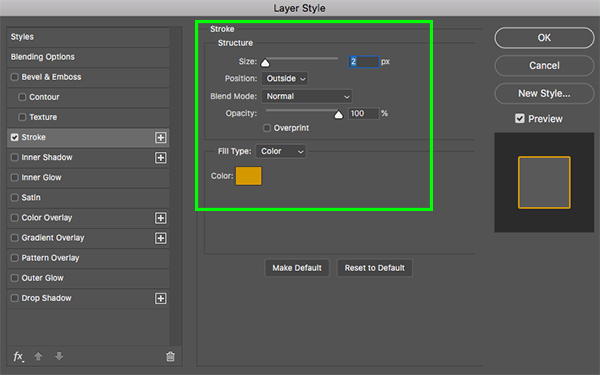
Double click on the ‘PIG & WHISTLE’ folder to open the Layer Style dialog box and check off the ‘Stroke’ option. Let’s set the ‘Size’ to ‘2’ and the ‘Position’ to ‘Outside’. Once you’ve done that, click on the ‘Color’ box to change the stroke color.
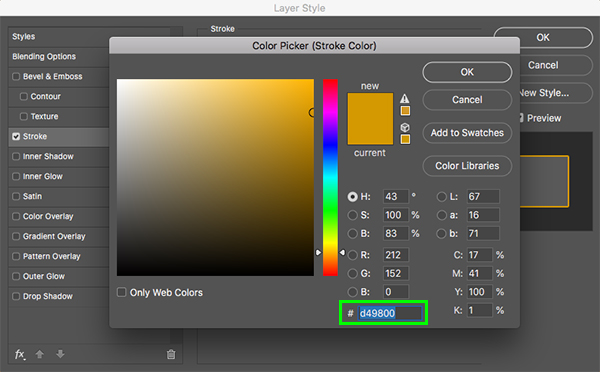
For the stroke color enter the hex value ‘#D49800’ and then press ‘Return’ on the keyboard or click ‘OK’ two times to apply the changes and close out of the dialog boxes.
Step 19: Text Shadow
Click on the small arrow next to the ‘PIG & WHISTLE’ folder to reveal the two text layers inside. From here, select both layers by clicking on each one while holding the Command/Ctrl key. Next, press Command/Ctrl+J to duplicate them and then drag the copies below the folder.

With both text layer copies selected, tap the down arrow a few times and then the right arrow a few times to offset both lines of text. After that, press ‘4’ on the keyboard to reduce the opacity of both layers to ’40%’ as shown in the image below:
Step 20: Adding Lines
Press ‘U’ on the keyboard to switch to the Rectangle Tool and then make sure you have a solid black fill with no stroke selected. From here, click and drag a long rectangle above the text that spans the width of the word ‘PIG’ as shown here:
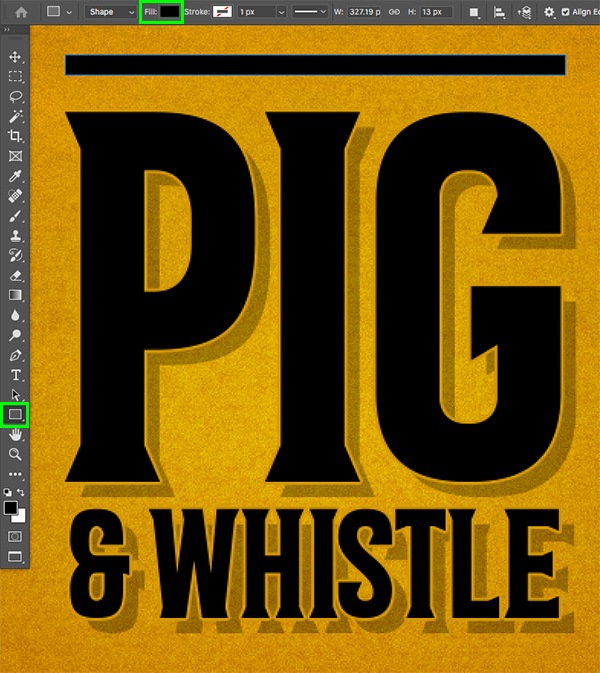
Select the black rectangle layer, press Command/Ctrl+J, and then hold the Shift key and drag this copy to the bottom so that it underlines the second line of text like this:
Step 21: Secondary Text
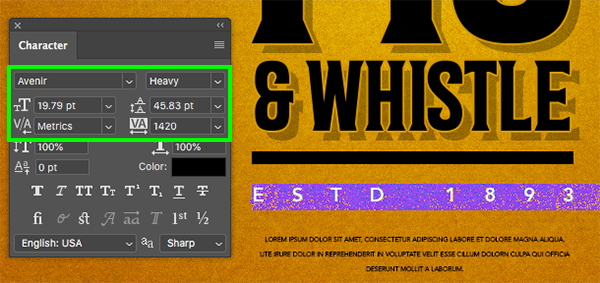
Create a new layer and then type out the words ‘ESTD 1893’ and place it below the main text. Open the Character panel once again and change the typeface to ‘Avenir’ with the ‘Heavy’ style selected and a solid black fill color. Change the size of the text to about ’19.79 pt’ and the tracking to ‘1420’ so the characters are spread out.
Step 22: All Natural
Create another new layer at the top of your Layers Palette and this time we’ll use ‘Avenir’ in the ‘Black’ style to type out the words ‘ALL NATURAL JAM PRESERVES’ in all caps. Change the size of this line of text to ’20.21 pt’ and the tracking for this layer can be set to ’40’. Center this text above the rest of the title so that it’s on the very top. The fill color here is not very important as long as you can see the text as we will be knocking it out of the black rectangle shape in the next step.

After placing your text, hold the Command/Ctrl key and click on the layer thumbnail of the text layer to activate a selection around the type.
Go to the Select menu and choose ‘Inverse’ or simply press Command/Ctrl+Shift+I to invert the selection. From here, select the ‘Inner stroke’ layer and then click on the ‘Add layer mask’ icon at the bottom of the Layers Palette.

We can now turn off the visibility of the ‘ALL NATURAL JAM PRESERVES’ layer and you should now be able to see your label background there instead.
Step 23: More Pigs!
Go to the File menu and choose ‘Place Embedded…’ from the dropdown menu.
Navigate to the ‘Graphic Goods’ folder and select the pig illustration before choosing ‘Place’ to import it. Scale the pig illustration up and move it over to the right side of the image so that it’s mostly cropped off. We also want to reduce the opacity of the layer to about ’40%’ as shown below:
Select the pig layer and press Command/Ctrl+J to duplicate it and then press Command/Ctrl+T to initiate a Free Transform. From here, hold the Control key and click on the layer to reveal a dropdown menu where we want to select the ‘Flip Horizontal’ option.

After flipping the pig the opposite way, hold the Shift key and slide it over to the opposite side so that it mirrors the illustration on the right. Once you have done that, press Command/Ctrl+S to save the artwork and then Command/Ctrl+W to close out of the window and return to the main mockup file.

Step 24: Final Adjustments
Now that we’re back in our main mockup, let’s open the ‘Working layers’ folder so that we can make a few final adjustments. The first thing we want to do is select the top ‘Working layers’ file and change the Blend Mode from ‘Screen’ to ‘Color Dodge’.
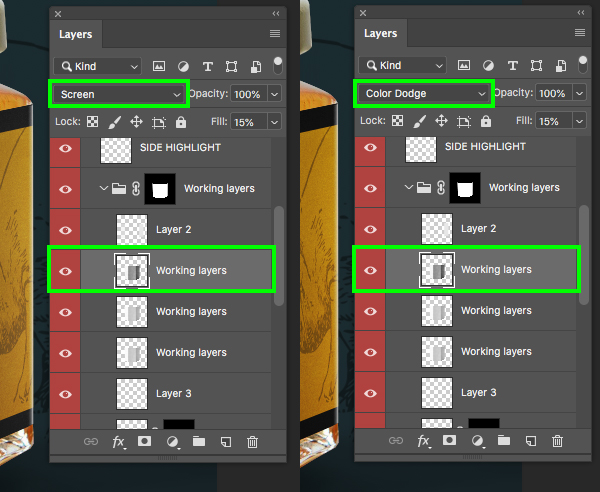
Next, select the ‘Layer 2’ layer and change the Blend Mode of this layer from ‘Normal’ to ‘Overlay’.
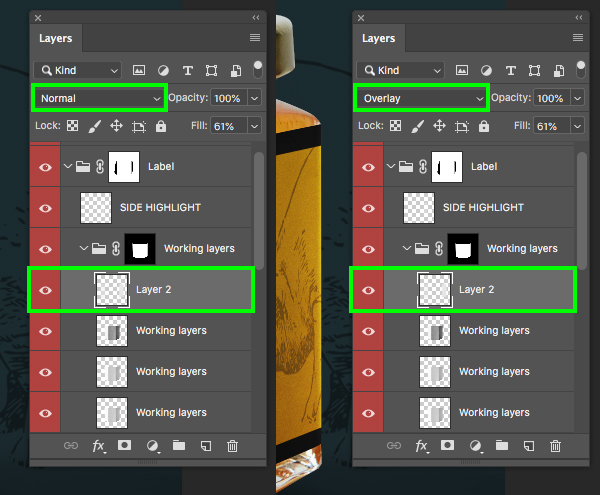
Once you have made those two adjustments all we need to do is turn off the visibility of the third ‘Working layers’ layer as shown below:

We have now completed our Pig and Whistle Packaging Design! To create our packaging we’ve used a small handful of elements including the beautiful ‘Double Porter’ typeface from Fenotype along with a high-quality vintage illustration from the Design Cuts Marketplace and a free packaging mockup. Whether you are looking for clean and professional sans or textured and stunning scripts, this library is every font Guru’s dream collection!
Remember that whether it’s your outcome for this tutorial or something new you’ve made, we’d love to see your designs on our Facebook page.
Please leave a comment if you have any questions or suggestions. I always look forward to hearing from you!
There’s still time to check out The Font Guru’s Essential Library featuring some of the most renowned type designers around for an unbeatable price of $29!

Thank you!
Thanks for watching Vessto :)
Thanks for this tutorial! I focus mostly on coding websites but I enjoy creating graphics and I can use the practice. The main problem I ran into was using the Double Porter 6 font when it didn’t show up in Photoshop after adding it to my fonts. So I substituted another slab serif which threw off the font size and related font scales. So my end product was off, with the text running onto the sides of the jar. Otherwise it was a close replica of yours. Now that I’ve closed and restarted Photoshop, Double Porter 6 shows up, and I will be redoing this tutorial. Looking forward to more!
Hey Steve,
Thank you so much for your comment Steve and we’re so happy to hear that this tutorial is really helpful for you to be able to practise your graphic design skills- we hope that you have picked up some great new tips and tricks :)
I’m sorry to hear that your Double Porter 6 font didn’t appear in Photoshop at first- it can sometimes require you to completely close and reopen Photoshop for your newly installed fonts to appear so I’m so glad that this one is showing for you now!
We hope that you have lots of fun checking out all of our other tutorials Steve and all of our tutorials to come :) Happy designing!
Thank you!
You’re so welcome!
Thank you for the tutorial. Always great to learn something new.
Woohoo we’re so happy to hear that you enjoy picking up new tips and tricks with our tutorials Stephen :)
Another excellent tutorial! Thanks Eric!
Yay we’re so glad that you love this one Andrea!
Thank you so much for the kind words Andrea! I am very happy to hear that you enjoyed it! :)
Thank you so much for coming back to Andrea’s comment Eric, and of course for another superb tutorial :)
Thanks Annabel!