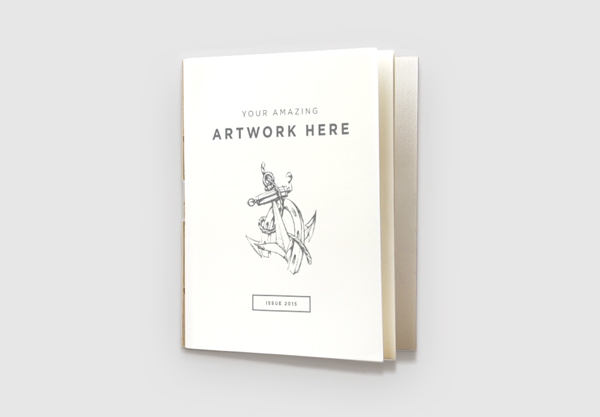
WHAT WE’RE CREATING:
Greetings Design Cutters!
My name is Pam and I’m taking over for Jo as one of your tutorial designers. Jo will be greatly missed and I hope I can be just as big of an inspiration as she has been. They are definitely big shoes to fill, but I can’t wait to get started.
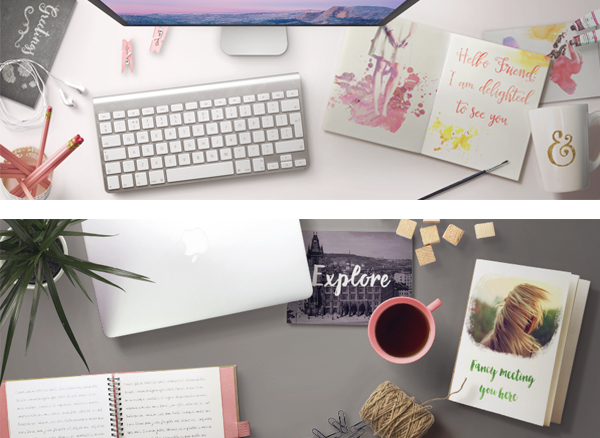
For this tutorial, I thought I would show you how mock-up items can be used in a fun, unique way outside of portfolio and work-related use. To do this, we are going to be creating two different social media headers- one for Twitter and one for Facebook. I implore you to take the info from this tutorial and make it your own. There is no better way to show off your personality and style than a customized scene with your design!
Quick note: In this tutorial, the term “clipping” or “clipped layer” is used a few times. This means that the layer is only visible/applies to the layer directly below it. You can very quickly do this by holding ‘Alt’ down on your keyboard and clicking between the two layers. Here’s a quick demonstration.
Let’s get started!
Follow along with this tutorial: Download the freebies
As always, we have an amazing freebie for you to enjoy. Thanks to our designers we have a huge assortment of individual scene items, textures and vectors. We’ve also included a link to download the .psd source files for this tutorial, so that you can use our source files as templates to create your own social media cover images.
Remember, this freebie is just a tiny sample taken from this great bundle: The Beautifully Artistic Designer’s Kit (1000s of Creative Resources) at just $29 (a massive 91% Off). This vast assortment of artistic resources includes an enormous variety with everything from fonts to vectors, textures, mock-up items, actions, brushes and more! There is definitely something for every designer, so don’t miss out!

Step 1:
Once you have downloaded your huge freebies pack, we can begin!
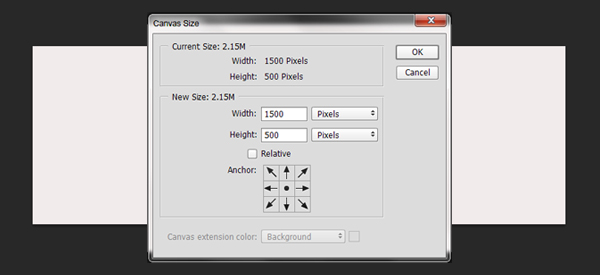
Open up Scene – 2400×1600@72dpi from Roman Jusdado in Photoshop. We are going to need to resize the canvas space to fit the official Twitter header size. From the main menu, go to Image > Canvas Size and input the following pixel dimension:
Width: 1500px
Height: 500px
Step 2:
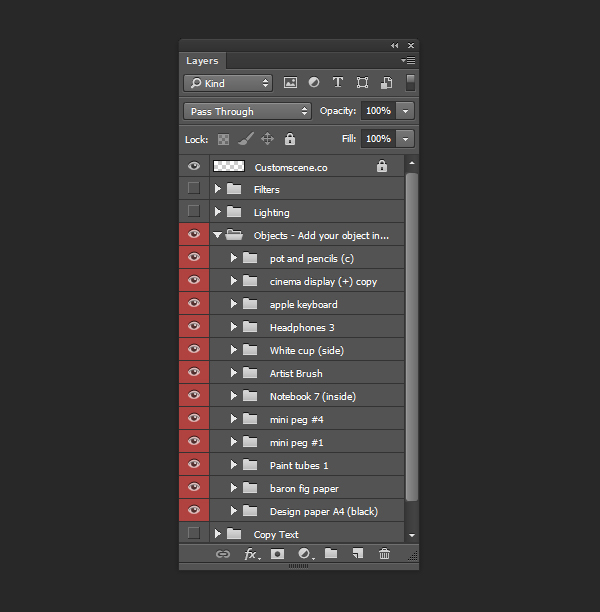
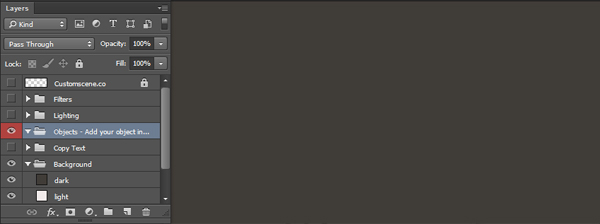
Taking a look in the Layer’s panel, you’ll notice there are groups already in place to help us create our scene. For now, we can hide the “Filters”, “Lighting” and “Copy Text” groups. The group we are going to be focusing on is “Objects- Add your object in this folder.” Currently the folder is empty, but we are going to fix that by moving over our chosen objects.
Open up Apple Cinema Display 27 (+).psd

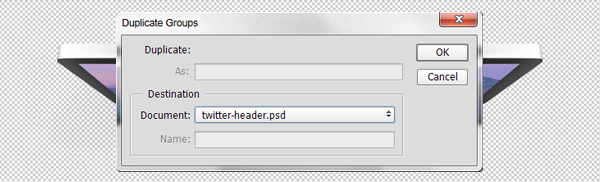
In the layers panel, there are two groups that we want to copy over into our twitter header file. Select both the “cinema display (+)” and “cinema display base” groups, then right click. Select “Duplicate layers.” When the pop up appears, choose your twitter header file from the drop down menu.
Now, when you switch back to your original file, the two groups will be placed somewhere in your layers panel. Move the two new groups into the objects group. Make sure you always copy the full group, as we will need all of the layers to add our designs later.
With the groups selected, hit ctrl/ cmd + T to activate transform and use the corners to scale the computer screen. If you hold shift while scaling, it will prevent your layers from becoming warped while you size them. I scaled and placed my screen as follows:

Keep in mind that my placement is merely a suggestion; I encourage you to try your own layout to make your header reflect you as a designer!
Step 3:
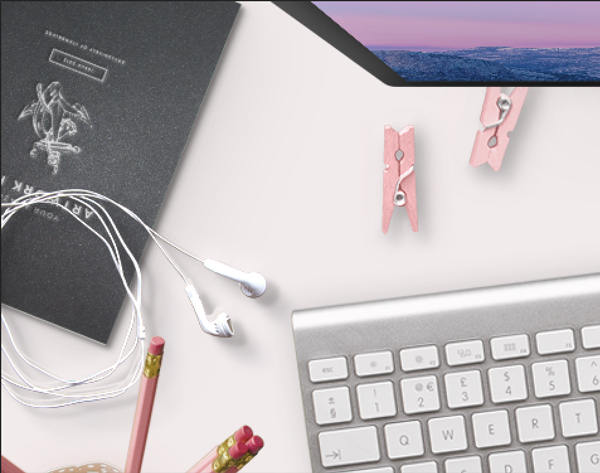
Now that we’ve gone into some detail on how to duplicate your separate objects into the Twitter header file, I’m going to show you which ones I picked out and where I placed them. This is the perfect time to take a look through your bundle and see if there are any other objects that you prefer!
From our freebies folder, I opened the following PSD files by Roman Jusdado and copied over the groups:
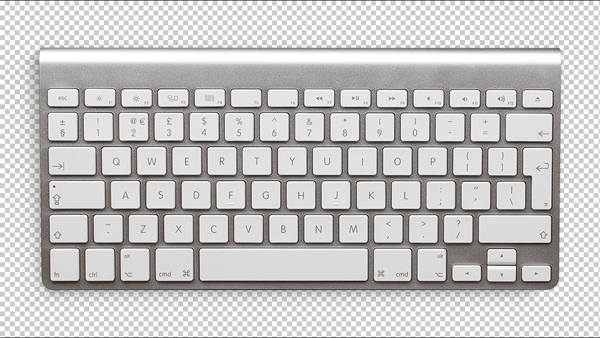
Apple Keyboard.psd
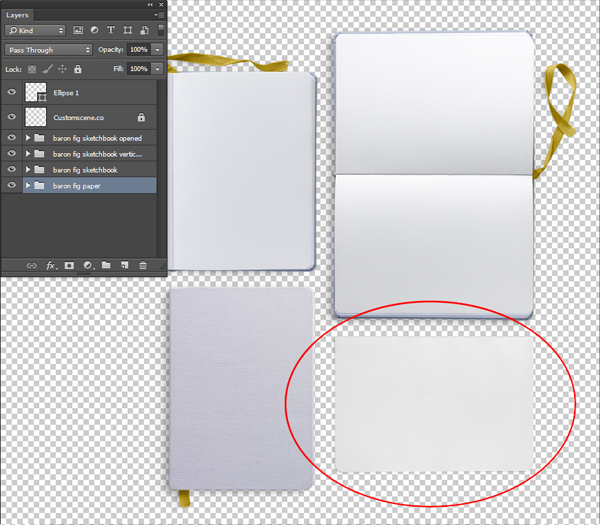
Inside the file Baron Fig Sketchbook (+) I took only the group “baron fig paper” from the bottom right corner.
Pot and Pencils (c)

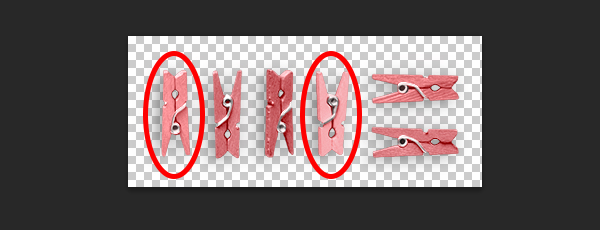
I also grabbed “mini peg #1” and “mini peg #2” from Mini Pegs (c)
So far, this is how I scaled and placed my items in the scene. The only thing to be wary of when sizing is making sure each item looks proportional (for example, your mini pegs wouldn’t be larger than your pencils).

Step 4:
For the rest of our duplicated objects, I used the following freebies from Item Bridge.
007_Artist Brush

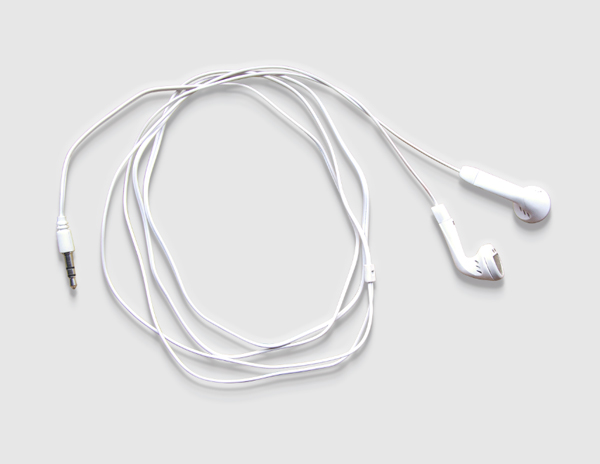
038_Headphones 3
048_Paint tubes 1
058_Notebook 7 (inside)
And finally, duplicate the group from 014_Design paper A4 (black).

I arranged my objects in the following manner:

You may need to move your groups within the objects folder so that the correct objects overlap. This is the order I placed mine in:
Step 5:
Now that we have all of our objects in place, I’m going to show you one by one how I edited my groups to make this scene my own.
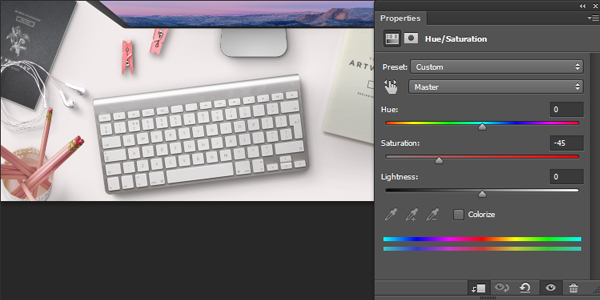
I wanted my scene to have a pastel, washed out feel, so to start off I added a Hue/Saturation adjustment layer with the saturation at -45 and clipped it to my “pot and pencils (c)” group.
Step 6:
For our first mock-up change, we are going to add a gold foil design to our cup. To do this, open up the “White Cup (side)” group and double click on the smart object thumbnail to the left of the “White Cup (side)” layer. This will open up a PSD file in another tab where we can place our flat design.
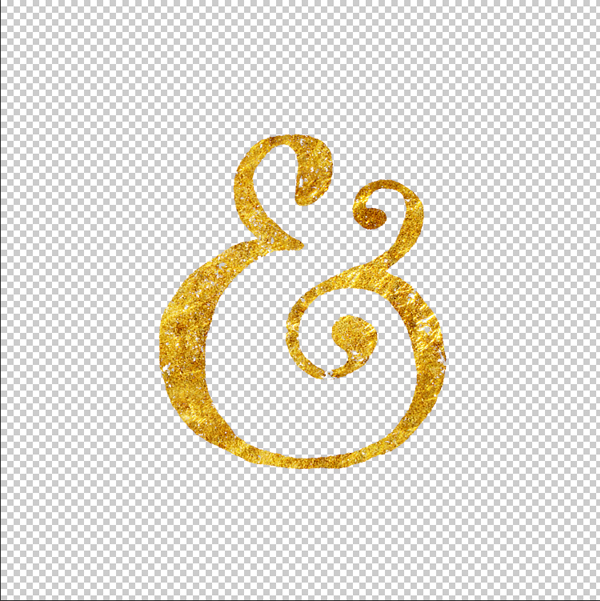
I love using type as a decorative element, and luckily this bundle has some gorgeous type mixed in with the other artistic elements. From the freebies folder, take the following “&” symbol:

Before we place our “&” into the real file, go to retro-supply-co > Hot Foil Kit > Smart PSD’s and open up Hot_Foil_3000x3000pixels.
NOTE: This Hot Foil Kit is part of the wider bundle, and not part of the freebie pack that accompanies this tutorial.

In the layers panel, double click the “Double Click to Add Your Work” layer. Another smart object file named “PlaceHolderArtwork1” will open up. Hide the skull layer and place the “&” sign here.

Save and close the file, returning to Hot_Foil_3000x3000pixels. Just like magic, we’ve got a cool foil look to our type!
Under the “Foils” group in the layer section, there are many different textures to try. I chose “Gold Flake.”
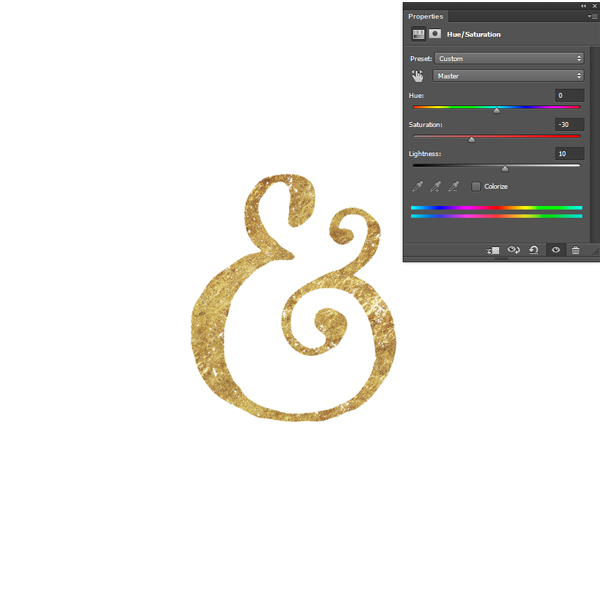
Once you are satisfied with your texture, make sure your background layers are hidden and select the new “&” sign with your marquee tool. Then, go to Edit > Copy Merged.
Paste the “&” into the smart object PSD. I kept mine pretty small, but the great thing about smart objects is you can save the file, close it, and reopen it from the original file with all of your layers still intact. If you ever feel like changing up a design later on, it’s that easy!

To keep with my pastel theme, I added a Hue/ Saturation adjustment layer with the Hue at -30 and the Lightness at +10. Then, I saved and closed the smart object PSD.
Our first mock-up item is finished! I love mock-up files with smart object layers because it takes all of the meticulous work out of Photo-shopping designs. Just a few clicks of a button and we have a realistic looking cup with any design we can think of!

Step 7:
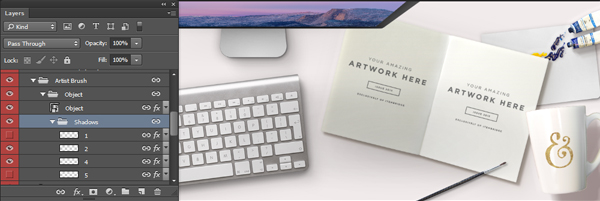
Open up the group “Artist Brush” in our layers panel. Under that group is another called “Object” and a sub group called “Shadows.” In the “Shadows” group, I turned off the visibility on layers 1 and 5. This way, the brush looks like it sits right on the page and not above it.
Step 8:
For our next object, we are going to work in the “Notebook 7” group. Let’s start with the page on the left. Double click on the first smart object thumbnail in the group. It will open up a file in another tab that looks like the following:
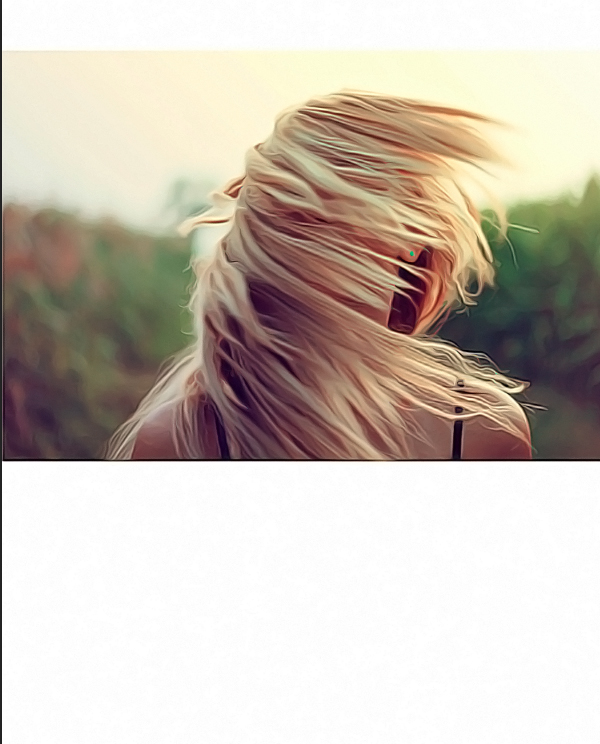
Using the watercolor painter effect from Ozono, we are going to take a photo and create a watercolor image.
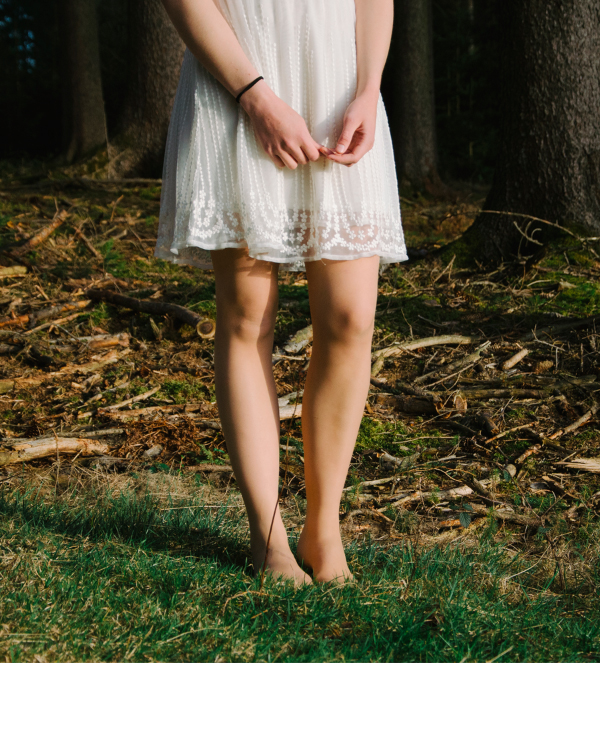
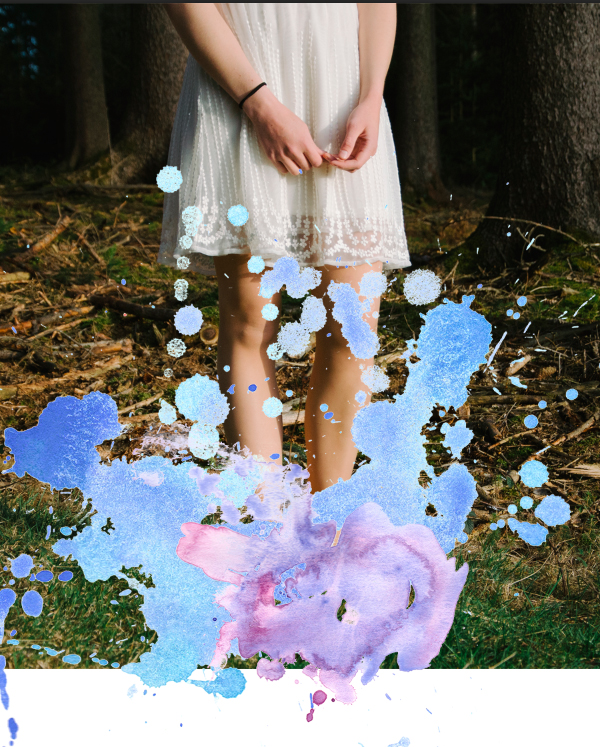
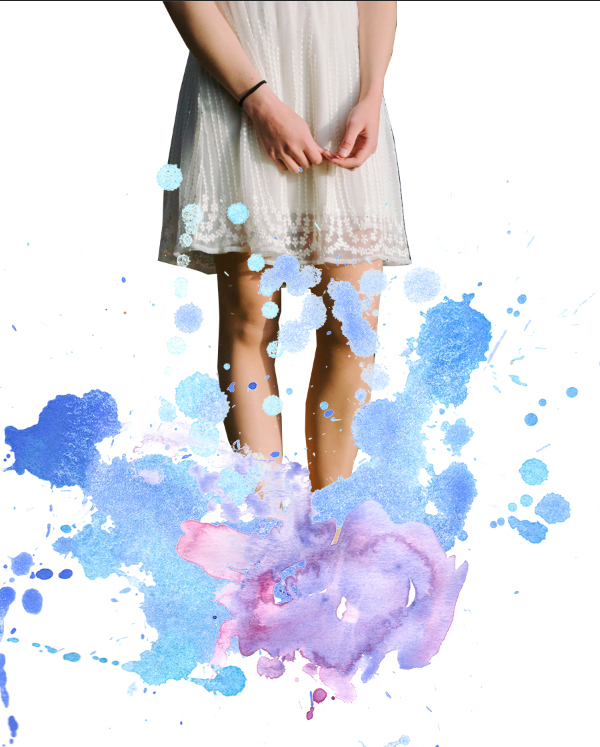
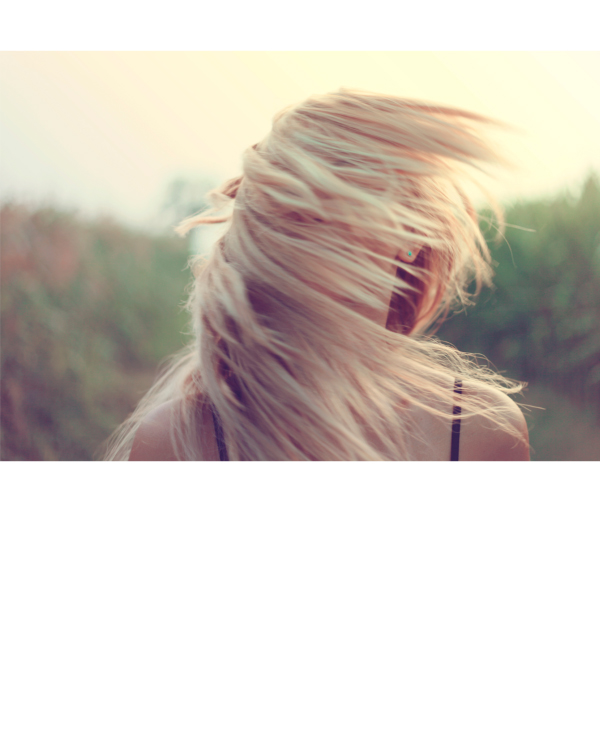
This is the perfect place to put a picture of you or maybe something artistic you have photographed. For tutorial purposes, I took a beautiful photo of a girl in the woods from Pexels. Copy the image and paste it into the smart object tab we just opened. Scale so that the girl is centered and bleeds off the top of the page.
Before applying the action, I wanted to add a watercolor edge to the photo. To do this, place Denim splat from our freebies folder in the same area as the following example:

Now, place Amethyst blob from our freebie folder so that it engulfs the area around her feet. Merge the two watercolor layers together.
For the next step, we want to create a mask so that we can get rid of excess background. Using your favorite of the selection tools, select the part of the girl that is not covered by watercolor. I personally like using the polygonal selection tool, but for our messy purposes the magnetic lasso tool is also a good option.
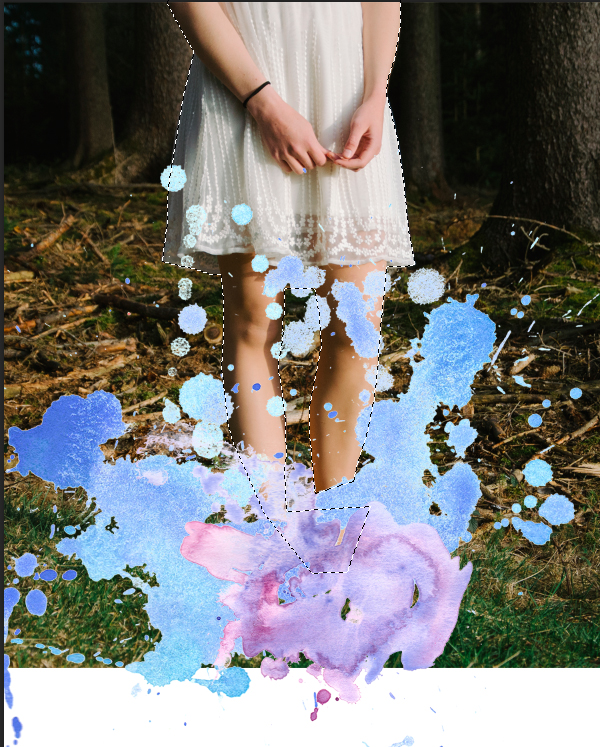
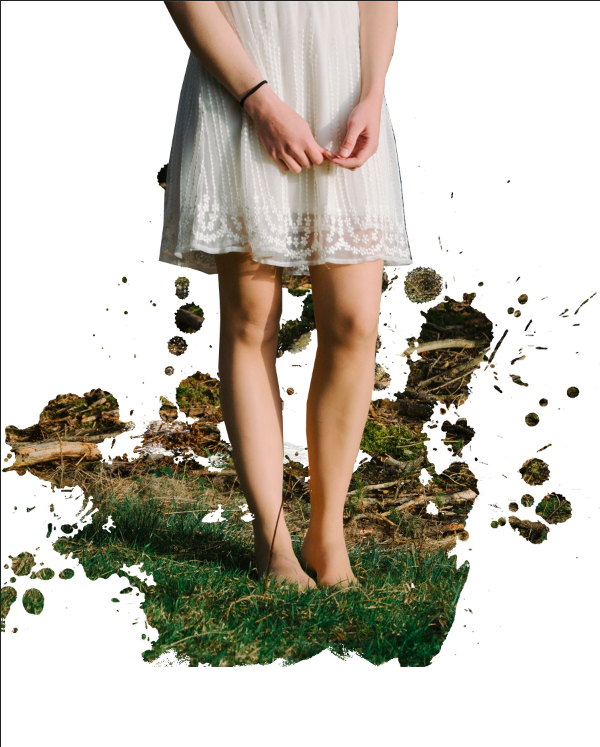
Once you have the area you want, click the “add layer mask” button at the bottom of the layers panel (making sure that the photo layer is selected within the layers panel). This will create a mask hiding the excess background but not fully deleting it in case you want to make more edits.
Ctrl/ cmd + click the thumbnail for the merged watercolor layer in the layers panel. This will select the entire area that the watercolor fills. Now, hide the watercolor layer and select your photo’s masked layer.
You can use black, white or gray to either restore photo or remove its visibility within a mask. Using the brush tool, select the color white and color within the selection we made of the watercolor. This will restore the photo only within the watercolor’s outline, creating a painterly edge.
Now for the magical part- the watercolor action! In your actions panel, hit the drop down button and click “load actions.” Locate the file watercolor painter.atn by going to ozono > Watercolor-Professional-Painter. Once you have selected this, the action will show up in your actions panel in a folder titled “watercolor painter.” Now, all you have to do is click on “Start Here” and press the play button.
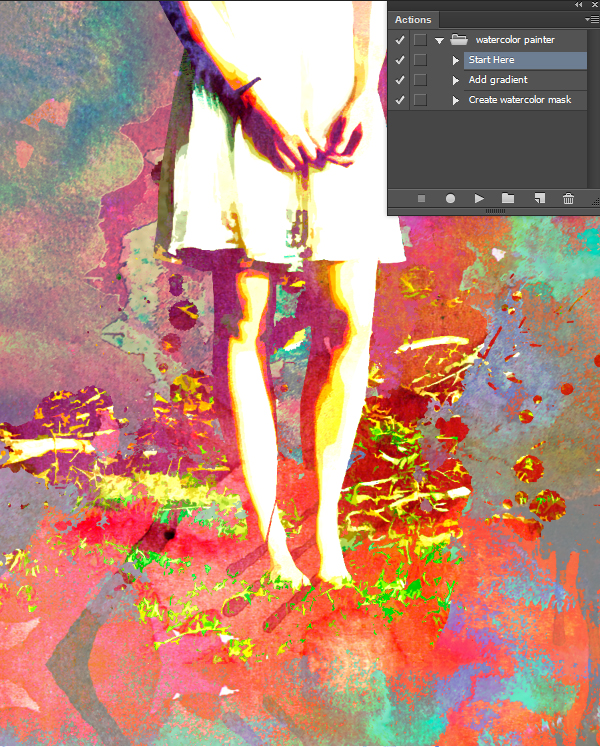
The resulting image will be a crazy cool photo with a 70’s vibe. As much as I love it as is, it doesn’t match with the style within the rest of my scene, so I’m going to show you how to mess with the options and make it your own.
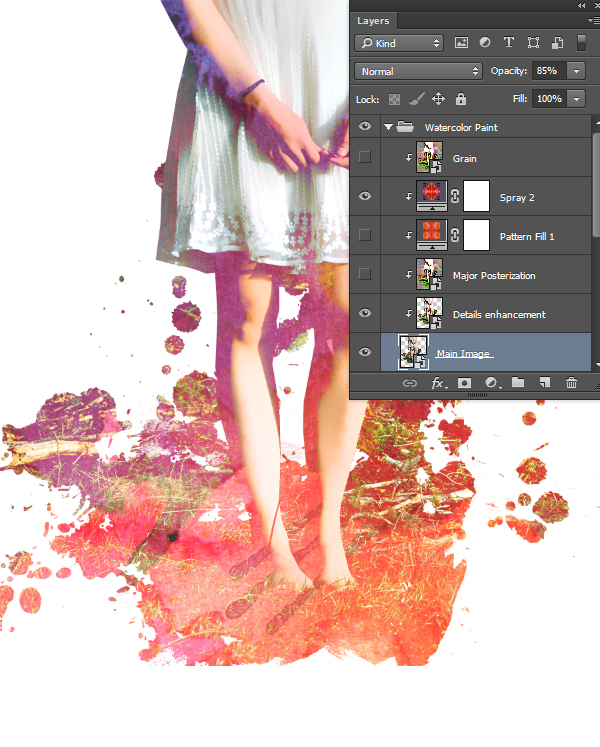
First, we only want the area visible that we cut out. To do this, clip all of the effects to the “Main Image” layer that was created during the action.
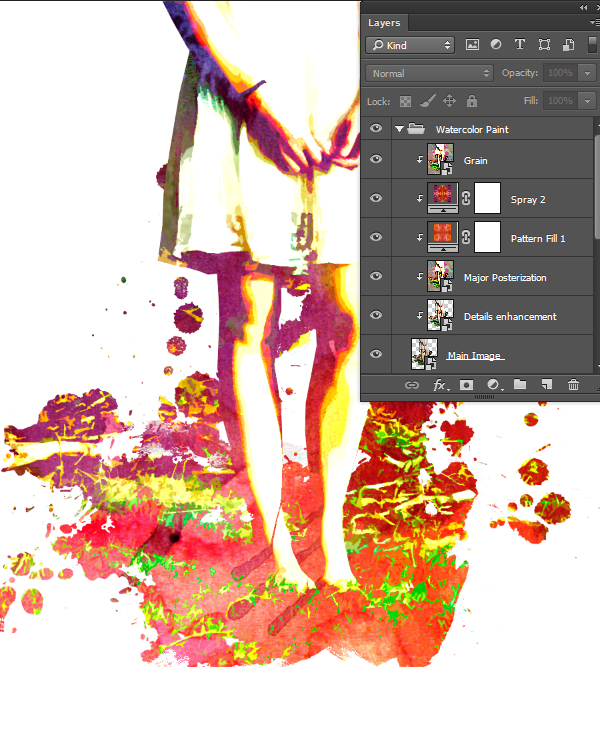
I ended up hiding my “Grain,” “Pattern Fill 1,” and “Major Posterization” layers. Then, I set the opacity of my “Main Image” at 85%.
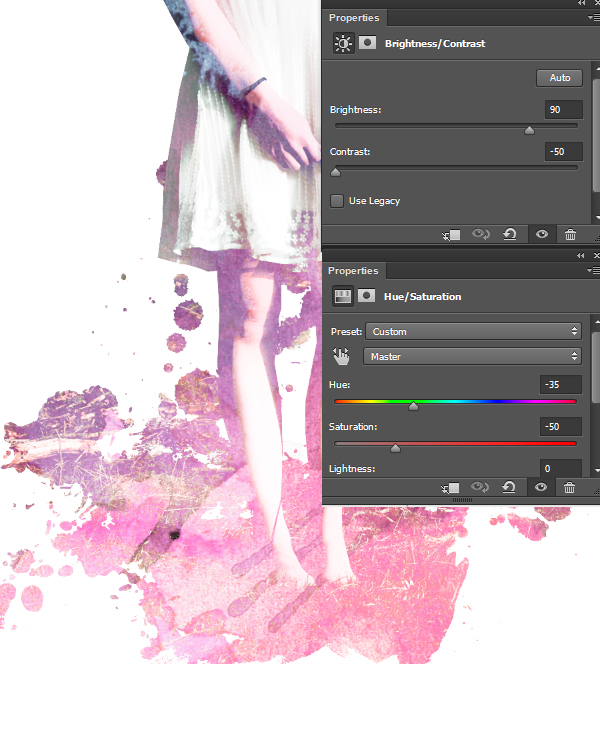
On top of all of my layers, I created a Hue/ Saturation adjustment layer with the Hue at -35 and the Saturation at -50. Then, I added a Brightness/Contrast adjustment layer with the Brightness at 90 and the Contrast at -50.
Finally, save the file and return to the Twitter Header.

The result looks like a freshly painted work of art! It is easy to apply this technique to any photo. Simply use water color shapes to mask out the background and apply the action to add some immediate character to your photos.
Step 9:
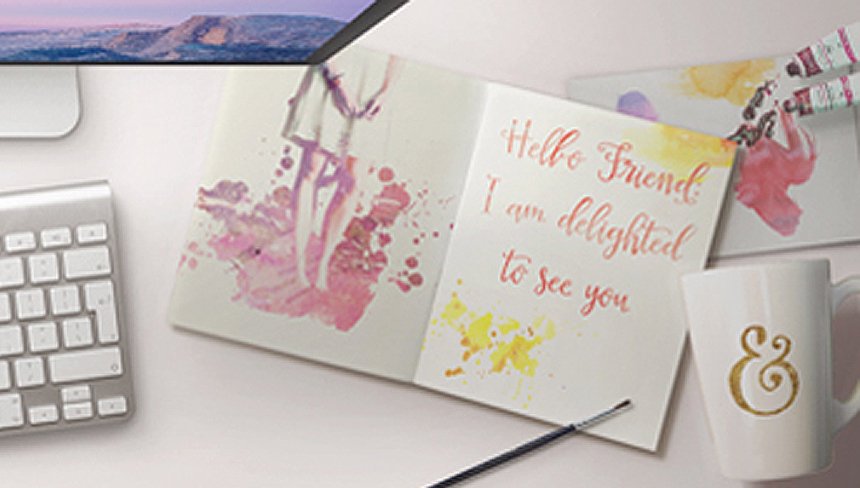
Double click on the smart object thumbnail in layer “Notebook 7 (page 2).”
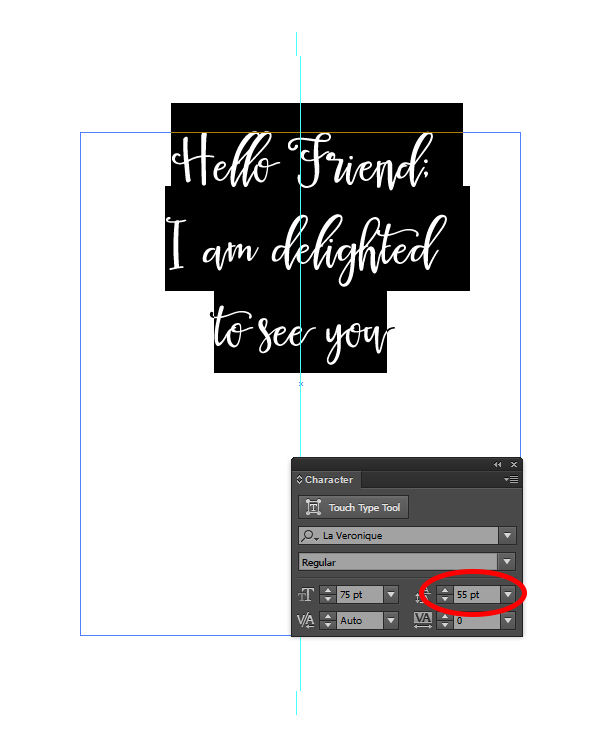
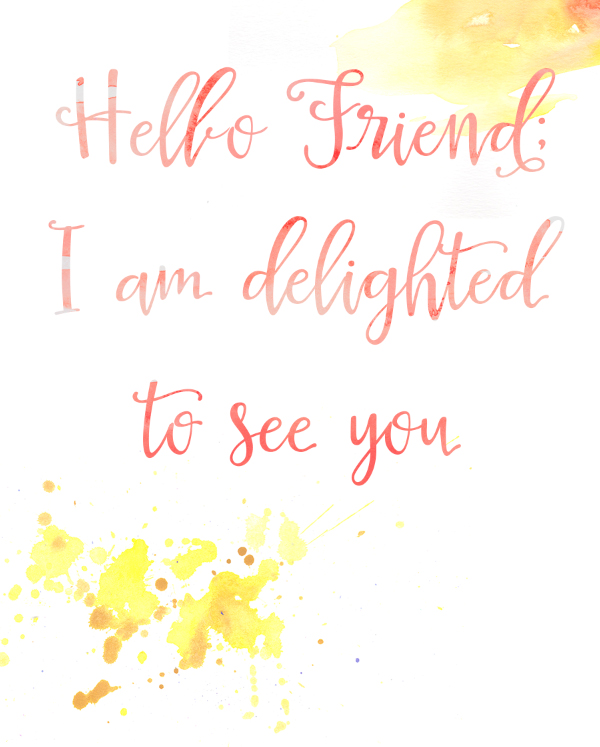
For the right side of the notebook, I wanted to put a greeting to welcome viewers to my Twitter. I chose to use the font La Veronique because it has a lot of beautiful glyphs to choose from. Since I wanted to look through and pick my favorite letters, I opened up a new document in Illustrator and typed my phrase, “Hello Friend; I am delighted to see you” in 75 pt centered type.
NOTE: This font is part of the wider bundle, and not part of the freebie pack that accompanies this tutorial.
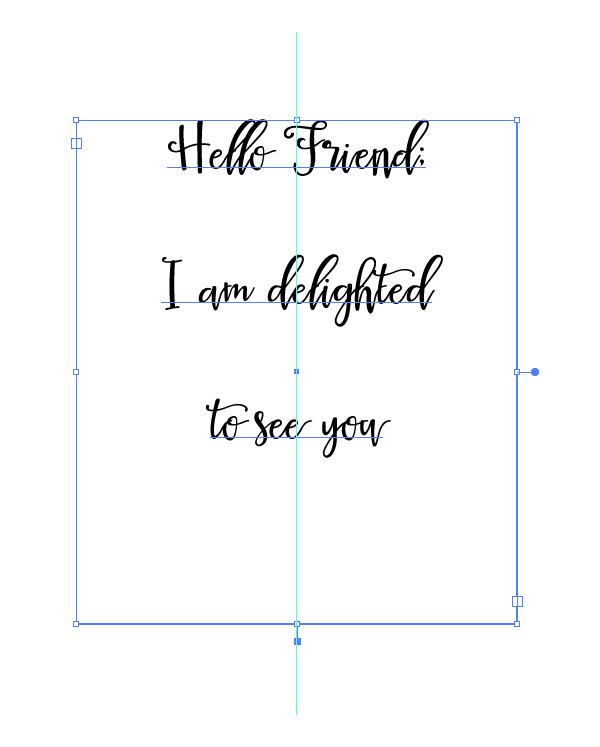
To make the lines of type closer together, open up the Character panel by going to Window > Type > Character and change the leading to 55pt.
Open up the glyph panel by going to Type > Glyphs. Then, highlight the letter you want to change and find your favorite replacement. Double click the new letter in the glyphs panel to change it out. This is a great way to make the type your own!

Now that we have customized our type, copy and paste it into the smart object for Notebook 7 (page 2), scaling to fill the top portion of the page.

Next, place -Buff wash.jpg from our freebie file above our type and create a clipping mask. Scale and move the wash until it is covers the majority of the type.

Since our type is so light, apply a Hue Saturation layer with the following attributes:
Hue: -40
Saturation: 20
Lightness: -10

Next we are going to add some decoration! Pick your favorite splats and blobs from The Co-op or use the ones from the freebie, Daffodil splat.png and Amber blob.png. Place them so that they frame the type.
Finally, save the file and return to your Twitter Header. Now the notebook looks like a customized work of art!

Step 10:
For the next item alterations, I added a Hue/ Saturation adjustment layer and clipped it to one of my mini pegs. Then, I duplicated the adjustment layer and clipped it to the second peg. Now, they have the same light coloring as the notebook we just edited.

Step 11:
Next on our item list is our paint tubes. Since we don’t have any blue anywhere else in our screen, add a Hue/ Saturation layer with the following attributes:
Hue: 120
Saturation: -15
Lightness: 30

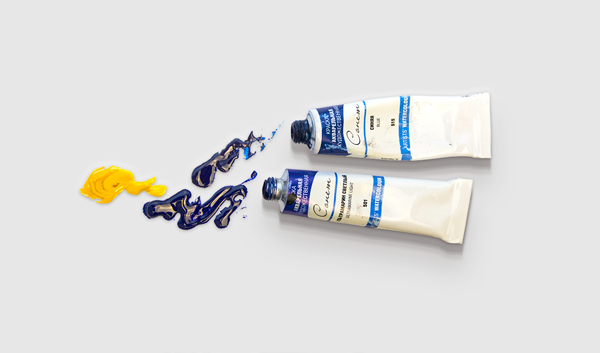
Next, we want to remove the paint glob that’s now showing up as a bright neon turquois. Double click the smart object thumbnail under the “Paint tubes 1” group titled “Object.” A separate window will open of the paint tubes.
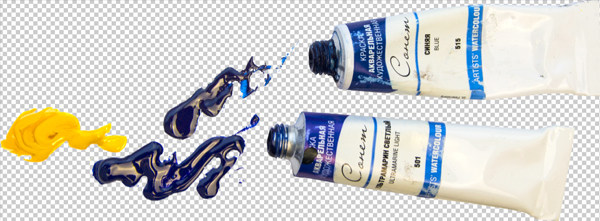
Our goal is to get rid of the yellow paint blob, which can be done in many ways. Because it is so close to the blue blob, I used the polygonal lasso tool around it and clicked delete. After you have removed the blob, save and return to the Twitter Header.
As you can see, our blob is gone but there is still a bit of a shadow.
To get rid of the shadow, go into “Shadows” group inside “Paint tubes 1” and turn off shadows 6 and 7.

Step 12:
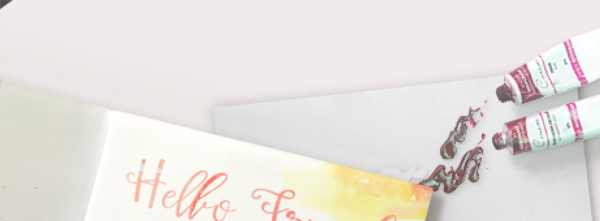
Our next step is to customize the paper that the paint is spilling onto. Under the “baron fig paper” group, double click the smart object thumbnail titled “edit content.” It will open up a new tab titled “mockup.psb.”

Here we are going to place the loose paint images from Studio Denmark. Place the freebies Loose Paint 2, Loose Paint 4, and Loose Paint 5. Since the bottom left corner is covered by our notebook, we only need to arrange them on the upper and right parts of the page.

Now we are going to add texture to really make the paint swatches look real. To do this, place the freebies Buff wash, Muave wash, and Red Velvet wash. Then, clip one to each of the loose paint pngs.
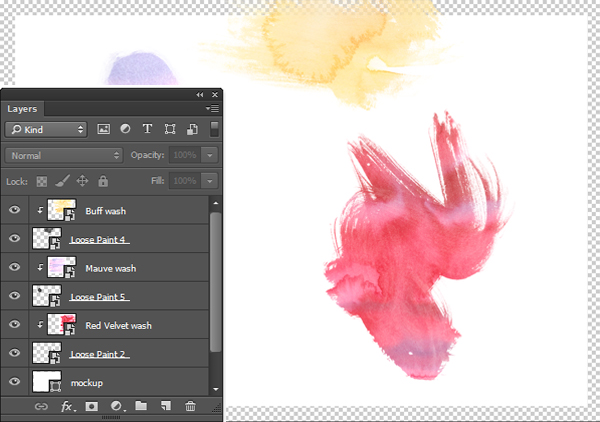
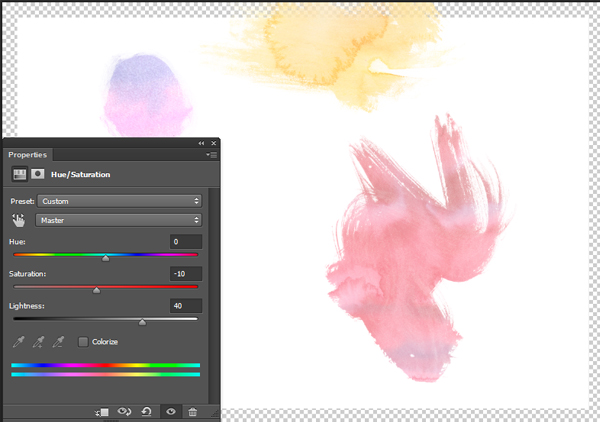
Above my “Red Velvet wash” layer, I created a Hue/Saturation adjustment layer with the Hue at -10 and Lightness at 40. Now that paint swatch is a similar brightness to its counterparts.
Save the file and return to the Twitter Header. We are very close to finishing our new scene!

Step 13:
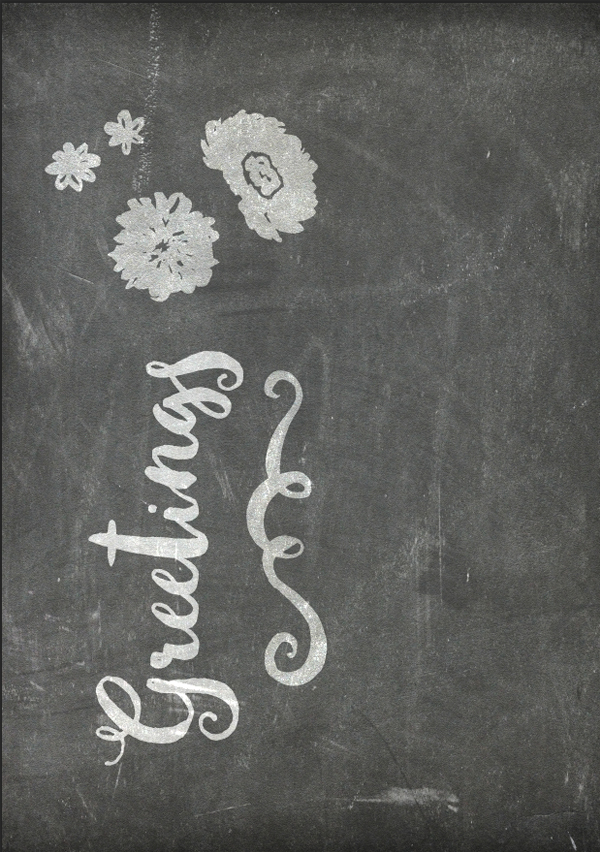
For our final edit, we are going to put our own design on the “Design paper A4 (black)” group. Open up the smart object in the layer “Design paper (black).”
Place the freebie 11×14 Chalkboard 2 and scale to fill the page.
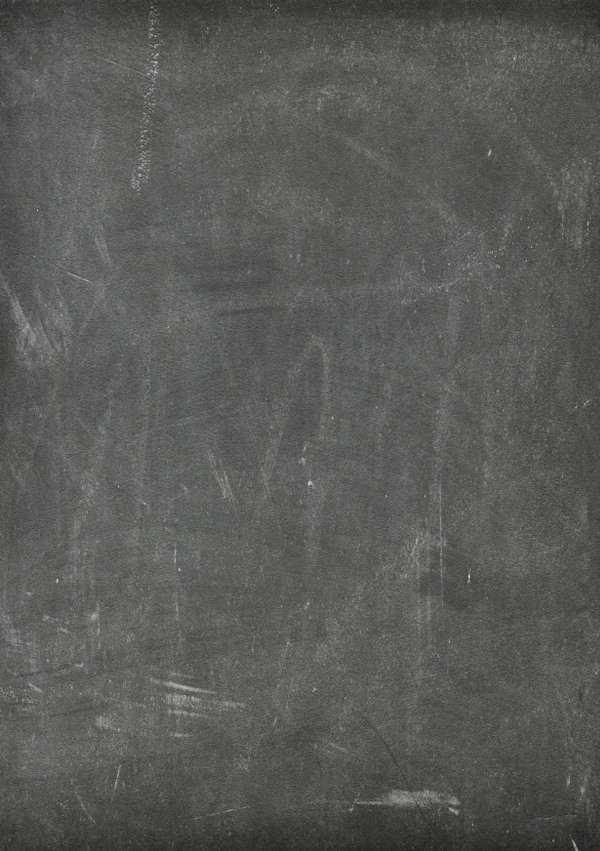
Just like that, our paper is now a chalkboard! Now we are going to place some type. In Sweetgrass Script Regular, type “Greetings” in white 200pt.

Change the blending mode of the type to “overlay.” Our type is still a little too light, so duplicate the layer and set the duplicate’s opacity at 30%.

The placing of type is going to depend on how you rotated your paper in our Twitter Header. Mine is currently upside down and bleeding off the upper page like so:
Because of this, I’m going to rotate my two type layers -90 degrees and place it in the bottom left corner. That way, the headphones won’t cover the message.

To show you a preview, this is what our type would look like if we saved it now:

Before we fix the contrast, we are going to add some more decorative elements. From the freebie file, select the remaining vector elements, change their color to white and paste them in the smart object file.

Arrange the flowers in the empty space next to greeting by rotating and scaling them using the transform tool (ctrl/cmd + T). Then, set their blending mode to overlay.
Next, above all of the layers, add a Brightness/ Contrast adjustment layer with the Brightness at -30 and Contrast at 100.
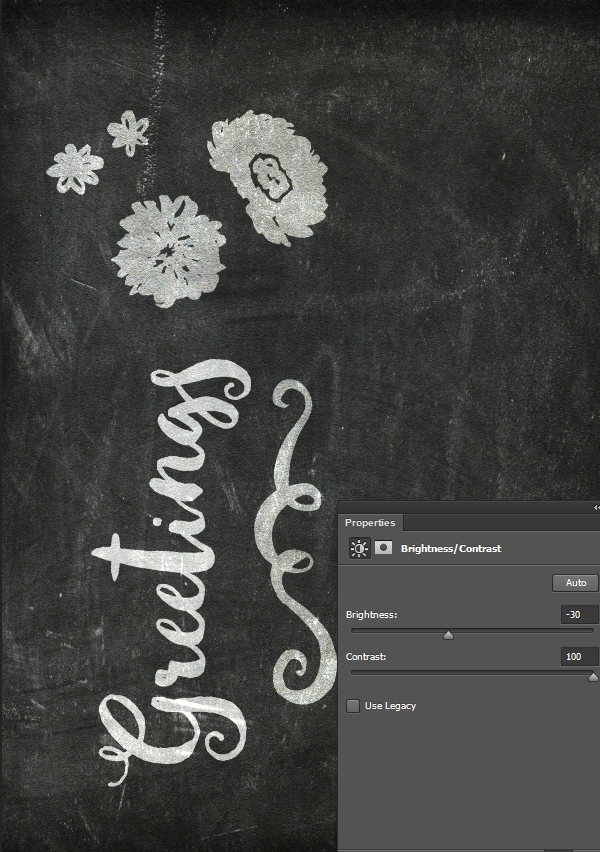
Now, save the file and return to the Twitter Header, which will look like the following:

Step 14:
Now that we have all of our items in place and edited, turn on the “Filter’s” and “Lighting” groups. Feel free to try them all and see which you like best. I chose to turn on “Filter #6.” For lighting, I kept it with the “General Adjustment” and “Top Left” groups on because our shadows point to the right.

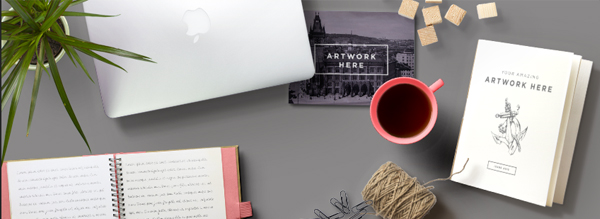
Now we have our finished Twitter Header!
Step 15:
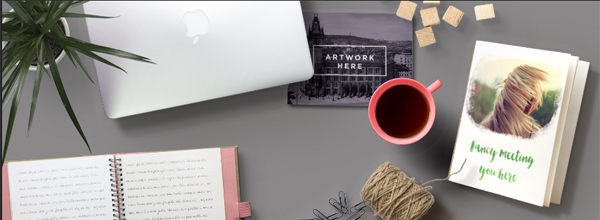
Next I’m going to show you how I created an alternate scene for a Facebook header. Hopefully this gives you a better idea of how you can use the resources in this bundle to take what I’m showing you and really make it your own.
To start, open up another fresh version of Roman Jusdado’s Scene – 2400×1600@72dpi. This time, we are going to change the canvas size to fit the facebook proportions, which are 851px by 315 px.

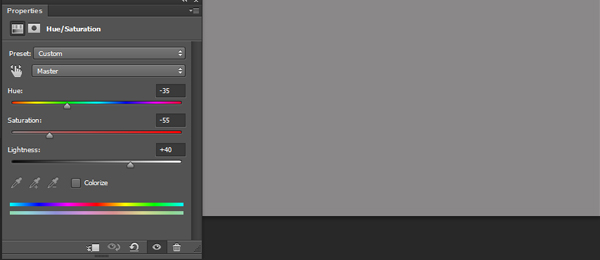
Hide all of the groups with the exception of “Background” and the currently empty “Objects- Add your objects in this folder.” For this header, we are going to be using an altered version of the dark background, so make that one visible in the background folder.
Now, above the “dark” layer, create a Hue/Saturation adjustment layer with the following attributes:
Hue: -35
Saturation: -55
Lightness: +40
Step 16:
Now we are going to add the following items in the same fashion as before (duplicating each group into our Facebook Header file). From Roman Jusdado grab the following freebies:
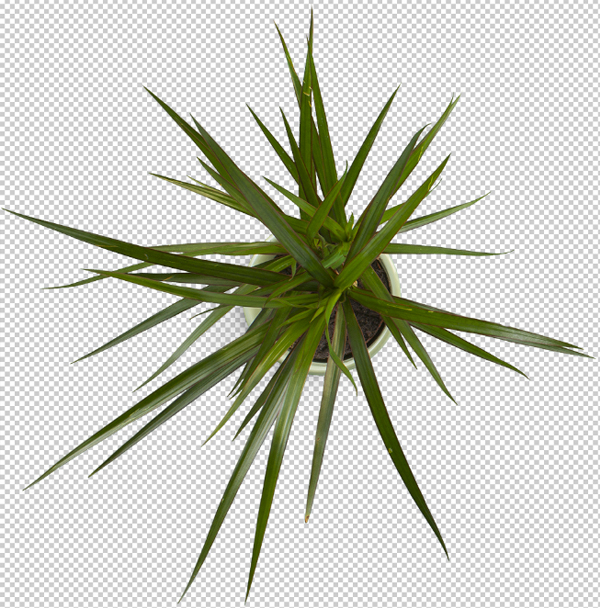
Plant 4
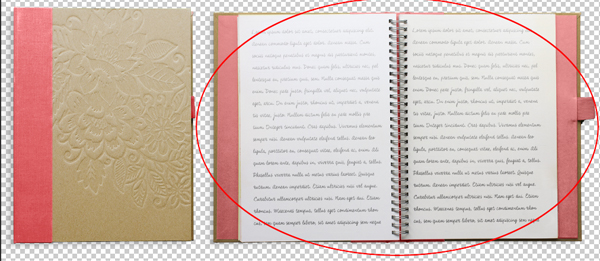
The open diary in Diary (c)
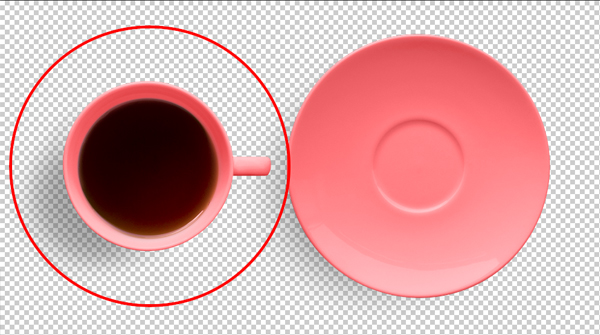
The tea cup from Tea Cup & Saucer (c)
From Item Bridge I took the following:
059_Notebook 7 (page)
042_Postcard (front)
009_Twine string (side 2)

036_MacBook (close)

039_Paper clips

046_Wooden cubes 2
I placed my items in the following layout:
My layers were placed in the following order, so that the items overlapped in the correct manner:

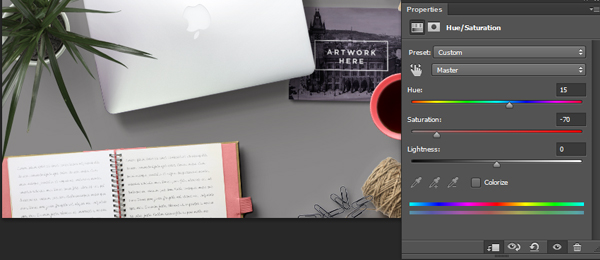
Step 17:
For my first object, the “plant” group, I clipped a Hue/Saturation layer with the Hue at 15 and the Saturation at -70.
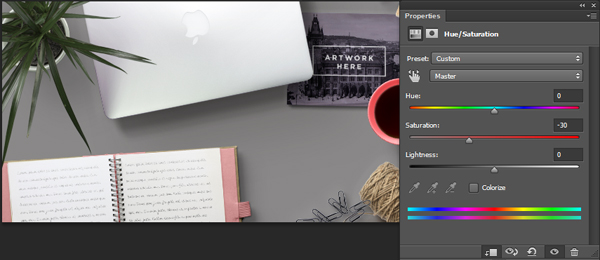
Step 18:
For the “diary opened (c)” group, I clipped a Hue/Saturation layer with the Saturation at -30.
Step 19:
Many of our layers don’t need any editing, so the next we are going to work on is the “Notebook 7 (page).” Open up the smart object.

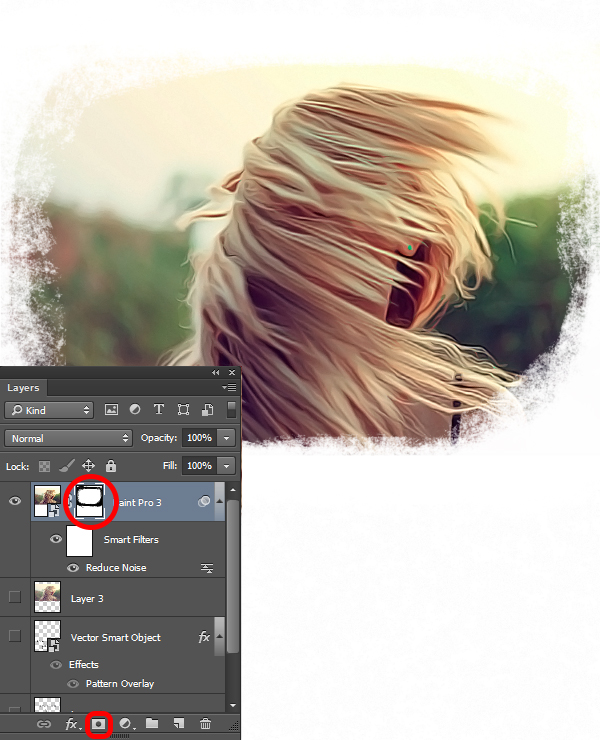
Instead of a watercolor photo, this time we are going to use the Paint Pro 3 action from Ozono to create a painted effect on a photo. First, hide the layer with the pre-programmed imagery.
For tutorial purposes, I’m using another wonderful image from Pexels. Place the photo and scale to fit horizontally in the smart object tab.
Load the action Paint Pro 3.atn into your actions panel like we did with the watercolor image. We have a few options in the actions window for “Paint Pro 3.” I clicked on “02- Paint Pro 3 (2000px Canvas)” and pressed play.
Next, we are going to use one of the wonderful brushes supplied by Alex Dukal. I know what you’re thinking, “don’t I need a tablet you use brushes?” But there are plenty of uses even if you don’t have access to a tablet! In this instance, we are going to use a brush to mask out the edges of our photo and make it even more painterly.
NOTE: This brush is part of the wider bundle, and not part of the freebie pack that accompanies this tutorial.
With the brush tool selected, click on the drop down menu and navigate to settings (the gear icon). From the drop down menu, choose “Load Tool Presets.” Then, locate AD_The-Cartoonist-Brushes_V1.0.tpl by going to alex-dukal > The-Cartoonist-Brushes. Clicking will load all of the brush presents into your tool preset picker.

Now that we have our brushes, create a layer mask linked to our photo. From our new list of brushes, choose “57. AD Cthulhu 100.” Using the color black, trace around the image to mask out the photo
Next, I added another greeting under the photo. In Bonjour Regular 30 pt centered, type “Fancy meeting you here” (or any other greeting of your liking).

To keep with the painting theme, I placed Red Velvet wash and clipped it to the type.

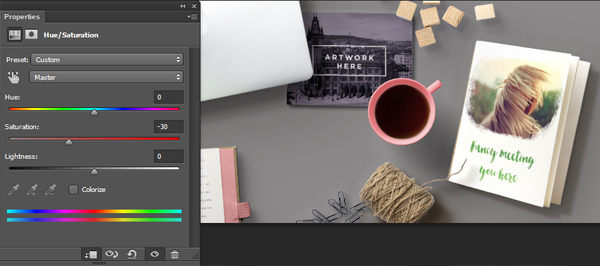
Above the wash, I clipped a Hue/Saturation layer with Hue at 100 and Saturation at -35.

Now, save the smart object and return to your Facebook Header.
Step 20:
For the next object group we are going to be working with “tea cup (c).” To make it look a little more faded, I clipped a Hue/ Saturation adjustment layer to the entire group with the Saturation at -30.
Step 21:
Finally, we are going to add our own type to the “Postcard (front)” group. Double click the smart object thumbnail to open the new tab.
Hide “Layer 1” which includes the “Artwork Here” type. Then, in Evenfall Italic type the word “Explore” in white 100 pt.

Hit save and return to the Facebook Header file.

Step 22:
For the final step, turn on the “Filters” and “Lighting” groups. I chose to use “Filter #6” and the default “Top Left” lighting.
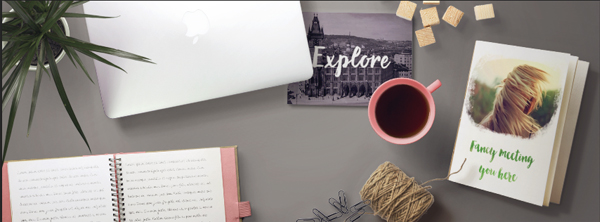
And we’re done!
I hope you enjoyed this tutorial as much as I did creating it! I always have fun using my design resources in new and creative ways. We barely delved into the many amazing resources included in the current deal and I can’t wait to see how all of you find new and exciting ways to use this bundle!
Remember to share your designs on the Facebook page too, as we love being inspired by the way you make these tutorials your own.
Hopefully this tutorial showed you one of the many ways you can take advantage of the resources in this incredible bundle. Remember, you can get this great deal for an enormous 91% off this week! Grab it below, while you still can:
The Beautifully Artistic Designer’s Kit (1000s of Creative Resources)

Is it possible to adjust the item shadows individually or is there just one global setting?
I’m not sure why, but somehow, in the second sample the Mac Book and the wood blocks feel like they are floating a bit above the desk. It might just be me who sees it that way but would it be possible to alter the shadows on those without changing the ones on the rest of the items?
Hey Joanne,
Thanks for the comment- I can definitely help you with this.
You can definitely adjust the shadows individually- if you make sure that the Global Light box is left un-ticked then you can adjust the shadows on each item individually. If this is ticked, all the shadows will move as one.
Let me know how you get on and if you have any more issues, please come back to me :)
Thanks for your response. Guess I will be buying this bundle. I did try to resist, I don’t really need more mockups even though these look cool, but I do want the Alex Dukal brushes and the Aqua Type.
One request for something that I’d really like to see in your next bundle, it is a package of ‘time’. As it is, I just don’t have enough time to use all the resources you pack into each bundle so then I feel guilty buying the next one, but there are always a couple of things I just can’t resist.
Hey Joanne,
Thanks so much for coming back to me! You are very welcome!
It is a super hard bundle to resist- there are some really cool resources in it!
Oh man if I ever come across the solution to more time, rest assured I will share the secret with you! I could use some more time myself lol!!
Thanks so much for all the great information, Pam. I’m feeling really inspired to try lots of new things and get experimenting with my latest pack. I definitely think they should keep you. ;)
Hey Robbie,
Thanks for commenting and for the awesome feedback- I am certain Pam will be so pleased to hear your feedback!
We are so happy to hear that she has inspired you- please do feel free to send over anything that you create as we would love to see it :)
Hello Robbie!
I’m so happy to hear that you were inspired to play around with the latest bundle. I had so much fun digging through it and creating this tutorial for you. Thank you for your comment!
Hey Pam,
Your tutorial has really inspired the community this month :). Awesome job!
Great tutorial! I was looking to do something like this and now I have it all here. Thanks!
Hey Laura,
How fantastic that this tutorial arrived at the right time for you! We are so pleased you enjoyed it!
Thanks so much for taking the time to comment on Pam’s tutorial- we really appreciate your feedback!
Awesome tut!! I am off to go work on my social profile headers, so excited. Thank you!
Hey Libby,
Thanks so much for your lovely comment!
We are so pleased to hear you loved the tutorial- Pam did an awesome job!
Please do feel free to share anything you create- we would love to see your designs!
Thank you so much for this amazing tutorial! One of the main reasons I had purchased this bundle was for the scene creator items and abilities, so this tutorial was super helpful!! :) Thank you!
Hey Angie,
Thanks so much for commenting!
We are so pleased that you enjoyed the tutorial and found it helpful! Thanks so much for your purchase as well- we really appreciate it!
Please do feel free to send over anything you create- we would love to see them!