Today we’re going to show you how to install brushes in Procreate from products downloaded from the Design Cuts Marketplace, though you can also use products from your personal resources. The brushes that we’re going to be using for this example are from the Chalk Dust Brush Kit For Procreate by Ian Barnard, and we’ll be installing a couple of these in different ways so you can see what your options are.
We are offering both a video tutorial and step by step written instructions, so you can choose which way you want to follow along and install your newly purchased brushes in Procreate.
Subscribe to our YouTube channel for more great design tutorials and creative content.
Step by Step Procreate Written Instructions
1. How to download Procreate brushes on iPad from your Design Cuts account?
Once you’ve purchased a set of brushes from our marketplace, log in to your Design Cuts account from your iPad. When you click on your account, you should see the product at the top of your purchased products. We will show you how to download these brushes to Procreate.
Next, go to View Files under the Chalk Dust Brush Kit for Procreate and you’re going to find a link that looks something like this. Tap on it to download all the files.
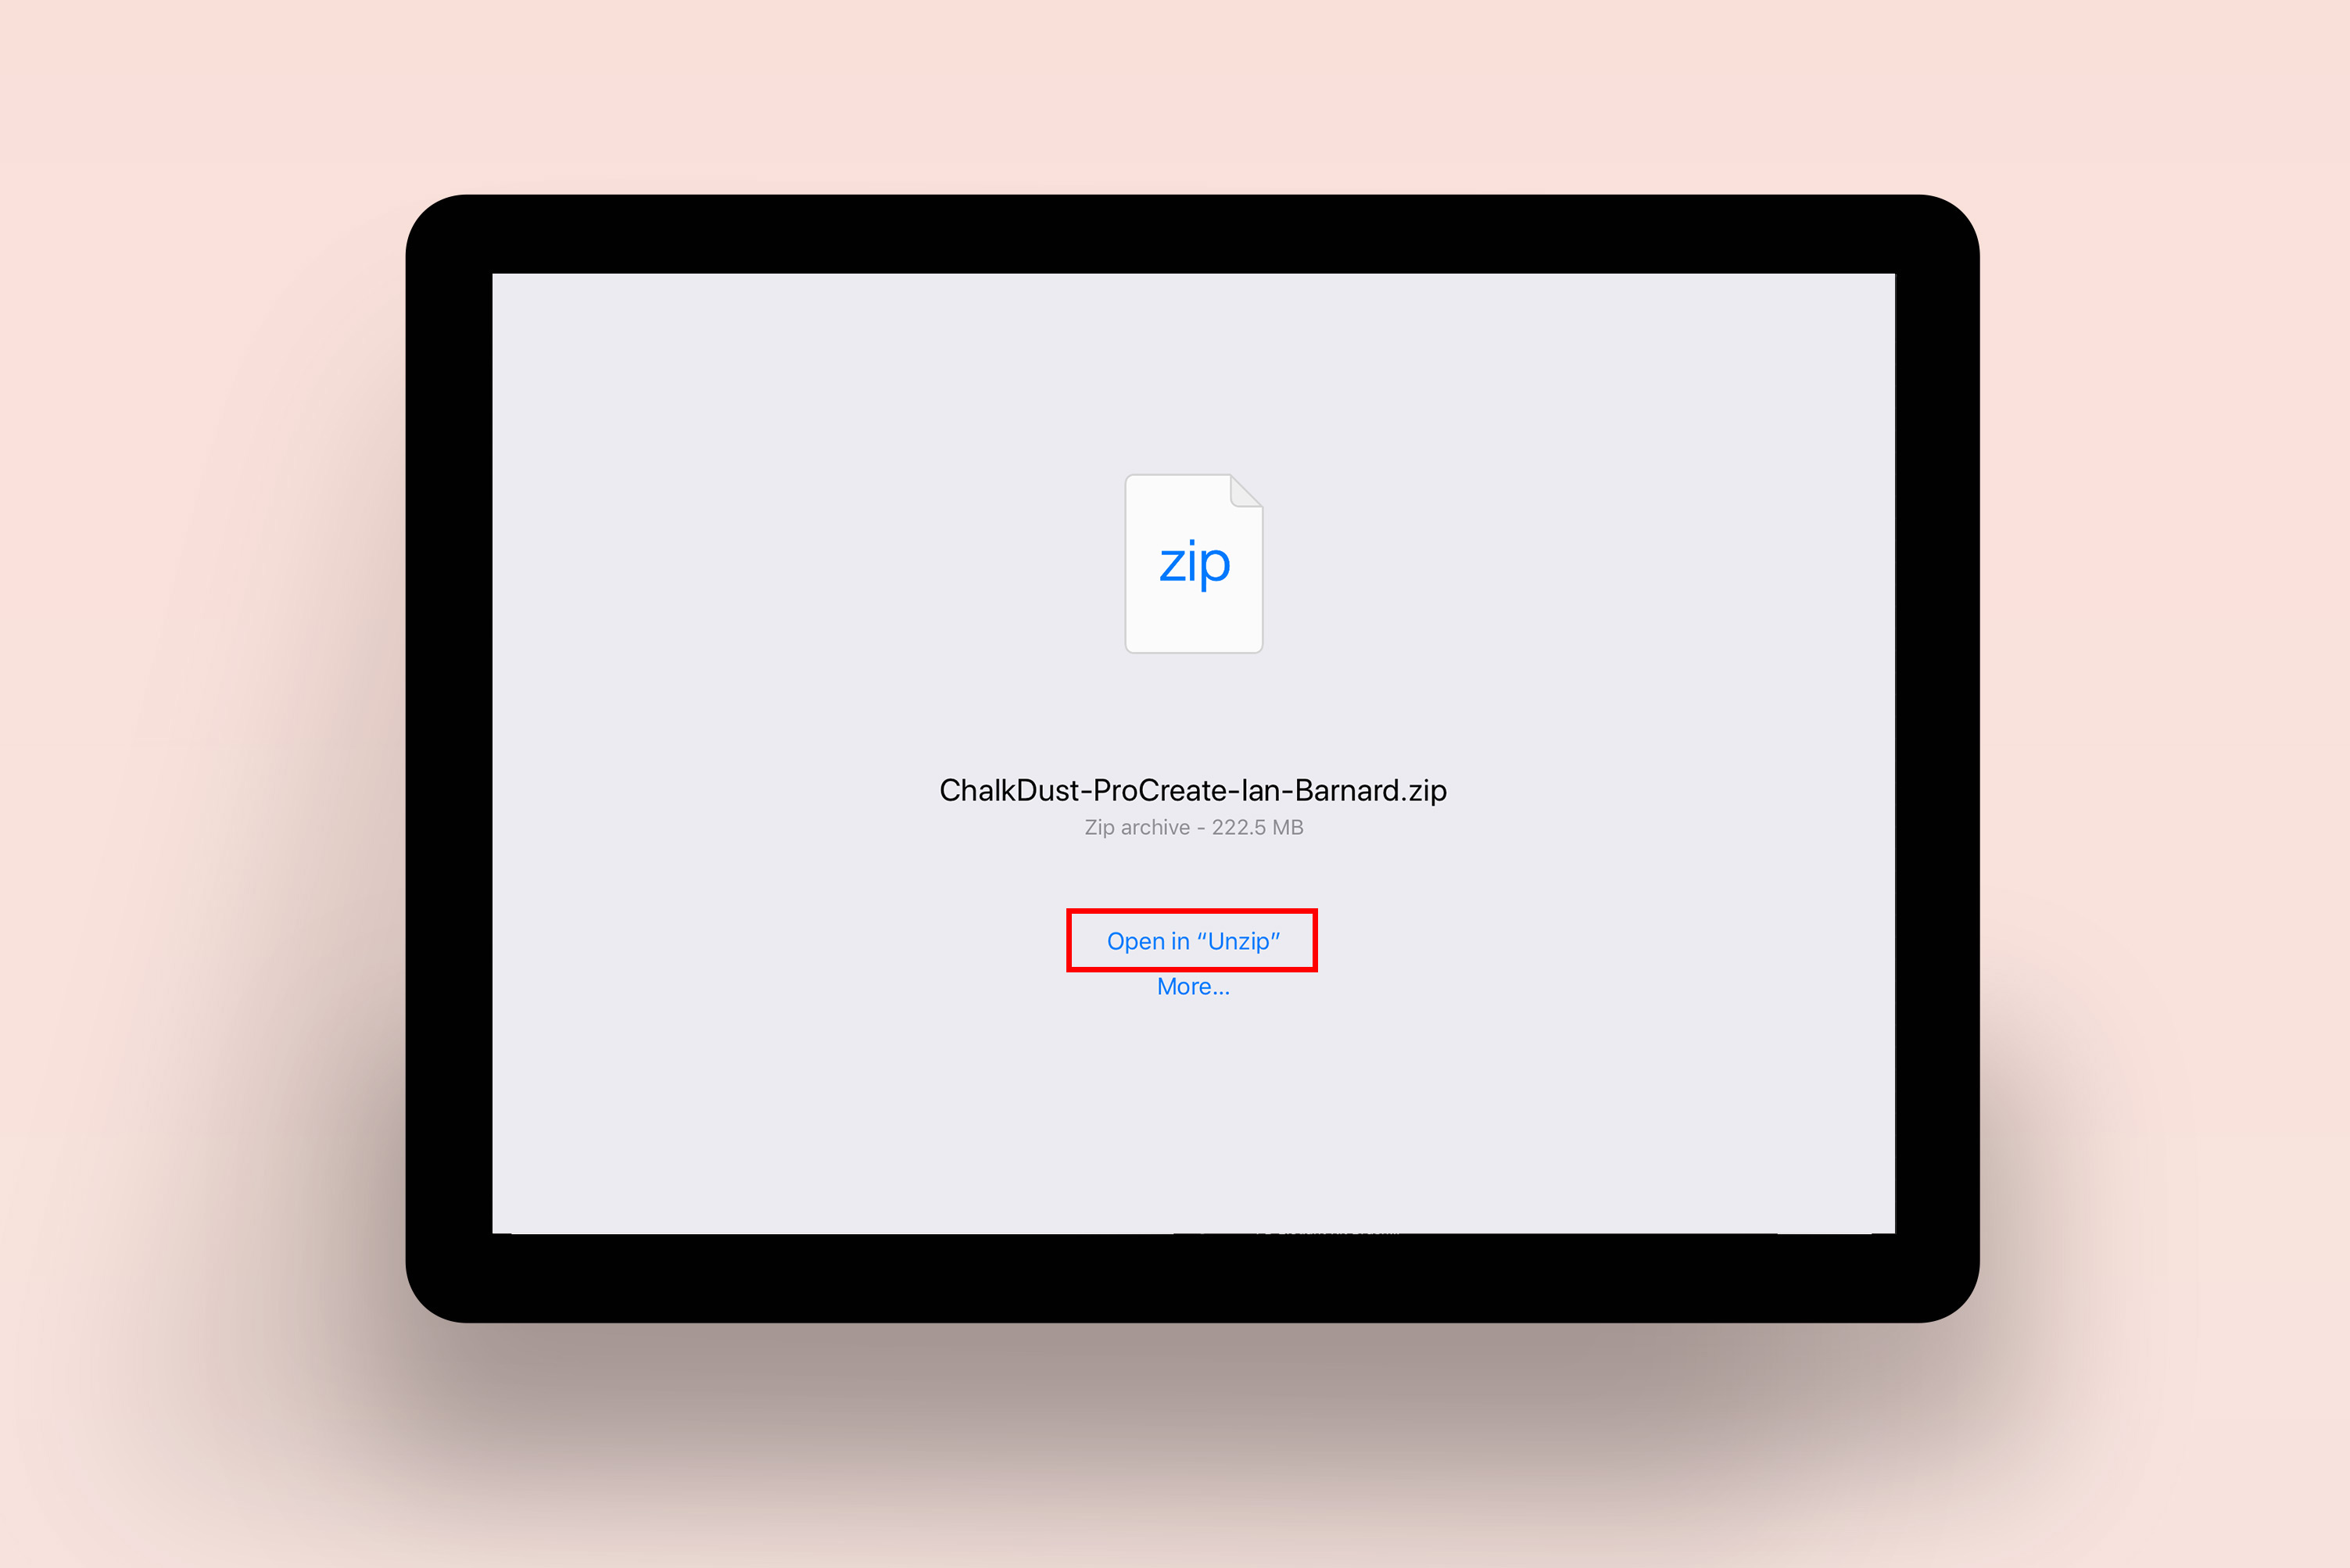
Once you’ve clicked on the button, you’re going to see either a pop-up at the bottom of your screen, or your screen will give you an option for where to open the files.
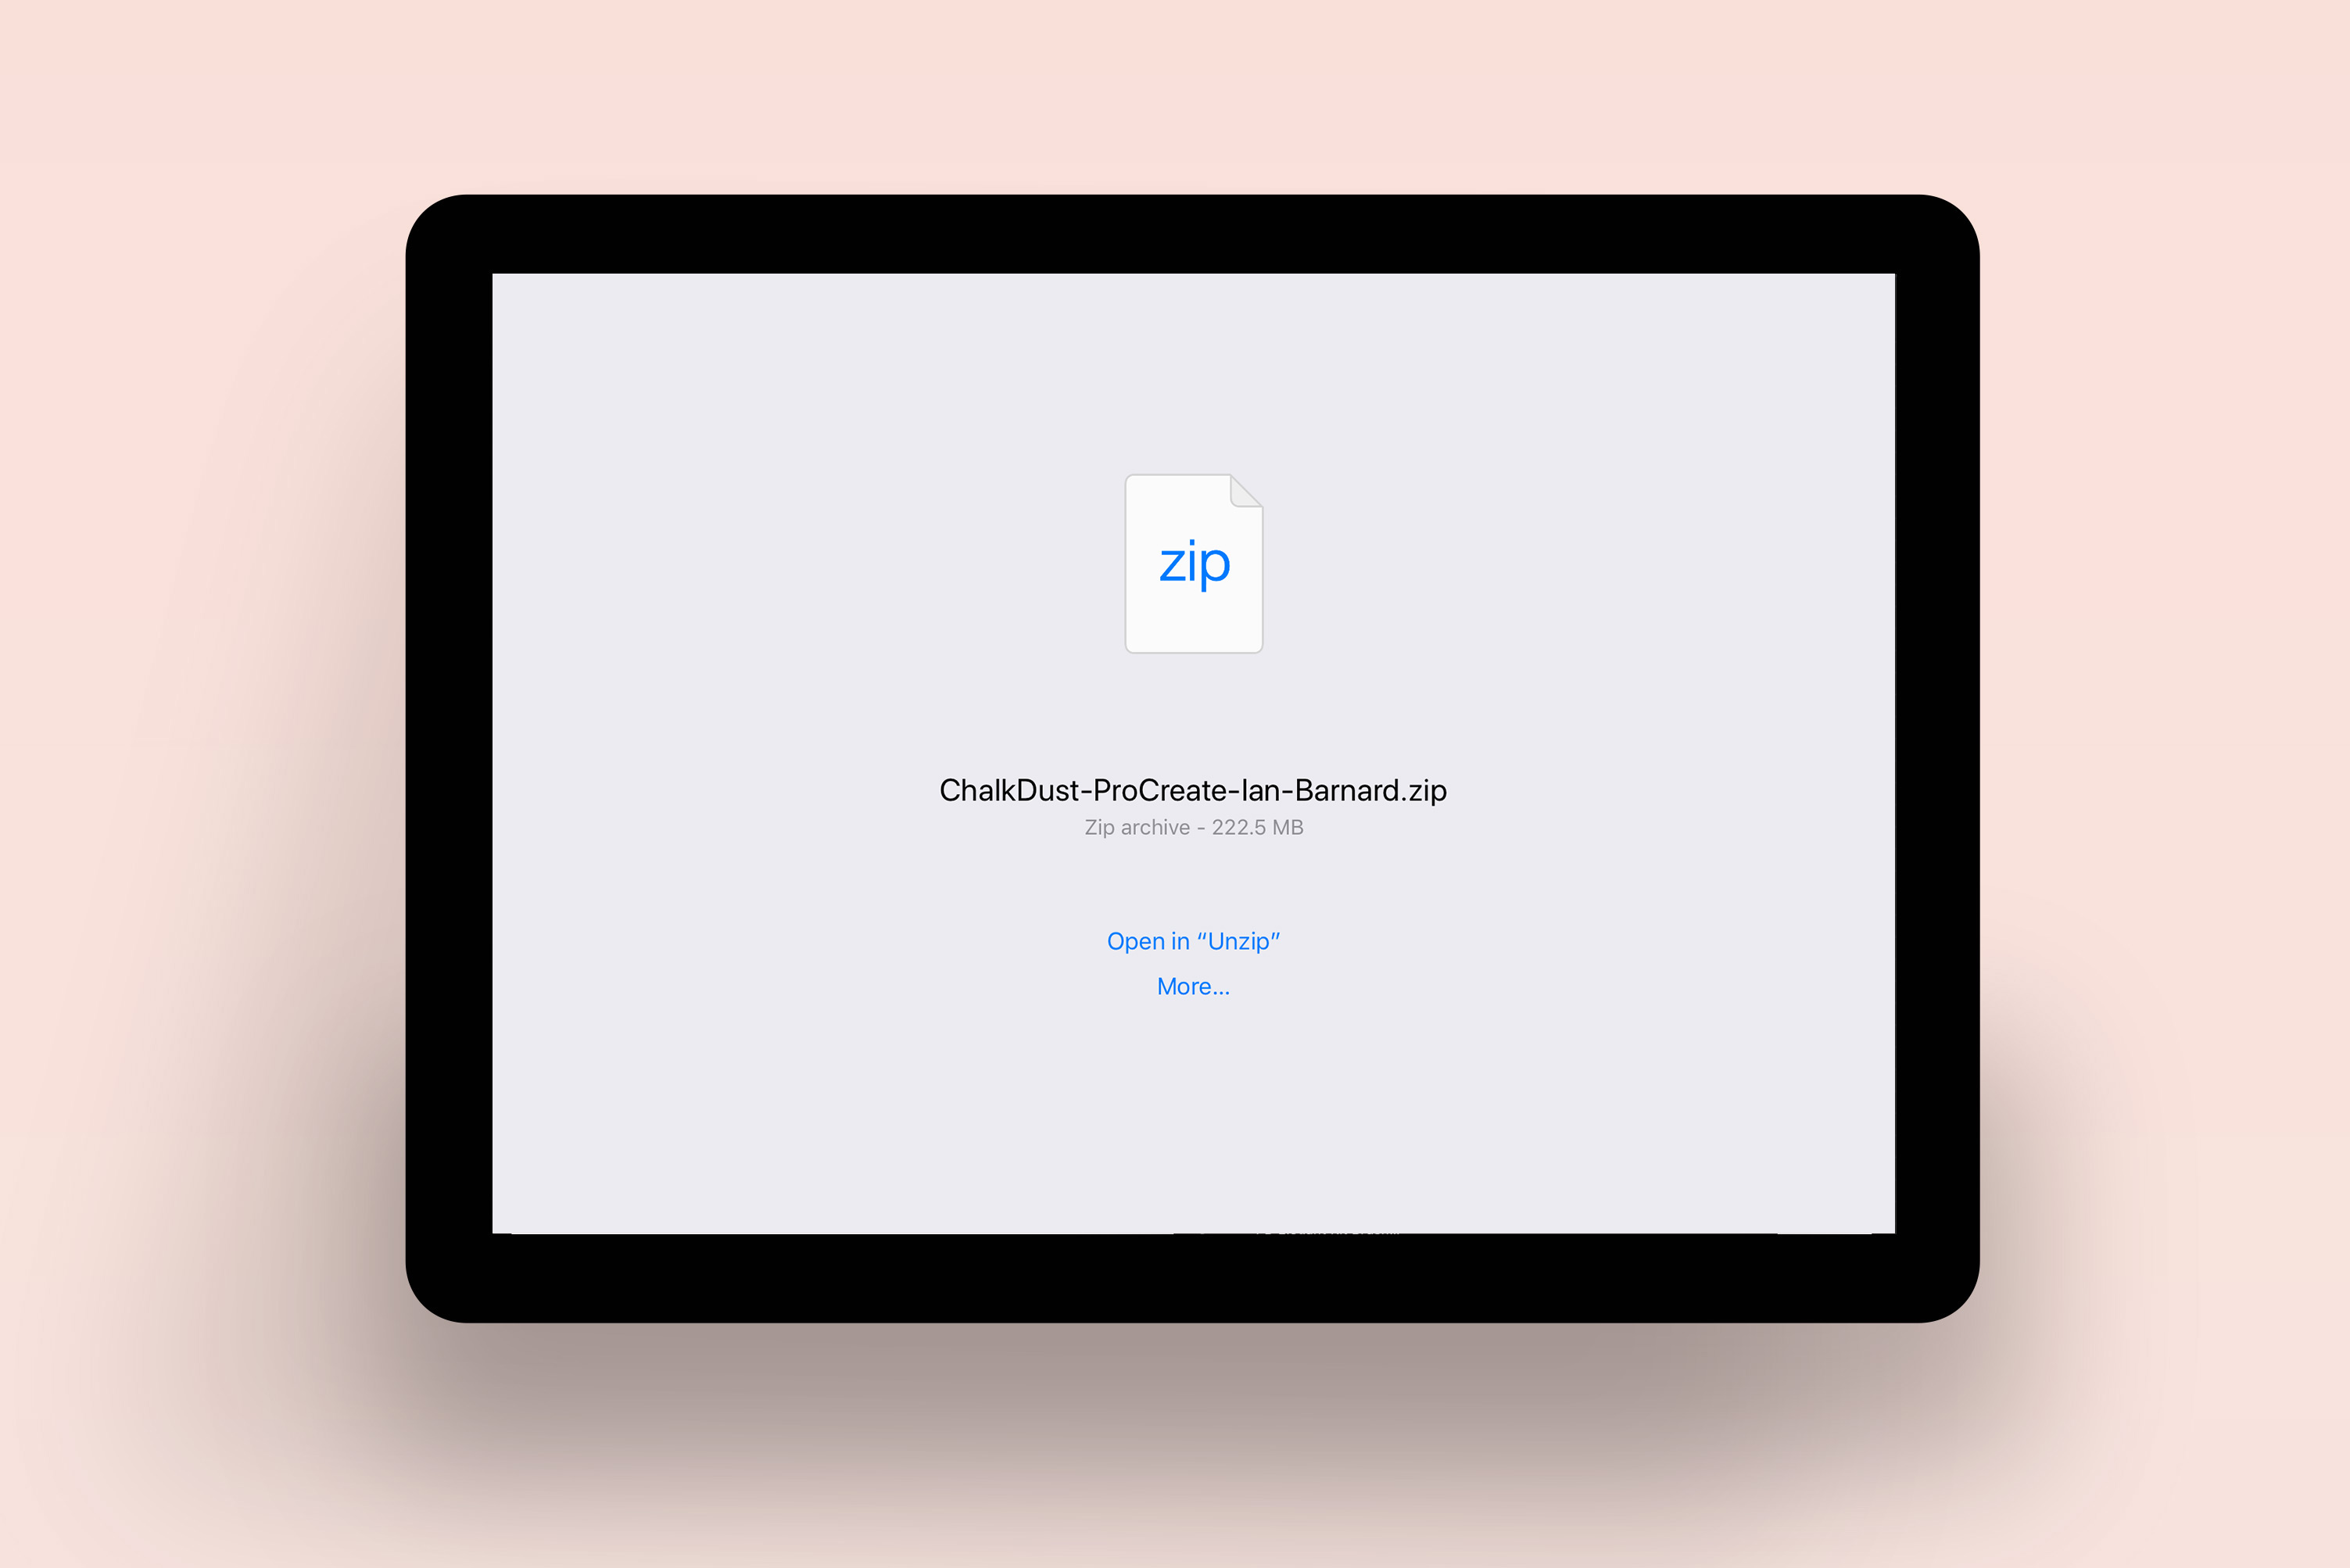
We’re just going to tap “Open in Unzip”, and if you don’t have an unzip application you’re going to need one. For this example, we are using Unzip – zip file opener, but there is a variety of free unzip applications you can find in the App Store
2. How to unzip your files?
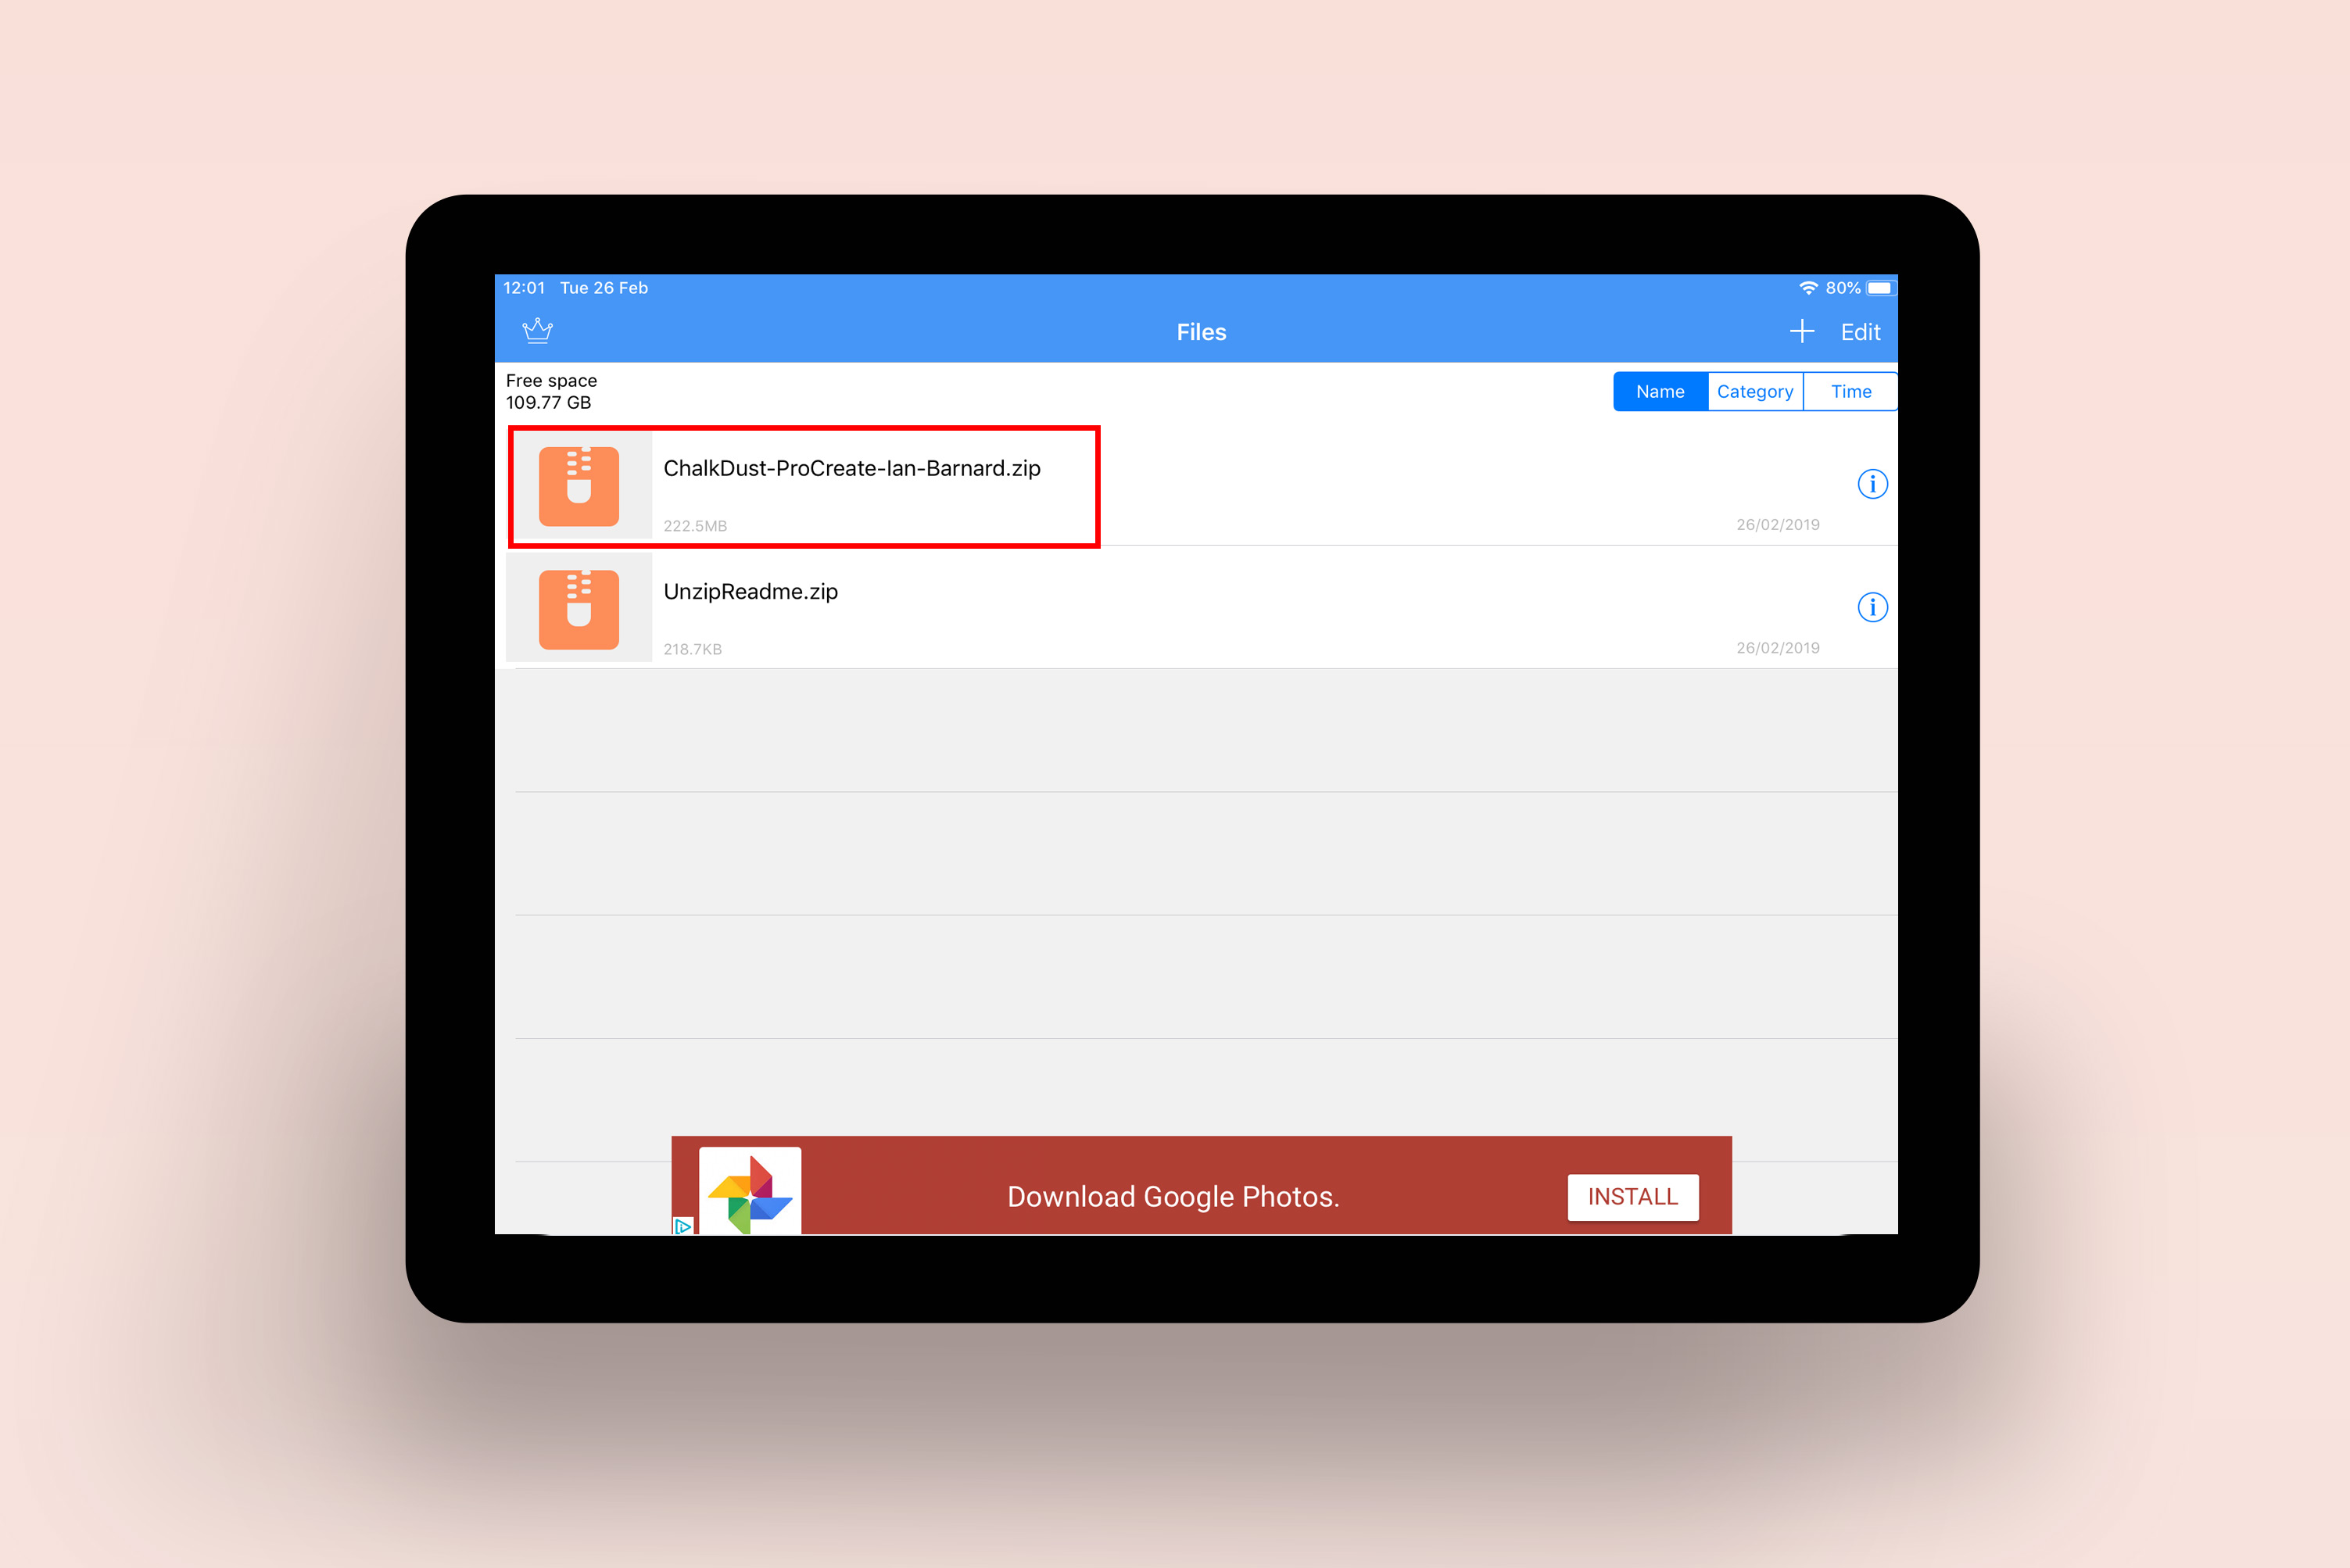
Next, locate the file name in the Unzip app and all you will need to do is just tap on it to unzip the compressed folder.
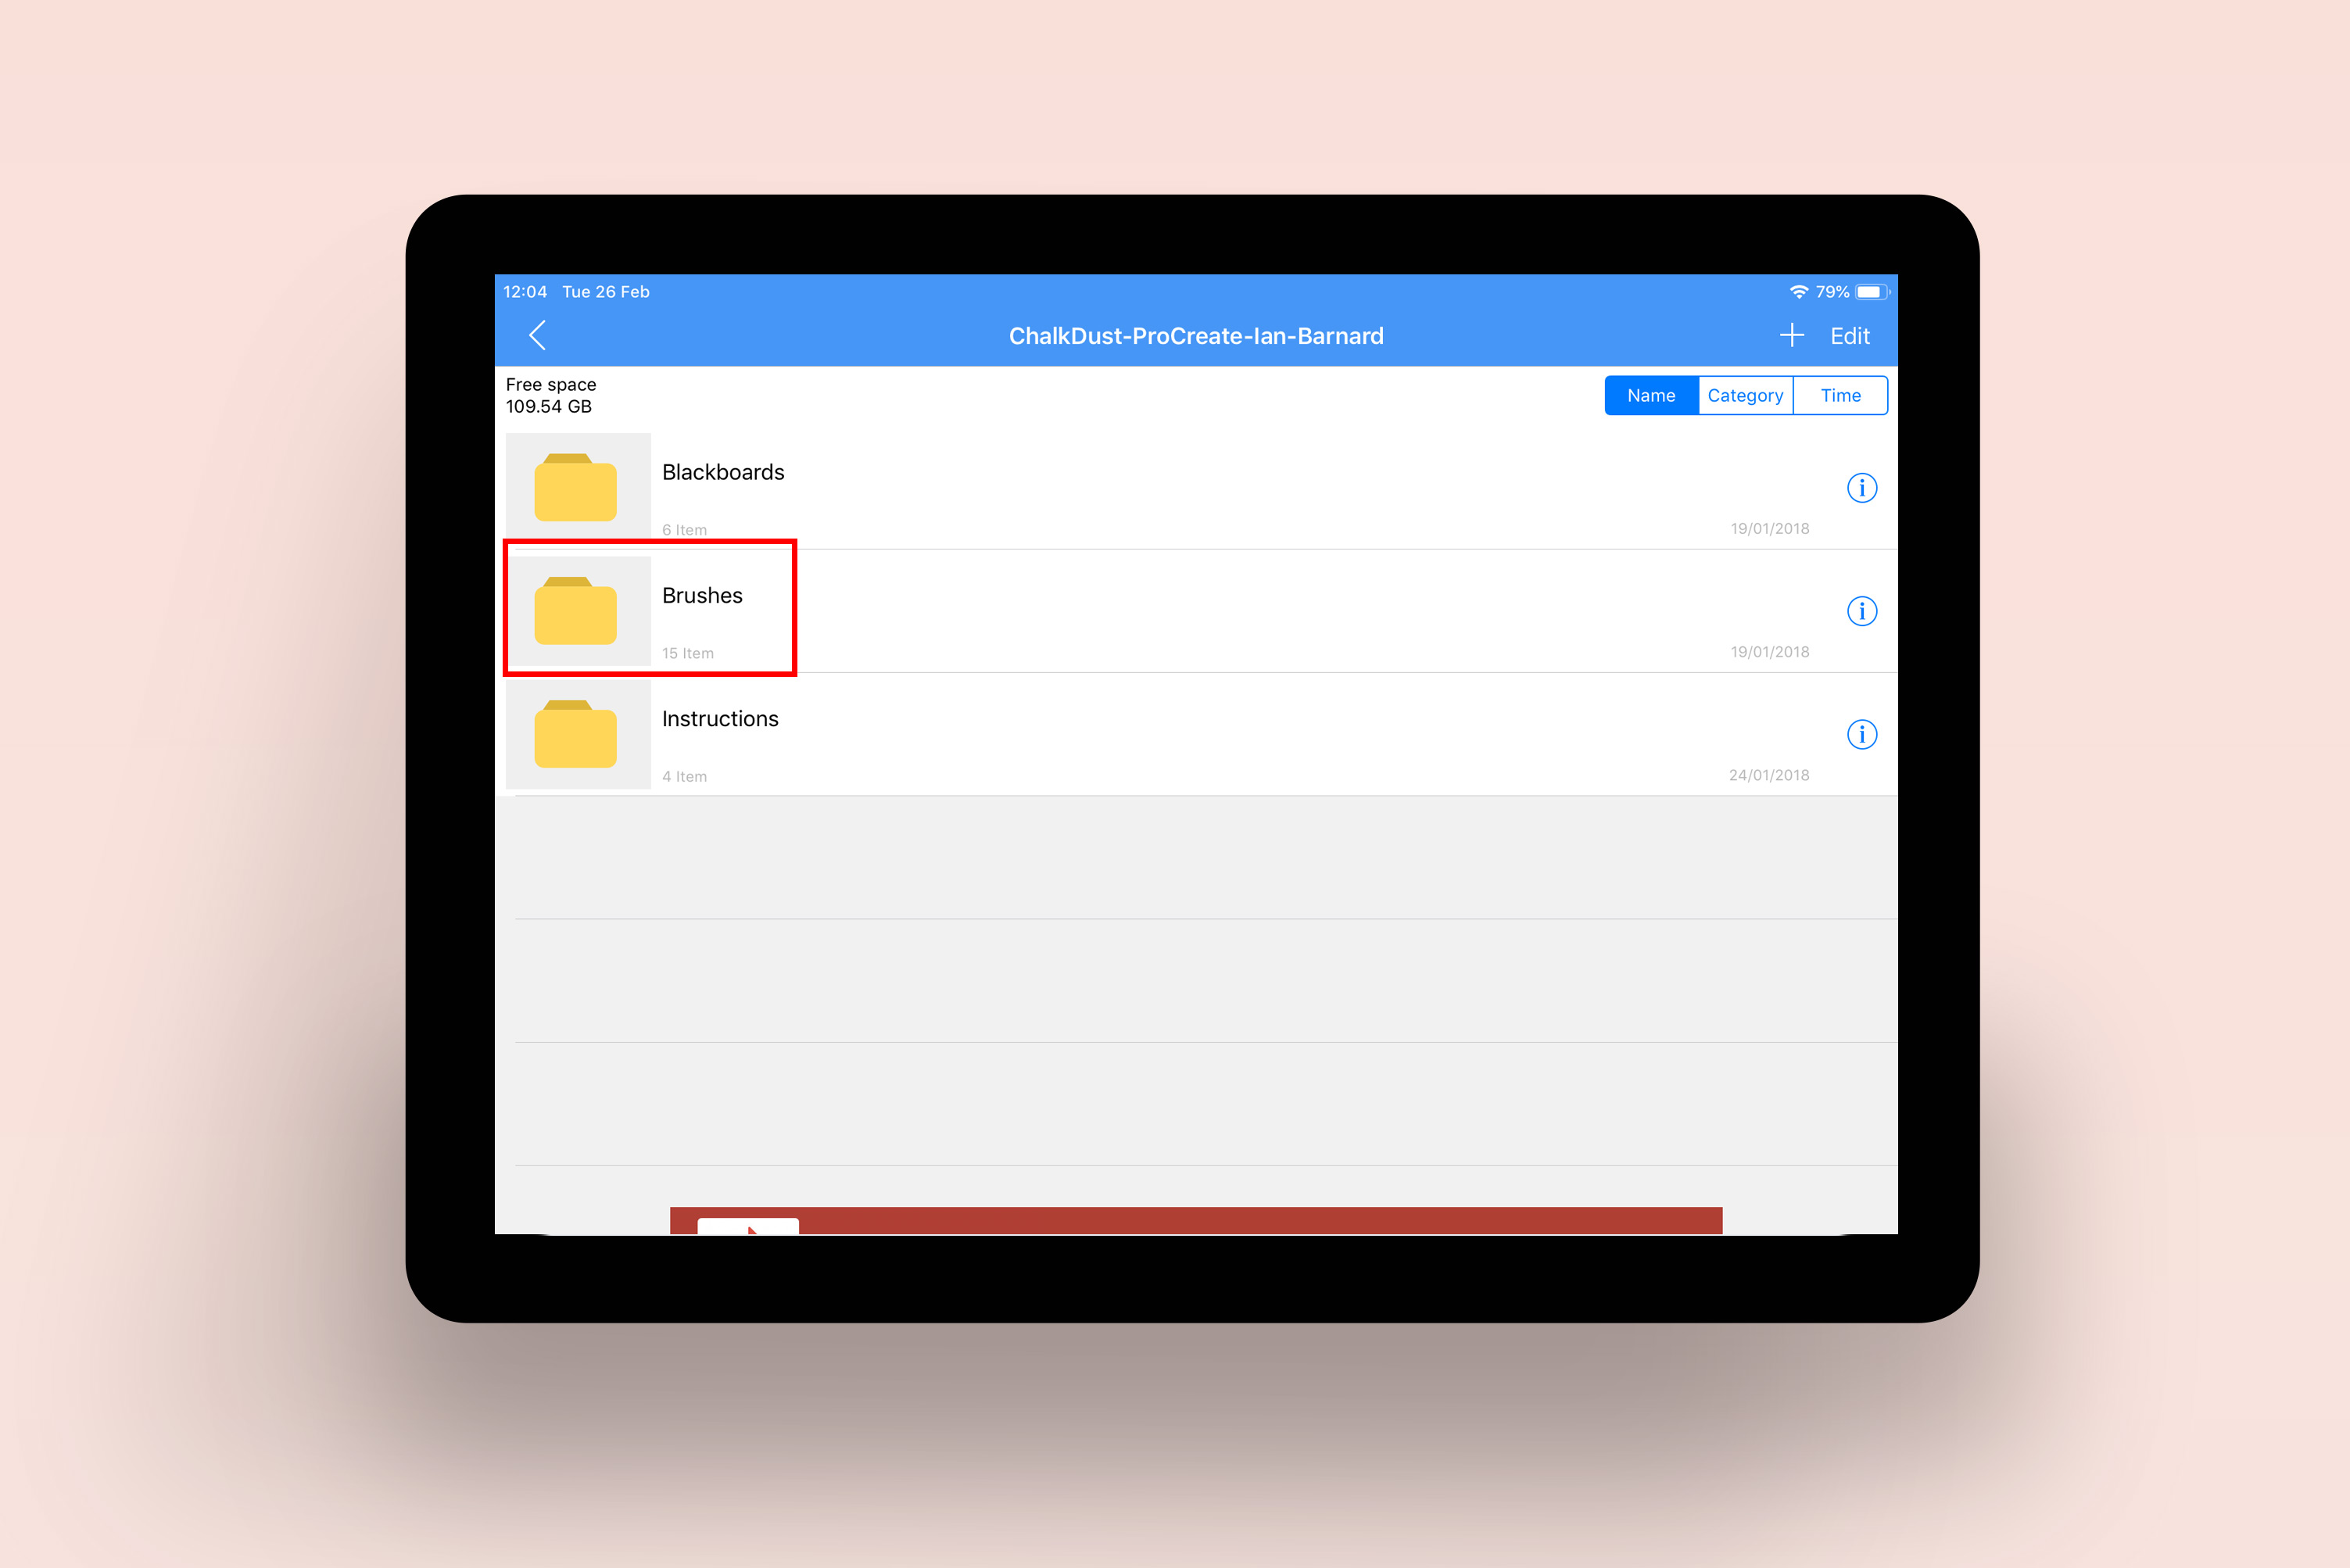
Once you’ve unzipped your files, just tap on the folder with the product name to open it. You will see the three folders included in this product, and will tap on the Brushes one.
3. How to import brushes to Procreate?
There are two methods for installing your new brushes in Procreate, and they are both just as quick and easy. The only difference is that the second method allows you to organise files in folders and it’s ideal for when you want to install multiple brushes from the same product at once.
Method 1 – Open files with Procreate
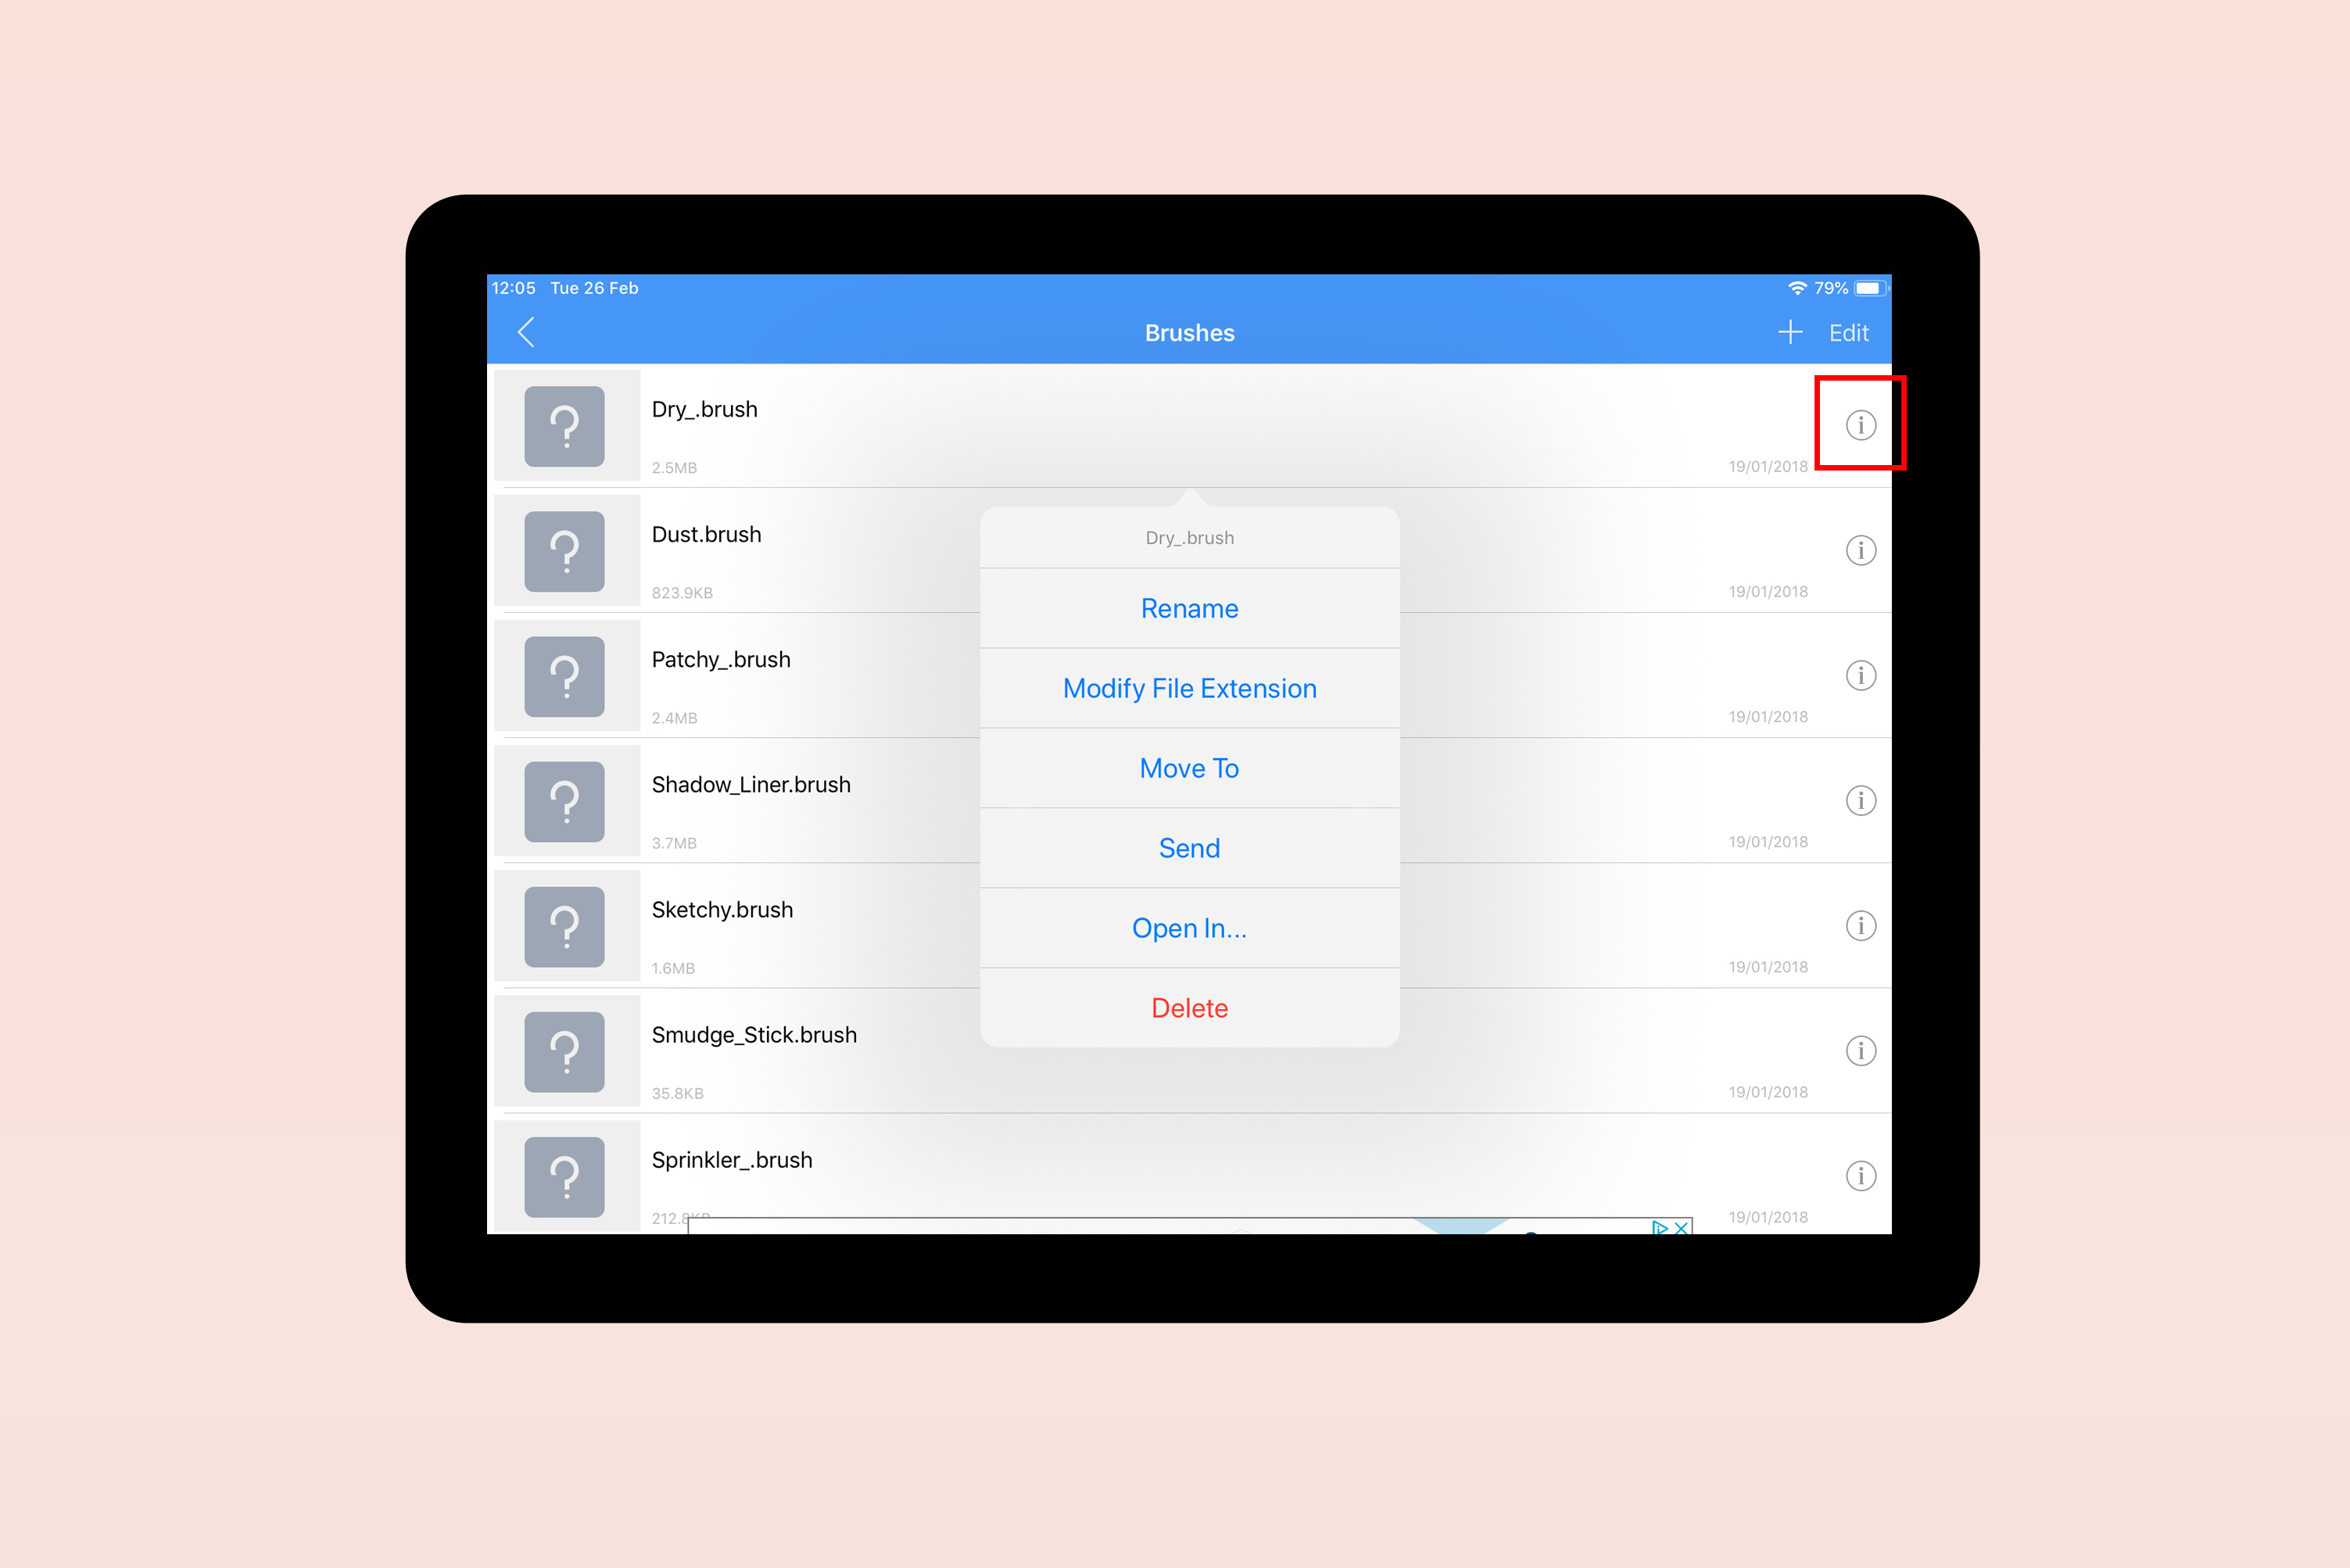
For this example, we’re going to use the “Dry Brush”. We’ll tap on the (i) icon which will bring up a set of options for what to do with the file. We’re going to select ‘Open In…’
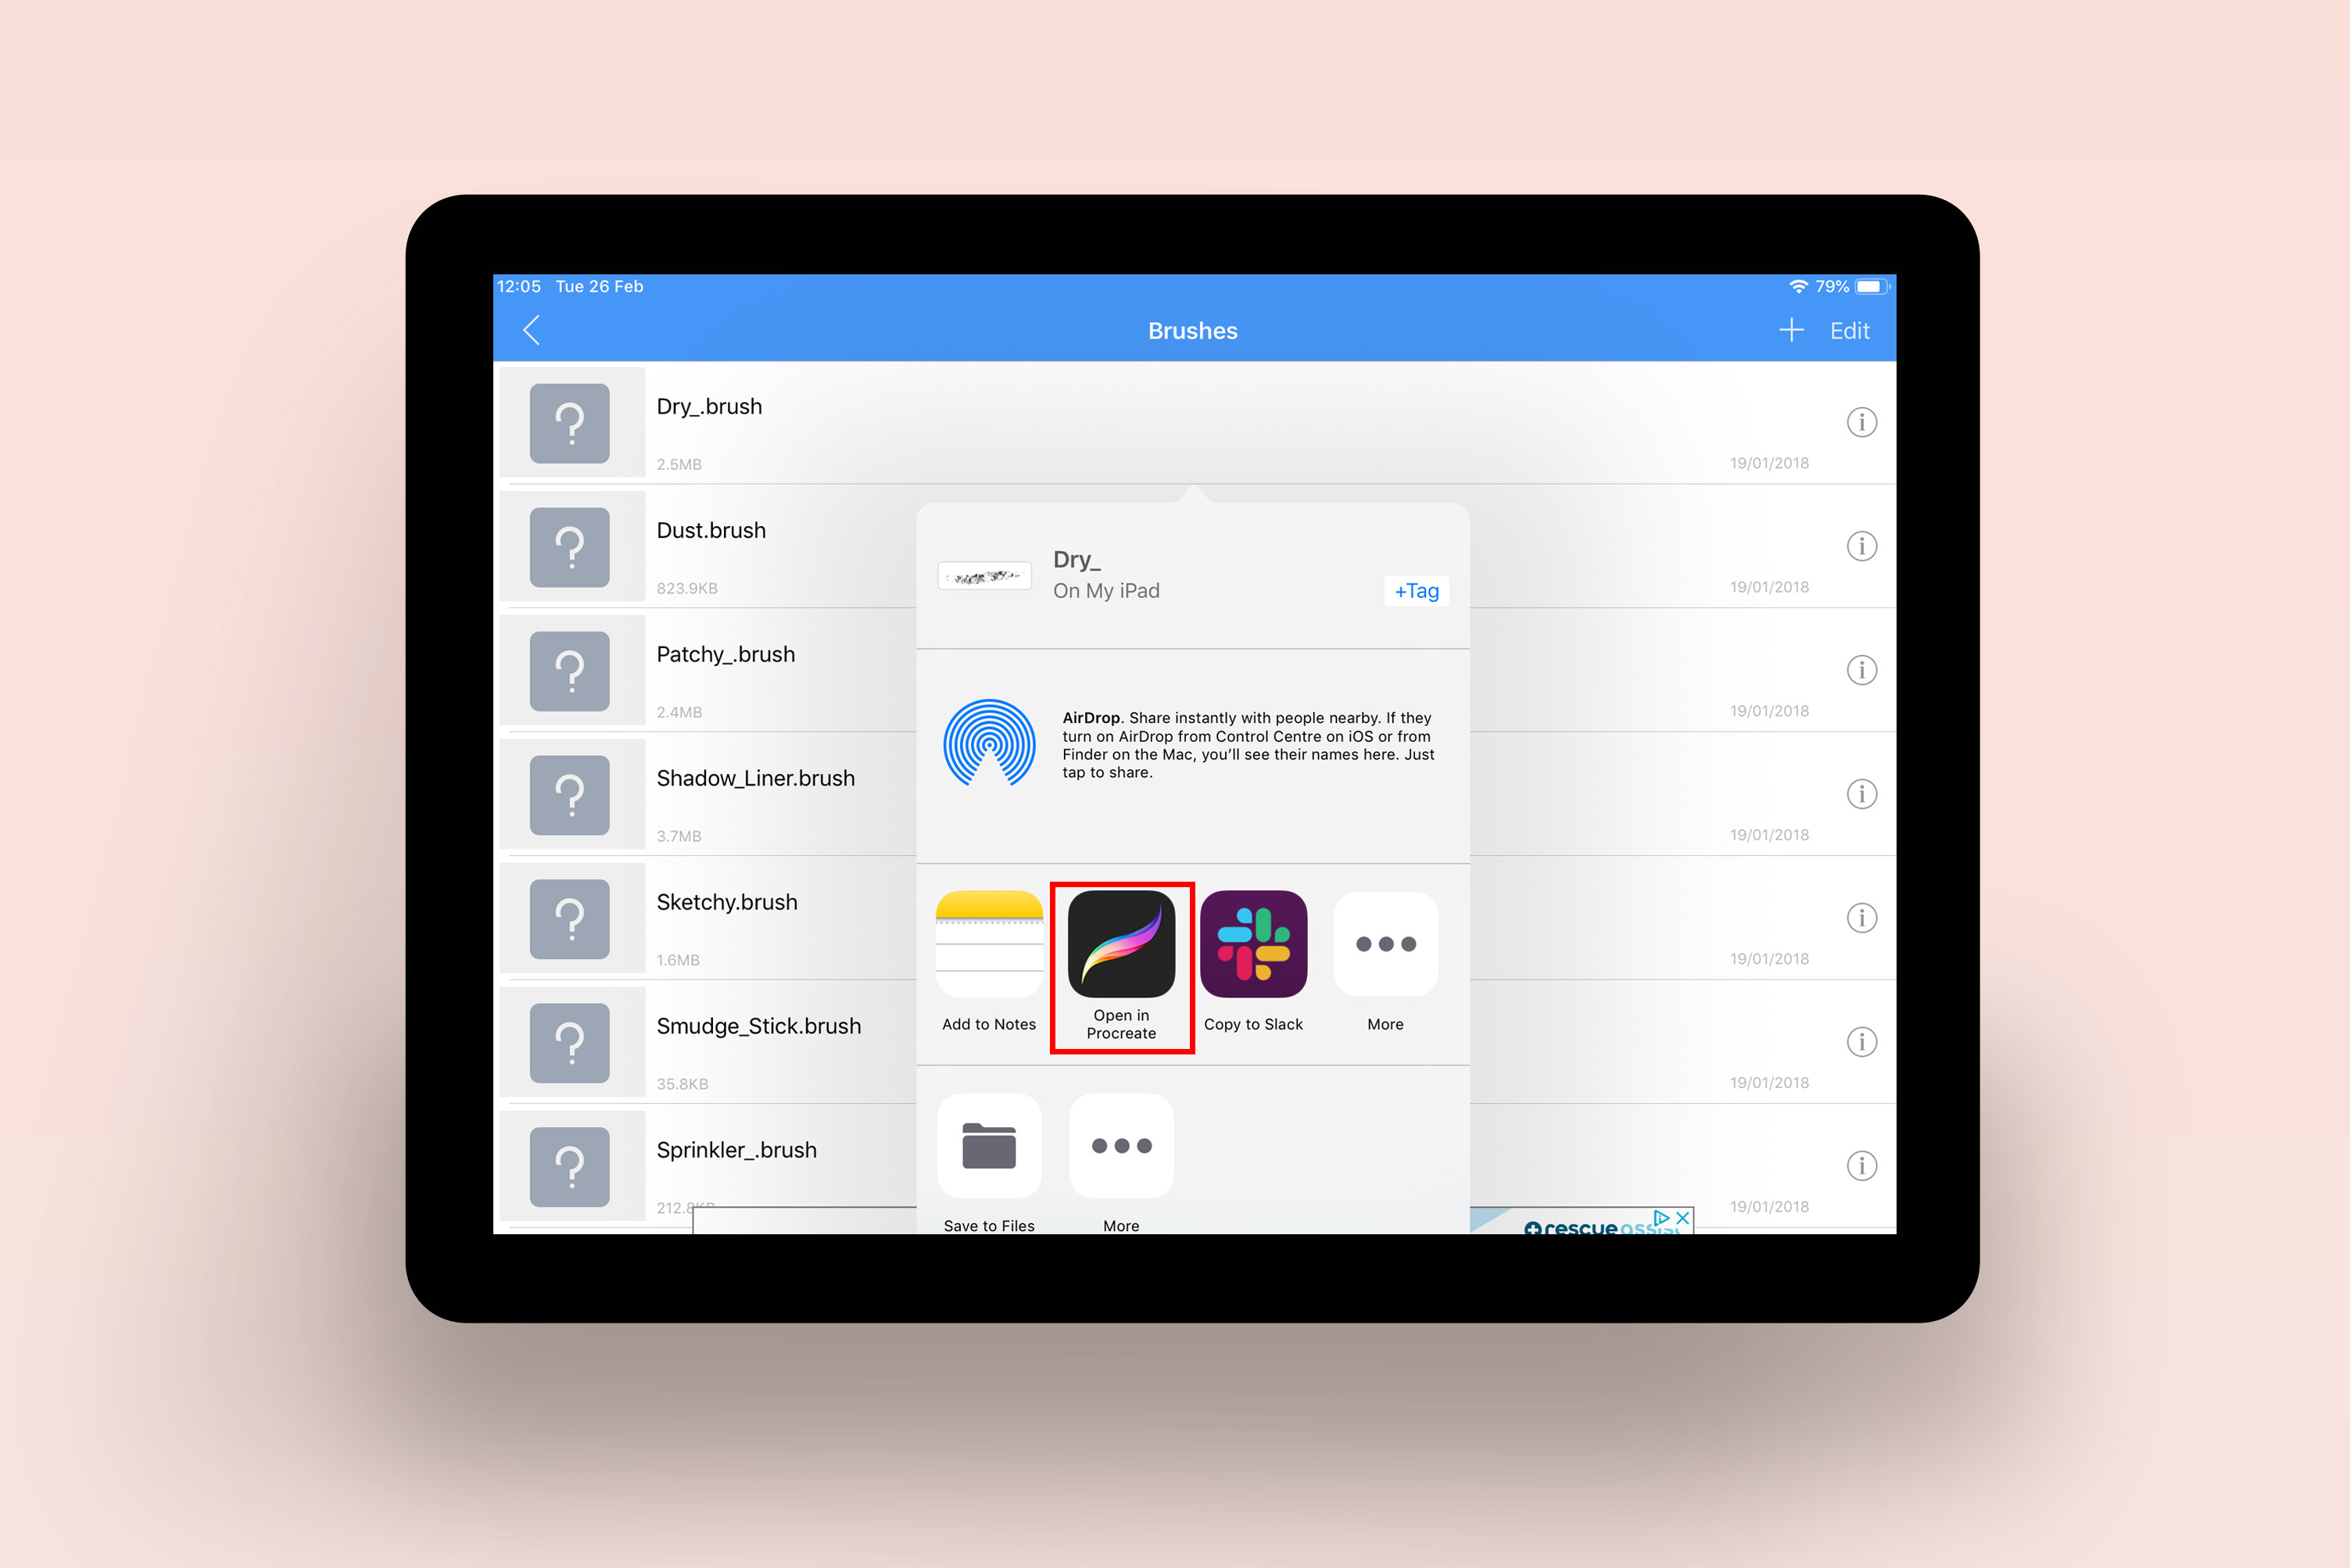
…which will bring up the programs you can use to open this file. Select Procreate to open the files in the application.
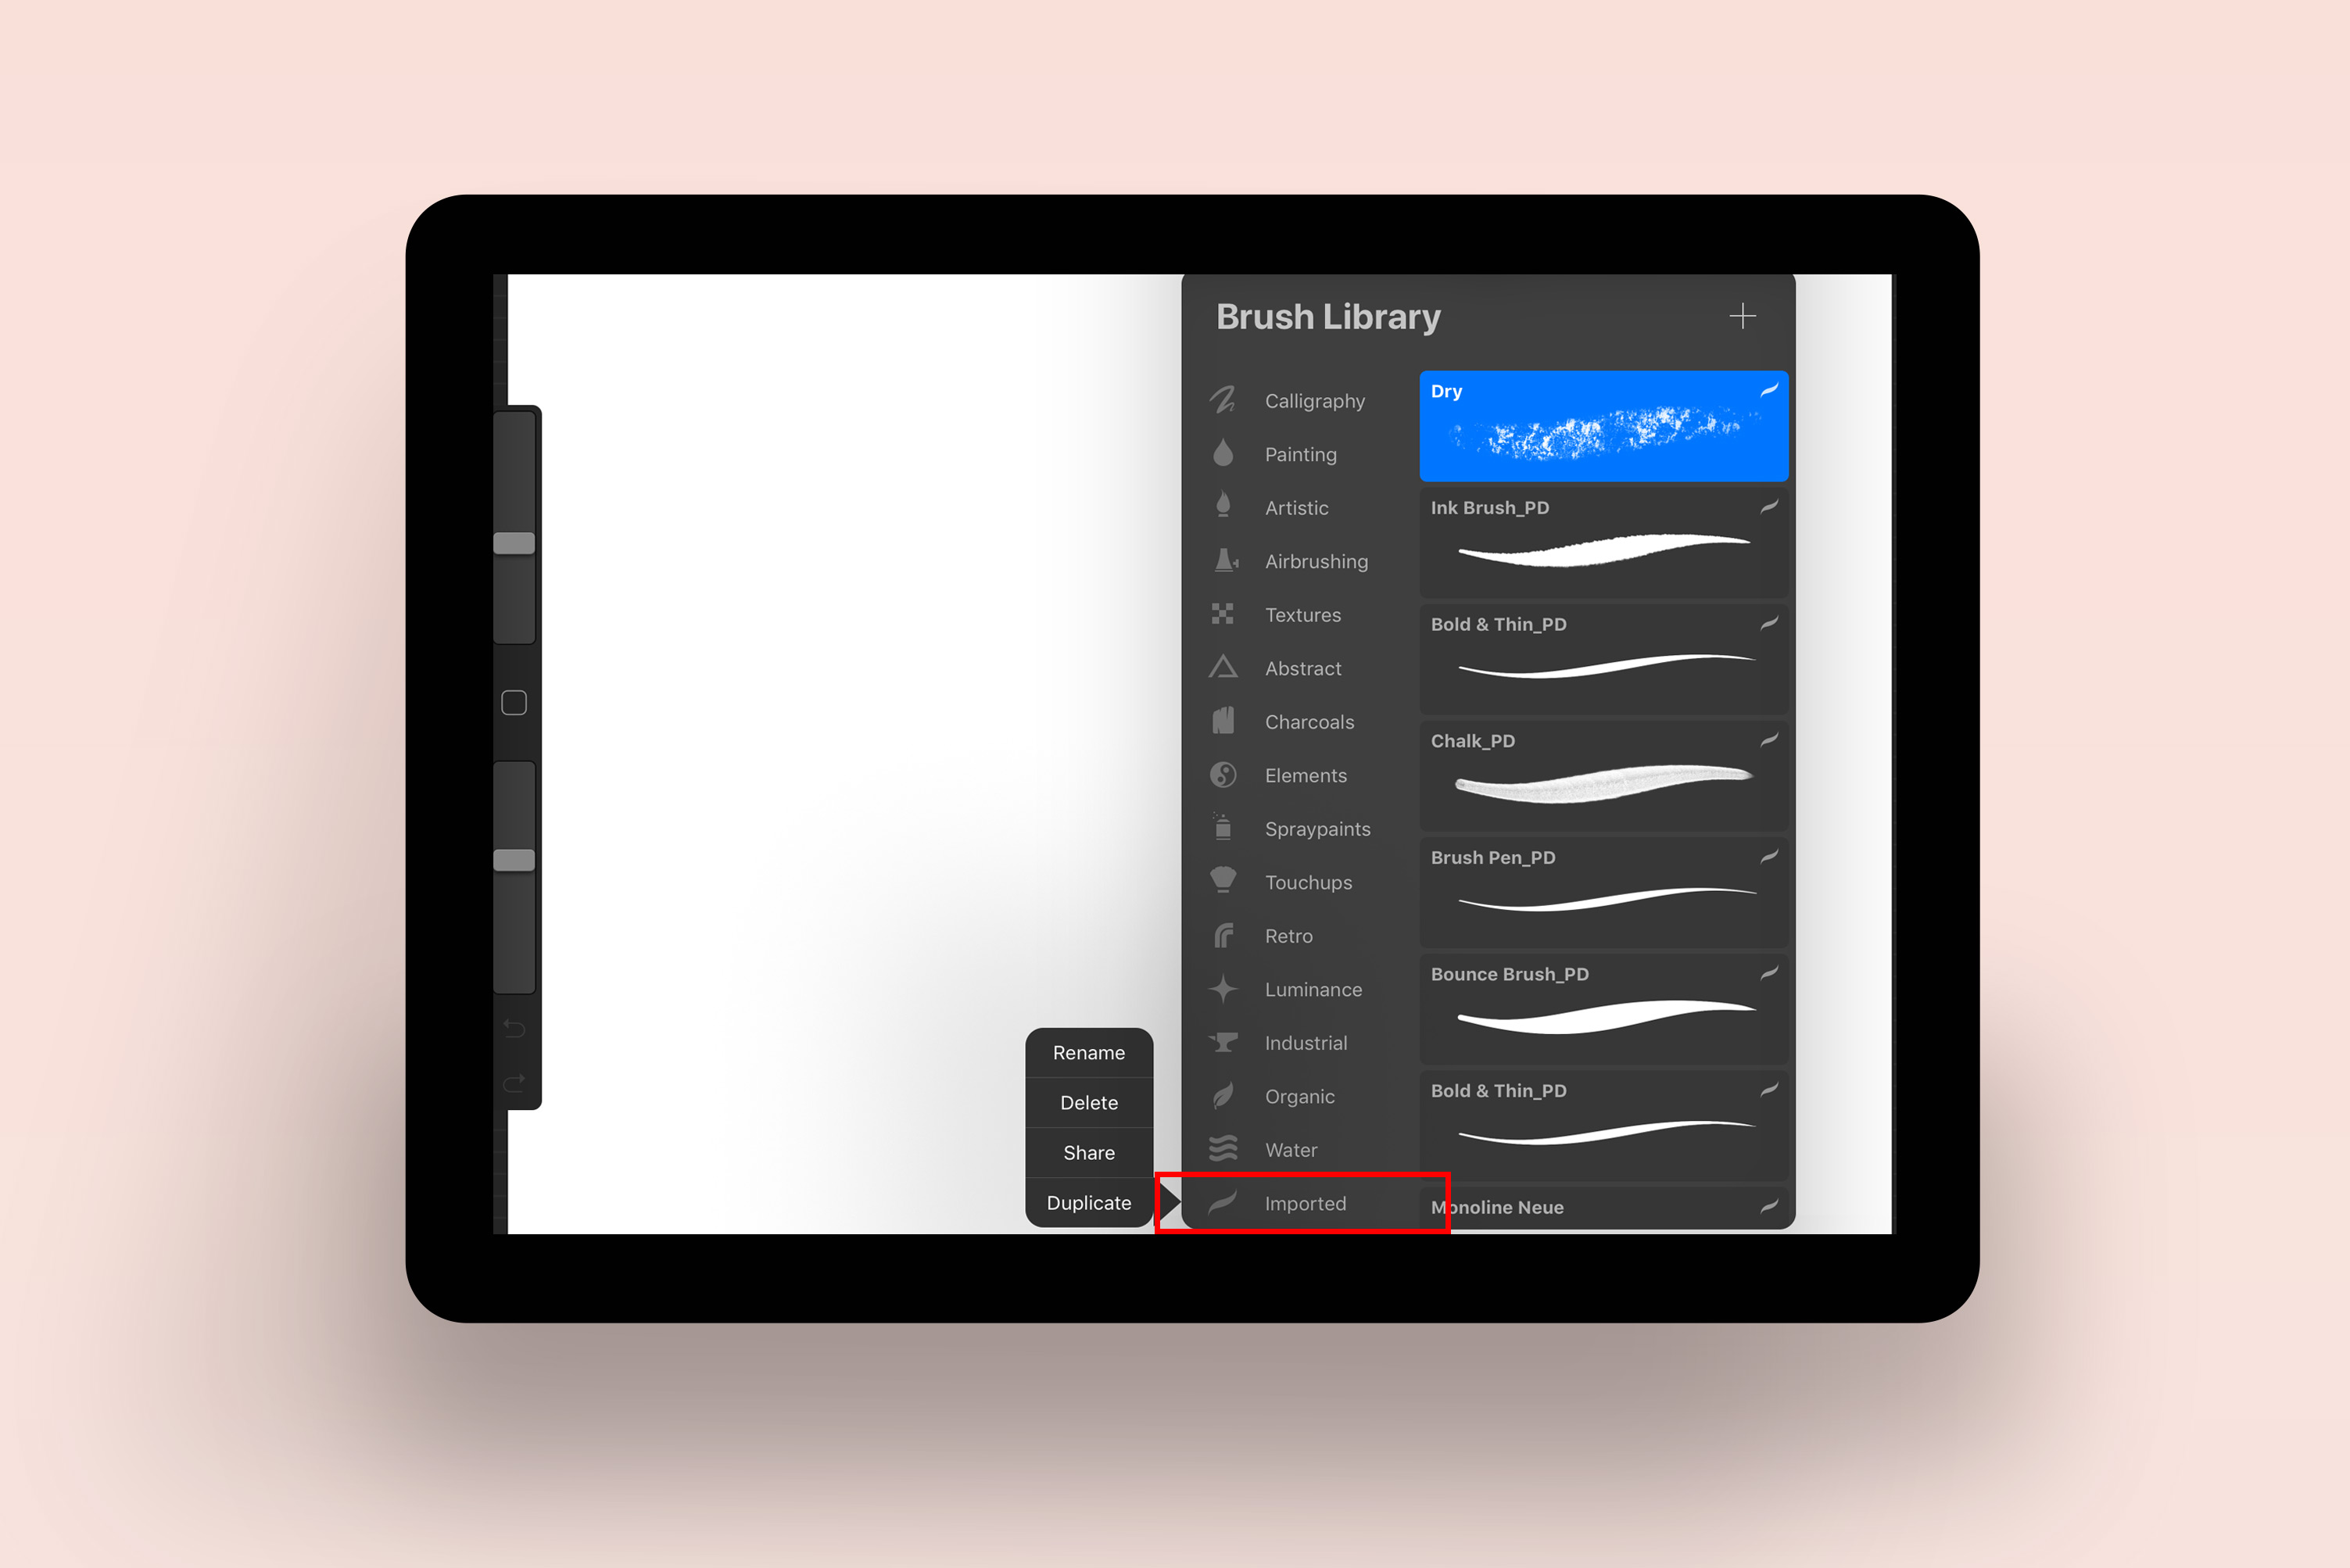
This action should open Procreate automatically, but if it doesn’t you can just switch to your Procreate App. Next, we will click on the brush icon in the top right of our screen.
This will bring up the Brushes Library. What we will do next is click on ‘Imported’ and this is where the Dry Brush will appear.
Method 2 – Organising your brushes in folders
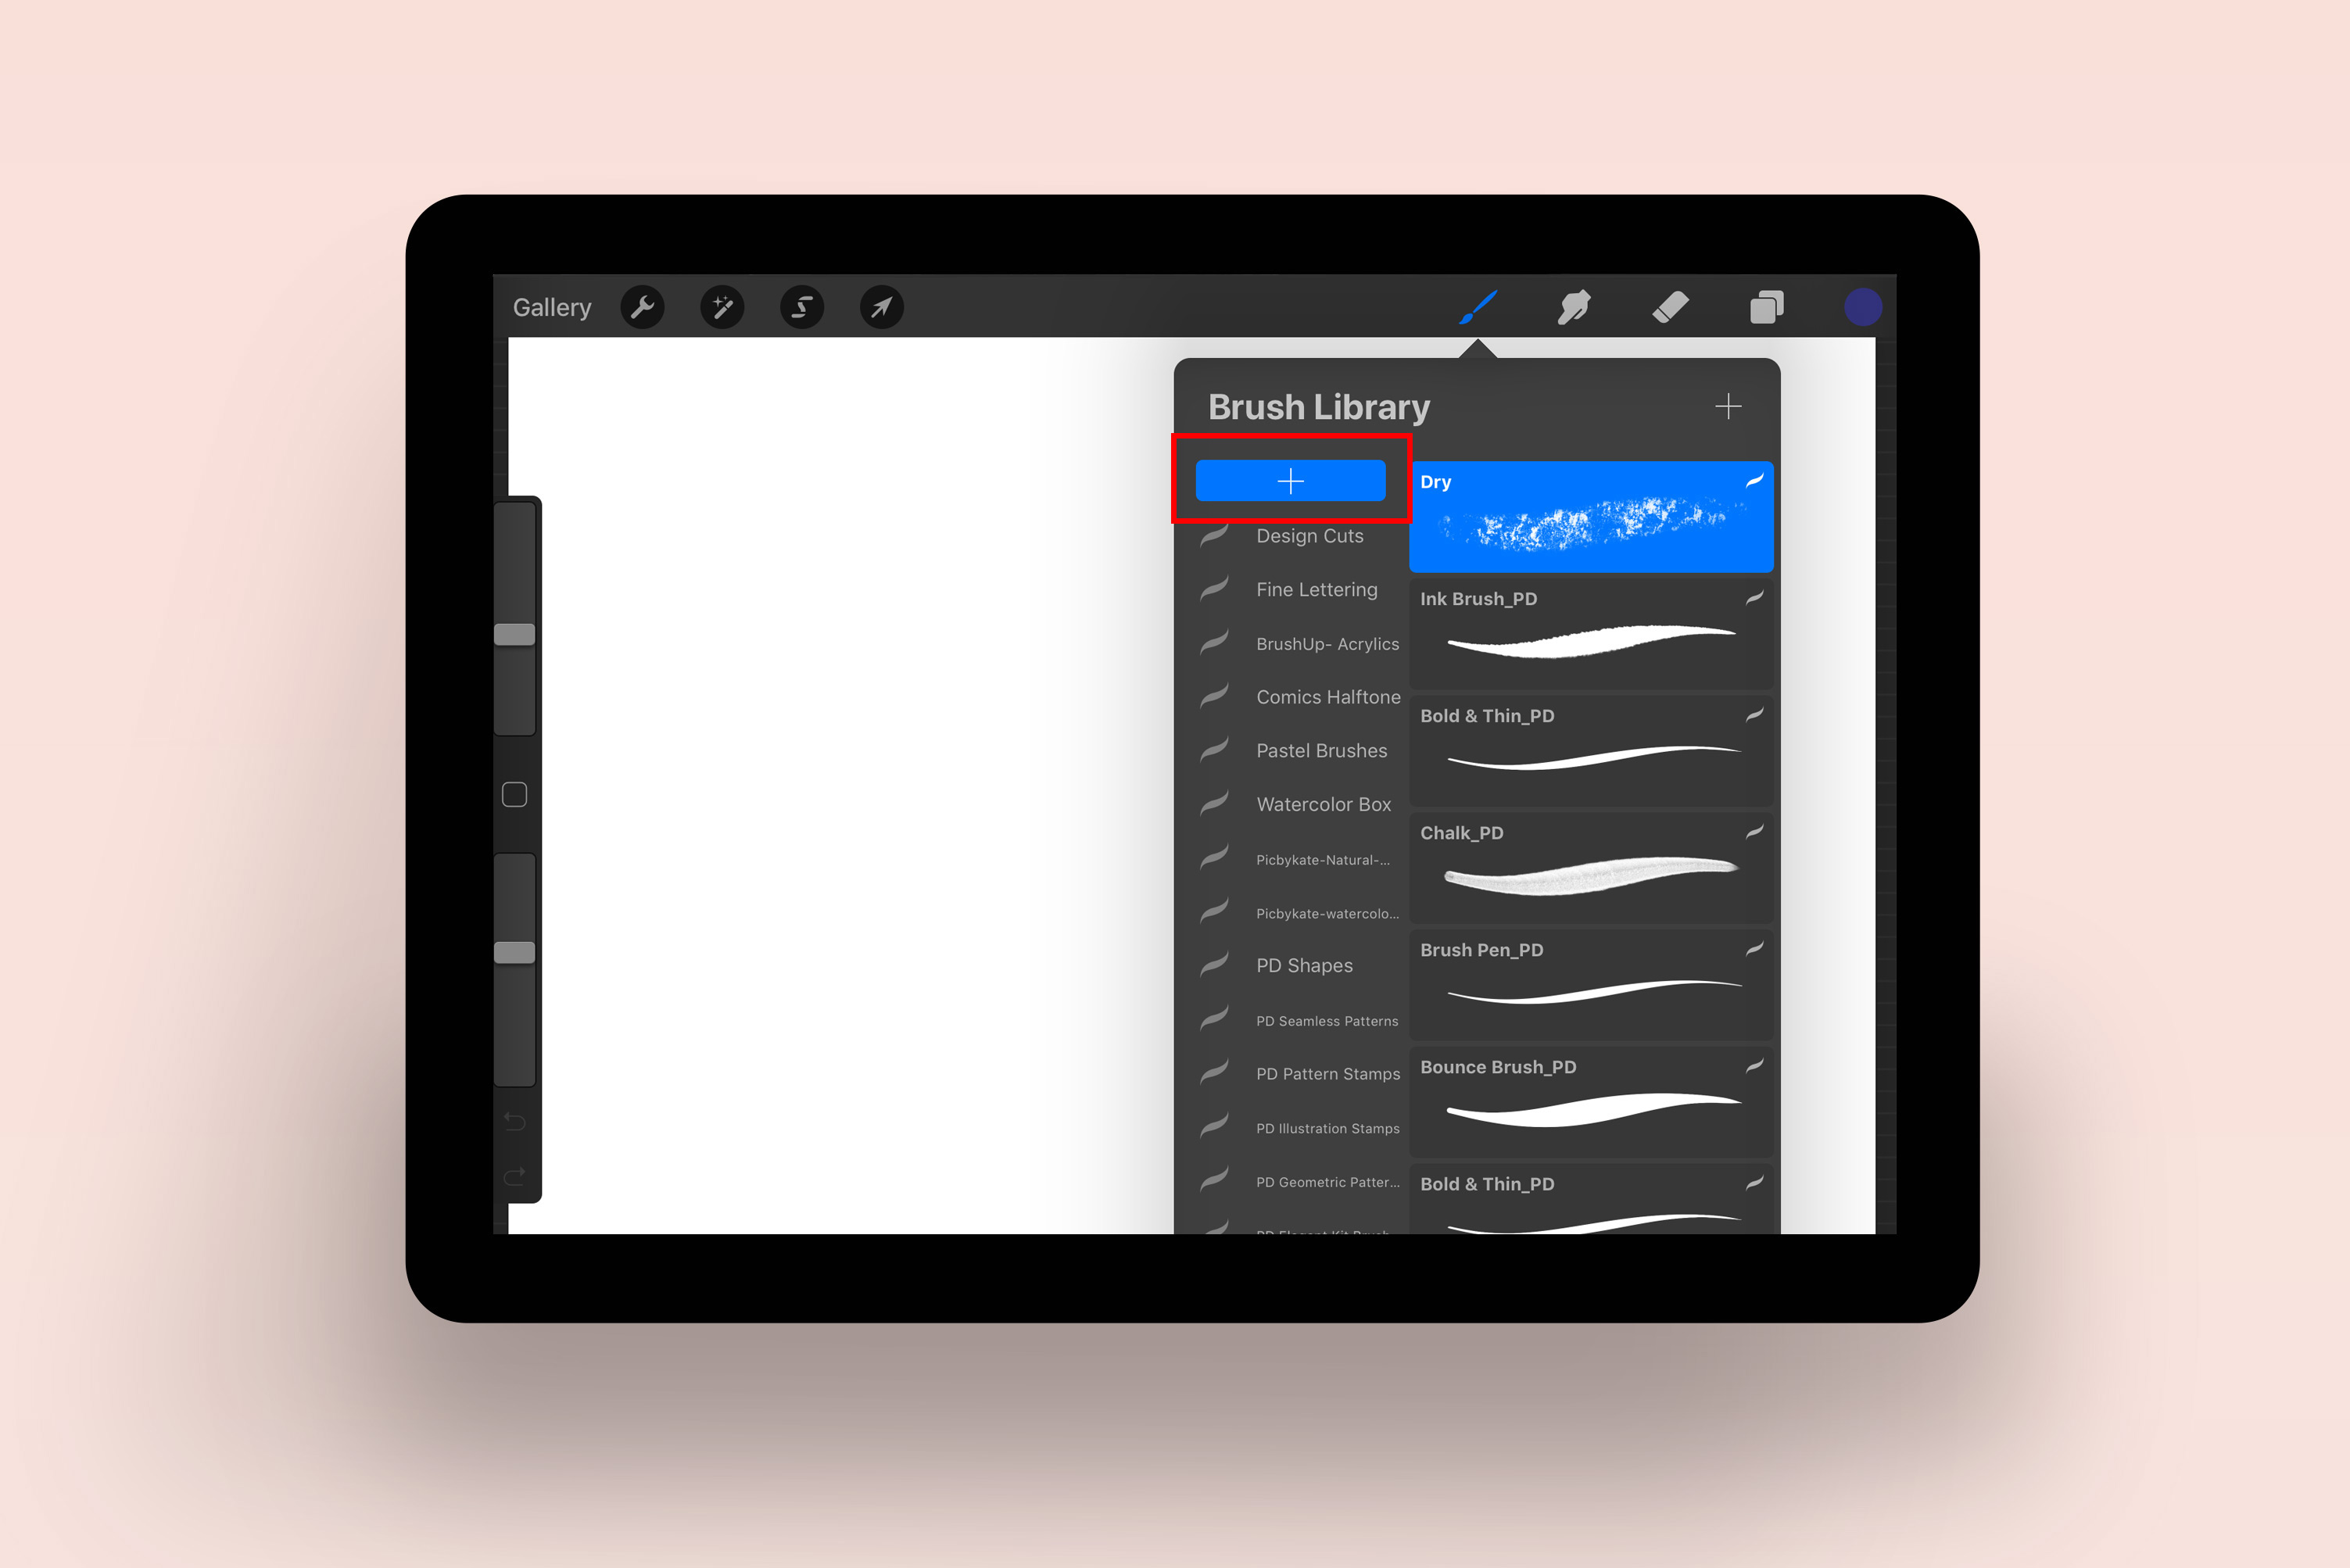
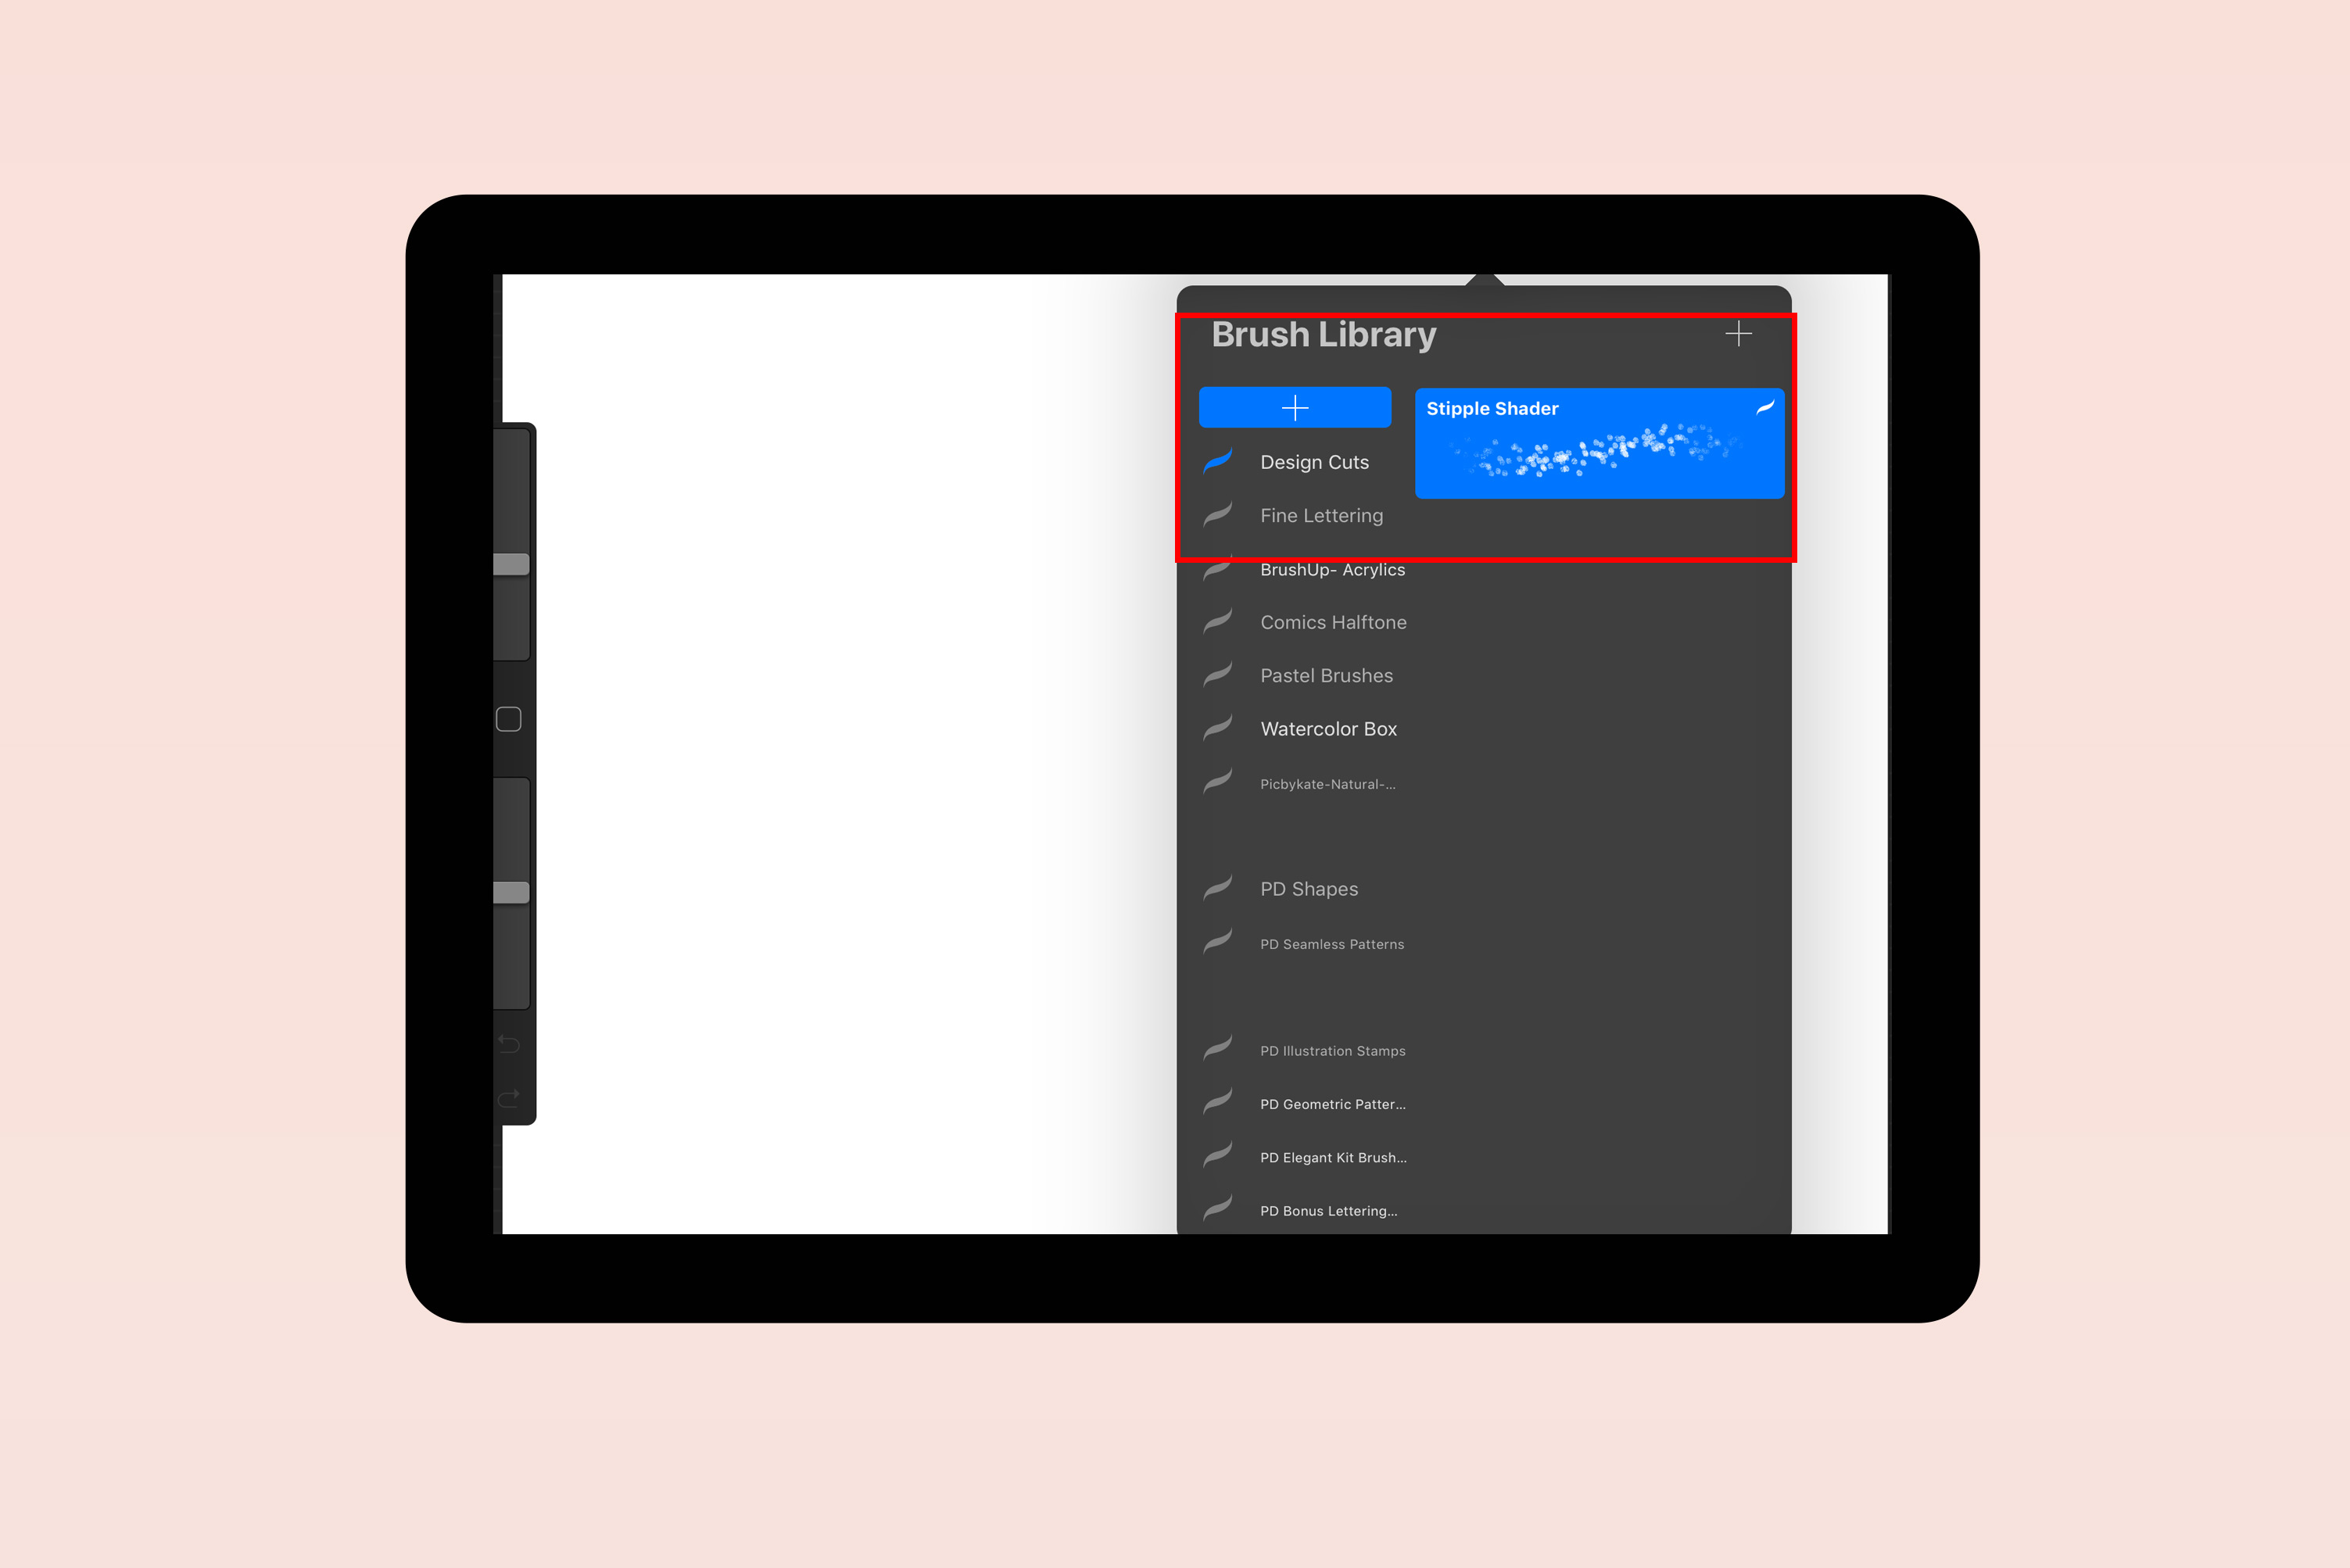
Any brushes you download will automatically be installed in the ‘Imported’ folder, but there is another option for installing brushes. We’re going to show you this other option as well, as it will allow you to better organise your brushes. To do this, you will need to scroll up to the top of your Brushes library and tap on the blue ‘+’ sign. For this example, we’ve created a Design Cuts folder in our library, but you can give your new folder any name.
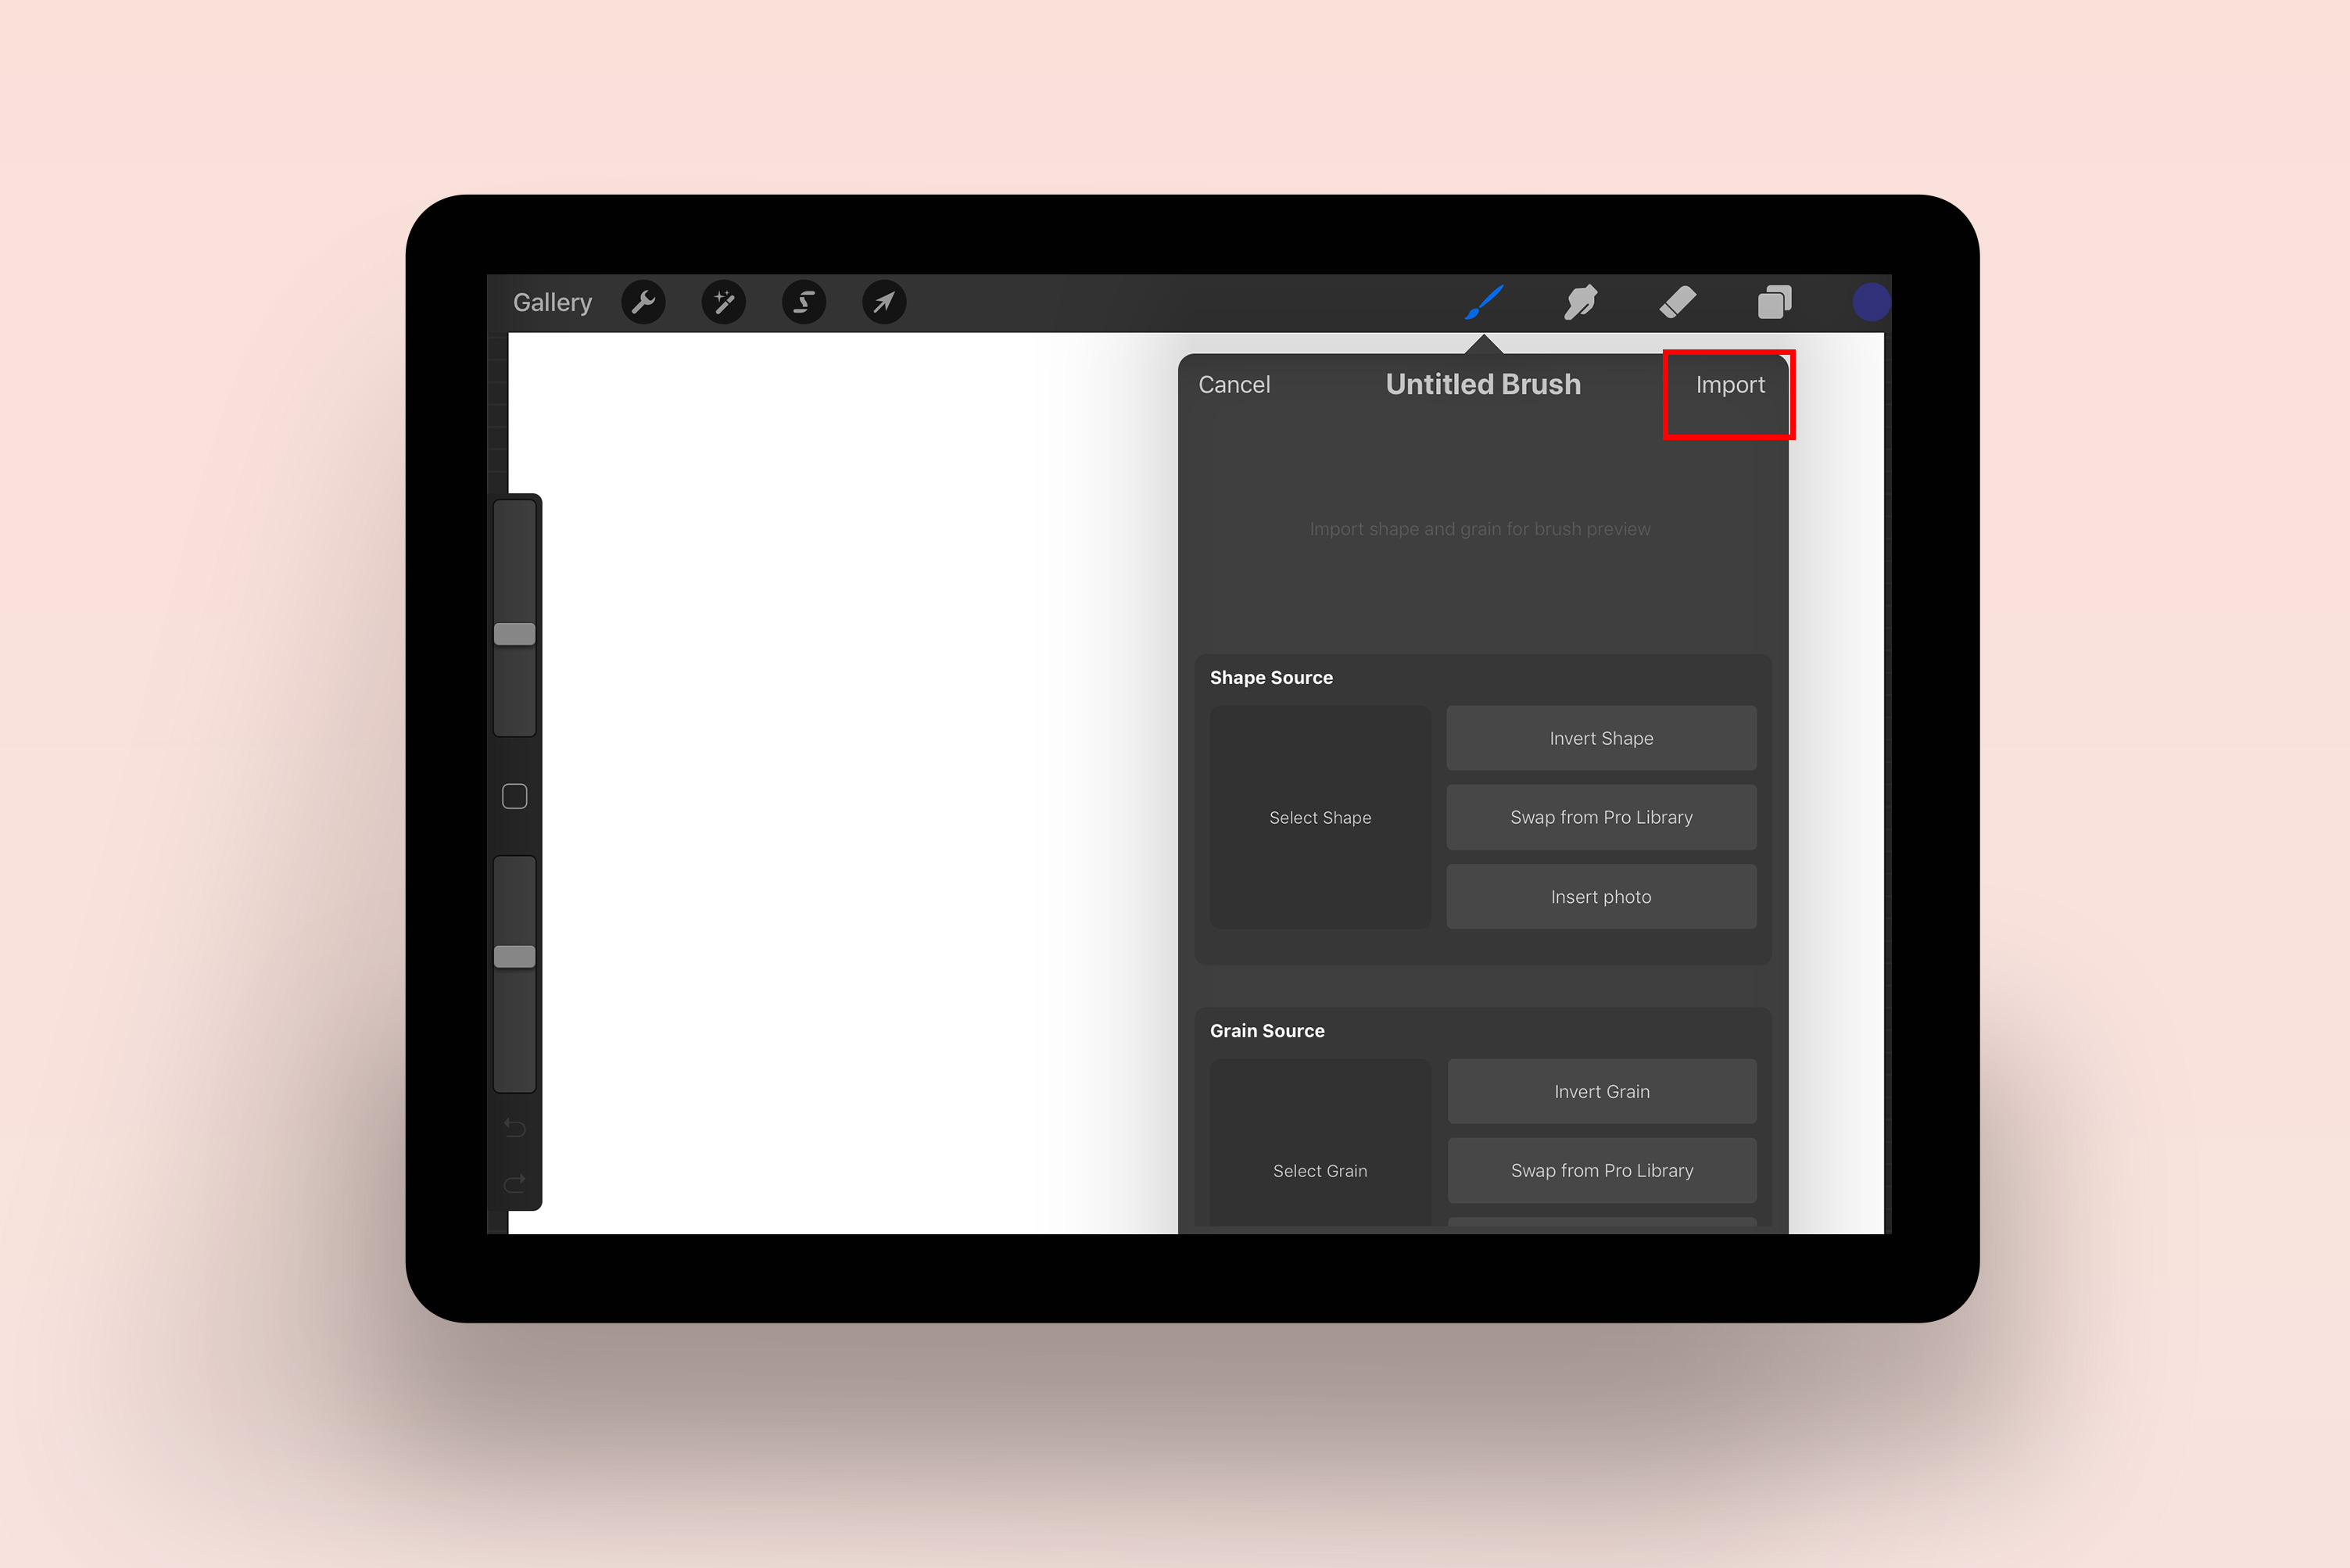
Next, with the Design Cuts folder selected, we will click on the top ‘+’ sign in the right corner and then select the option to ‘Import’ a new brush. This will take you to your files on your iPad.
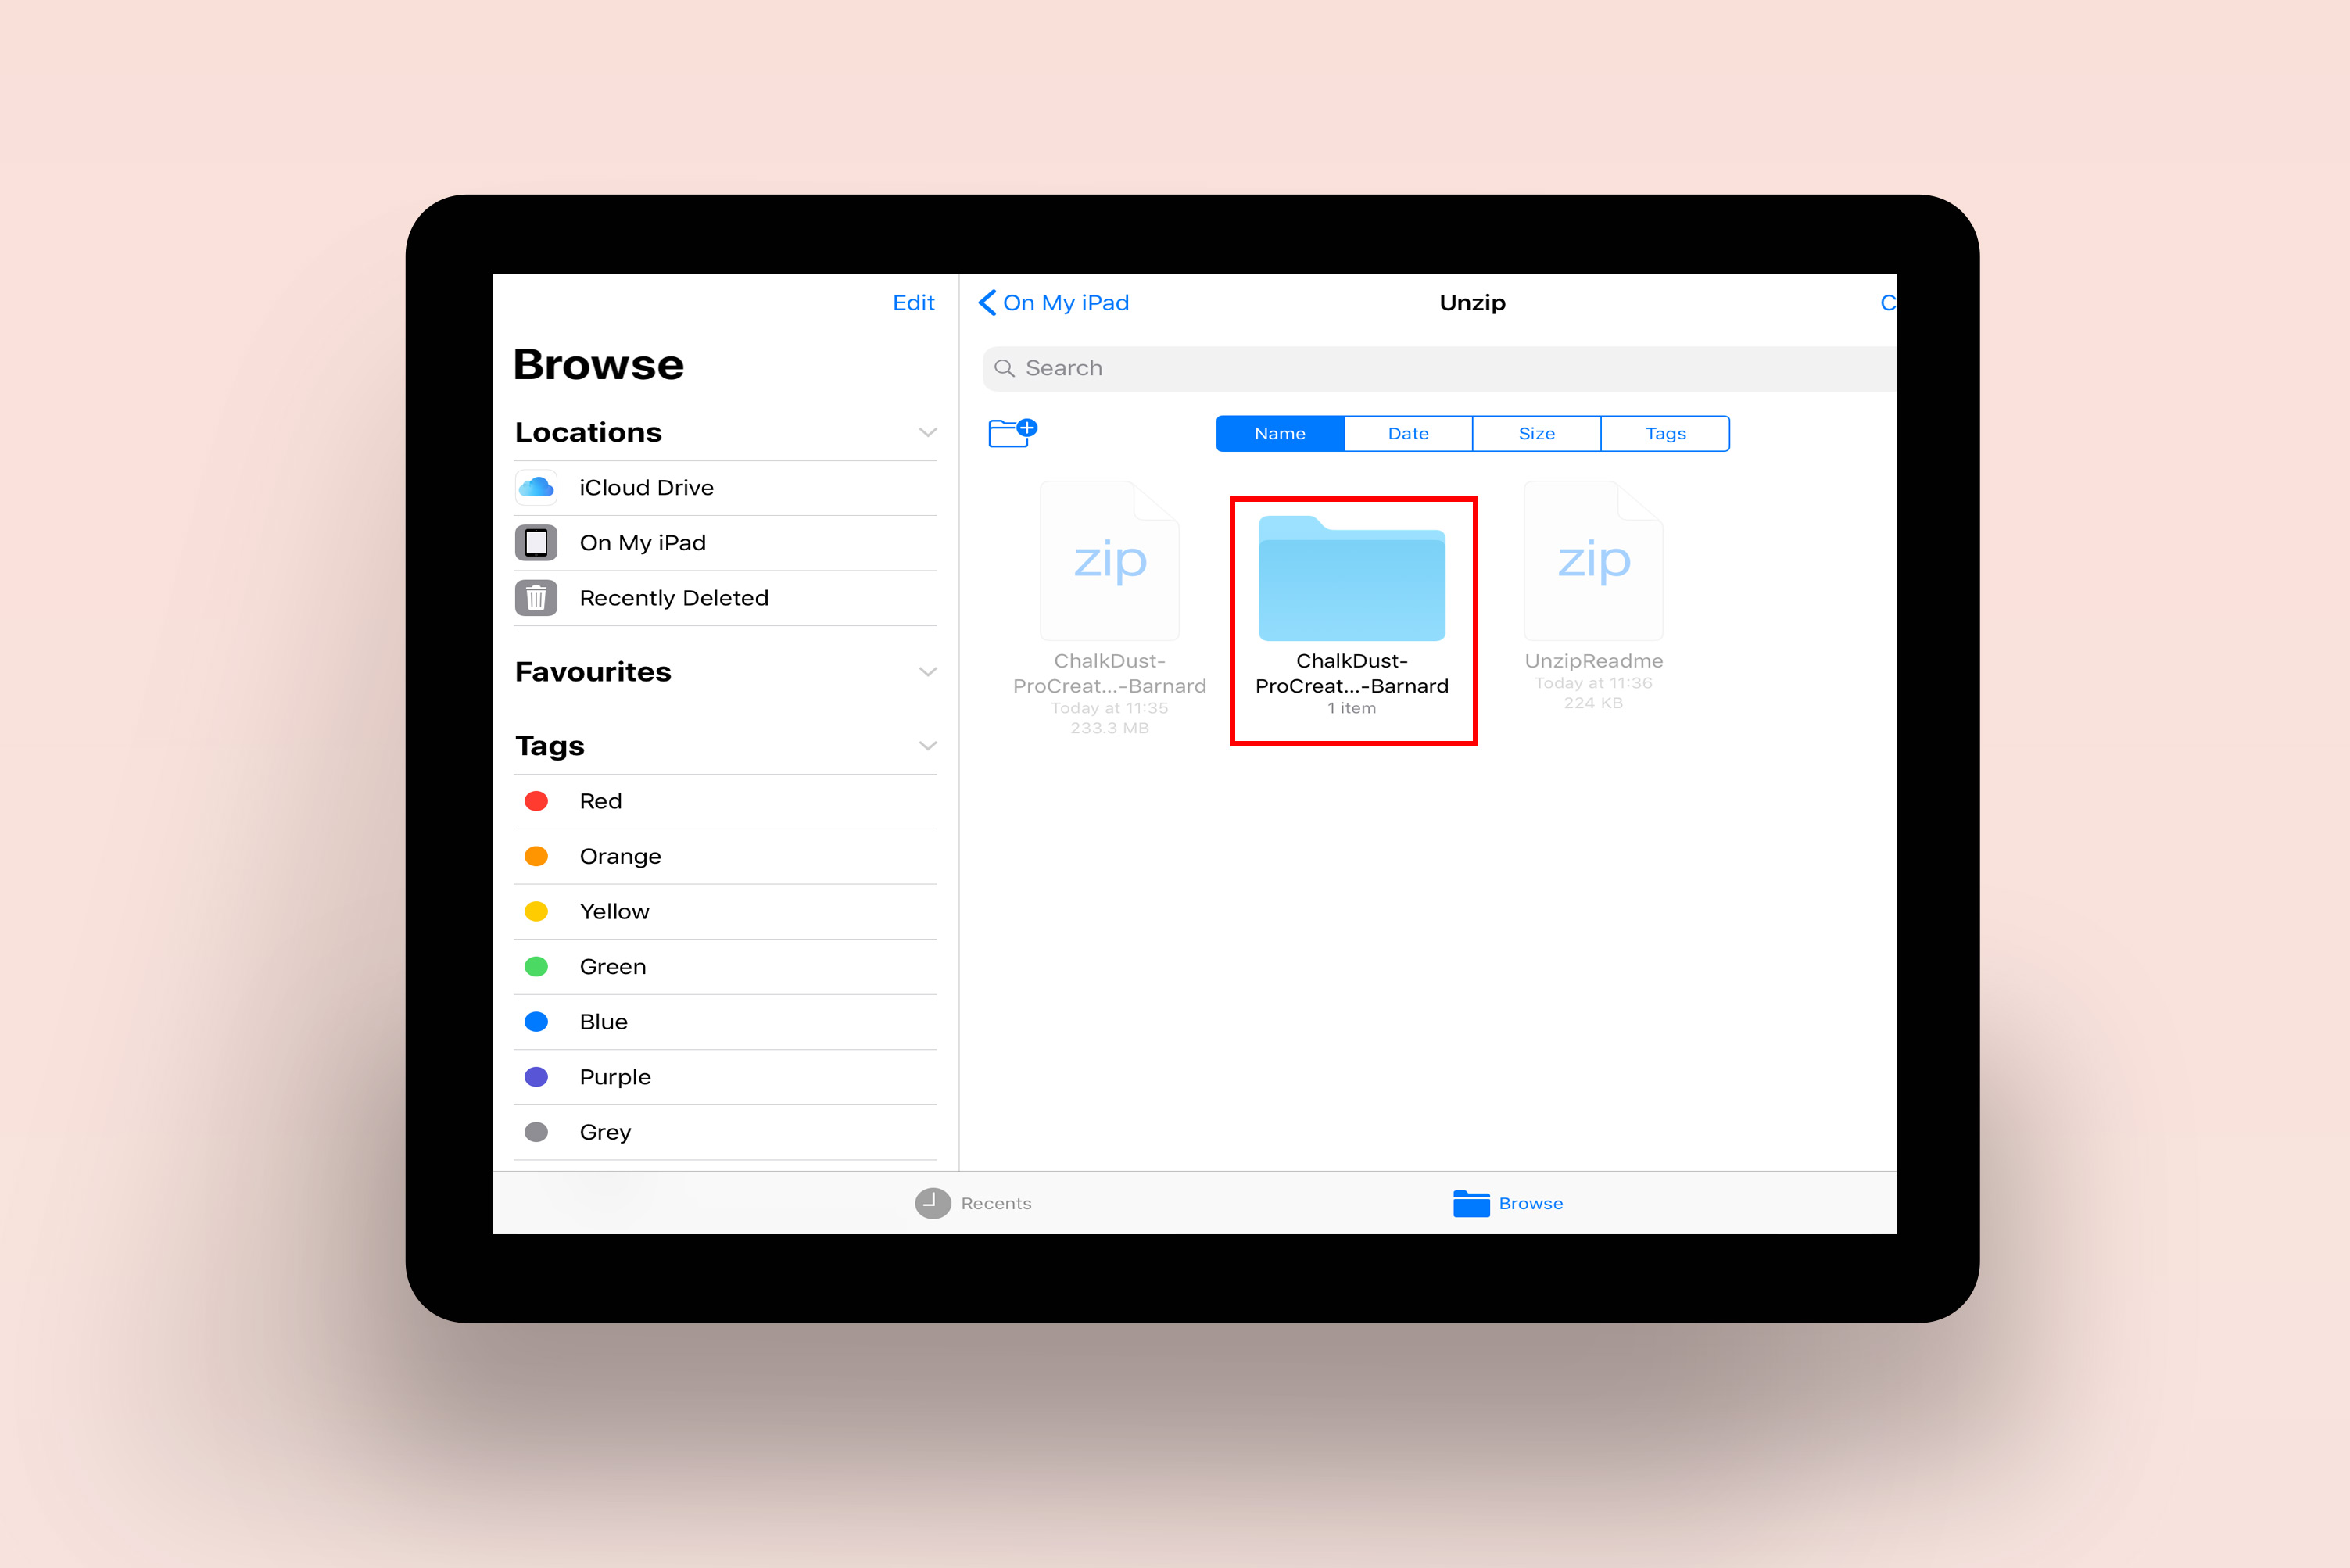
We will go back to the same Unzip files used in the previous steps and then click on the unzipped Chalk Dust Procreate folder to navigate to the Brushes folder.
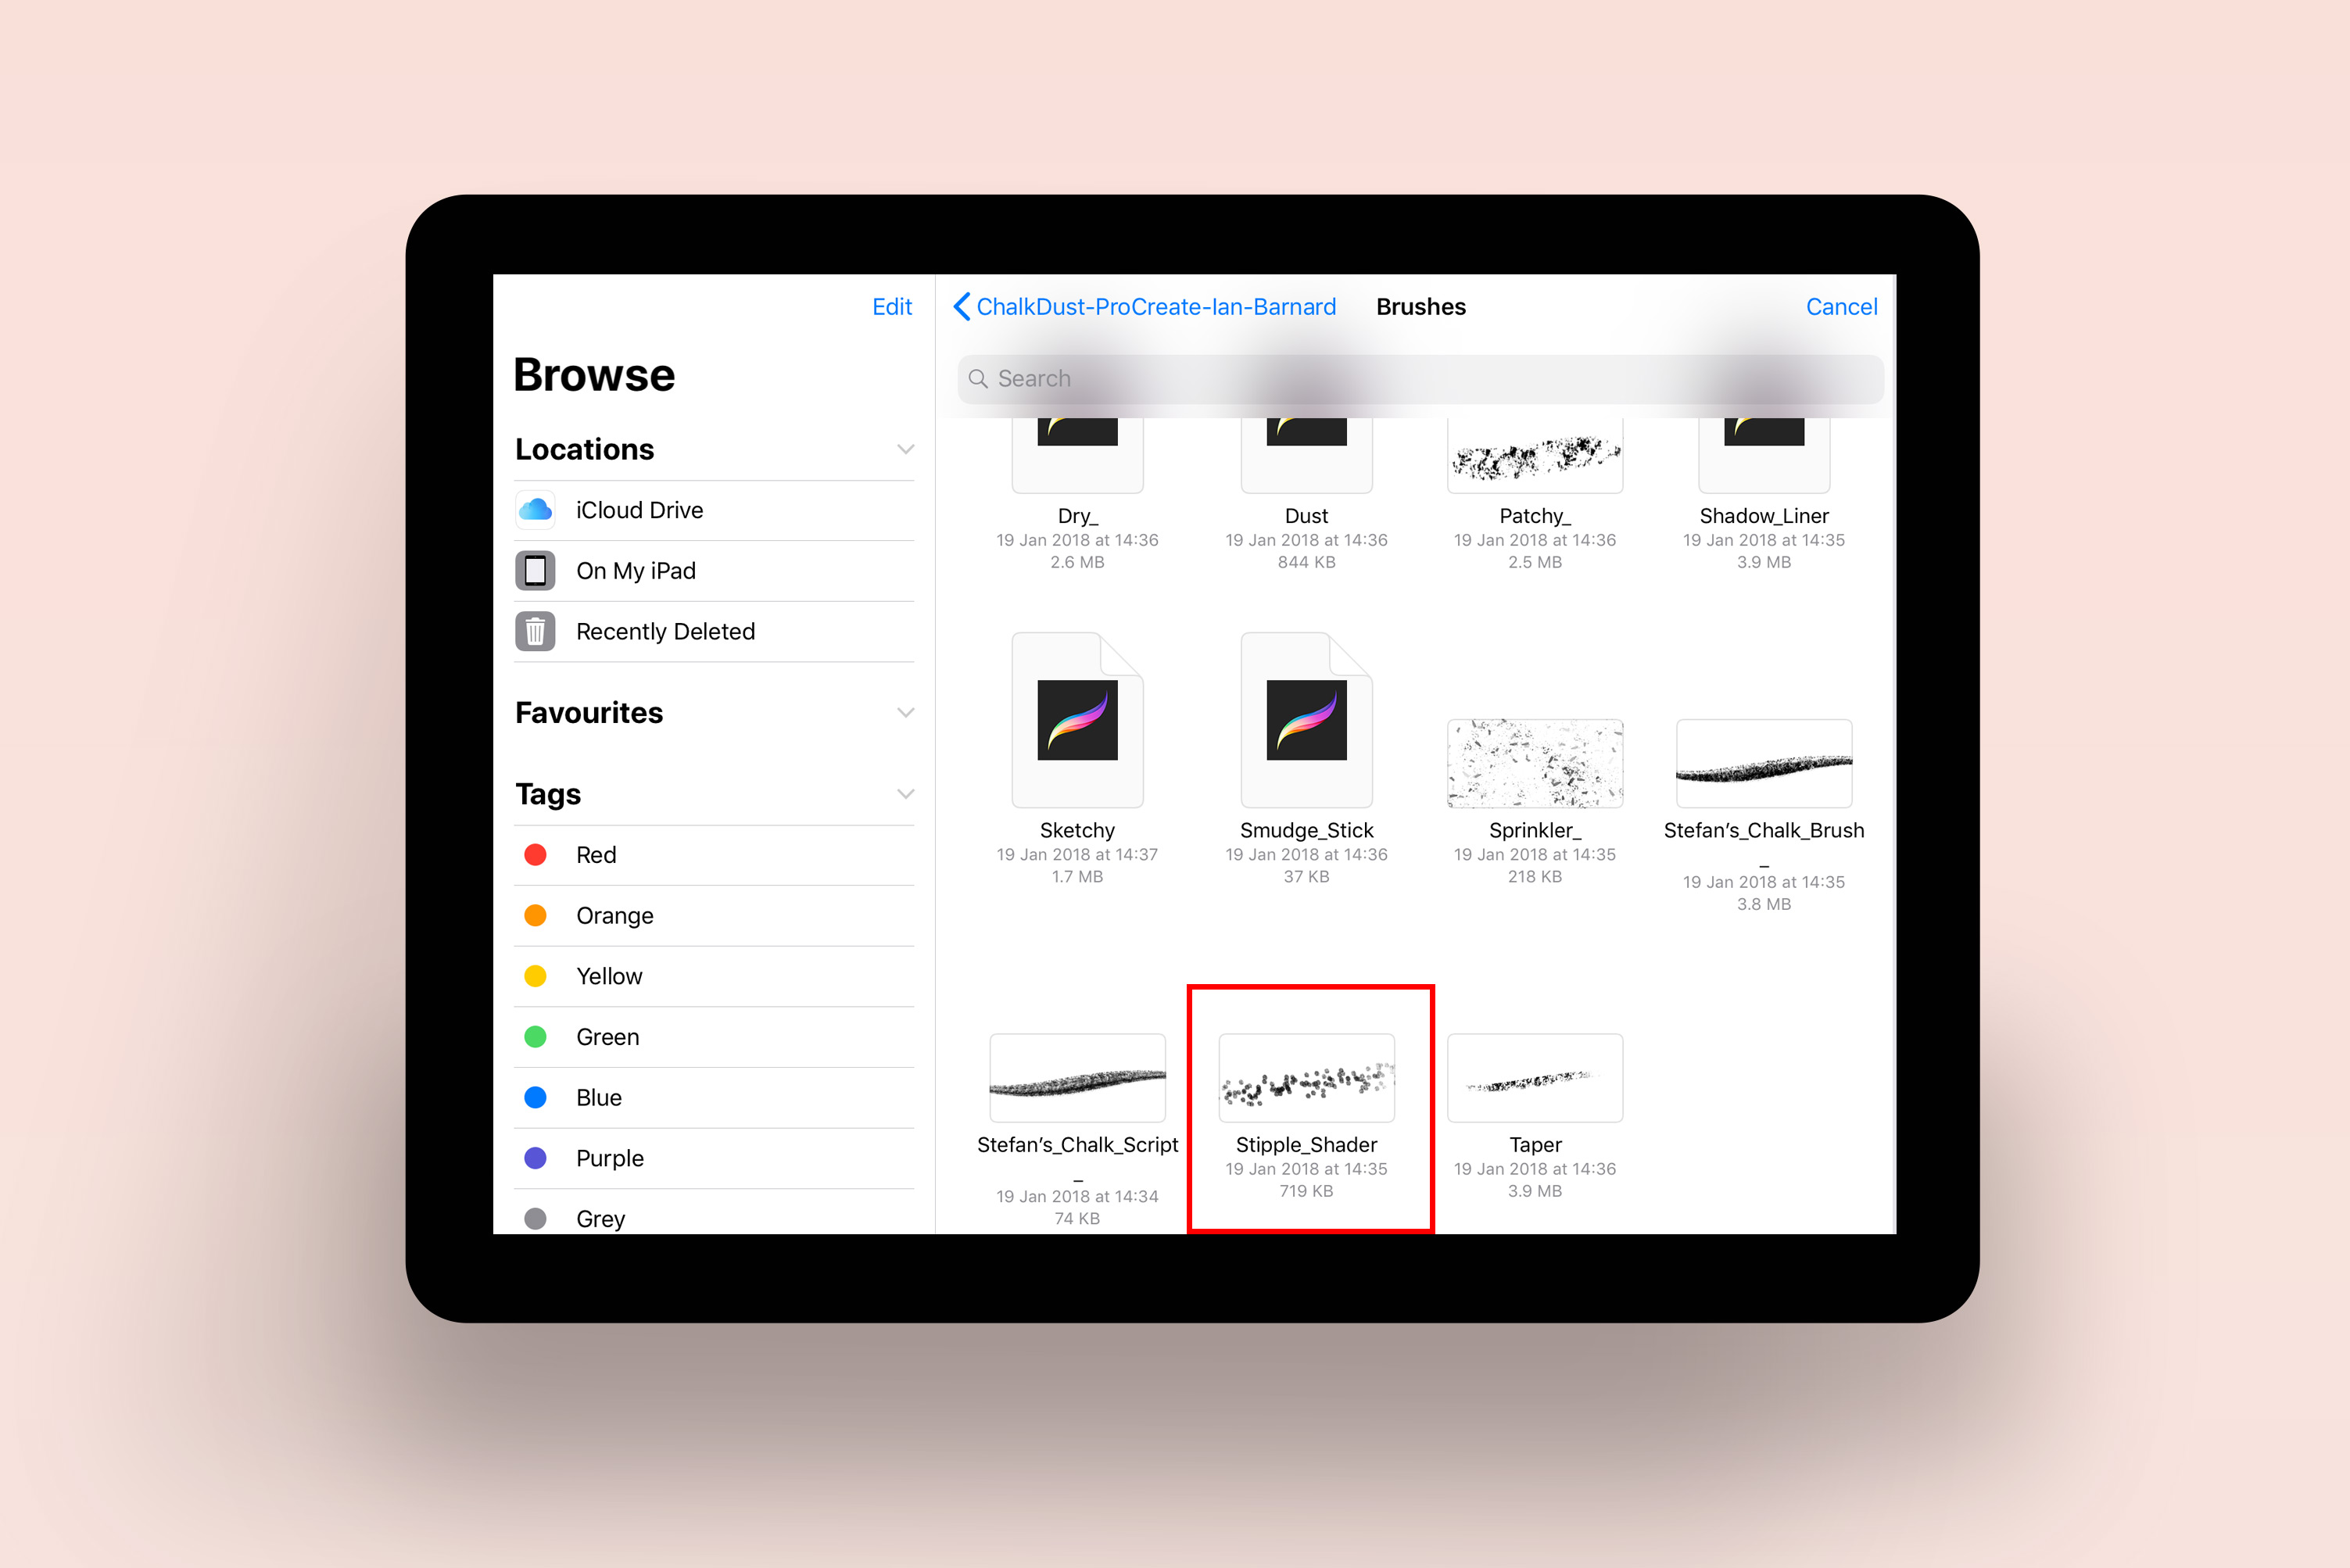
And now, you will be able to see the brushes visually, so you can better decide which ones you’re going to install.
This also allows you to install multiple brushes, but for this example we’re just going to install the ‘Stipple Shader’. After tapping on it, it’ll now be imported into our Design Cuts folder. Were you to install multiple brushes into the Design Cuts folder, they would all appear here.
Those are two of the ways that you can install your brushes into Procreate.
4. How to get more brushes in Procreate?
We have the answer to that and it’s very easy, just have a look at some of our most popular Procreate products:








This informative video and all your screenshots helps. Thank you!!!
That’s great to hear you found this helpful, Sue! :)
Hello!
I love my new brushes!! Do I need to keep a copy of them on my computer once I’ve downloaded them to my iPad? Also, is it just easier to download from my iPad vs. my computer? ~~Thanks, so much!
Hey Kim,
It’s great to hear that you love your new brushes! The great news is that once an item is in your account, you can re-download your files anytime. It is completely up to you whether you download your files directly onto your iPad, or transfer them over from your computer, and if you do have any queries about working with your Procreate brushes at all, please do not hesitate to get in touch with anytime :).
Trying to download some files I purchased for Procreate to my iPad and definitely do NOT see the same results as the first few steps. When I go into my downloads, select “View Files” for the product I want, and then select to download the file, all I get is computer code but no file. I would really appreciate some help!
Hey Tracy,
I am really sorry to hear that you are experiencing difficulty downloading your files on your iPad. I can certainly help with this and have send you an email so that we can get you up and running with your brushes as soon as possible.
Thanks.
Hey there,
You are very welcome and happy designing!