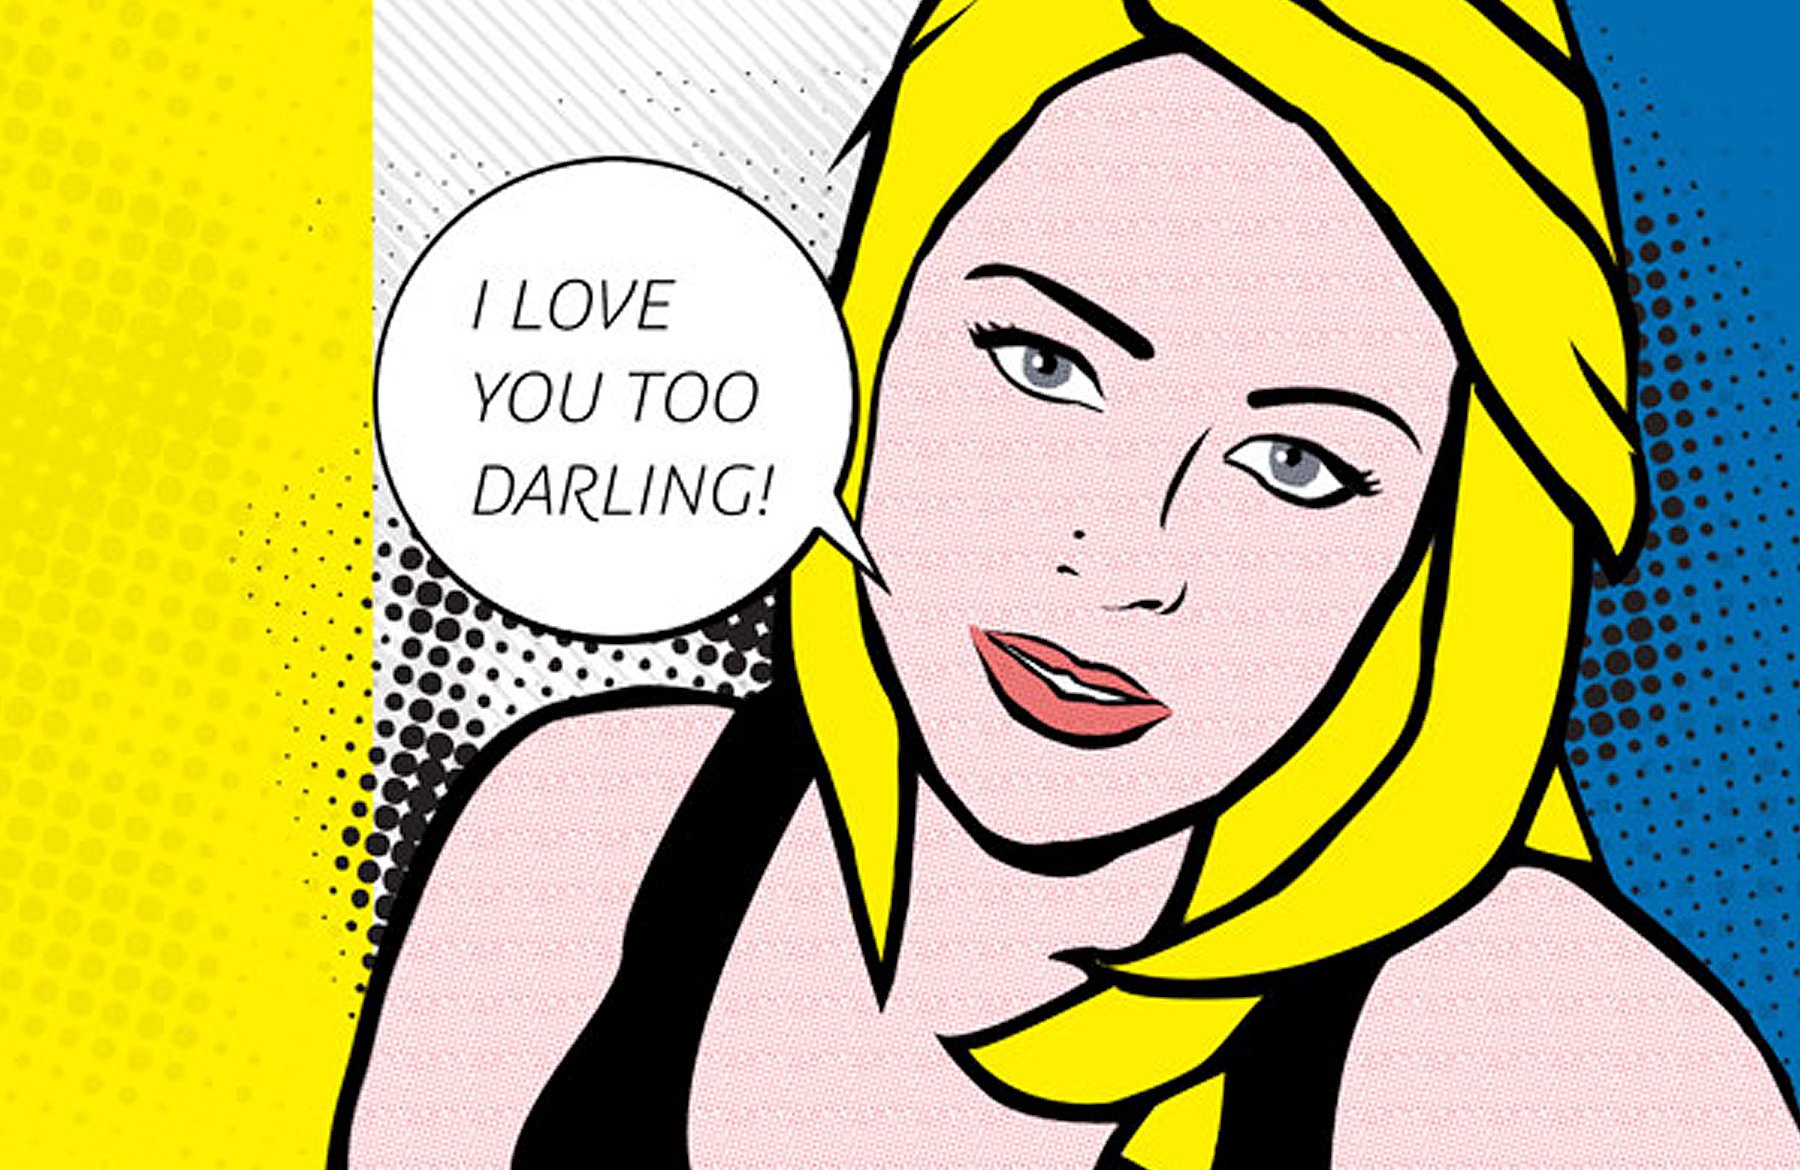
WHAT WE’RE CREATING:
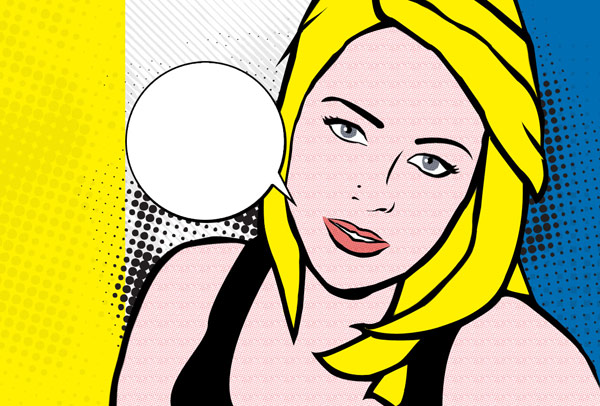
In today’s Photoshop tutorial you’ll learn how to convert your regular photos into an authentic pop art outcome. The tutorial is accompanied by a fantastic halftone vectors pack courtesy of Go Media. You’ll use these halftone vectors as well as some great design theory to create a believable pop art outcome.
Time to go back in time and dive right in!
Follow along with this tutorial: Download the freebies
This tutorial is accompanied by a fantastic freebie pack, taken from this week’s deal, offering you 1360 of Go Media’s best vectors.
To give you a sample of the main vector bundle, we’re giving away a free halftone vector pack.
Step 1:
Start by downloading this photo of an attractive young woman.
TOP TIP: This tutorial can be applied to any of your personal photos, so if you’d like to create a cool pop art style avatar, feel free to use another image:
This will be our base photo.
Step 2:
Before we start working with our image, we need to plan some of the details of the pop art style we’re looking to recreate.
Whilst pop art is visually quite simple and striking, a lot of the authenticity of this effect lies in the finer details.
Start by creating a mood board of some famous pop art creations, to get an idea of the visuals within this design trend.
Some things that I identified were:
– Bold black outlines
– The black outlines varied in width, to give a more natural, handmade look. They weren’t uniform
– There are no straight lines in the outlines. Pop art is more fluid, rather than angular
– However, despite the fluidity of the trend, there are no rounded corners. The ends of shapes often form a sharp point, despite the main lines of the image being curved.
– The color palette is very bright, but also limited to just a few primary colors
– Usually the halftone textures popular amongst pop art are only applied over skin or specific areas of the image, with the majority of the image being comprised of solid colors
All of these observations are a great start for understanding the pop art style better.
I also created my limited color palette that I could use as a swatch reference palette whilst building up my image:
The colors are:
#fff000 (yellow)
#ffeef1 (skin tone)
#006db2 (blue)
#eb7e7c (red)
Step 3:
Create a new layer called ‘lines’.
Use the pen tool to create a path, starting around the girl’s shoulder. Remember, you don’t want anything too uniform, as we’re going for a bold, but handmade approach.
If you need any help mastering the pen/path tool then you should check out this helpful tutorial:
Become a Master of the Pen Tool in Under 30 Minutes.
One you’ve created a nice closed off path to form the start of a bold outline by the girl’s shoulder, go to your path’s palette and right click on your active work path. Click ‘make selection’ to turn this path into an active selection:
Fill your active selection with black. Now you no longer need your work path, so right click on it in the paths palette and click ‘delete path’.
Step 4:
Repeat Step 3, until you’ve created your entire outline.
Avoid the facial features for now, and focus on a main outline for your character, as well as some details of the hair.
Be attention to how each part of the outline flows into the next.
Once you’ve completed your outline you’ll most likely need to go in and refine it. Delete areas that don’t look right. Play around with varying outline width. Keep referring back to your mood board of images for visual inspiration.
Step 5:
Create a new layer beneath your main outline layer.
Use your pen tool to create a solid black shape where the girl’s clothes are:
Create a new layer called ‘hair’. Select the yellow color from our original color swatch.
Use a hard paintbrush to paint in this yellow color where the hair falls. Be sure to paint within the outlines you created. The outlines are on a layer above your ‘hair’ layer, so you can afford to be fairly rough. If you make a mistake, just erase or mask off the incorrect area.
Step 6:
By now you should be fairly familiar with using the pen tool to create outlines.
Create a new layer called ‘nose’ and create some basic shapes to construct the outline for the girl’s nose.
Do the same for the eyes (including pupils) and the eyebrows:
Step 7:
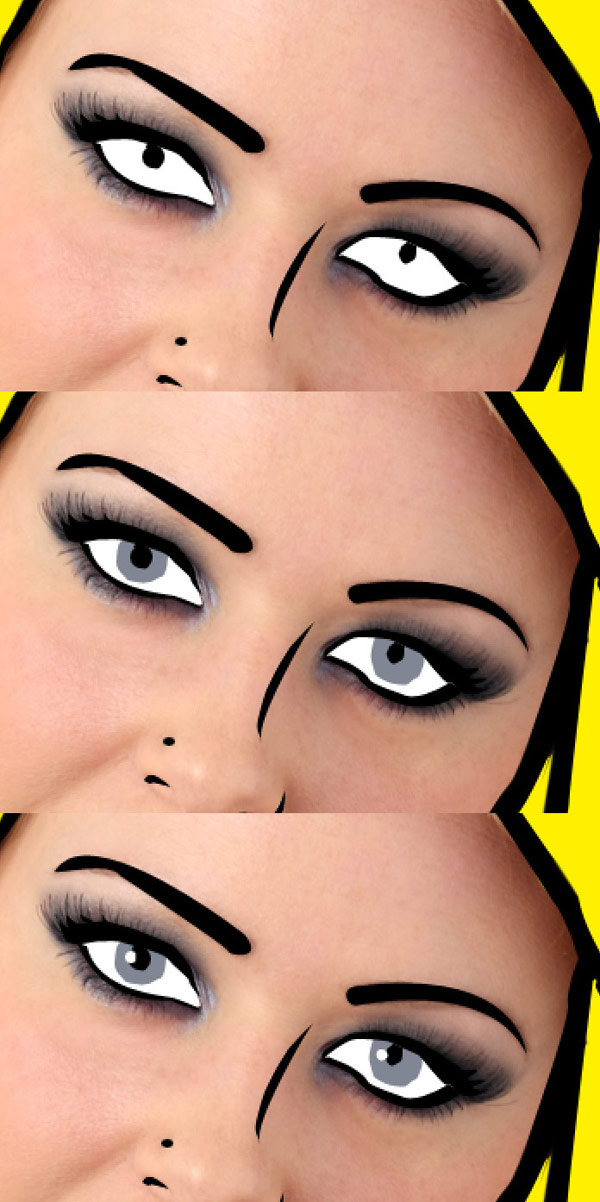
Now build up the eye details using multiple layers.
Follow this order:
– Add eye whites behind the eye outline layer
– Add the blues of the eyes above this layer
– Finally, add the whites of the pupils on a top layer
Step 8:
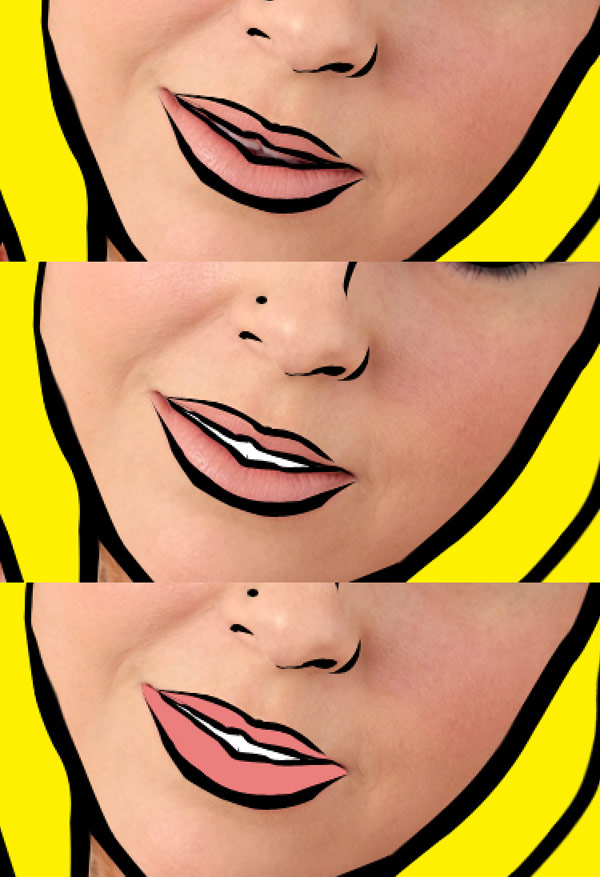
Similarly, start to build up the girl’s lips. Use the following steps:
– Create the black outline (deliberately make the lips fuller than in the original photo, as we’re going for a cartoon look here)
– Create plain white teeth underneath the outline layer
– Then create the solid red of the lips, using the shade of red from our color swatch
Step 9:
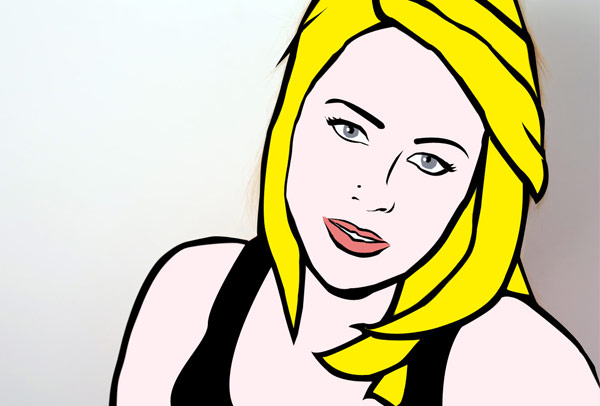
Now create a new layer beneath all your outline, facial detail and hair/clothes layers called ‘skin’.
Select the skin tone from our color swatch, and fill in all areas where the woman’s skin is showing:
Step 10:
Now, return to the form at the top of this page and access the freebie pack that accompanies this tutorial.
This pack contains 8 beautiful halftone vectors taken from our current deal:
Go Media’s Ultimate Vector Collection (1360 Meticulous Designs)
From this point on, you’ll need these halftones to complete the tutorial. It’s a fantastic freebies pack and we highly recommend you grab it, as well as checking out the full deal.
Step 11:
Open the halftone freebies pack and grab one of the halftones with a more uniform pattern.
Create a new document roughly 40px X 30px and scale down the halftone patterns to fill this area:
Now apply a color overlay blending option to this pattern layer, making it red.
Now hide the original background layer, leaving a transparent background, with just your red halftone showing.
Go to edit>define pattern and save this pattern as ‘pop art halftone’.
Step 12:
Duplicate your skin layer, and reduce the ‘fill opacity’ of the duplicate layer to 0%. Keep the main layer opacity at 100%.
Now apply the ‘pop art halftone pattern’ you just create in the previous step.
This will apply a great pop art looking pattern to your skin.
Step 13:
Now it’s time to focus on some of the finer details of our piece.
Start by grouping all layers linked to the eyes and eyebrows into a single layer folder.
Then use your transform controls to enlarge all of the eye layers, making the eyes slightly larger.
This helps establish a less realistic, more cartoon appearance:
Then, apply the halftone pattern you created to the lips and blues of the eyes:
Step 14:
It’s time to hide our original photo layer and start work on our colorful pop art background.
Ensure that you have a plain white background behind your woman.
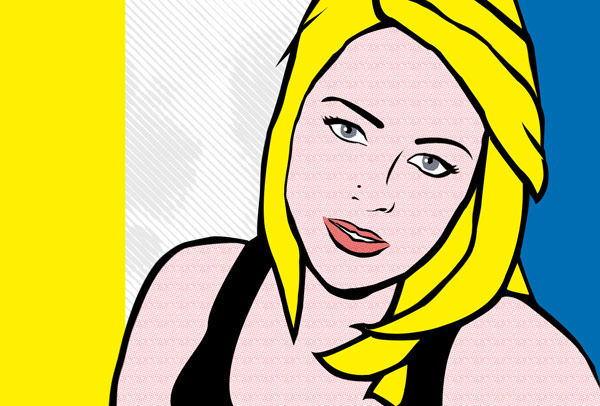
Then paste in one of the halftone patterns from the freebie pack for this tutorial. Reduce it’s opacity to 10%, and have it as a beautiful watermark to the left of the woman:
Now create a yellow panel in the left of your canvas, and a blue panel in the right of your canvas.
Remember to use the color swatch from the start of this tutorial to define these colors:
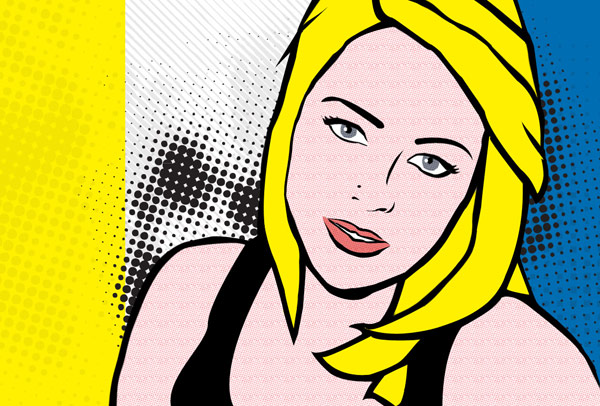
Apply various other halftones from the freebie pack for this tutorial. This really helps add depth and detail to the piece, and the halftones fit perfectly with the pop art cartoon style.
Step 15:
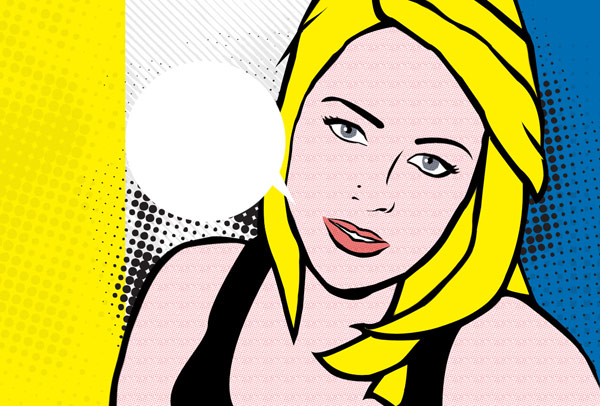
Create a new top layer called ‘speech bubble’. Use the circular marquee tool and lasso tool to create a speech bubble selection. Fill it with white:
Apply a 3px, black inner stroke to your speech bubble shape. Also apply a sharp black drop shadow.
This helps fit the bold pop art look for this piece:
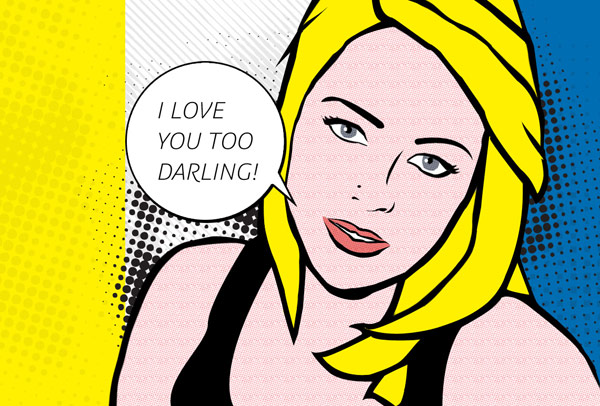
To complete the piece, add some thin text to the speech bubble, and type out a stereotypically retro message:
AND WE’RE DONE
I really hope that you enjoyed this tutorial. This pop art effect can easily be applied to your personal photos, and would be a fantastic way to liven up your Facebook page, and impress your friends and family. Have fun with the tutorial and enjoy the freebies pack.




I have to agree! This tutorial is amazing :) –even if it was created a while ago.
You guys just keep a rocking’!
Hey Diana,
Oh thank you so much!
That’s really kind of you and we supper appreciate your support, it means the world to us all here at DC :)
Loved how this tutorial unpacked the pop-art process :) but things got a little confusing in step 11 – grabbing and applying the half-tones. I figured it out & learnt something new (thanks for that) but it made going through the tutorial more work than it could have been with just a little more explanation for noobs like me.
Thanks team!
Hey John,
Thank you so much for your kind words! It’s great to hear that you enjoyed this tutorial and picked up some new tips & tricks :) I’m really sorry for any confusion caused with step 11 but I’m pleased to hear that you were able to complete the tutorial! Rest assured, we will certainly take this on board for our future tutorials so thank you kindly for your feedback!
Thanks again, John, and if there is ever anything I could help you with, please do let me know. I’m here to help!
This is an amazing tutorial – I can’t wait to make some of these!
Hey Robyn,
Thank you so much for your kind words! We’re so pleased you enjoyed this tutorial and we hope you like working with these freebies as well :)
Thanks again, Robyn! If you ever have any queries please do let me know. I’m here to help!