In this design tutorial I will be showing you how to create a polished looking packaging design for an upscale winery with Photoshop. We will begin by creating a wine label that will be using one of the all new typefaces from the current design bundle along with a free stock photo from Pixabay. From there we will implement one of the high quality PSD templates from the Essential Packaging & Branding Mockup from the Design Cuts Marketplace to apply our artwork to. If you are all ready to pay a visit to the winery then start up Photoshop and let’s get things started!
HAVE YOU SEEN OUR YOUTUBE CHANNEL?
Watch the video tutorial below and subscribe to our YouTube channel for regular updates direct to your inbox.
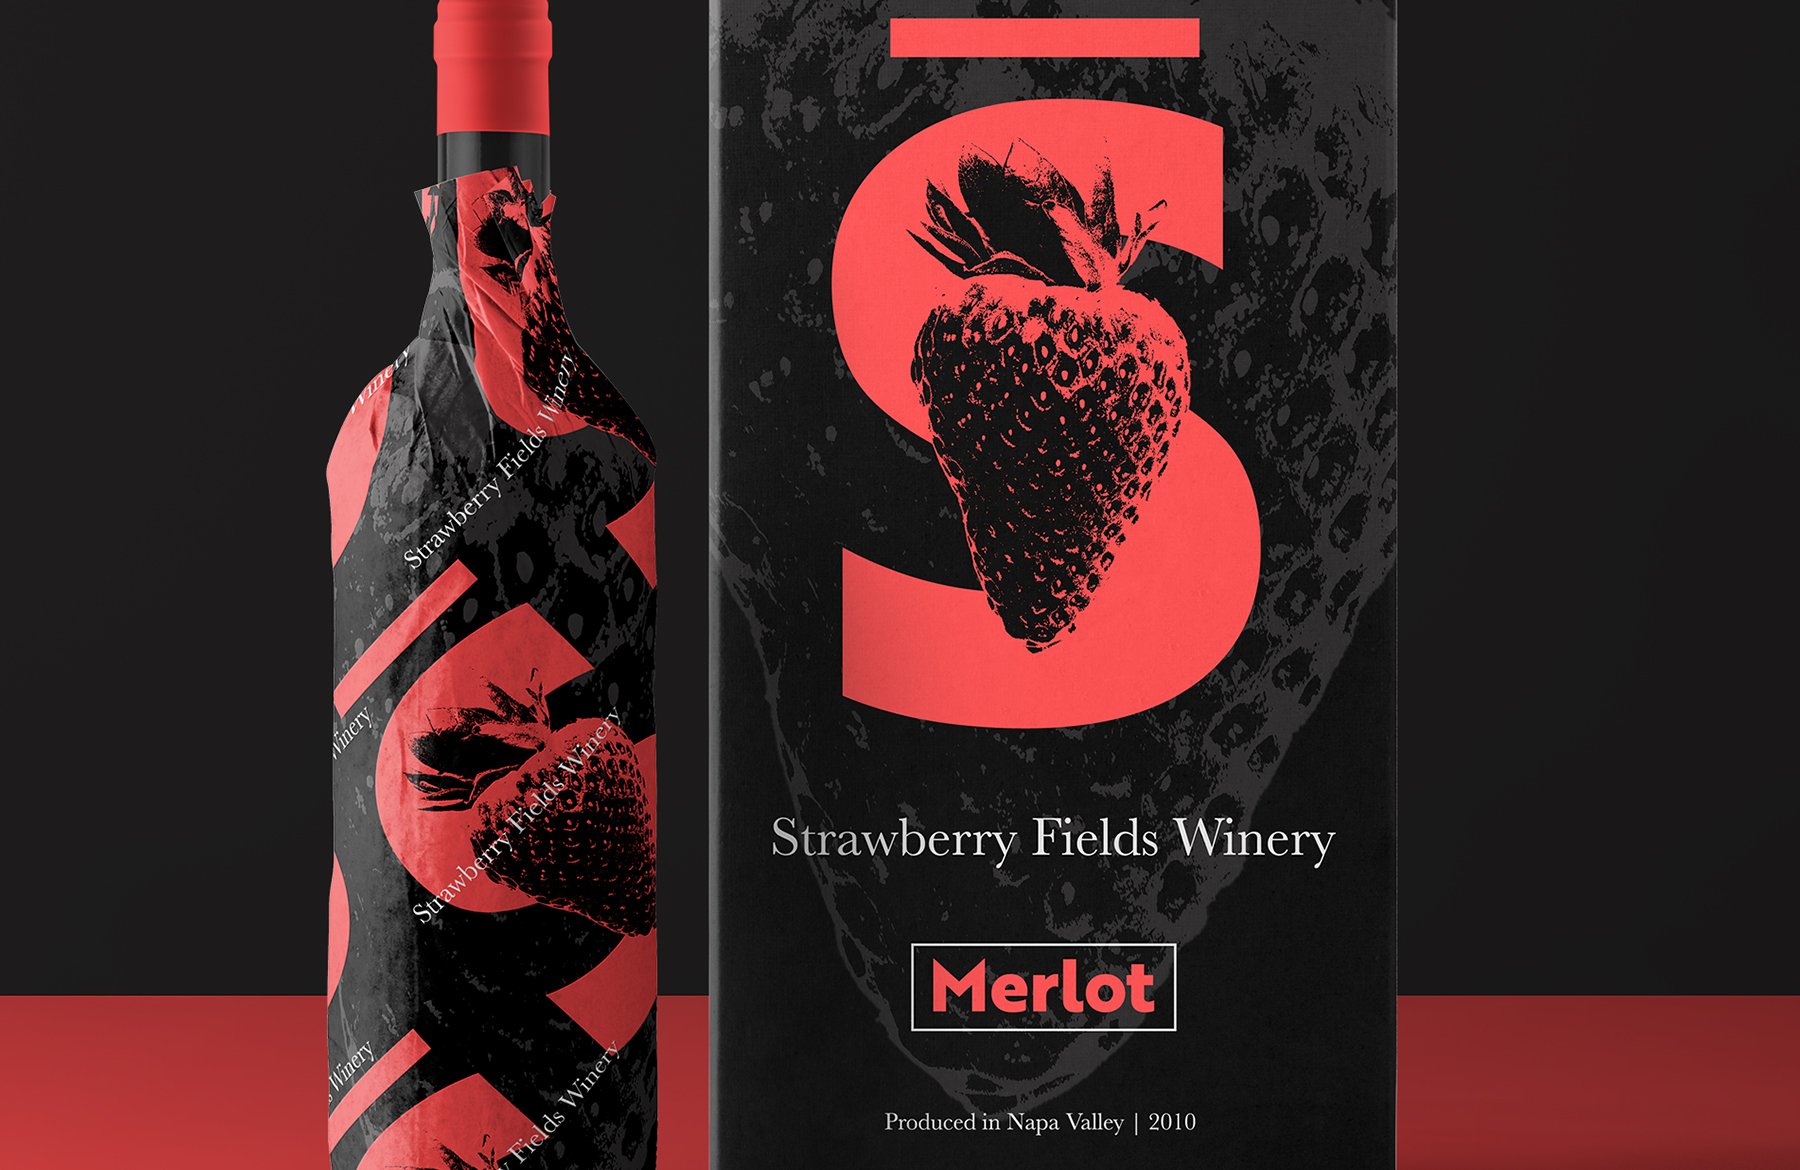
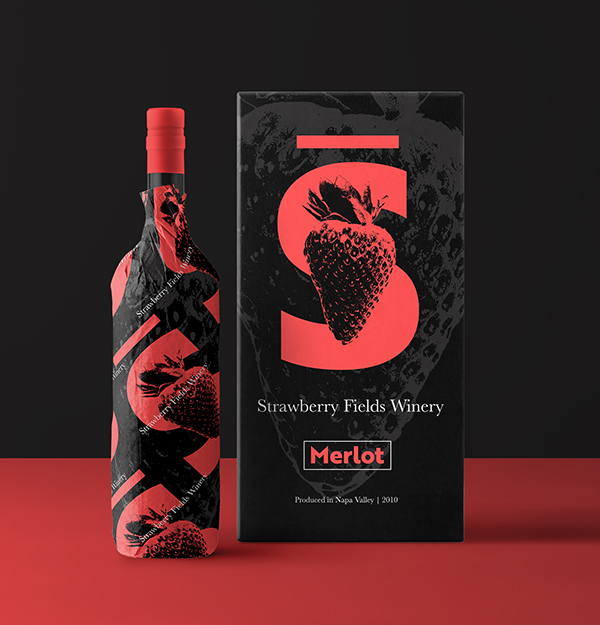
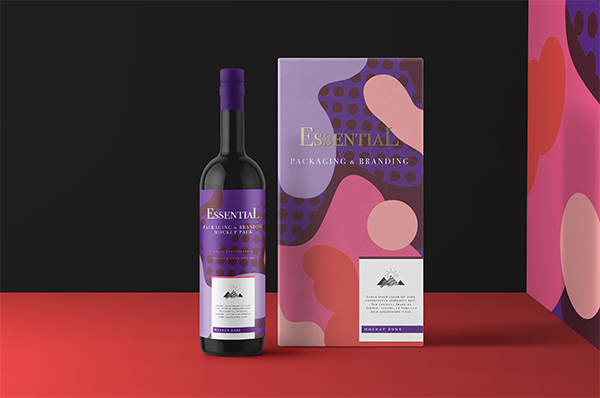
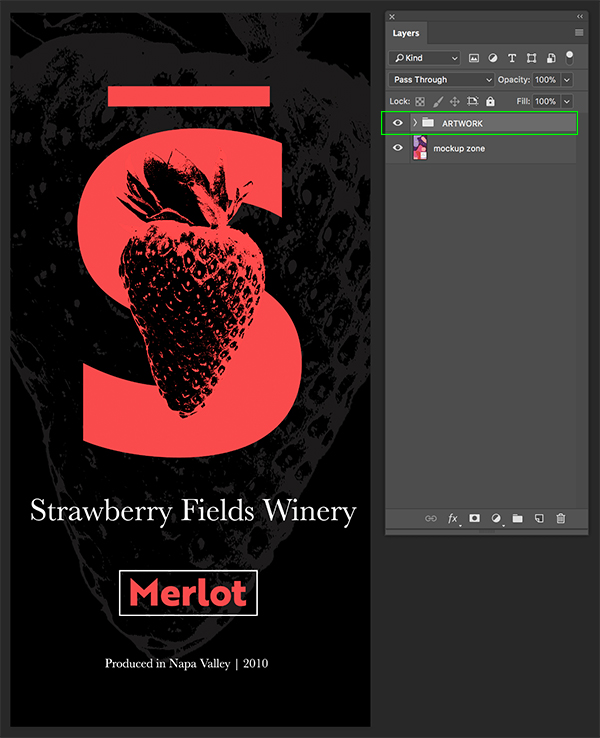
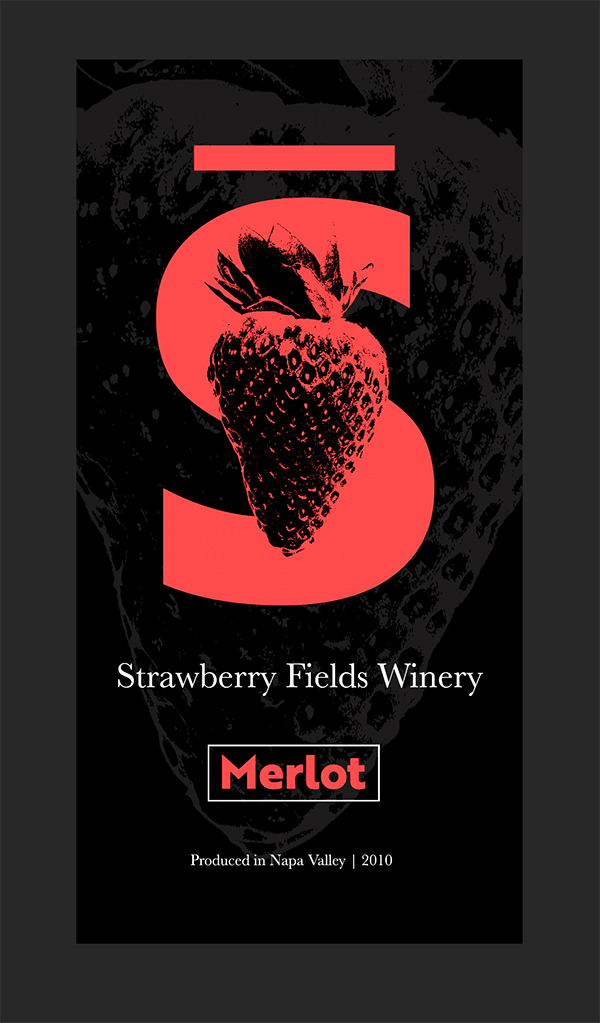
Here’s a look at what we’ll be creating:
Follow along with this tutorial: Download the freebie files
This freebie pack includes world-class font families for your library, with web fonts and commercial usage license included.
The freebie pack is a very small taste of what you can expect to find in the The Complete Iconic Font Library for just $29 (that’s 99% off). This massive collection will provide you with some of the most seminal, iconic fonts ever created.
Step 1: Strawberry Fields Winery Packaging Design
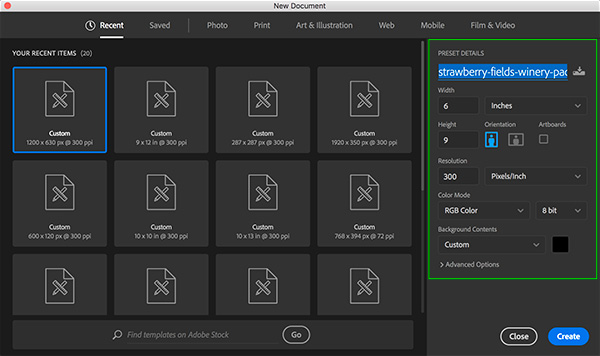
Let’s begin by opening Photoshop and creating a New Document. Make the document ’9”x6”’ with a ‘Resolution’ of ‘300’, ‘Color Mode’ of ‘RGB’, and the ‘Background Contents’ set to ‘Black’ and then click ‘Create’ from the lower right corner. You can name your document here as well – I have named the file ‘strawberry-fields-winery-packaging-design’.
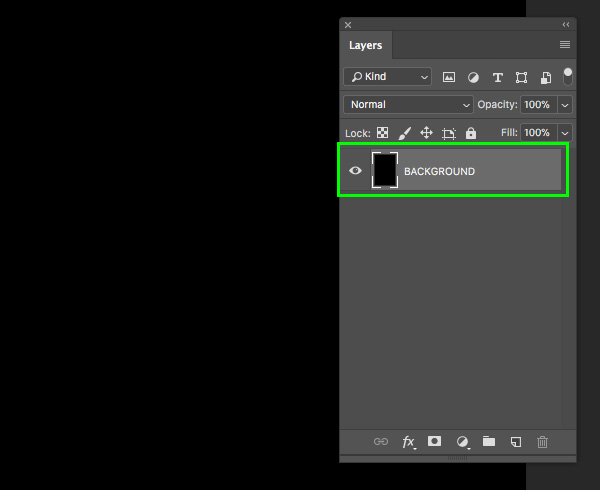
Once you have created your new document double click on the ‘Background’ layer with the small lock icon next to it.

You will then be asked to rename the layer, so let’s enter the name ‘BACKGROUND’ and then click ‘OK’ to proceed.
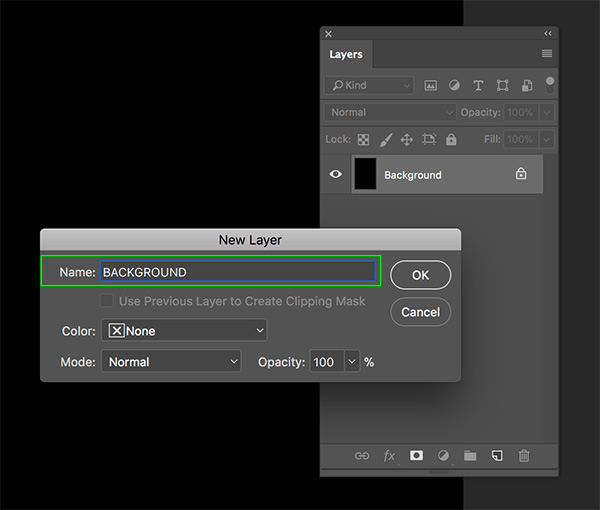
The background layer has now been renamed and unlocked.
Step 2: Strawberry Mask
At this point we will begin crafting the main logo. To begin, download the free stock image of the strawberry that we will be using here from Pixabay. Once you have downloaded the image open it inside of Photoshop. From here, grab your Magic Wand Tool (W) and change the ‘Tolerance’ setting in the top toolbar to about ’32’ as shown here:
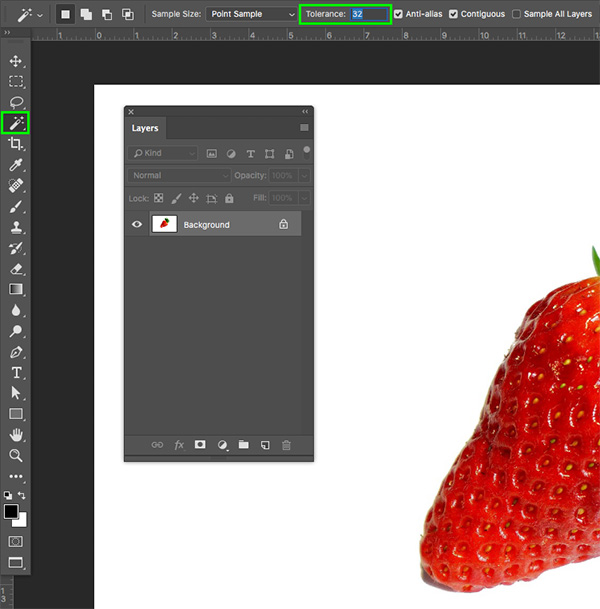
Next, use the Magic Wand Tool (W) to click anywhere in the white background of the strawberry image to make a selection. You may not get a perfect selection here, but that’s okay because we can fix this in the subsequent steps.
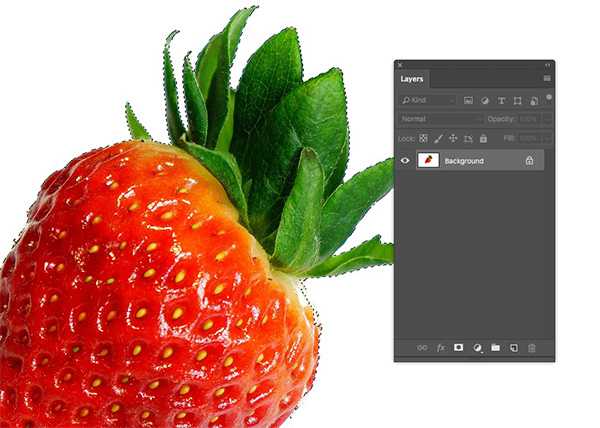
Now that you have the background mostly selected, go to the Select menu and choose ‘Inverse’ to invert the selection.
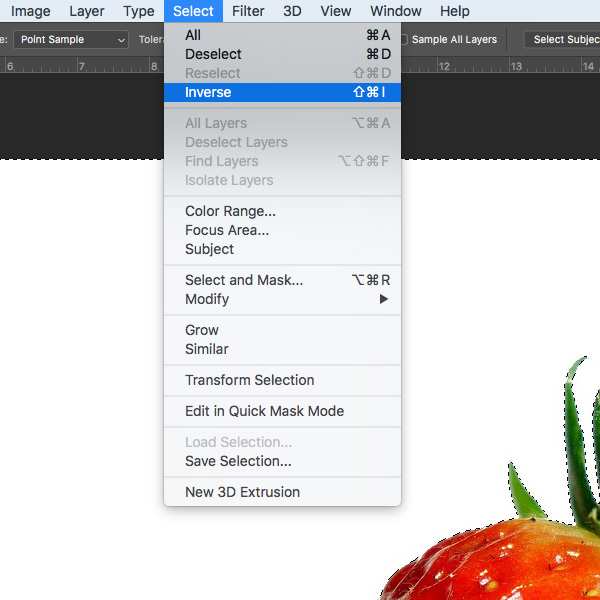
Click on the ‘Add Layer Mask’ icon at the bottom of the Layers Palette to add a mask so that you are just left with the strawberry and no background. You may notice a couple of areas that need a bit of cleaning up as indicated below:
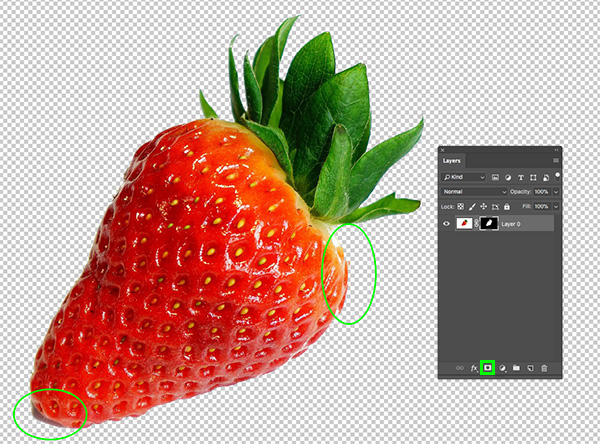
Here there are two areas that I need to quickly go back in and fix. The lower portion of the strawberry needs to be removed, so I will use a solid black round brush to paint this area out while my Layer Mask is selected. The area towards the top of the strawberry actually needs to be painted back in to the image, so instead, change your fill color to solid white and then brush over this area to bring it back in. You should now have a cleaner looking selection as shown here:
Step 3: Prepping
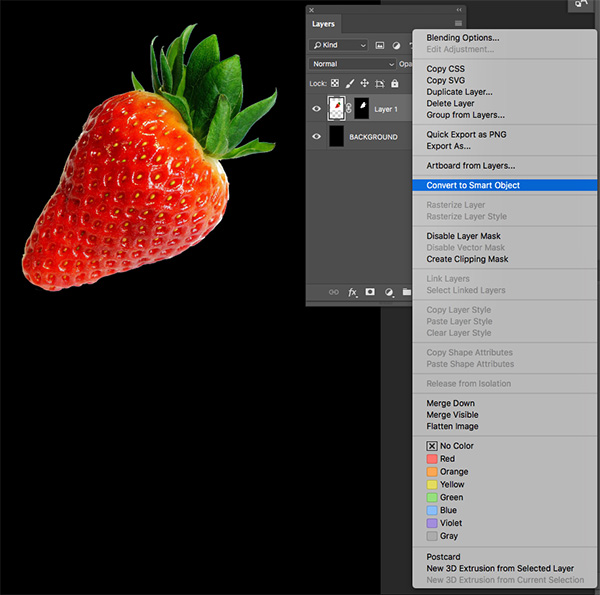
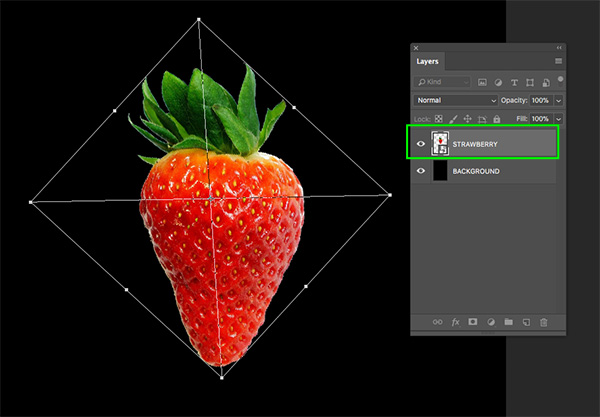
Now that we have our strawberry isolated with a mask applied, click and drag this layer into your main document. Next, hold the Control key and click on the layer and then choose ‘Convert to Smart Object’ as shown below:
After converting the image into a Smart Object press Command/Ctrl+T to initiate a Free Transform and then rotate the strawberry counter clockwise so that it’s upright before pressing ‘Return’ on the keyboard to apply the transformation. We will also double click the ‘Layer 1’ text in the Layers Palette and rename this layer ‘STRAWBERRY’ as shown in the image below:
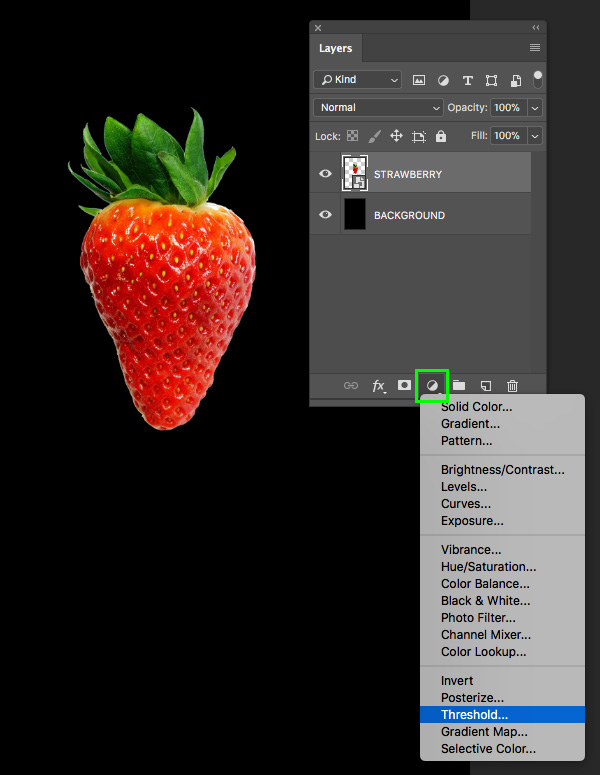
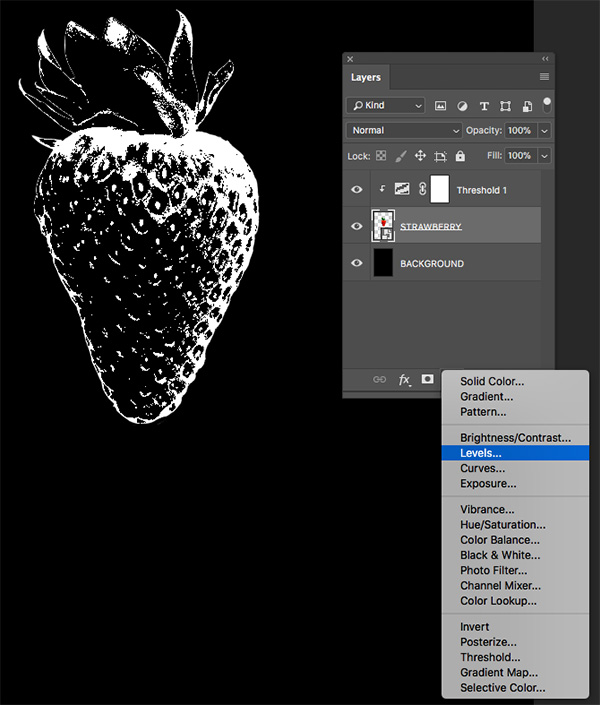
Step 4: Threshold Effects
Make sure you have the ‘STRAWBERRY’ layer selected, and then hold the Alt/Option key and click on the Adjustment Layer icon at the bottom of the Layers Palette. Once the menu appears, choose ‘Threshold…’ from the list as shown below:
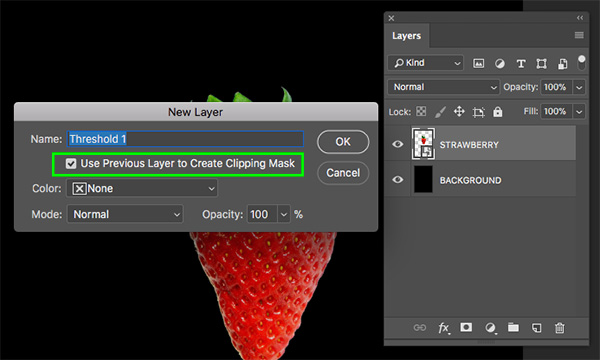
When prompted with the ‘New Layer’ dialog box, check off the option that says ‘Use Previous Layer to Create Clipping Mask’ and then click ‘OK’ or hit ‘Return’ on the keyboard.
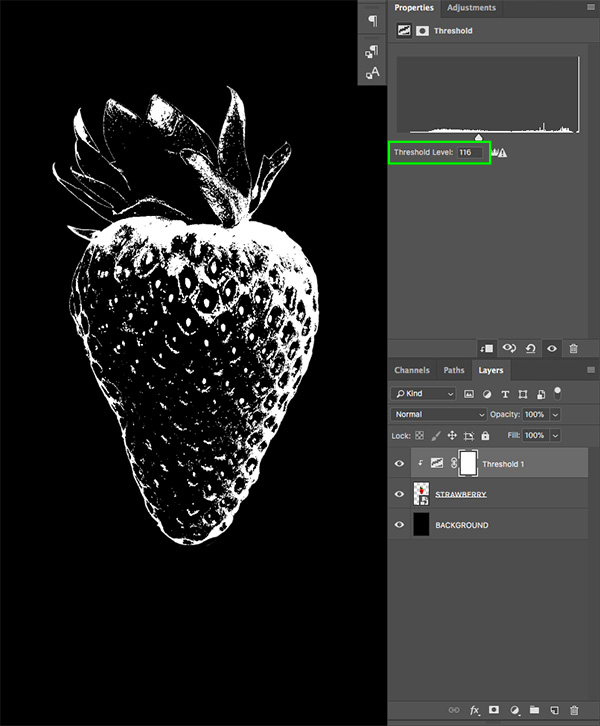
You will now have a Threshold Adjustment Layer above your Smart Object and it will have a Clipping Mask applied to it, indicated by the downward pointing arrow on the Adjustment Layer. Now let’s go to the ‘Properties’ and move the ‘Threshold Level’ slider to ‘116’ as shown here:
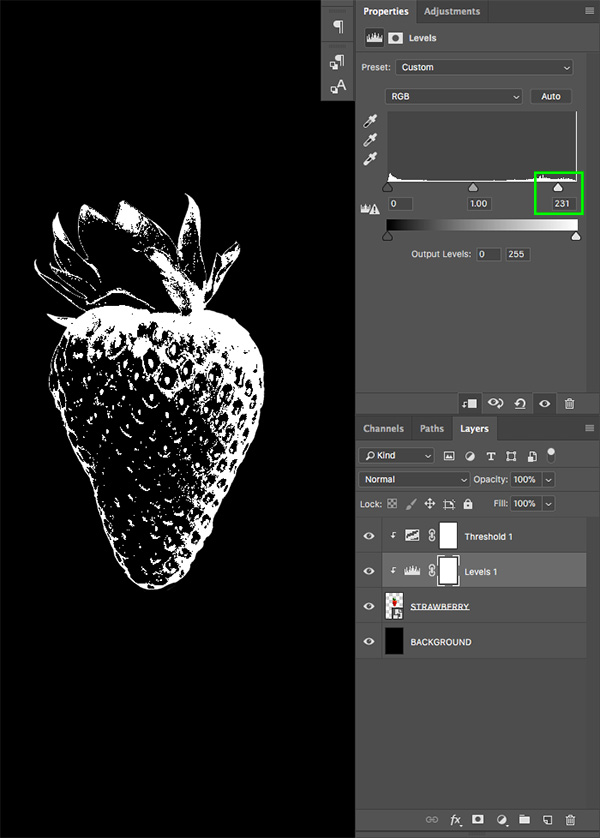
Step 5: Levels Adjustment
Select the ‘STRAWBERRY’ Smart Object once again, and this time we can simply click on the Adjustment Layer icon without holding Alt/Option. Next, choose ‘Levels…’ from the menu that appears to apply the Adjustment Layer that will automatically have a Clipping Mask applied.
From here, move the right hand slider in towards the center until it’ set to about ’231’ as shown below:
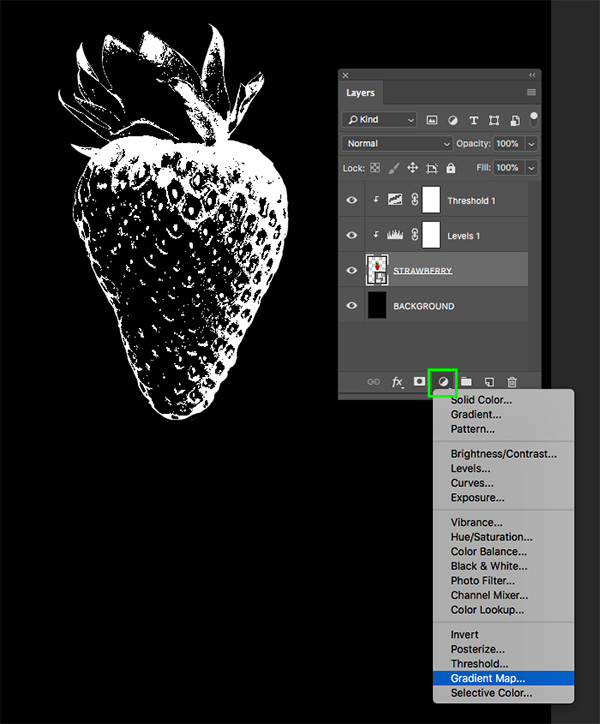
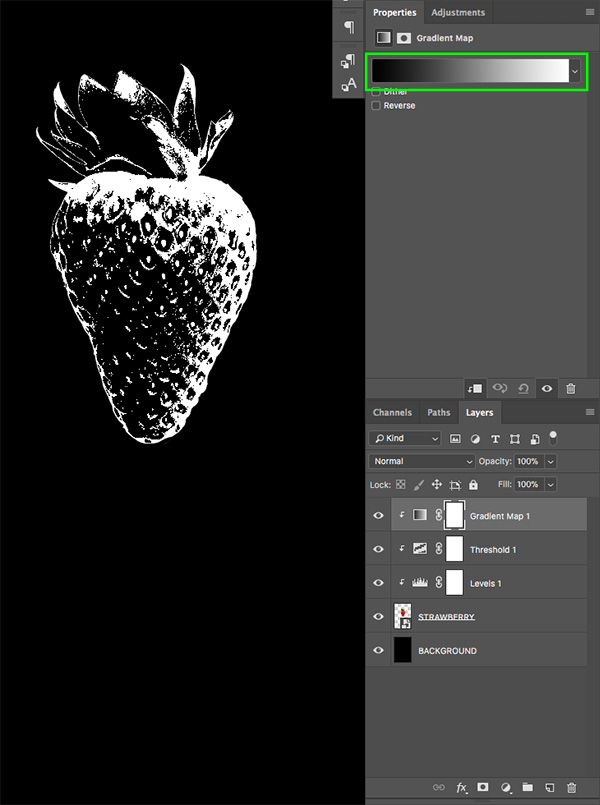
Step 6: Gradient Map
Select the ‘STRAWBERRY’ Smart Object once more time and then click on the Adjustment Layer icon again. This time, choose the ‘Gradient Map…’ option from the menu that appears.
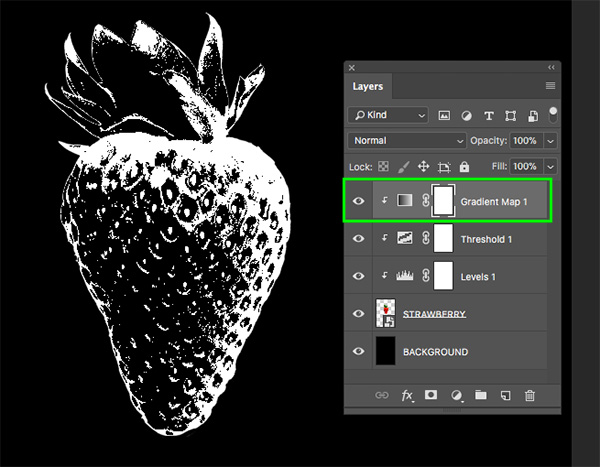
After applying the Gradient Map Adjustment Layer we will need to move it up in the layer stack but we still want to have a Clipping Mask attached to it. To do this, you can either click and drag the layer up two places or you can use the keyboard shortcut Command/Ctrl and the right bracket key twice to move the layer up two positions in the Layers Palette. Just be careful not to move it up any more than two times or the Clipping Mask will no longer be applied! If that does happen though, it is an easy fix – just move the layer back inside of the others and position it at the top again.
Step 7: Modifying the Map
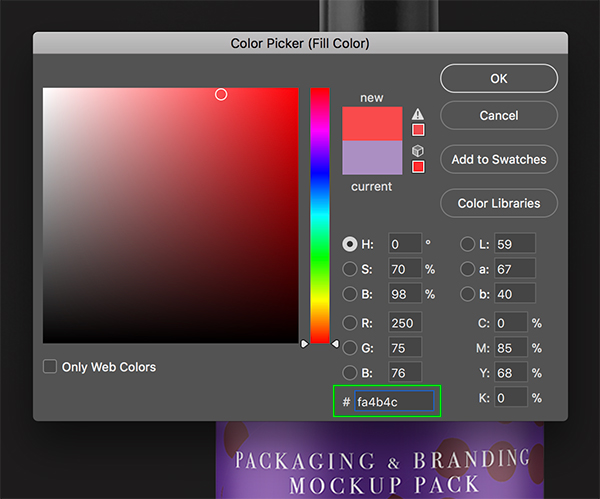
Take a look at the Properties panel and here we want to click on the black-to-white gradient box that is highlighted in the image below:
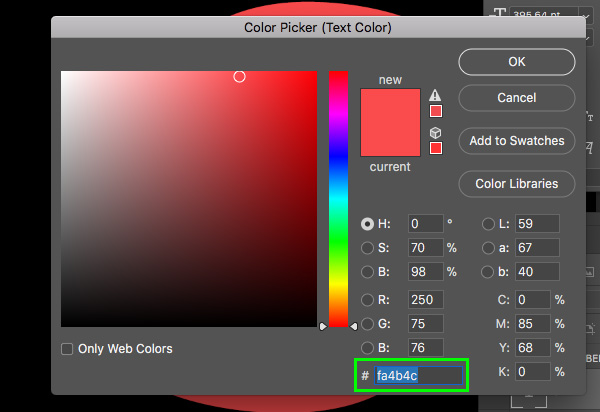
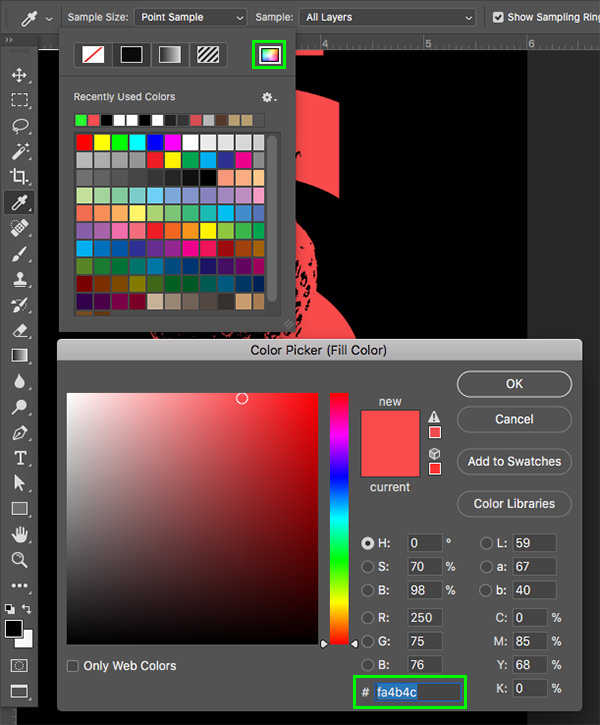
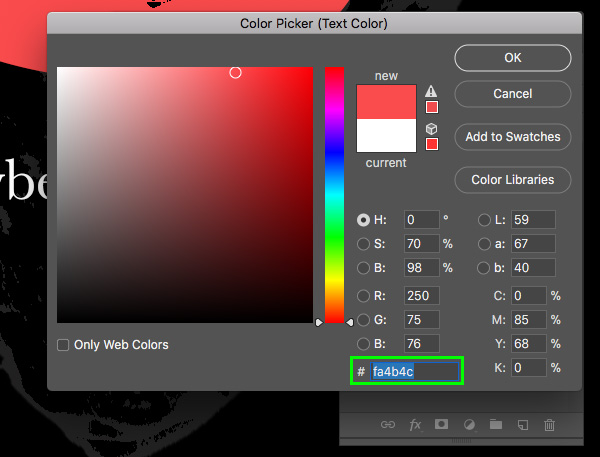
We are now inside of the ‘Gradient Editor’ which will allow us to change the colors. We want to leave the solid black, but to change the white color we will just need to double click on the tiny swatch highlighted here:
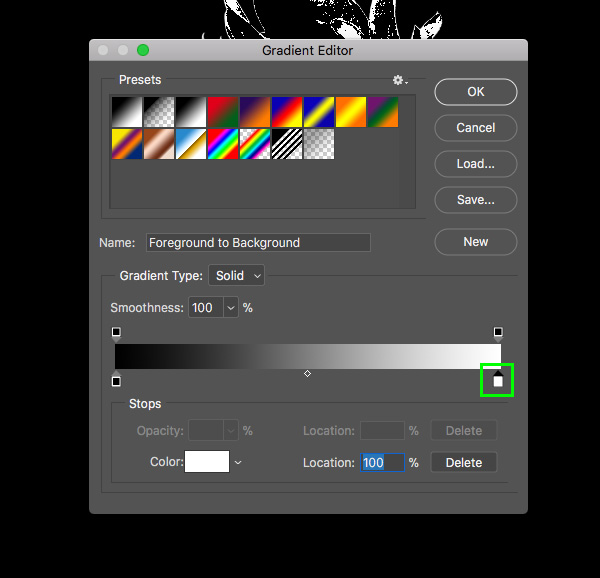
Next, enter the hex value ‘#FA4B4C’ and then press ‘OK’ two times to apply the changes and click out of both dialog boxes.

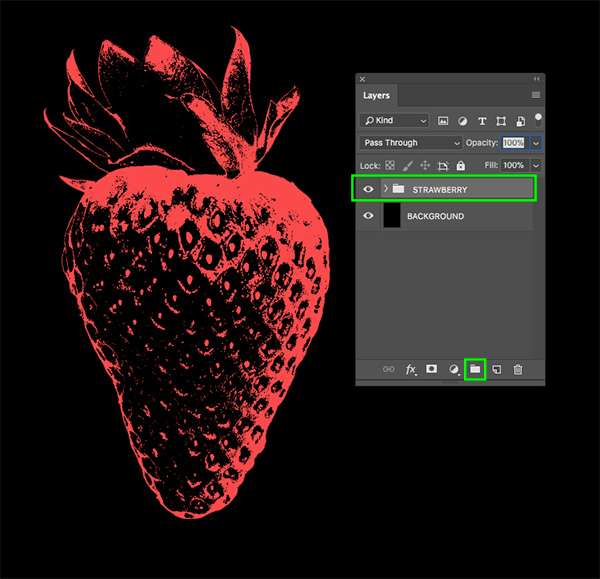
Step 8: Strawberry Folders
Select the top Gradient Map Adjustment Layer in the Layers Palette, hold the Shift Key, and then select the ‘STRAWBERRY’ Smart Object so all of these layers are selected simultaneously as shown below:
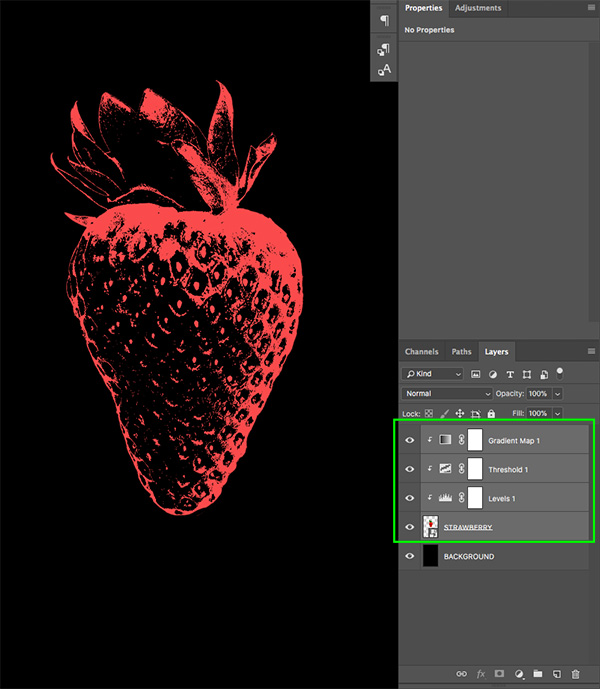
With all four of these layers selected, click on the small folder icon at the bottom of the Layers Palette or use the keyboard shortcut Command/Ctrl+G to place these layers into a new folder. From here, double click the ‘Group 1’ text and rename the folder ‘STRAWBERRY’ just like the Smart Object itself.
Step 9: Brother 1816
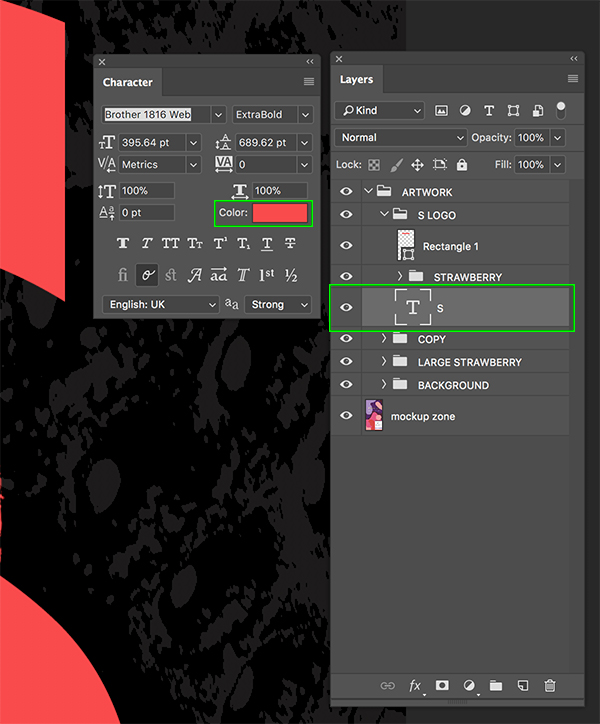
Create a new layer above the ‘STRAWBERRY’ folder and then switch to your Type Tool (T). Type the letter ’S’ and then make sure you have your Character Panel handy. If you don’t see this panel you can access it by going to the Window menu and choosing ‘Character’ from the dropdown menu. For this we will use the ‘Brother 1816’ font and set the ‘Style’ to ‘ExtraBold’. We also want to make the point size about ’395.64’ and then click on the white ‘Color’ swatch. This is a really fantastic typeface and the style we are using for the tutorial is just one of many that you will gain access to in the full bundle. If you don’t have access to this typeface, you can use a similar font from your collection.
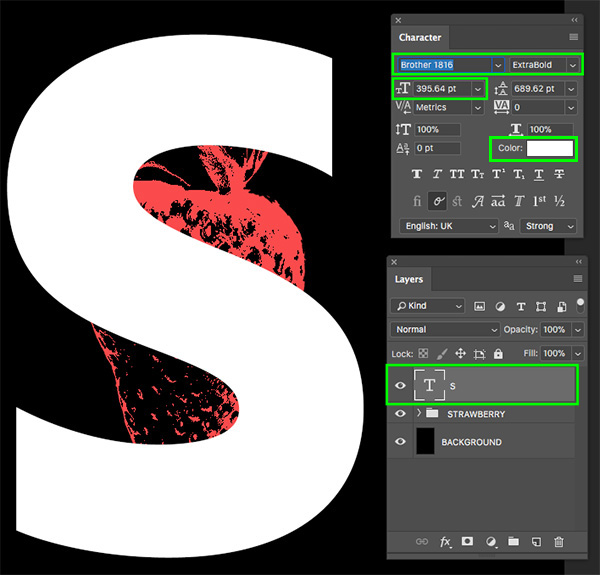
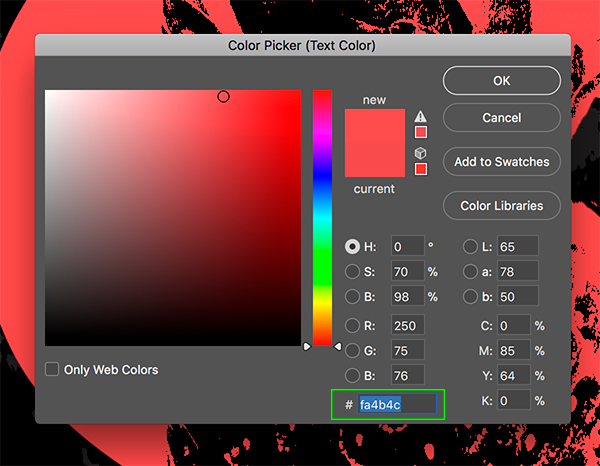
We will now change the fill color of the letter to ‘#FA4B4C’ so that it will match the color of our strawberry. Once you have entered the hex value press ‘Return’ on the keyboard to apply the changes.
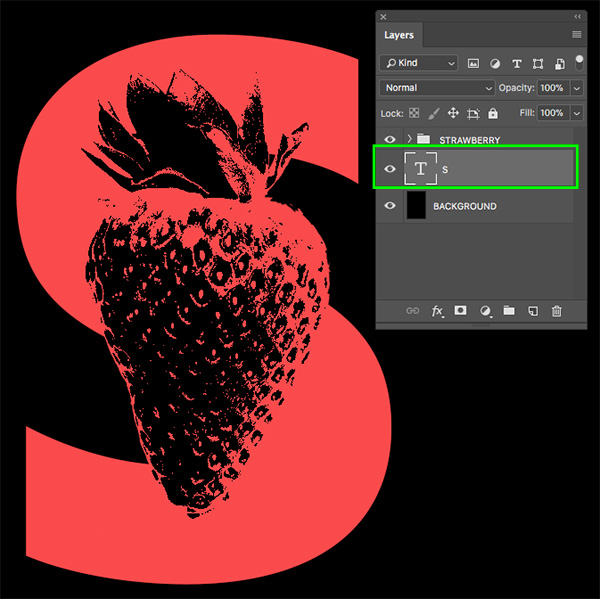
Next, move the ’S’ below the ‘STRAWBERRY’ folder so that it sits nicely behind the strawberry. Use the image below as reference for the placement of the letter in relation to the berry.
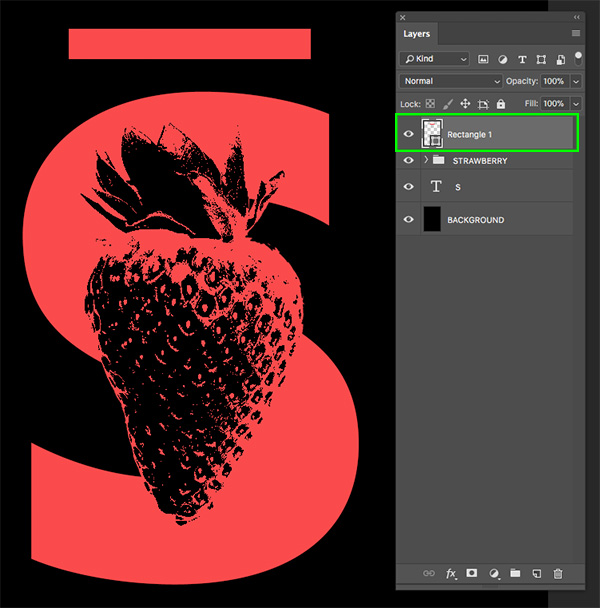
Step 10: Adding the Rectangle
Press the letter ‘U’ on the keyboard to switch to your Rectangle Tool. Take a look at the top toolbar and make sure that you have a solid ‘Fill’ color. Click on the swatch here to change the color.
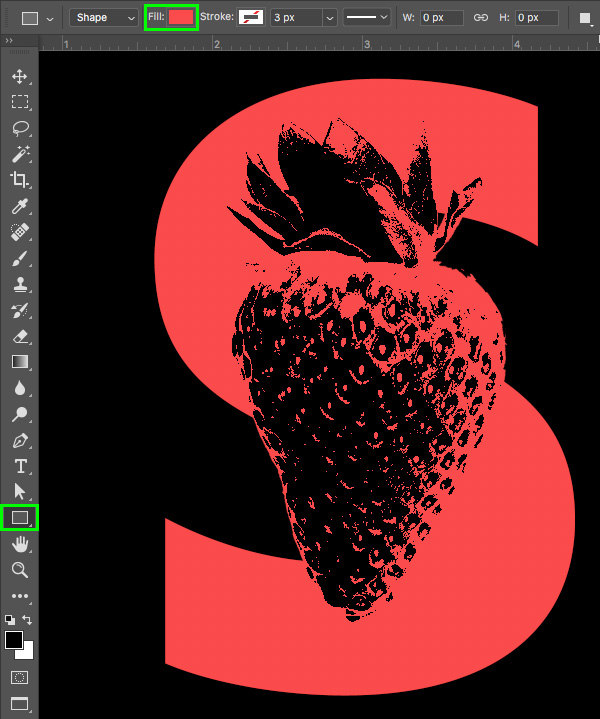
Click on the color spectrum / rainbow colored icon in the upper right of the dropdown and then you will be able to use the Color Picker to enter the hex value ‘#FA4B4C’ and then press ‘OK’ to close out of the dialog box.
From here we want to click and drag out a rectangle above the letter ’S’ and the strawberry as shown below:
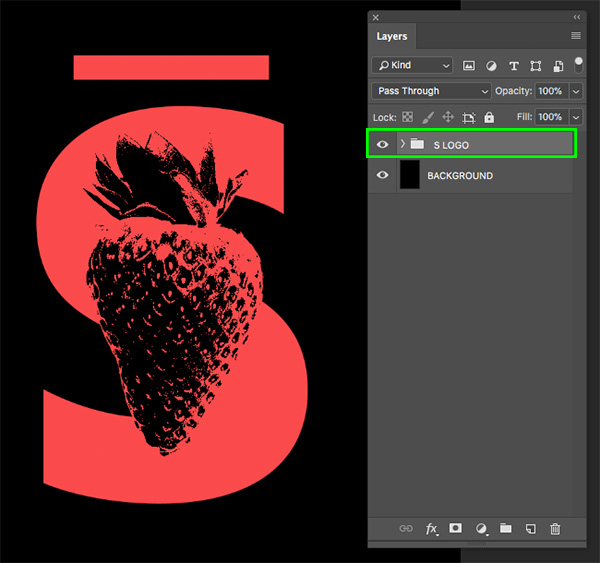
Step 11: S Logo
Once you have created the rectangle shape above the ’S’ select the top layer, hold the Shift Key, and then select the ’S’ layer so that all of the layers making up our lockup are selected at the same time.
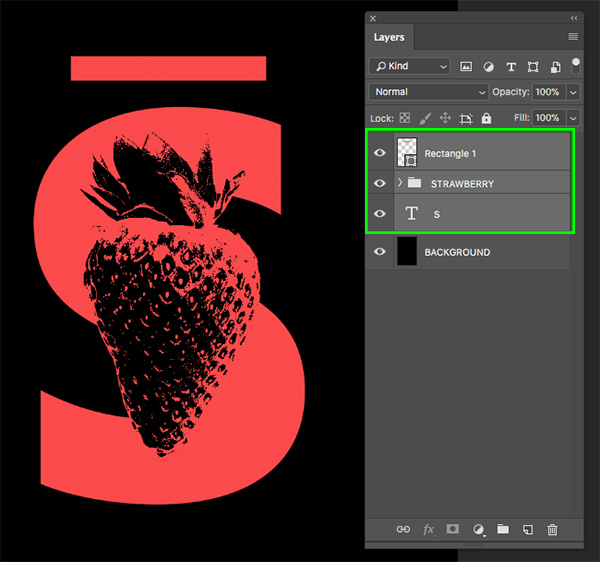
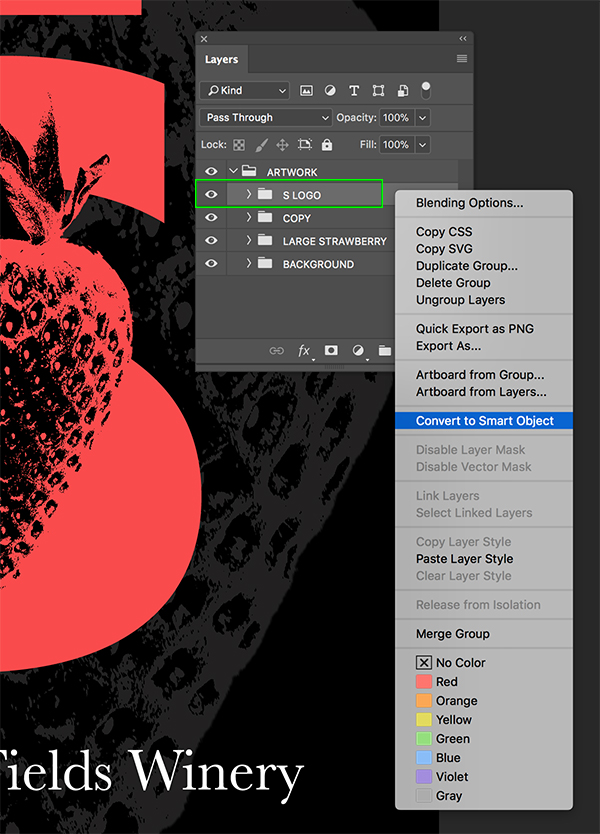
From here, press Command/Ctrl+G to put these layers and folders into a new folder and double click on the ‘Group 1’ text to rename it ’S LOGO’ as shown below:
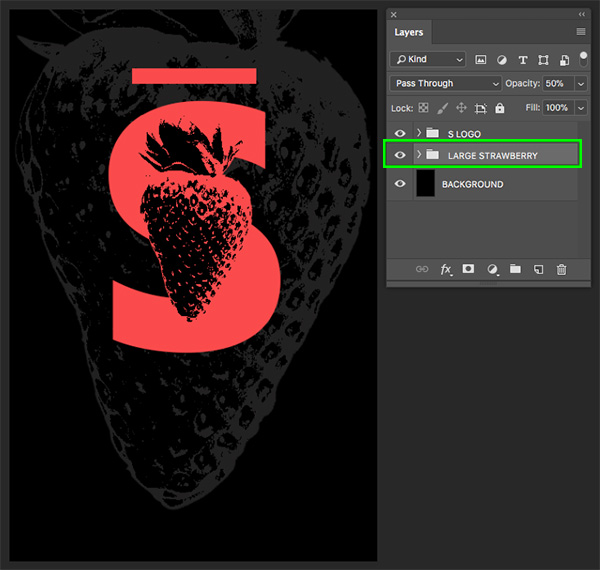
Step 12: Jumbo Strawberry
Open the ’S LOGO’ folder and select the ‘STRAWBERRY’ group folder inside. Next, press Command/Ctrl+J to duplicate the entire ‘STRAWBERRY’ folder.
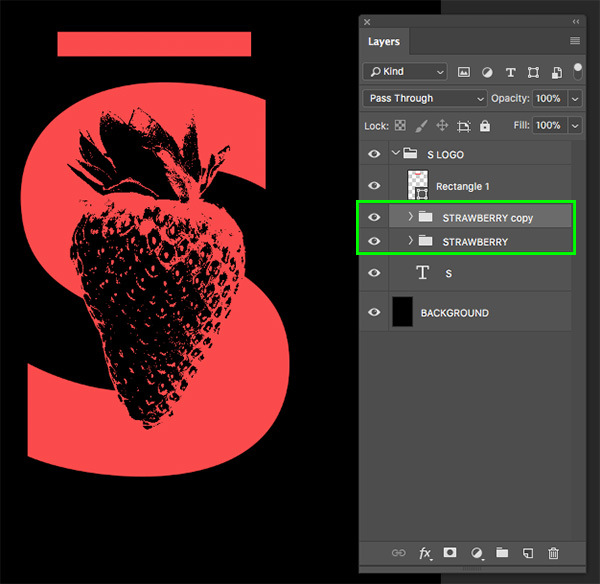
Click and drag the newly duplicated folder down so that it is no longer inside of the ’S LOGO’ group, but is instead below it as shown here:
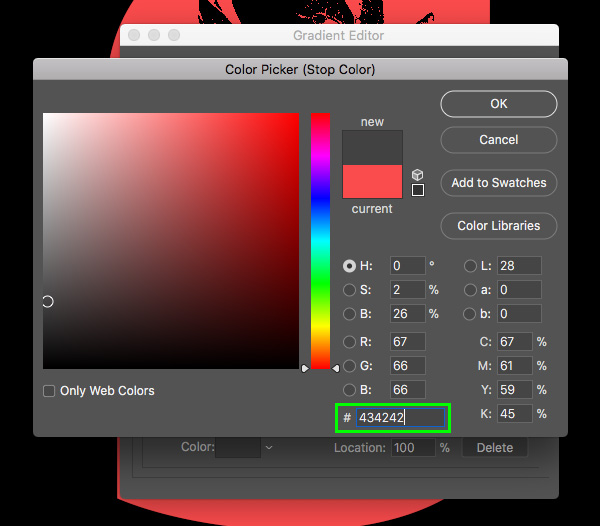
Now let’s go inside of the ‘STRAWBERRY copy’ folder and click on the Gradient Map Adjustment Layer. We will then select the color strip in the Properties panel and then double click on the magenta / red color swatch inside of the ‘Gradient Editor’ to change the color.
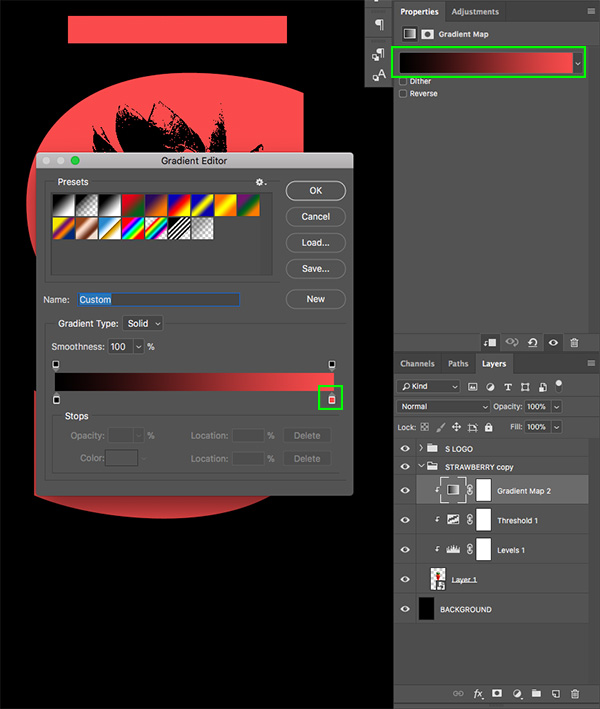
Let’s now enter the hex value ‘#434242’ which is a dark grey color. Once you have done that, click ‘OK’ two times to apply the changes and close out of both dialog boxes.
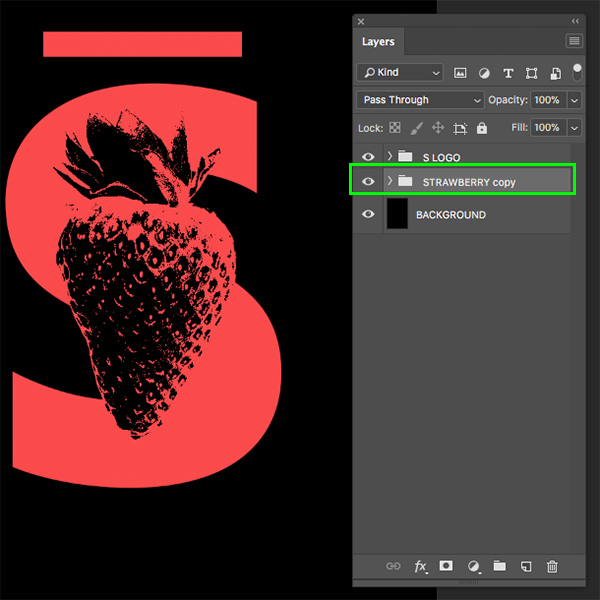
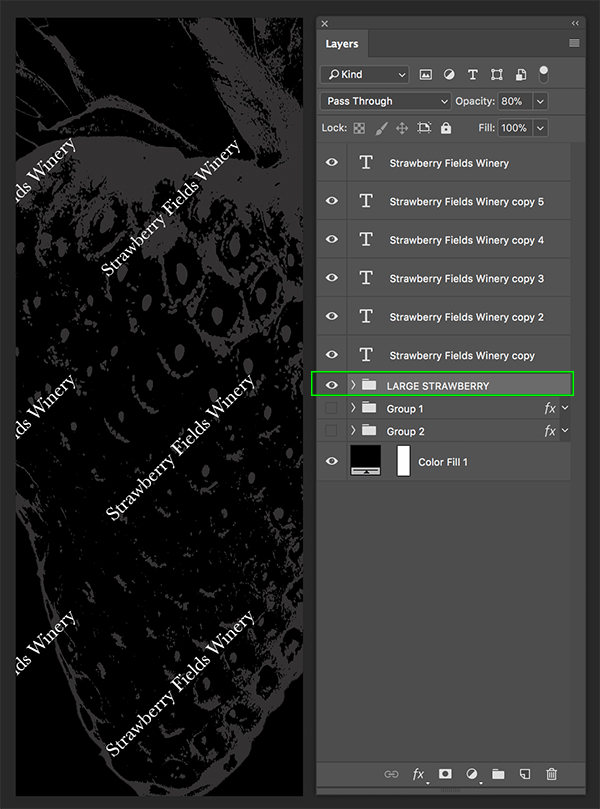
Double click on the ‘STRAWBERRY copy’ folder in the Layers Palette and rename this group ‘LARGE STRAWBERRY’. From here, select the folder and press Command/Ctrl+T and then click and drag outwards while holding the Alt/Option+Shift keys to scale it up from the center. What we want to do is place this large copy behind the original so that it serves as a background. Once you have scaled the large strawberry up, press the number ‘5’ on the keyboard to reduce the opacity of the entire folder to ’50%’. Your image should now look like this:
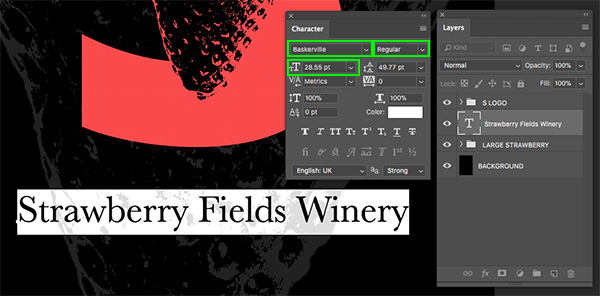
Step 13: Primary Text
Add a new layer just below the ’S LOGO’ folder and grab your Type Tool (T). Click below the large strawberry and type out the words ’Strawberry Fields Winery’. Make sure to bring up your Character Panel once again and here I will be using the ‘Regular’ style of the ‘Baskerville’ typeface set to about ’28.55 pt’ with a solid white fill. This happens to be a system font on Mac although there are a lot more styles available that you will find in the full font library bundle. If you don’t have access to the regular style of Baskerville then feel free to use an alternative such as Minion Pro, Georgia, or Times New Roman.
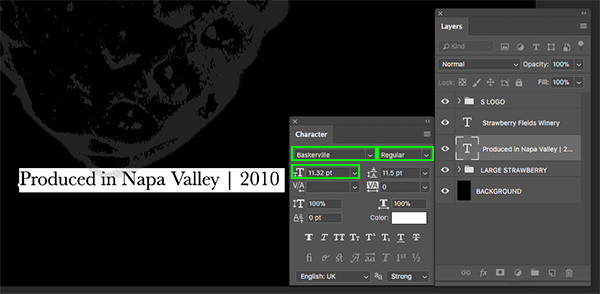
Create another new layer and this time type out ‘Produced in Napa Valley | 2010’ using the same typeface, only this time make the type smaller – somewhere around ’11.32 pt’ looks good.
Step 14: Merlot
Create another new layer between our previous two text layers and use the Type Tool (T) once again to type out the word ‘Merlot’. This time we will change the typeface back to ‘Brothers 1816’ and make the size about ’34 pt’ before clicking on the color swatch. If you don’t have access to this font, you can use any similar style from your own font library.
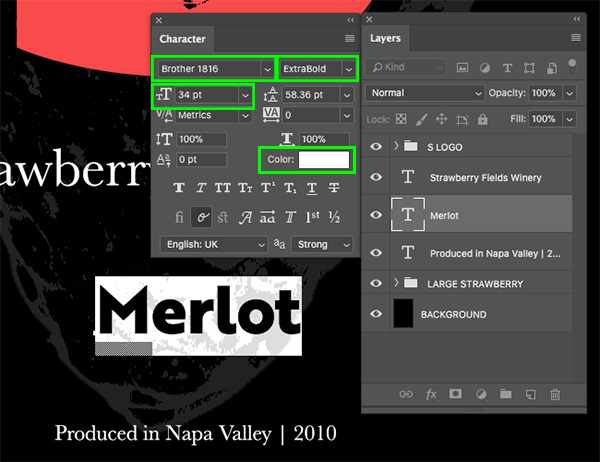
Change the fill color to the hex value ‘#FA4B4C’ that we have been using throughout and then click ‘OK’ to apply the changes.
Your text should now match the color of the ’S LOGO’ as shown below:

Step 15: Adding the Border
Press ‘U’ once again to switch to the Rectangle Tool and then change the settings in the top toolbar so that you have no fill color and a solid white stroke set to ‘5 px’ as shown below:
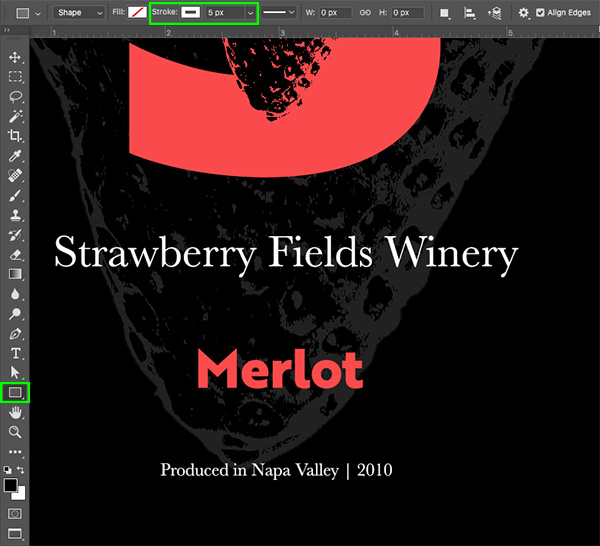
Click and drag out a rectangle around the word ‘Merlot’ that will serve as a thin border. Try to set the size and positioning of the rectangle so there is a bit of padding on all four sides of the text. You should now have something like this:

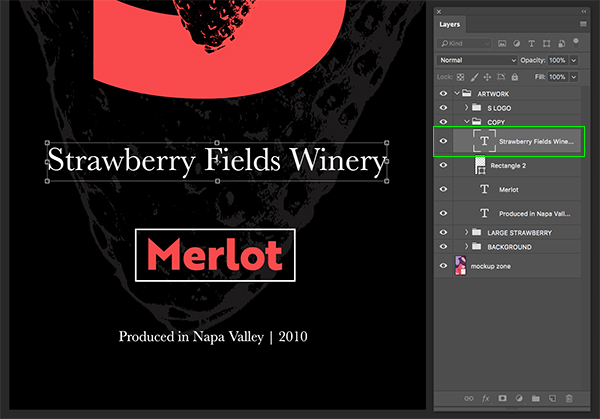
Next, select the top text layer, hold the Shift Key, and then select the bottom text layer.
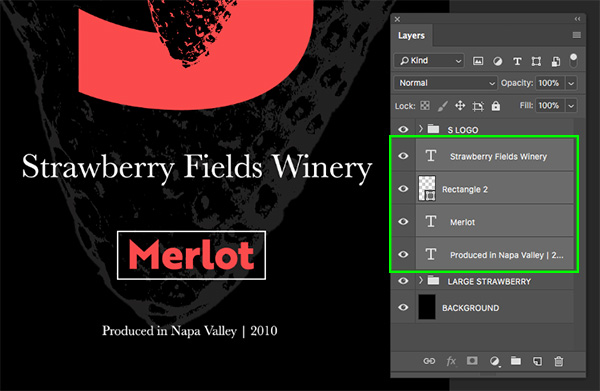
With all of the text layers and the white border selected, press Command/Ctrl+G to put them into a new folder. Double click the ‘Group 1’ folder name in the Layers Palette and change the name to ‘COPY’ as shown in the image below:
Step 16: Adding the Border
Since we have grouped all of our other layers so far, let’s quickly select the ‘BACKGROUND’ layer and put it into a new folder with the same name just to keep things nice and organized.

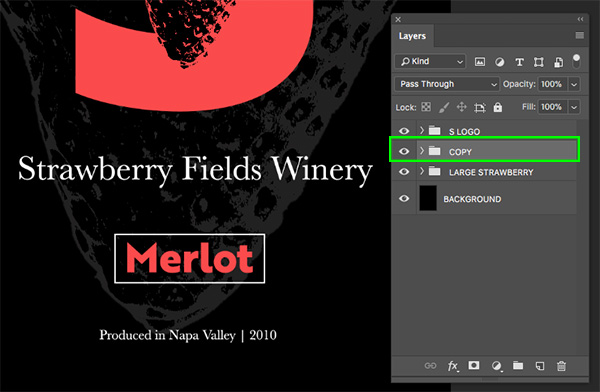
Step 17: Grouping the Artwork
Next, select the top ’S LOGO’ folder, then hold the Shift Key and select the bottom ‘BACKGROUND’ folder so all of our folders are selected simultaneously.
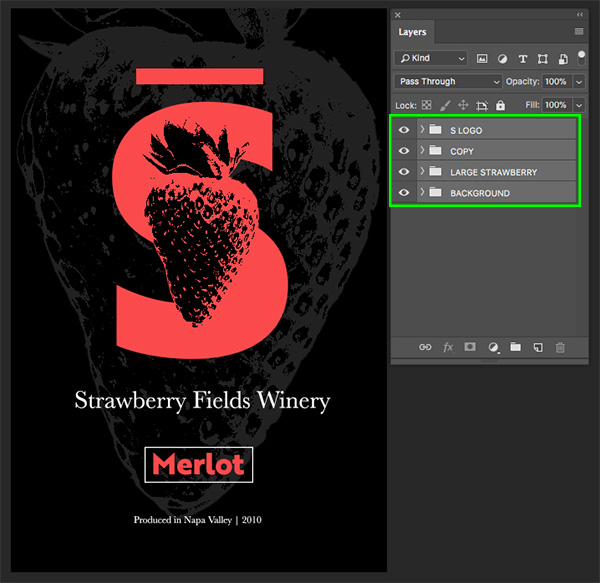
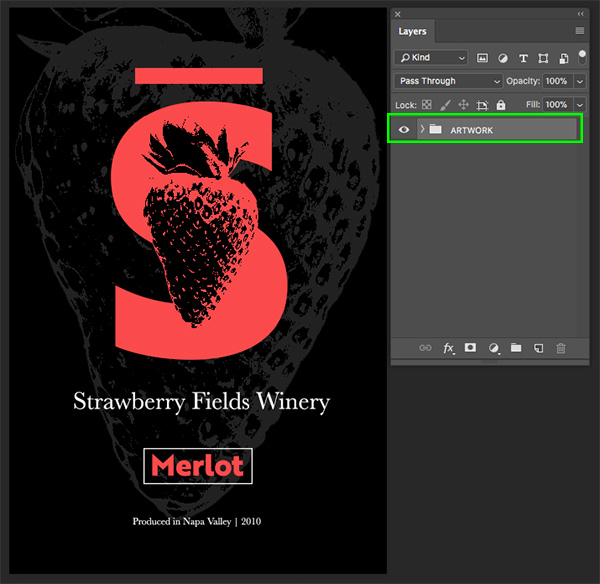
From here, press Command/Ctrl+G to place all of the folders into one new folder and rename it ‘ARTWORK’ so that everything we have created so far will be contained inside.
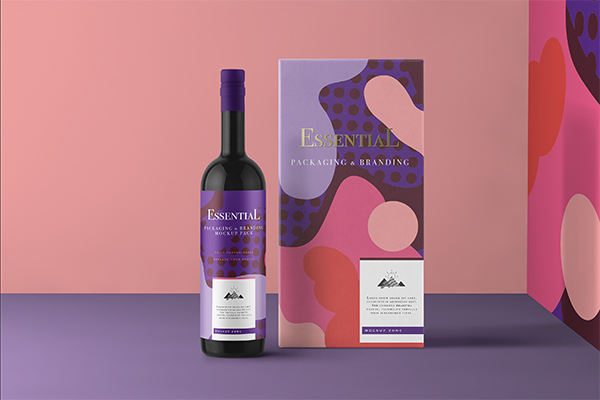
Step 18: Packaging Mockup
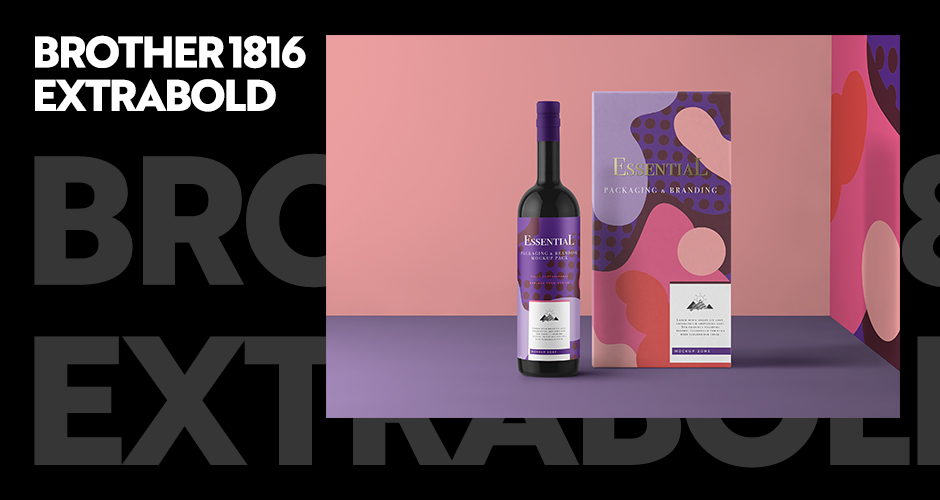
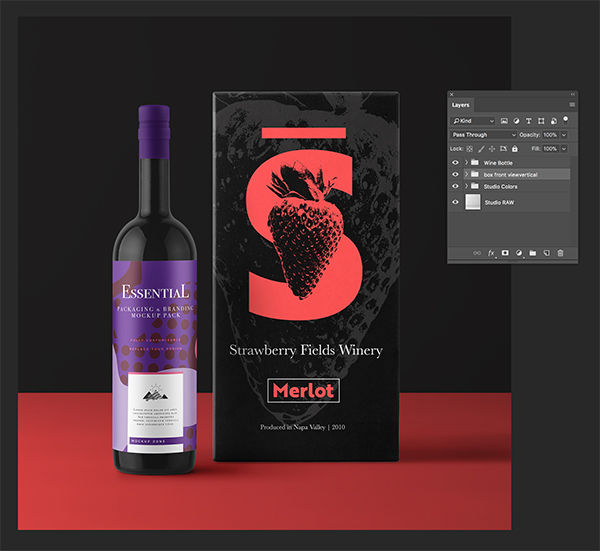
At this point we are ready to take our label design and apply it to some packaging! To do this we will first need a nice looking mockup. For the purposes of this tutorial I will be using the ‘Front View 01.psd’ from the Essential Packaging & Branding Mockup from Mockup Zone. This is an amazing value and I have found myself using it for a few side projects already so it is really a great investment for your design projects.
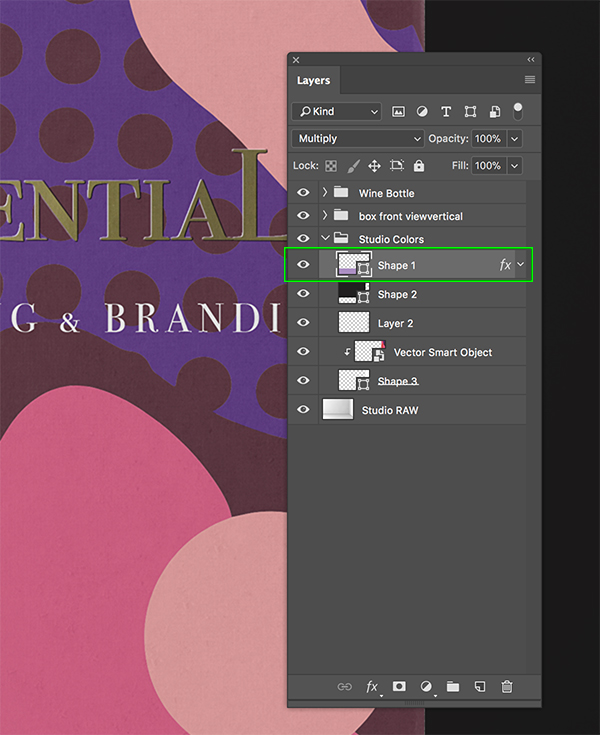
Once the PSD file is open, expand the ‘Studio Colors’ folder so we can make some adjustments to the room itself. First, select the ‘Shape 2’ layer highlighted in the image below:
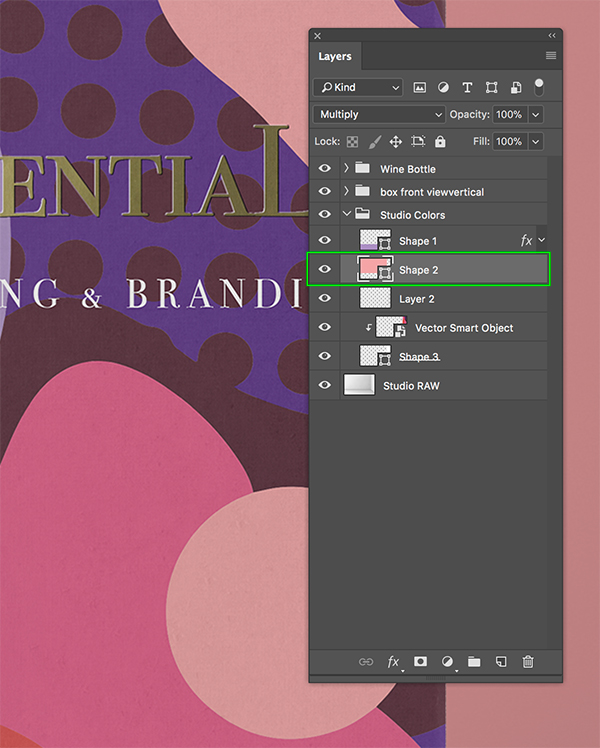
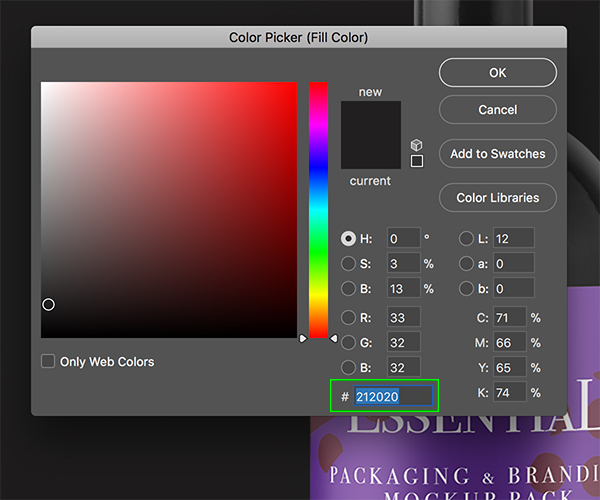
Press ‘U’ on the keyboard and then go to the top toolbar and click on the small color swatch next to the word ‘Fill’. Once the color panel appears, click on the color spectrum icon in the upper right corner to enter a custom color value.
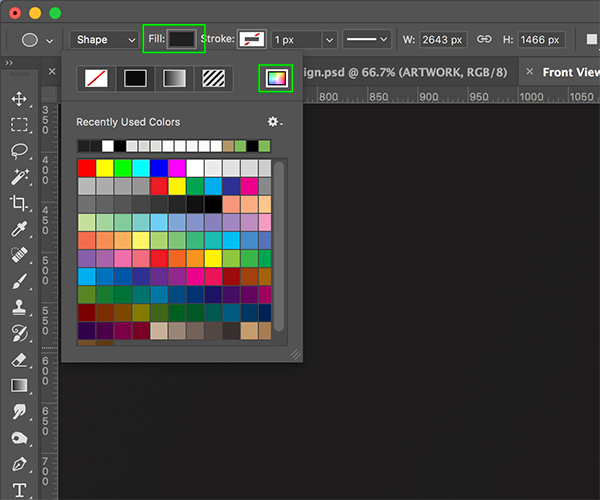
For the fill color let’s enter the hex value ‘#212020’ and then press ‘OK’ to apply the changes. Your back wall should now be showing up as dark grey.
Step 19: Floor Colors
Next, select the ‘Shape 1’ layer inside of the ‘Studio Colors’ folder.
Press ‘U’ once again and return to the top toolbar before clicking the small color swatch icon next to the word ‘Fill’ as we did in the previous step. Once again, click on the color spectrum icon in the upper right hand corner to reveal the ‘Color Picker’.
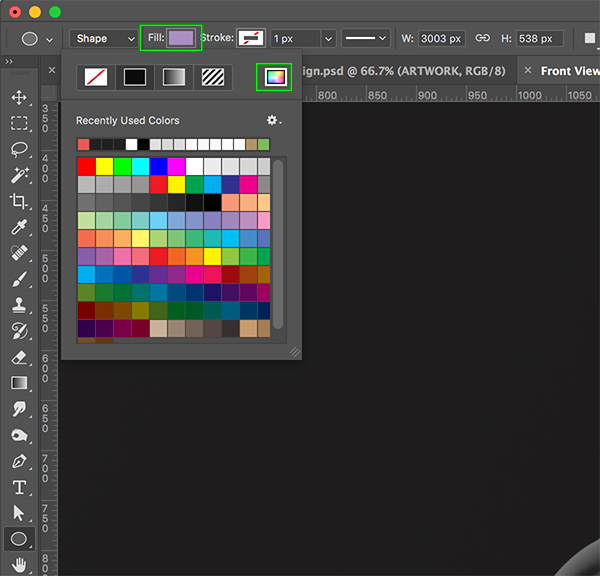
For the floor color, let’s enter our magenta color – ‘#FA4B4C’ and then press ‘OK’ to apply the change.
You should now have an updated floor color to go along with the dark grey back wall like this:
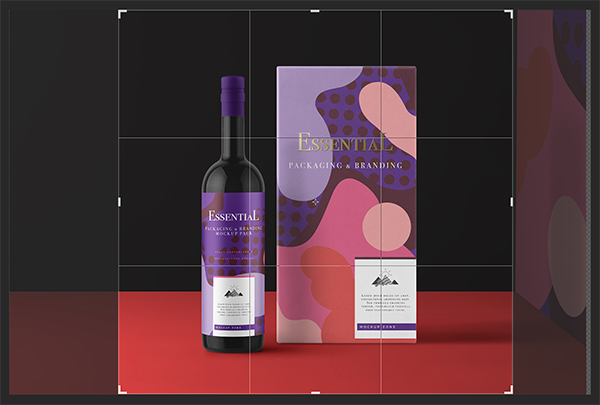
Step 20: Cropping the Scene
Press ‘C’ on the keyboard to switch to your Crop Tool. From here, hold the Alt/Option key and drag either the left or right handle around the preview box inwards to crop the sides out evenly. Drag inwards to make the scene a bit tighter in order to keep the focus on the packaging items in the center. Once you are happy with the crop, press ‘Return’ on the keyboard to apply the changes.
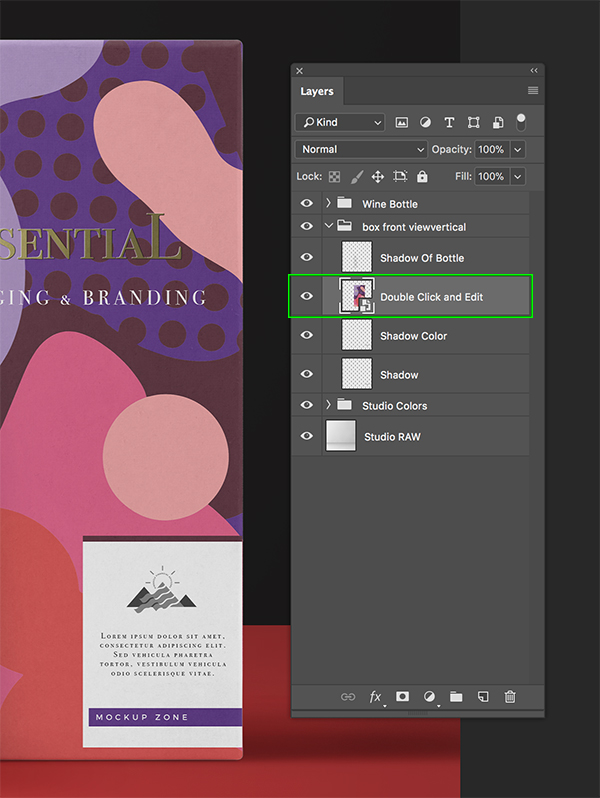
Step 21: Custom Box
Let’s now move on to customizing the other elements, starting with the vertical box. Click to expand the folder named ‘box front view vertical’ to reveal the contents. Inside of here we will want to double click on the Smart Object layer that says ‘Double click and Edit’ as shown below:
Once this file opens a new window there will be one more Smart Object we must dive into labeled ‘Your Design’ so go ahead and double click on that next.

Inside of this nested Smart Object you will find the flat artwork. This is where we will return to our original label design, which should now all be contained inside of a folder named ‘ARTWORK’ and we are going to click and drag it while holding the Shift Key over into this window, making sure that it is above the ‘mockup zone’ layer. You may need to apply a Free Transform (Command/Ctrl+T) and scale it down a bit to position it nice and centered as shown below:
After placing and positioning the artwork I have noticed a few things that we will need to adjust, starting with shrinking down our ‘Strawberry Fields Winery’ text. To do this, go inside the ‘COPY’ folder, select the text layer, press Command/Ctrl+T, and then drag inwards from any of the four corners of the bounding box while holding the Alt/Option+Shift keys to give it some more room so that it isn’t so close to the edges. Once you are happy with the size, press ‘Return’ on the keyboard to apply the transformation.
Step 22: Color Correction
The other adjustment we need to make is to some of the colors. I am noticing that for some reason our color has shifted slightly once we brought it into our mockup and everything except for the strawberry itself looks slightly faded or desaturated. To fix this, let’s go back to the ‘COPY’ folder and then select our large ’S’. Then, open the Character Panel and click on the color swatch shown below:
You may notice the hex value could be different now from our original color, so if that is the case we will want to go ahead and re-enter our hex value – ‘#FA4B4C’ and then press ‘OK’ to apply the changes.
Check the rectangle above the ’S’ as well as the ‘Merlot’ text and correct those colors as needed so that everything retrains the vibrant and punchy color of the strawberry. Once you have done that, press Command/Ctrl+S to save the file and then Command/Ctrl+W to close out of the window.
You should now see the design applied to the box, but we will also need to save this Smart Object file in order to update our main mockup. So, press Command/Ctrl+S to save the file and then Command/Ctrl+W to close out of this window to return to our main mockup.
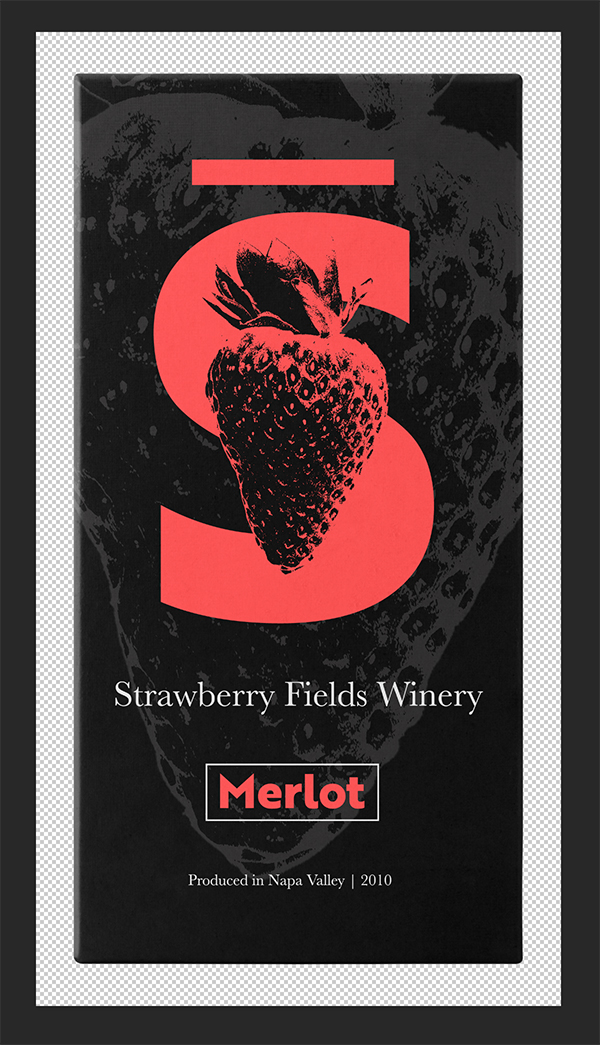
Your file should now look like the image shown here:
Step 23: Cap Colors
Back in the main mockup file, let’s expand the ‘Wine Bottle’ folder and double click on the first Smart Object labeled ‘Double Click and Edit’.
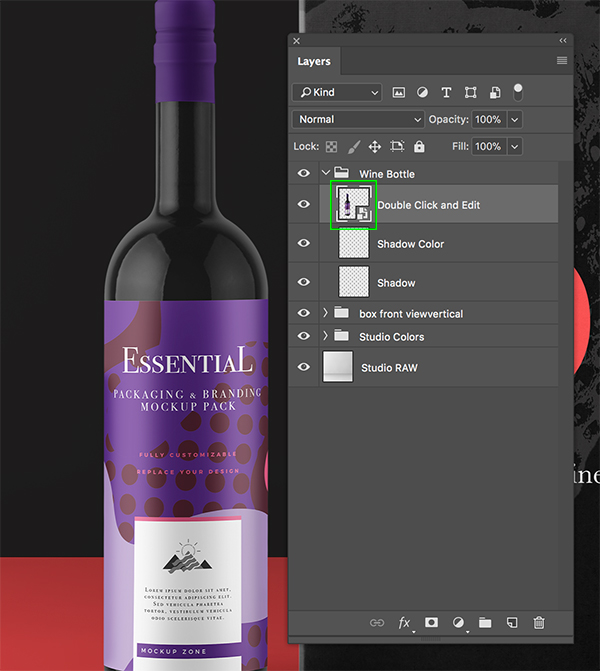
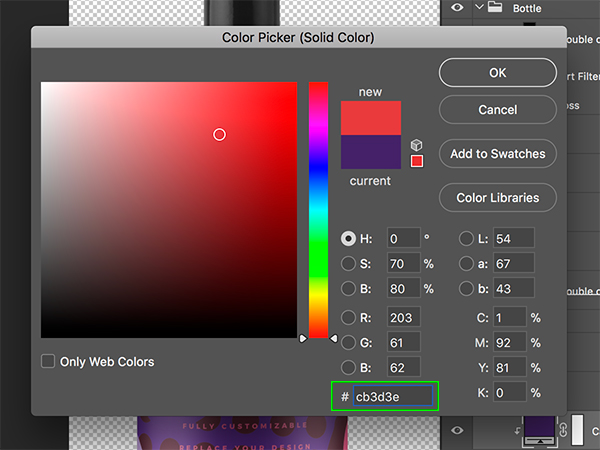
You should now be inside the Smart Object containing the bottle and the artwork. Once inside, click the small arrow next to the ‘Bottle’ folder to reveal the contents. If you scroll down a bit you will see the cap and attached to it is an Adjustment Layer containing the fill color. Let’s go ahead and double click on that small purple swatch indicated by the highlight box in the image below:
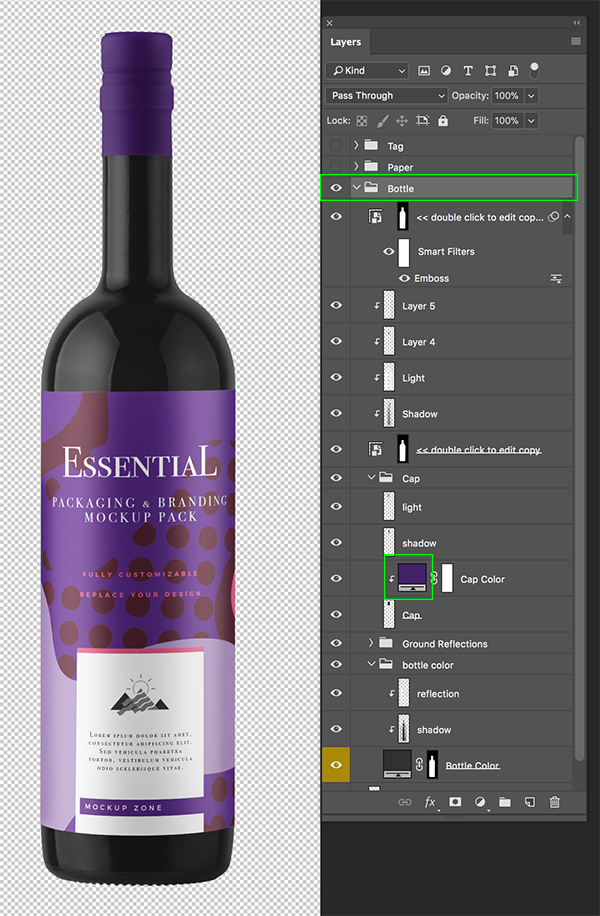
Next, enter the hex value ‘#CB3D3E’ to change it to a vibrant red / magenta color, and then click ‘OK’ to apply the color changes.
Step 24: Gift Wrapping
After changing the cap color, let’s collapse the ‘Bottle’ folder and turn on the visibility for the folder above labeled ‘Paper’.
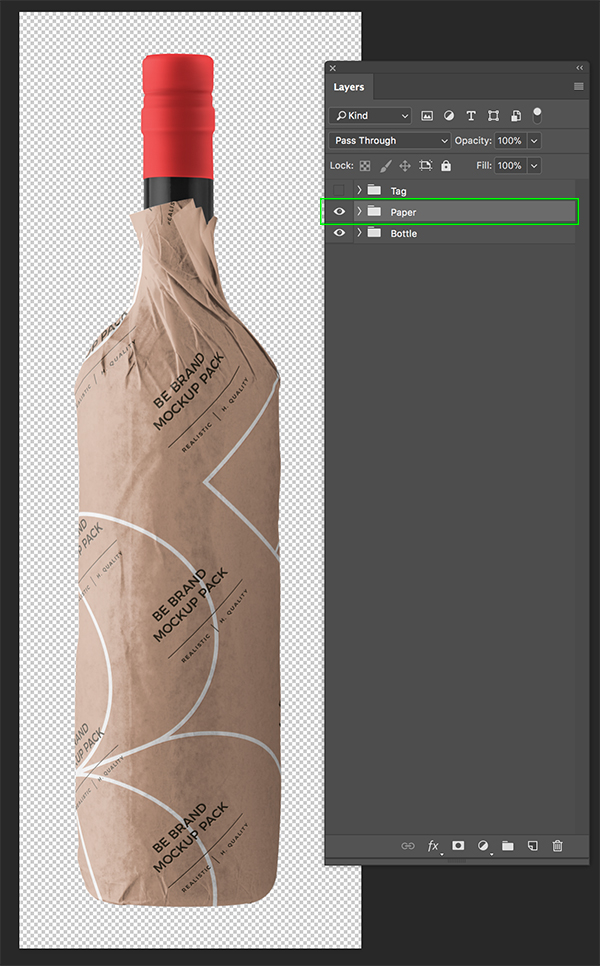
Expand the contents of the ‘Paper’ folder and then double click on the Smart Object labeled ‘< <double click to edit’ to go inside of the layer.
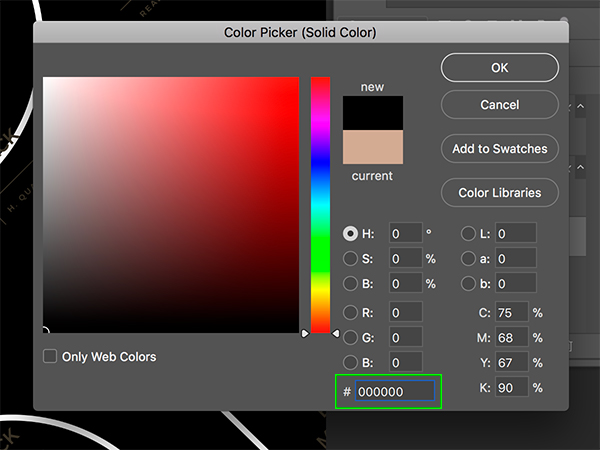
Once we are inside the flat artwork, double click on the Color Fill Adjustment Layer at the very bottom.
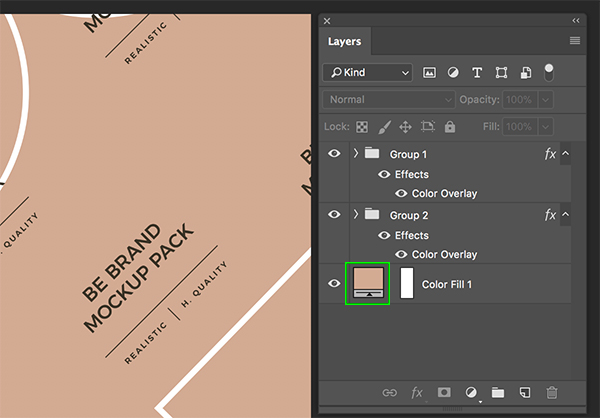
For the new fill color enter the hex value – ‘#000000’ which is solid black. After that, press ‘OK’ to apply the background color change.
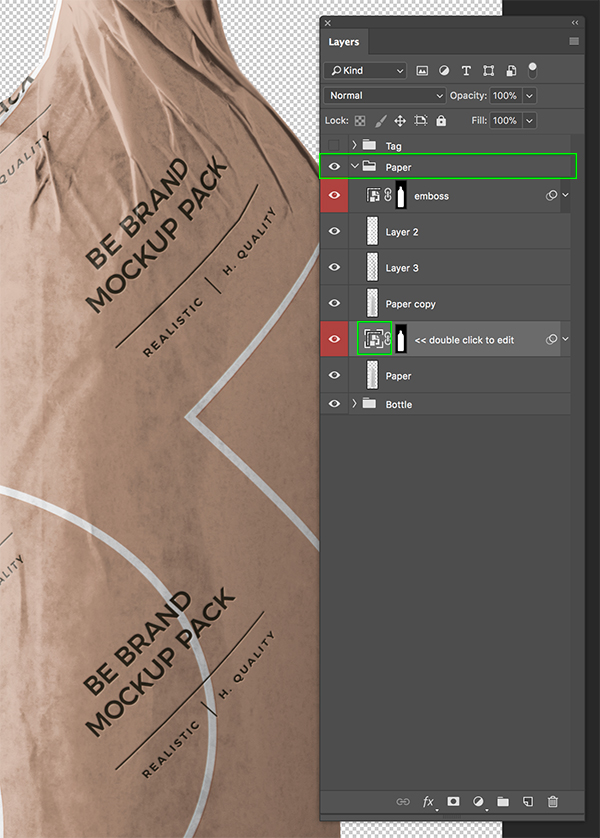
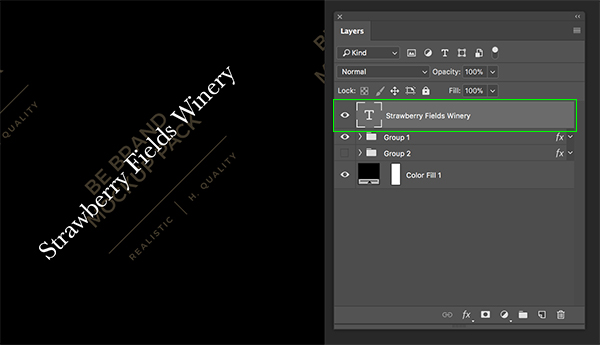
Step 25: Text Pattern
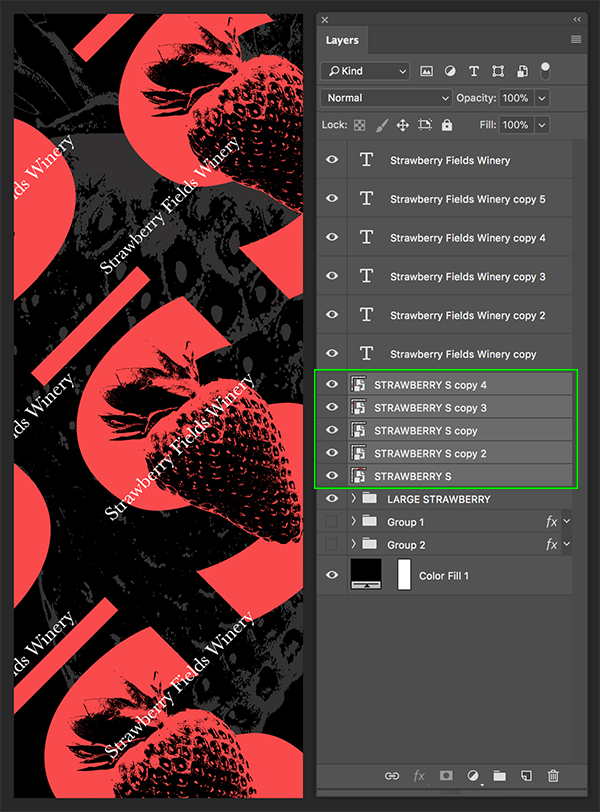
For the next step we will need to open our flat label design which you should have as a separate PSD file. From that file, grab the ‘Strawberry Fields Winery’ text from inside of the ‘COPY’ folder and drag it into this window. Turn off the ‘Group 2’ folder so we can see better and then use the Free Transform Command (Command/Ctrl+T) to scale down and rotate the text. By leaving on the ‘Group 1’ folder we have a guide that will give us an idea of the approximate size and placement to go for with our white text.
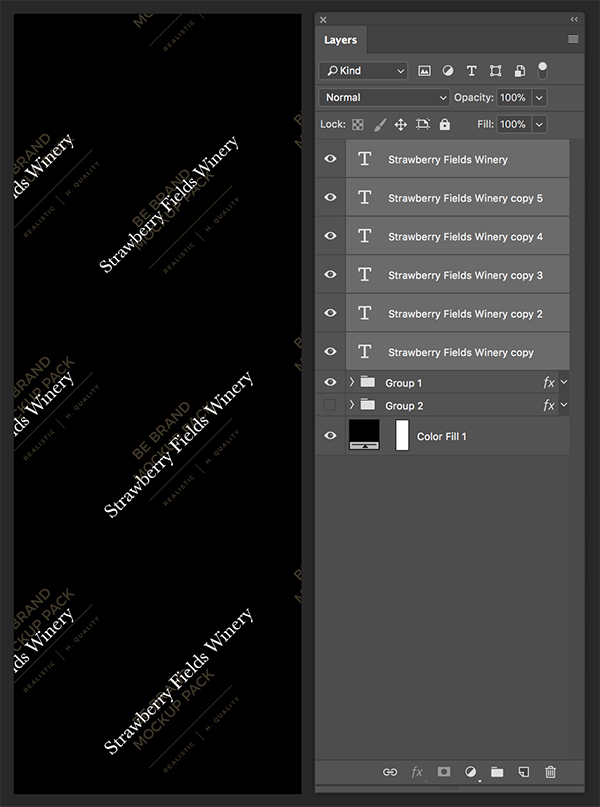
Press Command/Ctrl+J to duplicate the text layer several times and repeat the text as shown here:
Step 26: Berry Background
Return to the flat label design and this time take the ‘LARGE STRAWBERRY’ folder and drag it into the paper Smart Object file. We want to place this layer behind all of our text so we have a nice background as shown here:
Step 27: Colorful Pattern
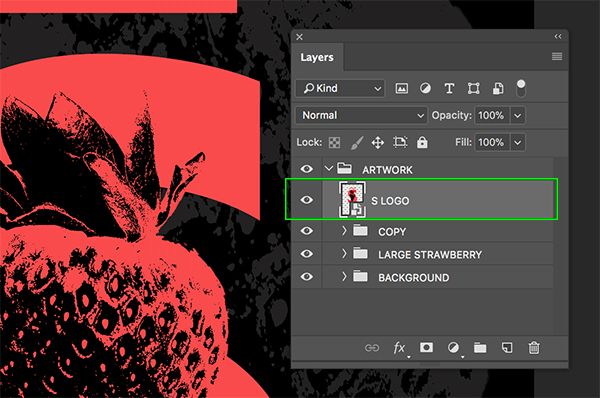
Going back to our flat label design once again, select the ’S LOGO’ folder and click on it while holding the Control Key before choosing ‘Convert to Smart Object’ from the dropdown menu as shown below:
From here, grab the ’S LOGO’ Smart Object and bring this into your paper Smart Object file with the rest of our pattern.
We can now drop this behind all of the ‘Strawberry Fields Winery’ text, but above the ‘LARGE STRAWBERRY’ folder. We will need to use the Free Transform Command (Command/Ctrl+T) once again to scale the ’S LOGO’ down by dragging inwards from any of the four corners of the bounding box while holding the Alt/Option+Shift keys and then rotating it to match the angle of the white text. Ideally we will have about five or six copies and then just make sure that both of the original ‘Group 1’ and ‘Group 2’ folders are turned off so we only have our pattern. Once you have done that, press Command/Ctrl+S to save the file and then Command/Ctrl+W to close the tab.
You will now be back in the initial Smart Object file showing the bottle mockup with the red cap and paper on a transparent background. Here we just need to press Command/Ctrl+S to save the file and then Command/Ctrl+W to close the tab to return to our main mockup where we should see our final packaging designs!
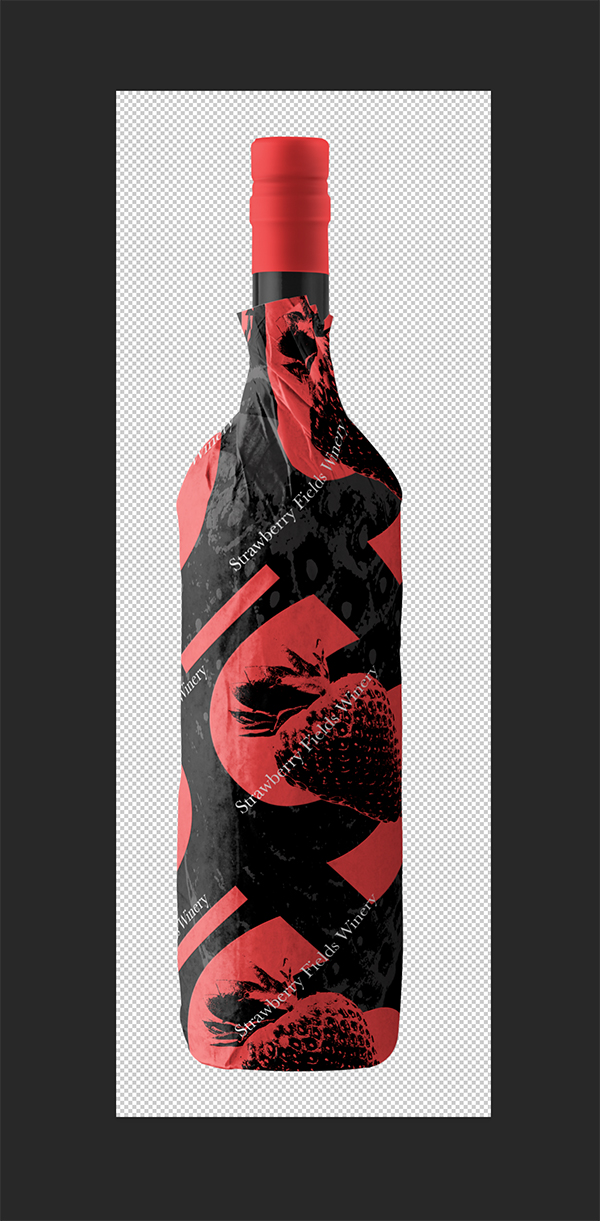
That now wraps up our high end winery packaging design for Strawberry Fields Winery! Today we created our wine labels using only a small handful of elements including one of the premiere typefaces from The Complete Iconic Font Library . We invite you to check out the complete library where you will discover some of the most popular type families of recent years, including additional weights of the award-winning Brother along with the stunning modern reimagining Intervogue. Don’t miss out on our most varied font bundle ever with such depth that it will continue to give you value for the rest of your design career!
Remember that whether it’s your outcome for this tutorial or something new you’ve made, we’d love to see your designs on our Facebook page.
Please leave a comment if you have any questions or suggestions. I always look forward to hearing from you!
There’s still time to check out The Complete Iconic Font Library featuring 333 stunning, professional quality fonts all for an unbeatable price of $29!
Hi, thank you for the file, it’s so beautiful. I plan to use this for my coffee mockup branding, and because it is coffee can I replace the wine bottle with a mug or coffee bag?
Again, thank you for this beautiful file.
Hey there,
Thanks so much for the comment and I can definitely help :) So all of our tutorials can be used as a guide to create something similar so please do feel free to replace the wine bottle with a mug/ coffee bag! We would love to see your finished product if you were keen to share!
Hi Carol,
Thank you for you reply. It’s great to know that I can replace the wine with my coffee tumbler. I would love to share my work once I finish it. How do you want me to share it? Via an email or I just need to paste a website link in the comment?
Please let me know.
Thanks,
Nga
Hey Nga,
Thanks so much for coming back to Carol, and I am so happy that she could help with your query!
We would absolutely love to be able to see what you create so please do feel free to pop us an email at hello@designcuts.com. Alternatively, we also have a Facebook Community group, where our community can share their work, and chat with their fellow designers. If you haven’t seen this already, you can check it out here: https://bit.ly/36G8pQu
Hi Annabel,
Thank you for your reply. I’ll send you guys an email from the provided email address. Have a great day :-)
Nga
Thanks so much for coming back to me Nga, and we really look forward to hearing from you :).
Hi there,
I just sent the email.
Have a wonderful day.
Nga
Thanks so much Nga, and we are so excited to see what you have created!
Nice tutorial. Would be good if there was an option to e-print this out to pdf or other format for offline viewing.
Thank you so much for your comment and I hope that you picked up some really useful tips on this one!
Thanks for your awesome feedback! I am so sorry for any inconvenience caused by not having an offline version of our tutorials, we try to keep everything in one place so that you can download your freebies and access the tutorial all in one place! This is a great suggestion though and we will definitely see if we can implement this in future for you to help improve your design cuts experience!
Super!
Thank you so much Veselina, we hope that you really enjoy this tutorial!
Great tutorial, really showing how to use these templates to create original display items with your own artwork/logo designs – thank you!
Woohoo thank you so much for your comment Victoria and we hope that these tips will come in great use for your own projects :)