In this tutorial I will be showing you how to create a fun and imaginative book cover design in Photoshop. To create the cover we will be using some of the awesome birthday freebies to celebrate Design Cuts 5th Birthday! In particular, we are going to be working with the Gorni Typeface by MaGo as well as the Oregano Vector Elements Kit by Milka. Please note these products will only be available for free until Friday 12th October at 10AM UK time, after which they will go back to their full Marketplace price. The elements we are using today are just a small sample of some of the great freebies and special offers available in our marketplace during our 5th Birthday Event.Once we layout our cover design we will then apply it to a beautiful mockup from Pixel Buddha’s Hardcover Book Mockup Set. If you’re ready to do some celebrating then fire up Photoshop and let’s begin!
HAVE YOU SEEN OUR YOUTUBE CHANNEL?
Watch the video tutorial below and subscribe to our YouTube channel for regular updates direct to your inbox.
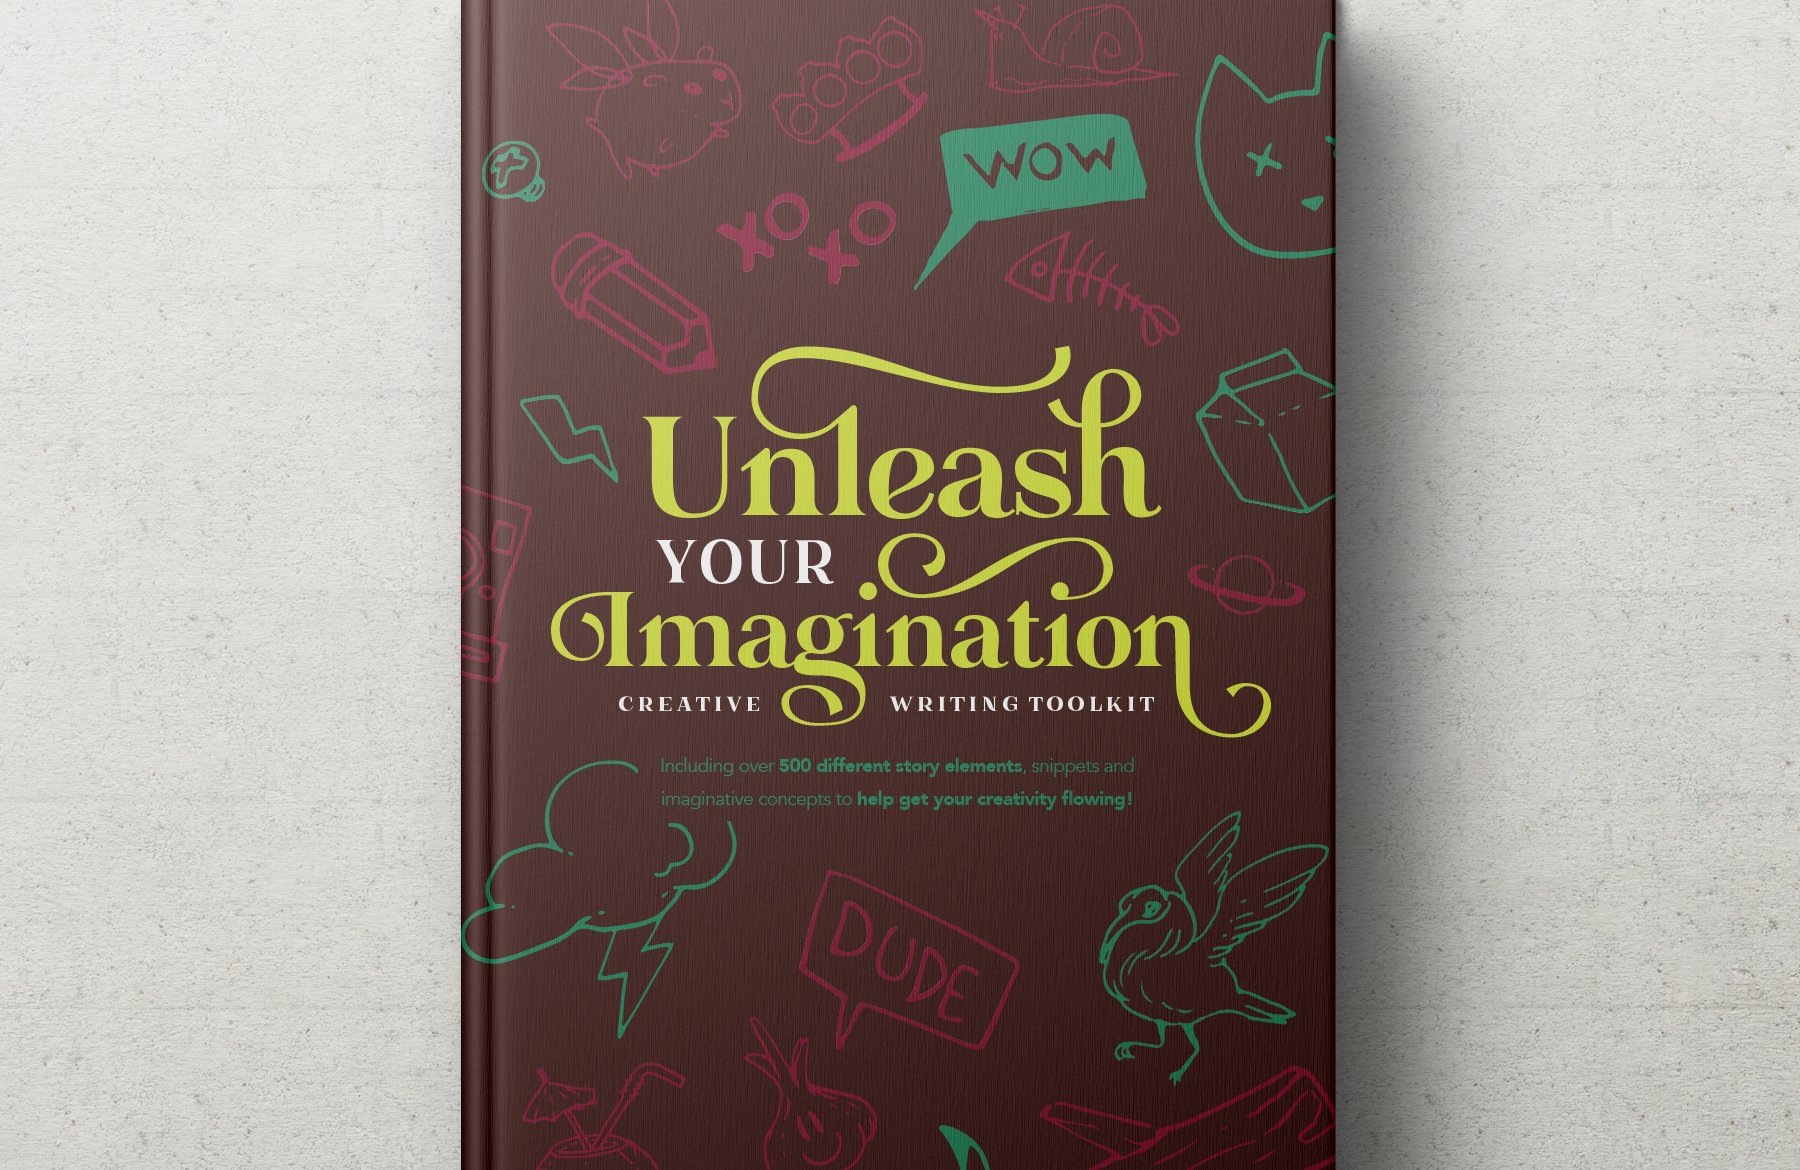
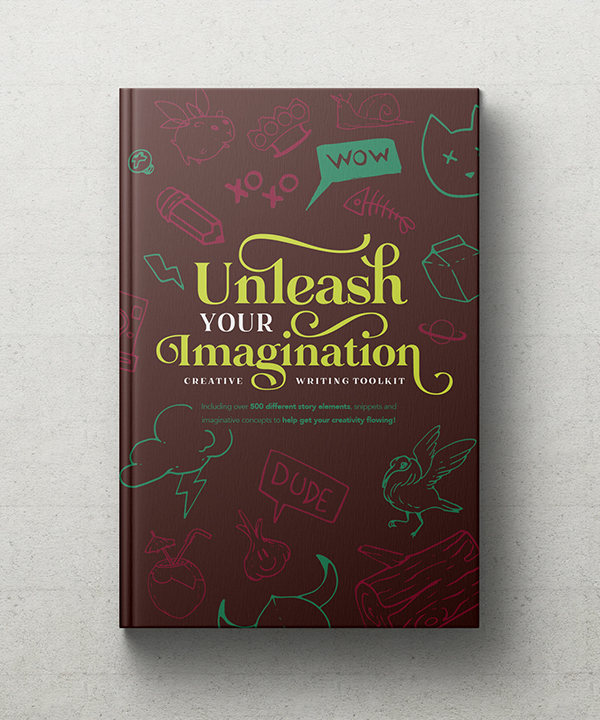
Here’s a look at what we’ll be creating:
Follow along with this tutorial: Download the freebie files
The two freebies used in this tutorial are part of the Five Friday Freebies which are available as a special offer during our 5th Birthday Event. You can pick up your copies using the links below:
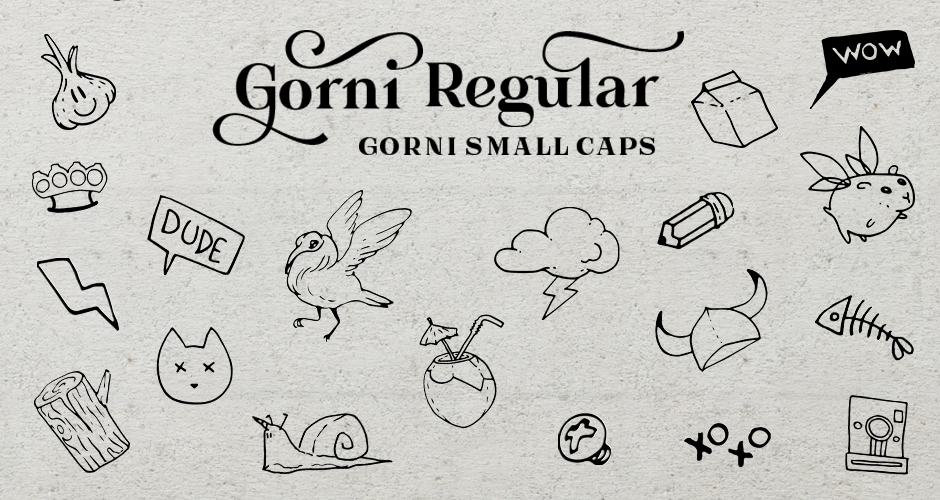
Gorni Typeface by MaGo
Oregano Vector Elements Kit by Milka
80 Seamless Hand Drawn Patterns by Qilli
Clean Vector Halftone Effects Collection by Offset
30 Lineart Logos, Badges & Frames by Marish
Please note these products will only be available for free until Friday 12th October at 10AM UK time, after which they will go back to their full Marketplace price.
Step 1: Unleash Your Imagination Book Cover Design
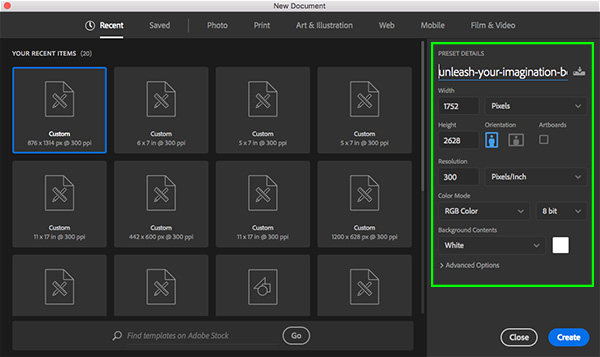
To get started, let’s first create a new Photoshop document and set the units of measurement to ‘Pixels’. From here, set the ‘Width’ to ’1752’ and the ‘Height’ to ’2628’. Change the ‘Resolution’ to ‘300’ and the ‘Color Mode’ can remain in ‘RGB’ for now. Once you’ve done that, give your document a name – here I am using the name ‘unleash-your-imagination-book-cover-design’ but feel free to use a name of your choice. After setting up the parameters for the new document, click ‘Create’ from the lower right hand corner.
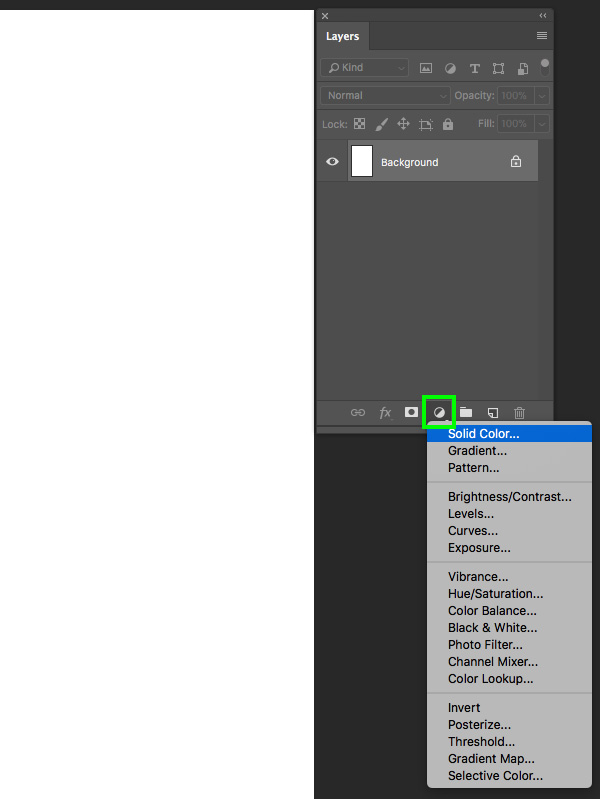
Once you’ve set up your new document, click on the Adjustment Layer icon at the bottom of the Layers Palette and choose ‘Solid Color…’ from the list that appears.
For the fill color, enter the hex value ‘#290A07’ and then click ‘OK’ or press ‘Return’ to apply the changes.

After adding your Adjustment Layer, select the locked ‘Background’ layer and press ‘Delete’ or drag it to the trash so you are only left with the ‘Color Fill 1’ layer as shown below:

Step 2: Gorni
In this step we will use our first freebie for this tutorial Gorni Typeface by MaGo. Please note this product will only be available for free until Friday 12th October at 10AM UK time, after which it will go back to its full Marketplace price. Create a new layer and press ’T’ on the keyboard to switch to the Type Tool. Click in the center of your canvas and type out the word ‘Unleash’ in upper and lowercase. In the Character Panel (found under the Window menu) change the typeface to ‘Gorni’ and use the ‘Regular’ style. Let’s make the size of our text about ’61.3 pt’ and then change the tracking setting to ‘-60’. Once you have done that, click on the color swatch to change the color of the text.
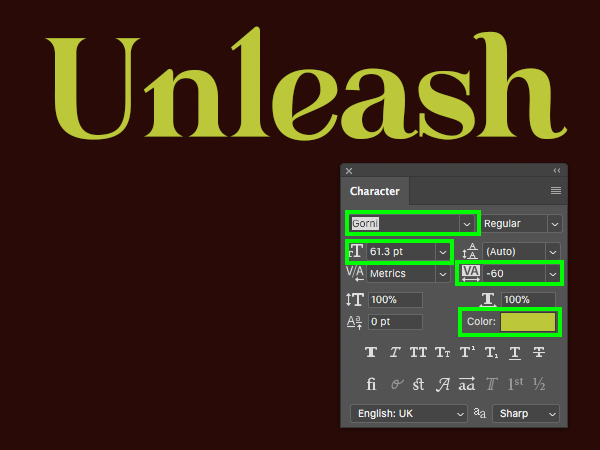
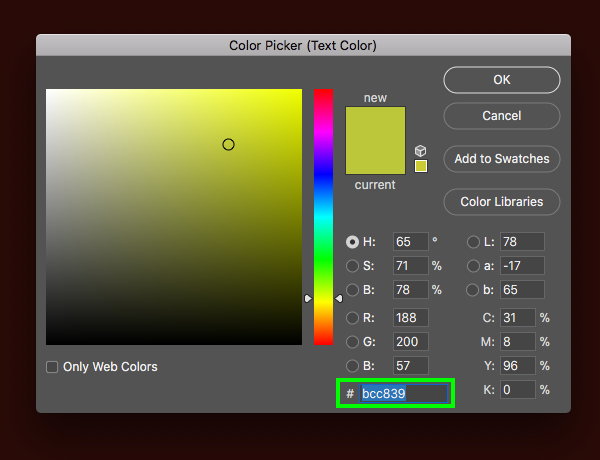
For the text color, enter the hex value ‘#BCC839’ and then press ‘OK’ to apply the changes.
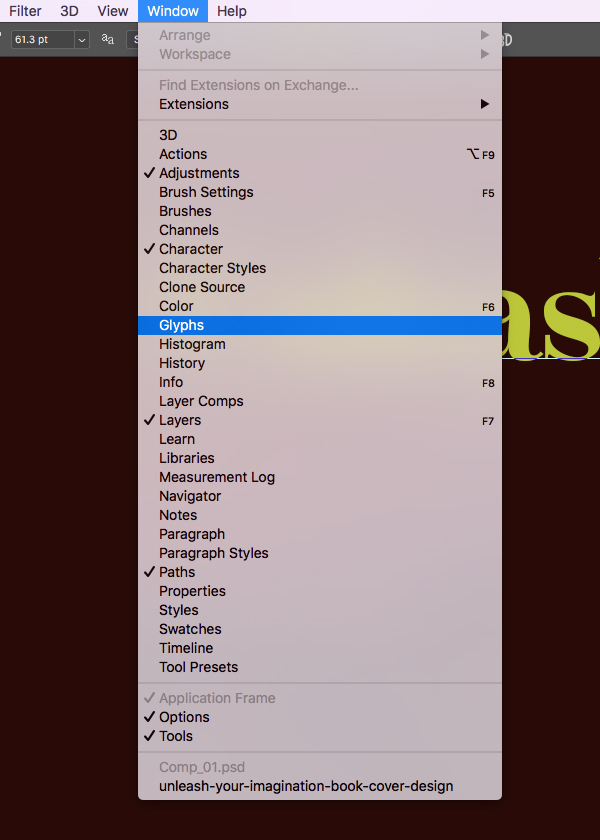
Next, go to the Window menu and choose ‘Glyphs’ from the dropdown as shown here:
Once you’ve opened the Glyphs panel, use the Type Tool (T) to highlight the letter ‘L’ and then you’ll notice that you have an alternative for that letter showing in the panel. Let’s double click on this alternative to change the appearance of the letter as shown in the image below:
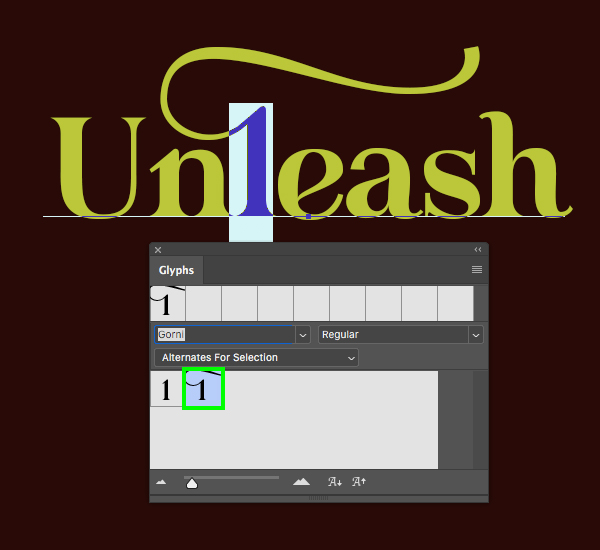
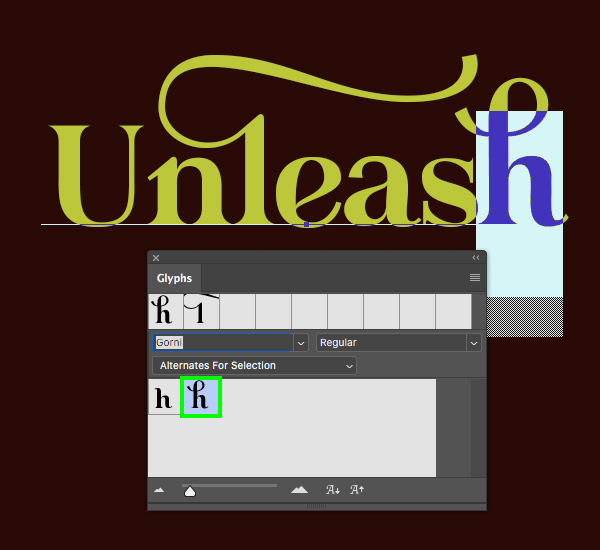
Next, highlight the ‘H’ at the end of the word and double click the alternative character to change its appearance.
Step 3: Using Glyphs
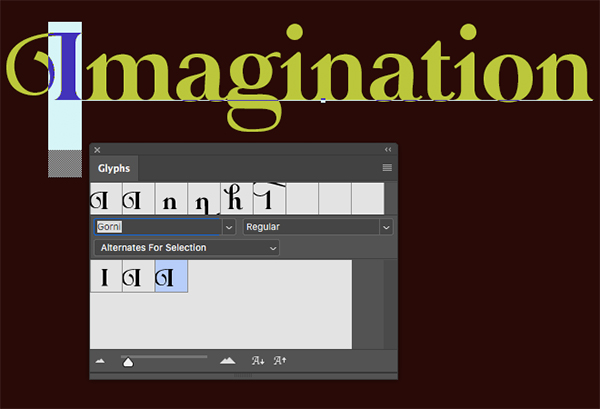
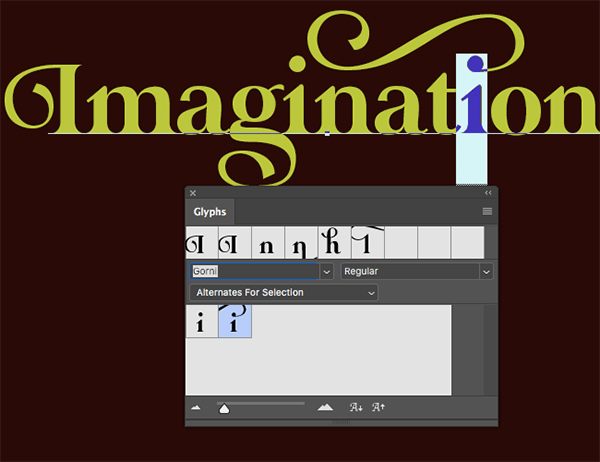
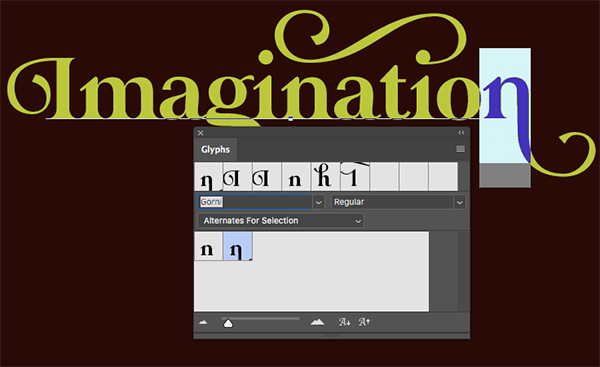
Add another line of text below the first, and this time type out the word ‘Imagination’ using the same font and settings as before. Let’s use the Glyphs panel once again to change a few of the characters starting with the ‘I’ as shown below:
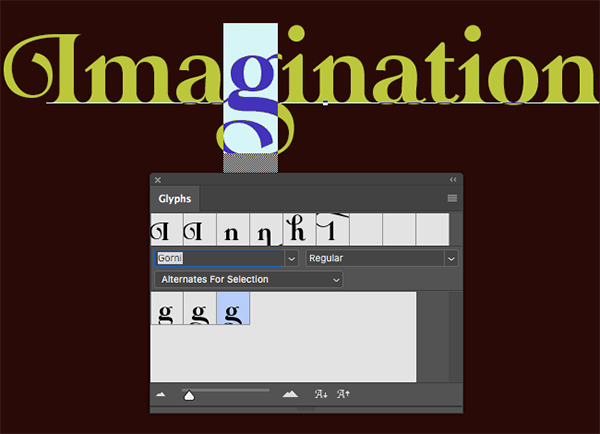
Move over and highlight the ‘G’ and use the third alternate in the Glyphs panel by once again double clicking on it to change the appearance of the character.
Move over to the ‘i’ and change that character as well.
Lastly, select the ’N’ at the end of the word ‘Imagination’ and change it to the alternative character in the Glyphs panel as well.
Step 4: Catchwords
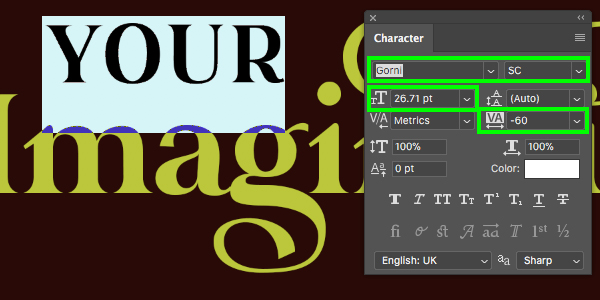
Let’s add another new layer and this time we will use the ‘SC’ or Small Caps style of the ‘Gorni’ typeface to type out the word ‘YOUR’ in all caps. Let’s use the Character panel to change the size to ’26.71 pt’ and the tracking can be set to ‘-60’. After that, change the fill color to solid white and place it just above the ‘mag’ in the word ‘Imagination’ as shown below:
Add another new layer and use the same font and style to type out the words ‘CREATIVE WRITING TOOLKIT’. Let’s change the size of this line of text to ’11.38 pt’ and expand the tracking so that it’s set to ’80’. The fill color can be set to solid white and then what we want to do is place this line of text below the word ‘Imagination’. Here we have the descender of the ‘G’ coming down so we will want to hit the spacebar a handful of times after the word ‘CREATIVE’ to add space between that and the word ‘WRITING’ in order to allow the tagline to read comfortably. Doing this will also make for better integration of the lines of text.

Step 5: Secondary Text
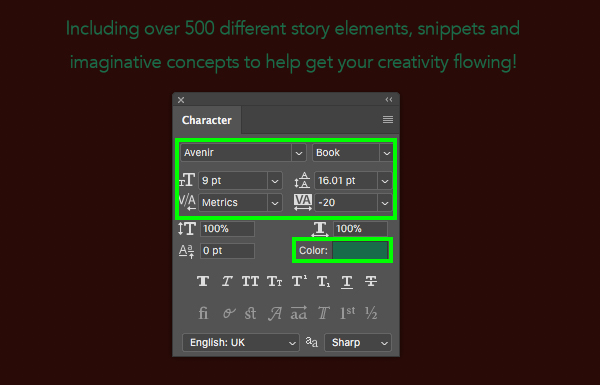
Add another new layer below the rest of the text and type out the lines ‘Including over 500 different story elements, snippets and imaginative concepts to help get your creativity flowing!’. We can break the line after the word ‘and’ and then use the Character panel to change the typeface to a nice clean sans serif font such as ‘Avenir’ using the style ‘Book’ or a lighter style. For the size we will set it to ‘9 pt’ and give it a tracking amount of ‘-20’ as shown below:
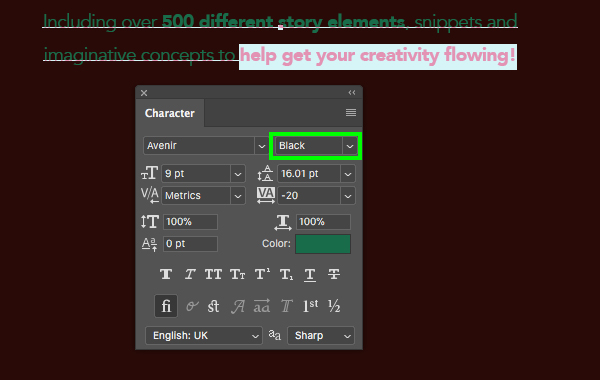
Using your Type Tool (T) click and drag around the ‘500 different story elements’ portion of the text and change the style to ‘Black’ to make it stand out.
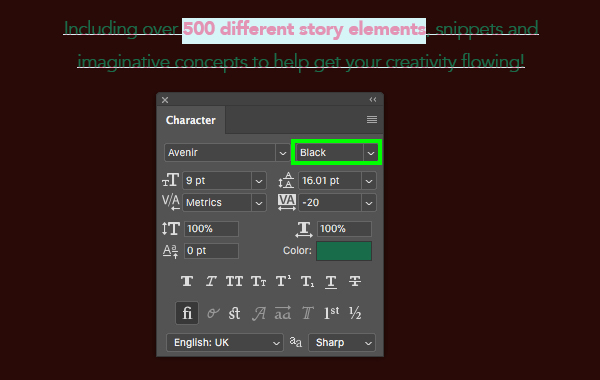
Let’s do this once again by selecting the ‘help get your creativity flowing!’ text and also changing the style to ‘Black’ as shown here:
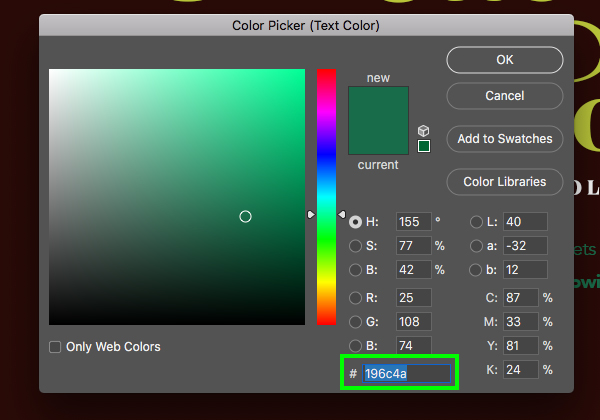
After making some of the text stand out a bit more, click inside of your text box a few times to highlight both lines of text and then click on the swatch to change the fill color to the hex value ‘#196C4A’ and then press ‘OK’ or hit ‘Return’ on the keyboard to apply the changes.
Step 6: Title Treatment
Now that we have set up our title, let’s select the very top layer in our Layers Palette, hold the Shift key, and then click on the bottom text layer so all of our text layers are highlighted simultaneously.
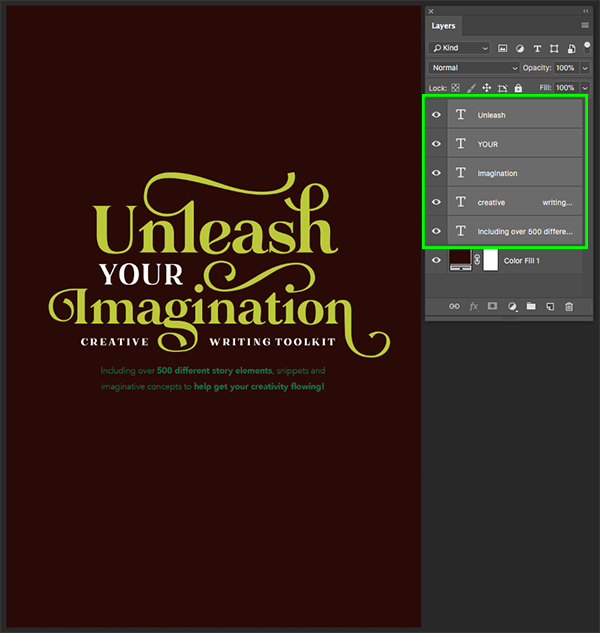
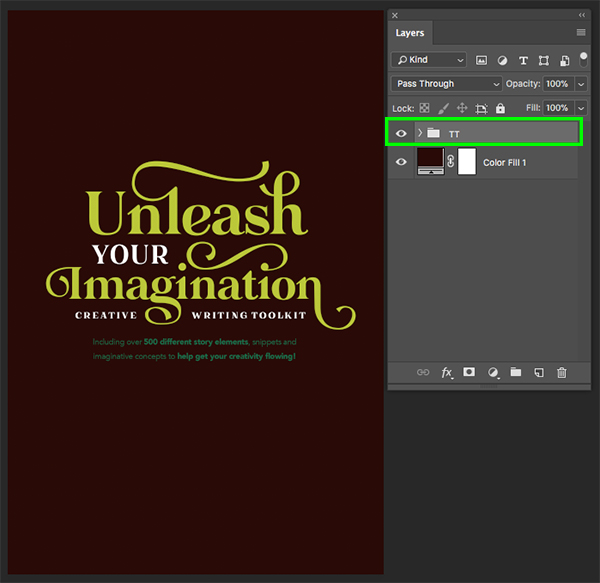
With all of your text layers selected, press Command/Ctrl+G to put them into a folder and then double click on the ‘Group 1’ text to change the folder name to ‘TT’ as shown in the image below:
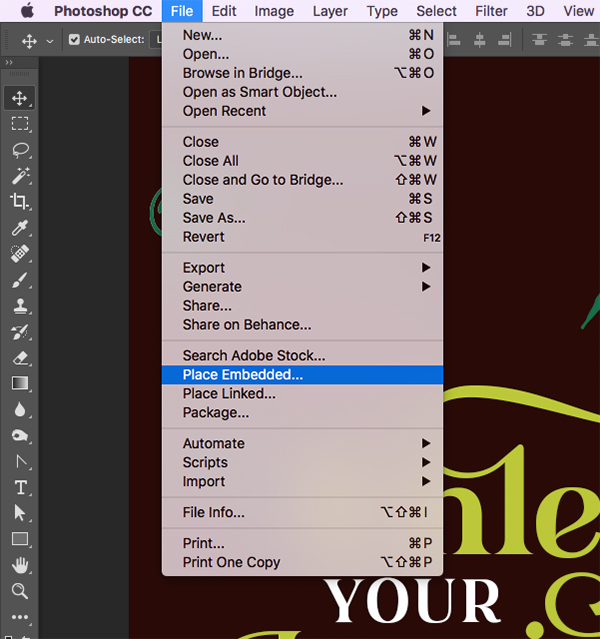
Step 7: Importing Illustrated Elements
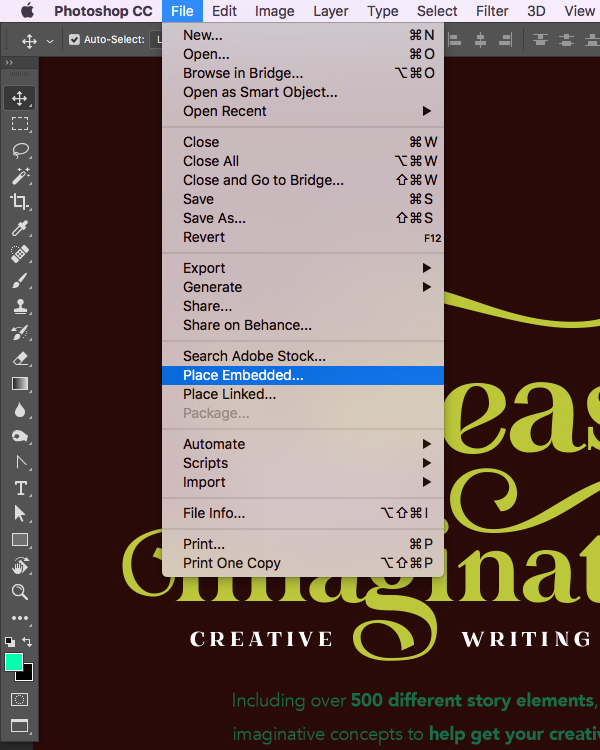
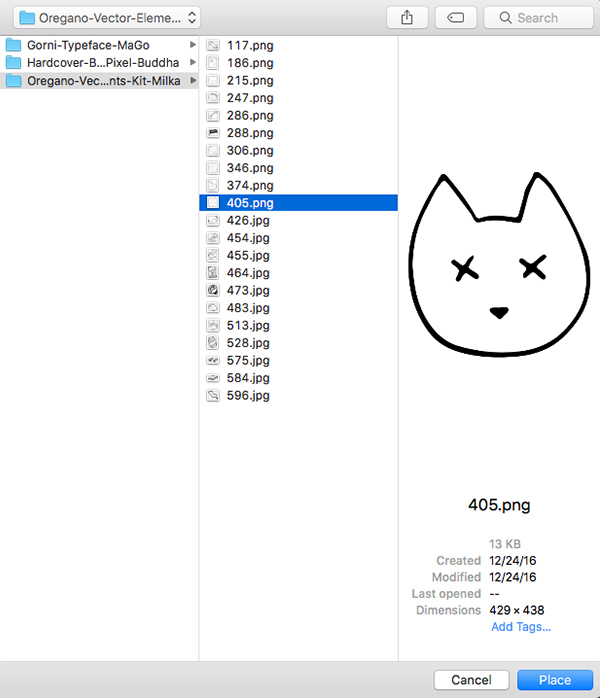
In this step we will use our second freebie for this tutorial Oregano Vector Elements Kit by Milka. Please note this product will only be available for free until Friday 12th October at 10AM UK time, after which it will go back to its full Marketplace price. Next, let’s begin importing some of our illustrated elements by going to the File menu and choosing ‘Place Embedded…’ from the dropdown list. Here we have selected the files we will use in this tutorial in a separate folder. Please use the below graphic as a reference if you wish to select the files for ease of use.
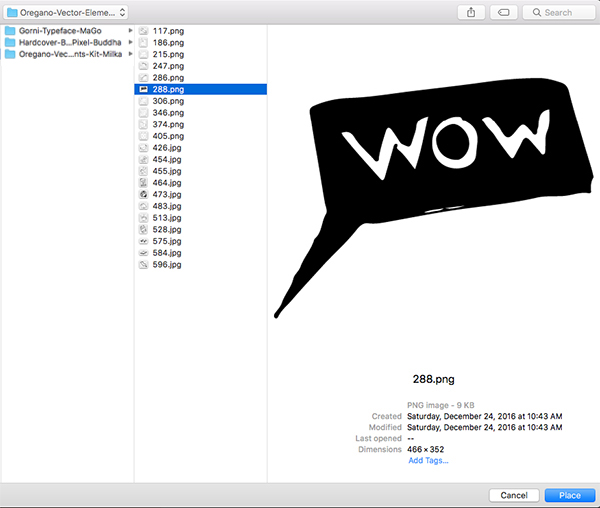
Navigate to ‘288.png’ in the freebies folder and then choose ‘Place’ from the lower right to import the first illustration.
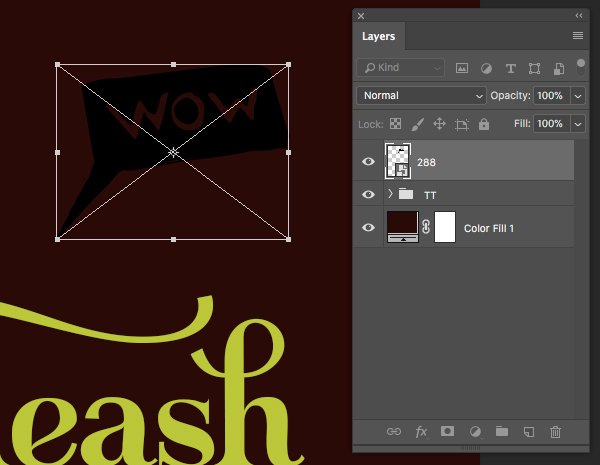
Place the Smart Object layer above the word ‘Unleash’ in the title and scale it using a Free Transform (Command/Ctrl+T) and dragging outwards while holding the Shift key until it’s about the same size as the image shown below:
Step 8: Hardware
Return to the File menu and choose ‘Place Embedded…’ once again, this time navigating to ’473.jpg’ and choosing ‘Place’.
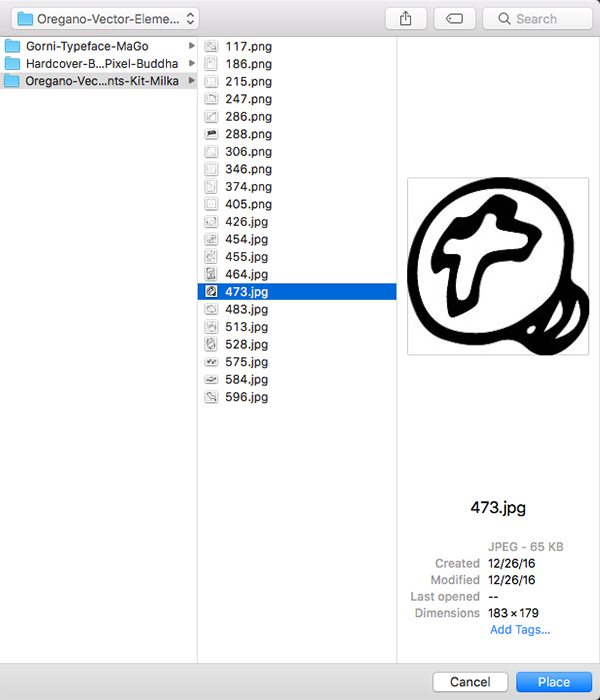
Scale and position the illustration towards the top left area of the design and then press ‘Return’ to apply the changes.
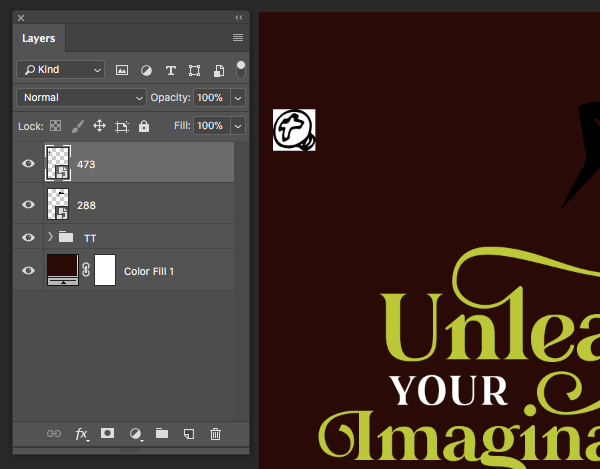
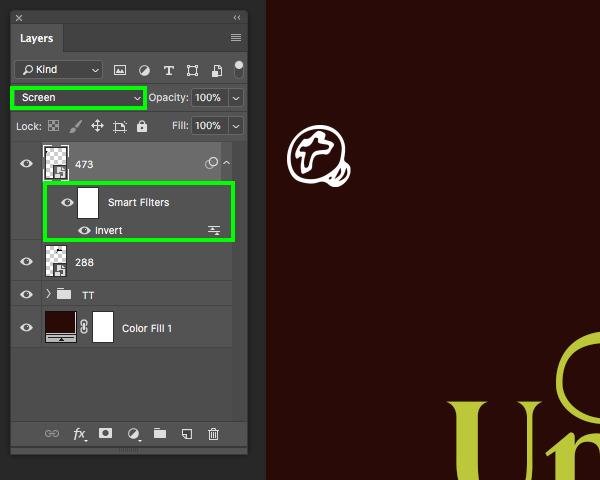
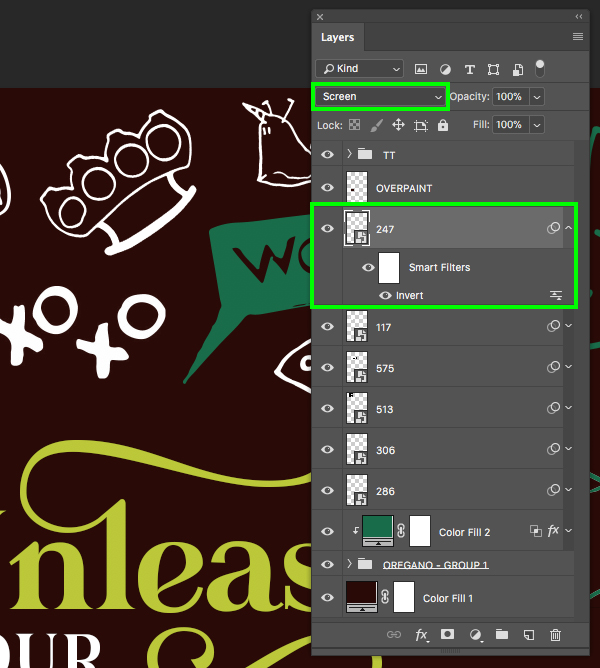
You may notice that some of the illustrations have backgrounds in them (the JPG files) where the PNG files are transparent. In order to fix this we will need to take a couple of extra steps that we will need to apply to all of the illustrations that we import. Let’s select the ‘473’ Smart Object and then pressing Command/Ctrl+I to invert it, and then change the Blend Mode from ‘Normal’ to ‘Screen’ as shown below:
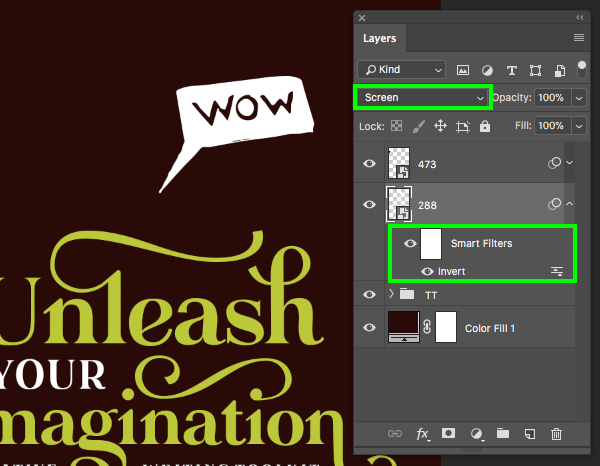
Let’s now go back and select the ‘Wow’ illustration that we imported in the previous step and invert it (Command/Ctrl+I) and then change the Blend Mode of the layer from ‘Normal’ to ‘Screen’ as shown below:
Step 9: Cat’s Meow
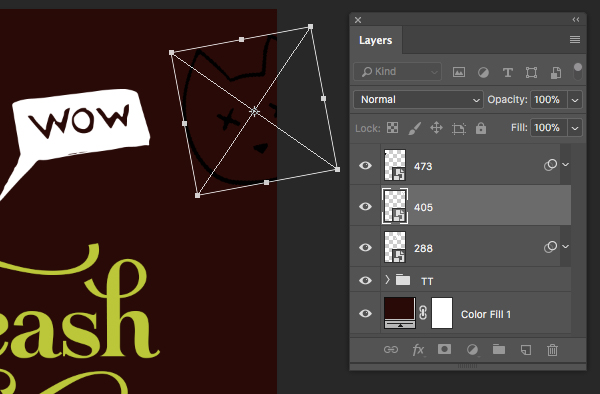
Return to the File menu and choose ‘Place Embedded…’ once again. This time let’s select ’405.jpg’ and choose ‘Place’ from the lower right corner.
Scale and rotate this layer over the right side of the canvas so that part of the face is cropped and then press ‘Return’ to apply the transformation. Use the image below as a reference for the size and positioning of the illustration:
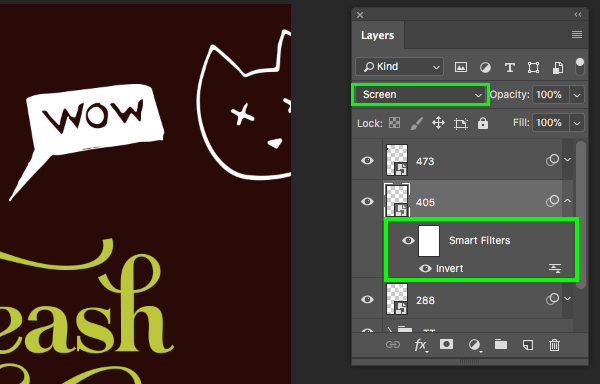
Let’s invert the illustration by pressing Command/Ctrl+I and then we will want to change the Blend Mode to ‘Screen’.
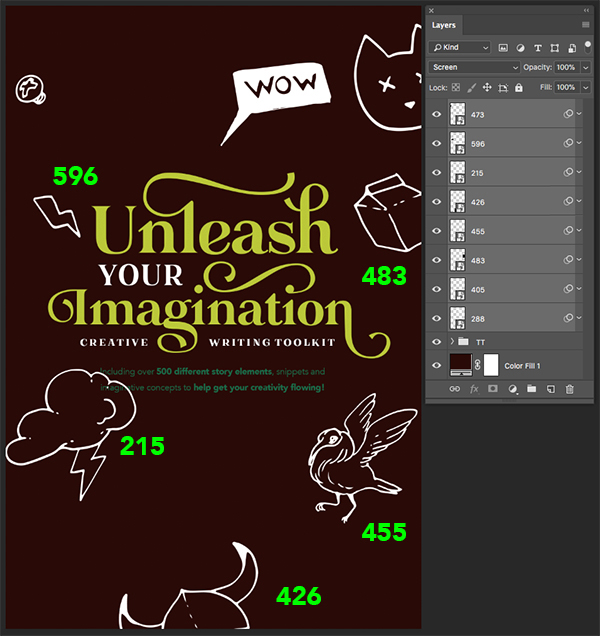
Step 10: A Nice Variety
We will continue to import several more illustrations via the File menu and repeat the process of positioning, scaling, and rotating them before once again inverting and changing the Blending Mode of each of the illustrations. The image below shows the next five illustrations and how they are placed around the design.
Once you’ve imported and set up the next batch of illustrations, select the very top one, hold the Shift key, and then select the bottom illustration so they are all selected at the same time. From here, press Command/Ctrl+G to place them into a new folder and double click on the ‘Group 1’ text and rename this folder ‘OREGANO – GROUP 1’ as shown here:
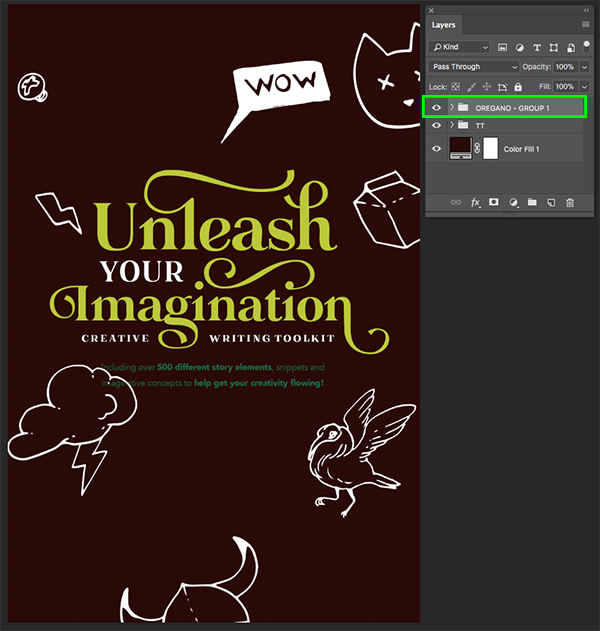
Step 11: Coloring Group 1
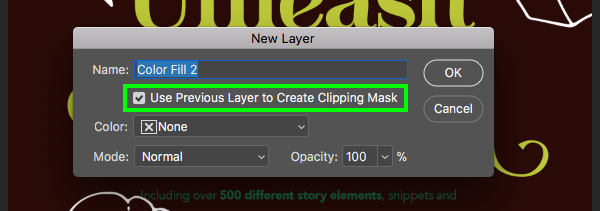
Select the ‘OREGANO – GROUP 1’ folder, and then hold the Alt/Option key and click on the Adjustment Layer icon at the bottom of the Layers Palette and choose ‘Solid Color…’ from the menu.

When the ‘New Layer’ dialog box appears, check off the ‘Use Previous Layer to Create Clipping Mask’ option and then click ‘OK’ to proceed.
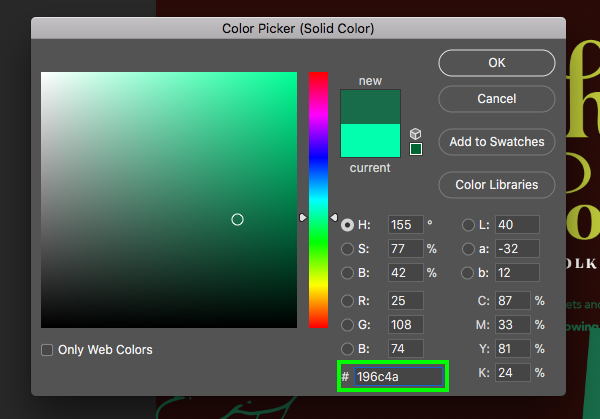
For the fill color enter the hex value ‘#196C4A’ and then press ‘Return’ or click ‘OK’ to continue.
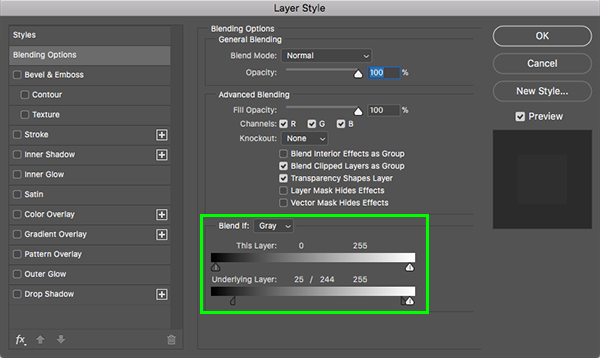
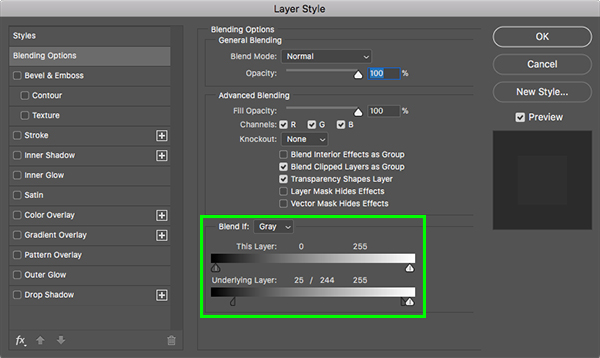
Double click on the group folder to bring up the Layer Style panel and go to the very bottom section where it says ‘Underlying Layer’. Here we want to hold the Alt/Option key and split the two gray tabs on the lower left apart. We will move the right slider all the way over towards the right and then move the left one in a bit so the settings read ’25 / 244’ as shown here:
Your image should now look something like the image below with all of the illustrations appearing in the same color without any background.
Step 12: Color Fix
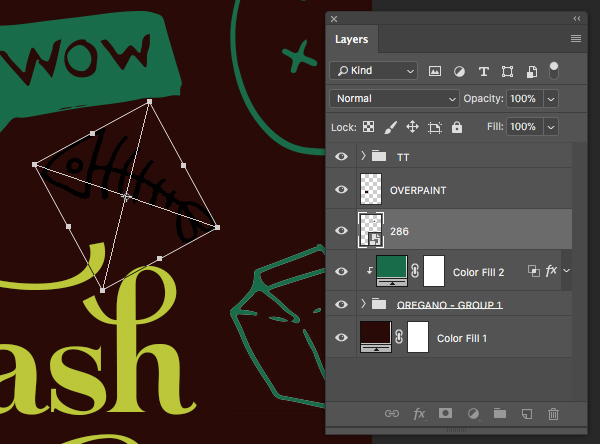
Create a new layer at the top of your Layers Palette and then press ‘M’ on the keyboard to switch to the Marquee Tool. Click and drag a wide rectangle out around the left side of the bluish-green text as shown here:

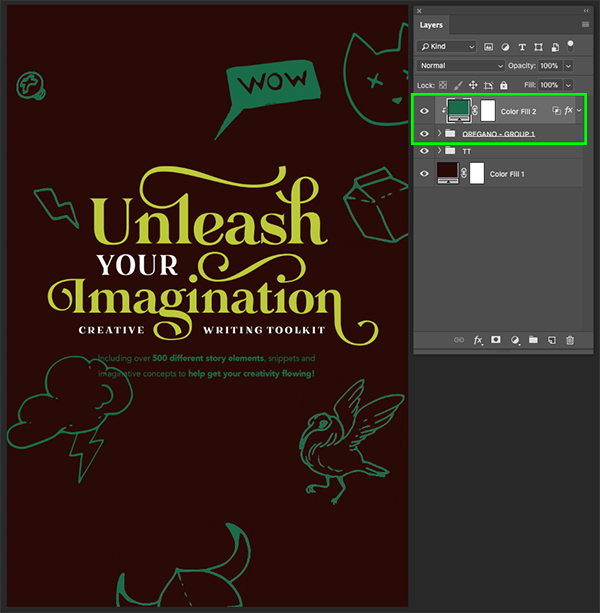
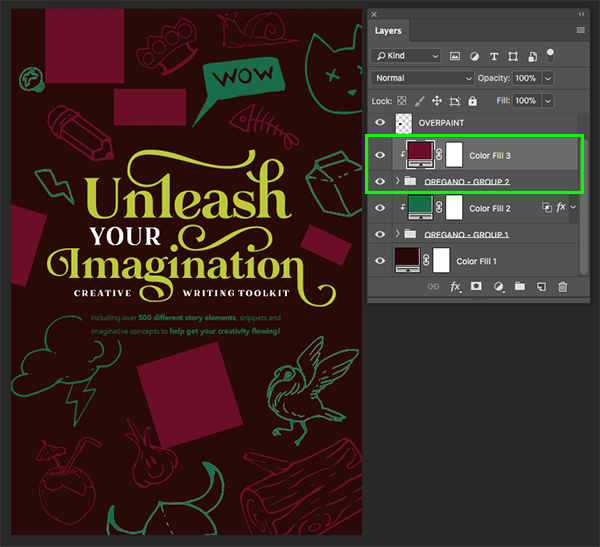
After your selection is active, press and hold the Alt/Option key to toggle your main cursor arrow with the Eyedropper Tool and click on an area of the background color to make it your foreground color. From here, simply press Alt/Option+Delete on the keyboard to fill the selection with the same color we used in the background. From here we will need to take the whole ‘TT’ folder and move it to the top to make sure that the text appears above this shape. You should now have a bit of breathing room and space around the text on the bottom.
Step 13: Second Illustrations Group
Return to the File menu and choose ‘Place Embedded…’ once again.
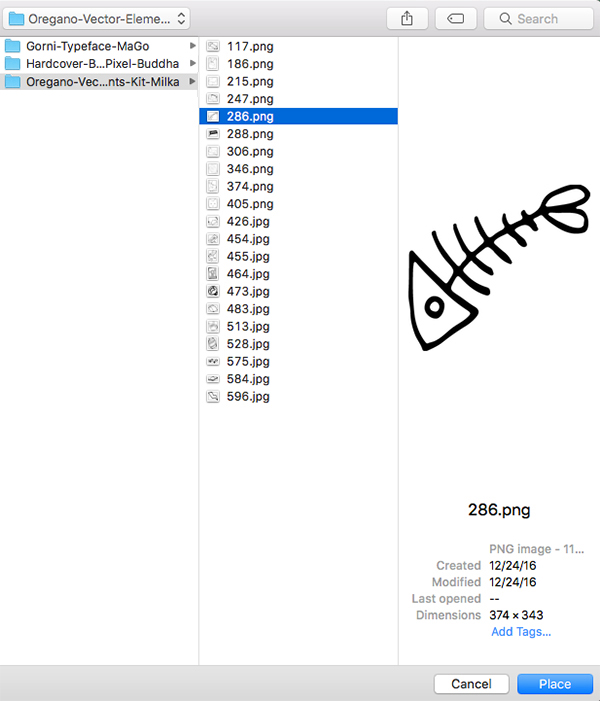
Navigate to the ‘286.png’ file from the freebies folder and then choose ‘Place’ from the lower right corner.
Scale and rotate the Smart Object just above the ‘sh’ in ‘Unleash’ as shown here:
Next, invert the layer and change the Blend Mode to Screen as seen in the image below:

Step 14: Escargot
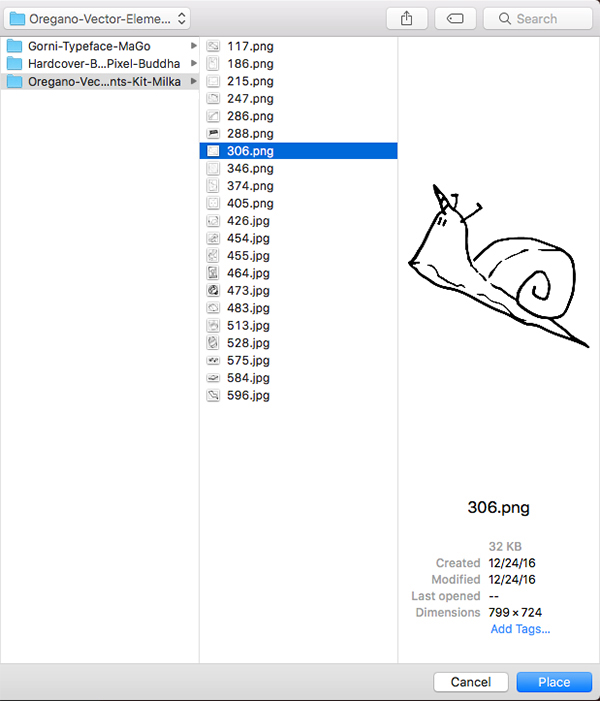
Return to the File menu and choose ‘Place Embedded…’ and then navigate to the ’306.png’ file and choose ‘Place’ from the bottom right corner to import the illustration of the snail.
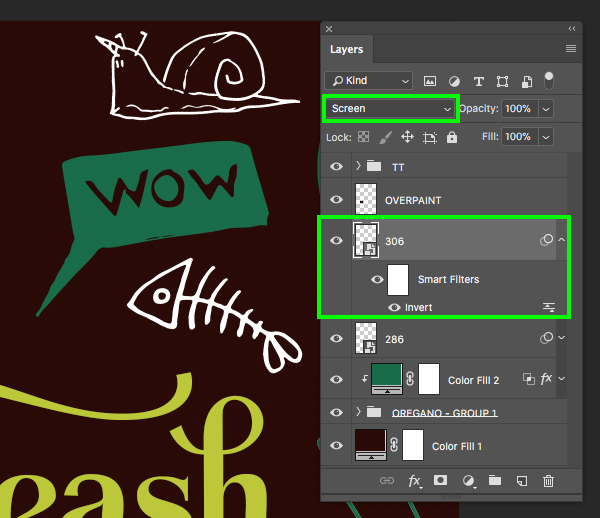
Scale and rotate the Smart Object and place it above the ‘Wow’ illustration. After that, invert the Smart Object and change the Blending Mode to ‘Screen’.
Step 15: Trifecta
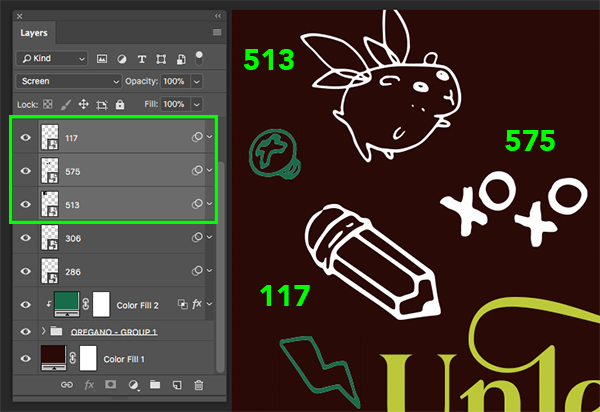
Import the next three illustrations – ‘117’, ‘575’, and ‘513’ and repeat the process of inverting and changing the Blending Modes. Let’s then place these around the upper left of the design as shown below:
Step 16: Brass Knuckles
Go back to the File menu and choose ‘Place Embedded…’ and this time we will grab the ‘247.png’ file and choose ‘Place’ to import it into Photoshop as a Smart Object.

Scale and position the brass knuckles in the space at the top of the image, invert it, and then change the Blend Mode to ‘Screen’.
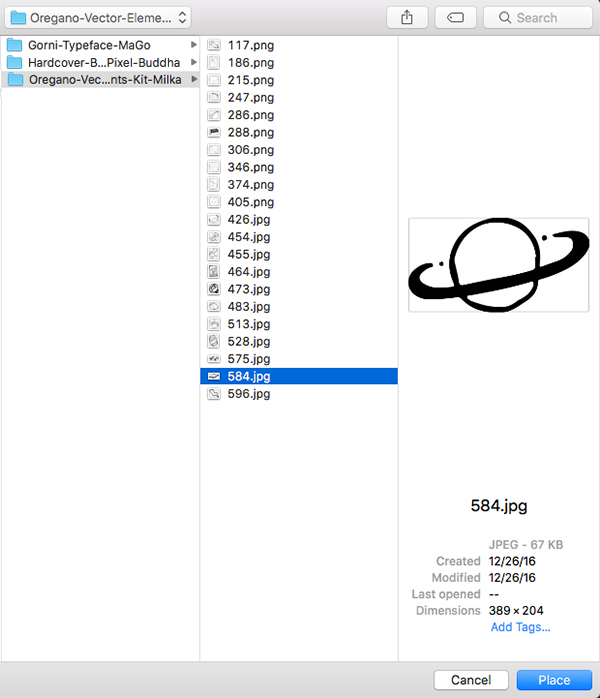
Step 17: Intergalactic
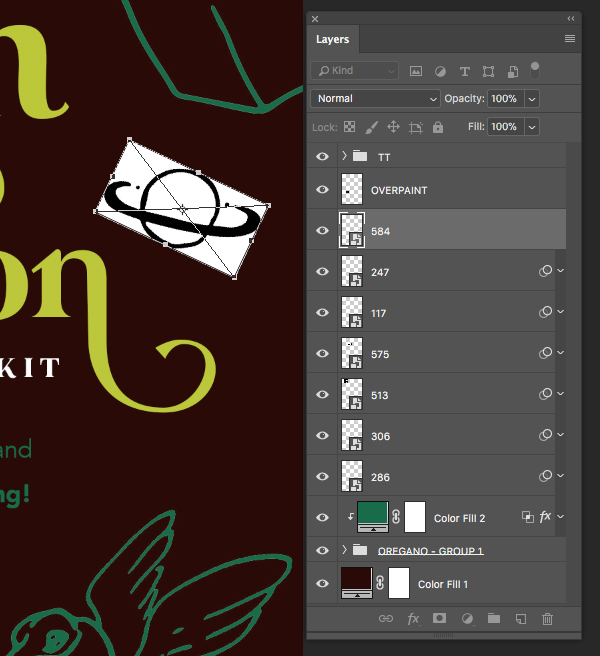
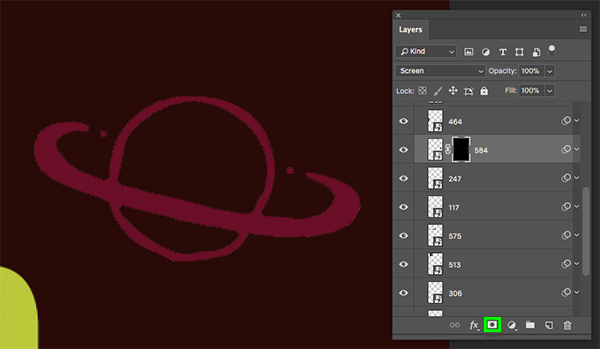
Let’s return to the File menu and this time we will grab the planet illustration – ‘584.jpg’. Once you have selected the illustration, choose ‘Place’ from the bottom right.
Scale the planet down and rotate it clockwise a bit before placing it just above and to the right of the ’n’ at the end of ‘Imagination’.
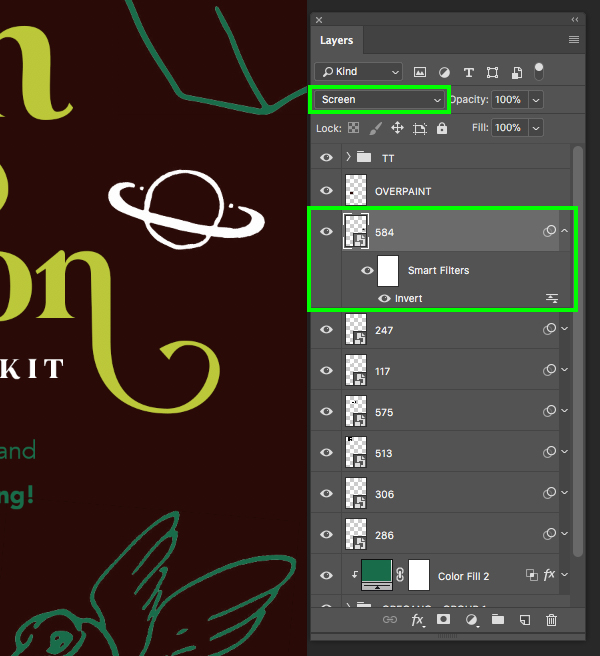
Next, press Command/Ctrl+I to invert the layer and then change the Blend Mode of the layer to ‘Screen’.
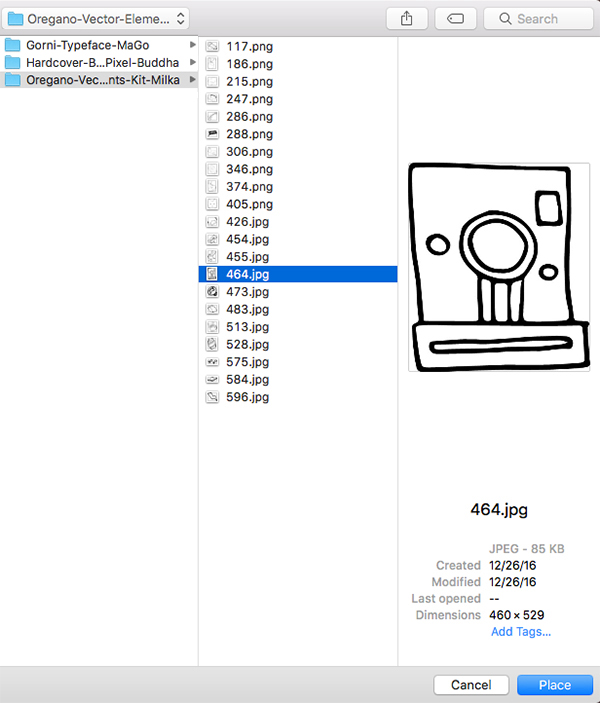
Step 18: Kodak Moments
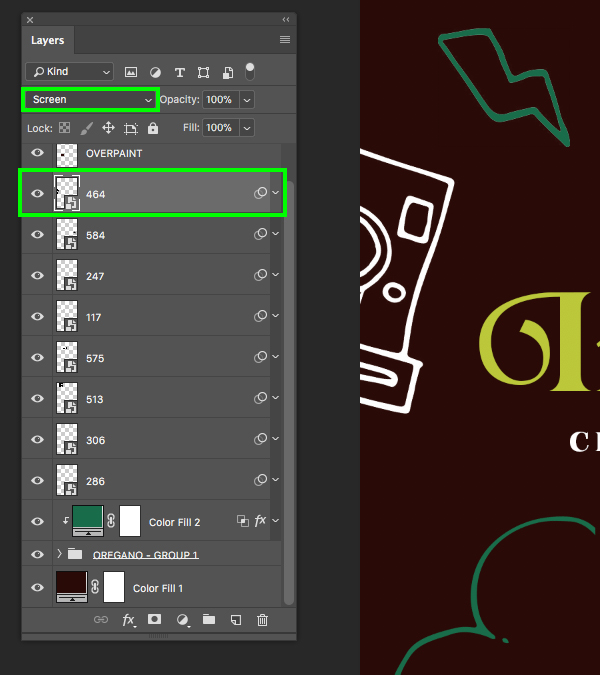
Once again return to the File menu and choose ‘Place Embedded…’ before navigating to the ‘464.jpg’ image and choosing ‘Place’ from the bottom corner of the dialog box to import it into your document.
Repeat the process of inverting the illustrations and changing the Blend Mode as shown below:
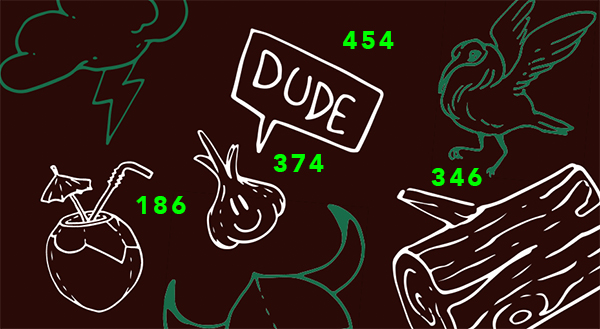
Let’s do this a few more times with the following illustrations, and use the image below for reference:
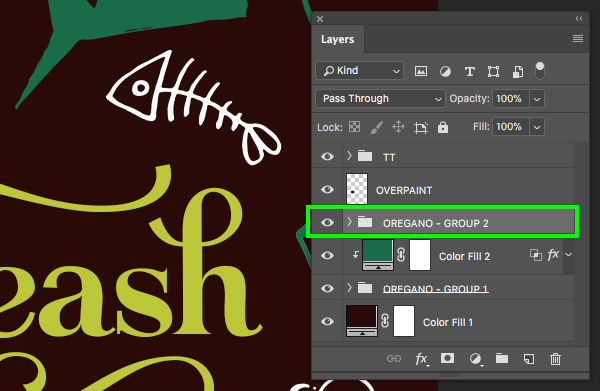
Step 19: Grouping the Illustrations
Select the top Smart Object illustration from the Layers Palette, hold the Shift key, and then select the bottom Smart Object layer so we have all of the new, white, illustrations selected at the same time.
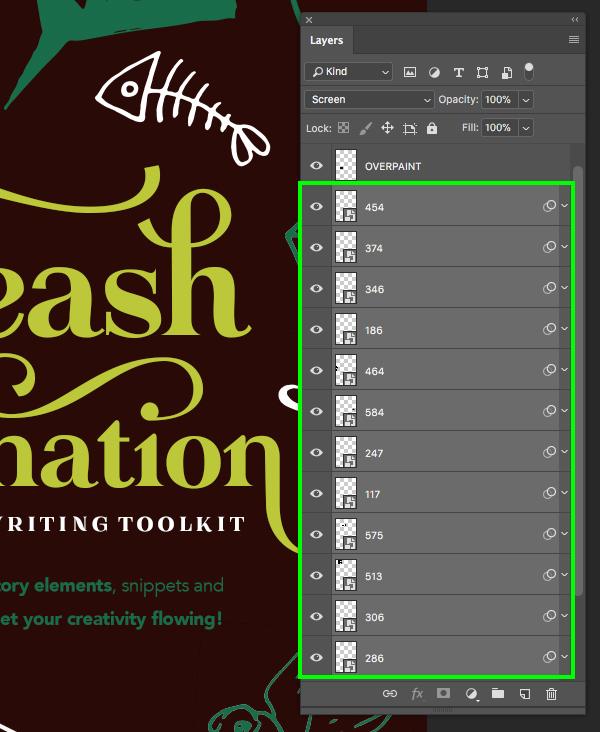
With all of the layers selected, press Command/Ctrl+G to put them into a new folder and then double click on the ‘Group 1’ text and rename the folder ‘OREGANO – GROUP 2’ as shown below:
Step 20: Adjustment Layers
Select the ‘OREGANO – GROUP 2’ folder and then hold the Alt/Option key and click on the Adjustment Layer icon from the bottom of the Layers Palette. From here, select the ‘Solid Color…’ option from the dropdown menu.
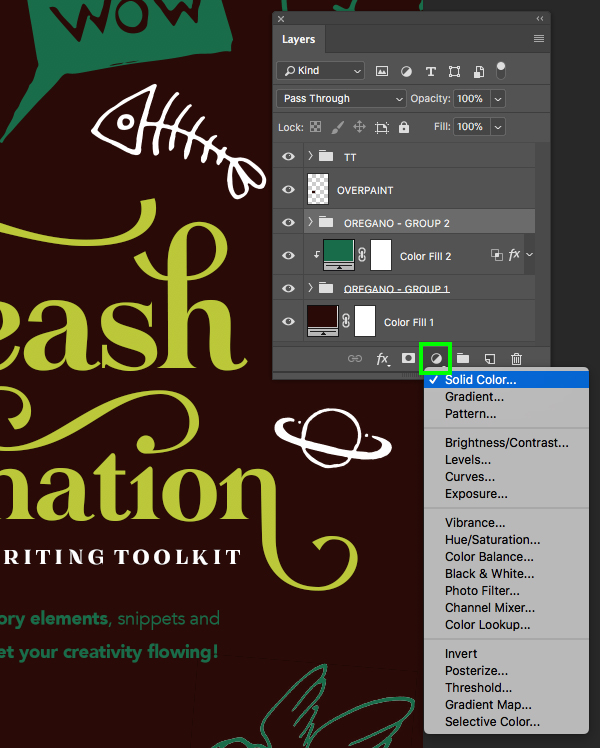
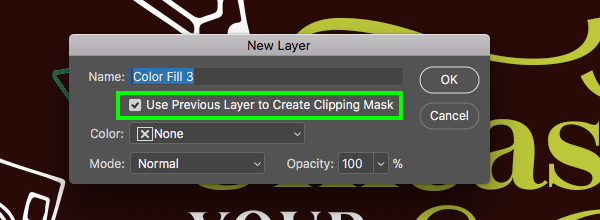
When the following dialog box appears, check off the ‘Use Previous Layer to Create Clipping Mask’ option and then click ‘OK’ to proceed.
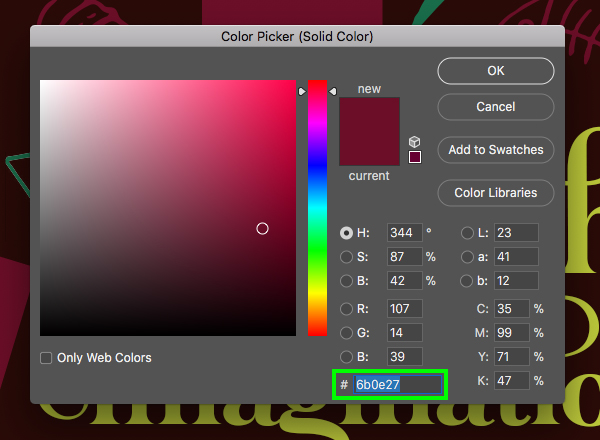
For the fill color, enter the hex value ‘#6B0E27’ and then press ‘Return’ on the keyboard or click ‘OK’ to continue.
As you can see, several of the illustrations now have solid color boxes around them, let’s go ahead and fix this in the next step.
Double click on the ‘OREGANO – GROUP 2’ folder to bring up the Layer Style panel and split the bottom sliders apart at the bottom of the ‘Blending Options’. Here we want to separate the two gray sliders on the bottom so they’re set to ’25 / 244’ and then press ‘OK’ to apply the changes and close out of the panel. When you return to your document you will notice the solid boxes are no longer there.
Step 21: Halo’s
In some cases, you may notice that a handful of the illustrations have a ‘halo’ around the edges, which we don’t want to see. To fix this, press ‘W’ on the keyboard to grab the Magic Wand Tool and then click inside an area of color within that shape to make a selection.
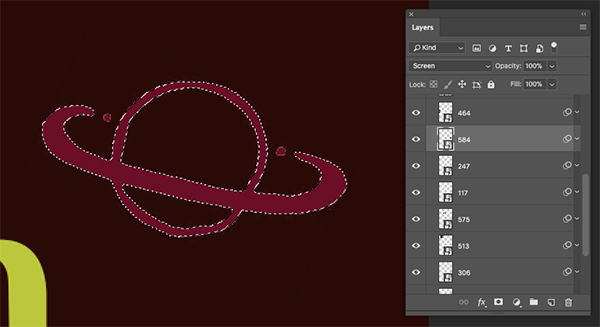
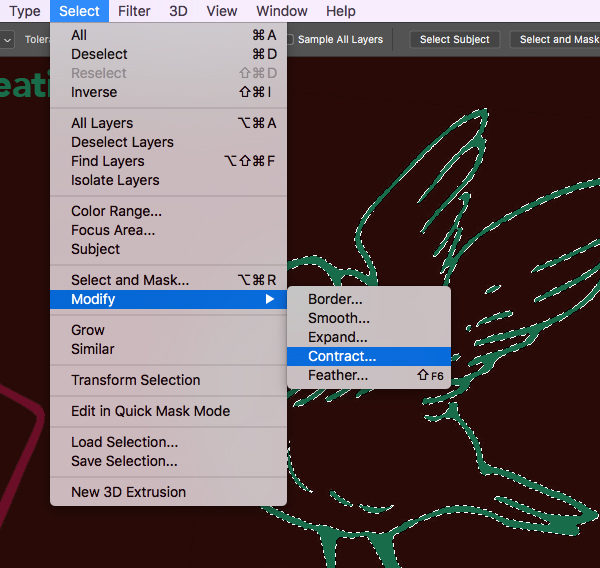
Next, go to the Select menu and choose ‘Similar’ to grab all of the similar colors in that layer.
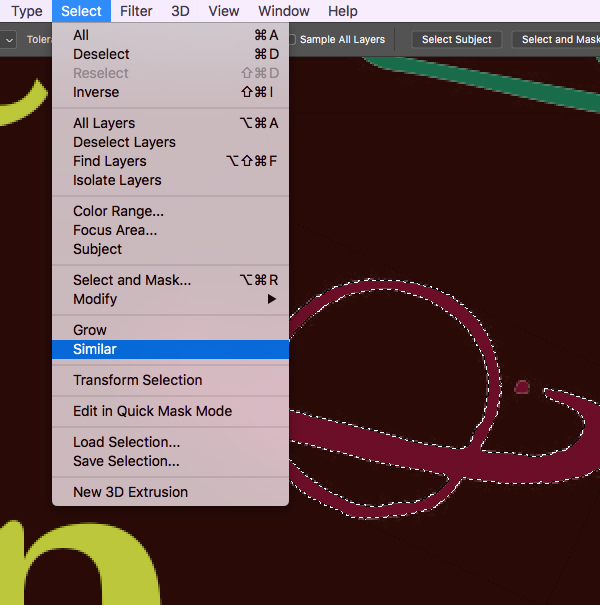
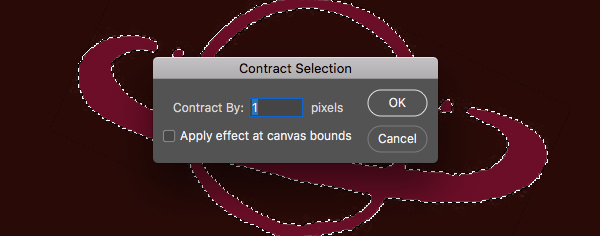
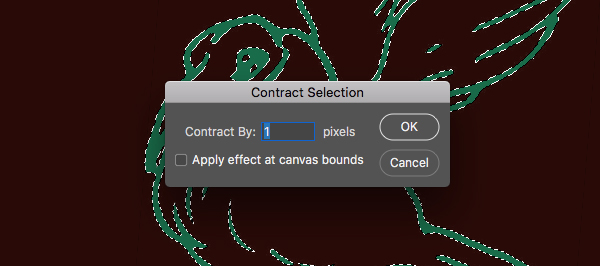
Go to the Select menu again and choose ‘Modify > Contract…’ from the menu.

Enter ‘1’ for the value and then press ‘Return’ or click ‘OK’ to continue.
From here, click on the ‘Add layer mask’ icon at the bottom of the Layers Palette to add a mask and get rid of the halo around the shape.
Step 22: Selection Fixes
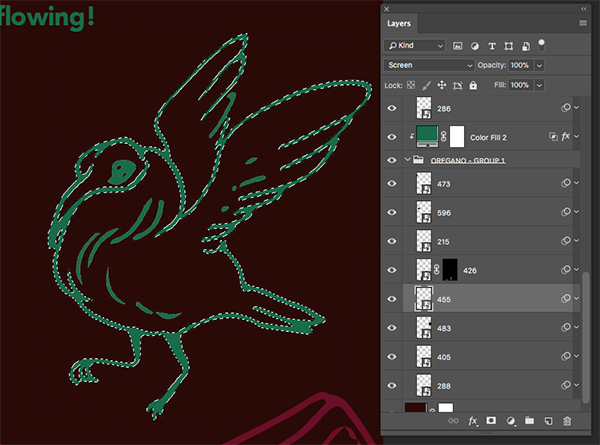
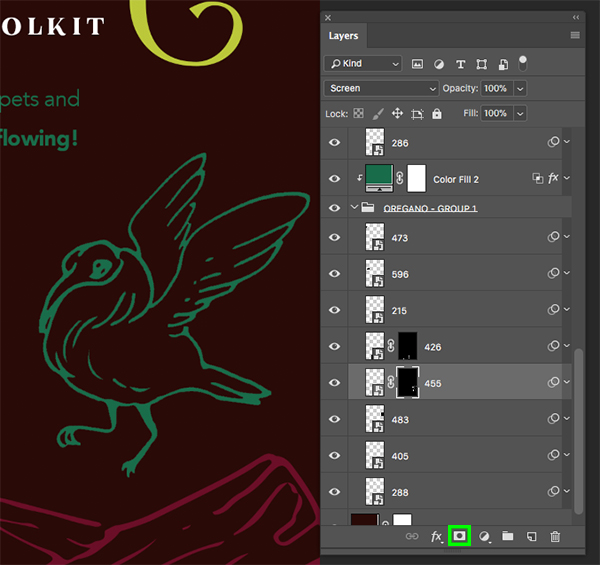
Let’s continue to do this with the other illustrations that have a light or white edge around them. Here we can selected the ‘455’ Smart Object layer and then use the Magic Wand Tool (W) once again to click on an area of color inside the shape to make a selection.
Next, go to the Select menu and choose ‘Similar’ to grab all of the similar colors in that layer once again.
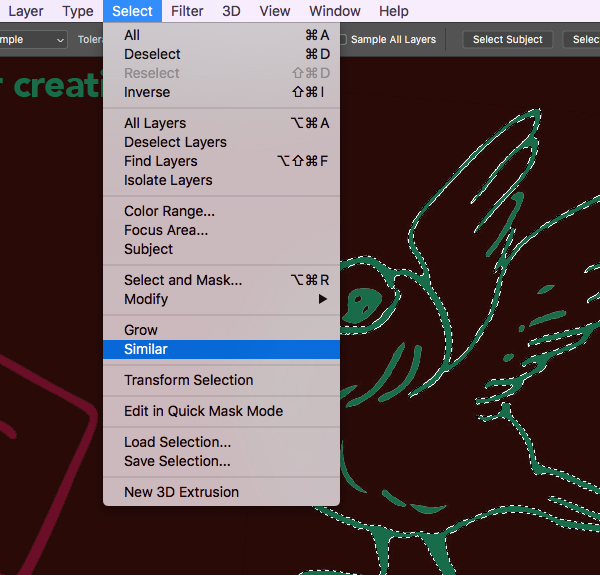
Go to the Select menu and choose ‘Modify > Contract…’ from the dropdown.
Enter ‘1’ for the ‘Contract By:’ value and then press ‘Return’ on the keyboard to continue.
From here, click on the ‘Add layer mask’ icon at the bottom of the Layers Palette.
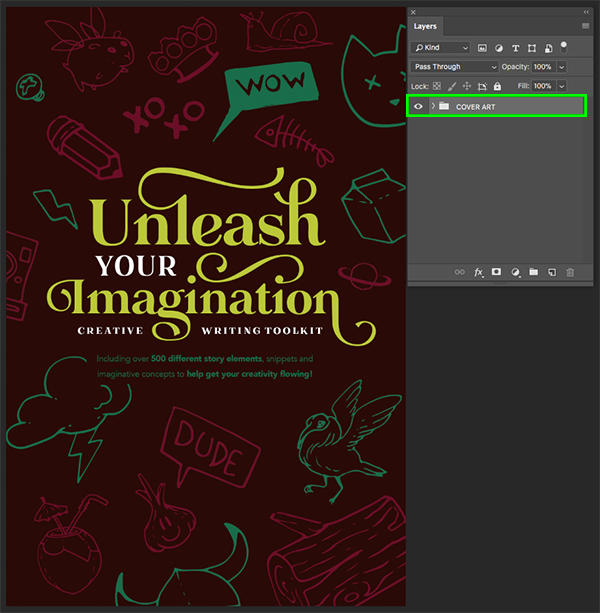
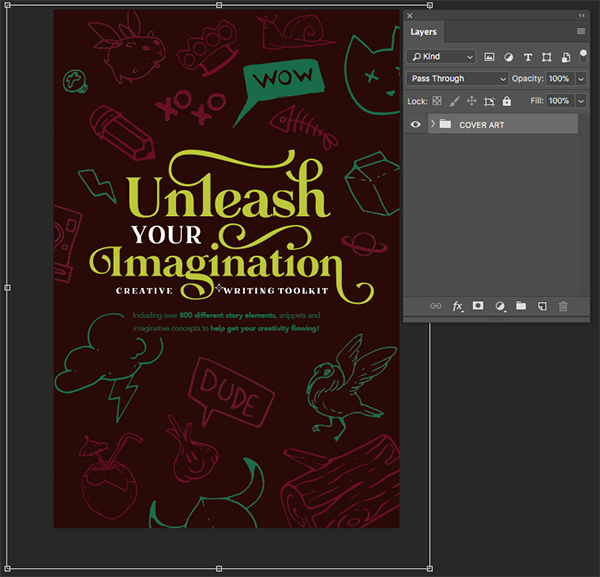
Step 23: Grouped Cover Art
After cleaning up the edges on the remainder of the illustrations that need to be adjusted, collapse all of the folders and groups in your Layers Palette. Select the very top layer in your Layers Palette and then hold the Shift key and click on the very bottom ‘Color Fill 1’ layer that serves as our background. You should now have all of your layers and groups selected at the same time.
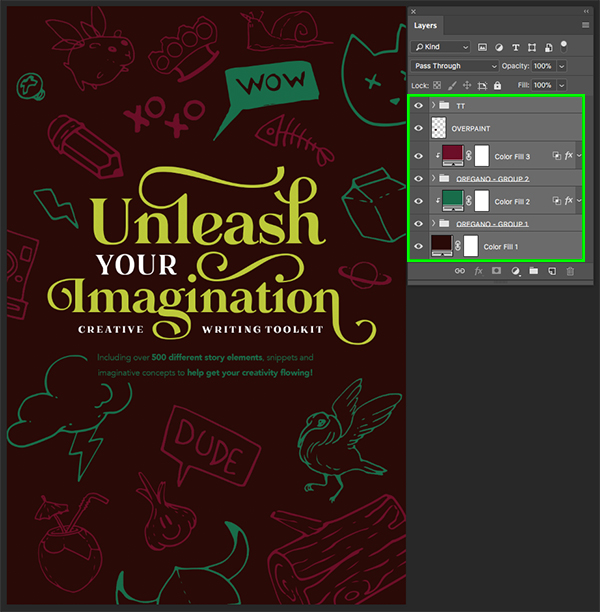
With all of your layers still highlighted, press Command/Ctrl+G to put them into a new folder and double click on the ‘Group 1’ text to rename the folder ‘COVER ART’. We now have our flat artwork designed and can apply it to the book cover mockup file.
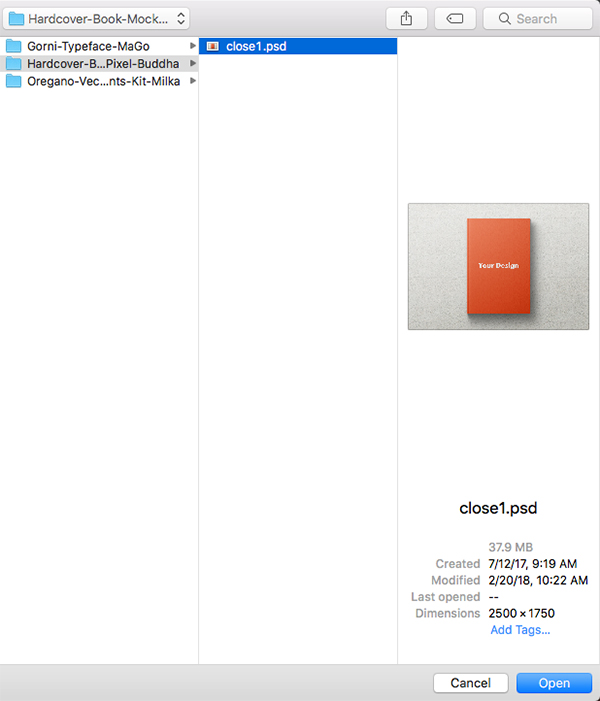
Step 24: Book Cover Mockup
In this step we will use a book cover mockup from the Hardcover Book Mockup Set by Pixel Buddha. If you have access to this product, go to the File menu and choose ‘Open…’ and navigate to the ‘close1.psd’ file in the ‘Hardcover-Book-Mockup-by-Pixel-Buddha’ folder before clicking ‘Open’ from the lower right corner. Alternatively, you can use a book cover mockup from your own collection or a free resouce from the Internet.
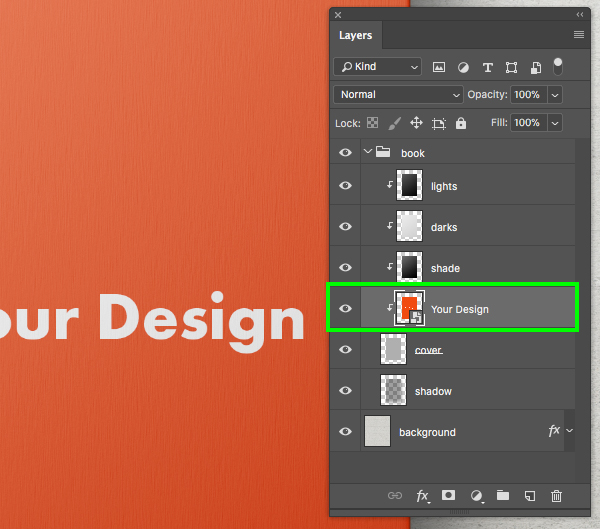
Once the file is open in Photoshop you will see that there is a folder called ‘book’ and a single ‘background’ layer as shown below:
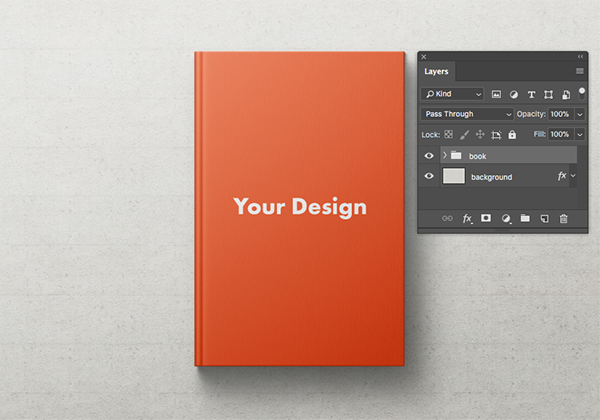
Before moving on, press ‘C’ on the keyboard to get the Crop Tool and then drag either the left or right handles inwards while holding the Alt/Option key to bring both handles in at the same time. Let’s crop the mockup so there is a mostly even amount of space all the way around the book and then press ‘Return’ on the keyboard to apply the changes.
Step 25: Replacing Artwork
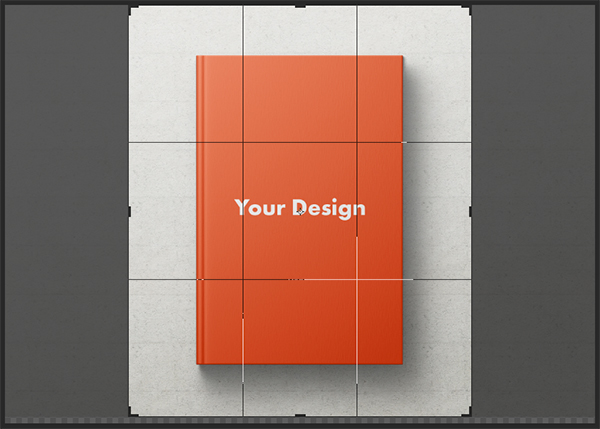
Click on the small arrow next to the ‘book’ folder to expand the contents and then double click on the ‘Your Design’ Smart Object layer inside as shown below:
After opening the flat artwork in a new window, let’s go back to the file containing our flat artwork and select the whole ‘COVER ART’ folder. Hold the Shift key and then click and drag this folder into the empty Smart Object and it should land right in the middle of your file.
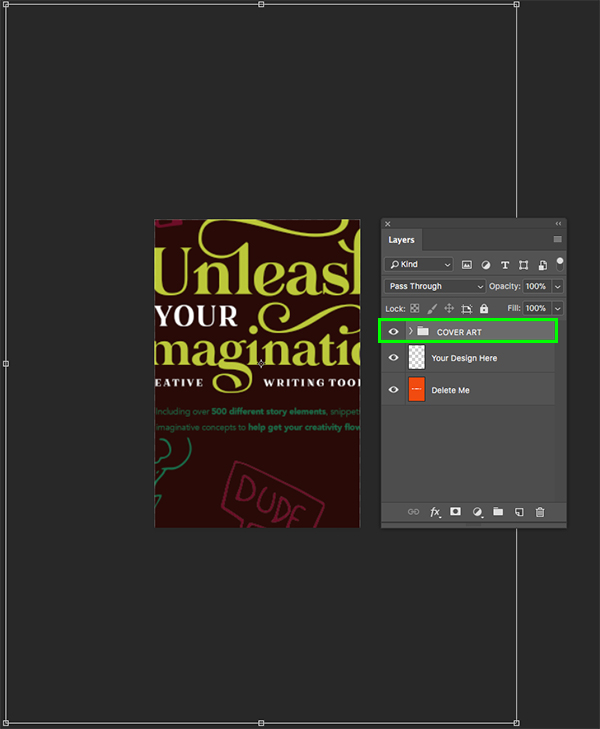
From here we will want to hold the Alt/Option+Shift keys and drag inwards from any four of the corner handles to scale the cover art down from the center until it fits perfectly into the Smart Object file. Once you’ve scaled the artwork down and positioned it accordingly, press Command/Ctrl+S to save the file and update the Smart Object. Once the file has finished saving you can use the keyboard shortcut Command/Ctrl+W to close the tab and return to the mockup.
Step 26: Saturation Boost
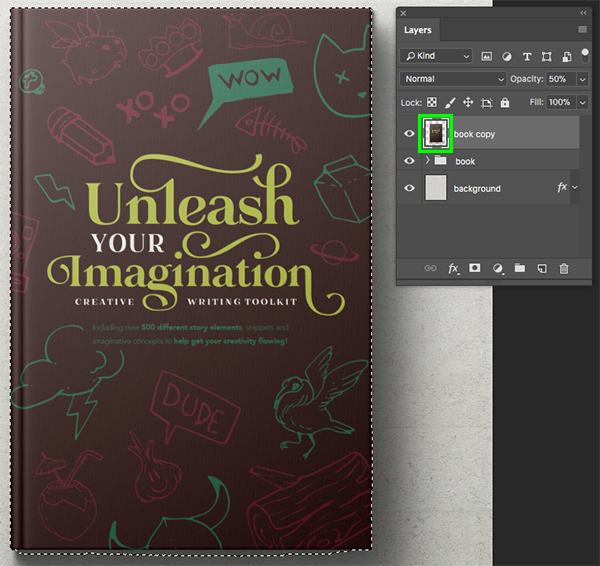
Select the ‘book’ folder and press Command/Ctrl+J to duplicate it. From here, select the new copy and press Command/Ctrl+E to merge the copy into a single file and then reduce the opacity of this layer on top to ’50%’ as shown below:
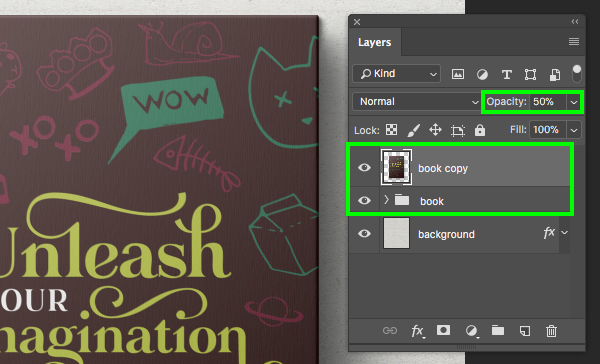
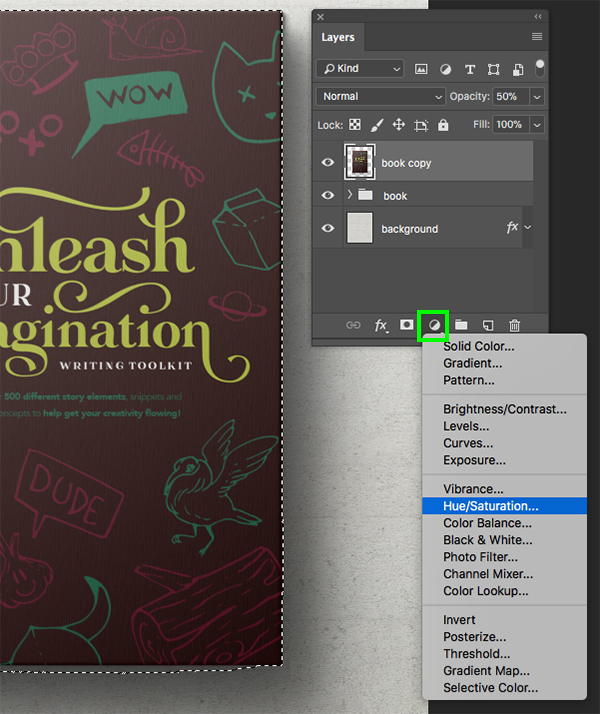
Next, hold the Command/Ctrl key and click on the layer thumbnail icon of the merged ‘book copy’ layer to activate a selection around it.
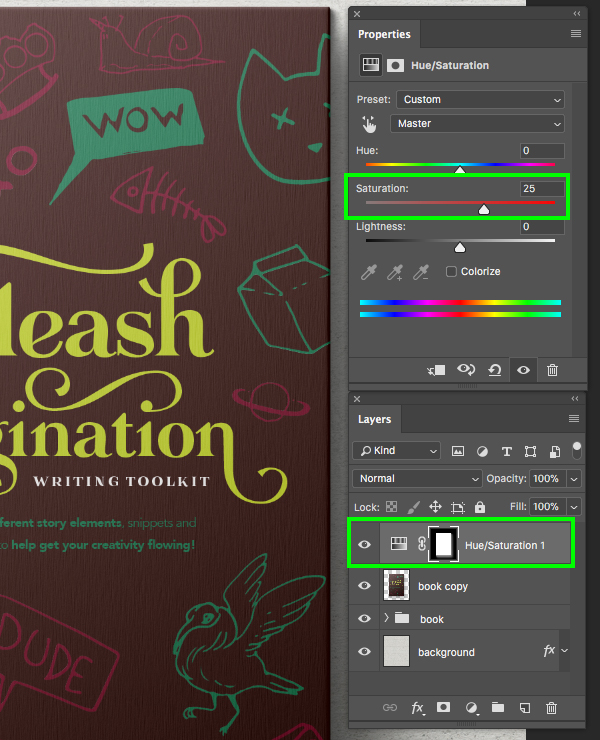
While your selection is still active, click on the Adjustment Layer icon at the bottom of the Layers Palette and choose ‘Hue/Saturation…’ from the list.
Your new Adjustment Layer will now be added with a mask already applied to it. In the Properties panel let’s now increase the ‘Saturation’ slider until it’s set to ’25’ to give the colors a nice boost.
Step 27: Contrast Boost
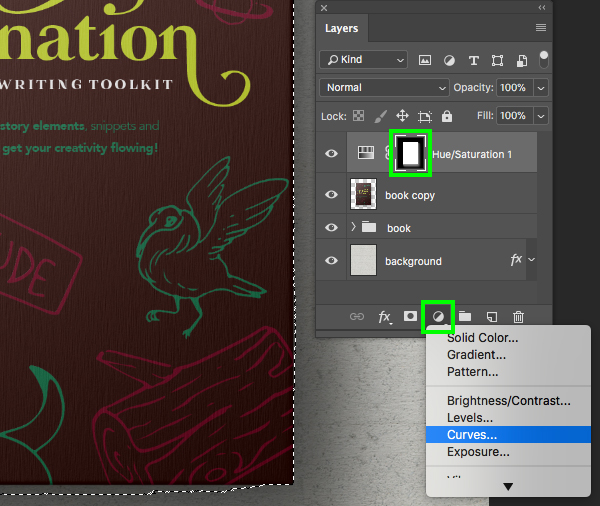
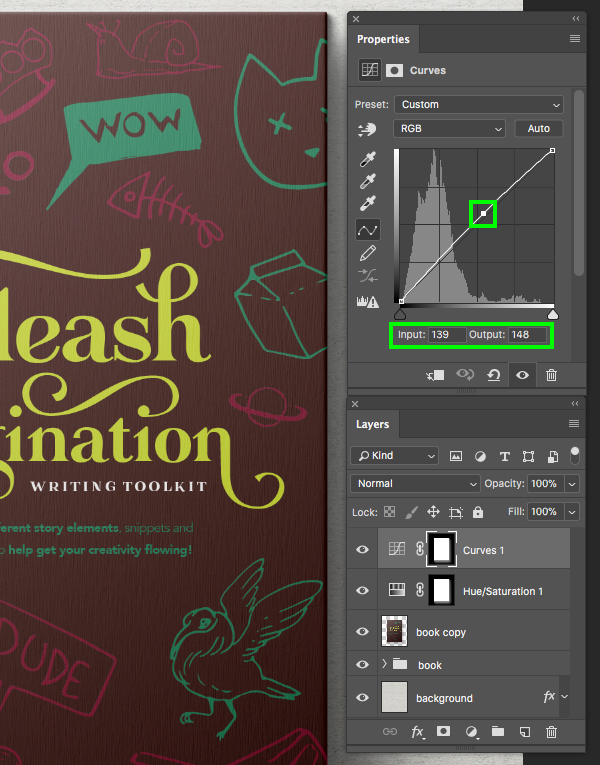
Hold the Command/Ctrl key and click on either the ‘book copy’ layer thumbnail icon or the icon of the ‘Hue/Saturation 1’ mask to activate another selection around the shape of the book. Once you have done that, click on the Adjustment Layer icon once again and this time choose ‘Curves…’ from the dropdown menu that appears.
After adding the Curves Adjustment Layer, create a single point in the middle of the grid in the Properties panel and move it up slightly so that the ‘Input’ is set to ‘139’ and the ‘Output’ is set to ‘148’ in order to brighten up the overall cover a bit and add some contrast.
At this point our book cover is looking great and we have now completed our design and mockup in Photoshop! To create the main artwork we used the beautiful Gorni Typeface along with some fantastic hand-drawn illustrations from the Oregano Vector Elements as part of the Design Cuts 5th Birthday Celebration Freebies! We hope you have enjoyed the tutorial and we are so excited to see what you come up with using these elements and techniques!
Remember that whether it’s your outcome for this tutorial or something new you’ve made, we’d love to see your designs on our Facebook page.
Please leave a comment if you have any questions or suggestions. I always look forward to hearing from you!

Wow, just scrolling through took an amazing adventure through making a book cover – really appreciate you helping me and many other authors and creators
Cheers
Mike
Thank you so much for taking the time to leave us such kind words Mike, it means the world :)
Thanks for the cool freebies and excellent tutorial guys! :-)
Woohoo you’re so welcome Peter :)
We hope that you really enjoyed working through this one!
Thanks for the tutorial! I will it try later :)
You’re so welcome and we hope that you really enjoy this one!
Wow is right. The quality here…just wow. Thanks for providing such helpful tutorials!
Thank you so much for your lovely comment, your support really means the world to us!
We hope that you had great fun working through this one :)