WHAT WE’RE CREATING:
Hello Design Cutters!
Today’s Photoshop tutorial walks you through creating some effective social media graphics to help promote your creative services. You’ll be designing social images for Instagram, Facebook and Twitter, with each having a consistent brand and aesthetic.
Here’s a look at what we’ll be creating:
Follow along with this tutorial: Download the freebie files
This freebie pack includes two useful social media templates, an ID card mockup template and a handy cardboard background texture.
This freebie pack is just a small sample of the huge number of resources featured in The Professional Designer’s Time Saving Toolkit available now for just $39 (that’s 99% off).
You can preview these awesome freebies below:
Step 1: Before you start
Have an image of yourself ready to use for the social media templates. Say cheese!

Next, it’s time to grab some fantastic free fonts that you’ll use throughout this tutorial.

Step 2: Portfolio Moodboard.
Next up is preparing a unique way to showcase your work within the social media graphics. In this case, we’re going to use the Portfolio Moodboard by Station Seven. This can be found within the main bundle files, under the ‘Minimalist’ pack.
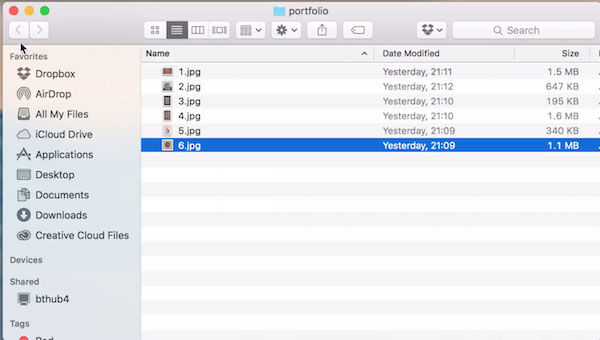
First, collect six of your favourite works in a folder named ‘Portfolio’ and rename the files from 1-6 in no particular order.
Open up the ‘moodboard.psd’ file in the Minimalist-Blog-Social-Pack folder by Station Seven and double click on the layer named ‘Image 1.’
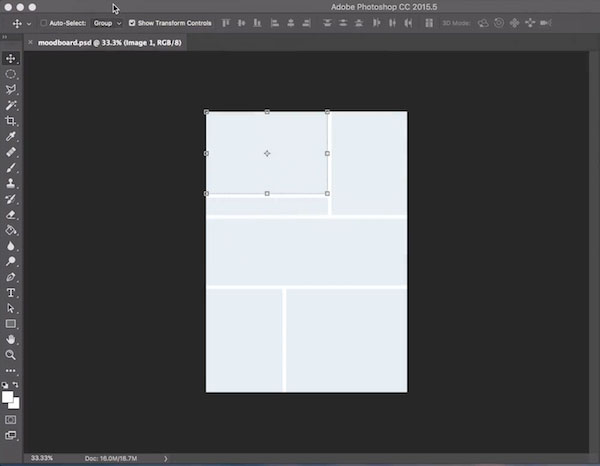
Place the image file named ‘1’ from the folder ‘Portfolio’ you’ve just created. Resize as desired and Save and Close Window.
Repeat this step with the corresponding layers to numbered images.

When you’re done, go to File > Save As and name the file ‘Portfolio_moodboard.jpg’.
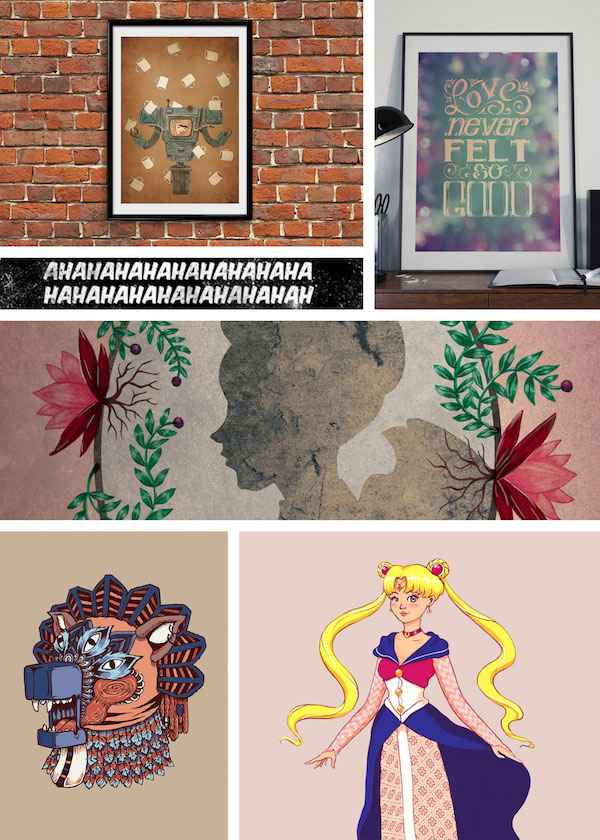
And voila! A ready made image you can now use in your templates.
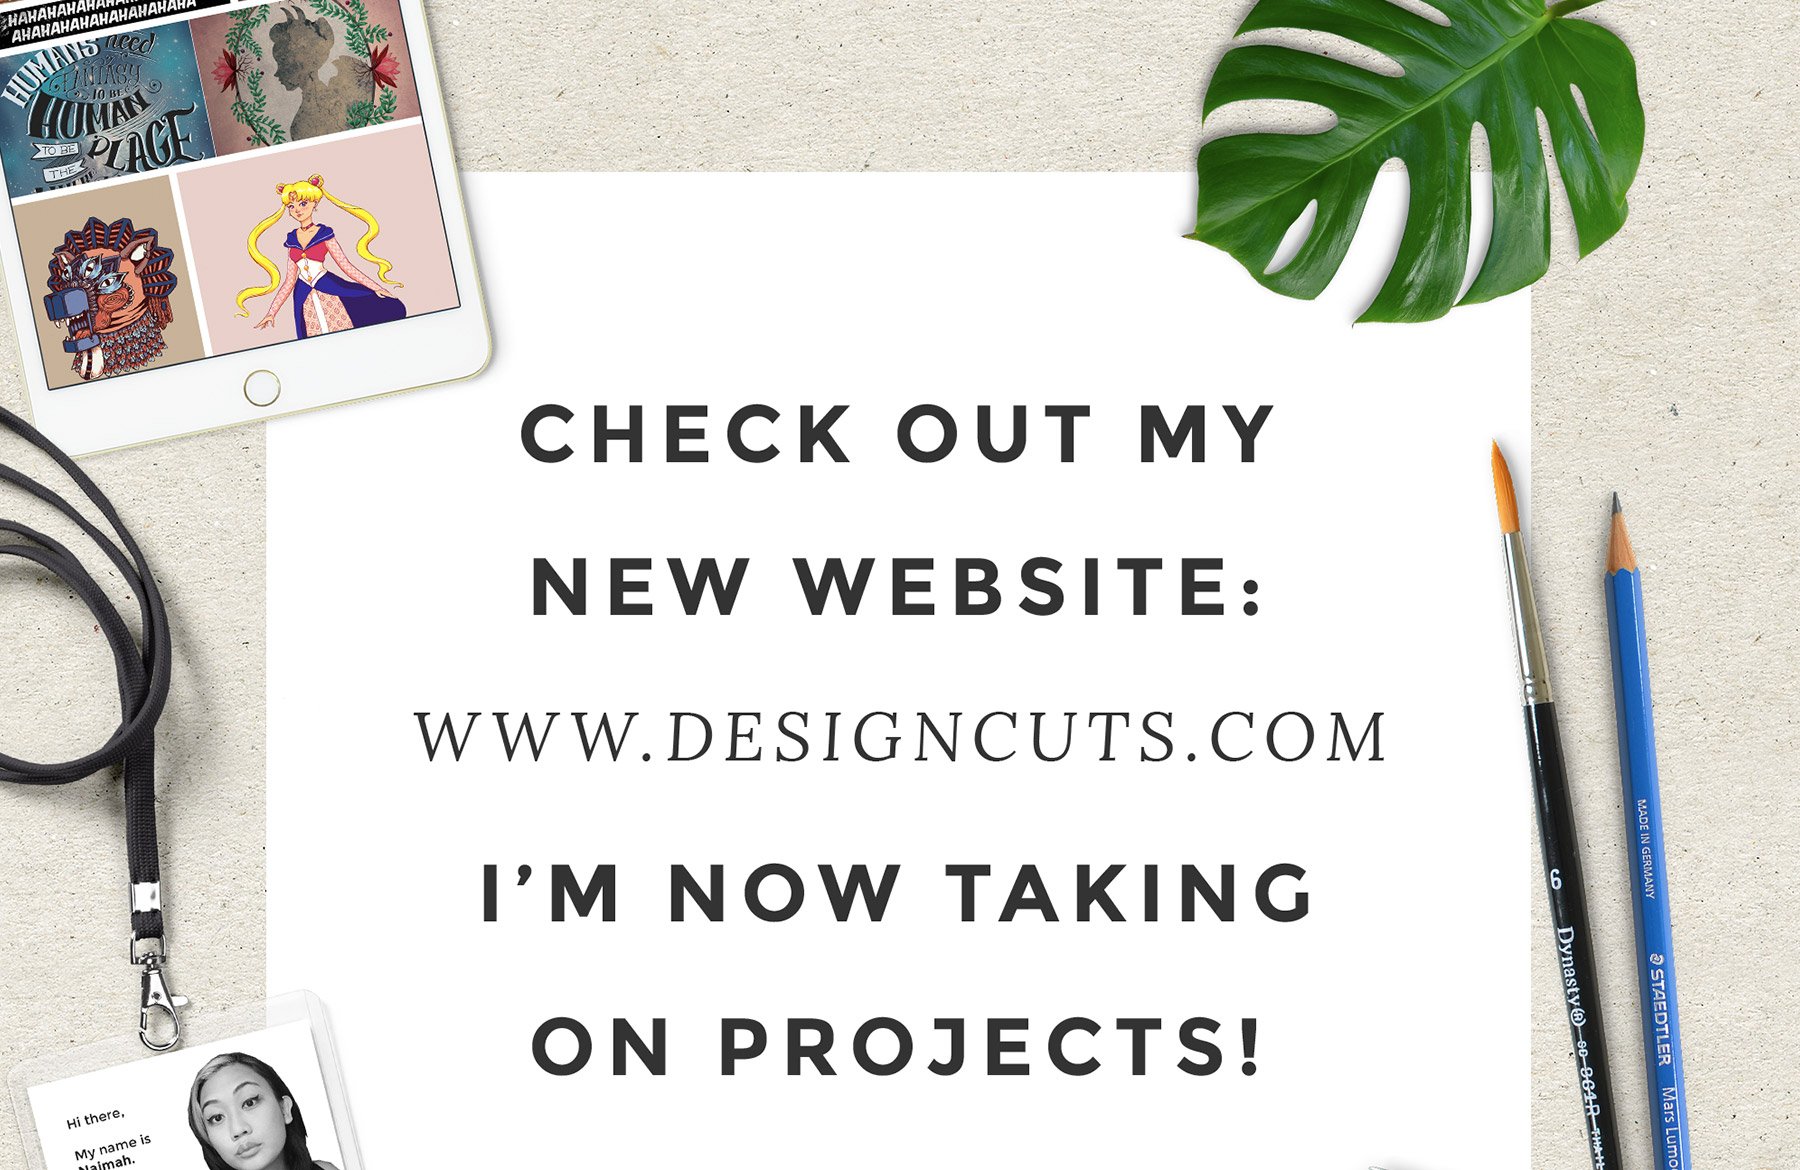
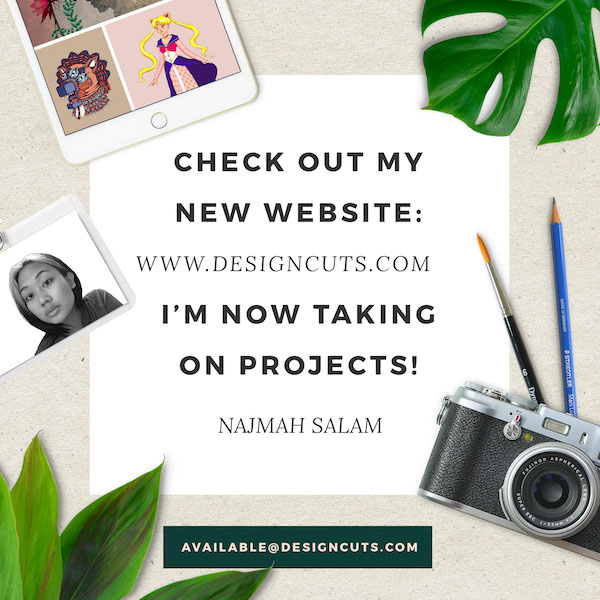
Step 3: Creating an Instagram graphic
We’re ready now to make an image that’s informative and stylish at the same time, ready for Instagram!
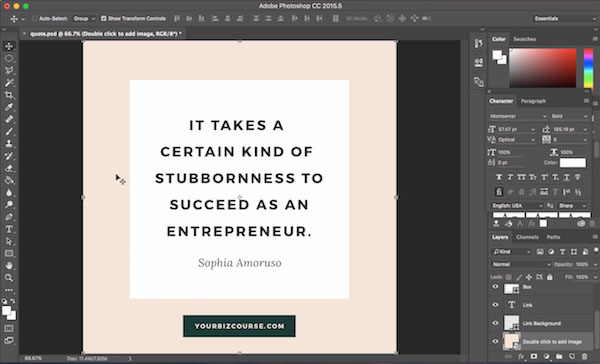
First, open up the ‘Quote.psd’ template made by Station Seven in the ‘Infopreneur-Instagram-Pack’ folder.
Go to File > Save As and rename the file ‘Instagram_promo.psd’.
Next, double click on the ‘double click to add image’ layer to open this smart object.
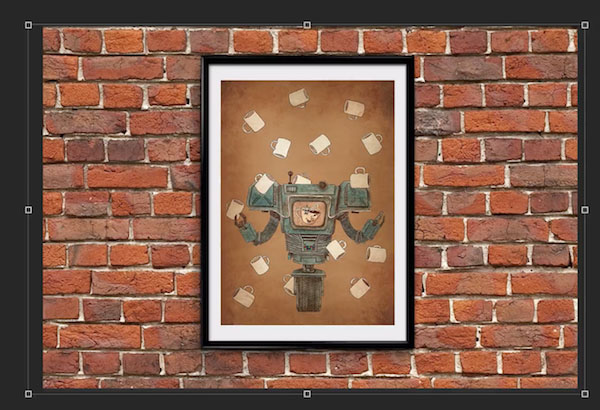
Download the ‘Cardboard_light.jpg’ image from Lisa Glanz in the freebies folder for this tutorial. Place this texture into your smart object document and resize so the file fills the canvas. Now Save this smart object and close the window. This will update your background in your main Instagram template.

You should now update the text in this template to reflect your services and the message that you want to convey.
Select the ‘quote’ text layer and edit text to: ‘CHECK OUT MY NEW WEBSITE’ and ‘I’M NOW TAKING ON PROJECTS!’
Select the ‘Attribution’ text layer and edit the text to your name.
Then duplicate the ‘Attribution’ text layer and move the copy to the middle of the canvas. Change the text to the URL of your choice, in this case we will be using ‘WWW.DESIGNCUTS.COM’. You can go ahead and change the text tracking to 100 for a more appealing look.
Change the ‘Link’ text layer to your e-mail address (we’ll use the fictional email ‘AVAILABLE@DESIGNCUTS.COM’). Now resize the ‘Link Background’ layer so it perfectly contains the e-mail address, with ample padding.
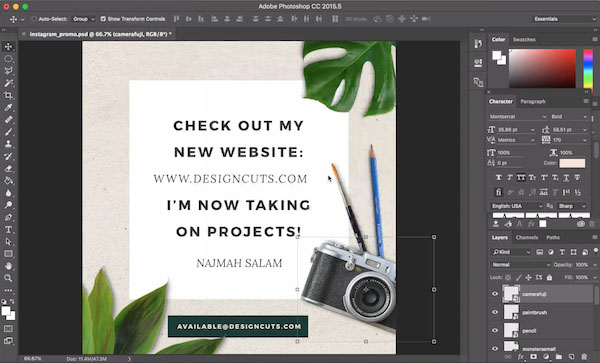
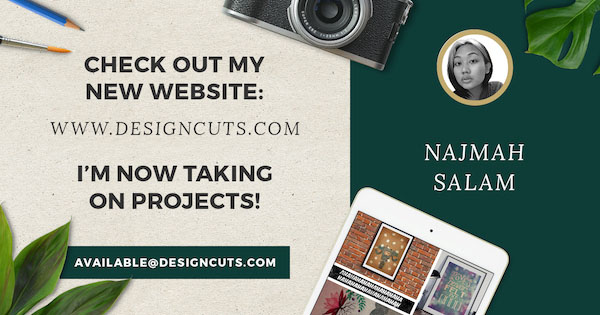
The end result should look like this:

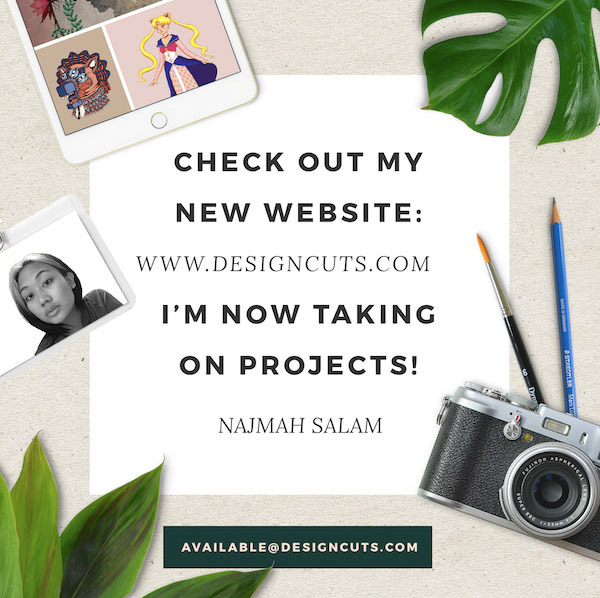
One of the many brilliant resource packs available in the design bundle are the Ladypreneur-Mockup elements from Station Seven; a clean and stylish set of images to add life to any graphic!
We can start placing the elements from the Ladypreneur-Mockup folder to add some visual interest to our piece.
Feel free to add your own twist on the placement of these graphics, but take a step-by-step look at how I’ve done below!
• Place leaves.psd, and rotate 20° clockwise.
• Place monsterasmall.psd, and rotate 125° anticlockwise.
• Place pencil.psd, and rotate 175° clockwise.
• Place paintbrush.psd, and rotate 20° anti clockwise.
• Place camerafuji, and rotate 20° clockwise.
In any self-promotion, it’s always good to show who you are – we’ll be doing it in a slightly quirky way making use of an easy to use mockup file by Graphic Burger! This can be found within the freebies pack accompanying this tutorial.
Place the ‘ID-tag.psd’ file by Graphic Burger into your main document. Double click on the layer icon and hide the ‘shadow’ layer. Now double click on the layer icon ‘Full colour design’ and place a picture of yourself that you prepared earlier. Resize and delete or hide any layers you need to. Don’t forget to Save and close the window.
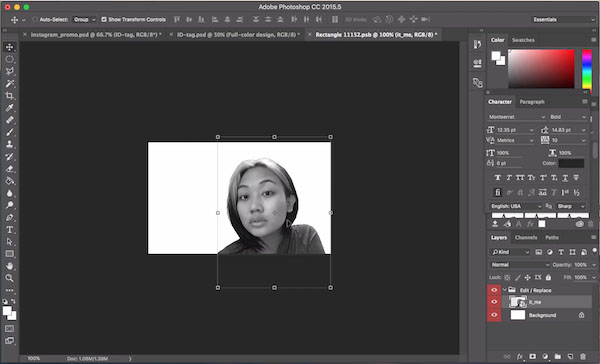
Save and close the window again to get back to the main document. Now rotate the ID tag layer 30° clockwise.
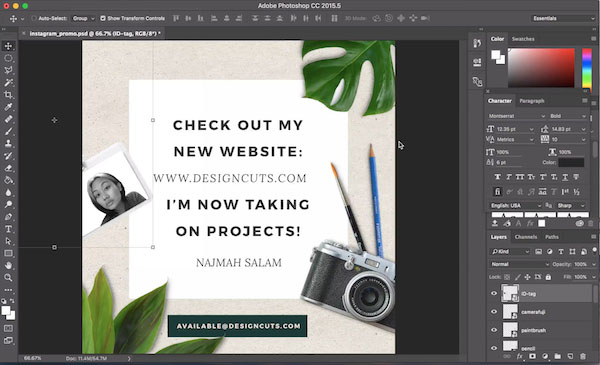
Another way to let the world know about your brand new website, is by showing off your work. We’ll be making use of the ‘Portfolio_moodboard.jpg’ file from earlier.
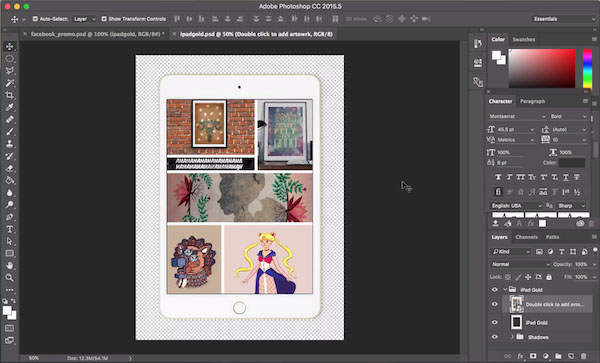
Place ‘ipadgold.psd’ by Station Seven, and rotate anticlockwise 20°.

Double click on the ipadgold layer, and double click on the ‘double click to add work’ layer icon.
Place ‘Portfolio_moodboard.jpg’ file above all layers and resize it so that it fills the canvas. Save and close window, where you’ll see that you now have an iPad with a moodboard of your work on it.

Save and close window to get back to the main document.
Once you have saved this document as a jpeg file, you will now be ready to post this awesome promotional graphic for your Instagram profile!
Step 4: Creating a Facebook Promotional Graphic
Now we’ll be moving on to making a Facebook graphic with the same feel as the Instagram graphic we’ve just made, except for a few minor tweaks. The template we’re making use of by Pixel Buddha will ensure that you have a graphic that’s optimised for Facebook and looks appealing and informative, all at the same time! By using the same assets for the Instagram graphic, we’ll be making sure that we stick to a strong, consistent brand across all of our social platforms.
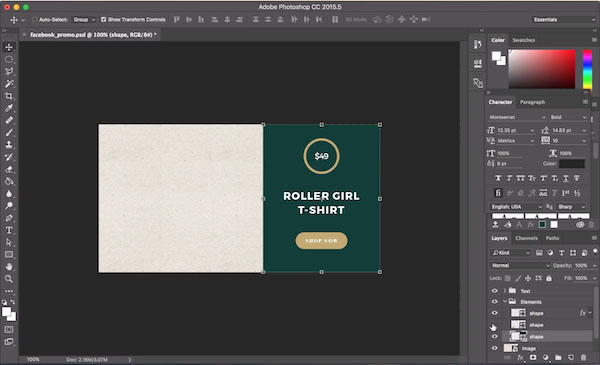
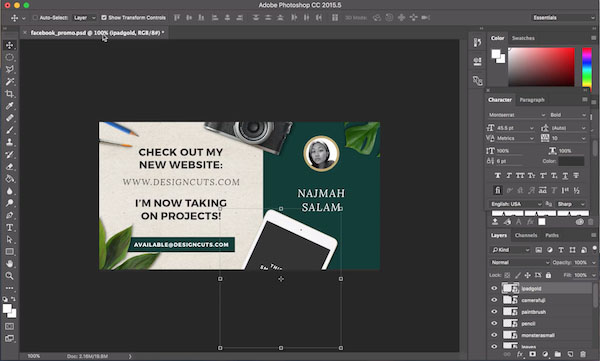
Begin by opening up ‘9.psd’ under the ‘facebook’ folder by pixel-buddha, and rename it to ‘facebook_promo’.
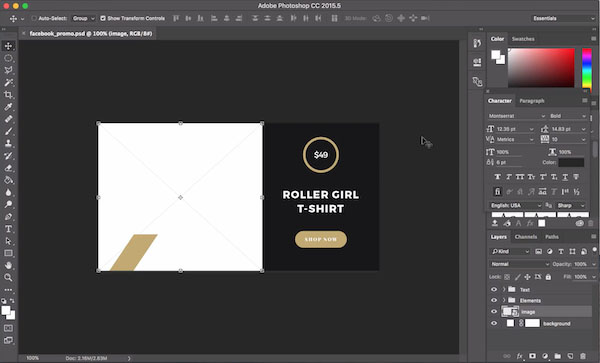
Double click on the ‘image’ layer, and place ‘Cardboard Light’ by Lisa Glanz. Resize this texture to fit, accept the transformation and save and exit this window to return to the main document.
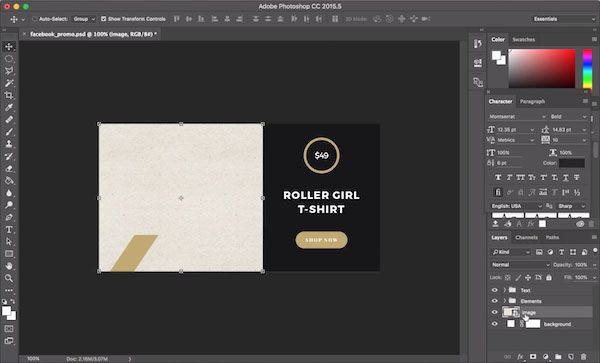
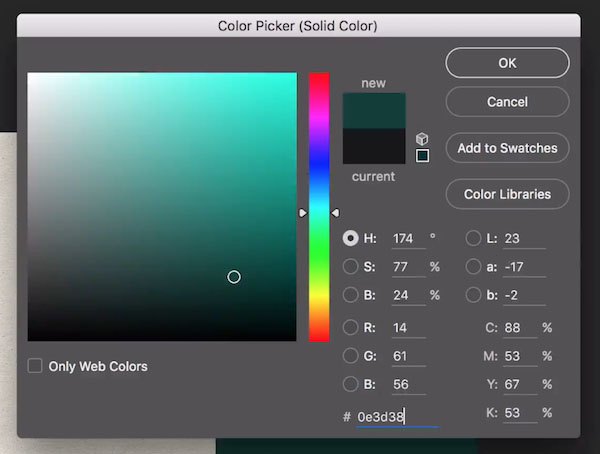
Double click on the black shape on the right and change its colour to hex code #0e3d38.
Hide the gold geometric shape in the bottom left corner of your template, it isn’t relevant for this brand.
Now place the photo of yourself that you have prepared from earlier and place it on a layer behind the gold circle shape.
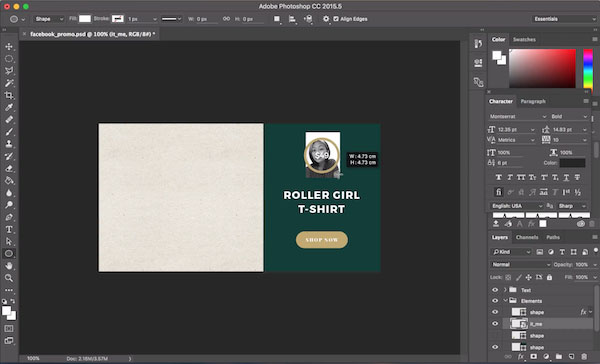
Create a new circle with the shape tool and make it slightly smaller than the current gold circle shape.
Create a clipping mask and be sure to move and resize your photo so it fits nicely within the gold circle!
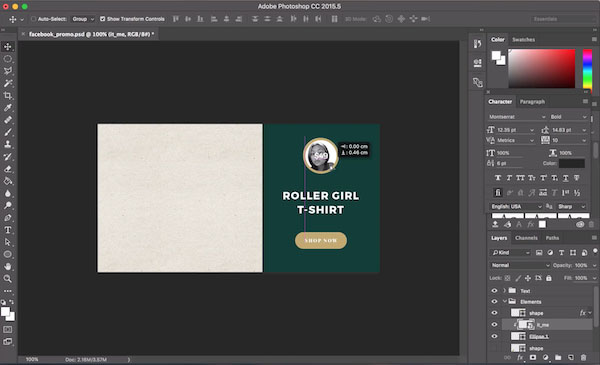
Now hide the text layer ‘$49’ and hide the ‘button’ group.
Create a new text layer with font Montserrat Bold, size 45.5pt and change its colour to #333333 and type ‘CHECK OUT MY NEW WEBSITE:’ Create another text layer and type: ‘I’M NOW TAKING ON PROJECTS!’ with the same styling.
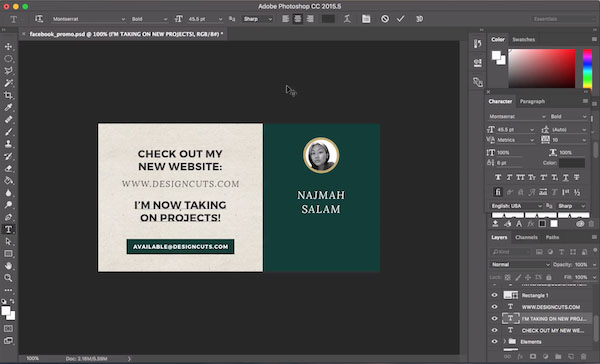
Create a new text layer and type ‘WWW.DESIGNCUTS.COM’ using font Lora Italic, size 36pt and place it in between the 2 previous text layers.
Edit and change ‘Roller Girl T-shirt’ text layer to your name, using font Lora Italic.
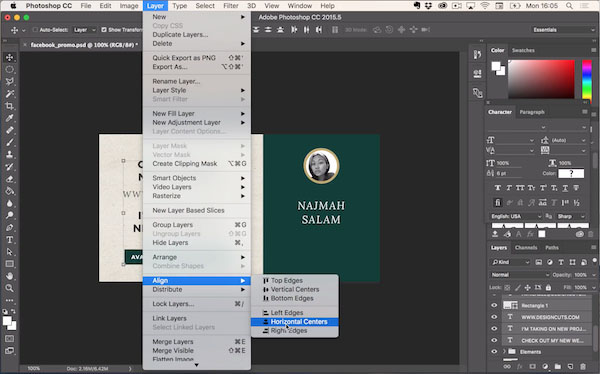
Start creating a button similar to the one in our Instagram graphic. Create a new text layer and type ‘AVAILABLE@DESIGNCUTS.COM’ using font Montserrat Bold, size 22pt and change the colour to white. Create a rectangle with the shape tool and change its colour to #0e3d38 and place it behind the e-mail address text layer. Instant button!
Select all of the text layers and the rectangle you’ve just created with the Shift key, and go to the menu and select Layer > Align > Horizontal Centres.
Now it’s time to start placing the decorative elements available from Station Seven!
Step-by-step:
• Place leaves.psd, and rotate 20° clockwise
• Place monsterasmall.psd, and rotate 125° anticlockwise
• Place pencil.psd, and rotate 65° anticlockwise
• Place paintbrush.psd, and rotate100° clockwise
• Place camerafuji, and rotate 20° clockwise
• Place ipadgold.psd, and rotate clockwise 25°.
Once again, you can make use of the ipadgold.psd file to showcase your work. Double click on the ipadgold layer, and double click on the ‘double click to add artwork’ layer icon. Place Portfolio_moodboard.jpg’ file from earlier and resize until it fills the canvas. Save and close the window.
Now Save and close the window again to return to main document. You are now ready to save the document as a jpeg file to post onto Facebook!
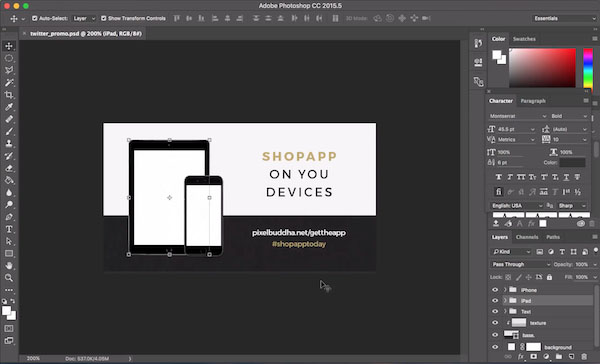
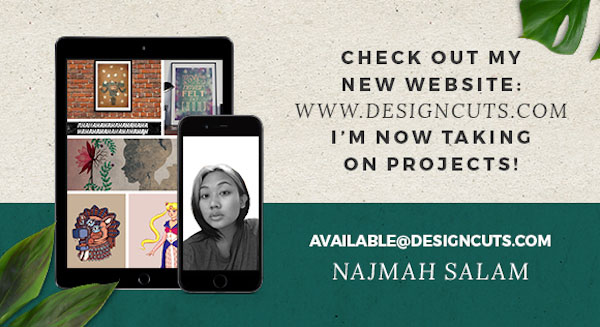
Step 5: Creating a Twitter Promotional Graphic
Lastly, we’ll be creating a graphic with the same assets especially for Twitter.
Open up file ‘3.psd’ under the ‘Twitter’ folder by Pixel Buddha and rename it to ‘Twitter_promo’. This can be found within the freebies pack that accompanies this tutorial.
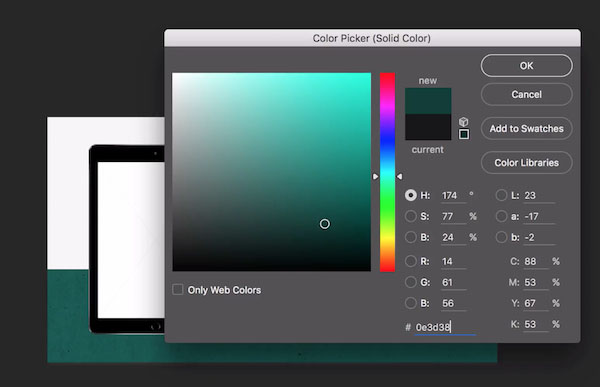
Select ‘Base’ layer and double click on the icon – change the colour the hex #0E3D38.
Place ‘Cardboard Light’ file by Lisa Glanz below the ‘Base’ layer and resize it to cover the entire canvas.

Select ‘Shopapp_’ text layer and type ‘CHECK OUT MY NEW WEBSITE:’ and ‘I’M NOW TAKING ON PROJECTS!’ with font: Montserrat Bold, 18pt and hex #333333. Now type ‘WWW.DESIGNCUTS.COM’ with font Lora Italic, 19pt and hex #333333.
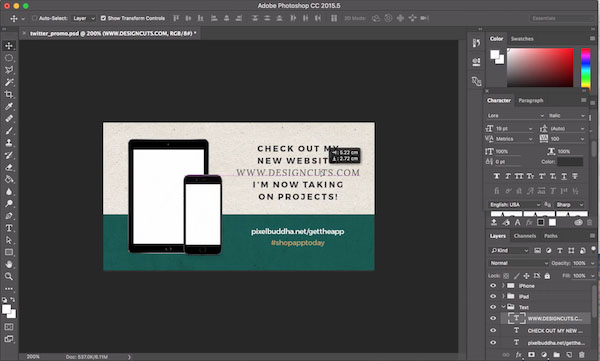
Select the ‘pixelbuddha.net…’ type layer and change to ‘AVAILABLE@DESIGNCUTS.COM’, font Montserrat Bold 15pt.
Select text layer and type your name, and change to font Lora Italic, 22pt and tracking 100. Change colour to white.
In this particular graphic, we want to make use of the iPad and iPhone mockups that are already included.
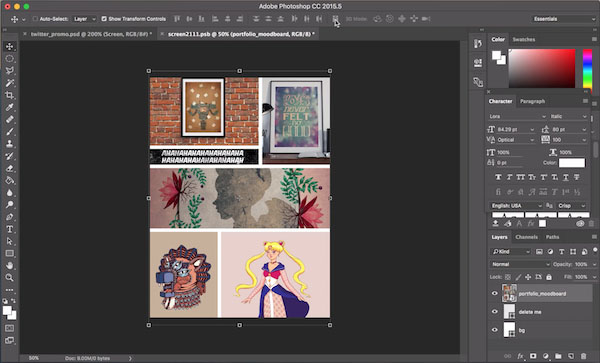
Expand the iPad layers group and double-click on the ‘screen’ layer. Place the ‘Portfolio_moodboard.jpg’ file you made earlier and delete the layer that says ‘delete me’. Be sure to resize the image so that it fills the canvas and then Save and close this window.
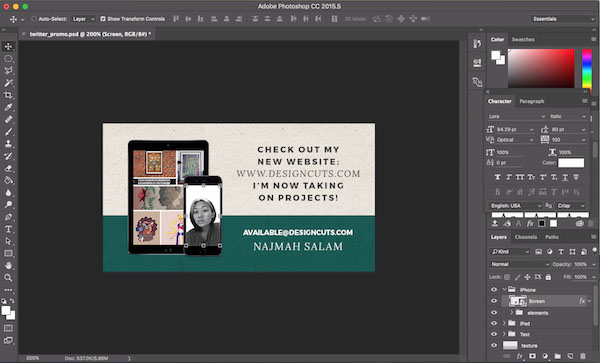
Expand the iPhone layers group and double-click on the ‘Screen’ layer.
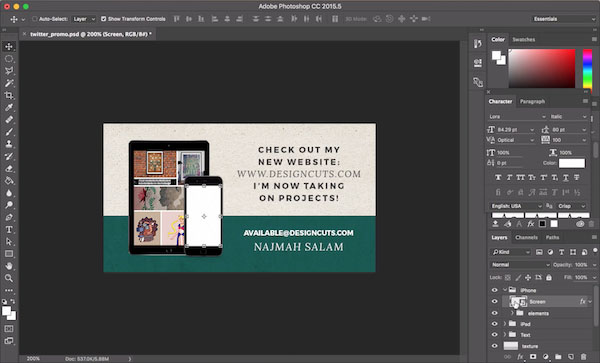
Place the picture of yourself from earlier, and delete the layer that says ‘delete me’. Save and close this window to return to the main document.
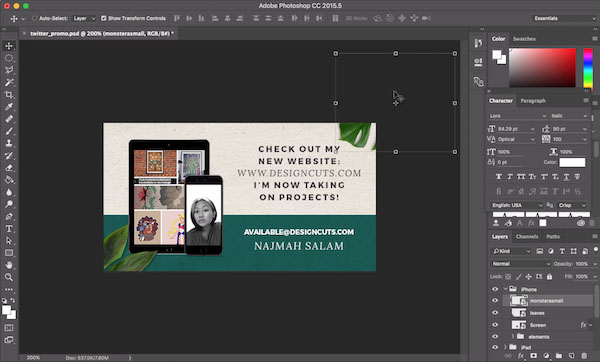
In this instance, we’ll keep the decorative elements to a minimum as the image is noticeably smaller than our other graphics, and we already have both an iPhone and iPad as key elements.
Place leaves.psd in one corner, by Station Seven and rotate 20° clockwise, and place monsterasmall.psd in the opposite corner, and rotate 125° anticlockwise.
You are now ready to save this file as a jpeg to post to Twitter.
And there you have it, three graphics to post to social media that will make up a strong, self-promotion campaign!
We hope that you enjoyed working with this week’s freebies, and we’d love to hear your thoughts about this lesson in the comments below.
Whether it’s your very own version of this tutorial or a whole new creation using our freebies, do feel free to post your work on our Facebook page.
There’s still time to check out The Professional Designer’s Time Saving Toolkit to fill your library with an astounding variety of high-quality, time-saving resources for 99% off the regular price.

Hi – I just downloaded the files and don’t see the Portfolio Moodboard by Station Seven – anywhere. I have graphic burger, lisa glanz sample, and pixel buddha.
Hey Sheila,
Thanks so much for your comment.
I am so sorry for any confusion with this tutorial- the Portfolio Moodboard by Station Seven can be found within the main bundle files, under the ‘Minimalist’ pack however isn’t available as part of the freebie download I am afraid! This tutorial is to give you tips on how you could use your elements if you picked up the Professional Designer’s Time-Saving Toolkit- my sincerest apologies for any disappointment!
The Moodboard isn’t essential for you to follow along and we really hope you will still pick up some great tips and tricks from this one :)
Err ma gosh. OK! Sounds good. And thanks for the quick reply. I’m going to see what I can make with what I have.
Hey Sheila,
Thank you so much for coming back to me!
I am so sorry for any disappointment and I really hope that you get on with the rest of the tutorial OK :)
Great idea to mockup our own little design for our own sites! FYI Facebook doesn’t allow boosts or limits boosts on images with a certain percentage of text, so might have to adjust the fb graphic. They’ll tell you, though, in the boost dialogue box whether it’s ok or not *before* you boost it.
Hey Erin,
Thank you so much for the awesome comment!
This is really useful and I have just had a look into this one myself and I completely agree- so a big thanks to you for sharing this with the rest of the community.
It would appear that if you play around with your post, maybe try less text or adjust the post as you say, you should be absolutely fine :)
Thank you so much for taking the time to help out with this one and for your kind words- it means a lot to the whole team and I!
What is the final size of the mood board document, does it matter, and should the portfolio pics be a minimum or maximum size? Love Design Cuts…thank you!
Hey Wendy,
Thank you so much for your comment.
I would say it is always good to go higher res with your portfolio images, for sharpness but it’s totally up to you really, as to what you want to achieve :)
Team DC are sending a whole lot of love right back at you, your support means a great deal to us all!