In this tutorial, we will be creating a branded mockup for Botanical Fresh cosmetics in Photoshop. To do this, we will be using a small handful of elements from Design Cuts, Little Valley Studio and Samolevsky Art from The Exceptional Textures And Patterns Bundle. This all new bundle is a massive collection of textures and patterns that will help you keep your design toolbox up to date and on trend. In addition to these high quality resources, we will also be creating a custom scene using product packaging mockups and other realistic items from the Cosmetic Packaging Branding Mockup by Mockup Zone along with a free typeface from DaFont.com. So, if you are ready to get started, then let’s roll up our sleeves and create something beautiful in Photoshop!
HAVE YOU SEEN OUR YOUTUBE CHANNEL?
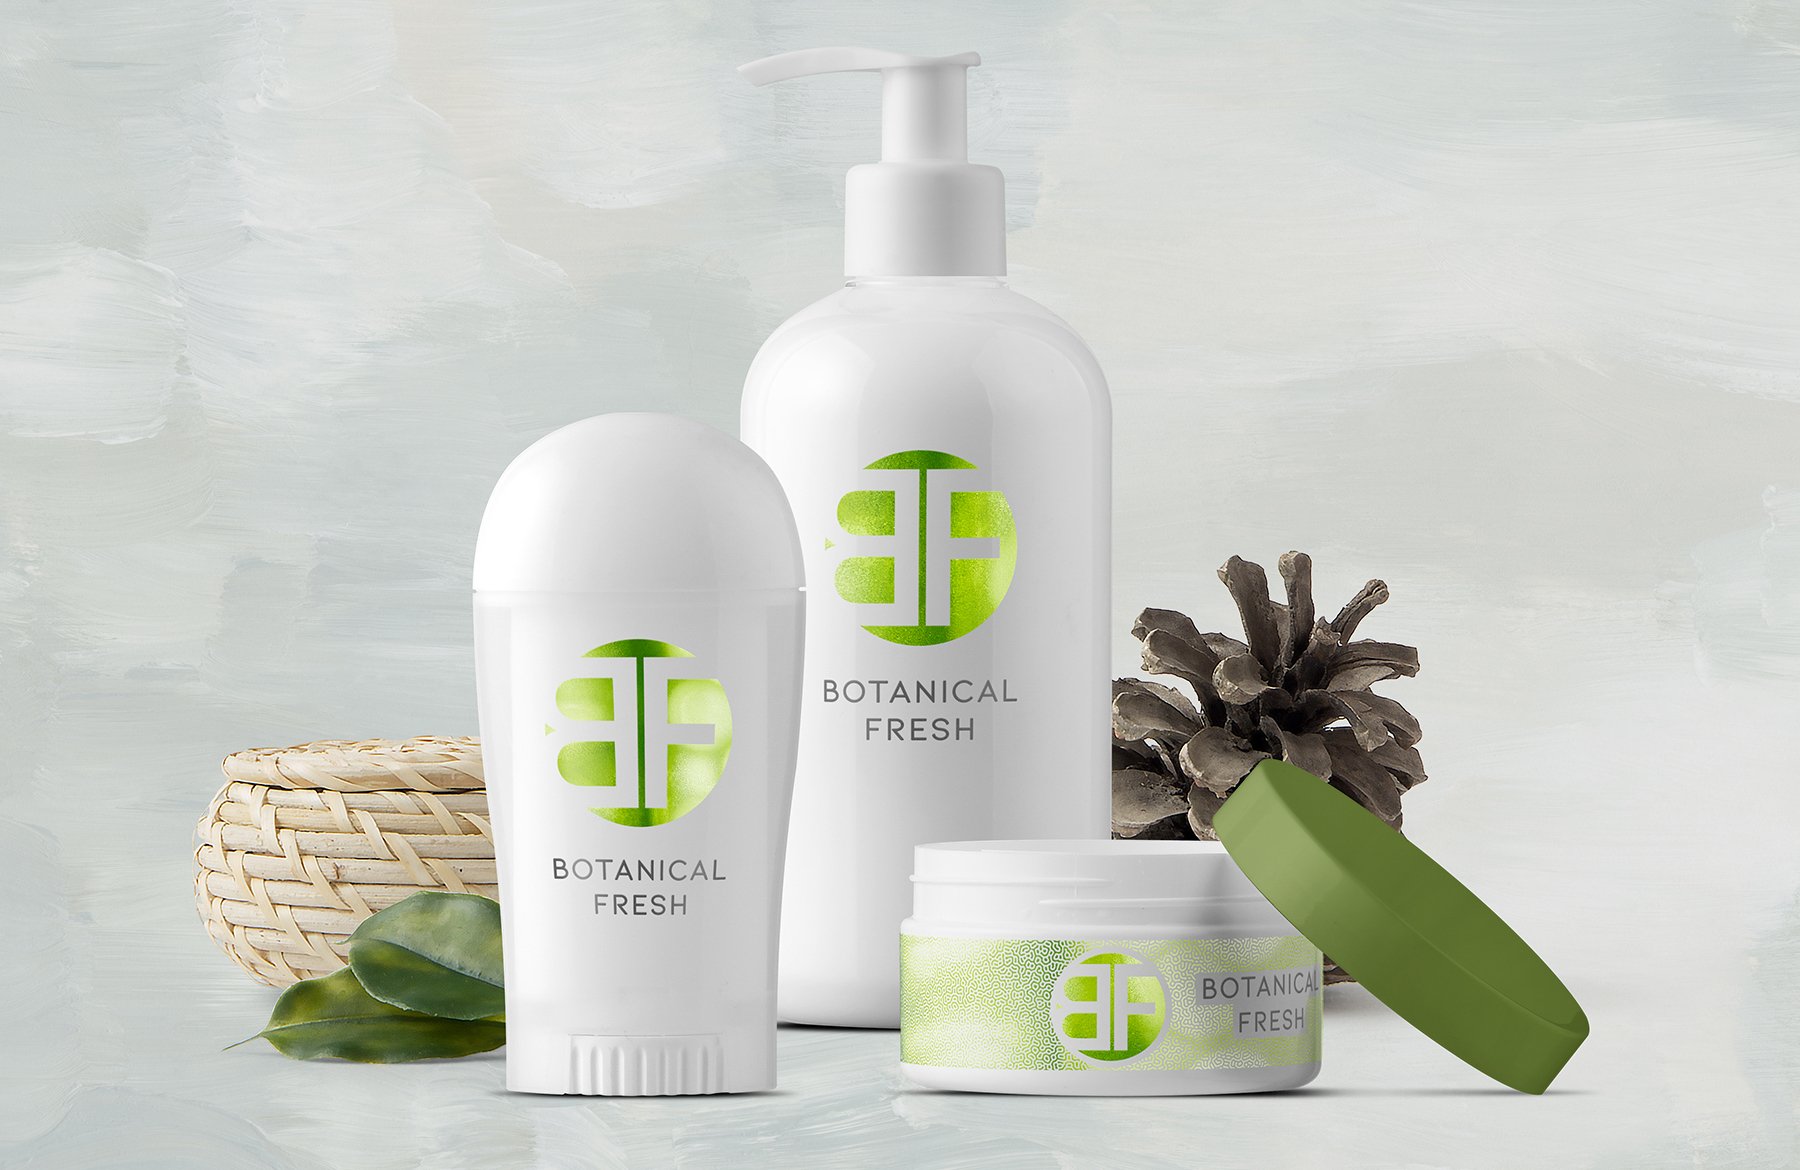
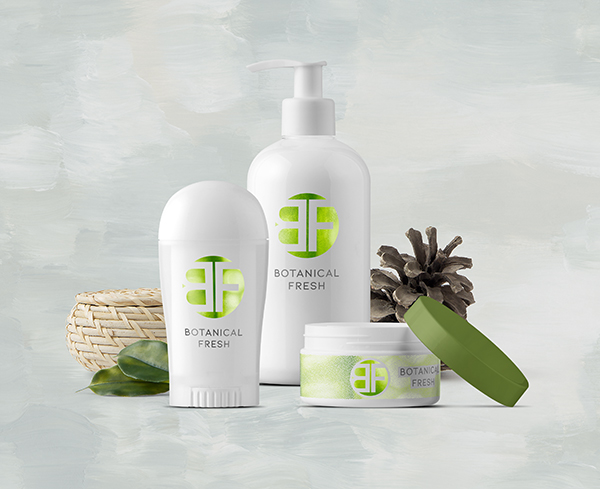
Here’s a look at what we’ll be creating:
Follow along with this tutorial: Download the freebie files
This freebie pack is just a small sample of what you can expect to find in The Exceptional Textures And Patterns Bundle for just $29 (that’s 99% off). From abstract, marble, and fruit textures to art-deco patterns, brushes, and so much more!

Step 1: Botanical Fresh Cosmetic Packaging Design
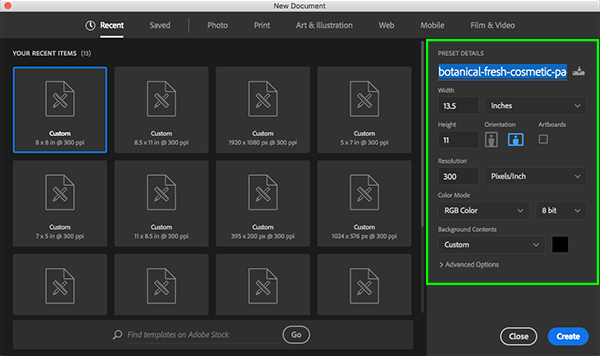
To get started we will create a new document that is ‘13.5’ inches wide by ’11’ inches tall with a ‘Resolution’ of ‘300’ and a ‘Color Mode’ of ‘RGB’. Let’s also give our document a name – here I will be calling mine ‘botanical-fresh-cosmetic-packaging-design’ and then go ahead and click ‘Create’ in the lower right corner to make your new document.
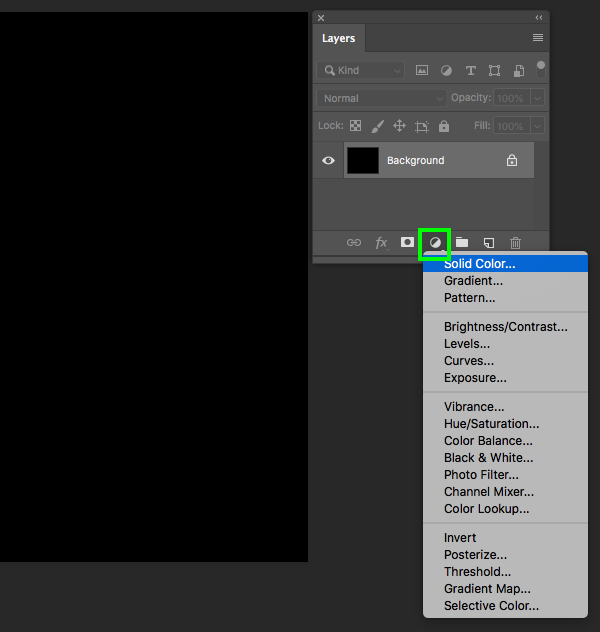
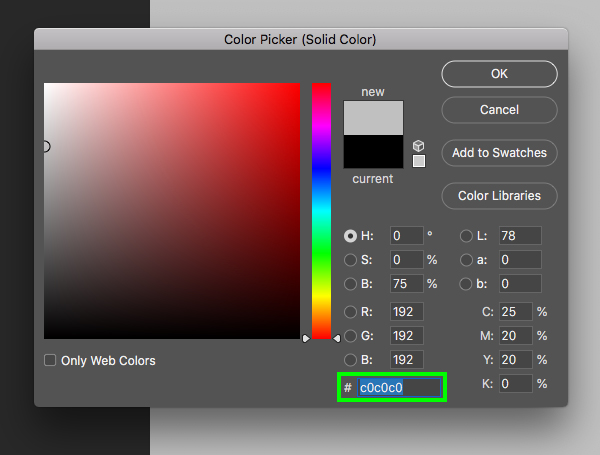
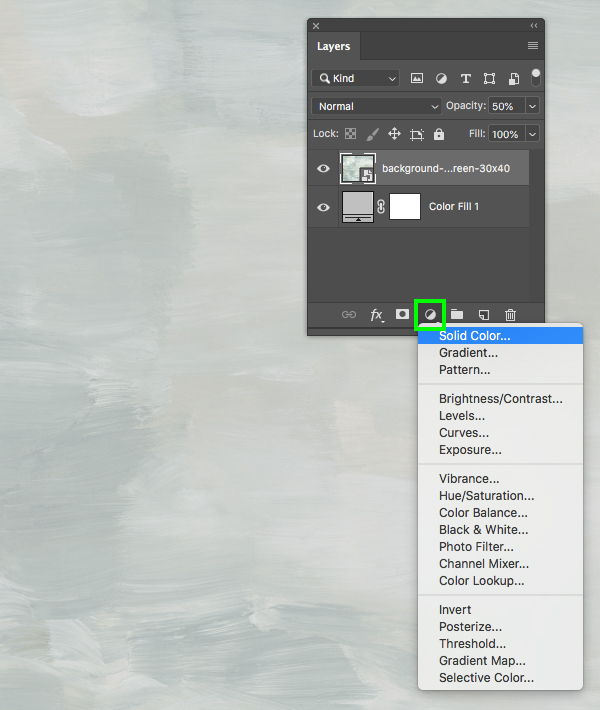
After creating the document, click on the Adjustment Layer icon at the bottom of the Layers Palette and choose ‘Solid Color…’ from the dropdown menu that appears.
Enter the hex value ‘#C0C0C0’ and then click ‘OK’ to apply the changes.
You should now have your medium gray ‘Color Fill 1’ layer and from here we can go ahead and delete the default ‘Background’ layer.

Step 2: Painted Walls
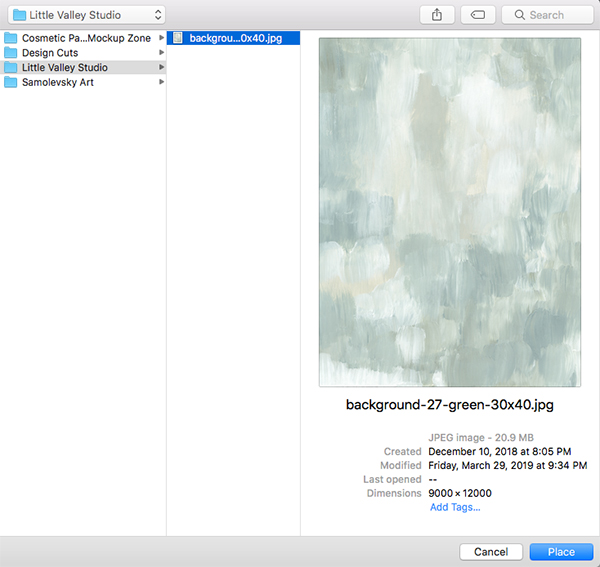
Next, go to the File menu and choose ‘Place Embedded…’ from the dropdown menu.

Navigate to the freebies folder and select the ‘background-27-green-30×40.jpg’ inside of the ‘Little Valley Studio’ subfolder and then choose ‘Place’ from the bottom right corner as shown below:
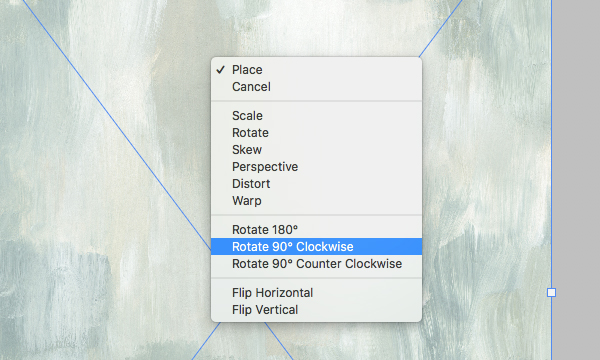
Once you have brought in the painted texture background, hold the Control key and click on the image before choosing ‘Rotate 90º Clockwise’ to rotate the image horizontally.
After rotating the image, hold the Alt/Option+Shift keys and click and drag outwards from any of the four corners of the bounding box to scale it up from the center until it extends a bit farther than the canvas and then press ‘Return’ on the keyboard to apply the transformations.

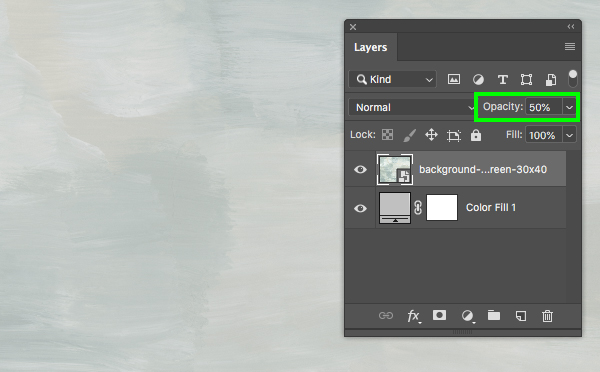
From here, select the painted texture and press the number ‘5’ on the keyboard to reduce the opacity of the layer to ‘50%’ as shown here:
Step 3: Lighter Wash
With the painted texture Smart Object layer selected, return to the Adjustment Layer icon at the bottom of the Layers Palette and choose ‘Solid Color…’ once again.
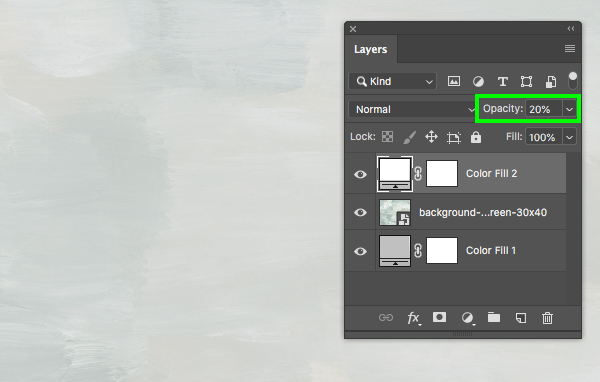
Enter a solid white fill color or ‘#FFFFFF’ and then press ‘Return’ or click ‘OK’ to apply the color changes.

Next, select the white ‘Color Fill 2’ layer and press the number ‘2’ to reduce the opacity of this layer to ‘20%’ which helps to lighten the texture just a bit more.
Step 4: Background Group
Select the top ‘Color Fill 2’ Adjustment Layer, hold the Shift key, and then select the bottom ‘Color Fill 1’ layer so all three of your layers are selected at the same time.
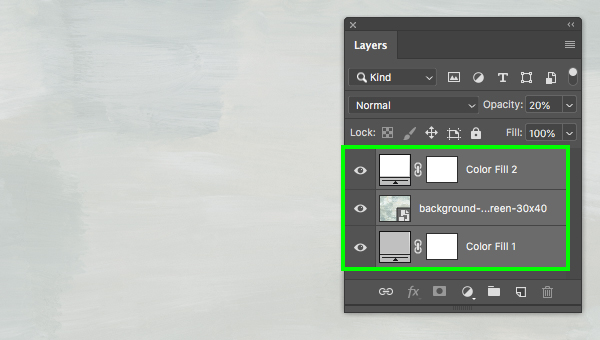
From here, press Command/Ctrl+G to place these layers into a new folder and double click the ‘Group 1’ text and rename the folder ‘BACKGROUND’ as shown here:

Step 5: Product Mockups
Next, go to the File menu and choose ‘Open…’ from the dropdown list.
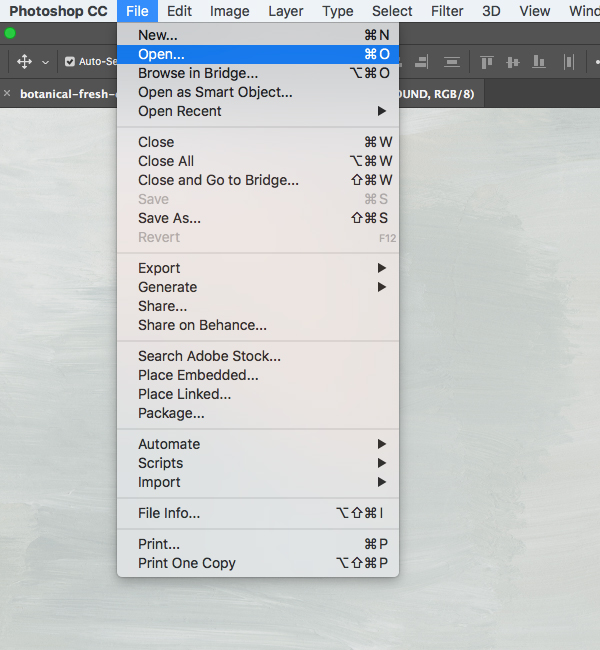
Navigate to the ‘Big White Dispenser Bottle.psd’ file which is one of many beautiful and realistic looking packaging mockups from the Mockup Zone pack. You can check out the full list of mockups complete with previews included in this product by visiting the Design Cuts Marketplace, but for now we will be working with a few of these specific items.
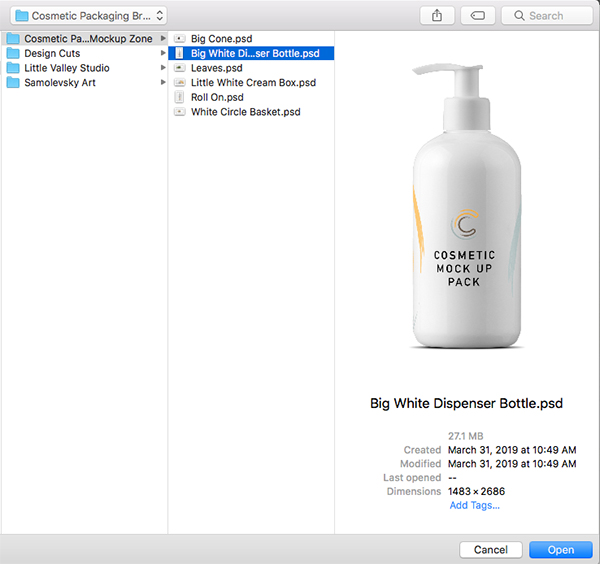
Once you have opened the PSD file, move it next to your main working document. From here, select the whole ‘big white dispenser bottle’ folder and click and drag it into your file, positioning it roughly in the center.

Step 6: Rollin’ Rollin’ Rollin’
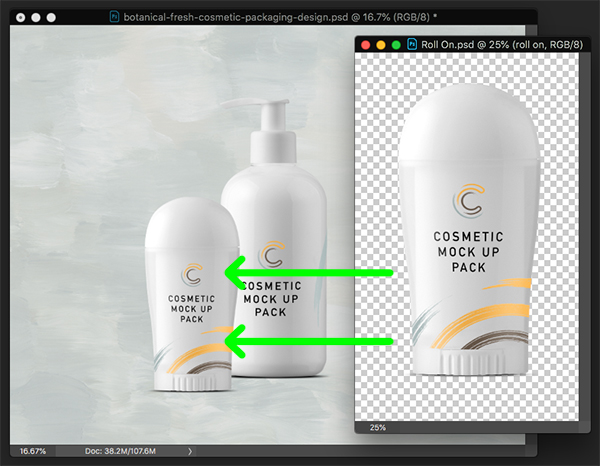
Next, go to the File menu and choose ‘Open…’ from the dropdown list once again. This time we will navigate to the ‘Roll On.psd’ file found in the ‘Cosmetic Packaging Branding Mockup by Mockup Zone’ subfolder and then choose ‘Open’ from the bottom right corner.

Here we will do the same thing where we click and drag the entire group folder into the main document and this time place it above the lotion dispenser. What we want to do here is move it down and to the left a bit so that it looks like it’s sitting in front of the previous mockup like this:
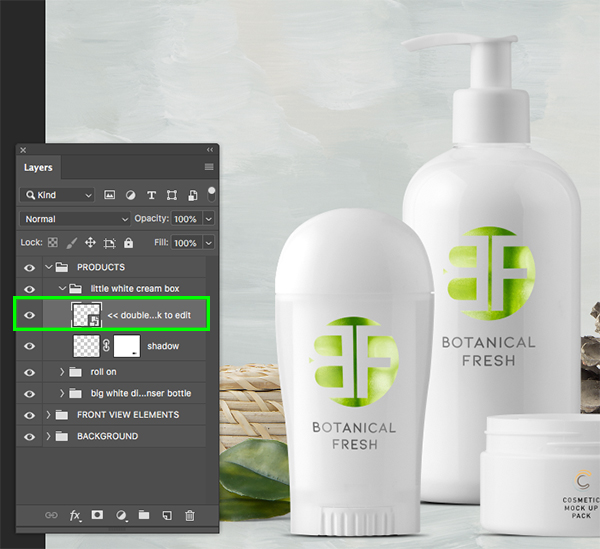
Step 7: Cream Box
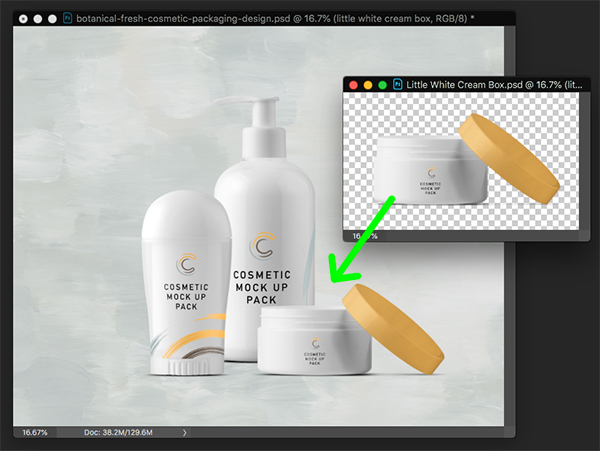
Return to the File menu and choose ‘Open…’ once again. This time we want to select the ‘Little White Cream Box.psd’ file and choose ‘Open’.
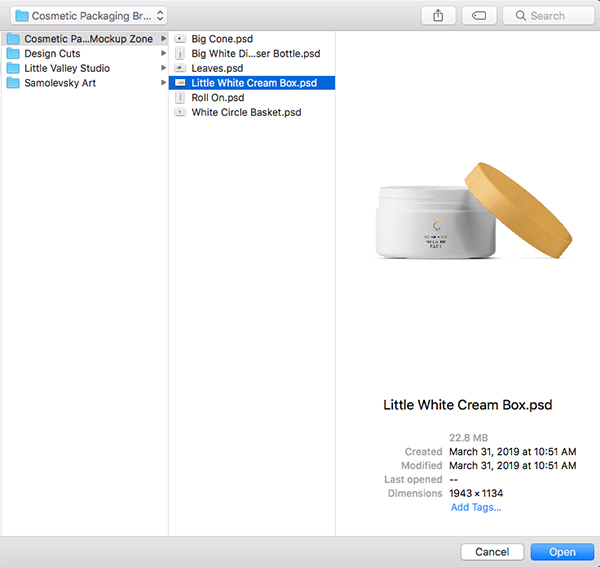
Click and drag the entire group folder into your main document and then move it to the right of the main lotion dispenser, but on the same horizon line as the roll on deodorant like this:
Step 8: Product Placement
Select the top ‘little white cream box’ folder, and then hold the Shift key and select the third product mockup just above the ‘BACKGROUND’ folder so all three of your product mockup folders are selected simultaneously.
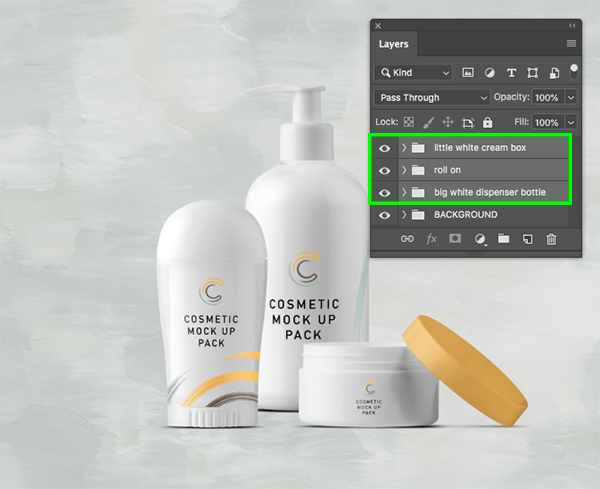
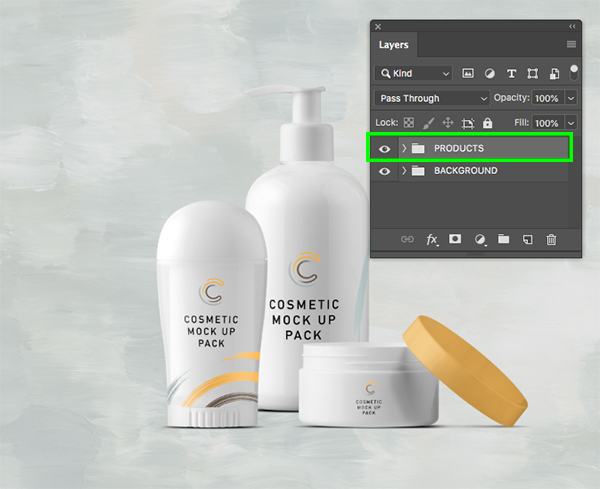
With your folders still selected, press Command/Ctrl+G to place them into a new folder and double click the ‘Group 1’ text to rename the folder ‘PRODUCTS’ as shown here:
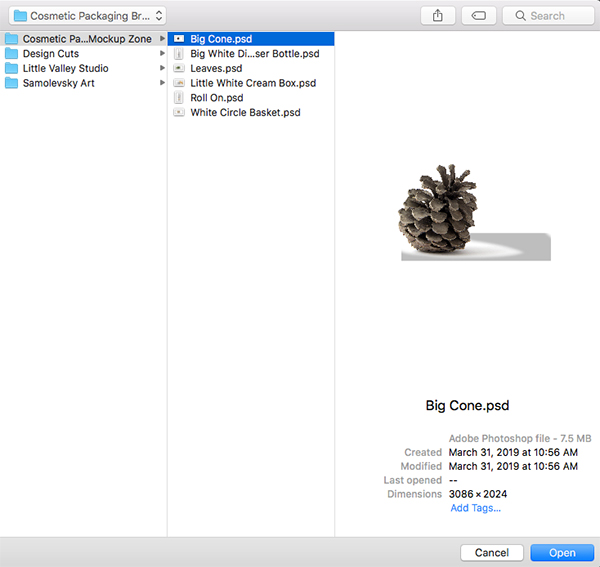
Step 9: Pine Cone
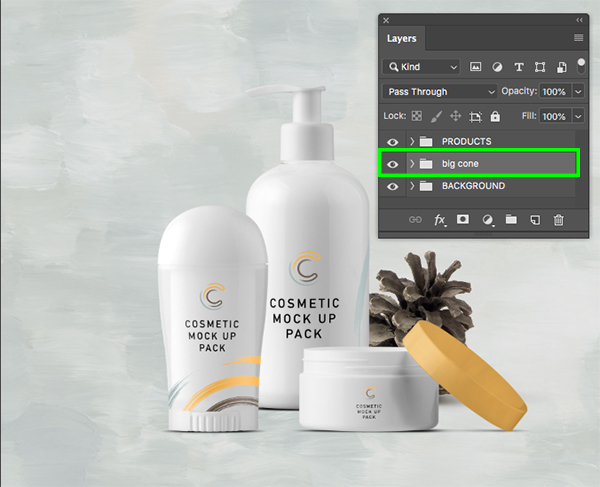
Go to the File menu and choose ‘Open…’ once again before navigating to the same mockup folder. This time let’s choose the ‘Big Cone.psd’ file and then click ‘Open’ in the lower right corner.
Click and drag the ‘big cone’ folder into the main mockup and place it behind the lotion dispenser and cream box and move it up just a bit so that it looks like this:
Step 10: Circle Basket
Go to the File menu and choose ‘Open…’ again. This time we want to select the ‘White Circle Basket.psd’ file before choosing ‘Open’ from the lower right.
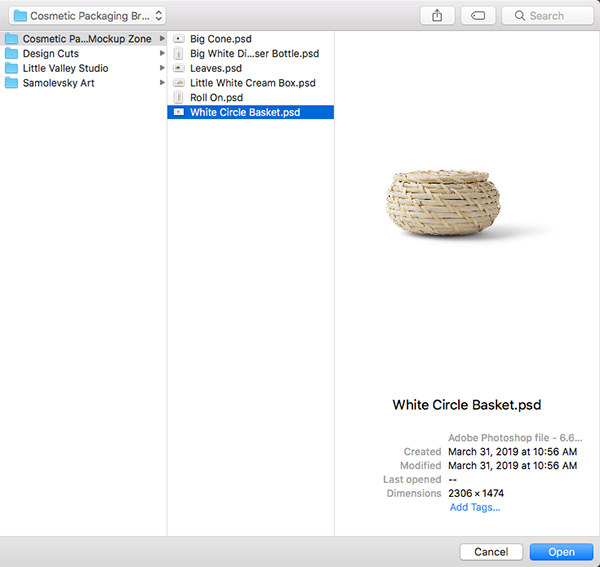
Let’s drag this folder into our main document and place it on the left side behind the deodorant as shown here:

Step 11: Green Leaves
We will head back to the File menu and choose ‘Open…’ again before navigating to the ‘Leaves.psd’ file and choosing ‘Open’ from the bottom right.
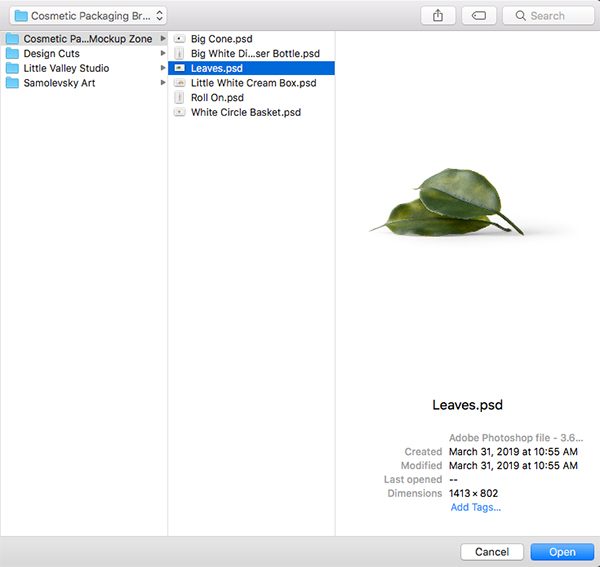
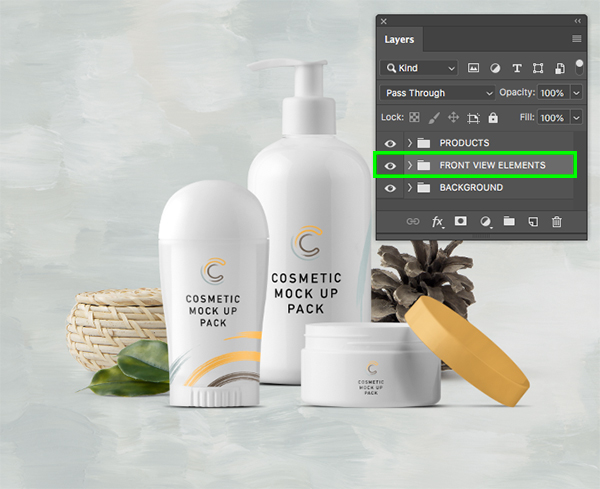
Let’s go ahead and bring in the whole ‘leaves’ folder before placing it above the ‘white circle basket’ and moving it down a bit. We want the leaves to fall between the basket and the deodorant and after that we will select the top ‘leaves’ folder, hold the Shift key, and then select the ‘big cone’ folder so all three of your items are selected together.

With these three folders selected at the same time, press Command/Ctrl+G to place them all into a new folder and double click the ‘Group 1’ text to rename the folder ‘FRONT VIEW ELEMENTS’ as shown here:
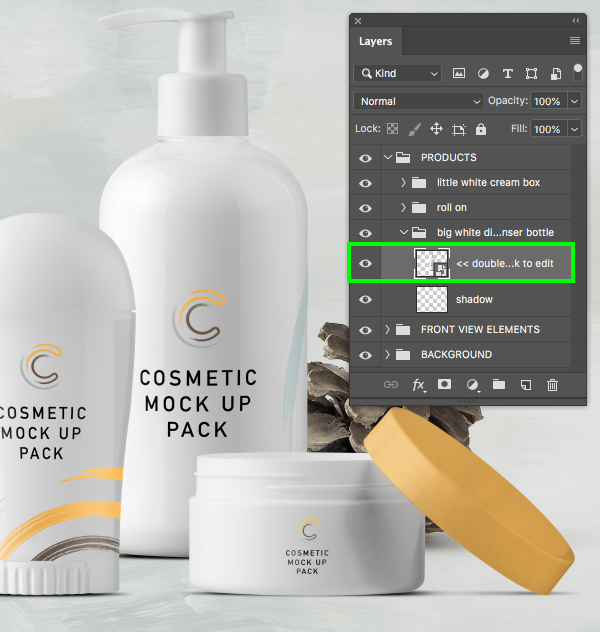
Step 12: Lotion Labels
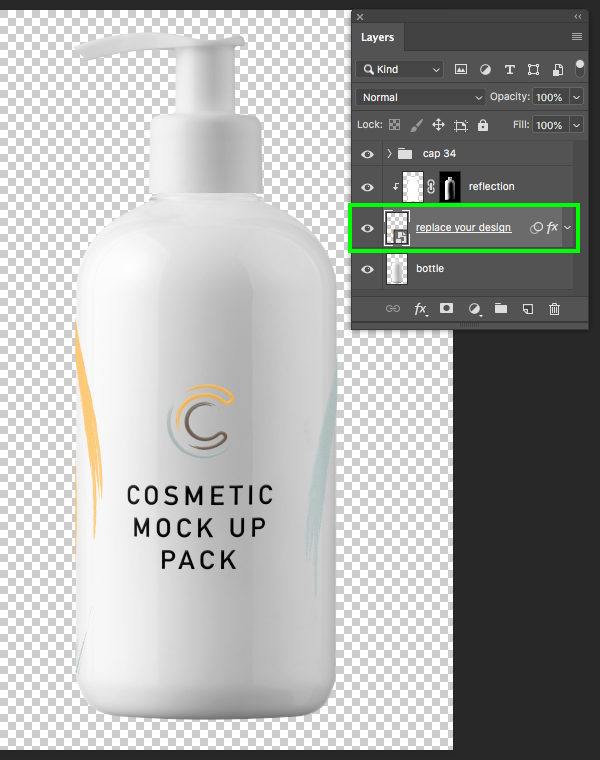
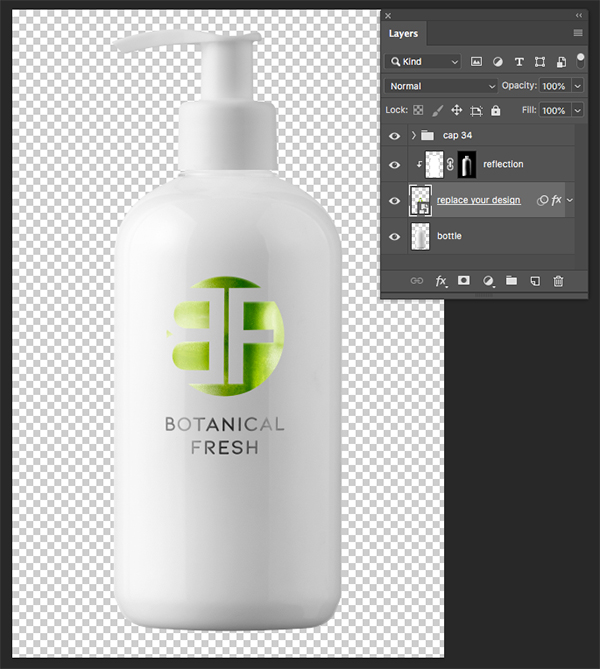
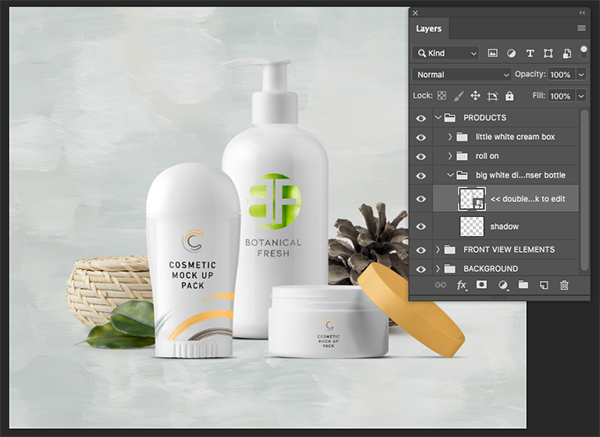
Expand the ‘big white dispenser bottle’ folder inside of the ‘PRODUCTS’ folder and then double click on the Smart Object highlighted below:
Once you’re inside of this Smart Object, double click the next one that says ‘replace your design’ as shown here:
Step 13: Macro Cucumbers
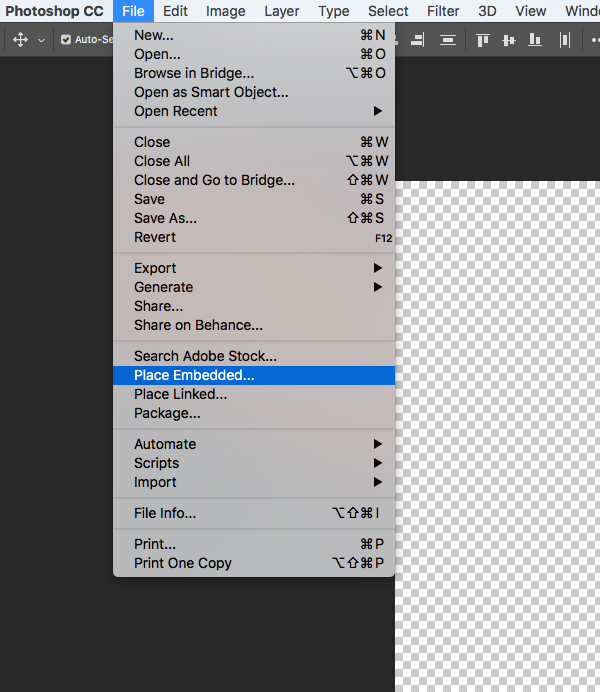
Go to the File menu and choose ‘Place Embedded…’ from the dropdown as shown here:
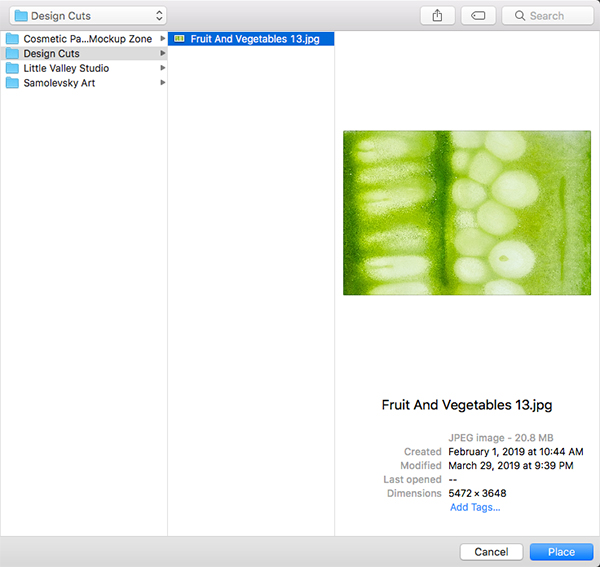
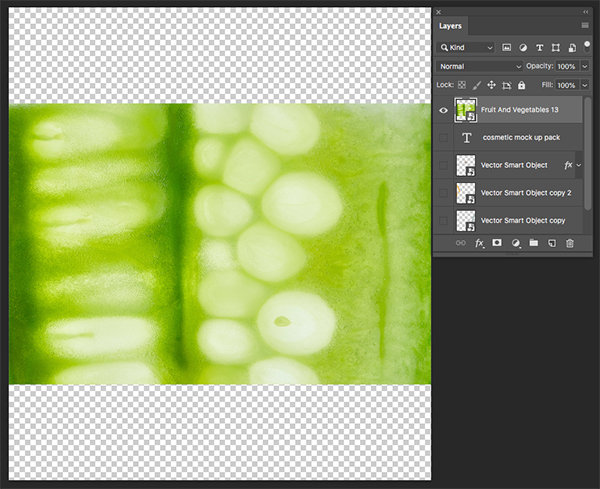
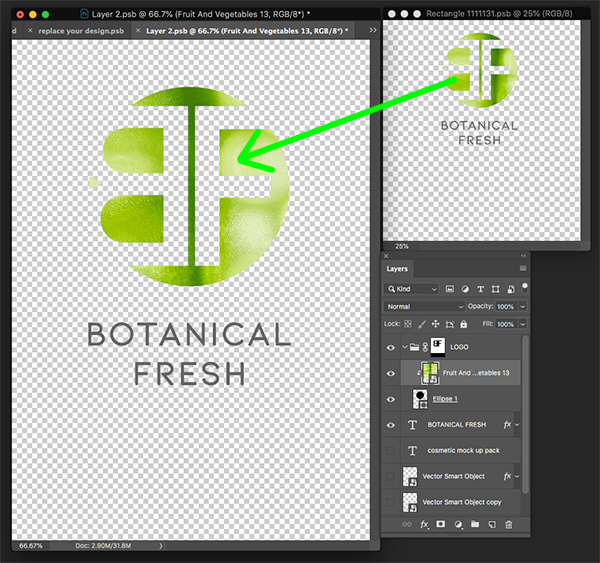
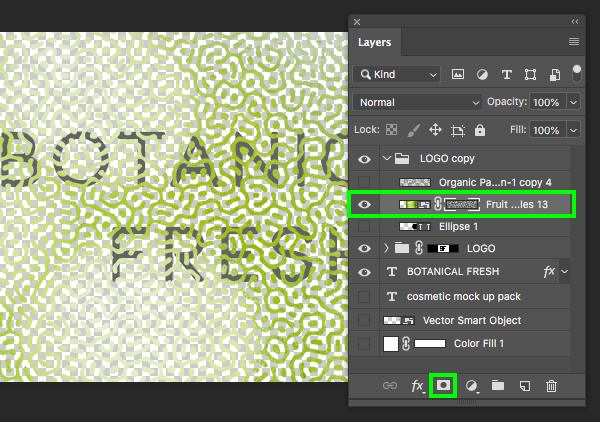
Navigate to the ‘Design Cuts’ folder inside of the freebies for this tutorial and then select the ‘Fruit And Vegetables 13.jpg’ image and click ‘Place’ from the lower right corner.
After bringing in the image, turn off the visibility of all of the other layers.
Step 14: Masked Cucumbers
Press the letter ‘U’ on the keyboard to switch to the Rectangle Tool and then tap it two more times while holding the Shift key to select the Ellipse Tool instead. From here, make sure that you have a solid fill color and no stroke as shown below:
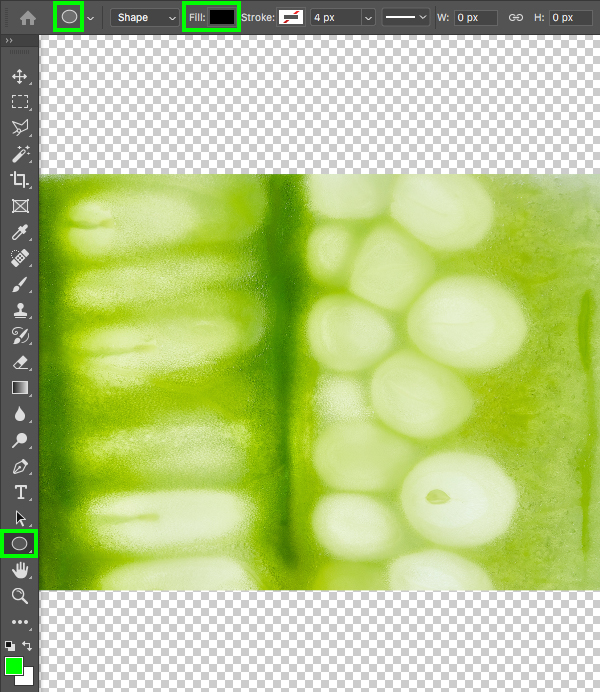
Click and drag outwards while holding the Shift key to create a circle above the cucumber image like this:

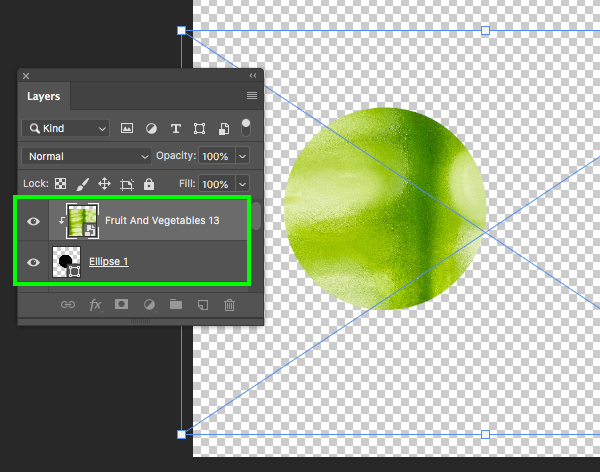
After you’ve created the circle, move that layer just below the macro image. Once you’ve done that, hold the Control key and click on the fruit texture and then select ‘Create Clipping Mask’ from the dropdown menu.

You should now see a small arrow to the left of the fruit image indicating the Clipping Mask that has been applied.
Step 15: Cleaning Up
Select the ‘cosmetic mock up pack’ text layer below the ‘Ellipse 1’ layer, and then hold the Shift key and select the very bottom layer so all of the layers towards the bottom of the Layers Palette are selected together.
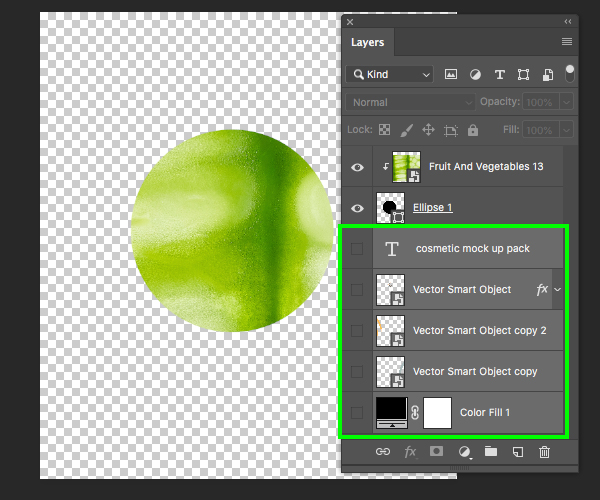
With all of these layers selected together, press ‘Delete’ to remove everything except for the fruit texture and the circle. Once you have done that, hold the Command/Ctrl key and click on each of the two remaining layers so they are both selected.
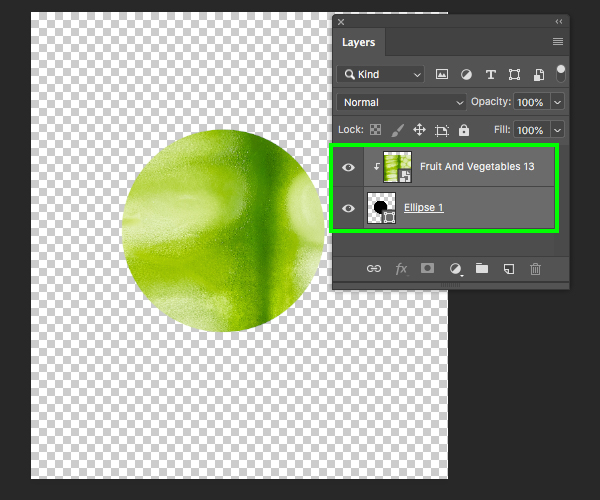
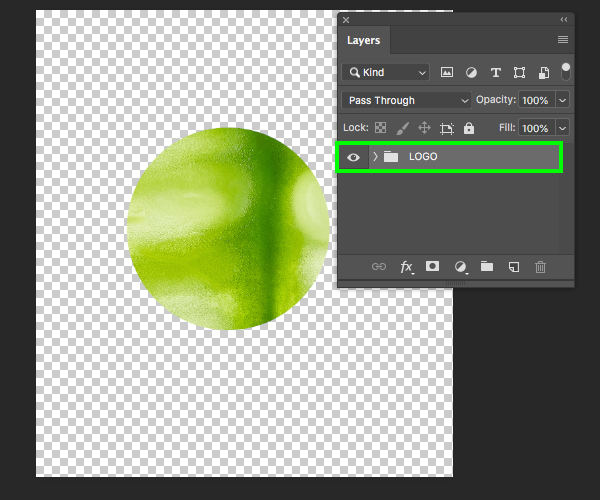
With these two remaining layers selected, press Command/Ctrl+G to place them into a new folder and double click the ‘Group 1’ text to rename it ‘LOGO’ as shown here:
Step 16: Logo Lockup
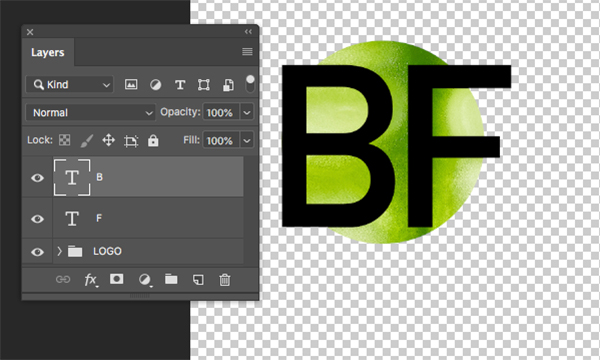
Create a new layer and switch to the Type Tool (T) before clicking your cursor and typing a capital ‘B’. Here I am using the typeface ‘DIN Alternate’ in the ‘Bold’ style at about ‘681 pt’ with a solid black fill. If you don’t have this particular typeface you can use any other bold, sans serif font such as ‘Avenir’ or ‘Gotham’.

Select the text layer and press Command/Ctrl+J to duplicate it, and then hold the right arrow and the Shift key to slide it over to the right of the letter ‘B’ so it looks like this:
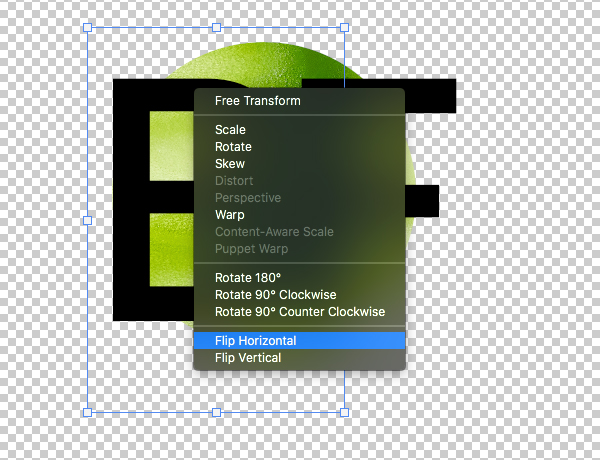
Press the letter ‘V’ to switch to the Move Tool and then select the layer with the uppercase ‘B’. From here, press Command/Ctrl+T to initiate a Free Transform and then hold the Control key and click on the layer to reveal a dropdown menu. From here, choose the ‘Flip Horizontal’ option to flip the letter the other way.
Step 17: Logo Knockout
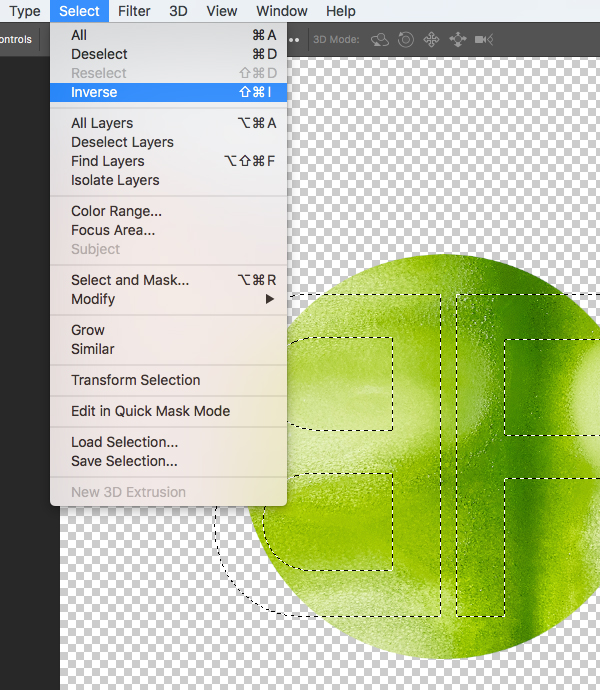
Now that we have two separate text layers – each with a single letter on it – we can hold the Command/Ctrl+Shift keys and click on each of the layer thumbnails to activate a selection around each of the letters.
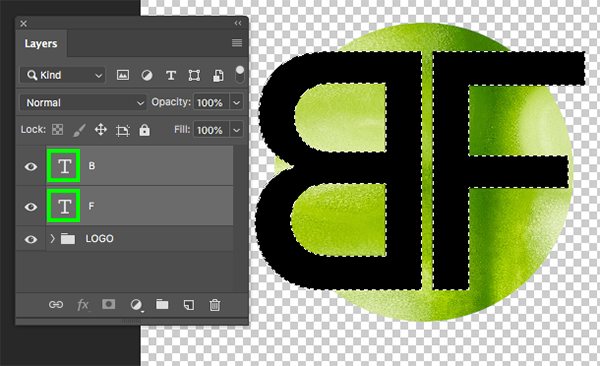
With an active selection around both letters, go to the Select menu and then choose ‘Inverse’ as shown below:
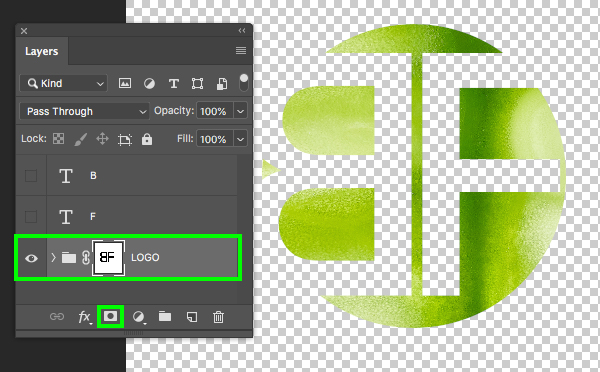
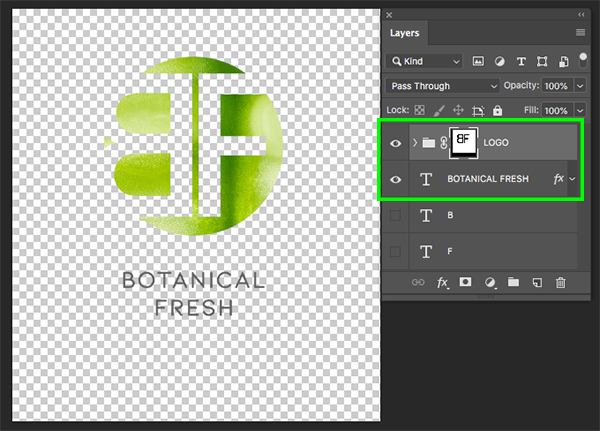
Next, with the ‘LOGO’ folder selected and your inverted selection still active, click on the ‘Add Layer Mask’ at the icon at the bottom of the Layers Palette and you should now see your letters knocked out of the texture.
Step 18: Abbreviated
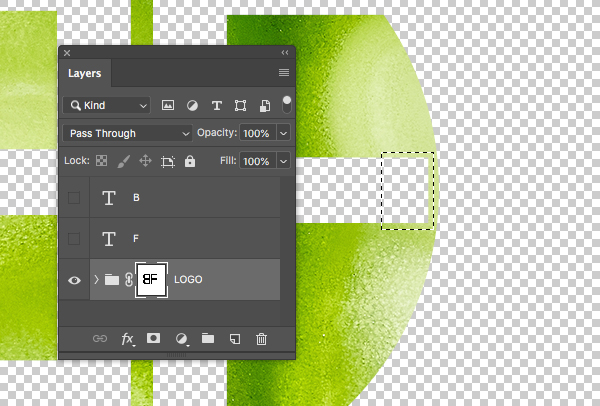
Press the letter ‘M’ to switch to the Rectangular Marquee Tool and then click and drag a small rectangle around the right side of the middle of the letter ‘F’ as shown here:
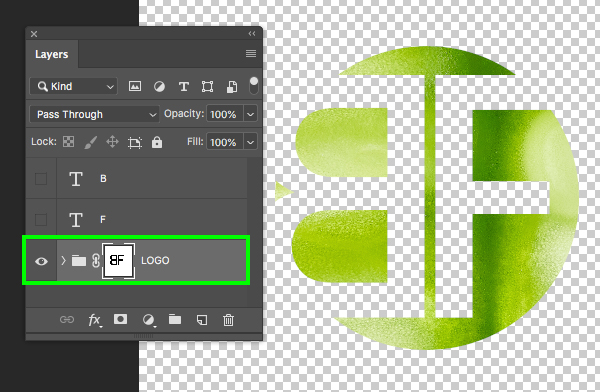
Press the letter ‘D’ to reset your default foreground and background colors, and then press ‘X’ to toggle them until your foreground color is set to solid white. From here, with your selection still active, press Alt/Option+Delete to fill the mask with solid white. Doing this will bring in the middle portion of the ‘F’ a bit to allow some of the fruit texture to show through on the right.
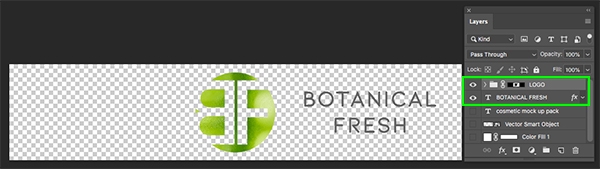
Step 19: Botanical Fresh
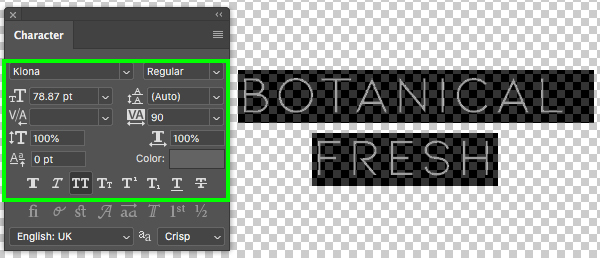
Create a new layer and use the Type Tool (T) to type out ‘BOTANICAL’ and then make a second line and type out ‘FRESH’ on the second line. Press Command/Ctrl+A to select all of the text, and then Command/Ctrl+Shift+C to center the text. Let’s now use the Character panel to change the typeface to a free font called ‘Kiona’. Once you’ve changed the typeface let’s make the size about ‘78.87 pt’ and set the tracking setting to ’90’.
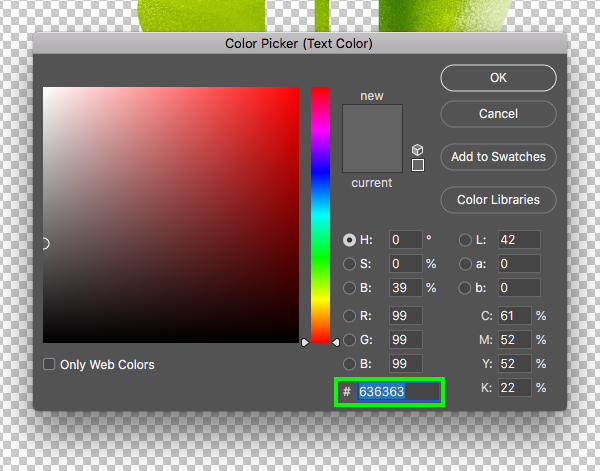
Click on the ‘Color’ box next and change the fill to the hex value ‘#636363’ and then press ‘Return’ or click ‘OK’ to apply the changes.
Next, double click on the ‘BOTANICAL FRESH’ text layer to bring up the Layer Style panel and check off the ‘Stroke’ option. After that, let’s change the ‘Size’ to ‘2 px’ with a ‘Position’ set to ‘Outside’ as shown here:
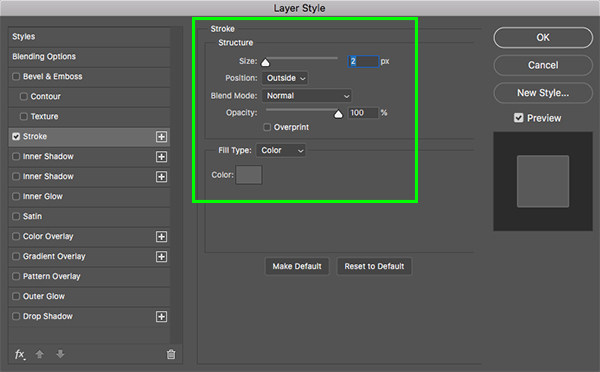
For the actual stroke color, use the same gray as we used for the text – ‘#636363’ and then press ‘OK’ twice to apply the changes and close out of both dialog boxes.

From here we can press Command/Ctrl+S to save the Smart Object and then Command/Ctrl+W to close the window and return to the previous mockup.
Step 20: Lotion Labels
After saving and closing the Smart Object you will now be in the previous mockup shown here:
You may want to go back inside of the Smart Object and move the label up, scale the ‘BF’ portion down a bit, or modify the size and positioning of the cucumber texture inside, but once you have done that and you’re happy with the way everything looks, save and close this Smart Object once again to return to the main mockup file.
Step 21: Deodorant Label
Expand the contents of the ‘roll on’ subfolder inside of the main ‘PRODUCTS’ folder and then double click on the main Smart Object file to go inside.
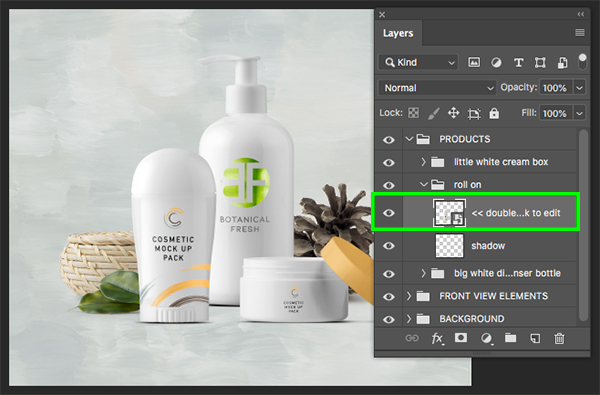
Once you are in the main deodorant mockup, double click the Smart Object here that says ‘replace your design’.

What we want to do here is open up the logo lockup from the lotion dispenser and click and drag both the circular logo and the text into the deodorant file and then save it and close it.
You should now have the same logo applied to the deodorant packaging. Let’s now go ahead and save this Smart Object by pressing Command/Ctrl+S and then close the window by pressing Command/Ctrl+W to return to your main mockup.

Step 22: Cream Box
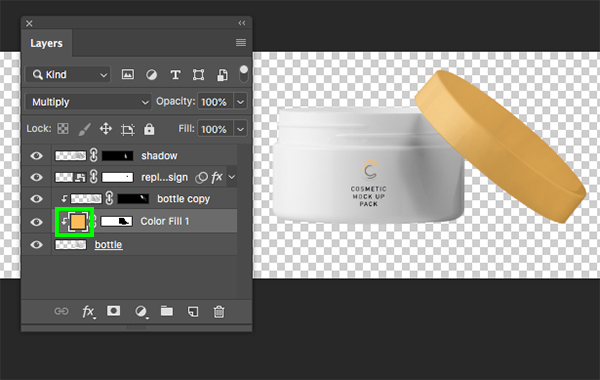
From the main mockup file, expand the contents of the ‘little white cream box’ folder and then double click on the main Smart Object inside.
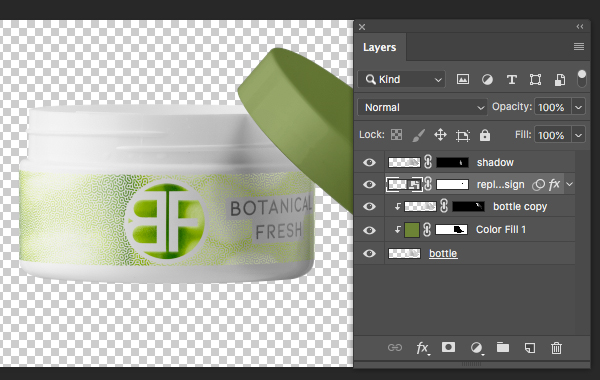
After going inside of this Smart Object, double click on the color swatch of the ‘Color Fill 1’ layer to change the color of the lotion lid.
Enter the hex value ‘#73823D’ and then click ‘OK’ or press ‘Return’ on the keyboard to apply the color change.
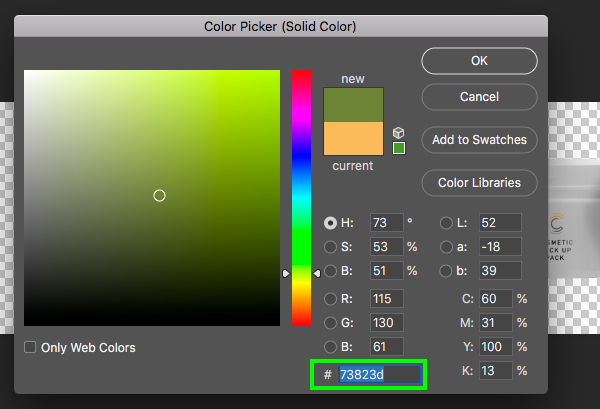
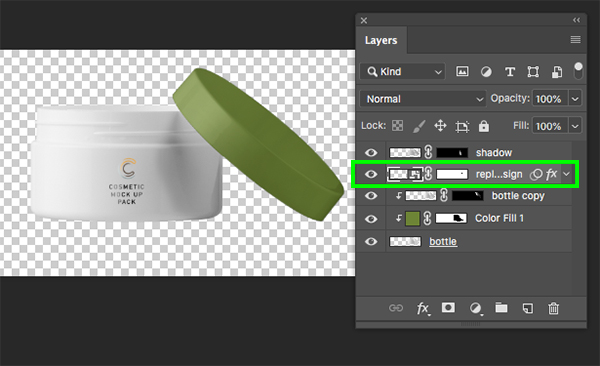
You should now see that the cream box lid has been changed to a medium green color. Let’s also double check to make sure that the Blend Mode of this layer is set to ‘Multiply’ as well before moving on.

Step 23: Cream Label
Double click on the second layer from the top, which is the main Smart Object layer here for our label.
Here we want to drag the logo lockup from either the deodorant or the lotion dispenser into this window and turn off all of the other layers.

Since this Smart Object is short and wide we will need to scale down the circular lockup and then place the ‘BOTANICAL FRESH’ text to the right of it as shown here:
Step 24: Releasing The Mask
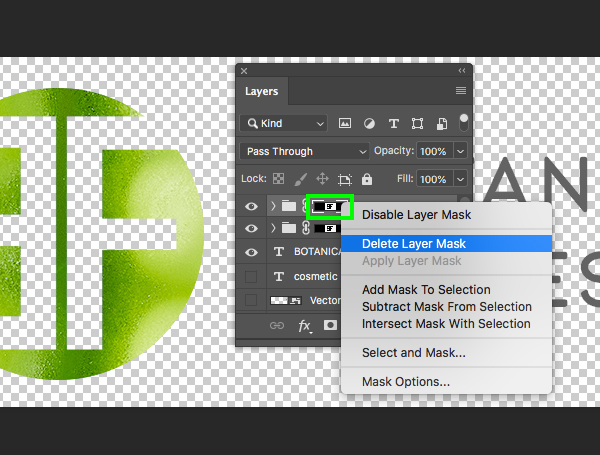
Select the ‘LOGO’ folder and duplicate it by pressing Command/Ctrl+J. Once you have done that, hold the Control key and click on the Layer Mask on the top copy of the ‘LOGO’ folder and then choose ‘Delete Layer Mask’ from the dropdown to remove the mask.
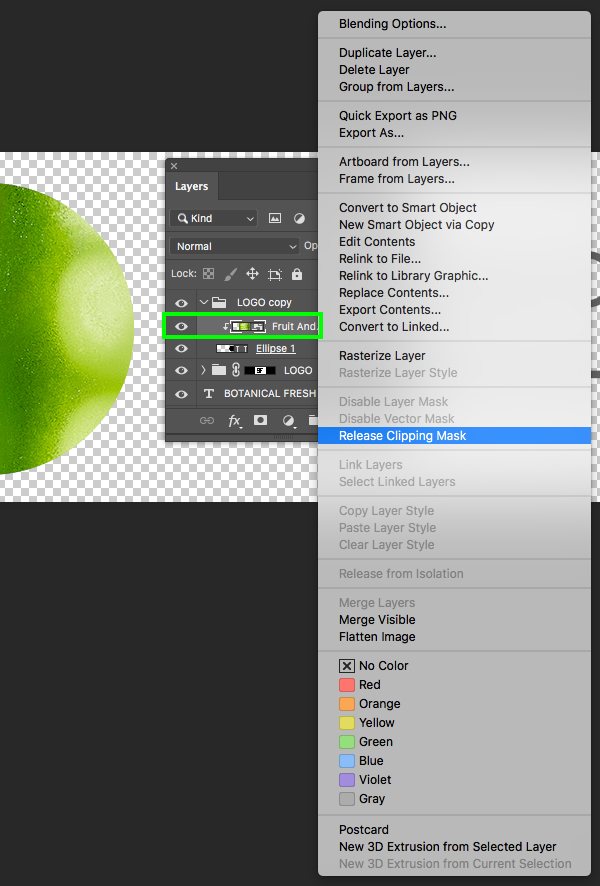
After removing the mask, go inside of the folder and select the fruit texture while holding the Control key. From here, choose the ‘Release Clipping Mask’ option from the dropdown menu that appears. Doing this will allow the full texture to show so that it’s no longer confined to the shape of the circle.
Step 25: Organic Pattern
Go to the File menu and choose ‘Place Embedded…’ from the dropdown menu.
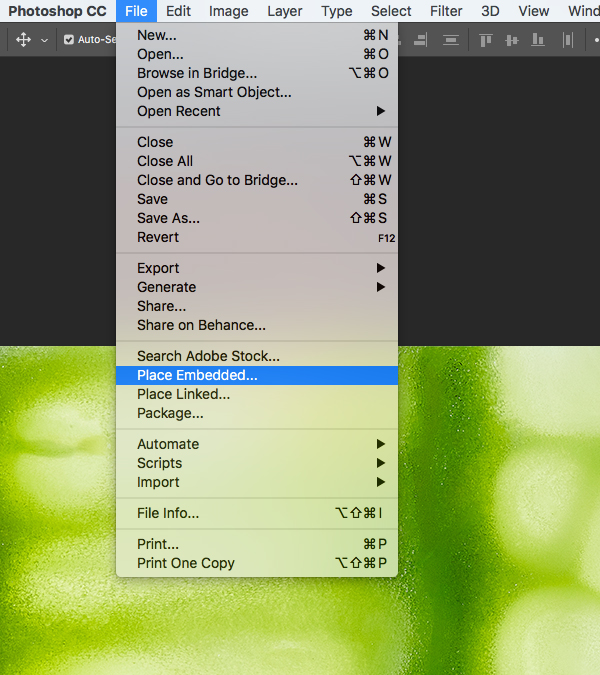
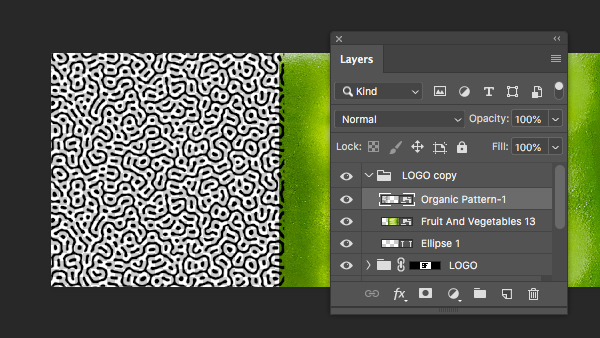
Next, navigate to the ‘Samolevsky Art’ subfolder inside the main freebies folder and then select the ‘Organic Pattern-1.png’ file before choosing ‘Place’ from the lower right.
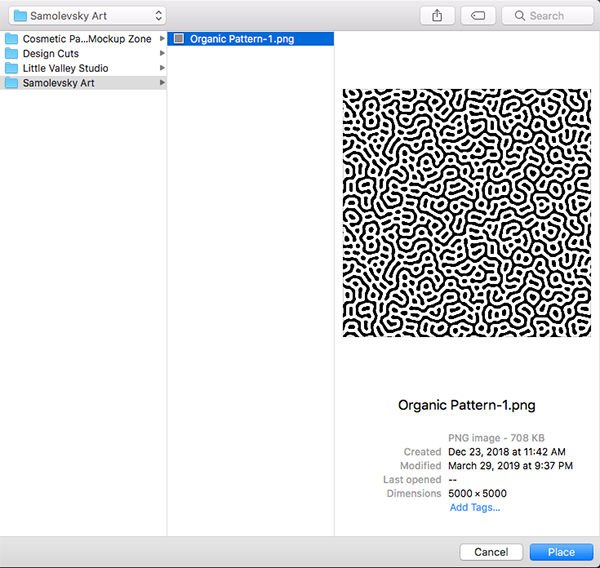
Place the pattern all the way to the left of the canvas as shown below:
Step 26: Organic Pattern Repeated
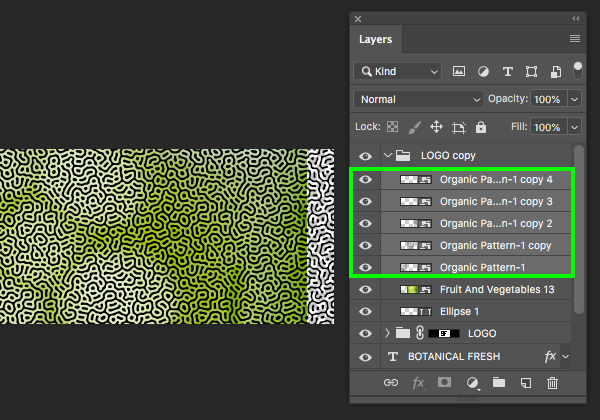
Select the first organic pattern Smart Object and then press Command/Ctrl+J to duplicate it. Hold the Shift key and slide the new copy over to the right of the original so that it lines up to create a seamless looking pattern. Repeat this three more times until your pattern goes all the way across the canvas. Once you have done that, select the very top copy in your Layers Palette, hold the Shift key, and then select the bottom organic pattern Smart Object so they are all selected at the same time.
Press Command/Ctrl+E to merge all of the organic pattern textures together. After that, hold the Command/Ctrl key and click on the layer thumbnail icon of the merged pattern layer to activate a selection around it as shown here:
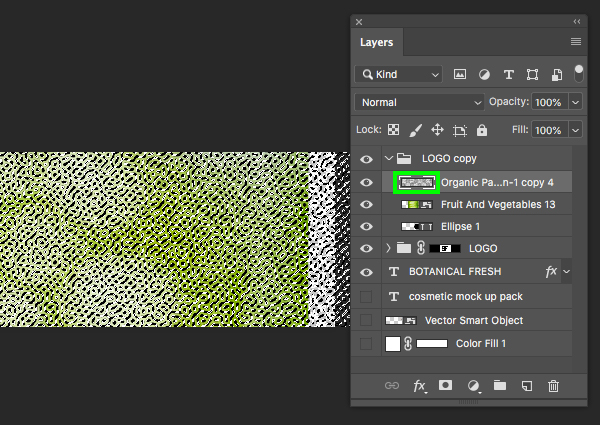
Inside of the ‘LOGO copy’ folder, turn off the visibility of the merged organic pattern as well as the ‘Ellipse 1’ shape below the fruit image. With the selection still active, select the cucumber image layer and apply a new Layer Mask as shown in the image below:
If you need to enlarge the cucumber texture to fill the width of the label, click the link icon between the image and the mask on the layer and then just choose the image itself and use a Free Transform (Command/Ctrl+T) to scale the image up proportionally and independently from the mask. Once you have scaled the texture up enough, press ‘Return’ to apply the changes and then relink the image and the mask.

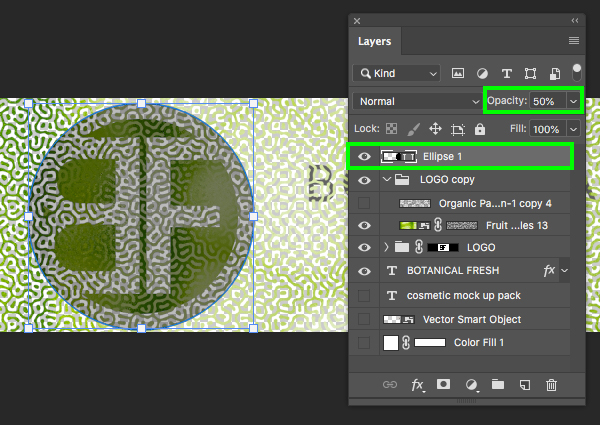
Step 27: Pattern Logo Knockout
Turn the visibility of the ‘Ellipse 1’ layer back on and move it to the top of the Layers Palette. Press the number ‘5’ to reduce the opacity of the layer to ‘50%’ so you can see through it. From here, press Command/Ctrl+T to do a Free Transform and then click and drag outwards from any of the four corners of the bounding box while holding the Alt/Option+Shift keys to scale it up proportionally from the center until it’s a bit larger than the circular logo like this:
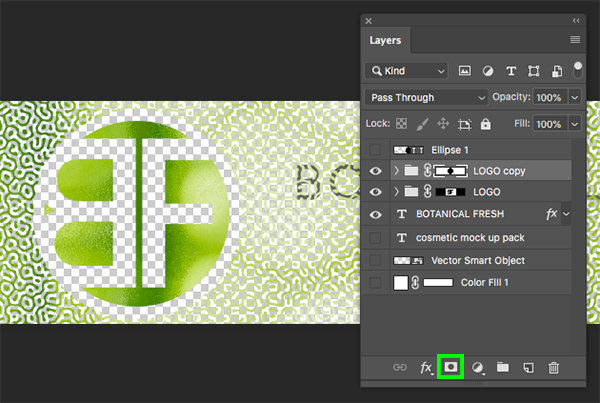
After enlarging the ellipse shape, turn off the visibility of the layer. Hold the Command/Ctrl key and click on the layer thumbnail icon to activate a selection around it. Next, select the ‘LOGO copy’ folder and press Command/Ctrl+Shift+I to invert the selection. Once you have done that, click on the ‘Add Layer Mask’ icon at the bottom of the Layers Palette to knock the circle and logo lockup out of the organic pattern as shown here:
Step 28: Text Knockout
Press the letter ‘M’ to switch to the Rectangle Marquee Tool and then click and drag out a rectangle around the word ‘BOTANICAL’ leaving some space around all of the sides. Next, hold the Shift key and drag out another rectangle around the second line that says ‘FRESH’ so you wind up with one solid shape that looks a bit like a wide ‘T’.
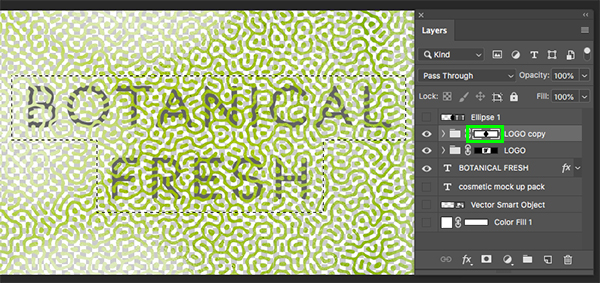
Select the Layer Mask that is attached to the ‘LOGO copy’ folder and then make sure you have a solid black foreground color selected and press Alt/Option+Delete to fill the selection with solid black. Doing this should remove the organic pattern from the rectangle shape we created making it more legible. After making these adjustments, press Command/Ctrl+S to save the Smart Object and then Command/Ctrl+W to close the window and return to the previous mockup.

Step 29: Saving The Last Label
Now that we are in the main cream box mockup, you should see how your label looks. If you are happy with the size and placement of everything then press Command/Ctrl+S one more time and then close the window to return to your main mockup.
We have now completed our Botanical Fresh Cosmetic Packaging Design! To design our branded mockup we’ve used a small handful of resources from The Exceptional Textures And Patterns Bundle along with some beautiful mockups from the Design Cuts Marketplace and a free typeface. The resources and techniques we have used in this tutorial are just one example of the plethora of applications for this massive collection of high-quality elements for your next design project!
Remember that whether it’s your outcome for this tutorial or something new you’ve made, we’d love to see your designs on our Facebook page.
Please leave a comment if you have any questions or suggestions. I always look forward to hearing from you!
There’s still time to check out The Exceptional Textures And Patterns Bundle featuring exceptional quality resources from top designers such as Rule By Art, Design Dell, Pink Coffie, and an exclusive texture pack from Design Cuts all for an unbeatable price of $29!

I am always happy. Great tutorials including freebies. Many Thanks.
Thank you so much for all of your comments today, they really have made our week :D
Great tutorial! Thank you!
It’s awesome to hear you’ve enjoyed another one of our tutorials!
Thanks so much for letting us know and we hope you’ll get loads of use out of the freebies :)
oh waw, awesome tutorial, thanks !
You’re so welcome Sun and I hope that you pick up some really useful tips in this tutorial :).
Another great tutorial from Eric!
Yay we’re so glad that you think so Andrea and we know that Eric will be so pleased to hear this!
awesome tutorial
Thanks Amy, we’re so happy to hear that you enjoyed it :)