In this tutorial, we will be putting together a nature themed wellness flyer design in Photoshop. To do this we will be using some beautiful textures and design elements courtesy of Eclectic Anthology and Veris Studio from The Creator’s Inspiring Artistic Collection. This all new bundle includes a truly massive assortment of ready to work with brushes, textures, watercolours, map creators and more! In addition to these elements we will also be using a handful of free stock photos, a free typeface, and a free flyer mockup to bring it all together. If you’re all ready to venture into the wild then fire up Photoshop and let’s get started!
HAVE YOU SEEN OUR YOUTUBE CHANNEL?
Watch the video tutorial below and subscribe to our YouTube channel for regular updates direct to your inbox.
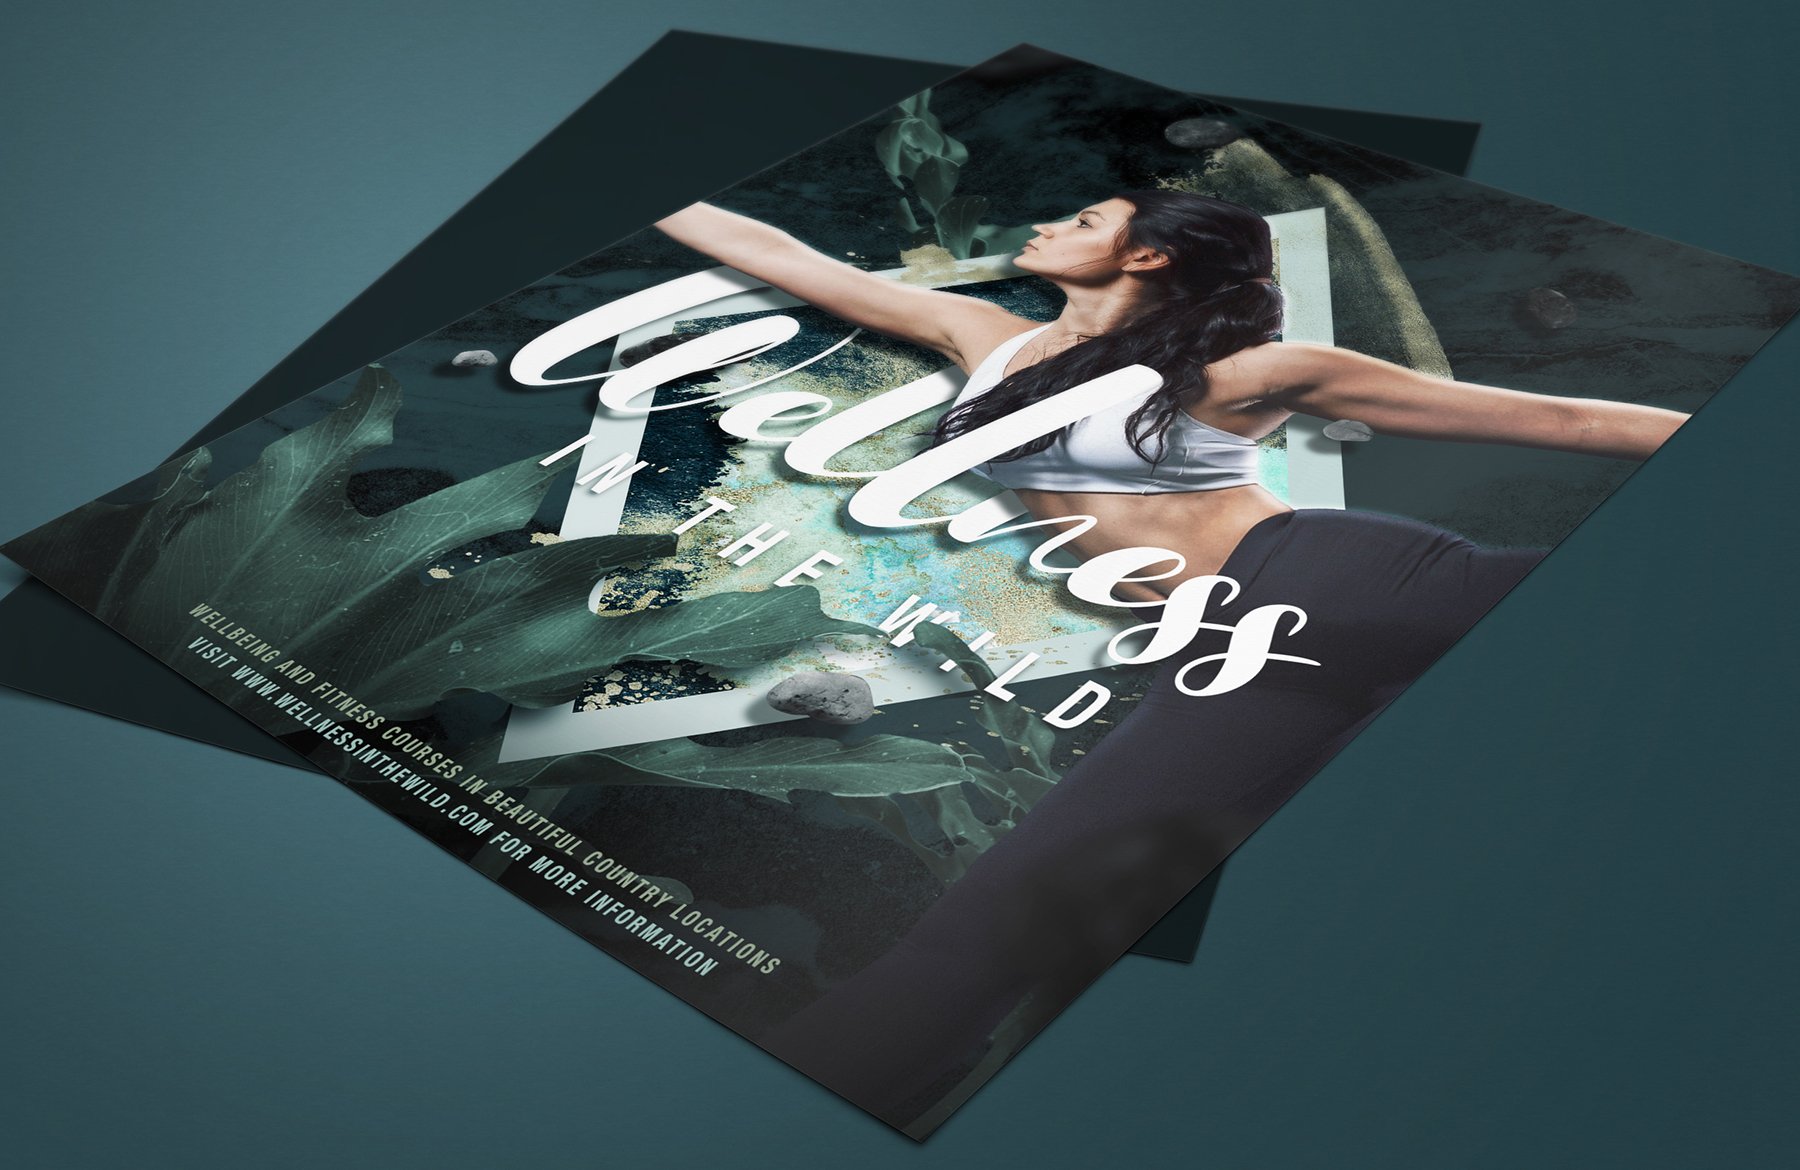
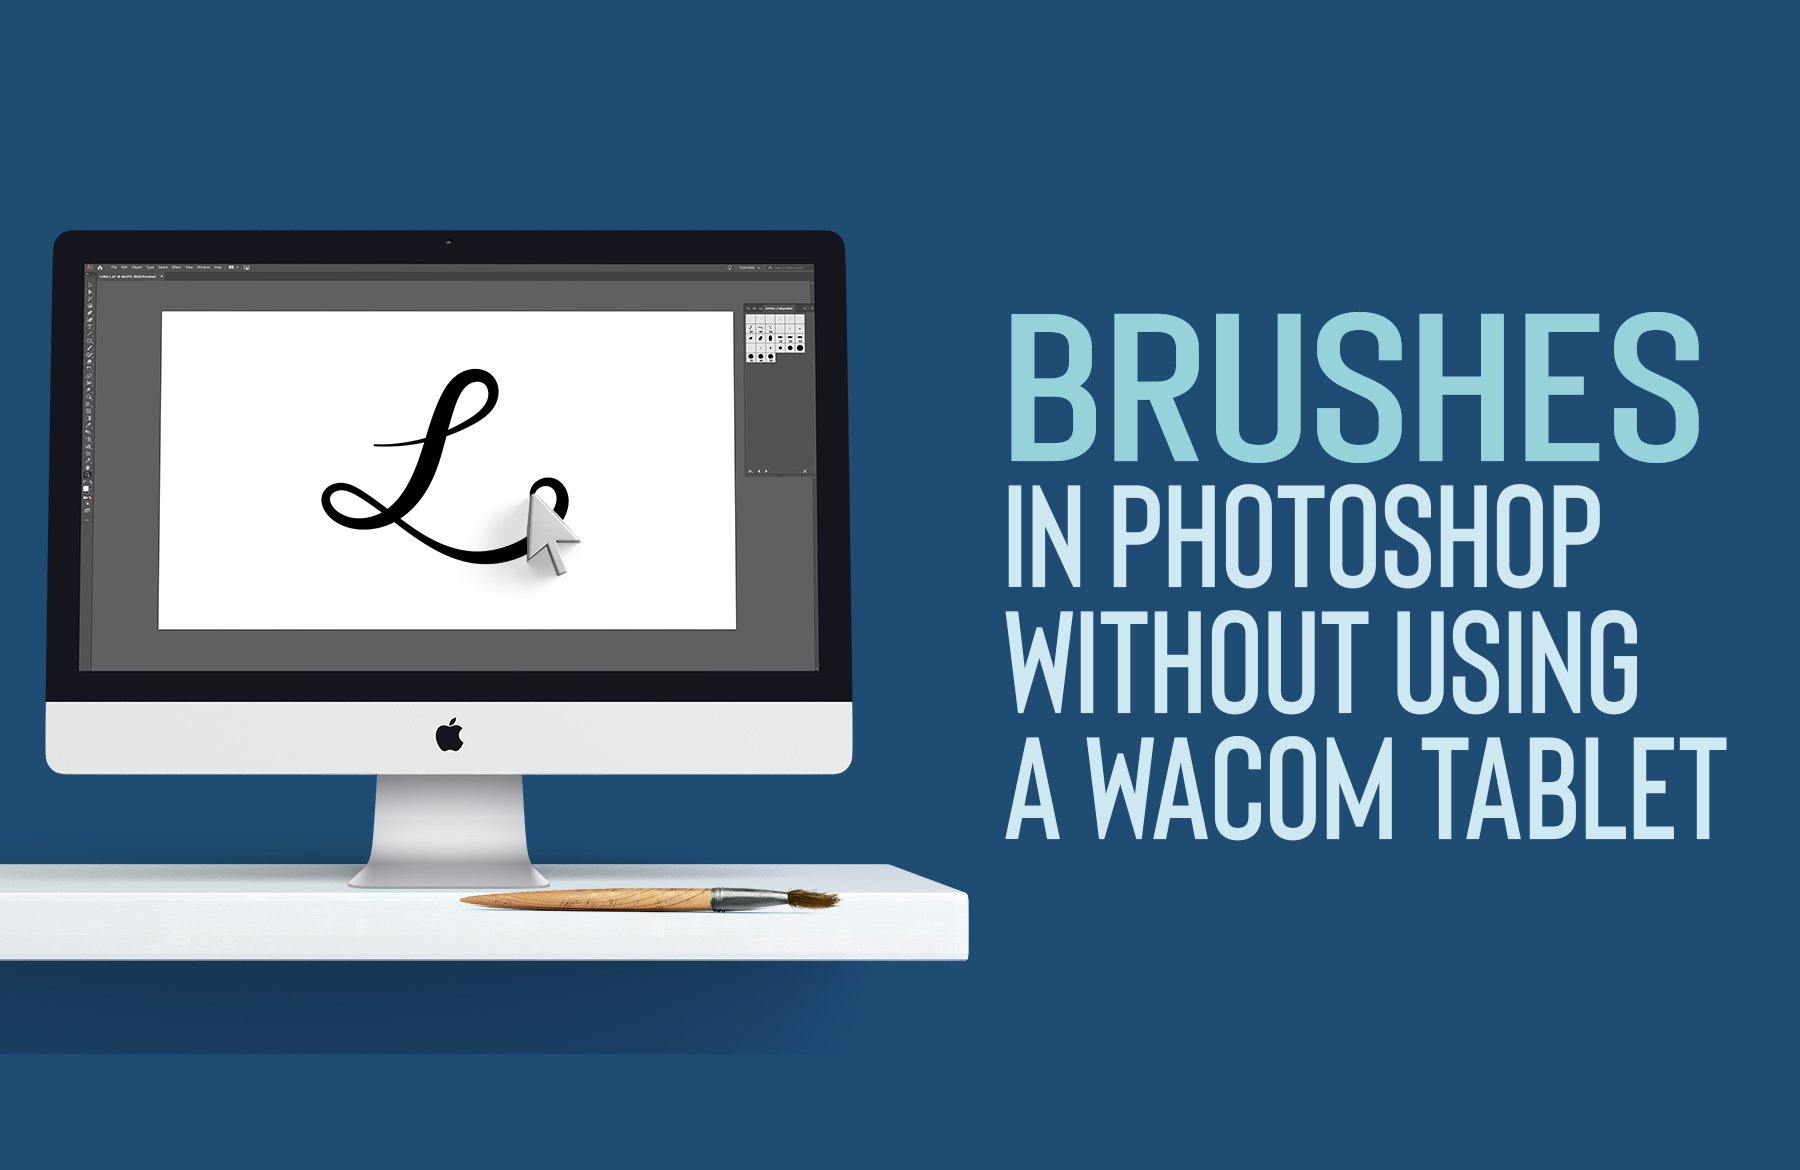
Here’s a look at what we’ll be creating:

Follow along with this tutorial: Download the freebie files
This freebie pack is just a small sample of what you can expect to find in The Creator’s Inspiring Artistic Collection for just $29! As with all our bundles, these fonts come with our extended license and at a staggering 98% off, for a limited time only!

Step 1: Wellness In The Wild Flyer Design
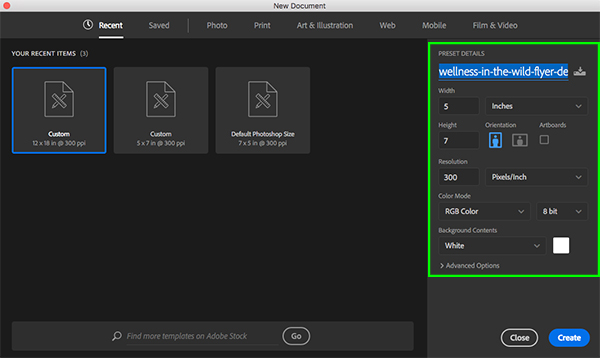
To get started, create a new Photoshop document that is ‘5’ inches wide by ‘7’ inches tall with a ‘Resolution’ of ‘300’ and a ‘Color Mode’ of ‘RGB’. After that, give your file a name – here I am calling my file ‘wellness-in-the-wilderness-flyer-design’ and then once you have done that, click ‘Create’ from the lower right hand corner.
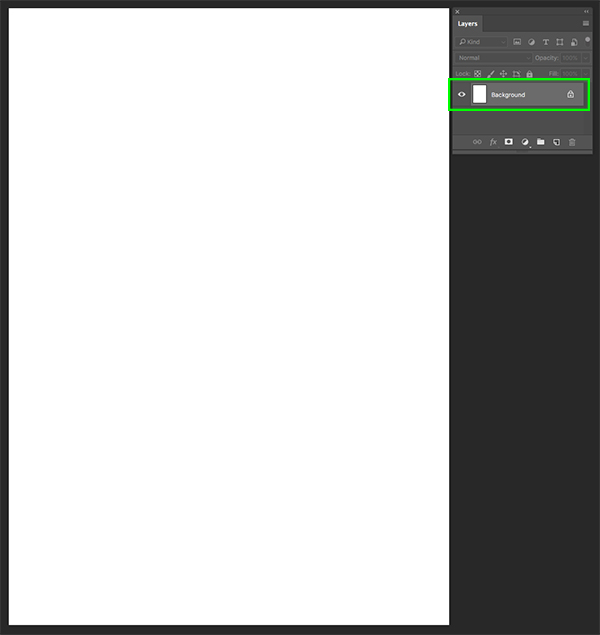
After creating your new document you should have a single, locked, layer simply called ‘Background’ as shown below:
Step 2: Paper Texture
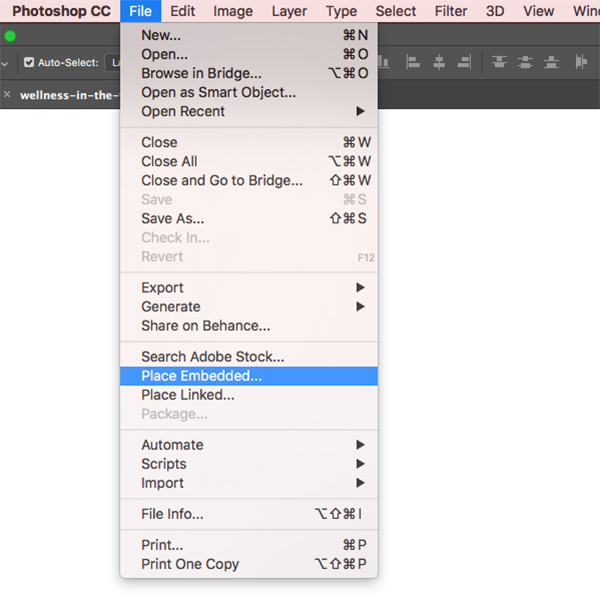
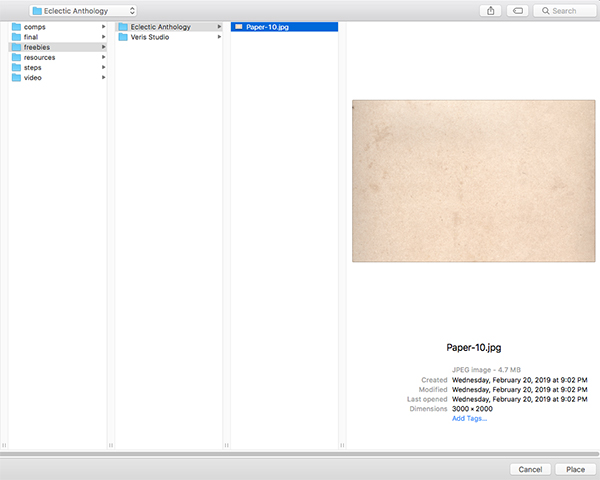
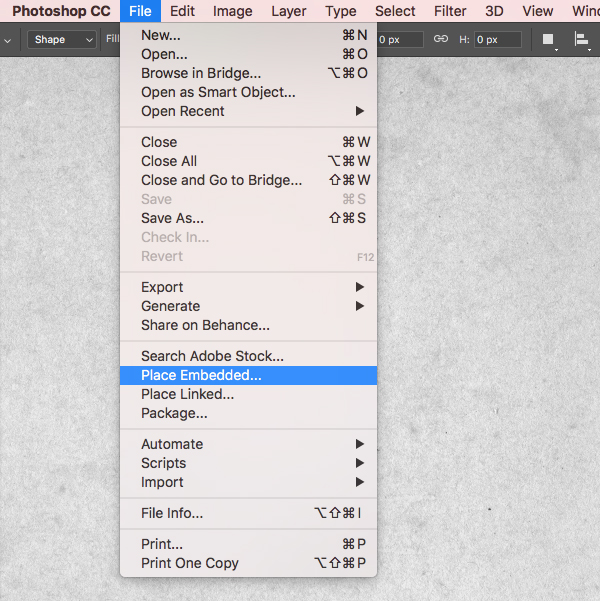
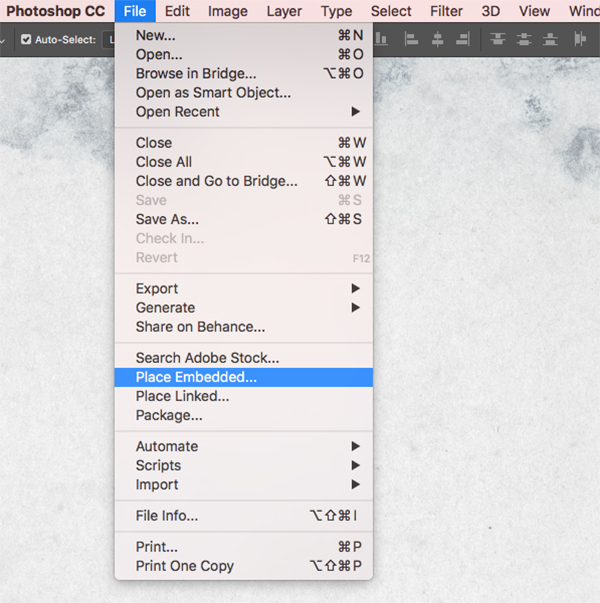
Go to the File menu and choose ‘Place Embedded…’ from the dropdown list.
Navigate to the freebies folder and then choose the ‘Eclectic Anthology’ subfolder where you will find the ‘Paper-10.jpg’ file. Once you have found the texture, select it and choose ‘Place’ from the bottom.
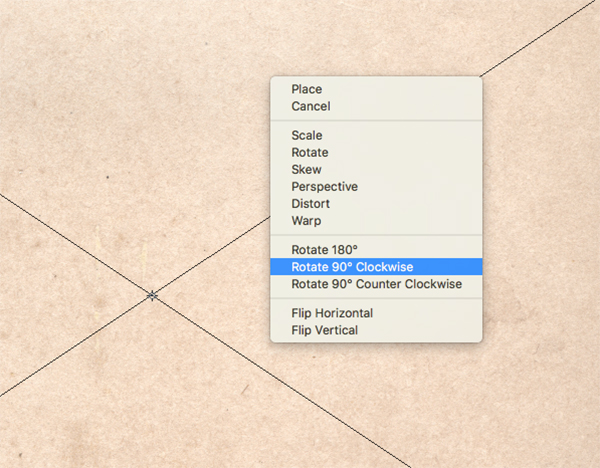
After bringing in the paper texture, hold the Control key and click on the Smart Object before choosing ‘Rotate 90º Clockwise’ from the dropdown to rotate it.
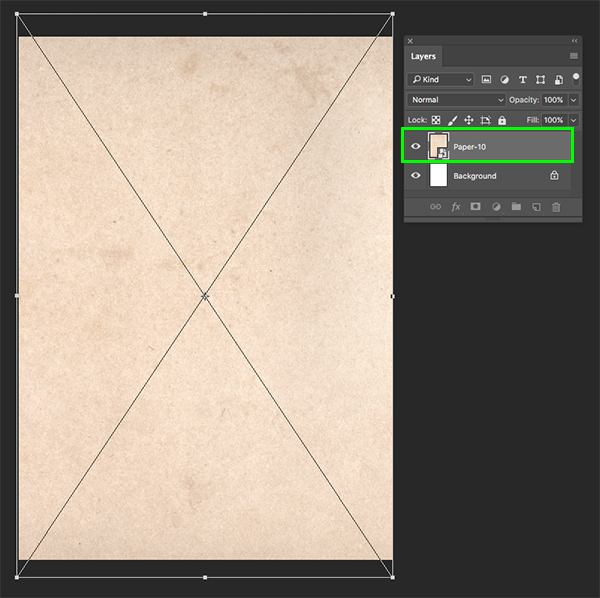
Once you have rotated the texture, drag outwards from any of the four corners of the bounding box while holding the Alt/Option+Shift keys to scale it up proportionally from the center until the width matches the size of your document. After that, press ‘Return’ on the keyboard to apply the transformation.
Step 3: Desaturation
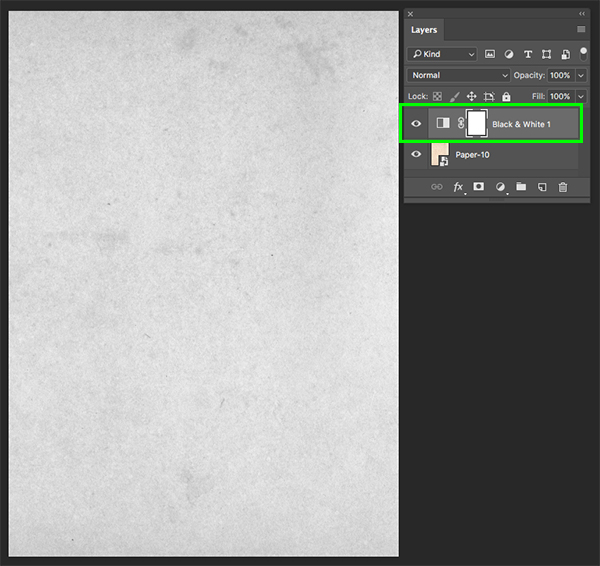
Now that we have added the paper texture, let’s go ahead and drag the locked ‘Background’ layer to the trash bin since we no longer need it. After that, click on the Adjustment Layer icon at the bottom of the Layers Palette and choose ‘Black & White…’ from the dropdown.

You should now have your Adjustment Layer sitting on top of the ‘Paper-10’ Smart Object layer as shown here:
Step 4: Marble Textures
Go to the File menu and choose ‘Place Embedded…’ from the dropdown list once again.
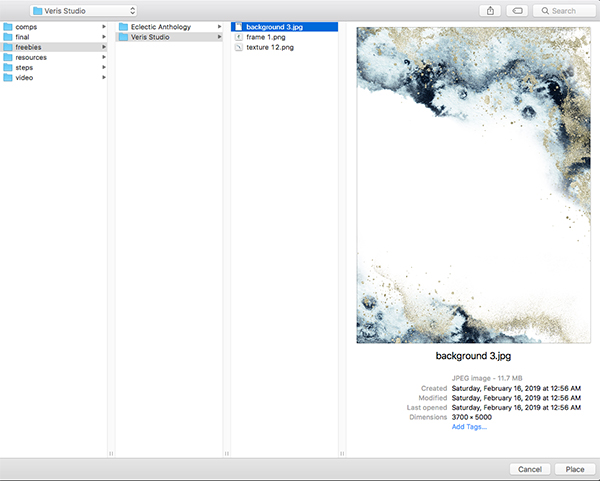
Let’s navigate to the ‘Veris Studio’ subfolder and choose ‘background 3.jpg’ before clicking ‘Place’ from the bottom to bring the texture into your file.
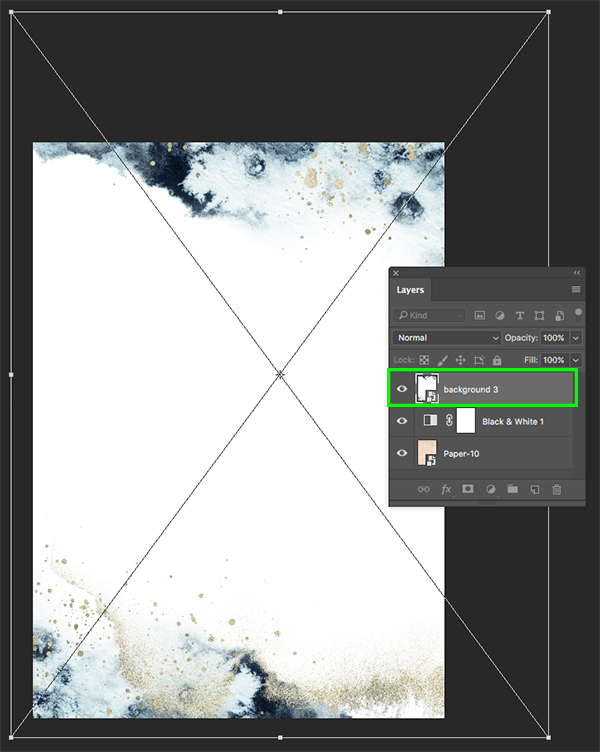
Scale the texture up by clicking and dragging outwards from any of the four corners of the bounding box while holding the Shift key and position it like this:
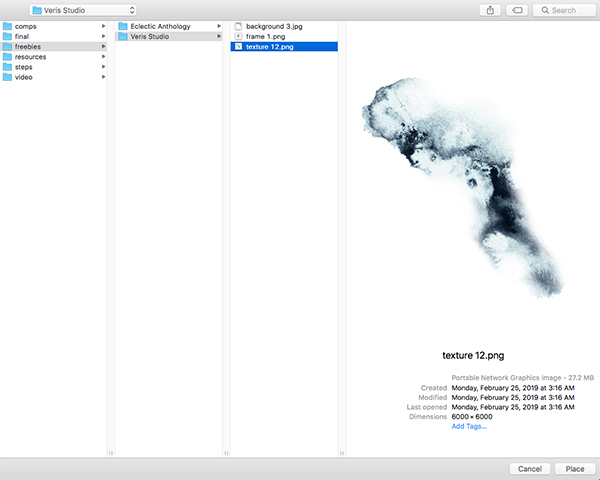
Return to the File menu and choose ‘Place Embedded…’ again, this time selecting the ‘texture 12.png’ file in the same ‘Veris Studio’ subfolder.
Place this texture at the top and scale and rotate it as shown below before applying the transformation changes:

Step 5: Marble Group
Select the top marble texture, then hold the Shift key and select the second texture just below so both of them are selected simultaneously.
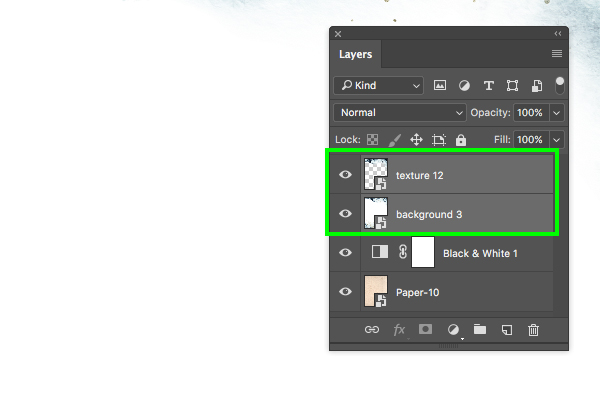
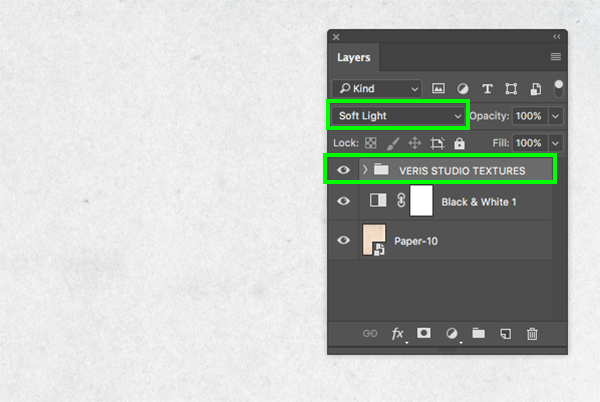
With both layers selected, press Command/Ctrl+G to put them into a new folder and double click the ‘Group 1’ text to rename this folder ‘VERIS STUDIO TEXTURES’ and then change the Blend Mode of the whole folder to ‘Soft Light’ as shown here:
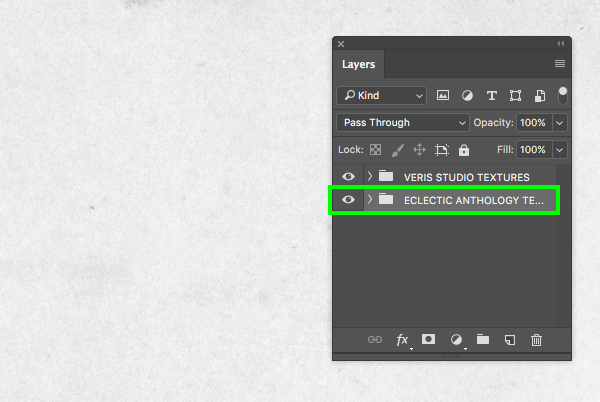
While we are at it, let’s also select the bottom paper texture and the Black & White Adjustment Layer and also place them into a folder called ‘ECLECTIC ANTHOLOGY TEXTURE’ to keep things neat and organized.
Step 6: Slab Texture
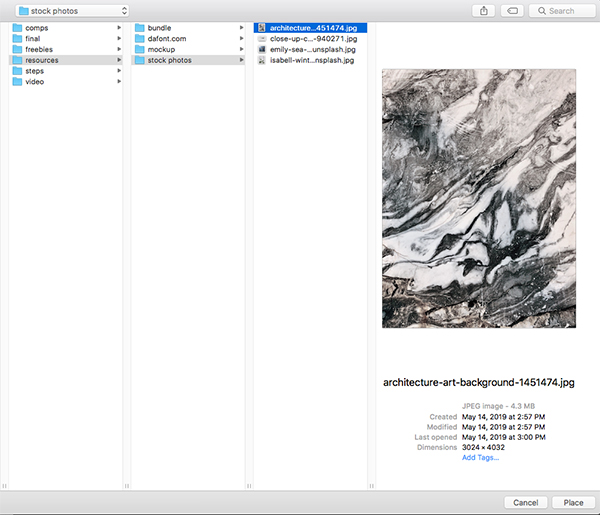
Next, download the free stock image of the stone slab texture and save it in a folder with your other resources for the tutorial. Once you have saved the image, return to Photoshop and go to the File menu and choose ‘Place Embedded…’ once again.
Next, navigate to the folder where your stone slab image is saved and then select the image and choose ‘Place’ from the bottom right.
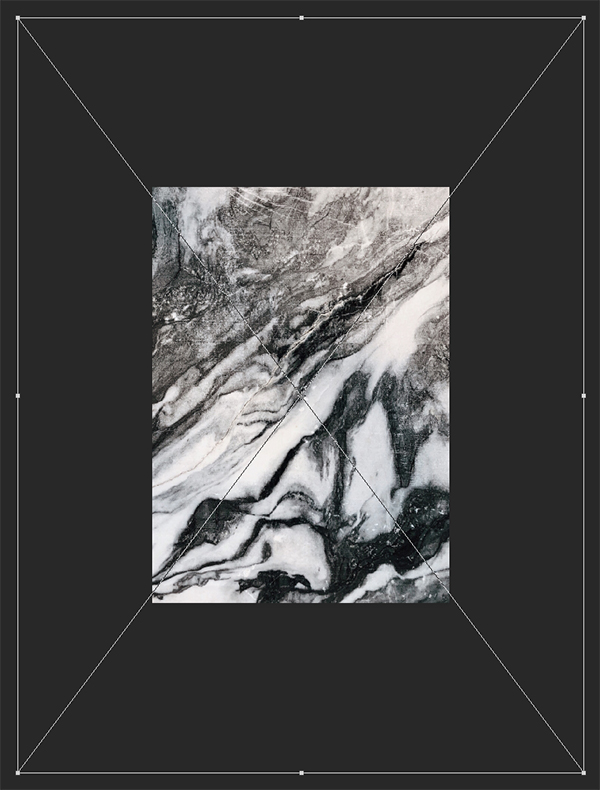
After bringing in the slab texture, hold the Alt/Option+Shift keys and drag outwards from any of the four corners of the bounding box to scale it way up. Use the image below as reference for the size of the texture:
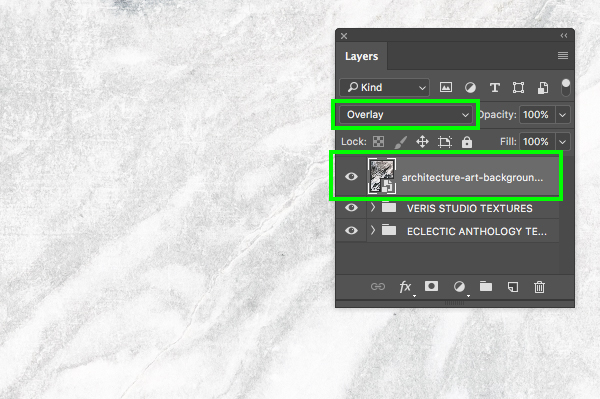
Once you’ve placed the texture at the top of the Layers Palette above the two group folders, change the Blend Mode from ‘Normal’ to ‘Overlay’.
Step 7: Color Adjustment Layer 1
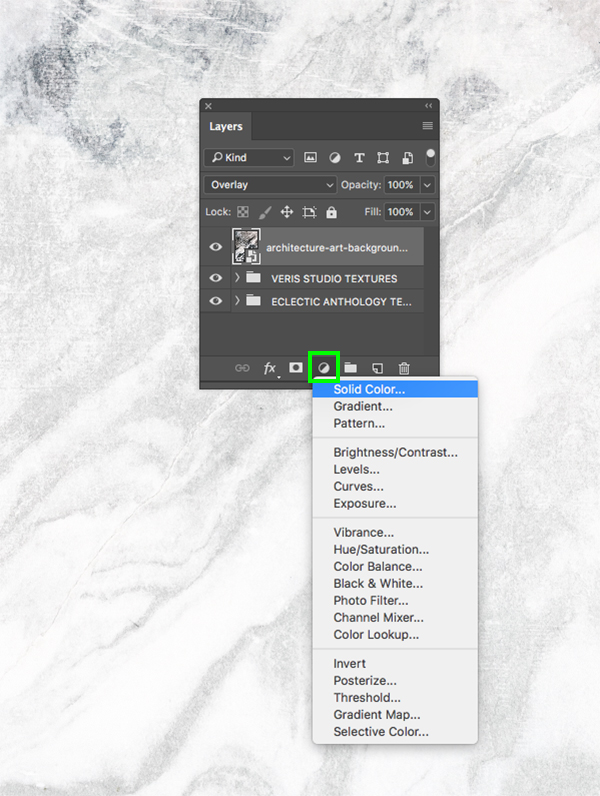
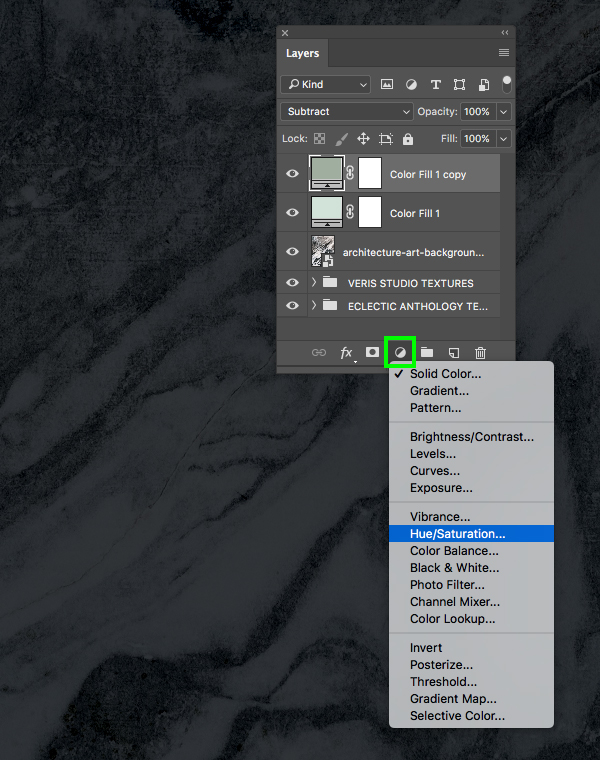
With the stone slab texture selected, click on the Adjustment Layer icon at the bottom of the Layers Palette and then choose ‘Solid Color…’ from the dropdown.
For the fill, let’s use the hex value ‘#D1E3D9’ and then click ‘OK’ or press ‘Return’ on the keyboard to apply the changes.
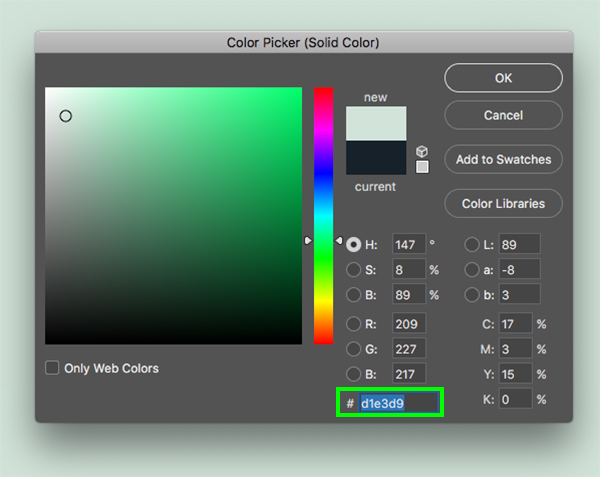
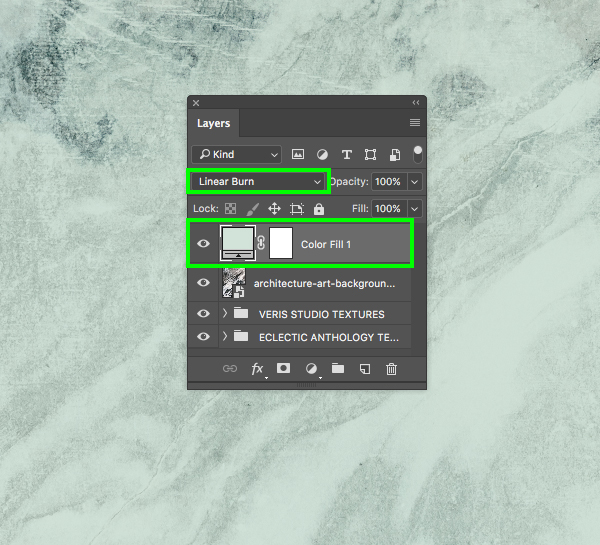
From here, change the Blend Mode of the ‘Color Fill 1’ layer from ‘Normal’ to ‘Linear Burn’.
Step 8: Color Adjustment Layer 2
Select the ‘Color Fill 1’ Adjustment Layer and then press Command/Ctrl+J to duplicate it.
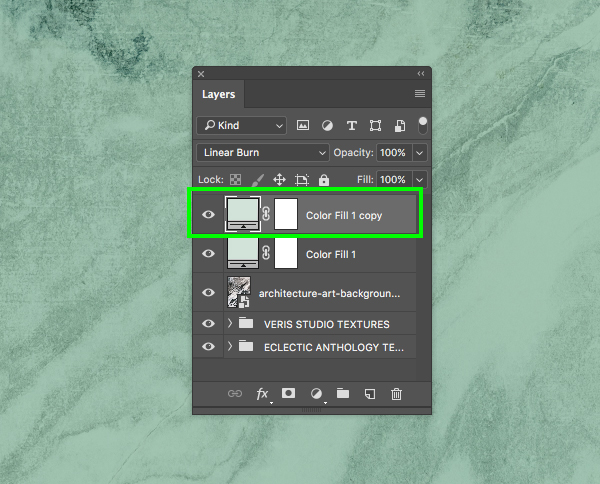
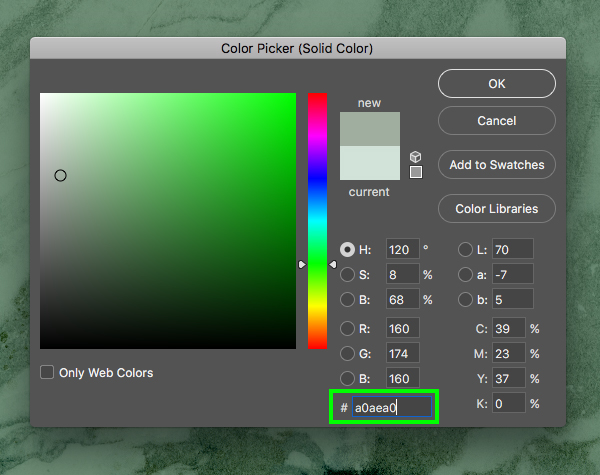
Click on the color swatch to open the ‘Color Picker’ and change the fill of this new copy to the hex value ‘#A0AEA0’ and then click ‘OK’ or press ‘Return’ to apply the changes.
Next, change the Blend Mode of this layer to ‘Subtract’.

Step 9: Hue/Saturation Adjustment Layer
With the very top layer in your Layers Palette selected, return to the Adjustment Layer icon at the bottom and choose ‘Hue/Saturation…’ from the list.
In the Properties panel, change the ‘Hue’ to ‘187’ and then move the ‘Saturation’ slider to ’25’ as shown below:

Step 10: Consolidation
Next, select the ‘Hue/Saturation 1’ Adjustment Layer at the top of your Layers Palette, and then hold the Shift key and select the ‘ECLECTIC ANTHOLOGY TEXTURE’ folder at the very bottom so all of your layers and folders are selected together.

With everything selected, press Command/Ctrl+G to place all of your elements into a new folder and double click the ‘Group 1’ text to rename this folder ‘BACKGROUND’.

Step 11: Designer Frame
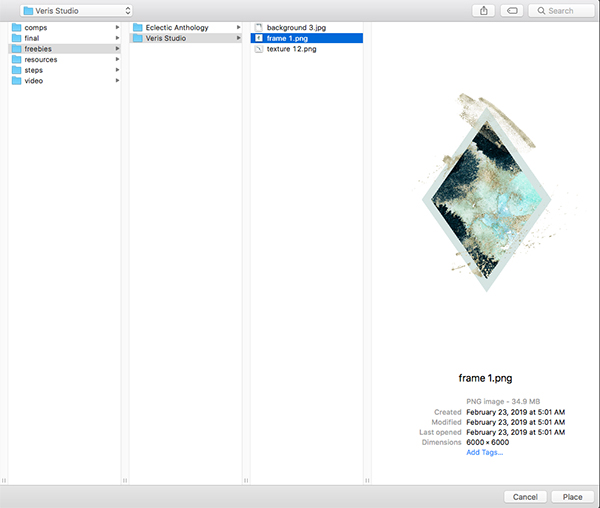
Next, go to the File menu and choose ‘Place Embedded…’ once again. From here, navigate to the ‘Veris Studio’ subfolder and then choose the ‘frame 1.png’ file before clicking ‘Place’ from the lower right.
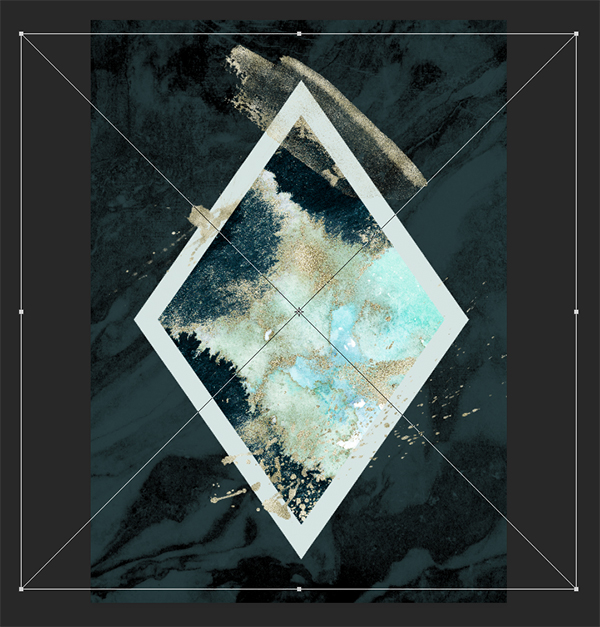
Once you’ve brought the frame into your composition, hold the Alt/Option+Shift keys and drag outwards from any of the four corners to scale it so that it matches the size and positioning of the image below:
Step 12: Plant Life
We now need to download the next free stock image and then saving the image with your other stock photos for the tutorial. Once you have done that, go to Photoshop and choose File > Open and then select the image to bring it into Photoshop.

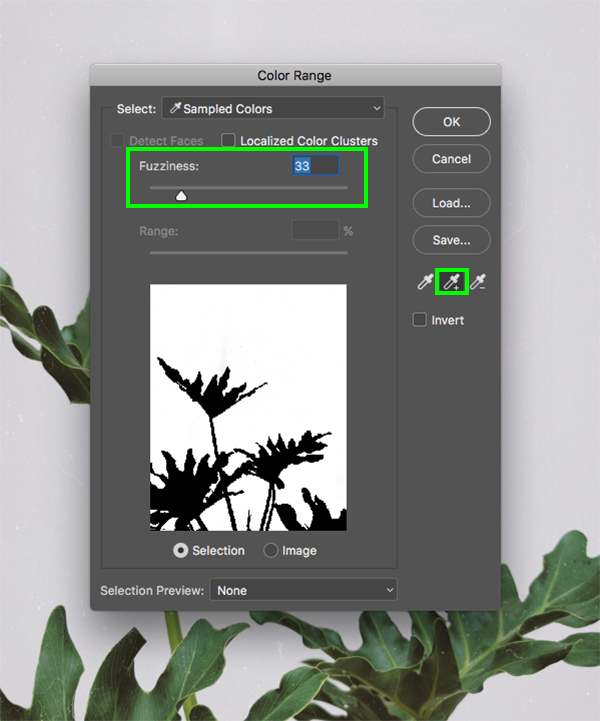
Now we will need to separate the plants from the background so to do this go to the Select menu and choose ‘Color Range…’ from the dropdown.

This is a great method for isolating subjects from their backgrounds that works particularly well when there is sufficient contrast between the colors in the foreground and background. You should see the ‘Color Range’ dialog box where all we need to do is select the middle eyedropper with the small plus symbol next to it and then begin clicking on your image and selecting all of the background colors. You can continue clicking any areas of the background to continue adding to your selection until you are left with a solid black and white image where the plants are all black and everything else is in white. Once you have done that, click ‘OK’ or press ‘Return’ on the keyboard to continue.
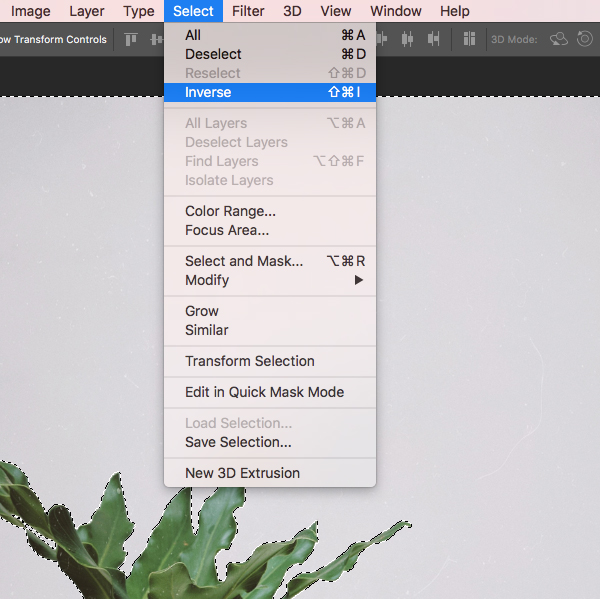
Once your selection is active, go to the Select menu and choose ‘Inverse’ from the dropdown to invert the selection.
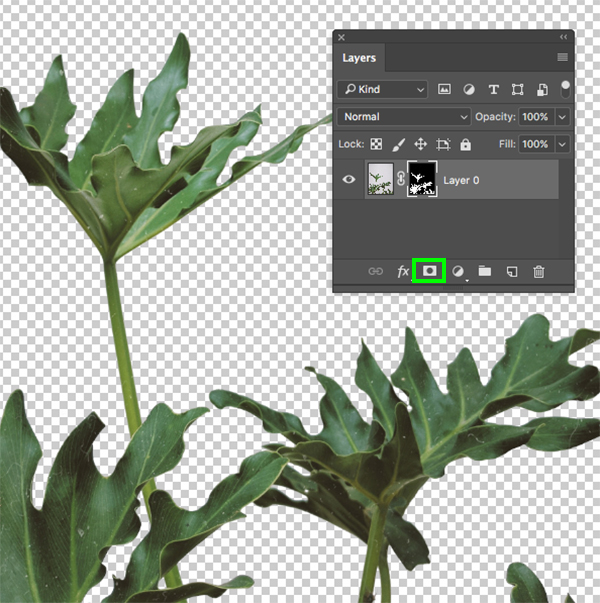
After inverting the selection, simply click on the ‘Add layer mask’ icon at the bottom of the Layers Palette and voila! Your background is now gone and you are just left with the plants.
Next, hold the Control key and click on the isolated plant layer and then choose the ‘Convert to Smart Object’ option as shown here:

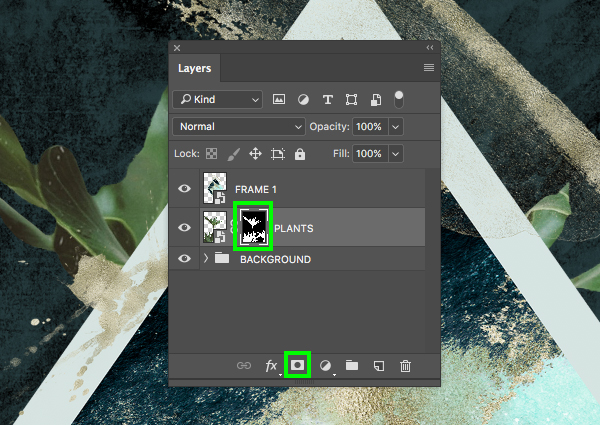
Now that we’ve isolated the plants and converted them let’s rename the layer ‘PLANTS’ and then drag the layer into the main document, positioning them below the frame like this:

Step 13: Refining The Plants
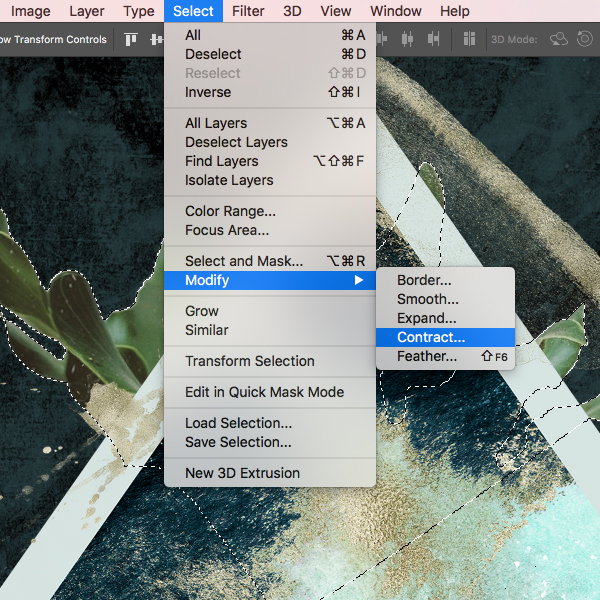
After scaling and positioning the plants beneath the frame, hold the Command/Ctrl key and click on the layer thumbnail icon of the ‘PLANTS’ Smart Object layer to activate a selection around it.

From here, go to the Select menu and choose ‘Modify > Contract…’.
For the amount, enter a value of ‘5’ pixels and then click ‘OK’ to continue.
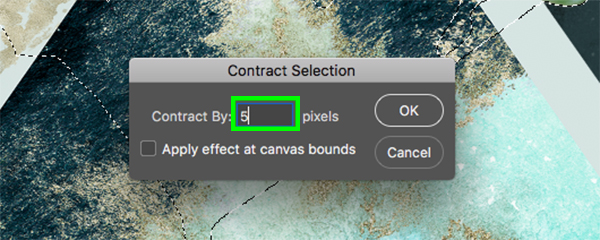
We have now brought in our selection by 5 pixels so that we can get rid of any white edges that were left around the plants. All we need to do now is click on the ‘Add layer mask’ icon at the bottom of the Layers Palette to apply a new instance of a mask to the Smart Object.
Step 14: Plant Adjustments 1
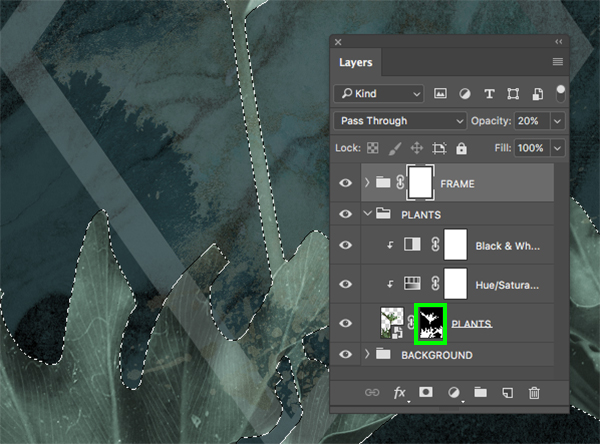
With the ‘PLANTS’ Smart Object layer selected, hold the Alt/Option key and click on the Adjustment Layer icon at the bottom of the Layers Palette before choosing ‘Black & White…’ from the dropdown.
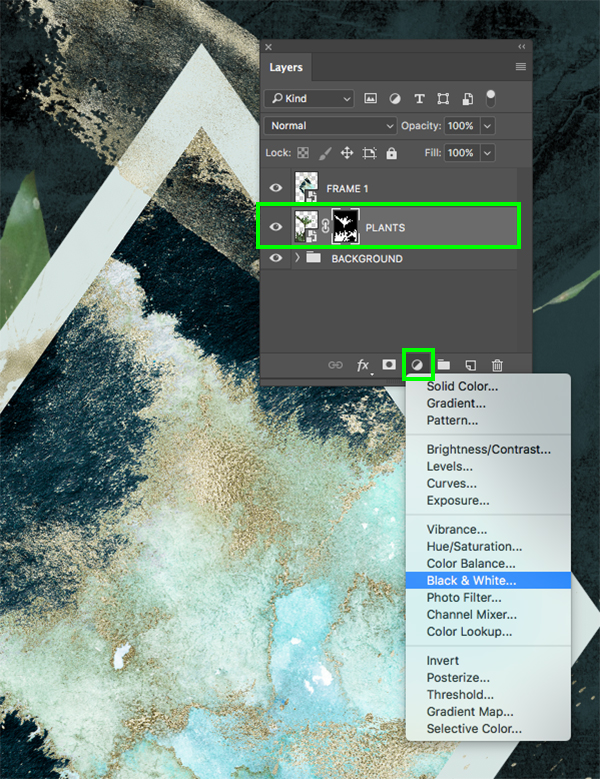
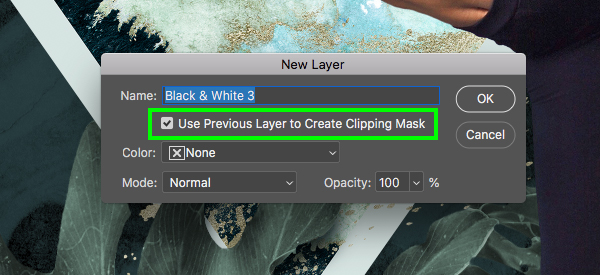
Next, check off the ‘Use Previous Layer to Create Clipping Mask’ option and then click ‘OK’ to proceed.

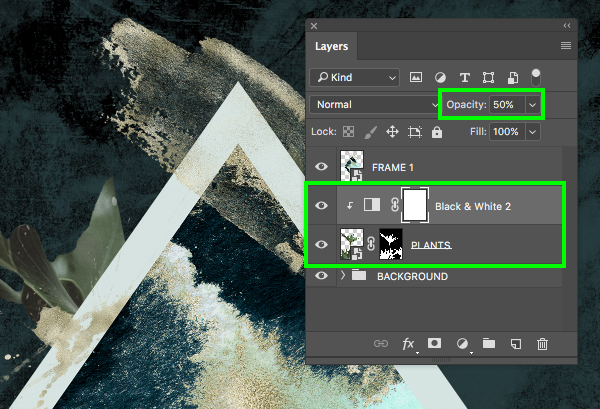
Once you’ve applied the Adjustment Layer with a Clipping Mask, select the Adjustment Layer and reduce the opacity to ‘50%’ as shown below:
Step 15: Plant Adjustments 2
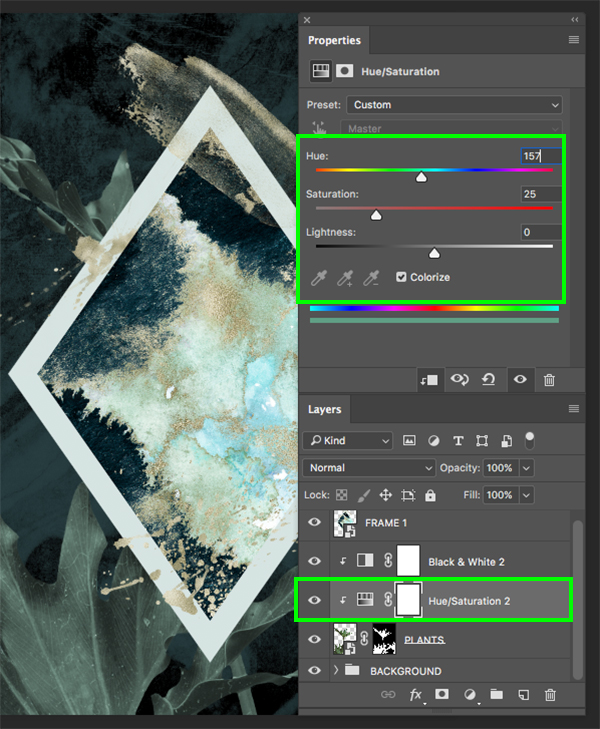
Select the ‘PLANTS’ Smart Object and then return to the Adjustment Layer icon at the bottom once again. This time, let’s choose ‘Hue/Saturation…’ from the list that appears.
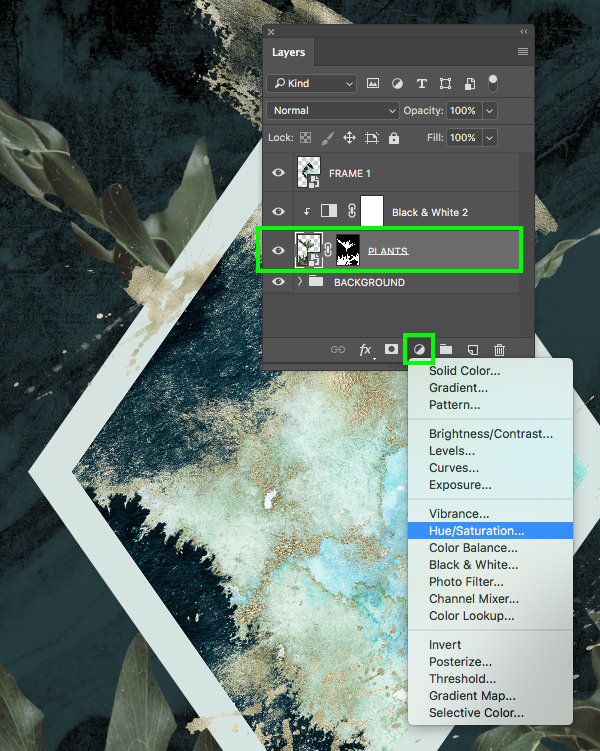
In the Properties panel, check off the ‘Colorize’ box and then move the ‘Hue’ to ‘157’ and the ‘Saturation’ to ’25’ like this:
Step 16: Plant Folder
Next, select the ‘PLANTS’ Smart Object, hold the Shift key, and then select the ‘Black & White 2’ Adjustment Layer so that all three of these layers are selected together.
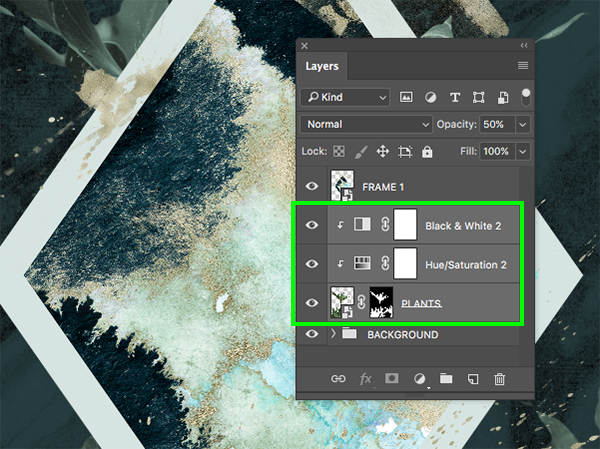
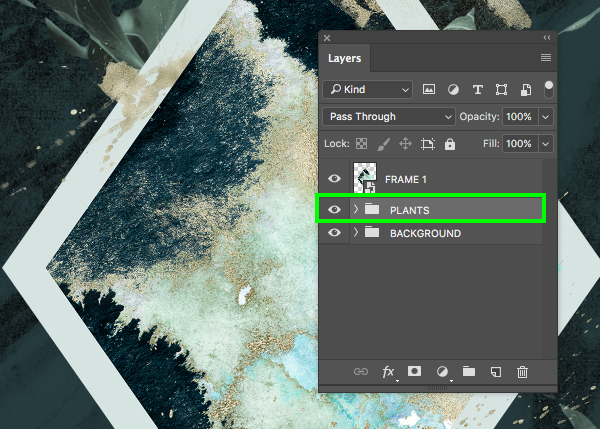
With these three layers still selected, press Command/Ctrl+G to place them into a new folder and double click the ‘Group 1’ text to rename the folder ‘PLANTS’.
Step 17: Frame Folder
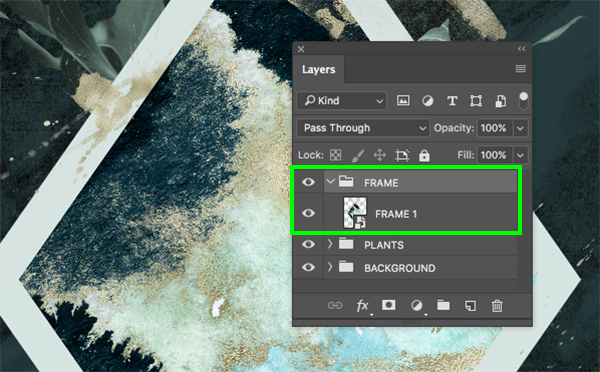
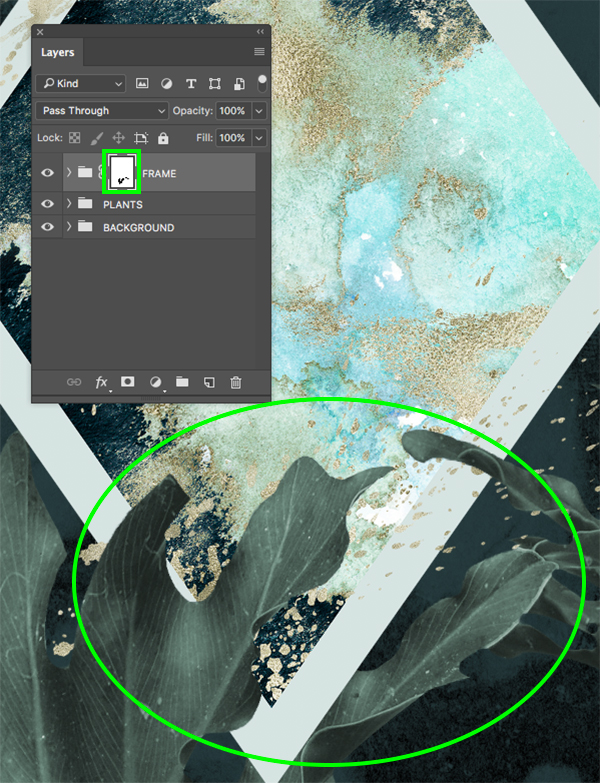
Select the ‘FRAME 1’ Smart Object and then press Command/Ctrl+G to place this layer into a new folder and then rename it ‘FRAME’.
With the ‘FRAME’ folder selected, press ‘2’ on the keyboard to reduce the opacity to ‘20%’ and then click the ‘Add layer mask’ icon from the bottom of the Layers Palette to apply a mask to the group folder.

Select the mask attached to the ‘FRAME’ folder and then expand the contents of the ‘PLANTS’ folder to reveal the main ‘PLANTS’ Smart Object inside. With the ‘FRAME’ mask still selected, hold the Command/Ctrl key and click the layer mask thumbnail icon of the ‘PLANTS’ Smart Object to activate a selection around it.
Press ‘B’ to switch to the Brush Tool and use a solid black brush to brush into the ‘FRAME’ layer mask going over some of the bottom leaves of the plant so that they overlap the frame. Here we should be mindful of the areas we are brushing but if you mess up simply change your foreground color to white and brush over the parts of the image that you want to bring back. Having the opacity of the frame set to a lower value will also help with this so you can see the plant through the frame. Once you are happy with the way things are looking, bring the opacity of the ‘FRAME’ folder back up to ‘100%’ opacity. You should now have something like this:
Step 18: Plant Shadows
Now that we’ve brought some of the leaves in front of the frame, let’s apply a shadow to create some depth and realism in the scene. To start, hold the Command/Ctrl key and click on the layer mask thumbnail icon of the mask attached to the ‘FRAME’ folder. This will activate a selection around the parts of the leaves that are coming in front of the frame.

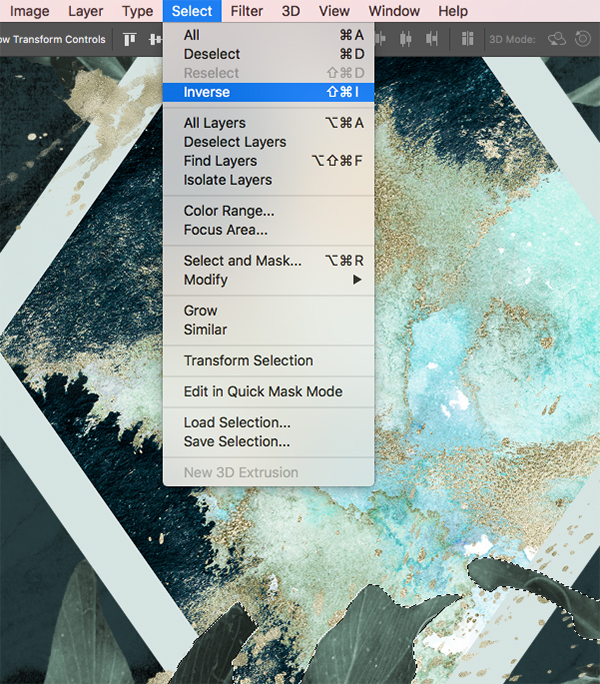
With your selection active, go to the Select menu and choose ‘Inverse’ from the menu to invert the selection.
Add a new layer to the top of your Layers Palette and then change your foreground color to the hex value ‘#223134’ and then press ‘Return’ or click ‘OK’ to continue. From here, simply press Alt/Option+Delete on the keyboard to fill the selection with this color on the new layer.

Now that we’ve filled the new layer with our dark blue/green color, double click the layer name and rename it ‘PLANT SHADOW’ as shown here:

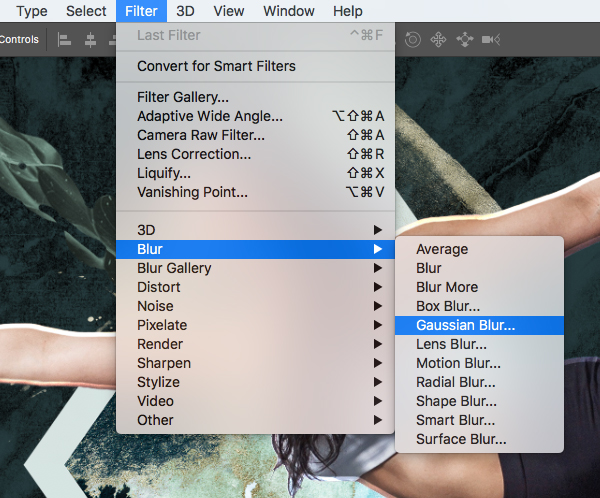
Select the ‘PLANT SHADOW’ layer and then go to the Filter menu and choose ‘Blur > Gaussian Blur…’ from the list.
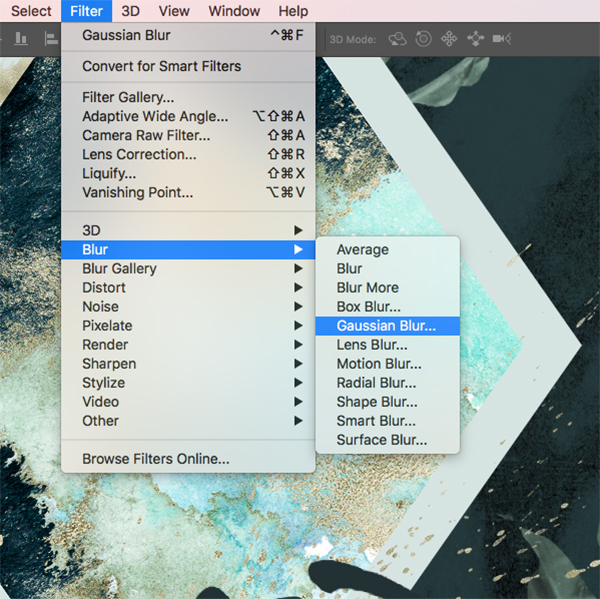
For the blur amount, enter a ‘Radius’ value of ‘17.6’ pixels and then click ‘OK’ to apply the effect.

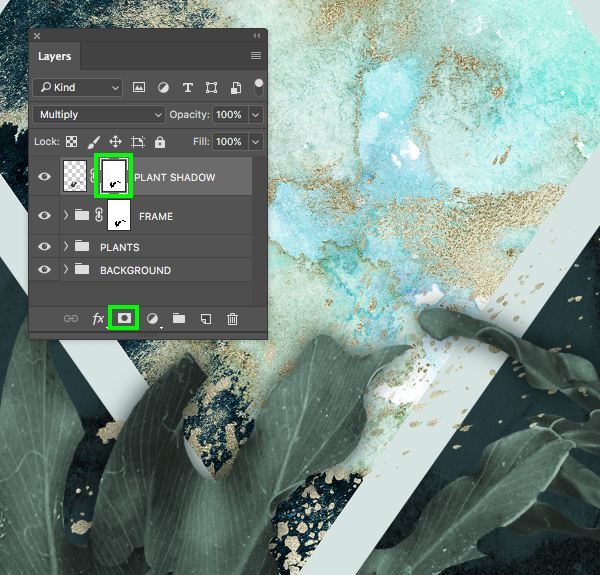
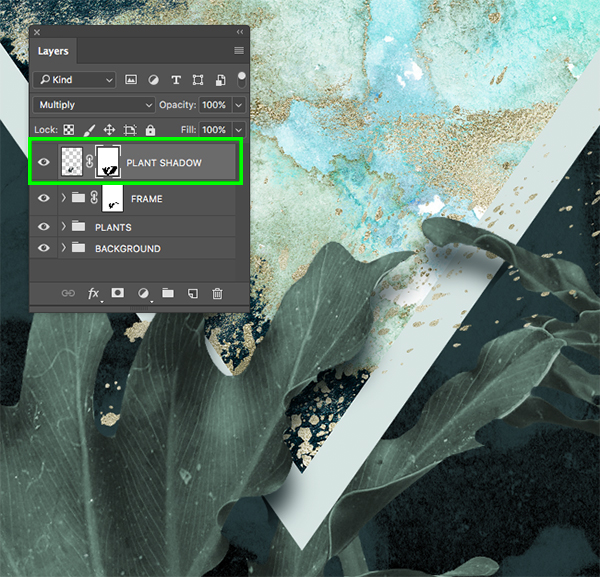
After applying the blur, let’s change the Blend Mode of the ‘PLANT SHADOW’ layer to ‘Multiply’. From here, hold the Command/Ctrl key and click the layer mask thumbnail of the ‘FRAME’ mask to activate a selection around it while making sure that your ‘PLANT SHADOW’ layer is still selected in the Layers Palette.

Next, with your selection active and the ‘PLANT SHADOW’ layer selected, click the ‘Add layer mask’ icon to apply a new mask to the ‘PLANT SHADOW’ layer. You should now have the same mask applied to the ‘PLANT SHADOW’ layer that we have for the ‘FRAME’ folder.
From here, click on the small link between the layer and the mask on the ‘PLANT SHADOW’ layer – this will allow us to move the layer around independently from the mask. Let’s select the layer itself and tap it down so that the shadow is offset and lower than the actual leaves of the plant. After that, use the solid black brush once again to clean up any of the shadow areas that have spilled outside of the frame. In the image below I have highlighted these areas so you can see the parts that need some cleaning up.
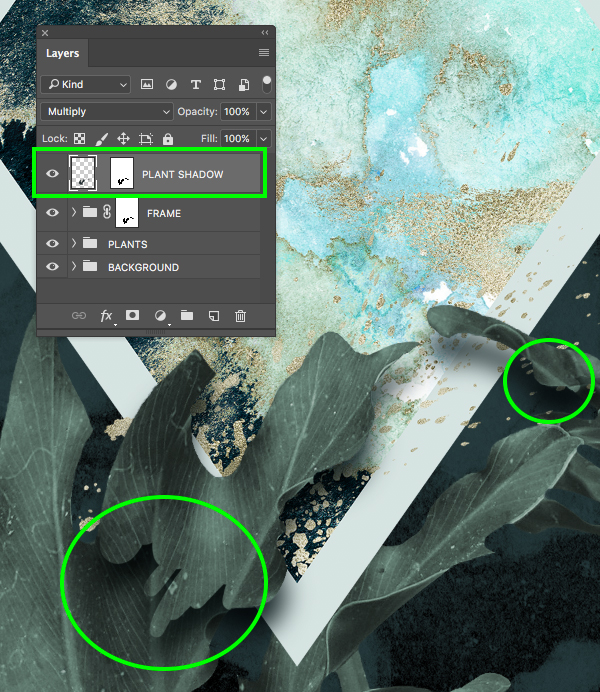
You should now be left with a clean selection so that your ‘PLANT SHADOW’ only appears below the leaves that are overlapping the frame.
Step 19: Wellness
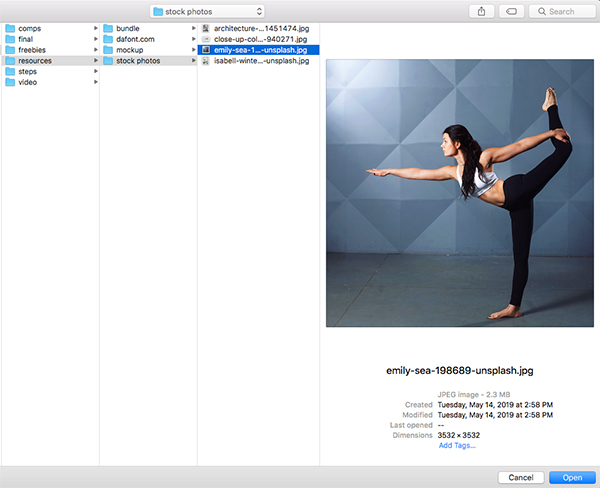
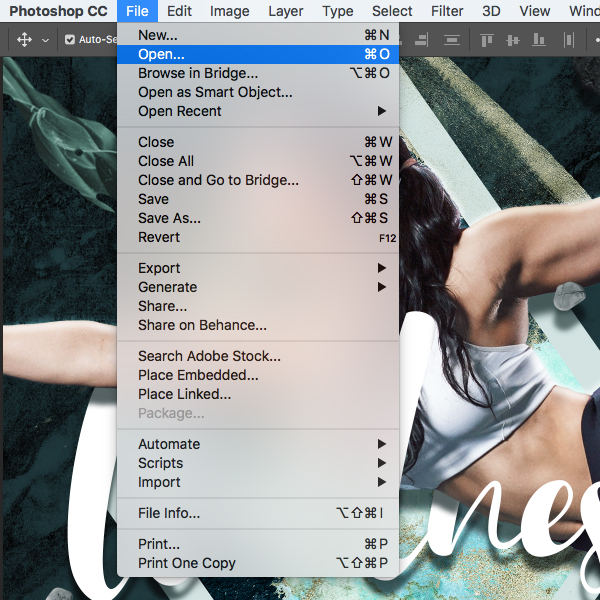
Next, download this free stock photo and save it with the other images we have downloaded thus far for the tutorial. After that, return to Photoshop and go to the File menu before choosing ‘Open…’ and then navigating to the photo and choosing ‘Open’ from the bottom right corner.
After opening the photo of the woman stretching, press ‘W’ to switch to the Magic Wand Tool and then set the tolerance to somewhere around ’32’ and begin clicking on the background. Hold the Shift key and continue clicking to select the background and if you mess up at any point or select part of the woman by accident you can simply press Command/Ctrl+Z to undo it and go back before trying again. Another good selection tip is that if you want to add to your selection and grab some of the smaller pieces that you may miss with the wand, hold the Shift key and tap ‘L’ to switch to the Lasso Tool and then freehand it by clicking and dragging around the areas you want to add to your selection.
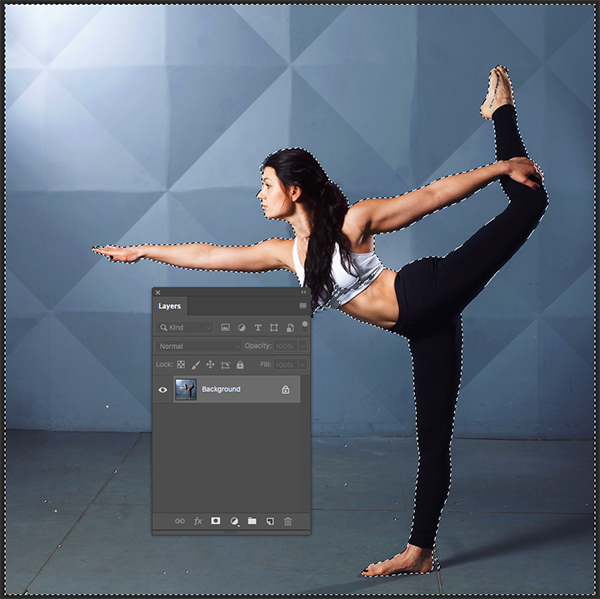
After using a combination of the Magic Wand Tool (W) and the Lasso Tool (L) you should have a pretty clean looking selection as shown here:

Press Command/Ctrl+Shift+I to invert your selection and then click the ‘Add layer mask’ icon from the bottom of the Layers Palette and you should now have something like this:

From here, let’s click and drag the masked layer into our main Photoshop document and place it at the top of our Layers Palette. Let’s position and size the woman similar to how I have it set up here:

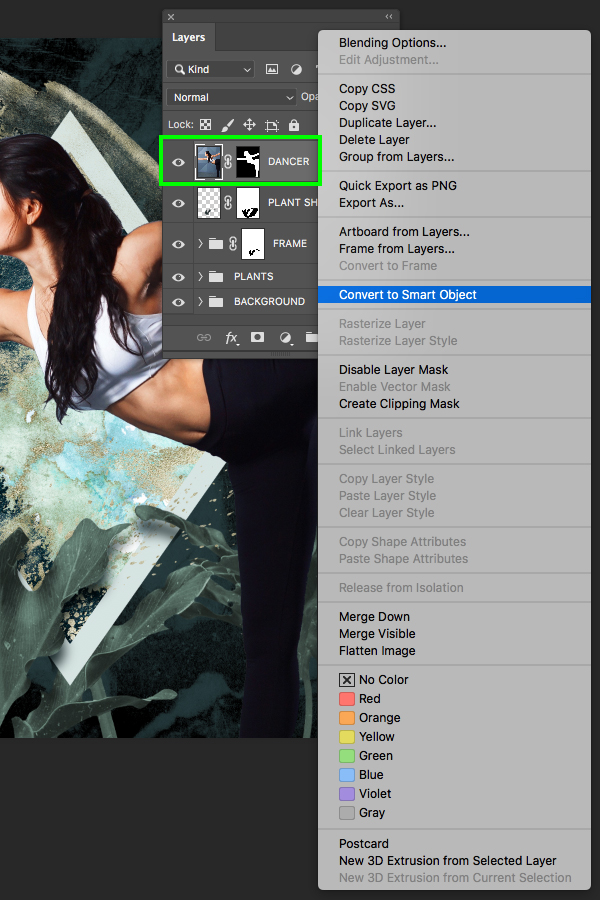
After scaling and positioning the woman let’s hold the Control key and click on the layer before choosing ‘Convert to Smart Object’ from the dropdown menu.
Step 20: Refining The Selection
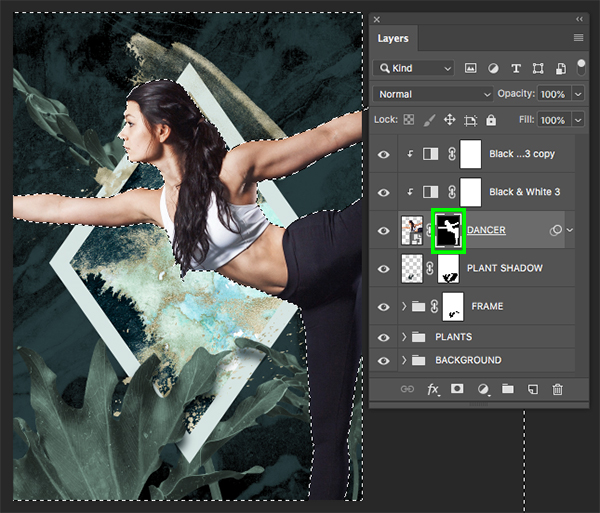
After converting the layer into a Smart Object, double click on the layer name and rename it ‘DANCER’ or any other name of your choosing. Click on the ‘Add layer mask’ icon to add a new mask to the layer. Once you’ve done that, hold the Command/Ctrl key and click on the layer thumbnail icon of the layer to activate a selection around it.

With your selection still active, go to the Select menu and choose ‘Modify > Contract…’ from the menu so we can bring our selection in by a few pixels.

Enter a value of ‘1’ for the number of pixels and click ‘OK’ or press ‘Return’ on the keyboard to continue.

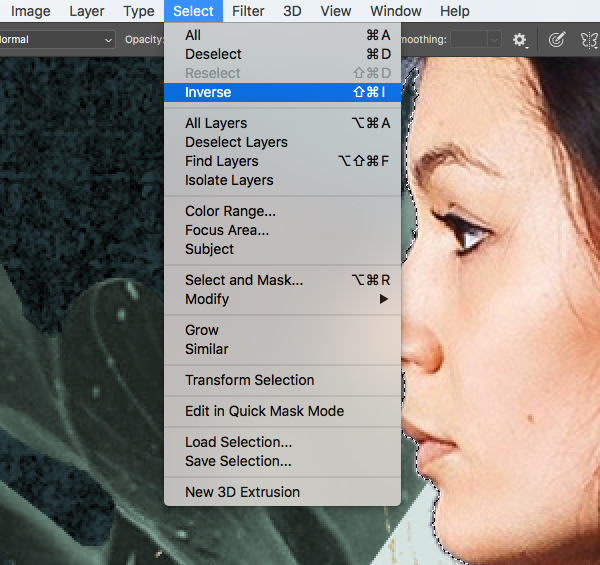
After we bring in the selection, let’s go back to the Select menu and choose ‘Inverse’ or press Command/Ctrl+Shift+I on the keyboard.
With solid black as your foreground color, press Alt/Option+Delete on the keyboard while the mask is selected and you should now have a cleaner selection around the woman.
Step 21: Refining The Selection
With the ‘DANCER’ layer selected, go to the ‘Image’ menu and choose ‘Adjustments > Shadows/Highlights…’ from the menu.
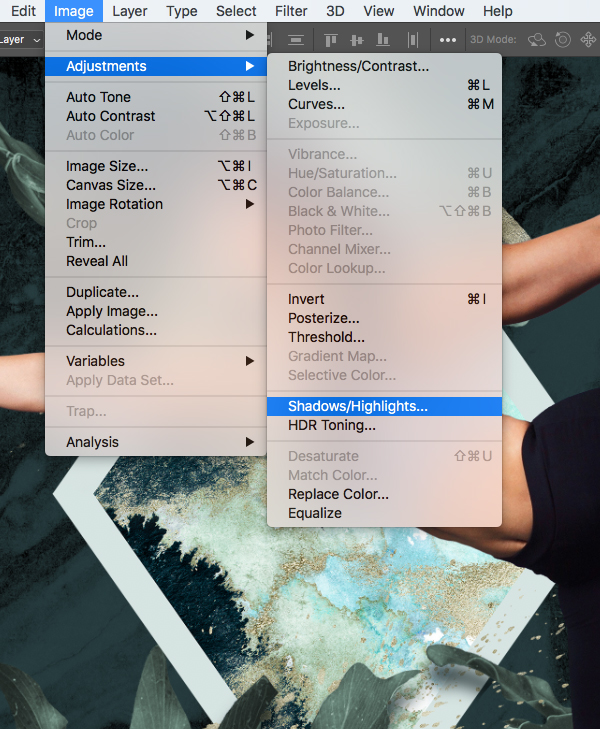
For the settings, we will only be adjusting the top section under the ‘Shadows’ by applying an ‘Amount’ of ’35’, a ‘Tone’ of ’50’ and a ‘Radius’ of about ’30’ which will help bring out some of the details in the darkest parts of the image. Once you have applied those settings, press ‘Return’ on the keyboard or click ‘OK’ to proceed.

Step 22: Dancer Adjustments
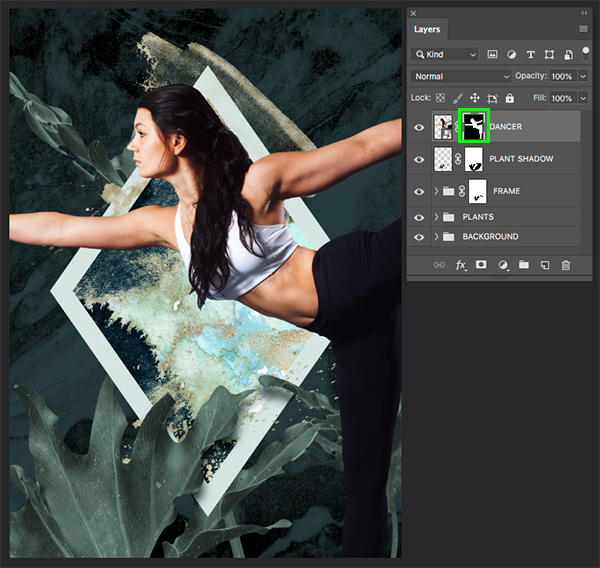
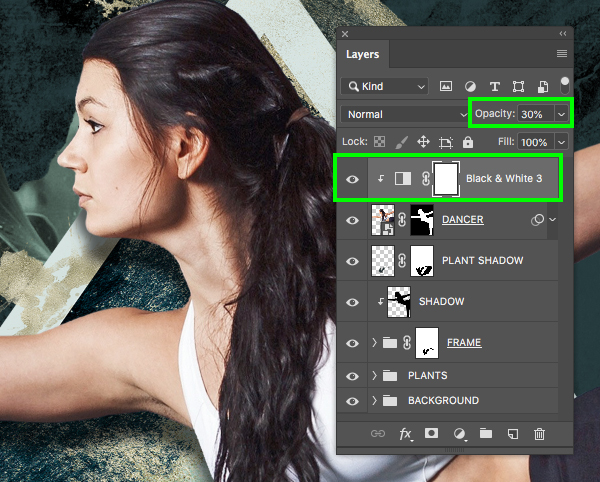
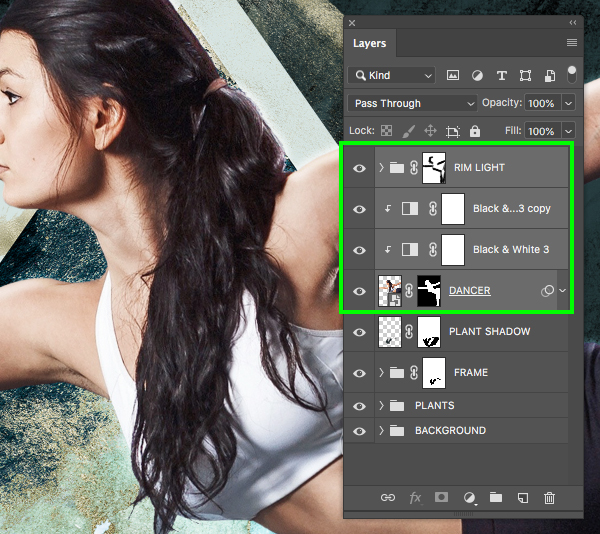
Select the ‘DANCER’ layer and then hold the Alt/Option key and click on the Adjustment Layer icon at the bottom of the Layers Palette. From the menu that appears choose ‘Black & White…’ as shown in the image below:

When prompted with the following dialog box, check off the ‘Use Previous Layer to Create Clipping Mask’ option and then click ‘OK’ to continue.
Now that we’ve applied the Adjustment Layer with a Clipping Mask, press the number ‘3’ on the keyboard to reduce the opacity of the Adjustment Layer to ‘30%’.
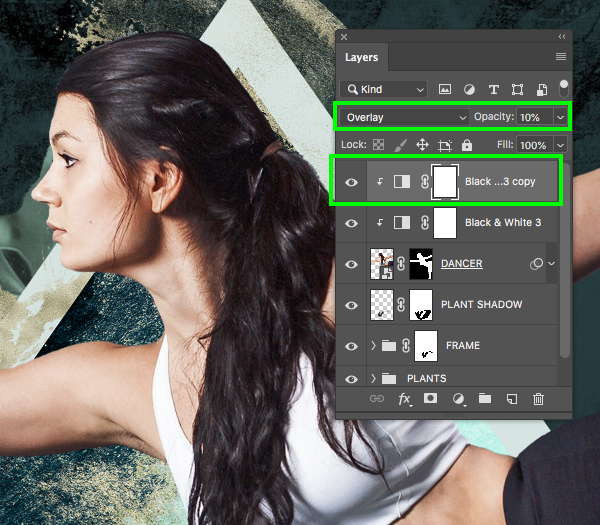
Select the ‘Black & White 3’ Adjustment Layer and then press Command/Ctrl+J to duplicate it. When this happens you will duplicate the layer but it will most likely no longer have the Clipping Mask meaning it will be affecting the entire image as opposed to just the layer that it’s clipped to. To rectify this, let’s use the keyboard shortcut Command/Ctrl and the left bracket to move the layer down one spot. When you do this it should automatically regain the Clipping Mask and move below the original Black & White Adjustment Layer. Let’s then press Command/Ctrl and the right bracket to move it up one spot so that it is now above the original Adjustment Layer. Change the Blend Mode of the duplicate Black & White Adjustment Layer to ‘Overlay’ and press ‘1’ to reduce the opacity to ‘10%’.
Step 23: Edge Light
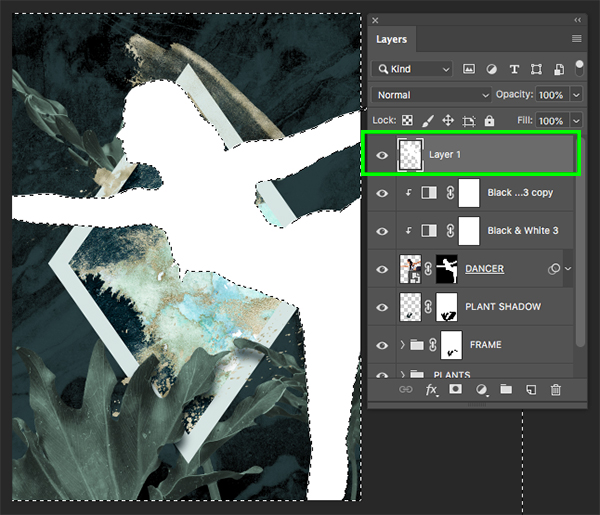
Hold the Command/Ctrl key and click on the layer thumbnail icon of the ‘DANCER’ mask to activate a selection around the woman.
Create a new layer at the top of the Layers Palette and then press ‘D’ on the keyboard to reset your default colors. From here, use the ‘X’ key to toggle back and forth between black and white until white is your foreground color and then press Alt/Option+Delete to fill the new layer with solid white.
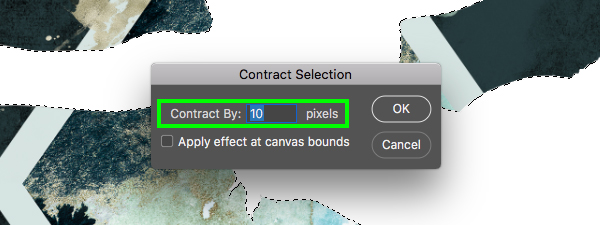
Go to the Select menu and then choose ‘Modify > Contract…’ from the dropdown menu that appears.

For the settings, enter a value of ’10’ for the pixels and then click ‘OK’ or press ‘Return’ on the keyboard to continue.
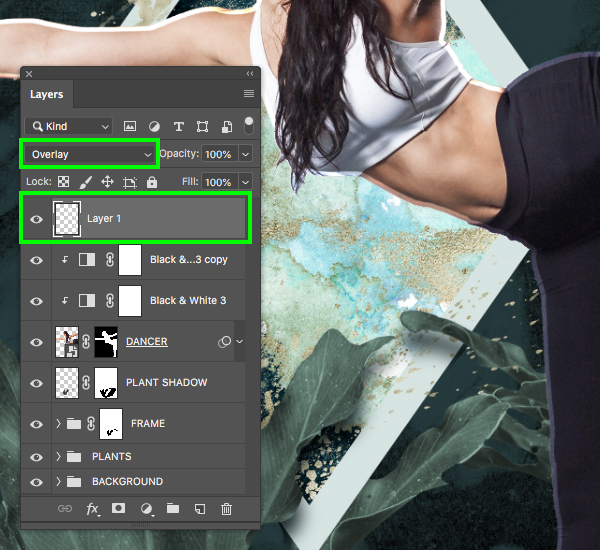
With the new layer filled with solid white still selected, press ‘Delete’ to get rid of everything from 10 pixels from the edge inwards, leaving you with a white outline around the dancer. After that, change the Blend Mode of the layer from ‘Normal’ to ‘Overlay’ to tone it down and blend it with the image a bit better.
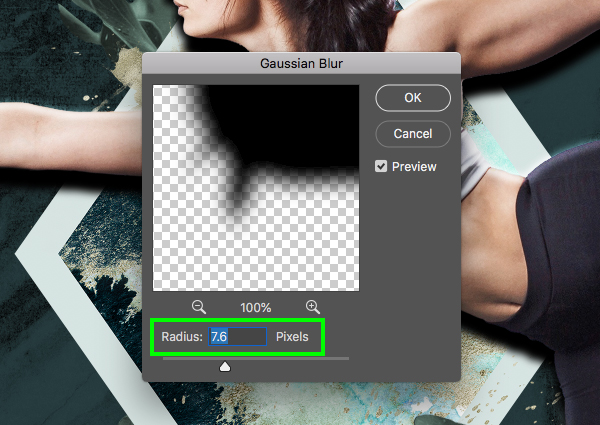
With the outline layer still selected, go to the Filter menu and choose ‘Blur > Gaussian Blur…’ as shown below:
Enter a ‘Radius’ value of about ‘7.6’ pixels and then click ‘OK’ to apply the effect and soften the lines resulting in a softer and more diffused outline.

Step 24: Painting With Light
After blurring the outline layer, select it and press Command/Ctrl+J to duplicate the layer and intensify the outer light effect. From here, select the top layer, hold the Shift key and select the original copy below so that both layers are selected at the same time.
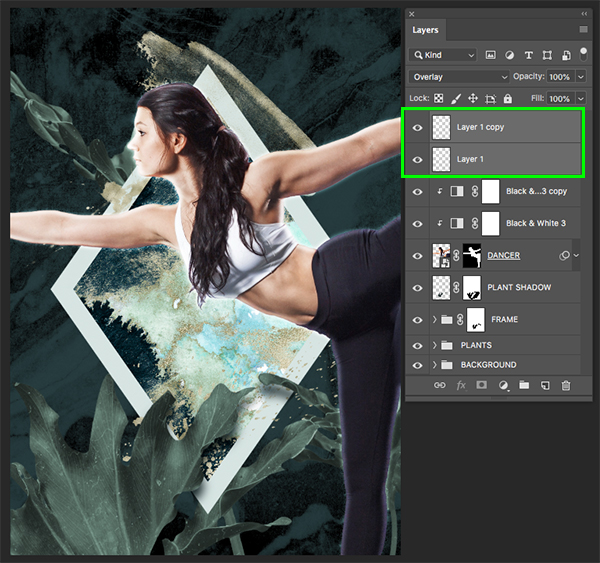
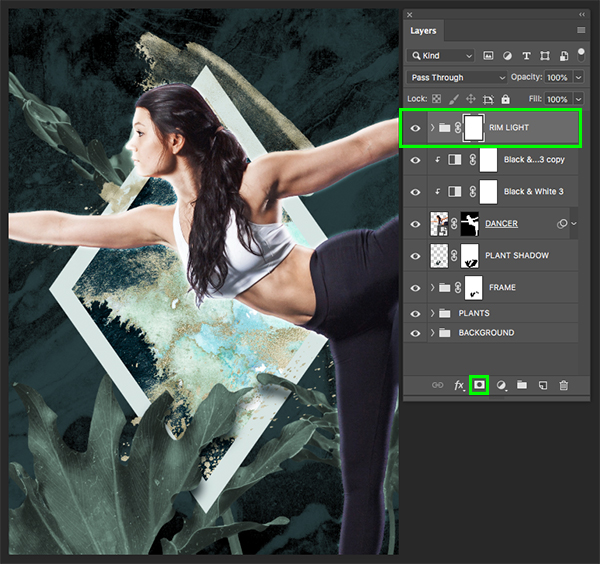
Press Command/Ctrl+G to place the two layers into a folder and double click the ‘Group 1’ text to rename it ‘RIM LIGHT’. Once you’ve renamed the layer, click on the ‘Add layer ask’ icon from the bottom of the Layers Palette to apply a mask to the whole folder.
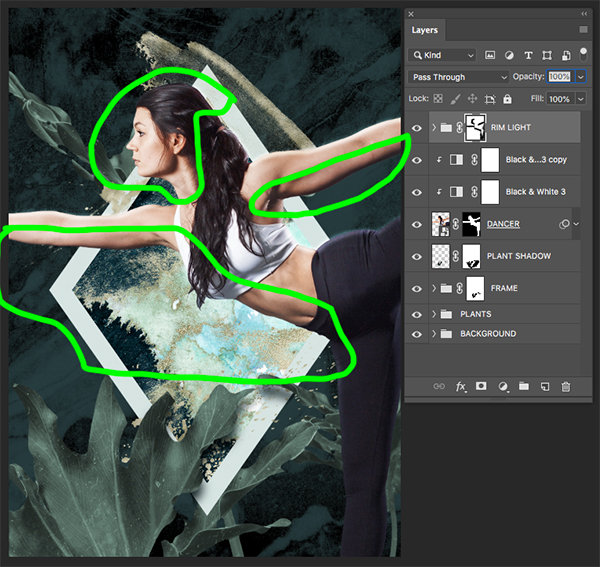
Press ‘B’ to switch to the Brush Tool and then hold the Shift key and the left bracket on the keyboard to create a soft edged brush. Set the size of the brush to about ‘125’ by using the bracket keys on the keyboard to modify the brush size. After you’ve changed the size and hardness of the brush, lower the opacity to about ‘50%’ by pressing ‘5’ on the keyboard and then make sure your foreground color is set to solid black.

Begin brushing over the parts of the dancer that are facing down since the original light source in the image appears to be coming from the top. Here we want to brush the bottom of both of the arms, the chest and ribs, and maybe some of the leg and around the face a bit. Doing this will leave the edge light only around the areas where the light naturally occurs, resulting in a more realistic look and feel.
Step 25: Groups On Groups
Select the top ‘RIM LIGHT’ folder, hold the Shift key, and then click on the ‘DANCER’ Smart Object layer so that those two layers and all of the layers between are selected at the same time.
Press Command/Ctrl+G to place the two layers into a folder and double click the ‘Group 1’ text to rename it ‘WOMAN’ or something similar to keep things simple and organized.

Step 26: Adding More Depth
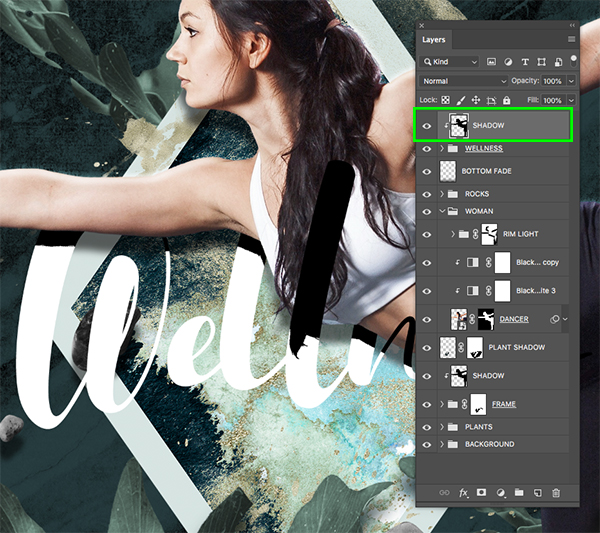
With the newly created ‘WOMAN’ folder selected, press Command/Ctrl+J to duplicate it, and then Command/Ctrl+E to merge the contents of the folder into a single layer.
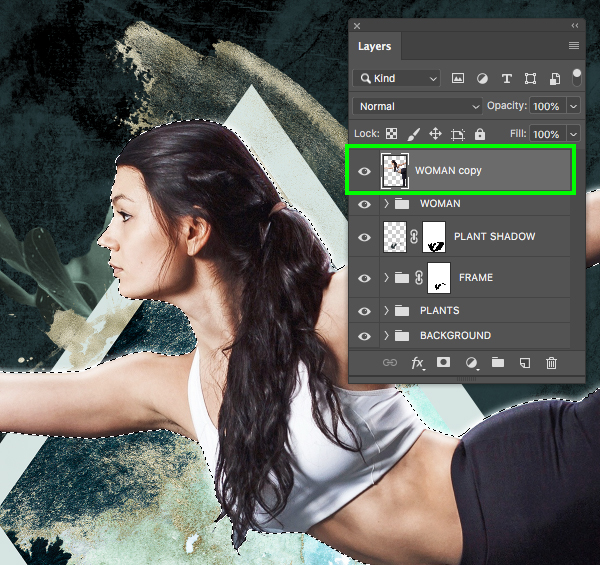
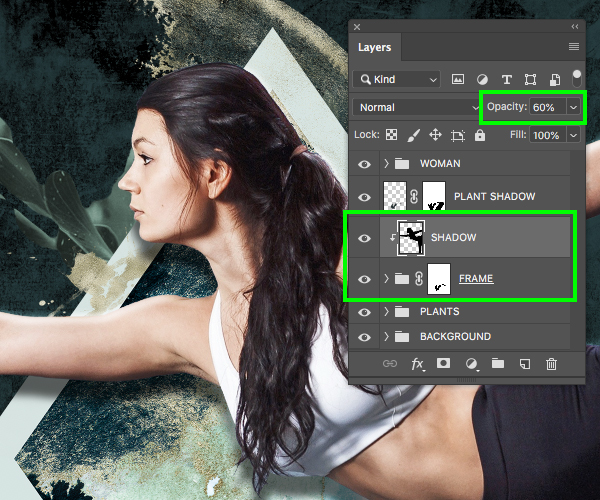
Double click on the layer name to rename the layer ‘SHADOW’ and then move it down so that it’s just above the ‘FRAME’ folder. Next, make sure you have a solid black foreground color selected and press Alt/Option+Delete on the keyboard to fill the selection with black, and then hold the Shift key and tap it down four or five times. You should now have something like this:
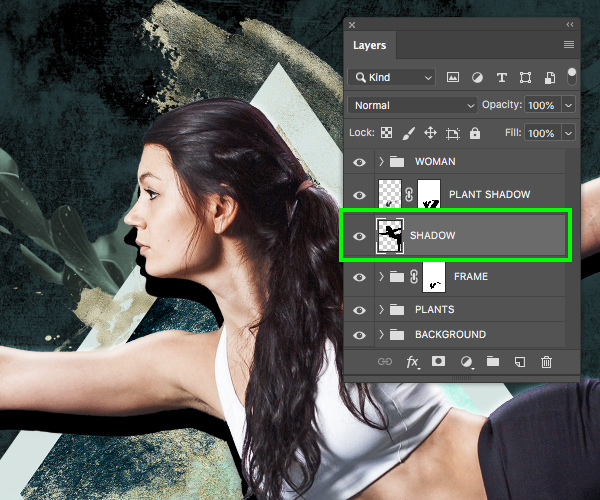
With the ‘SHADOW’ layer selected, go to the Filter menu and choose ‘Blur > Gaussian Blur…’ from the menu.
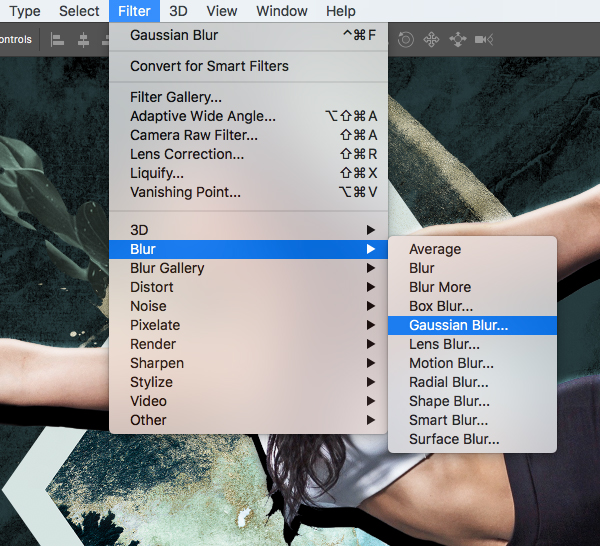
Enter a ‘Radius’ value of about ‘7.6’ pixels and then press ‘Return’ on the keyboard or click ‘OK’ to continue.
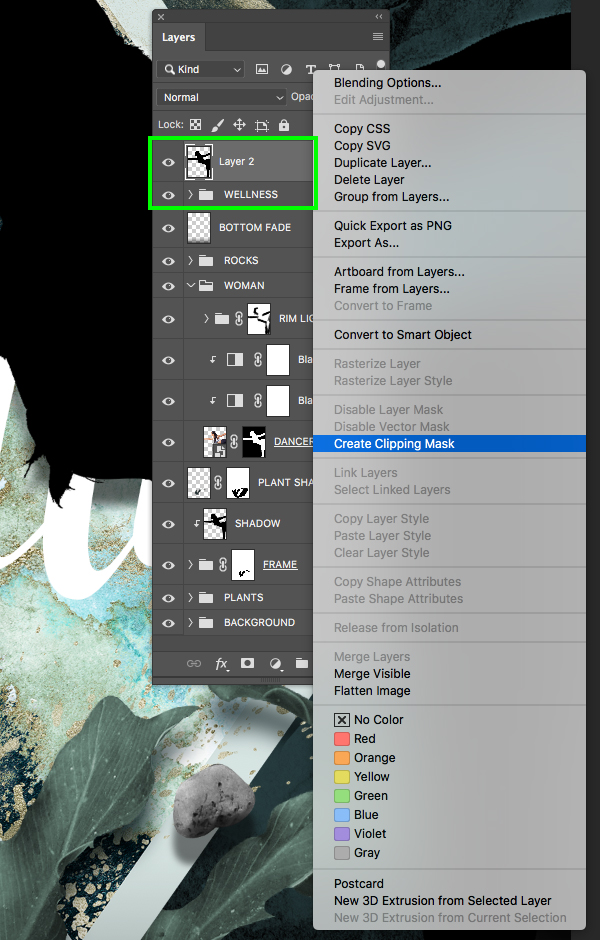
Now that we’ve applied the blur, hold the Control key and click on the layer to reveal a menu. From this menu we want to then choose the option that says ‘Create Clipping Mask’ shown here:

The shadow of the woman should now only be visible within the frame, and from here we just want to lower the opacity to about ‘60%’ by pressing the number ‘6’ on the keyboard.
Step 27: Mask Adjustment
This is just a quick fix, but because of the positioning of some of our layers, you may still see some small edges of the plants or frame sticking out from behind the woman. To fix this, let’s expand the contents of the ‘PLANTS’ folder and then select the mask applied to the main ‘PLANTS’ Smart Object inside. If you zoom in a bit you can see the area I want to target and brush out with a solid black brush.
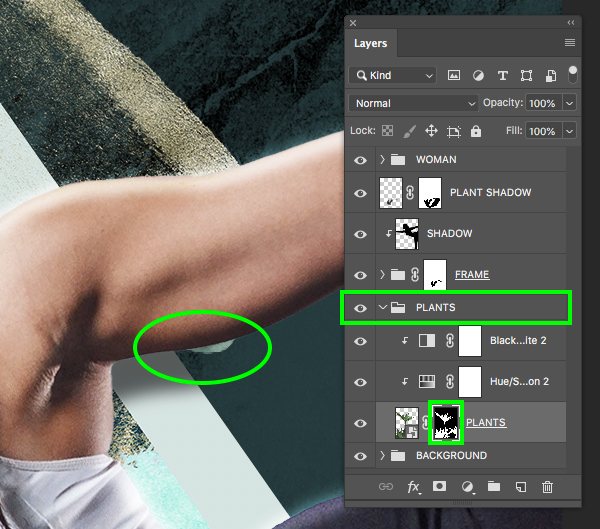
After removing that area it looks a bit cleaner and it’s small touches like this that we want to look out for since it’s always better to just go ahead and fix anything that sticks out to us now.
Step 28: Rocky Waters
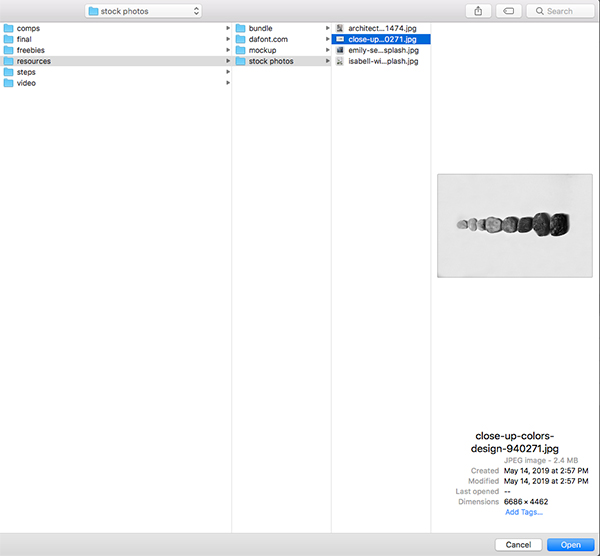
Next, download the last of the four stock photos we will be using and save it with the other images we have used for the tutorial. Once you have saved it, return to Photoshop, go to the File menu, and then choose ‘Open…’ from the menu. From here, navigate to the folder where the image of the stones has been saved and click ‘Open’ from the lower right.
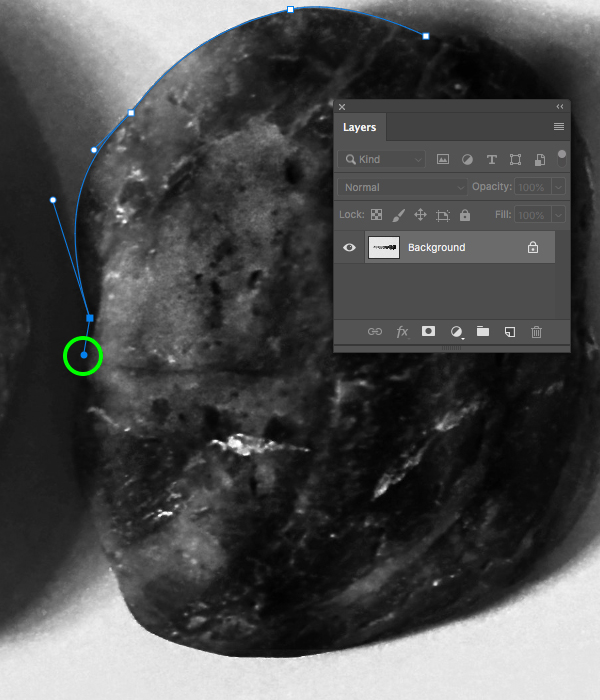
Now that we’ve opened the image, let’s zoom in using the keyboard shortcut Command/Ctrl and the ‘+’ key and then hold the spacebar down and drag around the screen to pan around the image. What we want to do next is isolate a few of these rocks from the group. Let’s start with the far right rock and press ‘P’ to switch to the Pen Tool. Click to create your first point, and then click and drag to move the handle around and alter the curve of the path so that it follows the form of the stone. In some cases, after you’ve created a point you will notice that some of the handles extend a bit, so what we can do is hold the Alt/Option key and grab the end of the handle and then move it around so that it goes in the direction of the stone we want to trace. Here I have highlighted the point that I need to drag towards the left so that it follows the curve of the stone:

In addition to bringing the handle towards the left, you can also bring it in closer or farther away from the previous point. In this example I have brought it in so that I have more control over the curve of the next path when I click again to make my next point.
After making my way around most of the first stone, I’ve come back around to the top where I started and I have a handle that is far too long and extending past the point I need to select to close the shape. Here we will once again select the end point while holding the Alt/Option key in order to bring the end of the handle in towards the right as it will give us more control over the trajectory of the next point.
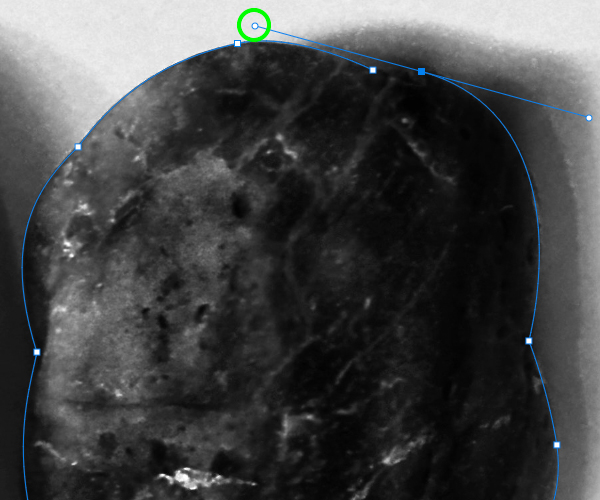
Now you can see that the handle is much closer to the last point we made which will make it easier for us to follow the curve of the rock and close the shape.

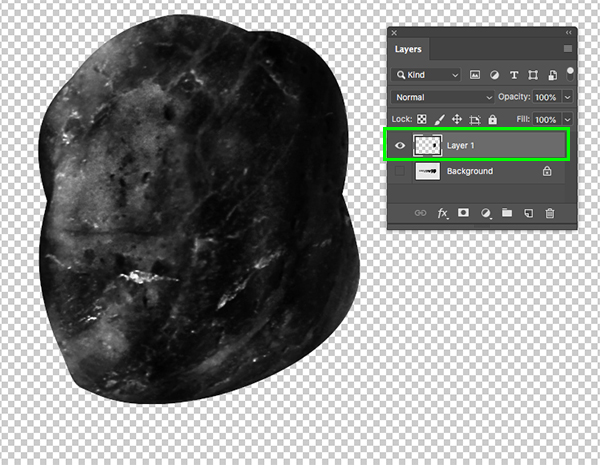
After closing the shape, press Command/Ctrl+Return on the keyboard to activate a selection using our path.
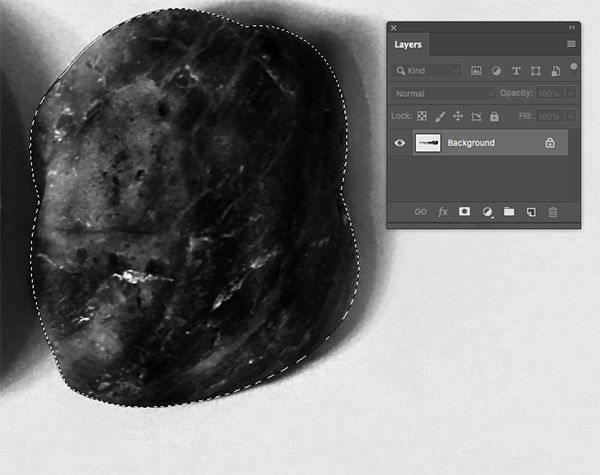
With your selection still active and the ‘Background’ layer selected, press Command/Ctrl+J to paste the selection onto a new layer. You can now turn the visibility of the ‘Background’ layer off to see that we have our isolated rock on a new layer of its own.
Step 29: Second Rock
Select the locked ‘Background’ layer and then use the Pen Tool (P) to trace the next rock over from the right. Once you’ve completed tracing the next rock, press Command/Ctrl+Return to activate a selection from the path and press Command/Ctrl+J to once again paste this rock onto a new layer.

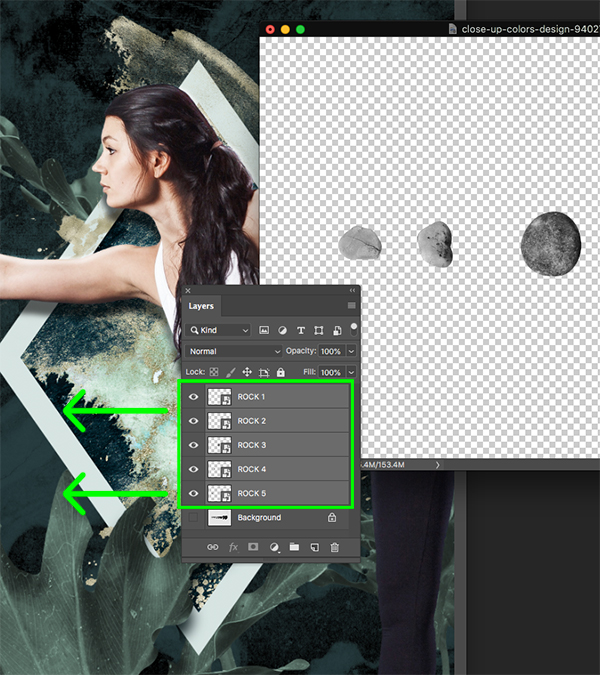
Continue to trace and paste a few more of the rocks from the photo with the Pen Tool until you have about five of them all on their own layer. After that, hold the Control key and click on each of the layers before choosing ‘Convert to Smart Object’ to make each of the rocks into Smart Objects.

Click and drag this window so that it’s next to the main document and then select the top rock Smart Object layer. Hold the Shift key and select the bottom rock Smart Object so that all four or five of the rocks are selected together. From here, hold the Shift key and drag the rocks into your working file. After bringing all of the rocks into your main document you can close out of the stock image window by pressing Command/Ctrl+W and then we don’t need to save it.
Step 30: Folder Of Rocks
If you select all of the rocks in your main file and press Command/Ctrl+T to a Free Transform, and then Command/Ctrl+0 on the keyboard, you will see the bounding box around the entire group of objects so you get a sense of where everything is.
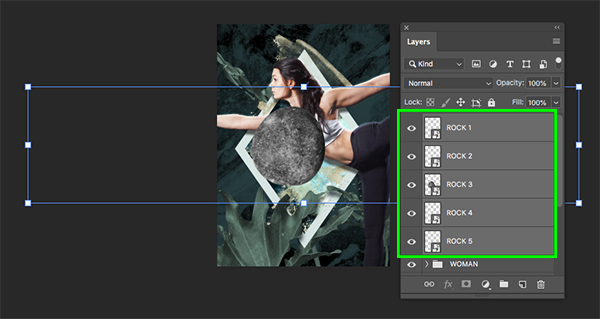
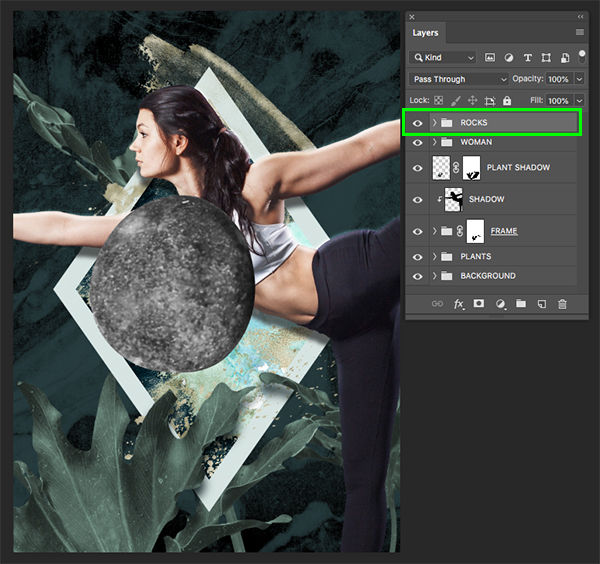
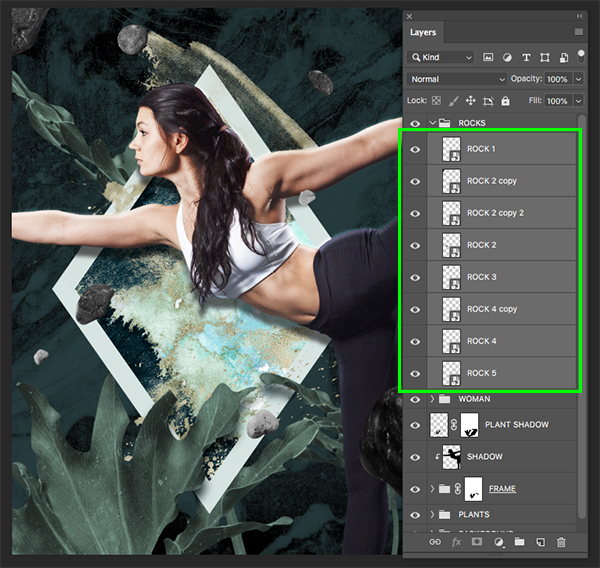
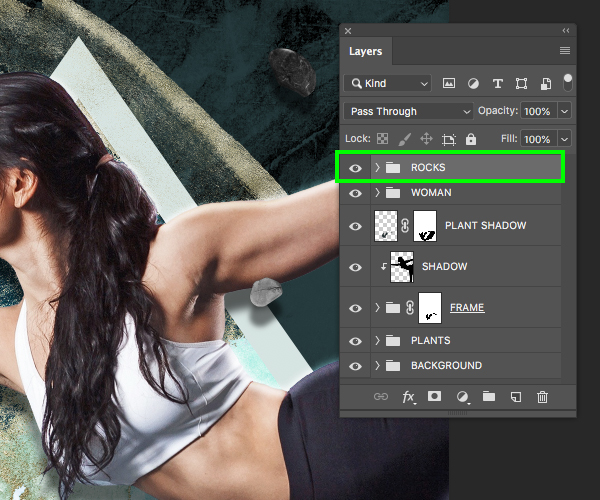
With all of the rocks still selected, press Command/Ctrl+G to place them into a new folder and rename it ‘ROCKS’ as shown here:
Step 31: Rock Around The Clock
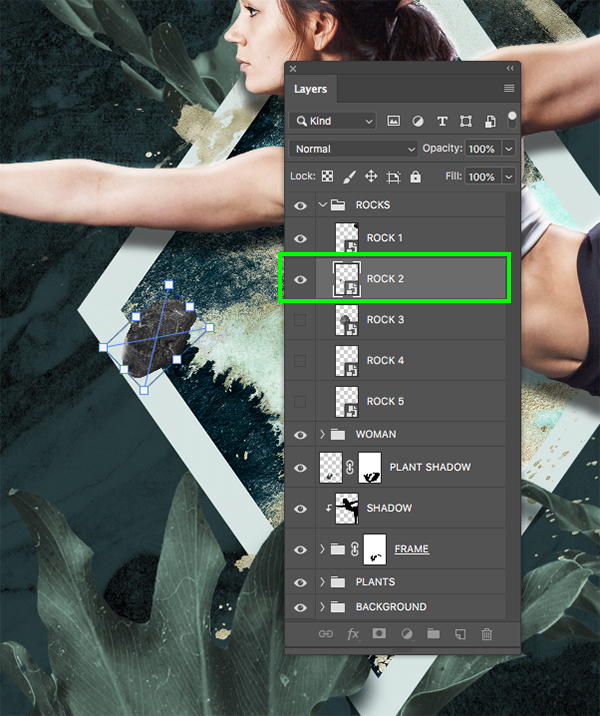
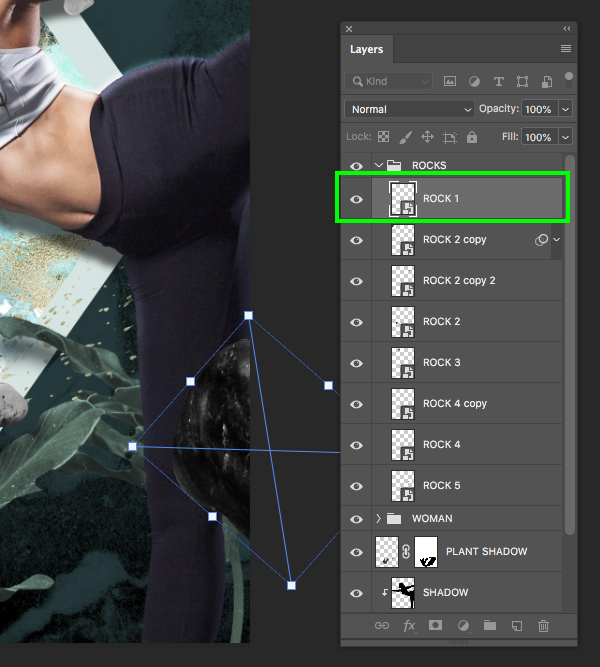
Go into the ‘ROCKS’ folder we just created and turn off all of the rocks except for the first one. Press Command/Ctrl+T to do a Free Transform and then scale, rotate, and position the first rock in the upper right corner like this:

Turn on the visibility of the second rock layer and then use the Free Transform to once again scale, rotate, and position the rock somewhere else in the image. Remember to also hold the Shift key while resizing the image to constrain the proportions so the rocks don’t get distorted.
Continue this process by scaling and rotating each of the rocks and making them appear to fall randomly throughout the design.
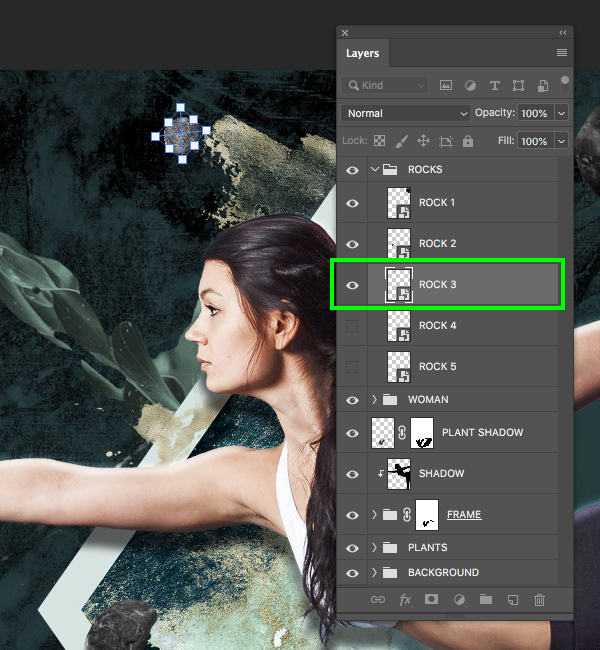
After a few minutes you can get a sense of where you want to place the rocks so that we have some variation. In some cases you may also want to duplicate a few of the rocks before transforming them just to add a few more. Just make sure that if you do use the same rock more than once that you transform it enough with scale, rotation, and positioning, so that it doesn’t look so obvious.
Step 32: Rock Blur
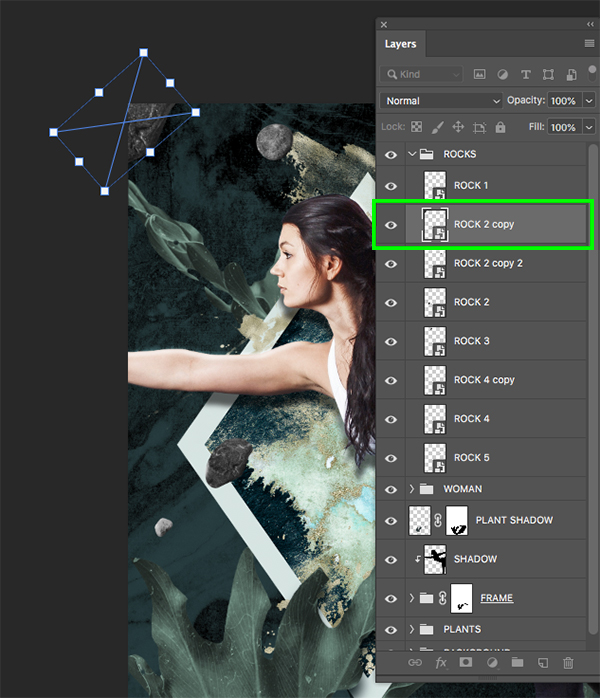
After you have positioned the rocks the way you want, select one of the largest rocks in your composition – here I am selecting ‘ROCK 2 copy’ from the upper left corner of my layout.
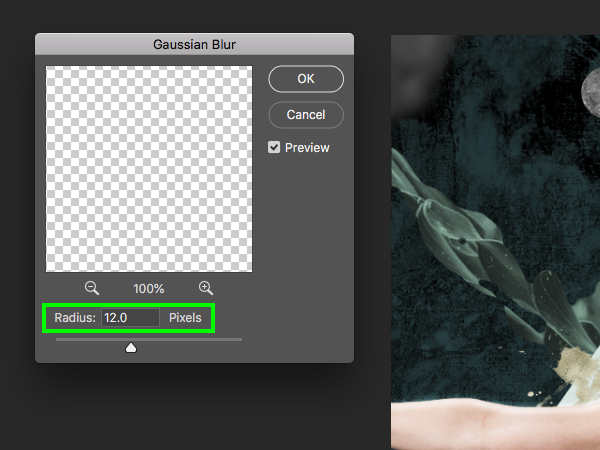
Next, go to the Filter menu and choose ‘Blur > Gaussian Blur…’ from the menu.

For the ‘Radius’ enter a value of ’12’ and then press ‘Return’ on the keyboard or click ‘OK’ to continue.
Repeat this step with any of the other large rocks in the foreground by selecting them and applying a blur in order to create more depth.
Step 33: Adding Contrast
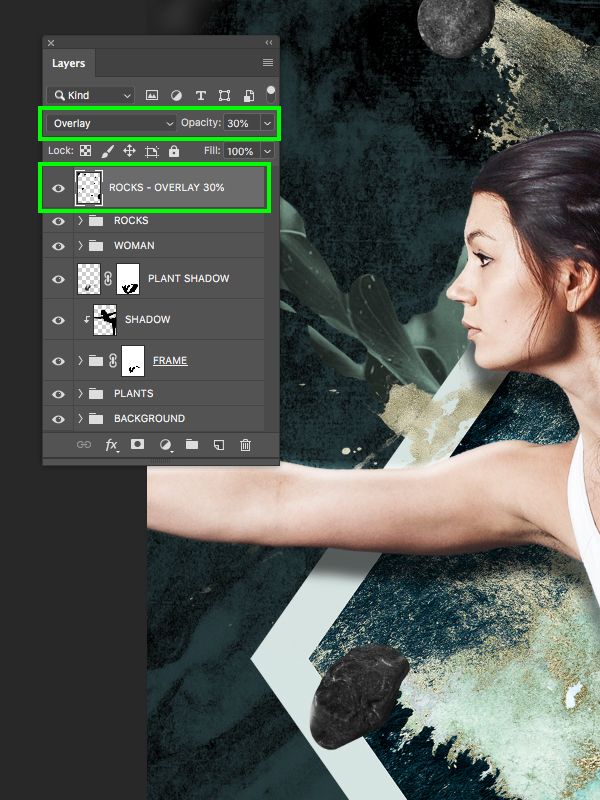
Select the whole ‘ROCKS’ folder and press Command/Ctrl+J to duplicate it, and then Command/Ctrl+E to merge it together into a single layer. From here, hold the Command/Ctrl key and click on the layer thumbnail icon of the merged ‘ROCKS copy’ layer to activate a selection around all of the rocks. Press ‘D’ to reset your default colors and then ‘X’ to toggle between black and white until the foreground color is set to black. Next, press Alt/Option+Delete to fill this new merged layer with solid black.

Change the Blend Mode of the merged layer to ‘Overlay’ and then press ‘3’ to reduce the opacity of the layer to ‘30%’ to add a bit of contrast. After that, double click the layer name to rename it ‘ROCKS – OVERLAY 30%’ as shown below:
Step 34: Adding Shadows
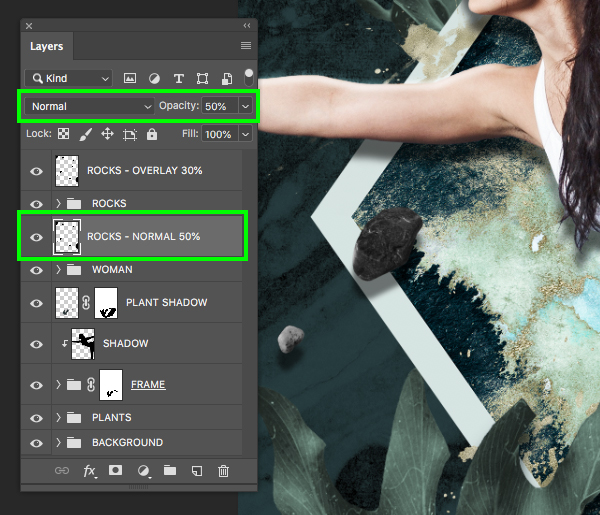
Select the ‘ROCKS – OVERLAY 30%’ layer and duplicate it by pressing Command/Ctrl+J and then move it below the main ‘ROCKS’ folder. Here I have brought the opacity all the way up to ‘100%’ and then we want to hold the Shift key and tap the down arrow a few times to offset this layer as it will serve as the shadows for the rocks.

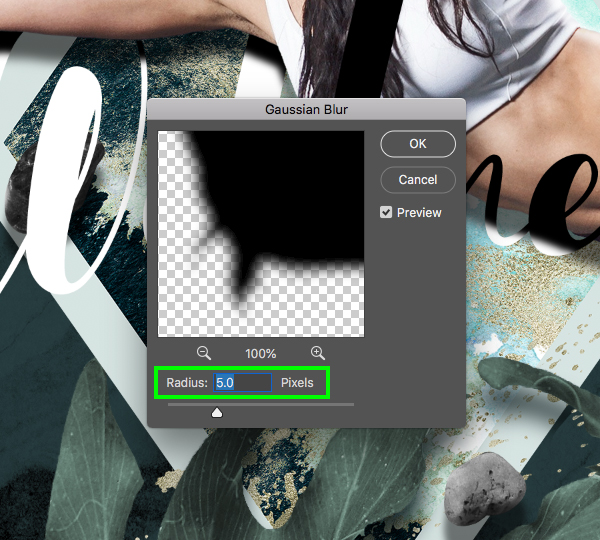
Select this new shadow layer and go to the Filter menu before choosing ‘Blur > Gaussian Blur…’ from the menu. Here we want to apply a ‘Radius’ of about ‘5’ pixels and then press ‘Return’ or click ‘OK’ to apply the effect and continue.

After applying the blur, let’s change the Blend Mode from ‘Overlay’ back to ‘Normal’ as this looks a bit better for the shadows. From there, bring the opacity down to about ‘50%’ by pressing the number ‘5’ on the keyboard. Here I will also rename the layer just for clarity.
Step 35: Rocking Out
Select the ‘ROCKS – OVERLAY 30%’ layer, hold the Shift key, and then select the ‘ROCKS – NORMAL 50%’ layer so the top three layers and the main ‘ROCKS’ folder are all selected together.

With these layers still selected, press Command/Ctrl+G to place them into a new folder and double click the ‘Group 1’ text to rename this folder ‘ROCKS’. Normally I wouldn’t name the folder the same thing as the subfolder inside, but in this case rocks are rocks so I think it’s alright!
Step 36: Bottom Fade
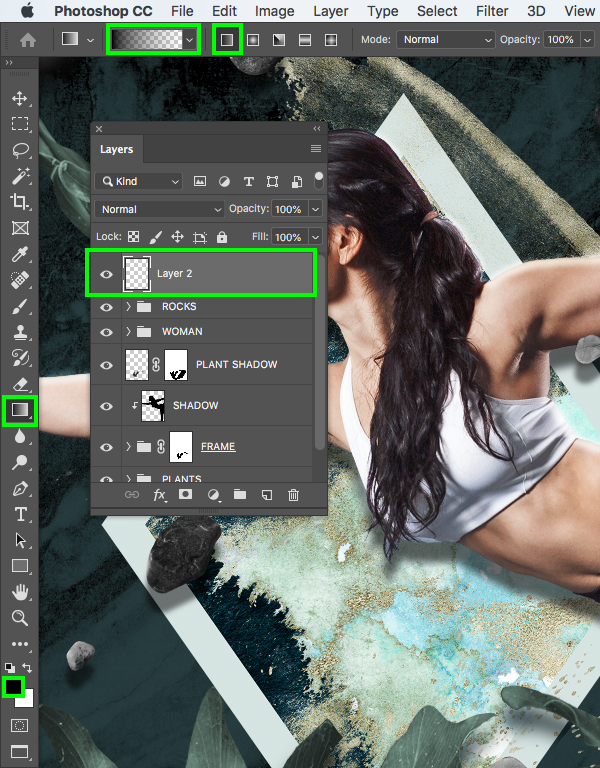
Create a new layer at the top of your Layers Palette and then set your foreground color to solid black. After that, press ‘G’ to switch to the Gradient Tool and select a Linear Gradient that fades from solid black to transparent as shown here:
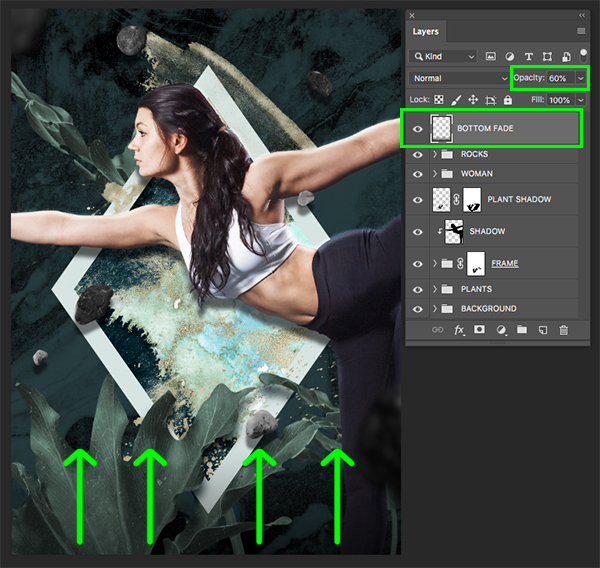
After setting up your gradient, click and drag from the bottom of the canvas upwards a bit to create a dark fade at the bottom of the image. Once you’ve done that, rename the layer ‘BOTTOM FADE’ and reduce the opacity to somewhere around ‘60%’ to make it a bit more subtle.
Step 37: Wellness Type
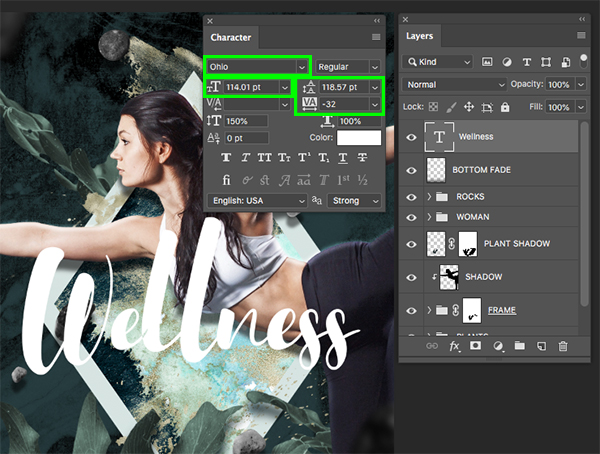
Next, download and install the Ohio typeface before moving on to the next step. Once you have done so, return to Photoshop and create a new layer before pressing ‘T’ to switch over to the Type Tool. Click your cursor somewhere in the middle and type the word ‘Wellness’ using the ‘Ohio’ font. Open the Character panel and change the size of the text to ‘114 pt’ with a tracking setting of ‘-32’ and a solid white fill.
Click the ‘Add layer mask’ icon to add a mask to the type layer and then hold the Command/Ctrl key and click on the layer thumbnail icon of the main ‘DANCER’ Smart Object layer to activate a selection around the woman.

Switch to the Brush Tool (B) and use a solid black brush to brush out the parts of the letters that we want to go behind the dancer as indicated below:

Step 38: Letter Fix
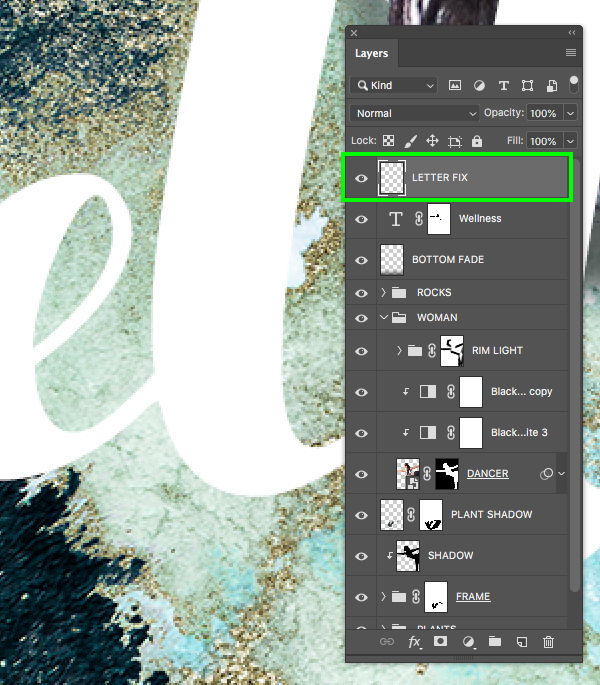
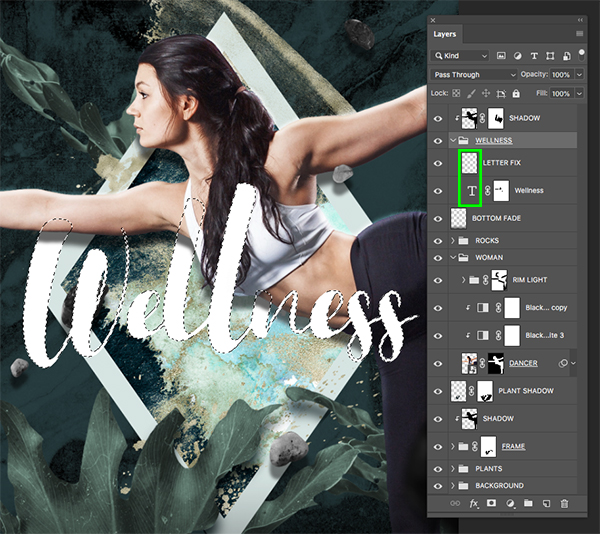
If we zoom in we can see that there is something funky happening with the typeface where the ‘e’ cuts into the first ‘l’ where it appears to be knocked out of the text. Let’s create a new layer just above the type layer so that we can manually paint over this piece.
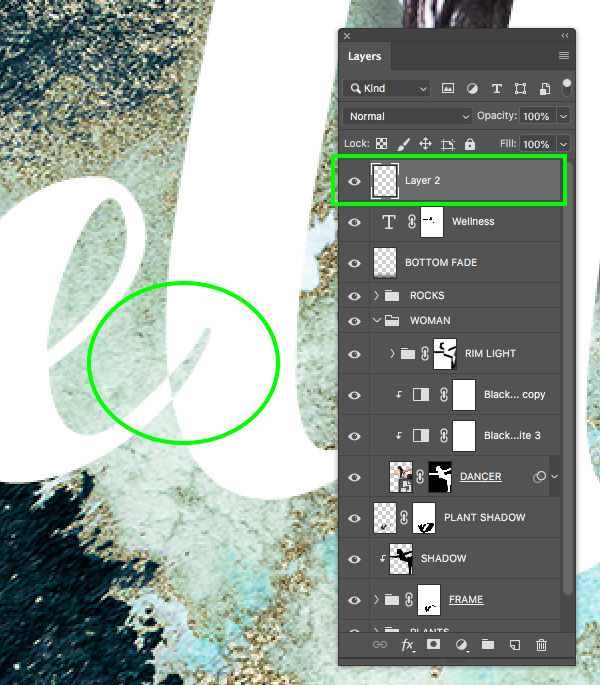
Use a solid white brush to cover up this knockout area between the letters and name the layer ‘LETTER FIX’.
Step 39: Grouping The Title
Select the ‘LETTER FIX’ layer from the previous step and then hold the Shift key and select the main ‘Wellness’ type layer so both layers are selected simultaneously.
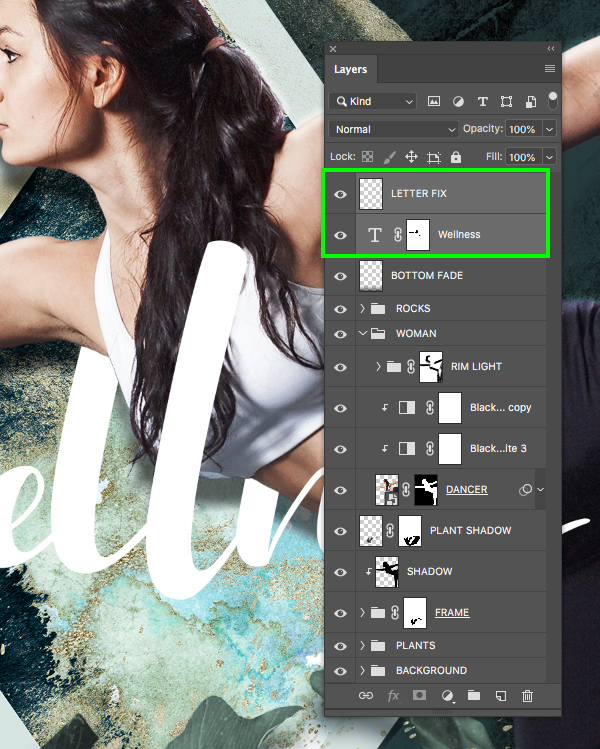
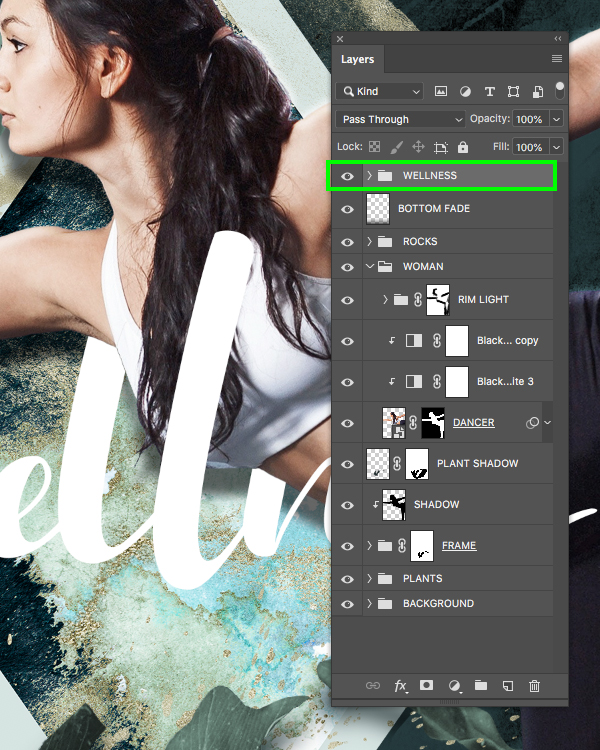
With both layers selected, press Command/Ctrl+G to place the layers into a folder and then double click the ‘Group 1’ text to rename the folder ‘WELLNESS’.
Step 40: Text Shadows
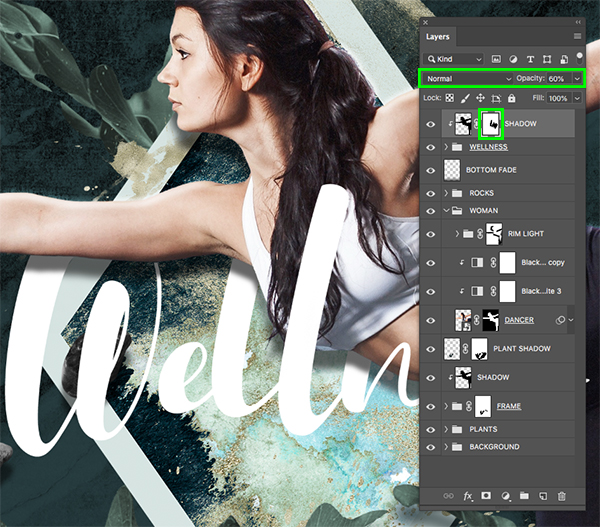
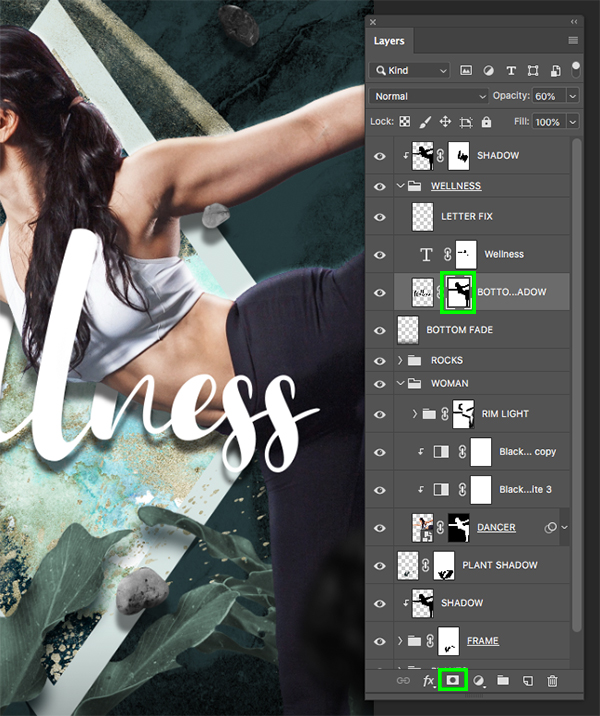
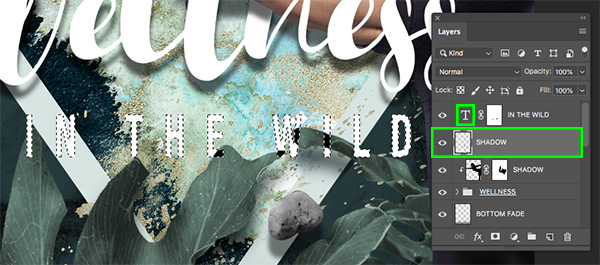
Hold the Command/Ctrl key and click the layer thumbnail icon of the ‘DANCER’ Smart Object layer to once again activate a selection around it. Once you have done that, create a new layer at the top of the Layers Palette and then fill the layer with solid black. After filling the layer you can deselect everything by pressing Command/Ctrl+D on the keyboard.
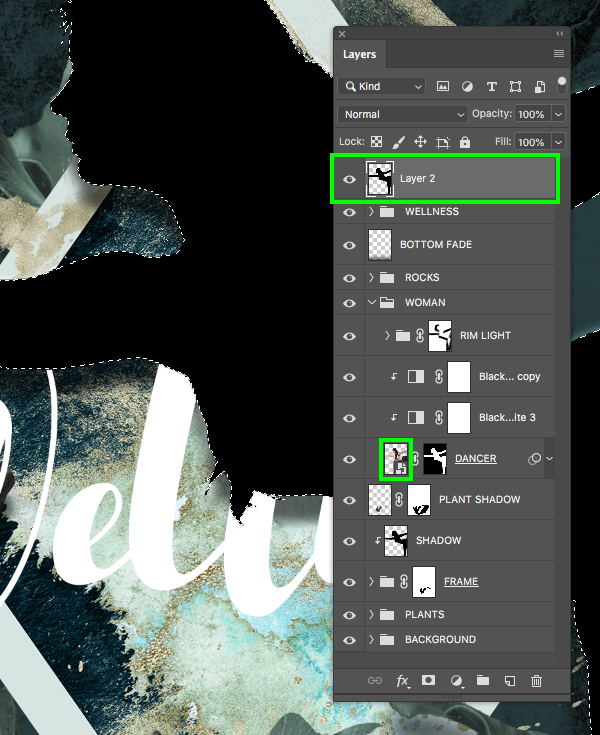
Hold the Control key and click on the new layer that should be just above the ‘WELLNESS’ folder and then choose ‘Create Clipping Mask’ from the menu.
The new layer at the top which I’ve renamed ‘SHADOW’ now has a Clipping Mask applied to it so that it only appears inside of the ‘WELLNESS’ text. Select the ‘SHADOW’ layer and then hold the Shift key and tap the down arrow three or four times to offset the shadow.
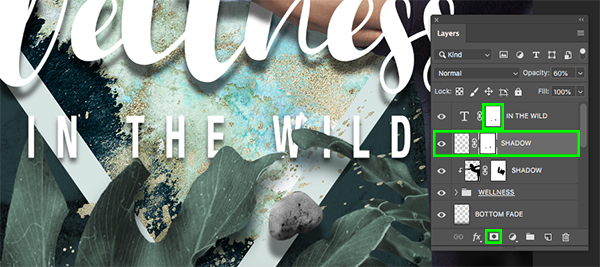
With the ‘SHADOW’ layer selected, go to the Filter menu and choose ‘Blur > Gaussian Blur…’ from the menu.

Apply a ‘Radius’ setting of ‘5’ and then press ‘OK’ to apply the changes.
Reduce the opacity of the ‘SHADOW’ layer to about ‘60%’ and then apply a mask to the layer. From here, use a solid black brush to go over any parts of the letters that are supposed to be in the front – mostly the second ‘l’ and the top of the ‘n’. Doing this should leave you with just the shadows going behind the dancer and onto the letters as shown here:
Step 41: Extra Text Shadows
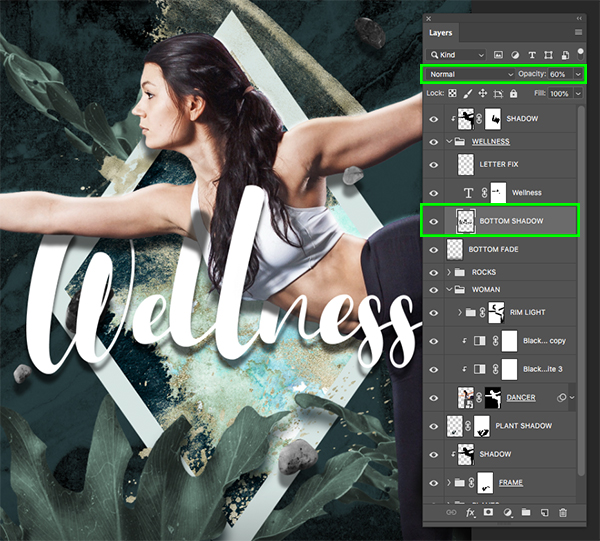
Hold the Command/Ctrl and Shift keys and click on both of the layer thumbnails inside of the ‘WELLNESS’ folder to activate a selection around the text.
Create a new layer and place it just below the ‘Wellness’ text layer and then fill it with solid black. Rename the layer ‘BOTTOM SHADOW’ and reduce the opacity to about ‘60%’ as shown below:
Step 42: Shadow Masking
With the ‘BOTTOM SHADOW’ layer selected, hold the Command/Ctrl key and click the layer thumbnail icon of the ‘DANCER’ Smart Object to activate a selection around the woman.
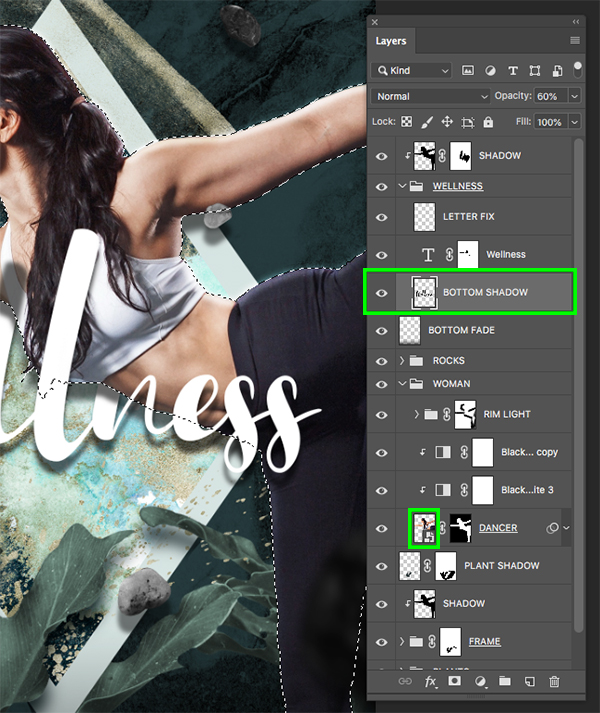
Next, press Command/Ctrl+Shift+I on the keyboard to invert the selection and then click on the ‘Add layer mask’ icon at the bottom of the Layers Palette. You should now only be seeing the ‘BOTTOM SHADOW’ appear behind the dancer.
Step 43: Secondary Text
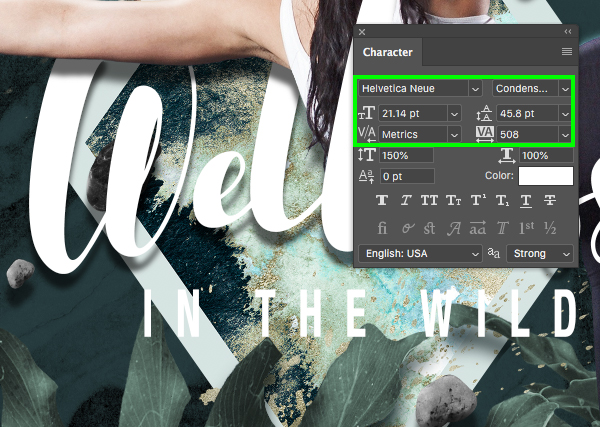
Create a new layer and switch back to the Type Tool (T) before typing out ‘IN THE WILD’ in all caps. Use the Character panel here to change the typeface to a bold condensed sans serif such as ‘Helvetica Neue’ in the ‘Condensed Bold’ style or something similar. Let’s make the size of the text about ’21 pt’ and set the tracking to about ‘500’ to space the letters out. Here we can also leave the fill color set to solid white.
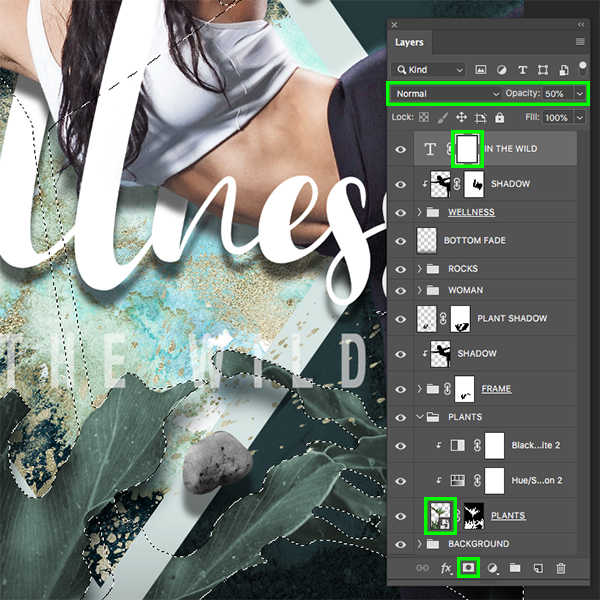
Add a layer mask to the ‘IN THE WILD’ text layer and then press ‘5’ to reduce the opacity to ‘50%’ so you can see through the text. After that, hold the Command/Ctrl key and click on the layer thumbnail icon of the ‘PLANTS’ Smart Object inside of the ‘PLANTS’ folder to activate a selection around the plants.
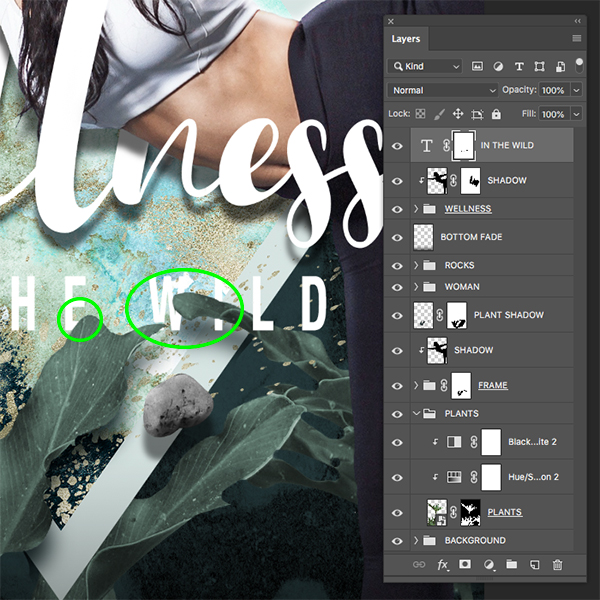
Use a solid black brush to brush over the bottom of the ‘E’ along with the ‘W’ and the ‘I’ to make it look like the leaves are coming in front of the letters. Once you have done that, press ‘0’ to bring the opacity back up to ‘100%’.
Step 44: Secondary Text Shadow
Hold the Command/Ctrl key and click on the layer thumbnail icon of the ‘IN THE WILD’ text layer, then create a new layer beneath it and fill it with solid black. After that, press Command/Ctrl+D to deselect all.
Rename this new layer ‘SHADOW’ and press ‘6’ to bring the opacity down to ‘60%’. Apply a Gaussian Blur effect with a ‘Radius’ of about ‘5’ and then tap the down arrow a few times to offset the shadow.

Hold the Command/Ctrl key and click on the layer mask thumbnail of the ‘IN THE WILD’ layer to activate a selection of the masked out areas of the text. After that, click the ‘Add layer mask’ icon from the bottom of the Layers Palette to apply an identical mask to the ‘SHADOW’ layer.
Step 45: Tertiary Text 1
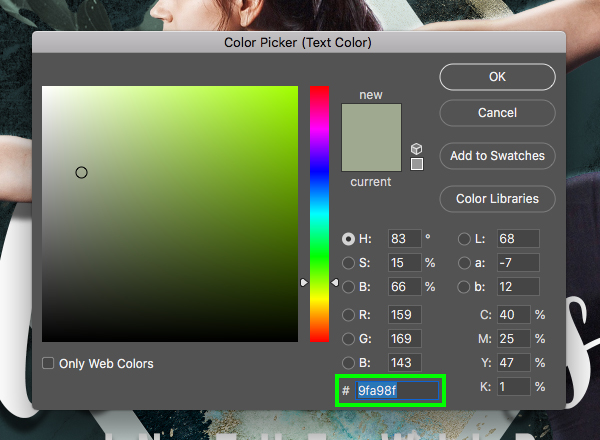
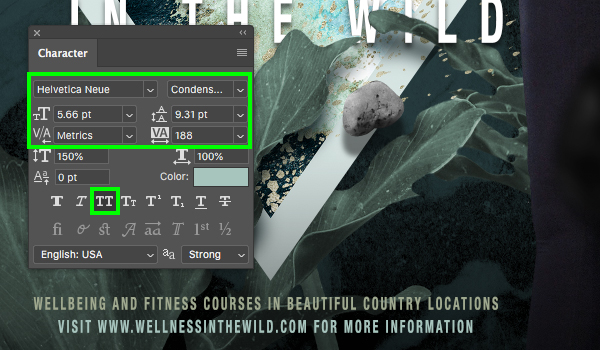
Create another new layer and use the Type Tool (T) to type out ‘WELLBEING AND FITNESS COURSES IN BEAUTIFUL COUNTRY LOCATIONS’ with the same ‘Helvetica Neue’ typeface that we used for the ‘IN THE WILD’ text. Use the Character panel to change the size of this text to about ‘5.66 pt’ and then change the tracking setting to ‘188’. Let’s also click on the small ‘TT’ icon to make sure that our text appears in all caps and then click the ‘Color’ swatch to change the fill color of the type.

Enter the hex value ‘#9FA98F’ and then click ‘OK’ or press ‘Return’ to apply the color changes.
Step 46: Tertiary Text 2
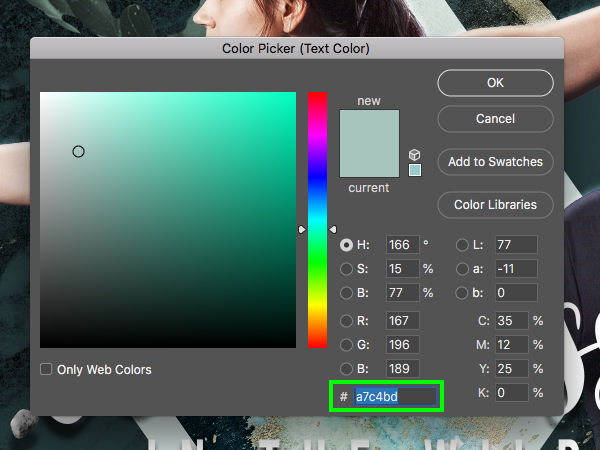
Add another layer and type out ‘VISIT WWW.WELLNESSINTHEWILD.COM FOR MORE INFORMATION’ with the same text settings as the previous line of copy. After that, click on the ‘Color’ swatch to change the color of the text.
For this line of text, change the fill color to the hex value ‘#A7C4BD’ and then click ‘OK’ or press ‘Return’ to continue.
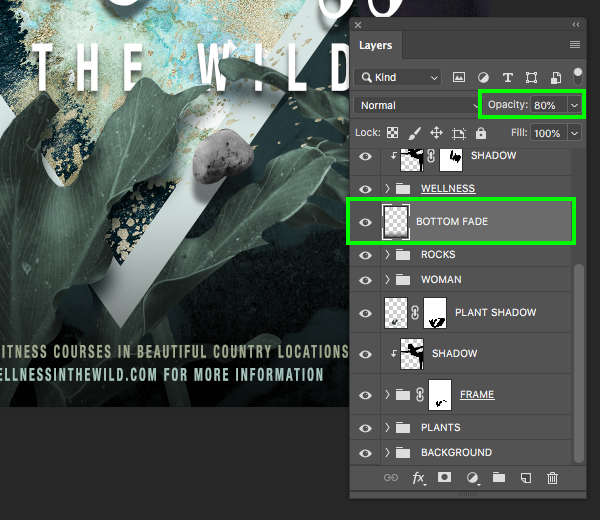
Step 47: Stronger Fade
Select the ‘BOTTOM FADE’ layer and bump up the opacity to about ‘80%’ to intensify the shadow and make the two bottom lines of text a bit easier to read.
Step 48: Text Folder
Select the top text layer in your Layers Palette, hold the Shift key, and then select the main ‘WELLNESS’ folder so all of the text layers and their shadows are selected at the same time.
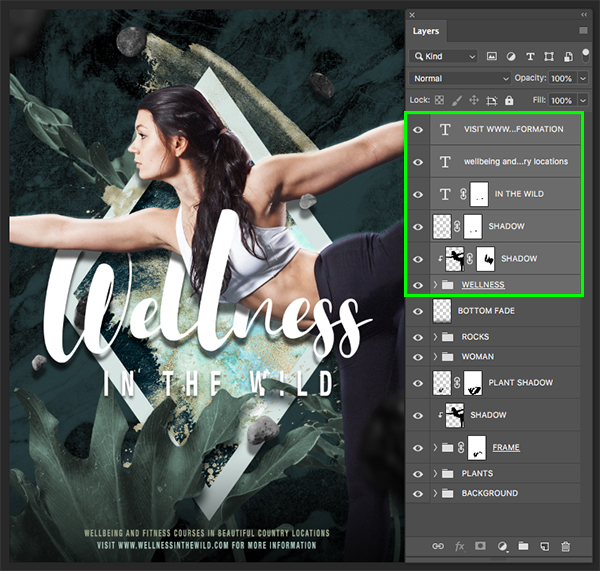
Press Command/Ctrl+G to place all of the layers into a new folder and double click the ‘Group 1’ text to rename the folder ‘TEXT’ since it contains all of our copy.
Step 49: Color Burn
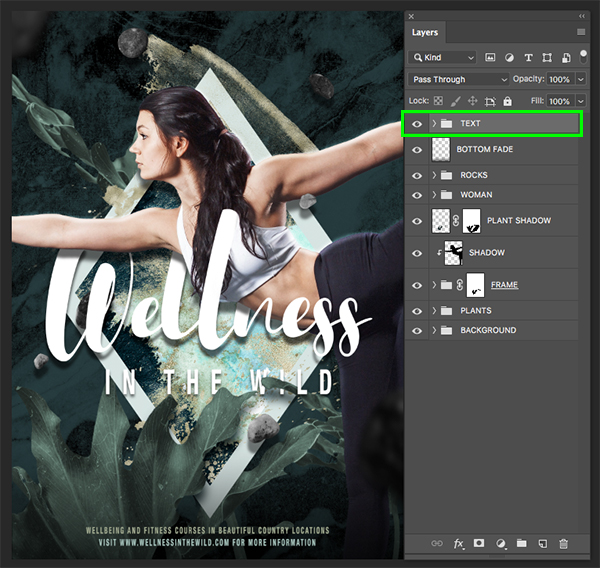
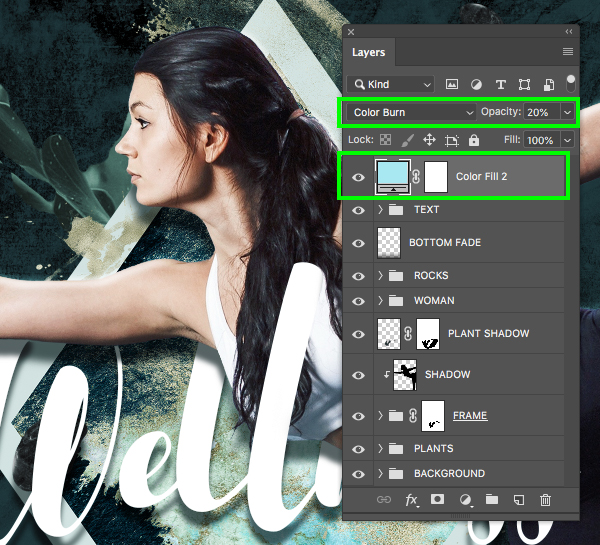
Select the top ‘TEXT’ folder and then click on the Adjustment Layer icon at the bottom of the Layers Palette before choosing ‘Solid Color…’ from the dropdown menu.

For the fill color, enter the hex value ‘#A8E8F1’ and then click ‘OK’ to continue.
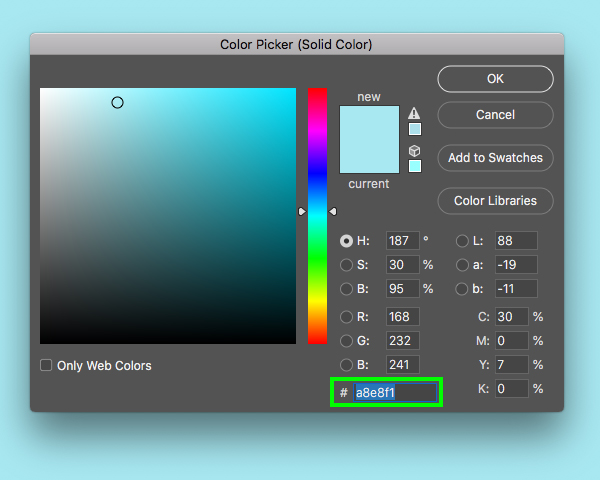
Change the Blend Mode of the ‘Color Fill 2’ layer to ‘Color Burn’ and then reduce the opacity to ‘20%’ to create a subtle blue tint over the whole image.
Step 50: Flattening The Design
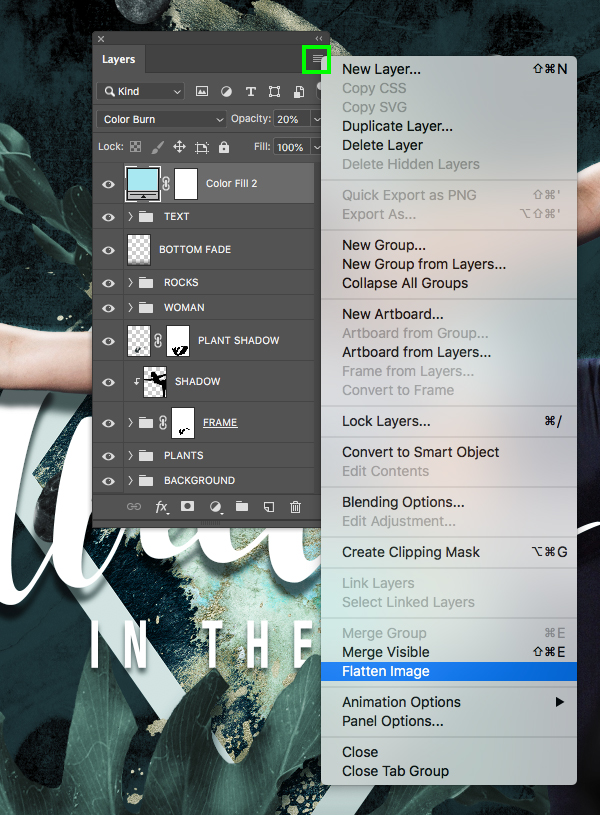
At this point we can save our work as the main flyer design is complete! Once you have finished saving the file, click on the hamburger menu in the upper right corner of the Layers Palette and choose ‘Flatten Image’ from the bottom.
You should now have a single ‘Background’ layer with all of the merged artwork like this:

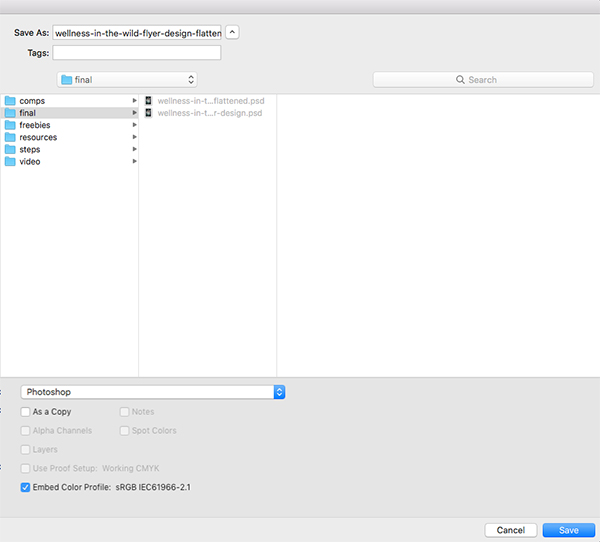
Next, go to the File menu and choose ‘Save As…’ and save this file with a new name – here I have simply added ‘flattened’ to the end of the file name so as not to save over our layered version.
Step 51: Flyer Mockup
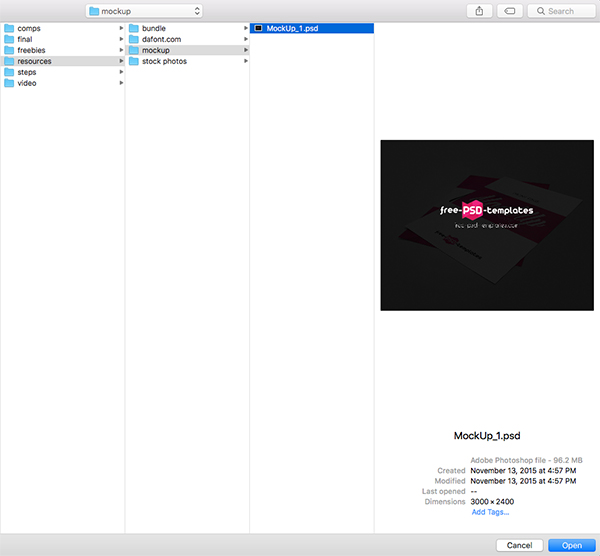
Download the free flyer mockup and save it with the rest of your tutorial files. After that, return to Photoshop and go to the File menu before choosing ‘Open…’ from the dropdown.
While there are several mockup PSDs that come in the download, the only one we will be using for the tutorial is ‘MockUp_1.psd’ so let’s go ahead and open this one up.
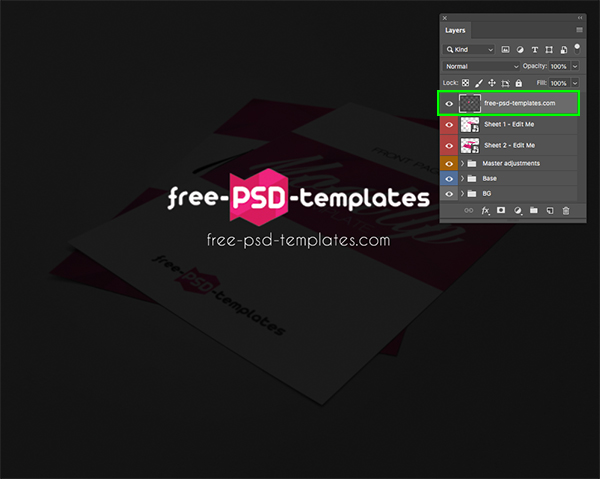
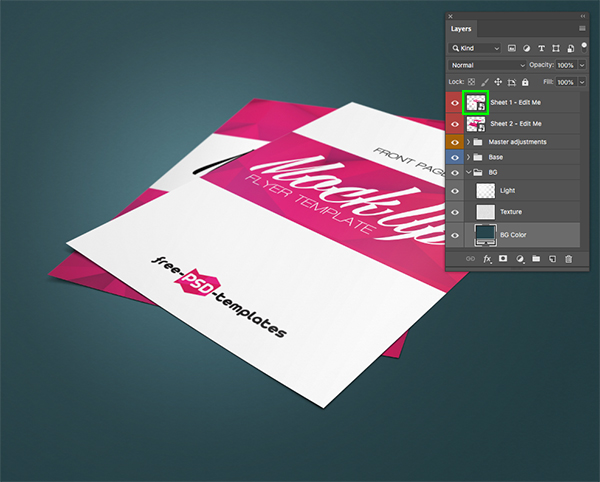
After opening the mockup file, select the top watermark layer and delete it.
Step 52: Mockup Background
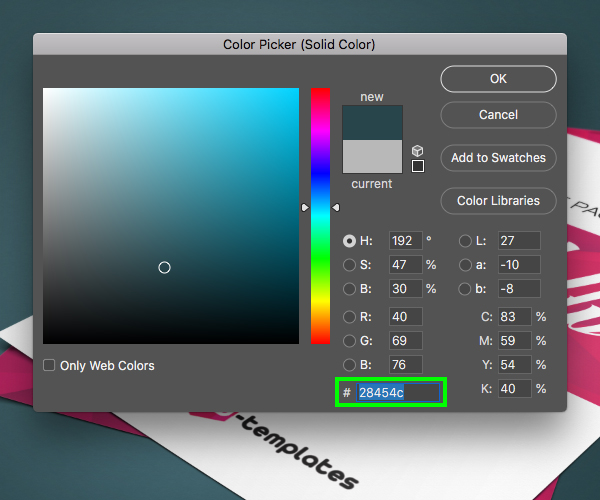
After removing the dark watermark layer, double click on the ‘BG Color’ Adjustment Layer thumbnail to change the color of the background.
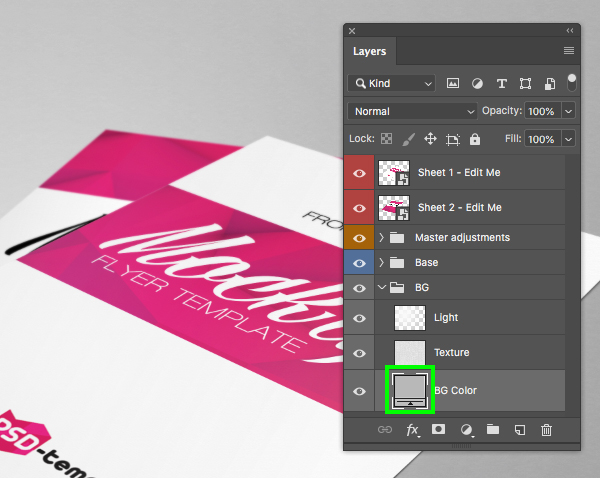
Replace the background color with the hex value ‘#28454C’ and then click ‘OK’ to continue.
Step 53: Replacing The Artwork
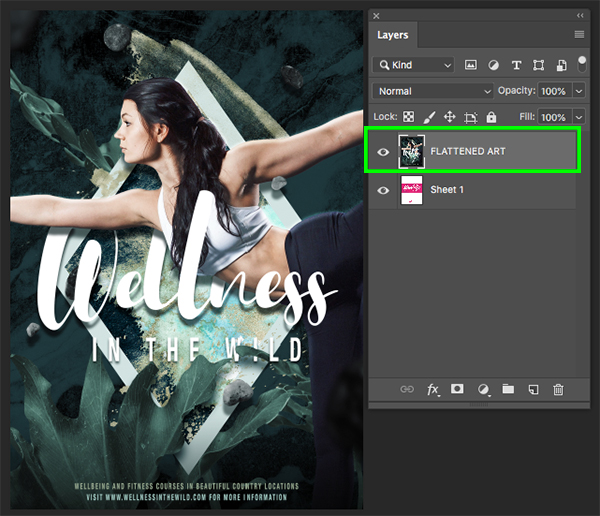
Double click on the top Smart Object layer in the mockup called ‘Sheet 1 – Edit Me’ to go inside the Smart Object layer containing the flyer artwork.
From here, place the Smart Object with the flat flyer artwork next to the flattened version of our flyer design. From here, select the ‘Wellness In The Wild’ flattened artwork, hold the Shift key, and drag it over into the flyer mockup as shown here:

You may have to scale the flyer up just a touch to make it fill the entire area but you should now have your artwork in place. Once this has been set up we can save the file by pressing Command/Ctrl+S and then closing the window to return to the main mockup.
Step 54: Flyer Back
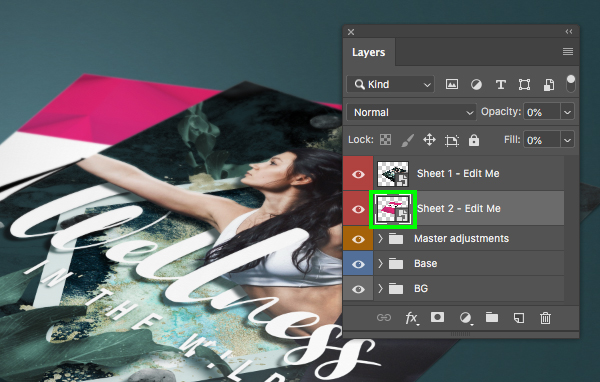
After returning to the main mockup, double click the ‘Sheet 2 – Edit Me’ Smart Object to go inside the back copy of the flyer.
Once inside of this Smart Object, change your foreground color to the hex value ‘#182629’ and then click ‘OK’ to apply the changes.
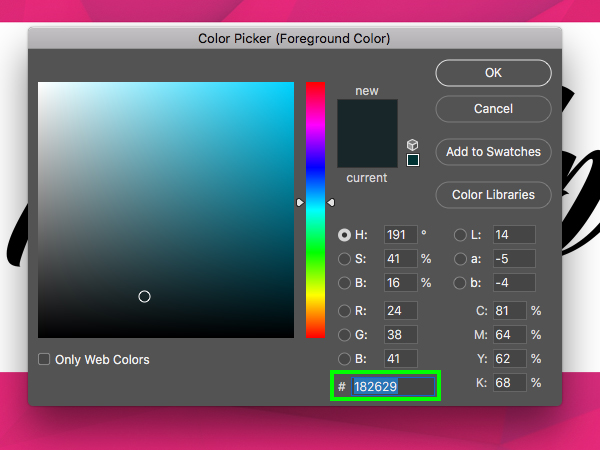
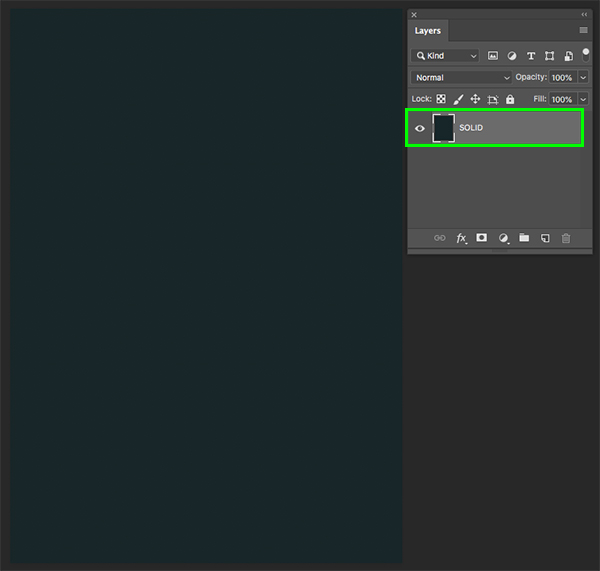
You should now have a single layer filled with your new color. From here, save the file and close the window to return to the main mockup and see the finished result.
We have now completed our Wellness In The Wild Flyer Design in Photoshop! To create our wellness flyer we’ve used an assortment of elements from The Creator’s Inspiring Artistic Collection that we’ve combined with various stock photos, typefaces, and a sleek looking mockup to present our design in a striking and professional way. Remember that the bundle elements we have used for this tutorial are just a small sampling of the high quality design resources you can expect to find in the full bundle. With packs from The Artifex Forge, Everdrifter, Set Sail Studios, and many more, this collection is full of inspiring resources to ensure you are fired up for all your current and upcoming design work!
Remember that whether it’s your outcome for this tutorial or something new you’ve made, we’d love to see your designs on our Facebook page.
Please leave a comment if you have any questions or suggestions. I always look forward to hearing from you!
There’s still time to check out The Creator’s Inspiring Artistic Collection providing you with the ultimate shortcut for jumping straight into your design projects all for a whopping 98% off!

Thank you so much!
Great tutorial and freebies! Love them all!
Thanks for commenting Despina, and we hope that you have picked up some awesome new tips and tricks in this tutorial :).
Nicely detailed tutorial with lots of useful techniques included. Thank you.
Woohoo were so glad that you think so Jeanne!
We hope that you picked up some great new techniques with this tutorial :).
Thank you so much, it´s amazing.
We hope that you pick up some really handy new tips and tricks with this tutorial Ulrike :)
Gran tutorial, como siempre.
Muchas gracias y buen fin de semana para todos.
Aww thanks so much for taking the time to leave us such a lovely comment María and we hope that you have a really lovely weekend too!
WOW! So amazing and useful tips for flyer design tutorial using photoshop. Thanks for sharing such creative and fantastic art.
Aww that is so nice to hear Paritosh and I hope that all of the new tips and tricks that you have picked up in this tutorial come in super handy for your own projects :). happy designing!