
In this tutorial I will be using some of the vintage design elements from the latest design bundle to create an ad for an old school garage & repairs shop named Roberto’s. Not only are these type of designs a throwback, but they also look pretty darn cool! We will be combining a classic car illustration from the bundle with several textures, typefaces and other design elements to create a unique and stylish advertisement. We will also be covering some very handy Photoshop tips and tricks that you will be able to apply to any of your own projects as well. Let’s get started!
HAVE YOU SEEN OUR YOUTUBE CHANNEL?
Watch the video tutorial below and subscribe to our YouTube channel for regular updates direct to your inbox.
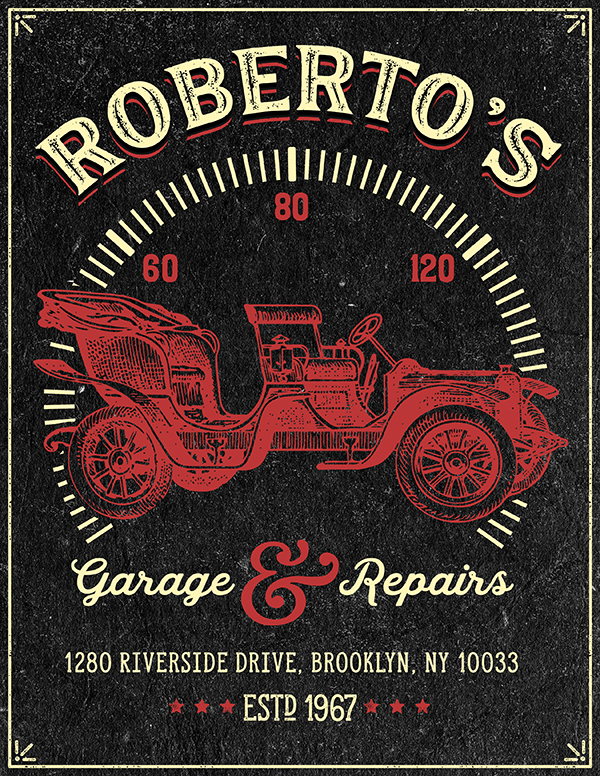
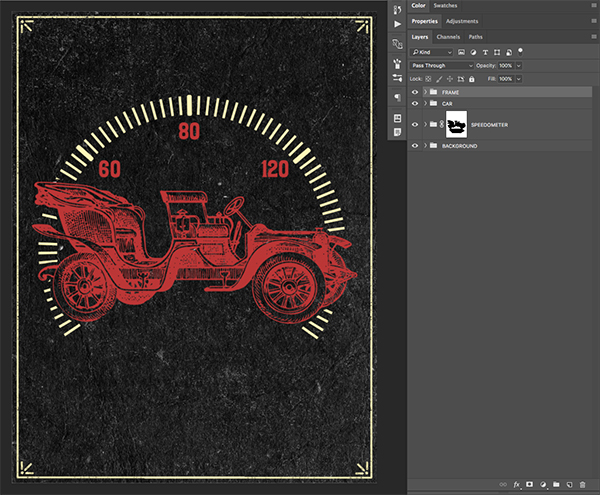
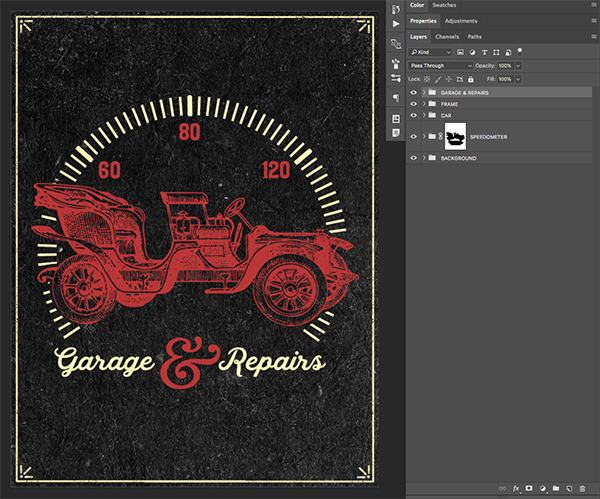
Here’s a look at what we’ll be creating:
Follow along with this tutorial: Download the freebie files
This huge freebie pack includes incredible resources from District 62, Graphic Goods, Greta Ivy, and The Beacon Collection.
The freebie pack is just a tiny taste of the resources available in The Designer’s Vintage Treasure Chest for just $29 (that’s 99% off). This bundle allows the beauty, detail and authenticity of the past to flow into your design projects.
Step 1: Roberto’s Garage & Repairs
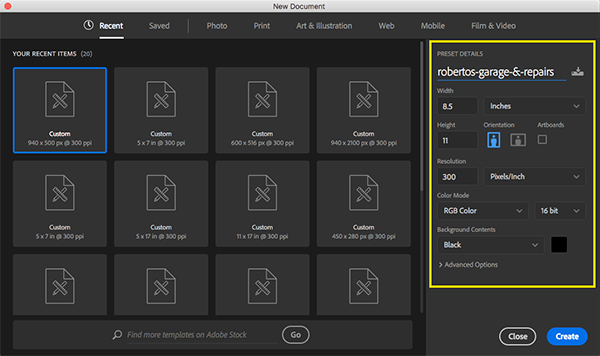
Open Photoshop and create a new document that is 8.5″ x 11″ or standard paper size. Let’s set the resolution to 300 pixels per inch and leave the color mode in RGB for now. We can also take this opportunity to name our file ‘robertos-garage-repairs’ or anything similar that you would like to use and make sure that your ‘Background Contents’ are set to black.
Once you have input the settings for your new document click on the ‘Create’ button or press the Enter key on your keyboard. Double click on the Background Layer to unlock it and when you are prompted with the ‘New Layer’ dialog box, rename the layer to ‘BLACK’ as shown in the image below.

You should now have your document set up with one unlocked layer in Photoshop.
Step 2: Paper Textures
Open the ’PaperTexture-19.jpg’ file from the Greta-Ivy Vintage Paper Collection Vol. 03 pack and drag it into your working document.

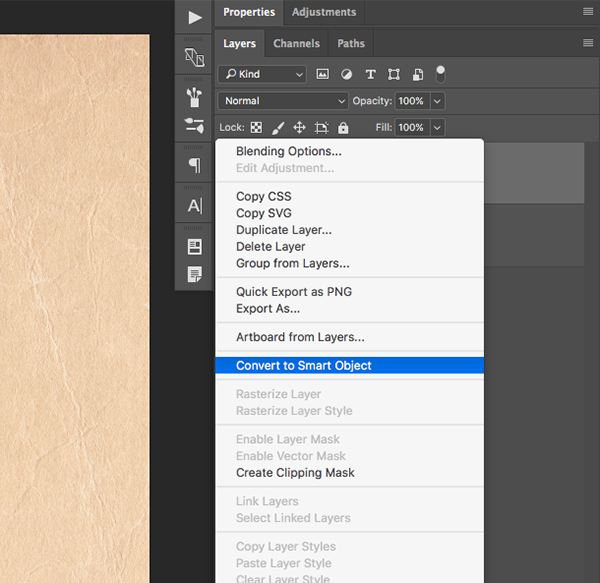
Hold the Control Key and click on the layer to reveal a dropdown menu. From here we want to choose the option that says ‘Convert to Smart Object’ as shown below:
After converting your layer to a Smart Object, press Command/Ctrl+T to initiate a Free Transform Command. Zoom about a bit by pressing Command/Ctrl and the – key if you can’t see the entire bounding box or press Command/Ctrl+0 to fit it inside of your window. Hold the Shift Key and drag inwards from any of the four corners of the bounding box to scale it down until it’s about the same size as your document like this:

We will now repeat this for the ‘PaperTexture-02.jpg’ file from the same pack. Bring the image into your document, convert it to a Smart Object, and then scale it down using the Free Transform Command so that it sits on top of your first paper texture. This time, however, we want to change the Blending Mode of our new paper texture to Multiply.
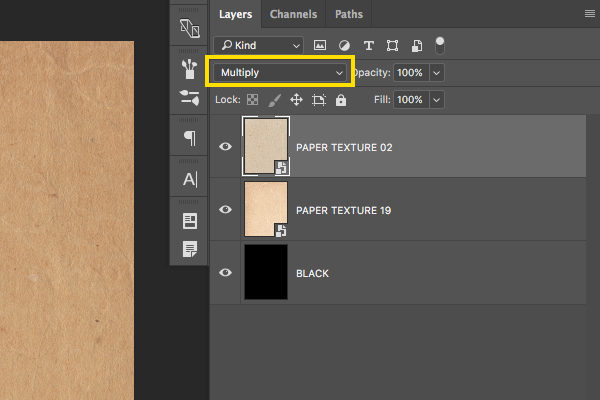
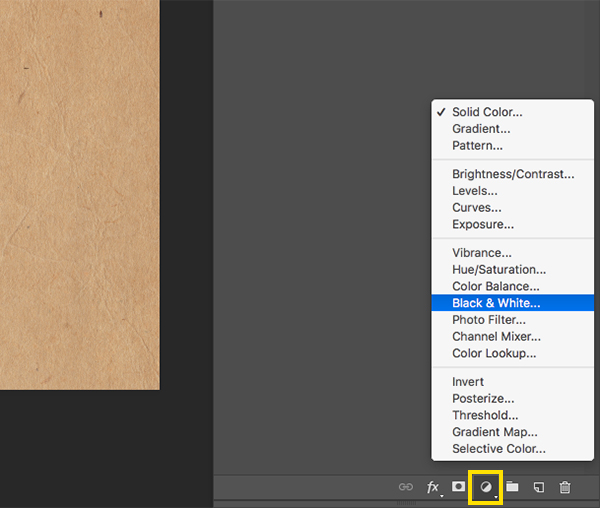
Step 3: First Adjustment Layers
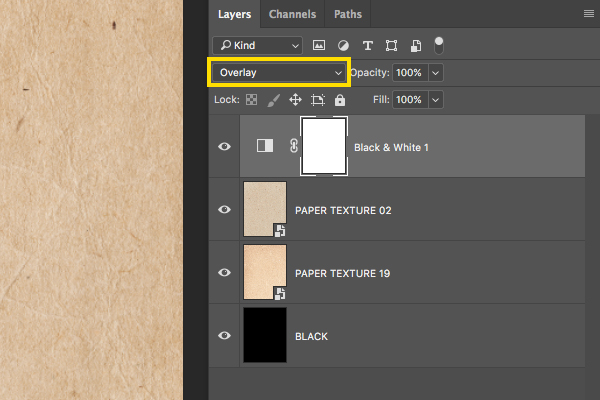
Make sure that your top paper texture layer is selected (should be the ‘Paper Texture 02 Layer’) and then click on the small black and white circle icon found at the bottom of the Layers Palette. This is where we can now add a Black & White Adjustment Layer.
Once you have added the Black & White Adjustment Layer, change the Blending Mode to Overlay as shown here:
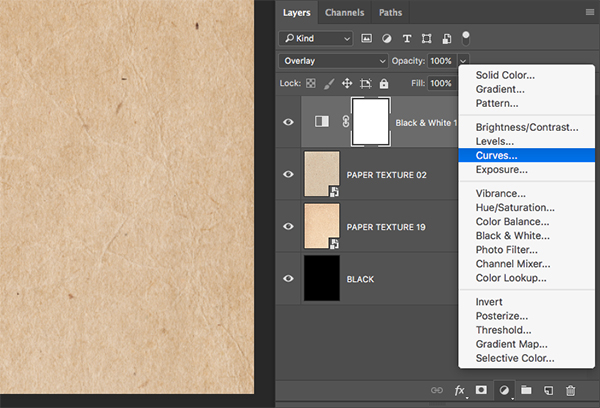
Step 4: Adding our second Adjustment Layer
With the top layer in your Layers Palette Selected, return to the Adjustment Layer option at the bottom of the Layers Palette, this time choosing ‘Curves’ from the list.
Once you have applied the Curves Adjustment, click in the middle of the grid to create a point, and then drag it downwards and slightly to the right so that it looks like this:
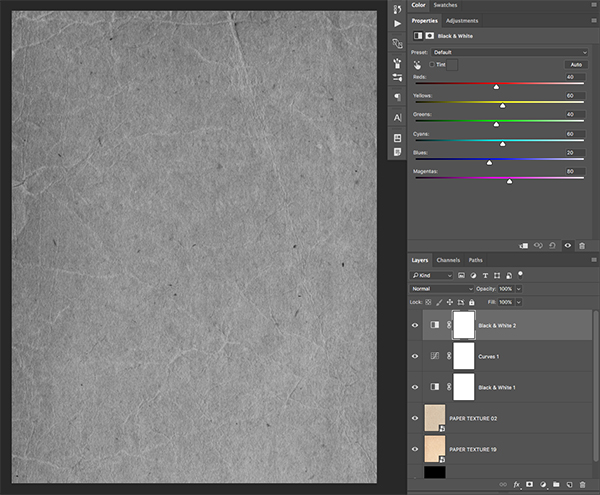
Select the Curves Adjustment Layer and then return to the Adjustment Layer Icon to add one more Black & White Adjustment Layer to the top of the stack.
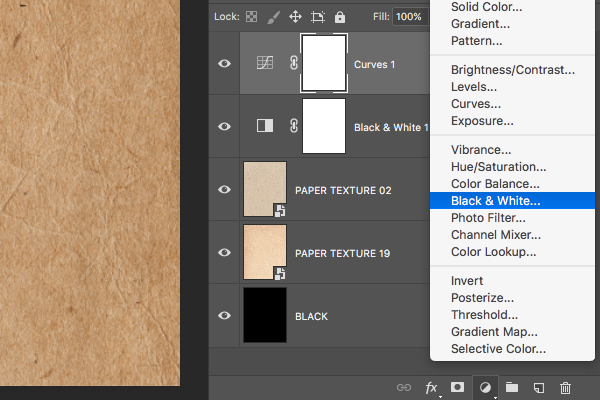
This time we will leave the Blending Mode of our Black & White Adjustment Layer set to Normal so you end up with something like this:
Step 5: Merging and Inverting
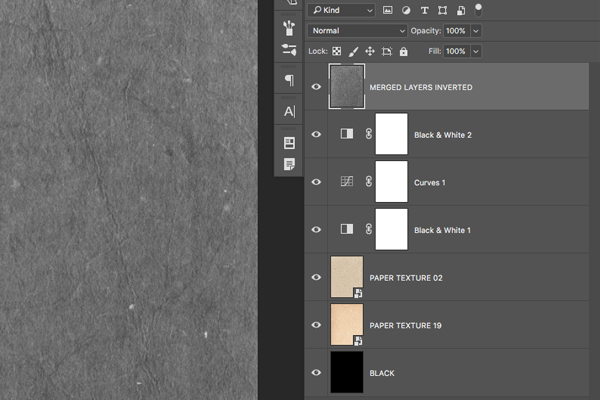
Select the top Adjustment Layer, which, should be the Black & White Adjustment Layer set to Normal. Next, press Command/Ctrl+Alt/Option+Shift+E to merge all of your current layers together. This will create a new layer at the top of your Layers Palette above all of the other layers below.

Once you have merged all of your layers onto a new layer at the top of the Layers Palette, select the merged layer and press Command/Ctrl+I on the keyboard to invert the layer. Alternatively, you could also go to the Image Menu and choose Adjustments > Invert.
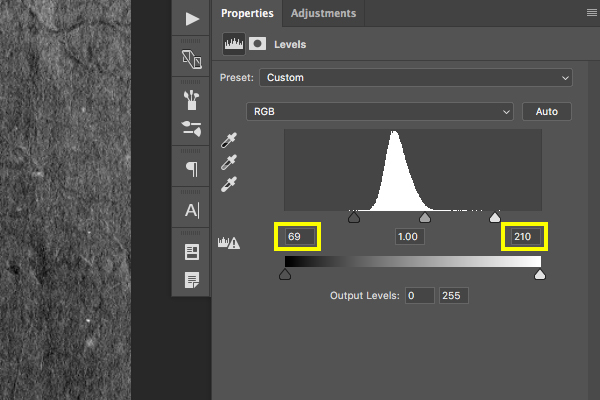
Step 6: Leveling Up
Next, select your inverted, merged layer at the top of the Layers Palette and add a Levels Adjustment Layer as shown below:

Move the left slider of the Levels Adjustment towards the right to set it to ’68’ and move the right slider towards the left to set the value to ‘210’ so it looks like this:
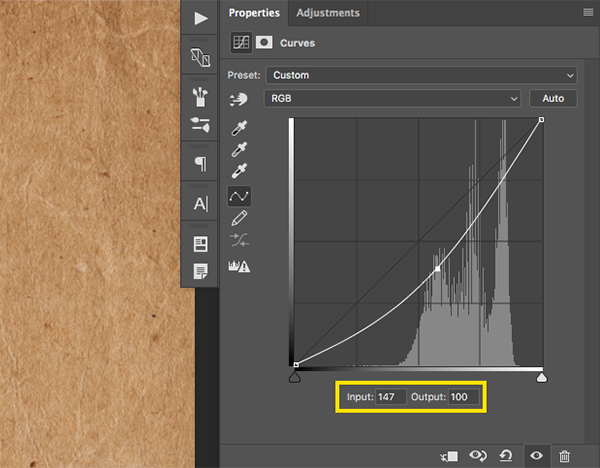
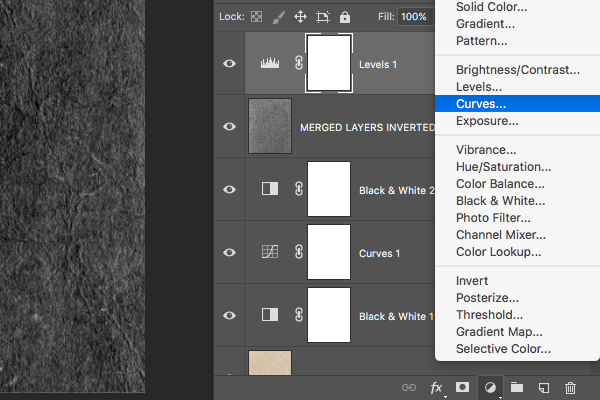
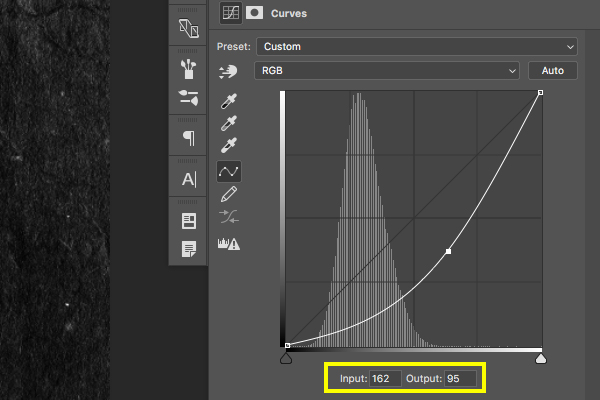
Add a Curves Adjustment Layer above the previous Levels Adjustment Layer to your Layers Palette.
Create a point in the center of the grid for your Curves and set the Input value to ‘162’ and the Output value to about ’95’ so you have something like this:
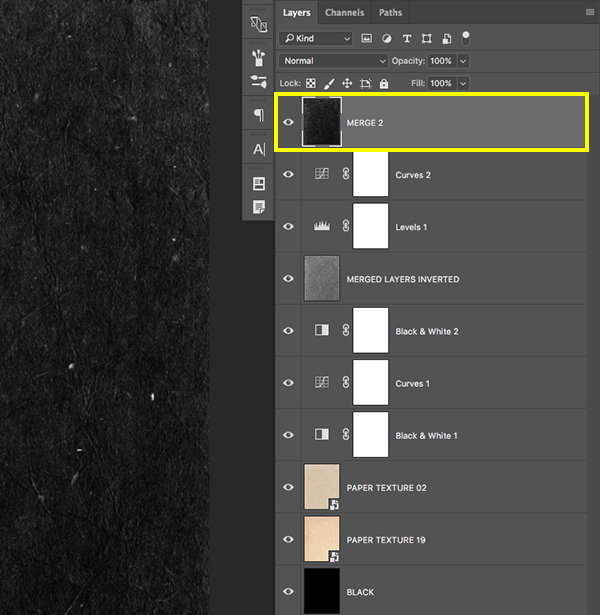
Step 7: Merging Again
Make sure you have your very top layer selected – this time it should be your Curves Adjustment Layer. From here we will once again use the keyboard shortcut Command/Ctrl+Alt/Option+Shift+E to merge all of the layers below into one new layer.
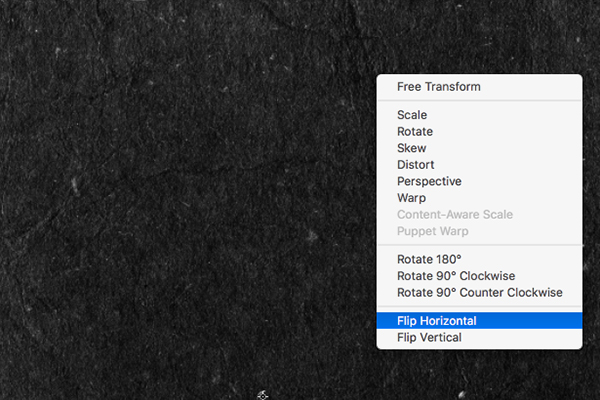
Select your newly merged background layer and press Command/Ctrl+T to initiate a Free Transform. Hold the Command/Ctrl Key and click on the image in your workspace to reveal a dropdown menu. From this list we will first choose the option to ‘Flip Vertical’ as shown below:
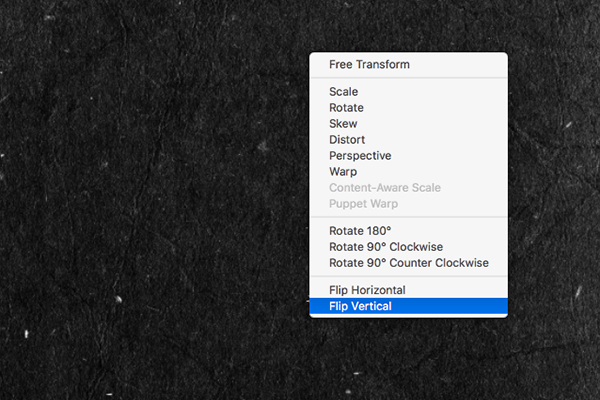
Repeat this once again, this time choosing the ‘Flip Horizontal’ option before pressing the Enter Key to apply the changes.
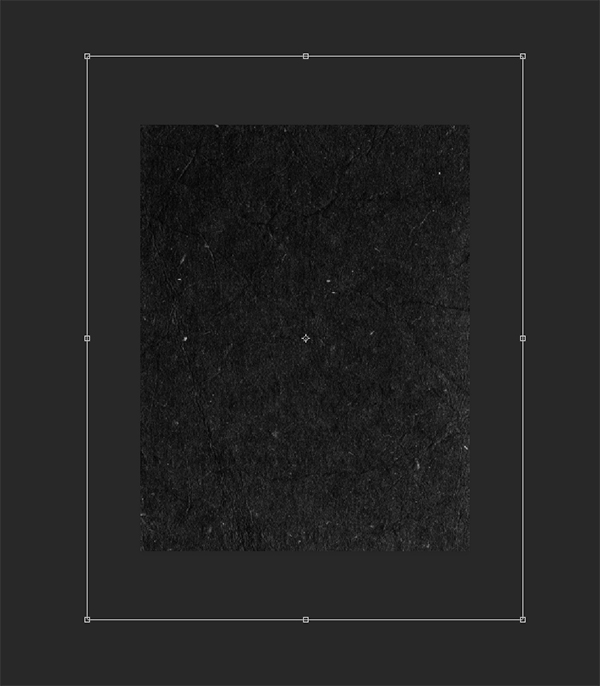
Select your merged background on the top of your Layers Palette, press Command/Ctrl+T to apply a Free Transform, and then hold the Alt/Option+Shift Keys to scale your image up by dragging outwards from any of the four corners of the bounding box until it looks like this:
Step 8: Adding some grunge
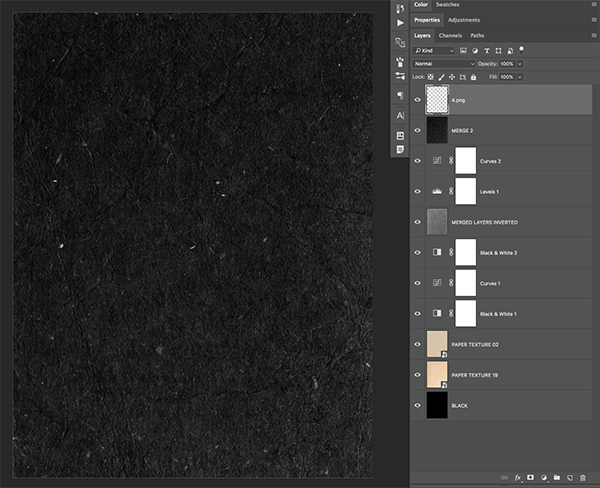
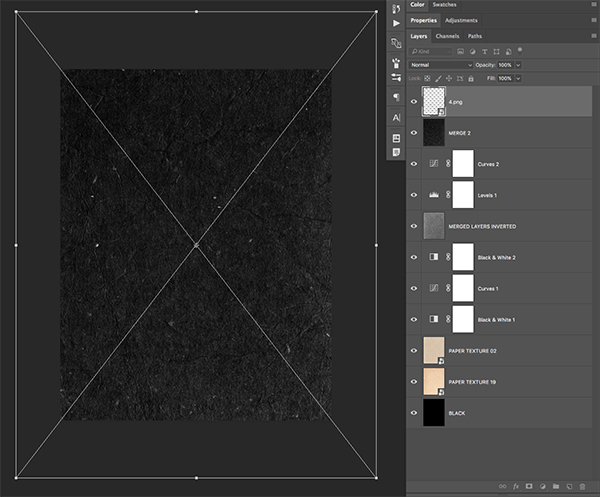
Next, open the ‘4.png’ file from District 62 as shown below:

Click and drag the texture file into your working document and make sure that it’s at the top of the Layers Palette. You can also rename this layer if you wish, but for now I will just call it ‘4.png’ to keep things simple and straight forward.
Hold down the Control Key and click on the layer before choosing ‘Convert to Smart Object’ as we did earlier.

Press Command/Ctrl+T to initiate a Free Transform Command, and then hold the Alt/Option+Shift Keys to scale the texture down a bit. We also want to rotate the texture 90 degrees by hovering our cursor over any of the four corners of the bounding box and then holding the Shift Key while rotating. You should end up with something like this:
Step 9: Coloring our grunge texture
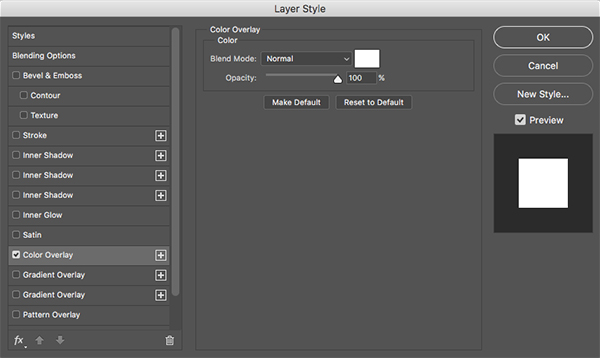
Double click on the ‘4.png’ layer to bring up the Layer Style Dialog Box. From here, check off the ‘Color Overlay’ option and change the color to solid white. Once you have done that, press ‘OK’ to close out and apply the changes.
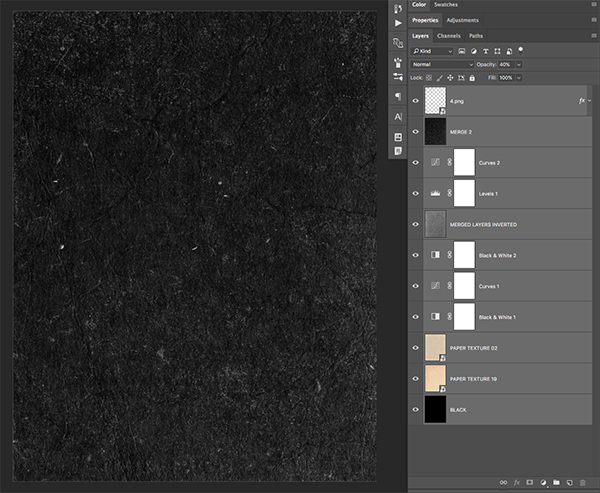
Next, press the number ‘4’ on the keyboard to reduce the opacity of the texture to 40%. You can also do this manually by simply moving the opacity slider to the left.

Step 10: Grouping our background
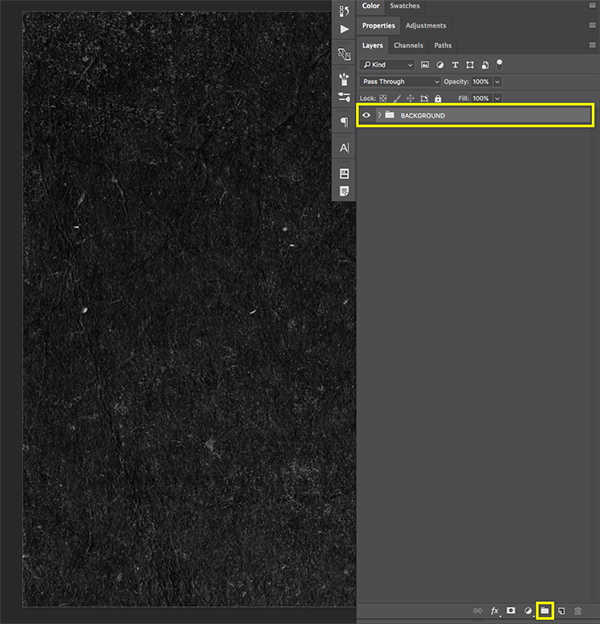
Select the ‘4.png’ layer, which should be the very top layer in your palette. Then, hold the Shift Key and click on the very bottom layer so you have all of your layers selected simultaneously.
With your layers all selected, click on the small folder icon at the bottom of the Layers Palette to place all of the selected layers into a Group Folder. You can also do this by using the keyboard shortcut Command/Ctrl+G on the keyboard. You will now have a folder that we can rename ‘BACKGROUND’ or anything similar that you want to use.
Step 11: Creating the speedometer
Create a New Layer above your ‘BACKGROUND’ folder and then press the letter ‘U’ on the keyboard. You should now see a toolbar across the top of your interface for the shape settings. Here we want to make sure there is no fill color, and just a 1px solid color stroke, similar to the image below:

With your New Layer selected, hold the Shift Key and click to drag out a large circle like this:

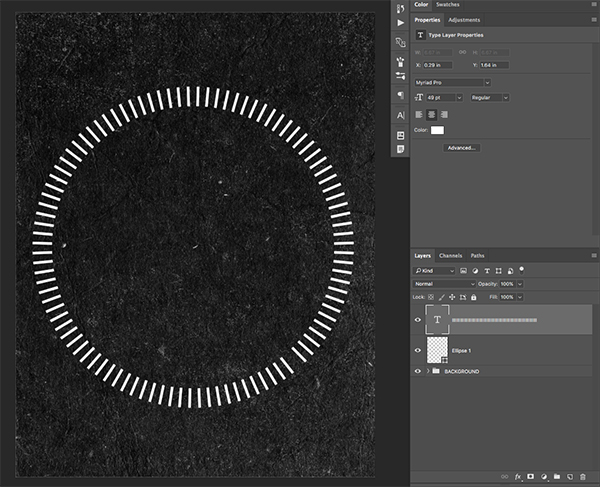
Press ’T’ on the keyboard to get your Type Tool and then click anywhere along the path of the circle. Hold down the Shift Key once again and type out several uppercase ‘I’s’ before selecting them, copying them (Command/Ctrl+C), and then pasting them (Command/Ctrl+V) until they go all the way around in a circle.
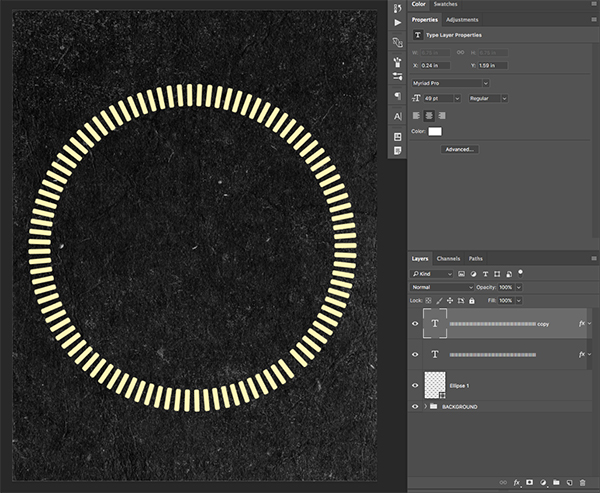
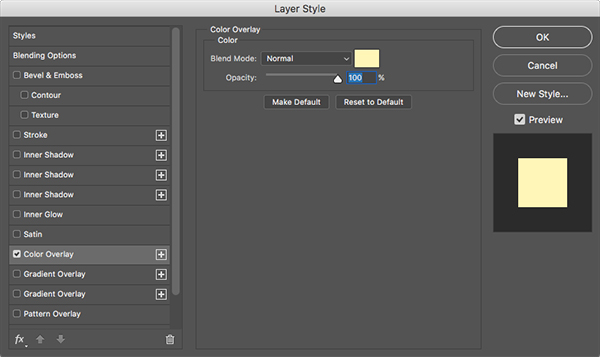
Double click this layer to bring up the Layer Style Dialog Box and then check off the box that says ‘Color Overlay’ and give it a fill color of #FFF6B7 as shown here:

Press ‘OK’ to apply the changes and then press Command/Ctrl+J to create a duplicate of this layer. Next, double click on the copy to bring up the Layer Style options. Check off the ‘Stroke’ option and apply a solid fill color that matches the Color Overlay (#FFF6B7) and then change the size to ‘8’ and the position to ‘Outside’. Also check to make sure that the opacity is all the way up and then hit ‘OK’ once again to apply the changes.

You should now have two copies of the circle, with the top layer having a slightly bolder and heavier appearance.
Select the top copy of the circular text and hold down the Alt/Option Key before clicking on the ‘Add Layer Mask’ option found at the bottom of the Layers Palette (highlighted with the yellow box in the image below):
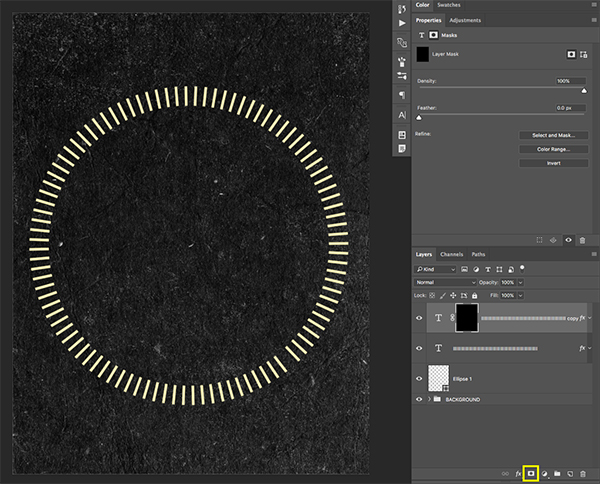
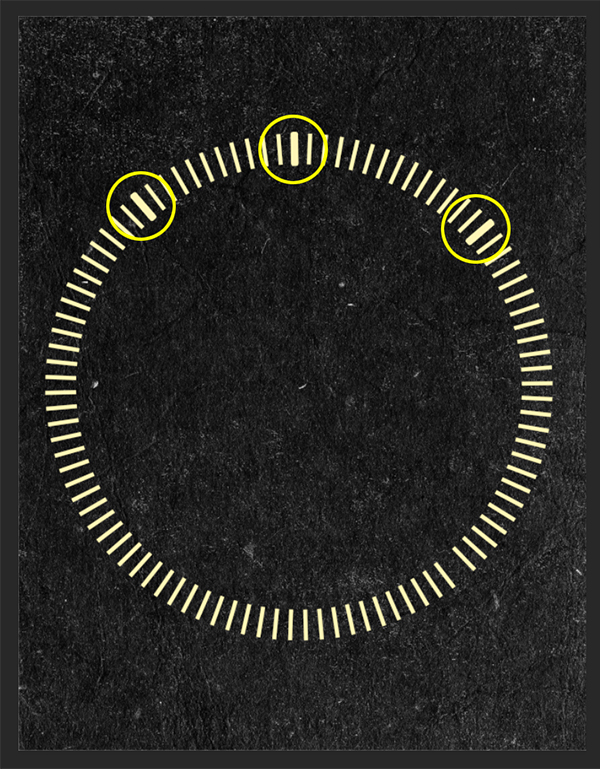
Press ‘B’ to switch to your Brush Tool and then make sure you have a solid white fill color and a hard round brush selected. Paint over three of the lines and try to make them equally spaced apart if you can. Your image should now look like this:
Select your top layer again, and then hold the Shift Key and click on the ‘Ellipse 1’ layer so all three layers are selected. From here, press Command/Ctrl+G or select the small folder icon found at the bottom of the Layers Palette highlighted below:
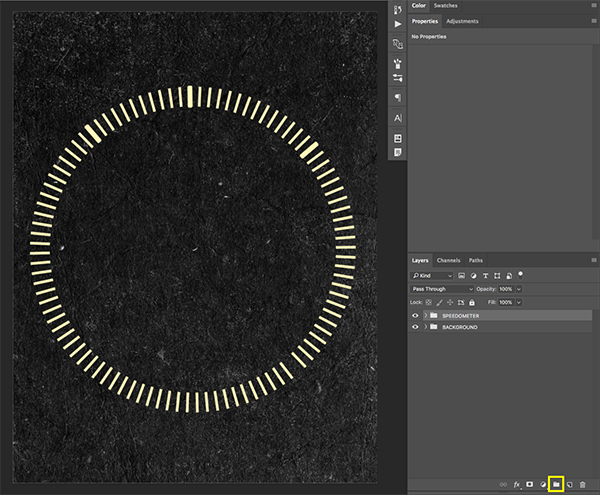
You should now have a new Group Folder that you can rename ‘SPEEDOMETER’ that we will be continuing to work with in the next section.
Step 12: Start your engines
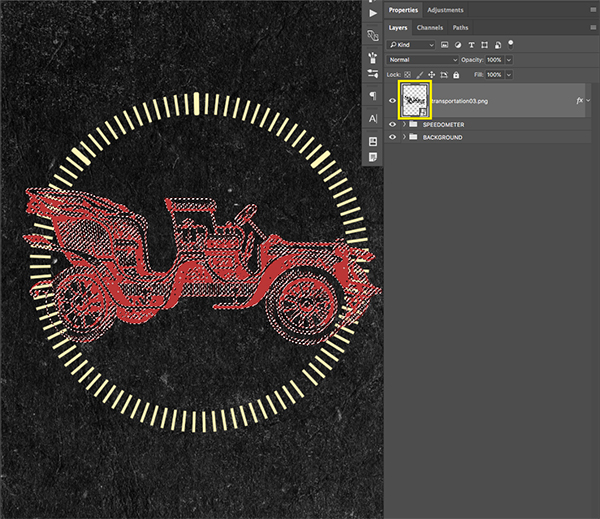
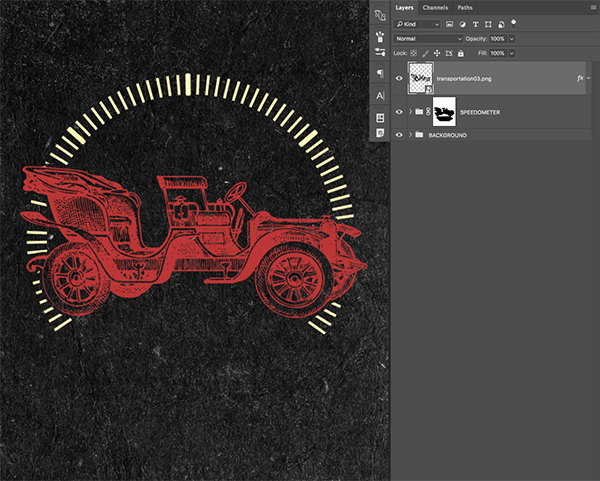
Next, open up the ‘transportation03.png’ image from Graphic-Goods.

Drag the car illustration into your working document and move it to the top of the layer stack. From here, hold the Control Key and click on the layer in the Layers Palette. From the dropdown menu that appears, choose ‘Convert to Smart Object’ to convert the layer.

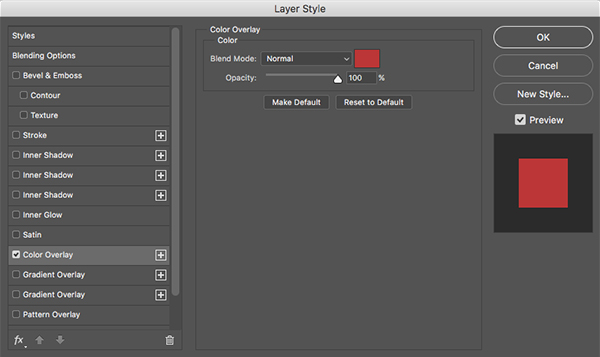
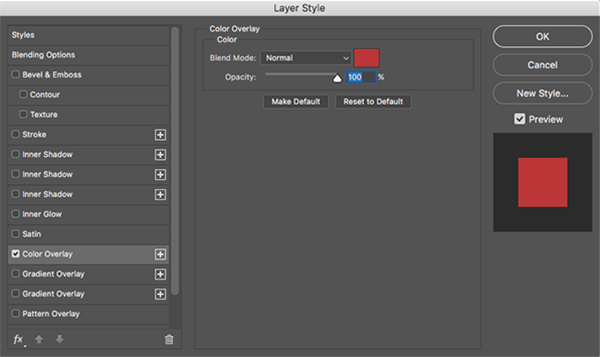
Double click the car layer and check off the ‘Color Overlay’ box before filling it with the color #BB3636.
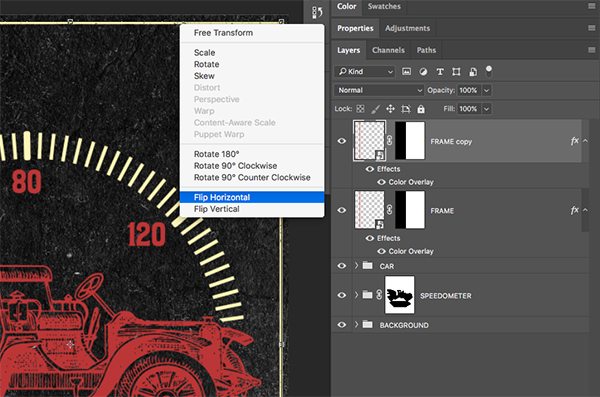
Press OK to apply the changes, and then press Command/Ctrl+T to initiate a Free Transform on the car illustration layer. Hold the Control Key and click on the car to reveal a dropdown menu. From here we want to choose ‘Flip Horizontal’ from the list as shown here:

After flipping the car horizontally so that it is facing the opposite direction, press Command/Ctrl+T again, and this time hold the Alt/Option+Shift Keys and drag any of the four corners of the bounding box outwards to make the car illustration larger. Make sure that the front and back of the car overlap the speedometer beneath it, and then once you are happy with the size of the car press the Enter Key to apply the transformation.

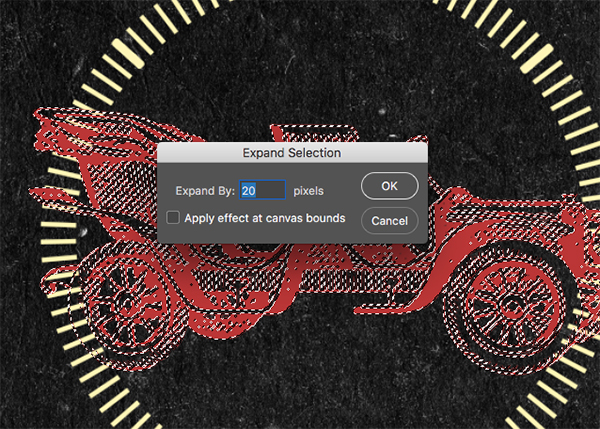
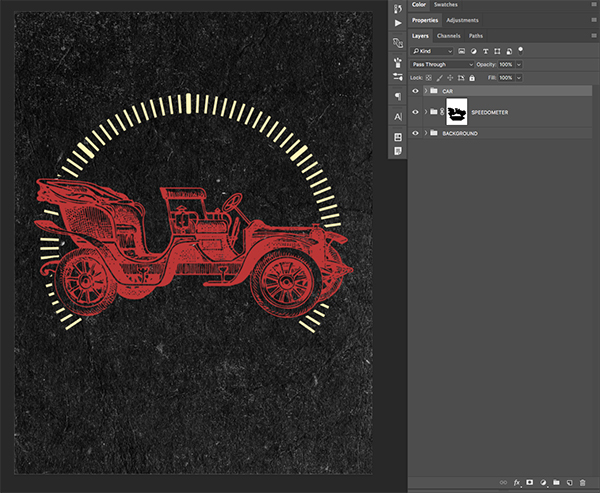
Step 13: Combining the car and speedometer
Hold the Command/Ctrl Key and click on the layer thumbnail icon for the ‘transportation03.png’ car layer to activate a selection around it as shown below:
With your selection still active, click the New Layer Icon found at the bottom of the Layers Palette, highlighted below:

With your New Layer selected, go to the Select Menu and choose ‘Modify > Expand’ as shown here:
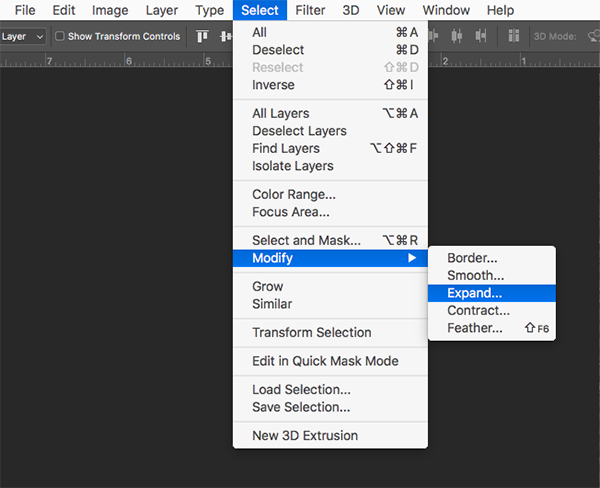
When prompted with the next dialog box, enter a value of 20 pixels and then press the Enter Key.
Press ‘D’ on the keyboard to revert to your default colors and make sure white is your foreground color. With your New Layer still selected and your selection active, press Alt/Option+Delete on your keyboard to fill the selection with solid white. After that, press Command/Ctrl+D to deselect everything or you can go to the Select Menu and choose ‘Deselect’ as an alternative.
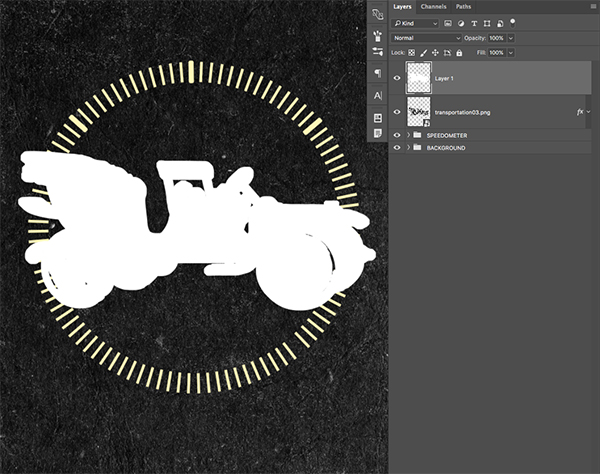
Use your Brush Tool (B) once again and fill in any gaps inside the car illustration where the background is showing through or where there are any small pieces of the lines of the speedometer showing. You should now have something like this:
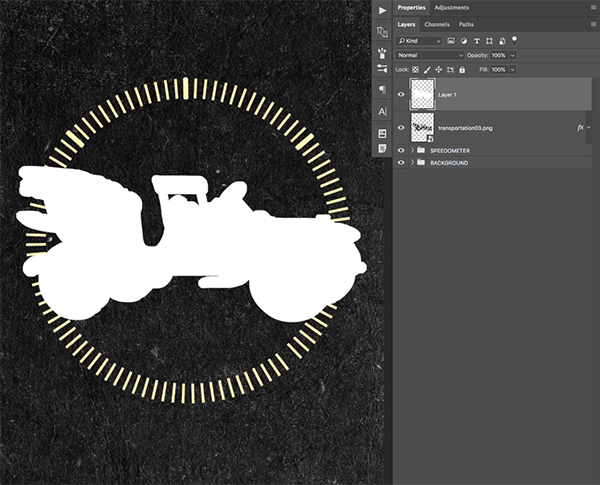
Hold the Command/Ctrl Key and click on the layer thumbnail icon for the solid white layer on top to activate a selection around it. Next, poke out the eye to turn the visibility of this layer off.
Press Command/Ctrl+Shift+I on the keyboard to invert the selection. You can also go to the Image Menu and choose ‘Adjustments > Invert’ to invert the selection. After that, click on the Layer Mask Icon at the bottom of the Layers Palette (highlighted by the yellow box in the image below):

You can now delete the top solid white layer. Switch back to your Brush Tool (B) and paint out most of the lower part of the circle on the ‘SPEEDOMETER’ folder Layer Mask. Your image should now look like this:
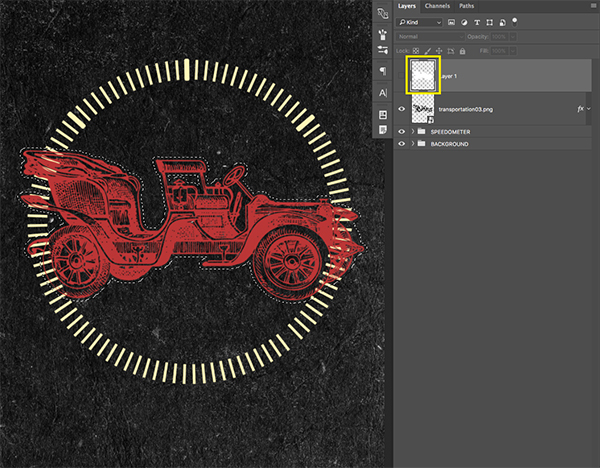
We can now select the car illustration layer and press Command/Ctrl+G to place it into a new Group Folder before changing the name to ‘CAR’ or something similar.
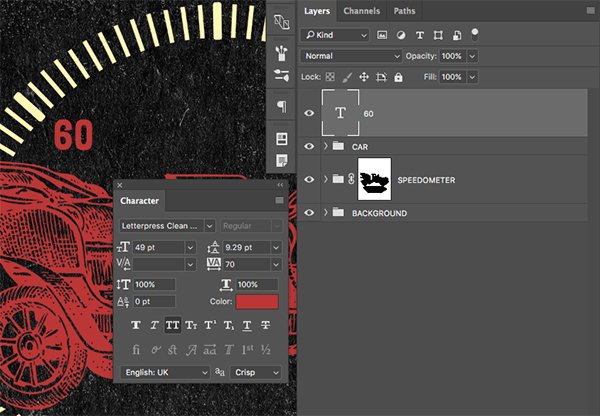
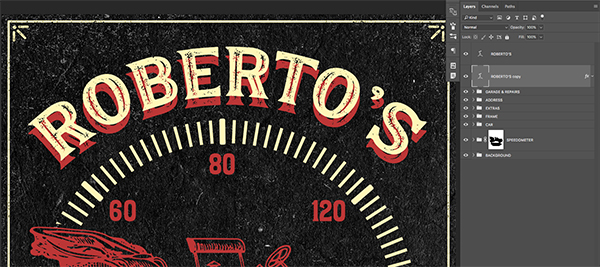
Step 14: Adding some numbers
Create a New Layer on the top of your Layers Palette and press ’T’ on the keyboard to get your Type Tool. Type out the number ’60’ and then highlight the numbers by either double clicking or clicking and dragging with the Type Tool. Bring up your Character Panel from the right side of the interface or you can go to the Window Menu and choose ‘Character’ if you don’t already see it. From here, change the typeface to Letterpress Clean Wood. This is one of several great typefaces found in this most recent bundle that you will get access to when you buy the full pack. For now we want to make the text about 49 pt in size, and we also want to highlight the text and use the Eyedropper Tool (I) to sample the same red color of the car.
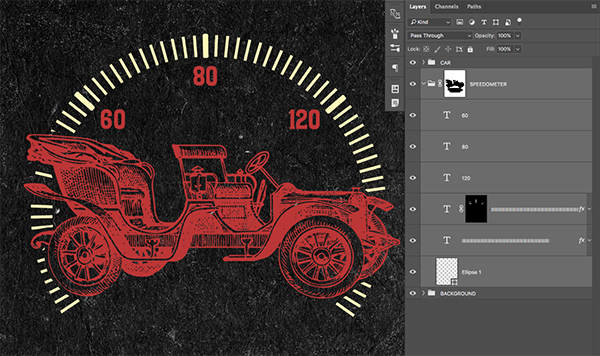
Create two more copies of the text layer by pressing Command/Ctrl+J and space them out so each number is below the thicker strokes that we created earlier. Change the middle number to ’80’ and the third number to ‘120’ as shown here:

Hold the Command/Ctrl Key and click on each of the three number layers. From here, expand the ‘SPEEDOMETER’ folder and drag the numbers into the folder so they are at the top of the group like this:
Step 15: Adding the frame
Next, open up the ‘LOGOSpg1.ai’ file from the District 62 Hanley Rough Font Collection with Adobe Illustrator.
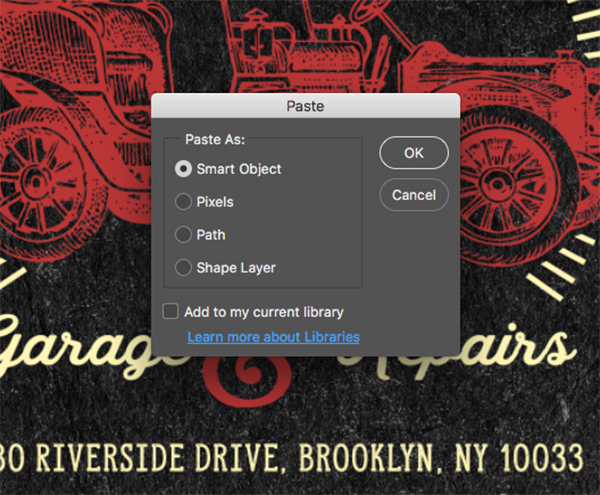
Use the Selection Tool (V) to click on the frame once the file opens, and then press Command/Ctrl+X to cut it from the document before closing out. Jump back over to Photoshop and press Command/Ctrl+V to paste the frame into the document. When prompted with the dialog box asking how you want to paste the frame, choose ‘Paste As: Smart Object’ and then hit OK. Once you have pasted the frame, press Command/Ctrl+T to initiate a Free Transform, and then hold the Shift Key and rotate the frame 90 degrees so that it matches the orientation of our document. Leave a bit of room around the edges on the top, bottom, and sides, and then move the frame over towards the right so it looks like this:

Double click on the frame to bring up the Layer Style Dialog Box and check off ‘Color Overlay’ before applying the same fill color as our speedometer (#FFF6B7) before pressing ‘OK’ to apply the changes.
Press ‘M’ to get your Rectangle Marquee Tool and then click and drag a rectangle around the right side of the frame spanning the entire height and leaving out the left part of the frame. After that, click on the Layer Mask Icon from the bottom of the Layers Palette.
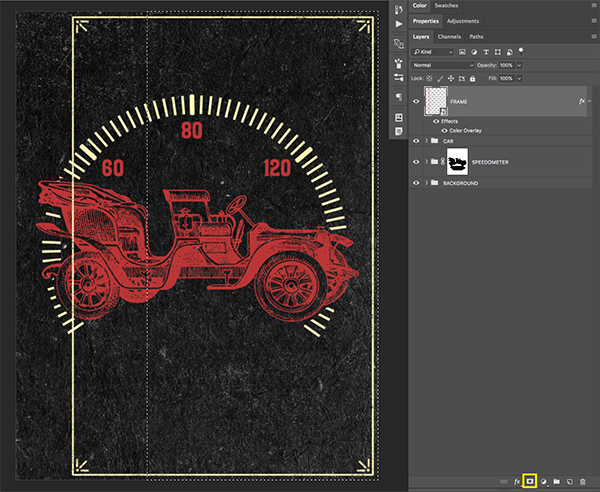
Your frame should now look like this with the Layer Mask applied:
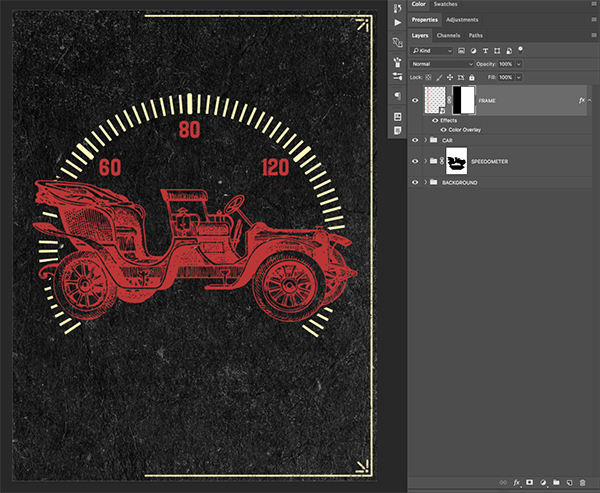
Press Command/Ctrl+J on your ‘FRAME’ layer to make a copy of it. Press Command/Ctrl+T to initiate a Free Transform and then click on the frame in your document while holding the Control Key to reveal the dropdown menu. From here we want to choose ‘Flip Horizontal’ from the list to flip the copy the other way.
After flipping this copy of the frame, move it over to the left side so that the frame now goes around the whole document like this:
Hold the Command/Ctrl Key to select both copies of the frame, and then press Command/Ctrl+G to place them into a Group Folder. Rename this folder to ‘FRAME’ or anything similar that will make the folder easily identifiable.
Step 16: Adding some graphic elements
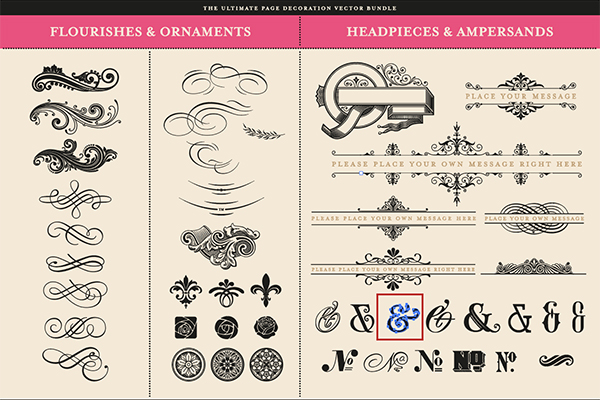
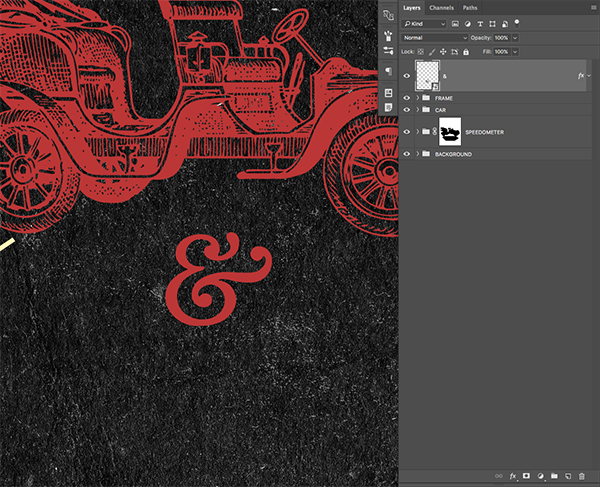
Next, go to your freebie pack for this tutorial and open the ‘page decoration bundle3.eps’ file from The Beacon Collection in Adobe Illustrator. Select the ampersand indicated by the red box in the image below and copy it by pressing Command/Ctrl+C:
Return to Photoshop and press Command/Ctrl+V to paste it. When prompted with the dialog box choose ‘Paste As: Smart Object’ as shown below:

Scale up the ampersand by using the Free Transform Command (Command/Ctrl+T) and holding the Shift Key while dragging outwards from any of the four corners of the bounding box.

Double click on the ‘&’ layer to bring up the Layer Style Dialog Box and apply a Color Overlay using the same solid red fill as our car (#BB3636).
Your ampersand should now look like the image below:
Step 17: Adding our tagline
Create a New Layer and switch to your Type Tool (T) before typing out the word ‘Garage’ using the Hanley Script typeface found in the full bundle. We want the size of this text to be about 49 pt in size as well. You may notice that initially the letters are not connected, but we can fix this easily.
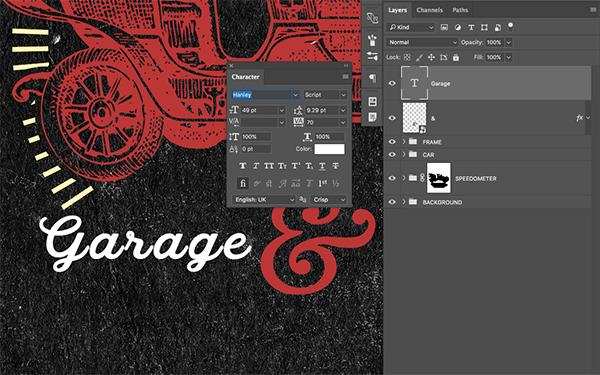
Highlight your text and click on the ‘Color’ option shown in your Character Panel before sampling the cream color from the frame or speedometer. Next, move your type cursor between the letters that aren’t connected. Hold the Alt/Option Key and use the left arrow on your keyboard to move the letters closer together, or the right arrow to move them farther apart. Your text should now look like this:
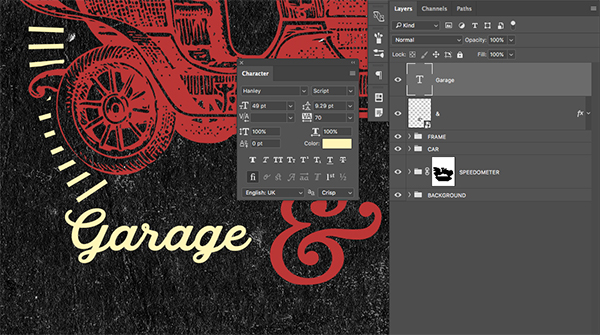
Press Command/Ctrl+J to make a copy of your text layer, and this time type out the word ‘Repairs’ and use the same shortcut to decrease the space between your letters so they appear connected.
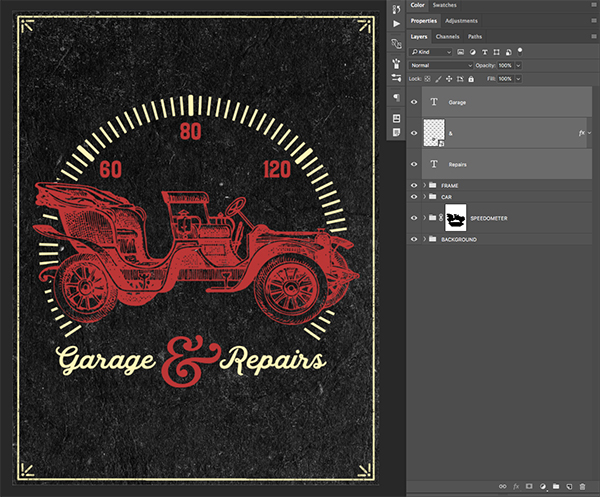
After you have adjusted both of your text layers, select both of these layers along with the ampersand by clicking on the layers while holding the Command/Ctrl Key and then press Command/Ctrl+G to put them into a folder. For now let’s call this folder ‘GARAGE & REPAIRS’ as shown here:
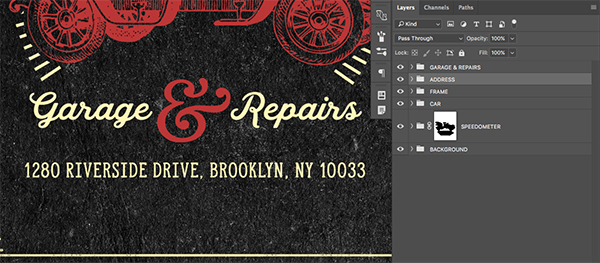
Step 18: Adding an address
Add a New Layer and switch back to your Type Tool (T) once again. Type out the address ‘1280 Riverside Drive, Brooklyn, NY 10033’ and change the color to match the cream color of our ‘Garage’ text (#FFF6B7). For the typeface we will be using Hanley Rough in the Slim Serif style set to about 27 pt size. This is another one of the great options that come as part of the Hanley Font Collection in the latest bundle. Once you have typed out the address you can move the type below the ‘Garage & Repairs’ text as shown here:

Select your address text and press Command/Ctrl+G to put this into a Group Folder named ‘ADDRESS’ and then move the folder below the ‘GARAGE & REPAIRS’ folder as shown below:
Step 19: Establishing an establishment
We will now open the ‘Extras1.eps’ file from the District 62 Hanley Rough Font Collection and copy the ‘Estd’ highlighted below:
Return to Photoshop and paste as a Smart Object.
Resize the ‘Estd’ and position it roughly in the center beneath the address as shown here:
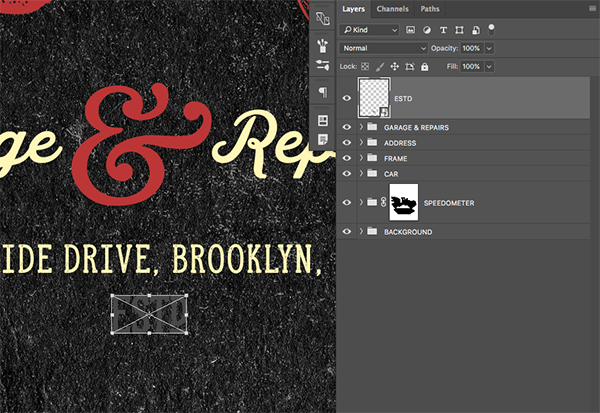
Double click the layer to bring up the Layer Style Dialog Box and apply a Color Overlay using the cream color #FFF6B7.

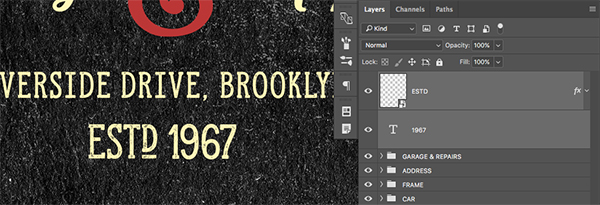
Press ‘OK’ to apply the changes and then create a New Layer and switch back to your Type Tool (T). Create some text that says ’1967’ using the same Hanley Rough Slim Serif typeface and resize it so that it’s the same height as the ‘Estd’ as well as matching the color. Your text should now look something like this:
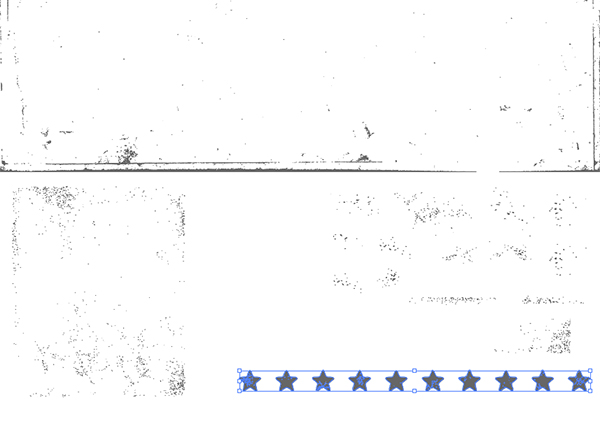
Step 20: Bringing in the stars
Next, open the ‘Extra_textures.ai’ file from the District 62 Hanley Rough Font Collection and copy the stars found on the bottom as shown here:
Come back to Photoshop and paste the stars in as a Smart Object before renaming the layer ‘STARS’ and placing it over the ‘Estd 1967’ like this:
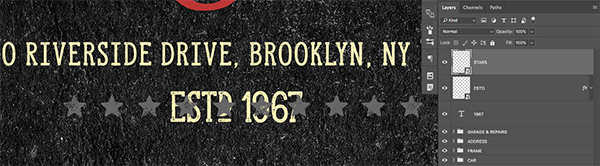
Double click the layer to bring up the Layer Styles and check off the Color Overlay. Apply the same red color that we have been using (#BB3636) before hitting ‘OK’ to apply the changes.

Press ‘M’ to grab the Rectangular Marquee Tool and then click and drag around the first three stars. From here, click the Layer Mask button found at the bottom of the Layers Palette.
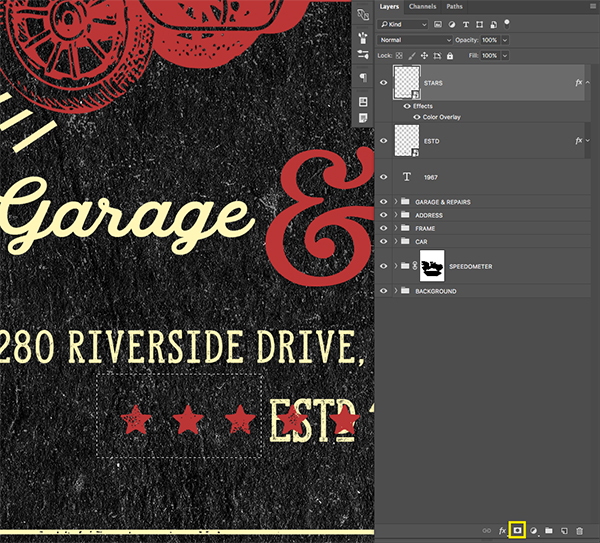
Select the ‘STARS’ layer and press Command/Ctrl+J to make a copy and then slide it to the right so you have three stars on both sides of the ‘Estd 1967’ text as shown here:
Hold the Command/Ctrl Key and select both of the ‘STARS’ layers along with the ‘Estd’ and ’1967’ layers before placing them into a Group Folder. Move this folder down just below the ‘ADDRESS’ folder.
Step 21: Adding the title
Create a New Layer and grab your Type Tool (T) before typing out the name ‘Roberto’s’ in all caps. For the this we will be using the Hanley Rough typeface with the Block Inline style applied. Double click inside the text to highlight it and you should now have something like this:
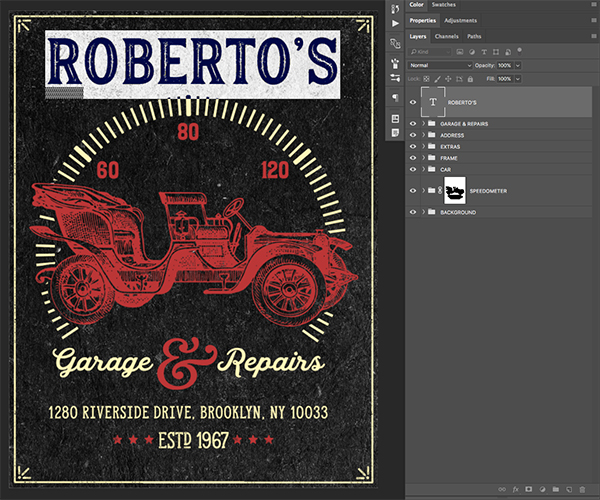
While your text is still highlighted, notice the options in the top toolbar where you can choose a color. Click on this box and then sample the cream color from somewhere else in the image. There is another icon here that looks like a ’T’ with a curved line beneath it. Go ahead and click on this icon shown here:

Clicking on this icon will bring up the Warp Text Dialog Box where we want to then click on ‘Style’ to reveal a dropdown menu. From the dropdown that appears, choose the first option that says ‘Arc’ as indicated below:
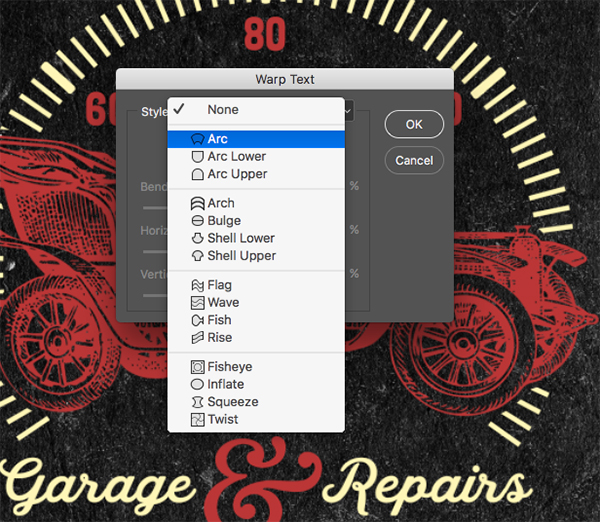
For the settings, apply a Horizontal Bend of 48% and then press ‘OK’ to apply the changes.
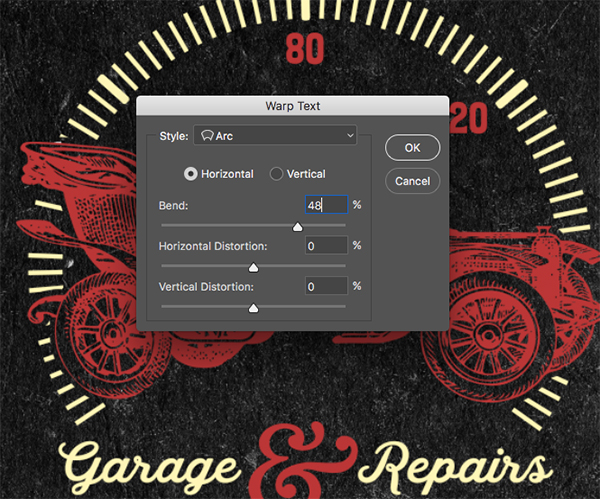
Your text should now look like this:
Step 22: Second copy
Select your ‘Roberto’s’ layer and press Command/Ctrl+J to make a copy and then move the copy below the original layer in your Layers Palette.
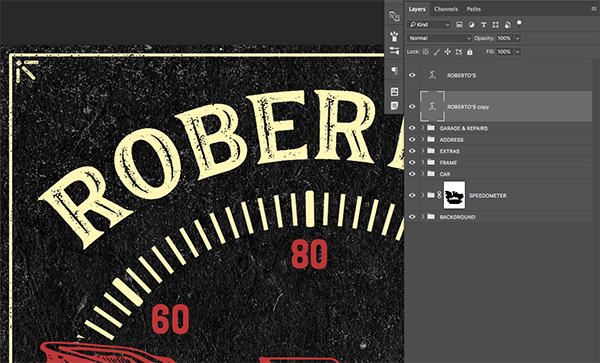
Double click on the duplicate layer to bring up the Layer Style Dialog Box and apply a Color Overlay with a solid red fill (##BB3636) and then apply the changes.

Hold the Shift Key and use the down arrow to move the red copy down so that it appears to be offset like this:
Step 23: Third copy
Select the duplicate ‘Roberto’s’ text layer and make one more copy in between both of the two type layers.
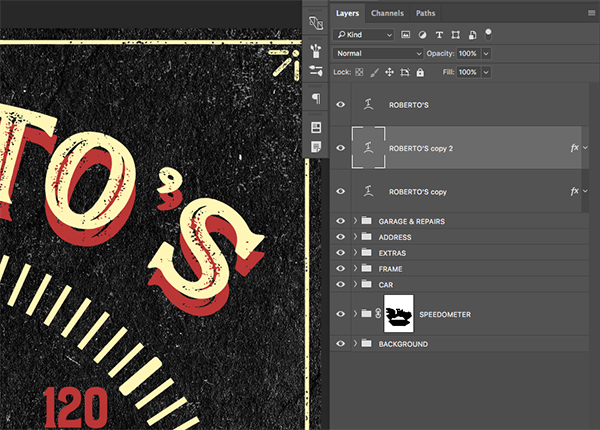
Double click on the layer and create a solid black Color Overlay in the Layer Style Dialog Box.
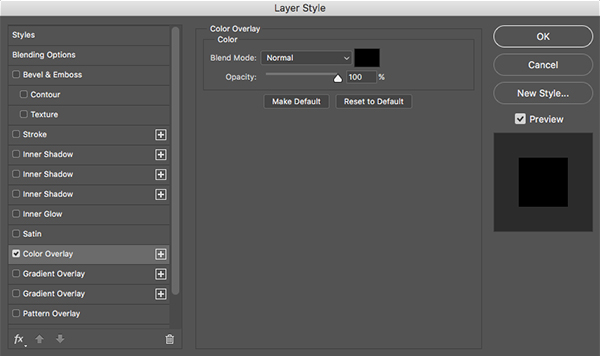
Before closing out, check off the ‘Stroke’ option and apply a solid black stroke at 100% opacity that’s set to 9 pixels. Also make sure that the position is set to ‘Outside’ as shown here:

Press ‘OK’ to apply the adjustments and then move this layer up a few clicks so it separates the original cream colored layer and the red layer. Hold the Command/Ctrl Key and click on all three of the text layers before placing them into a new Group Folder called ‘TT’ and you should end up with something like this:

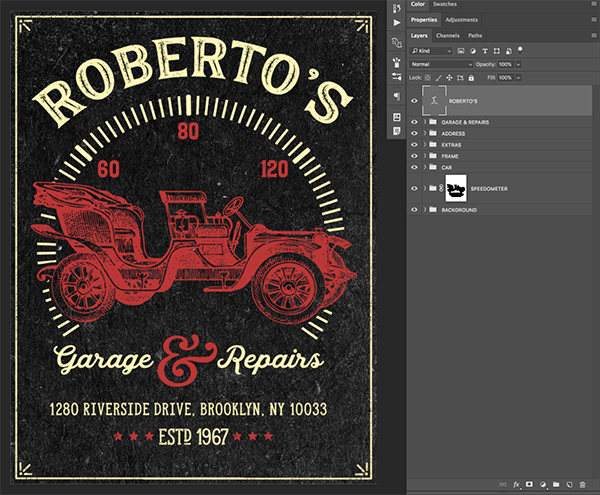
We can now move everything below the title down by simply selecting the Group Folders while holding the Shift Key and then tapping the down arrow a few times just to give the title some breathing room. Your image should now look like this:
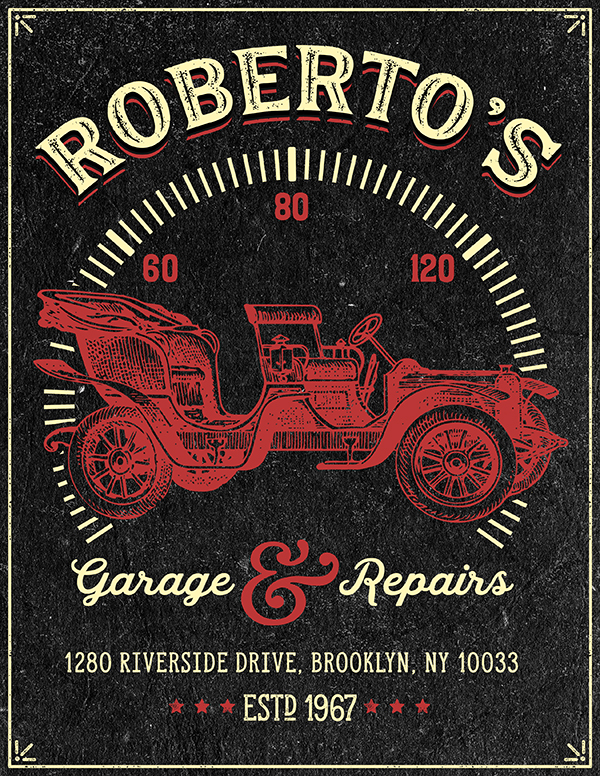
That concludes our Roberto’s Garage & Repairs Tutorial! I hope you guys are pleased with the outcome and of course feel free to make any changes or adjustments to customize your work even further.
Remember that whether it’s your outcome for this tutorial or something new you’ve made, we’d love to see your designs on our Facebook page.
Please leave a comment if you have any questions or suggestions. I always look forward to hearing from you!
There’s still time to check out The Designer’s Vintage Treasure Chest where you’ll discover thousands more quality vector graphics and tools for just $29.

This is a wonderful tutorial (and freebies, to boot!) Thank you for the seemingly endless stream of design tip wonders you all so graciously pass on. I know these tutorials take much time and effort to put together and publish . . . so thank you for your amazing work!
Thank you so much for such a wonderful comment! It really made our day at DC HQ :).
We are so happy you liked this tutorial and hopefully enjoyed trying it out! We just love to hear hat you find the tutorials helpful so thank you for reaching out to let us know and happy designing!
Another awesome tutorial!!
Thanks Andrea :) We would love to see how you got in if you were keen to share!
Gosh what an awesome tutorial! Learnt SO much – thank you
Thanks so much for the lovely feedback! We are so pleased you like this one :)
Hi! Thanks for this freebie and instructions! I didn’t receive any of the logos used in the tutorial. Is this correct? Please advise. Thanks again for creating this!
Hey Macarena,
Thanks so much for your comment!
Carol also picked up your email with regards to this so you should have a reply from her now :)
Love your tutorials especially that you provide both video and written options. sometimes I just need to see how to do a few steps so it saves me time instead of having to search the video, or vice versa.
So glad I found you a while back. :)
Sonia
Hey Sonia,
Thanks so much for the awesome feedback!
We’re so glad that you love them and hope that you can pick up some cool new tips and tricks too :)