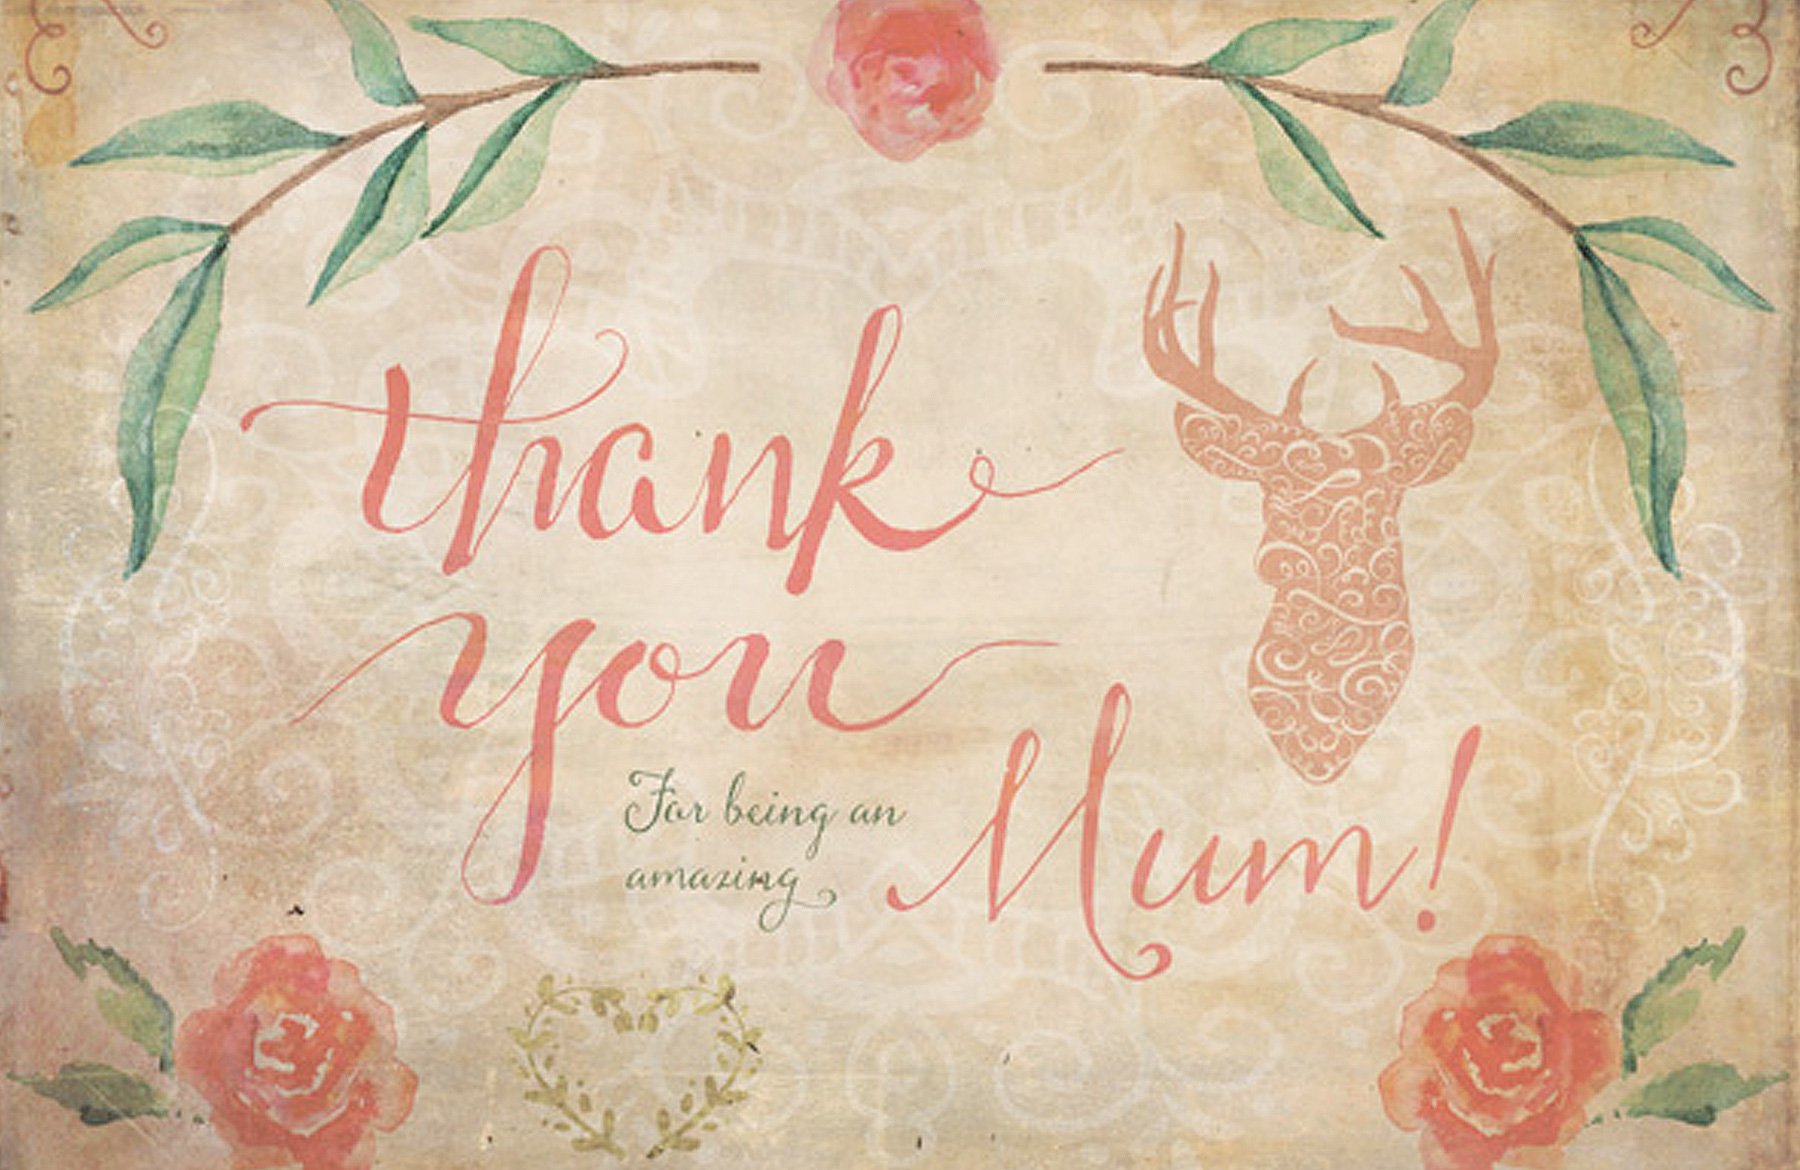
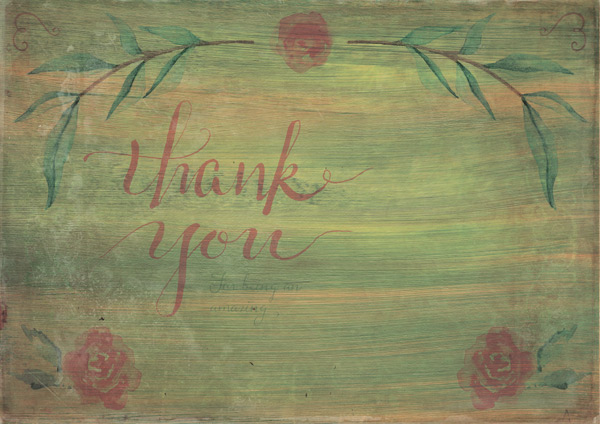
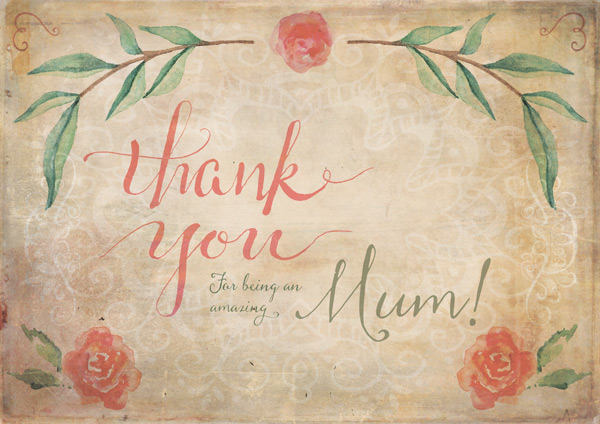
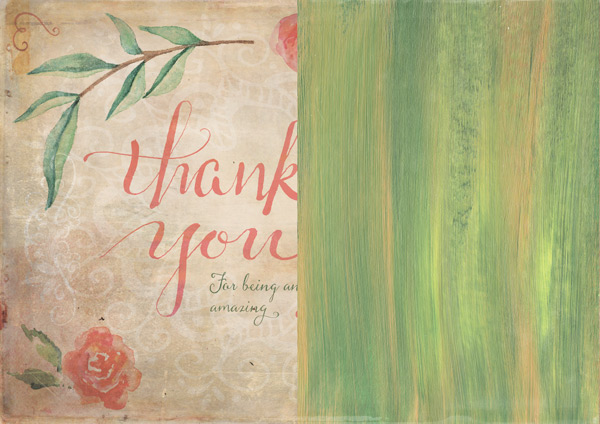
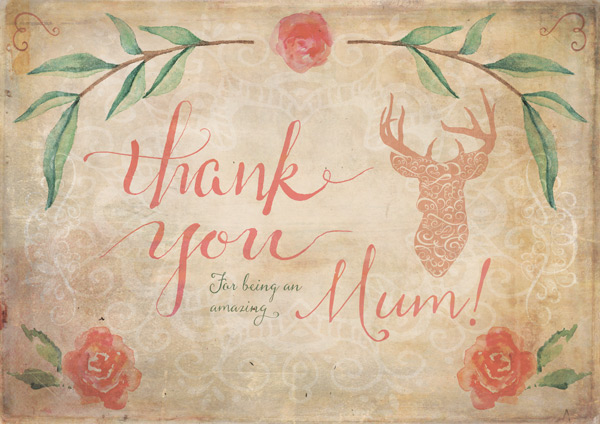
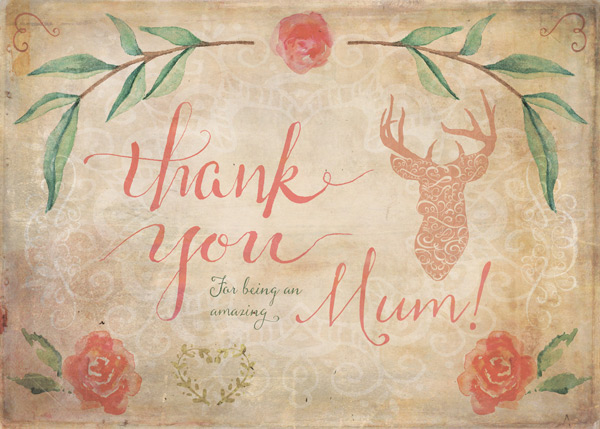
WHAT WE’RE CREATING:
Hey there Design Cutters!
Jo here, for another creative tutorial. This week, we’ve got a fantastic variety of resources to choose from and with Mother’s Day just around the corner here in the UK, it seemed the perfect opportunity to use some of the beautiful textures and painted florals included in the current bundle.
We’ll also go through adding the design to a mock-up scene creator for those of you who have purchased the full bundle, or want to see how it can be used first.
Quick note: In this tutorial, the term “clipping” or “clipped layer” is used a few times. This means that the layer is only visible/applies to the layer directly below it. You can very quickly do this by holding ‘Alt’ down on your keyboard and clicking between the two layers. Here’s a quick demonstration.
Ok, let’s get started!

Follow along with this tutorial: Download the freebies
As always, we have another great freebie for you to enjoy. Thanks to the generosity of our designers, we’ve got a big and varied pack for you to play with including textures, papers, screen textures, vectors and pngs.
Remember, this freebie is just a tiny sample taken from this great bundle: The Essential, Creative Design Arsenal (1000s of Best-Selling Resources) at just $29 (a massive 98% Off). This is our most extensive, highest quality bundle yet which has been months in the making. It includes everything from fonts, to vectors, textures, brushes, mockup templates, scene creator, effects packs and more! We’re sure there’ll be more than a few resources in here you’ll fall in love with and use again and again.

Step 1:
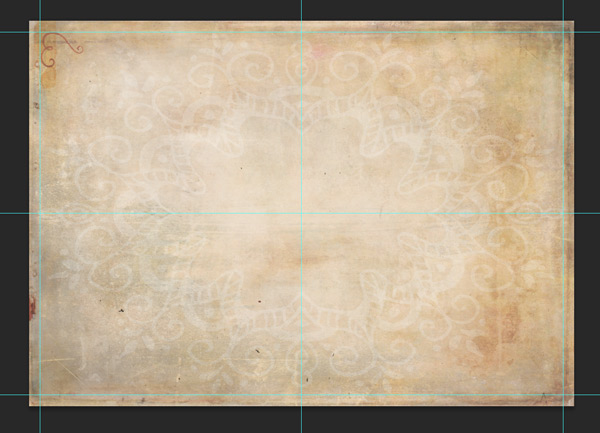
Open up a new (A4 landscape) 3508px x 2480px Photoshop document. Next, we’ll set up some guides that’ll help us with our layout during the design process. To do this quickly and accurately, go to View > New Guide in the main menu and type the following settings individually:
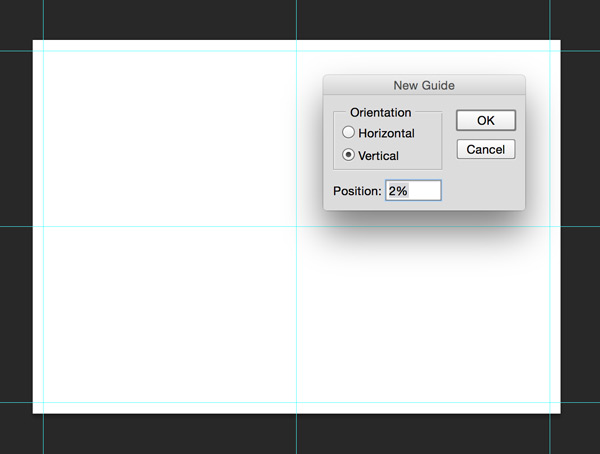
Vertical: 3%, 50%, 97%
Horizontal: 2%, 50%, 98%
That’s the prep work done, now to get creating!
Step 2:
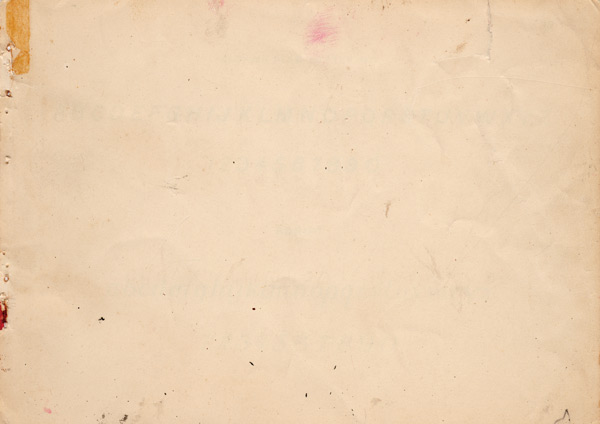
From the freebies, copy and paste vintage-paper-textures-volume-03-sbh-011.jpg scaling to fit the canvas:
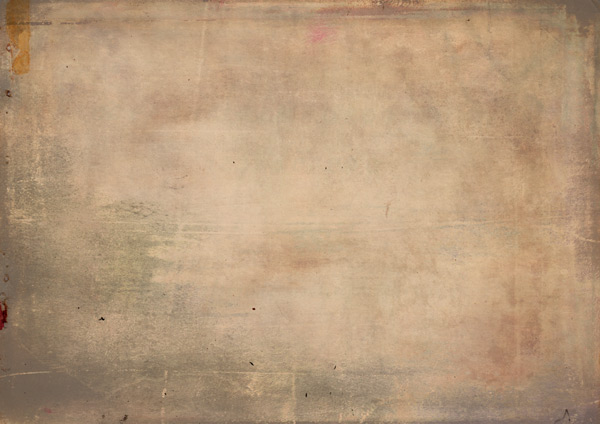
Back in the freebies folder, copy and paste 2LO Daydreamer 20.jpg again scaling so that it fits the canvas:

Change the blend mode to multiply and reduce the opacity to 45%:
We’re using another gorgeous texture from the freebies, this time 2LO Daydreamer 8. As before, copy and paste on to your canvas, scaling to fit:

Change the blend mode to soft light for a subtler effect:

We’ll add a little detail to the background using the gypseyink-freebie.psd. Open up the file, then copy and paste the design on to your photoshop canvas:
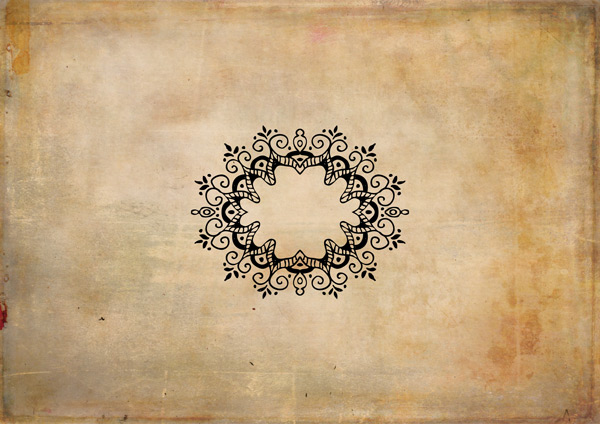
Use the guides to manually scale the shape to fit:

Once you’ve transformed the size, invert your shape (switching the colour to white), and change the blend mode to screen:

Reduce the opacity slightly to 65% for a softer effect:
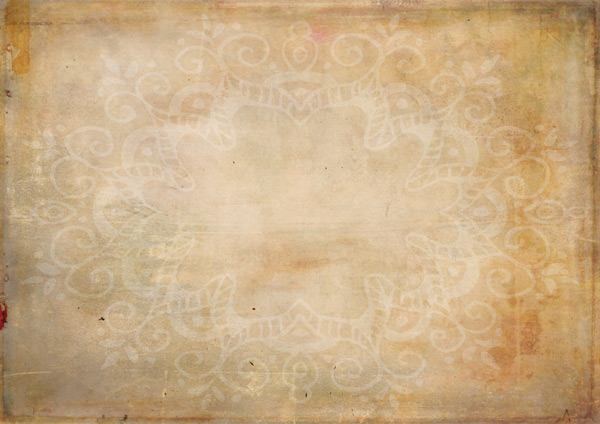
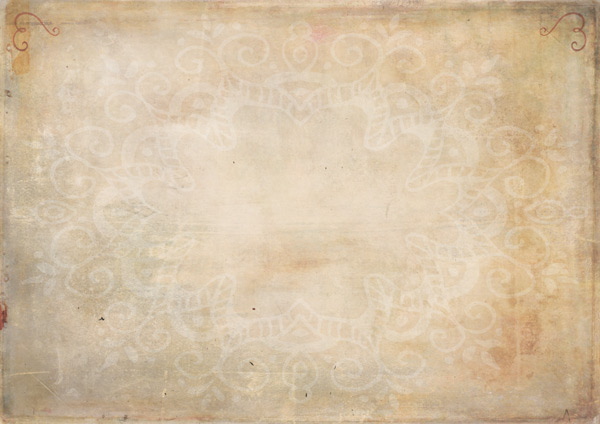
We’ve now created our background! Let’s keep things tidy and easy to find by grouping the layers together in to a folder.
Step 3:
We’re now going to prepare a screen texture that’ll apply to the whole design. Where possible, I always like to apply a screen texture early and work below it, in order to get a more accurate representation of the colours and textures whilst designing. At the end of the design, I’ll add a screenshot without the screen texture applied, so you can see how different the design would look!
From the freebies, copy and paste 2LO Black Screen Film1 4.jpg on to your canvas, scaling to fit:

Then, change the blend mode to screen:

Lock this layer to the top, and we’ll continue to work below it.
Step 4:
We’ll now start creating our overall design. From the freebies, copy and paste Water-Color-Pack_0000s_0002_swirl-3.png on to your canvas:

Rotate 90 degrees anti-clockwise, and use the guides to scale and position in the top left corner, similar to below. Change the blend mode to multiply and reduce the opacity to 65%:
Duplicate the layer, then from the main menu go to Edit > Transform > Flip Horizontal to create a mirror image and position in the top right corner:
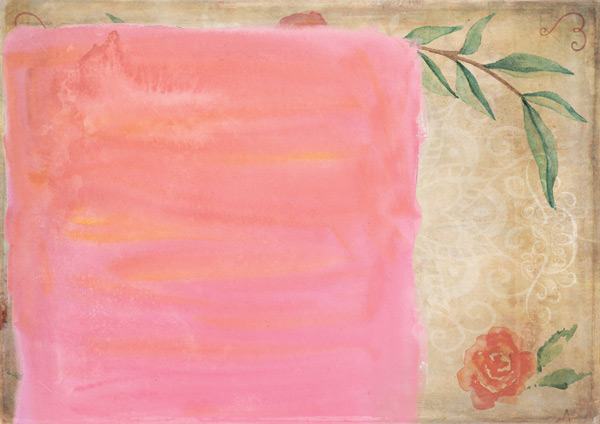
From the freebies, copy and paste the watercolour rose 2.png on to your canvas, positioning at the top center and scaling so that it’s a similar size as below:
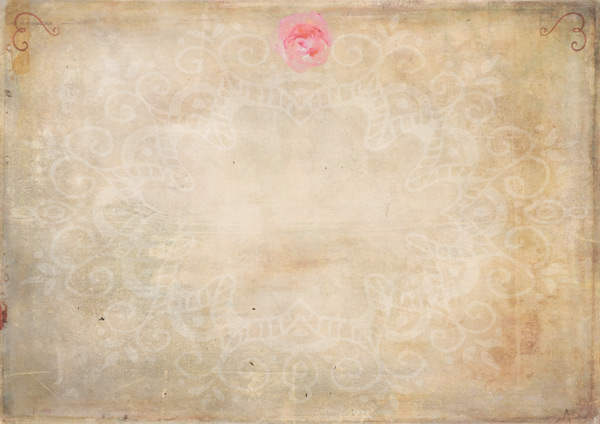
The colour looks a little bright as is, so let’s adjust this by changing the blend mode to color burn:

Just to make the image a little stronger, duplicate the layer, reduce the opacity to 50% change the blend mode to multiply. This helps fill in some of the areas that are very faint:
Step 5:
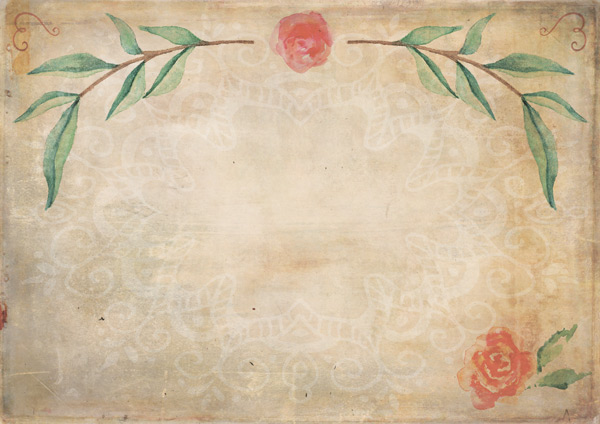
From the freebies, copy and paste Water-Color-Pack_0001s_0001_Leaf-1.png on to your canvas:

Obviously, we need to tweak this a bit to fit it in with our design! Change the blend mode to multiply, then scale down and rotate so that it’s similar to below:

Like we did for the corner swirls earlier, duplicate the layer and go to Edit > Transform > Flip Horizontal to create a mirror image and position on the opposite side of the flower:

Group these together in to a folder called “Branches” so that they’re easy to find – we’ll be coming back to edit these a little later.
Step 6:
From the freebies, select the watercolour leaf 5.png and paste on to your canvas:

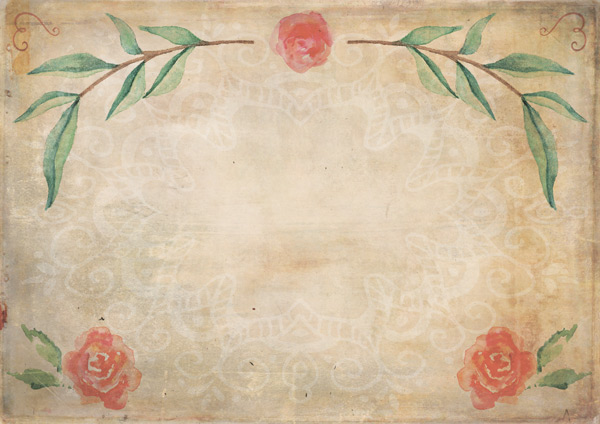
Again, we need to tweak this a bit to work with our design… Change the blend mode to multiply, then scale and position so that it sits in the bottom right corner similar to below:

Again from the freebies, select the watercolour rose 7.png and copy and paste on to your canvas. Change the blend mode to color burn, reduce the opacity to 90%, then scale and position so that it’s similar to below:
Duplicate the layer and reduce the opacity to 75%. Change the blend mode to multiply to help pick out some of the more transparent areas:

Group the layers together and duplicate the group. Flip the group horizontally and position in the opposite corner to create a mirror image:
Step 7:
We’ll add a little extra texture and colour to the design using the Water-Color-Pack_0003s_0010_Purple-2.png from the freebies. Copy and paste on to your canvas, scaling and positioning so that it sits just over the edge of the bottom left corner:

Change the blend mode to color burn and drop the opacity to 50%:
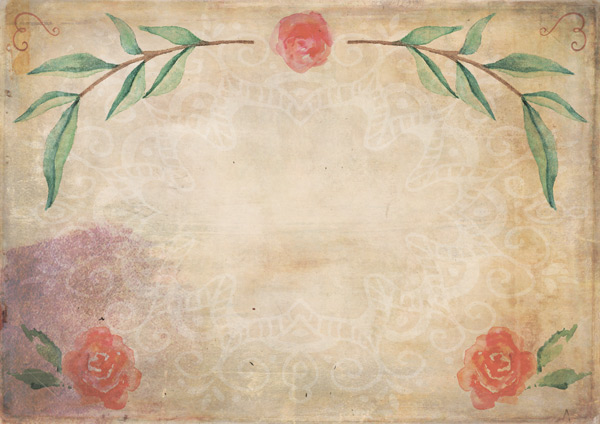
The shade of purple doesn’t really blend in to the design, so we’ll change this to a more in-keeping pinky-peach colour using a hue/saturation adjustment layer with the following settings:
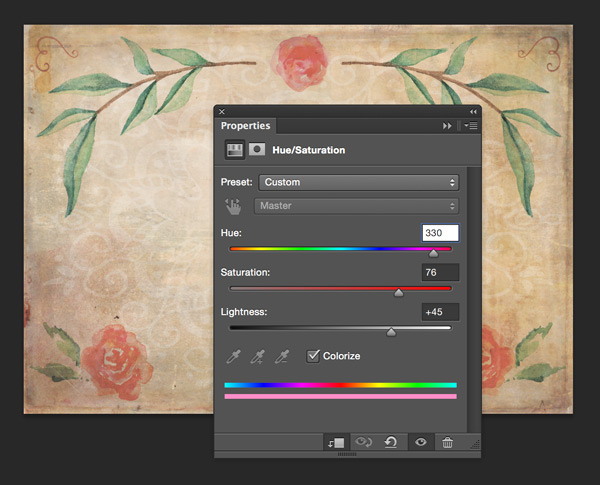
Hue/Saturation Settings:
Colourize: On
Hue: 330
Saturation: 76
Lightness: +45
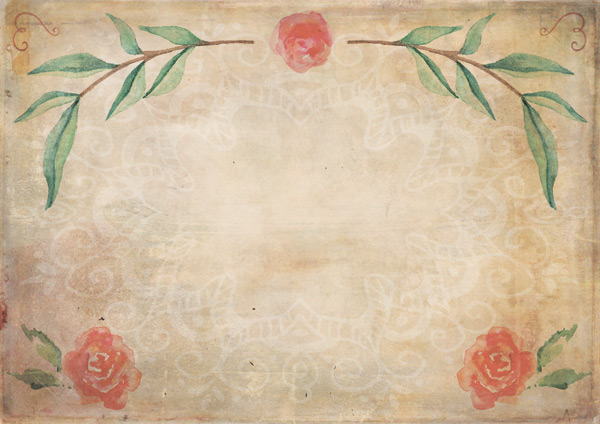
Step 8:
Next, we’ll add a little subtle detail to the space between the upper branches and roses in the bottom corner to create a bit more of a frame.
From the freebie-vectors.ai select the following vector:

Copy and paste on to your Photoshop canvas, rotating 90 degrees clockwise and scaling down so that it looks similar to the image below:
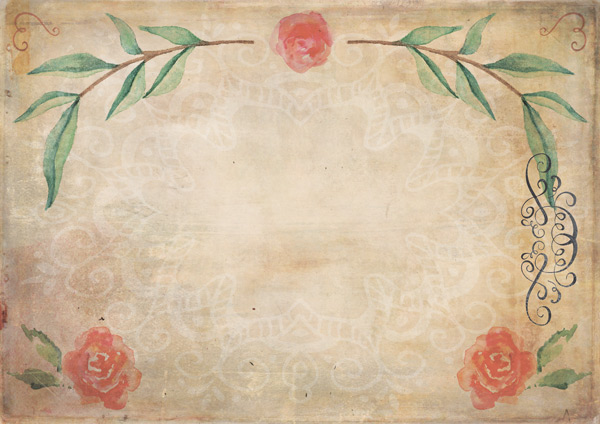
We’ll blend this in to our design a little more by changing the blend mode to soft light:

Duplicate the layer and flip horizontally to create a mirror image on the opposite side:

Step 9:
Now we’re going to add some text. From the freebie-vectors.ai file, copy and paste the “Thank You” image on to your Photoshop canvas and change the blend mode to multiply:

We’ll give this a painterly look using the watercolour_pinkback.png file from the freebies. Copy and paste the file on to your canvas so that it covers the “thank you” text – feel free to move it around to get an area of texture you particularly like covering the text:
Clip the layer to the text below:

Group the two layers together and then duplicate the group. Reduce the opacity of the duplicated group to 45% so that we add a little more depth to the colour:

Step 10:
If you’ve purchased the full bundle, select the font Butterscotch Regular and type “For being an amazing” like in the image below:

Font Settings:
Font: Butterscotch Regular
Style: none
Colour: #000000
Size: 25pt
If you don’t have Butterscotch Regular, you can use an alternative script/handwritten style font from your own collection as a substitute.
We’ll add a little variety to some of the letters now by using more of the font-family. Select the “F” at the beginning of the sentence:
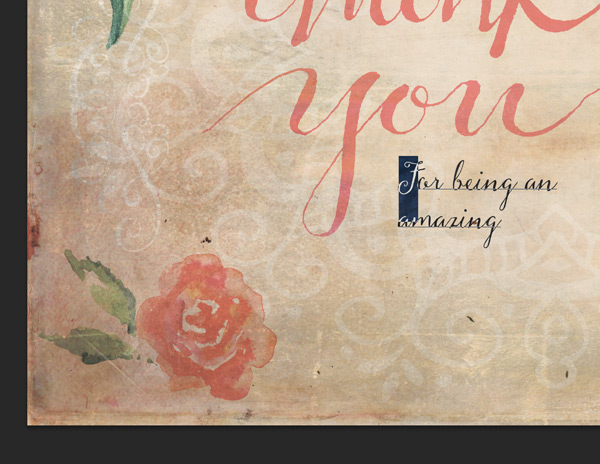
Change the font to Butterscoth_Alt_Cap itals which will give you an alternative uppercase letter ‘F’:
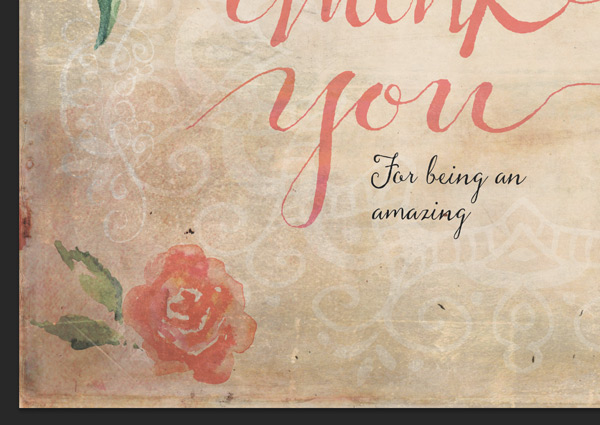
Do the same for the “g” at the end of “amazing”, selecting Butterscotch_Alt_a_to_o Regular as the font to get an alternative version:


Now, select the text and change the colour to #8b8d60:

It’s a little difficult to see at the moment, but we’ll be applying a multiplying texture effect over the top, and need this as our base colour for it to work. It’ll become much clearer in a moment!
From the freebies, copy and paste the brush-strokes-textures-volume-01-009-sbh.jpg file on to your canvas, rotating and scaling to fit:
Change the blend mode to multiply:
Clip this to the text layer below to complete the effect:

Step 11:
Continue by typing “Mum!” (or “Mom” for our friends across the Atlantic!) with the following settings:
Font Settings:
Font: Butterscotch Regular
Style: none
Colour: #8b8d60
Size: 100pt
Duplicate the watercolour_pinkback layer we used for the “thank you” text, and reposition above the “Mum!” text we just typed:

Clip it to the text below:

Step 12:
From the freebie-vectors.ai file, copy and paste the deer head image on to your Photoshop canvas, scaling and flipping horizontally so that it’s positioned similarly to below:
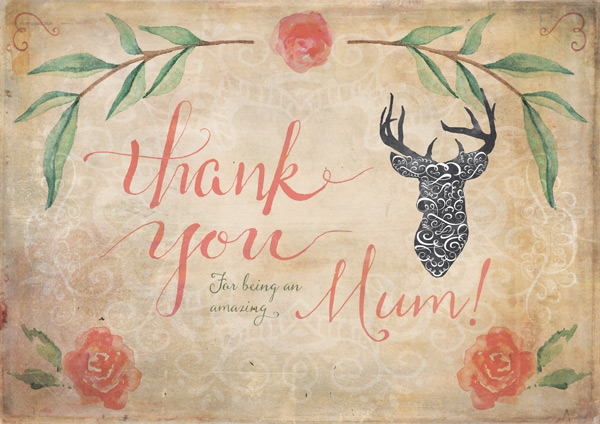
Set the blend mode to multiply:

As the decorative swirls on the deer are solid white rather than transparent, we need to remove these so that they will still show when we apply a clipped texture to this shape. To do this quickly, select the magic wand tool and click within one of the swirls (any area that isn’t black). Inverse the selection by going to Select > Inverse from the main menu:
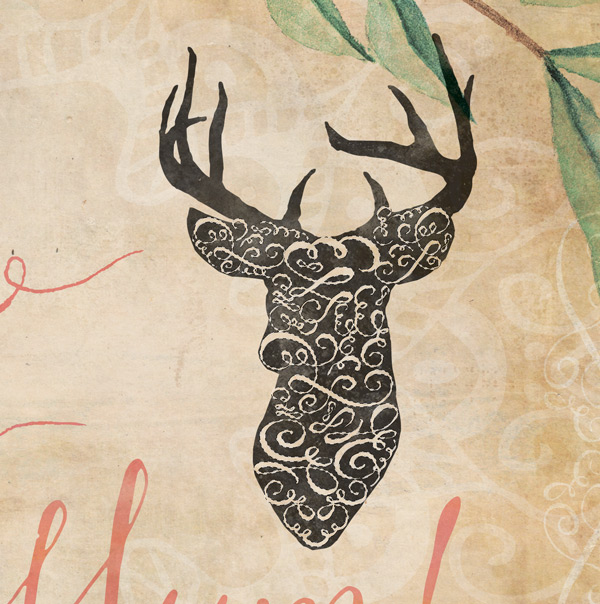
With the selection still active, and making sure the deer head layer is selected in the layer stack, create a layer mask. The layer mask should look like this:

Once you’ve created the mask, duplicate the brush-strokes-textures-volume-01-009-sbh layer we used for the text and rotate to a portrait position. Scale so that it fits the height of the canvas and position above the deer:
Clip it to layer below:
We’ll modify the colour by creating a clipped hue/saturation layer with the following settings:
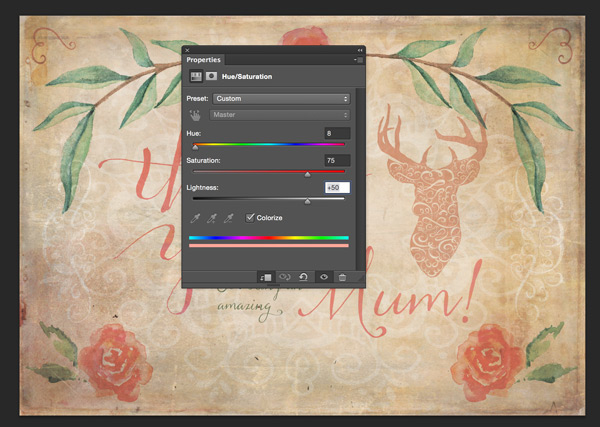
Hue/Saturation Settings:
Colourize: On
Hue: 8
Saturation: 75
Lightness: +50

Step 13:
We can see that there’s a little overlap in our design:
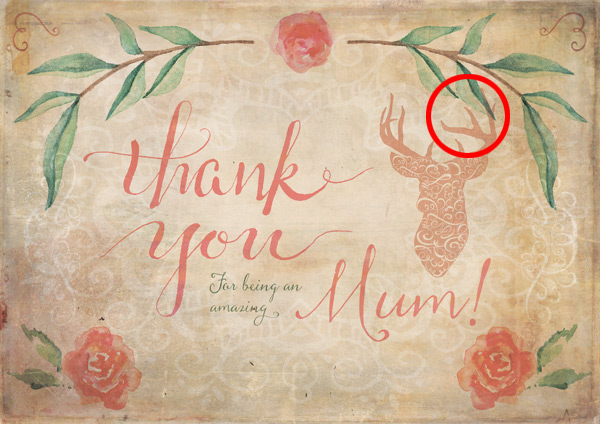
This can be easily corrected by going back to our “Branches” group and using a layer mask to hide the offending leaf!
Step 14:
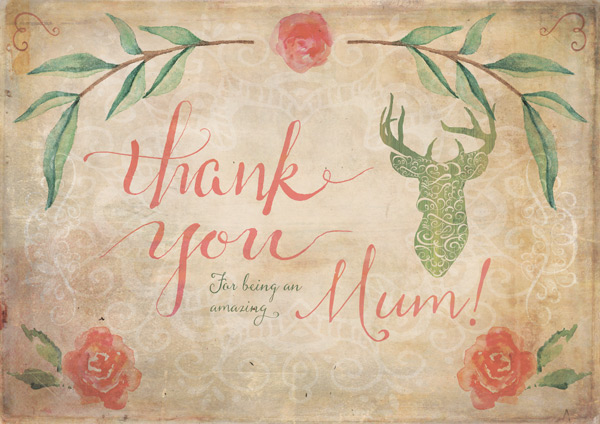
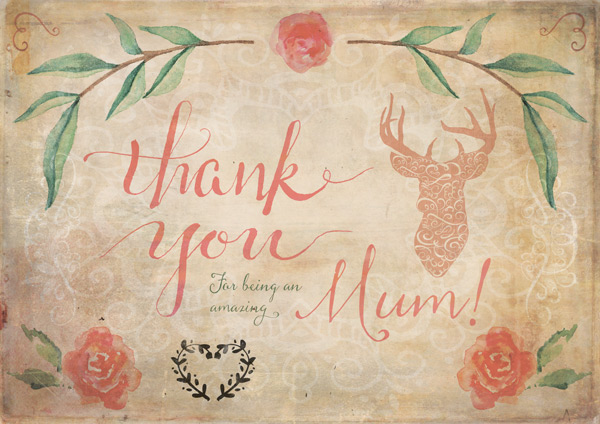
For the final step, copy and paste the heart wreath from the freebie-vectors.ai file on to your Photoshop canvas. Change the blend mode to multiply, scaling and positioning so that it’s similar to below:
To finish off, we just need to download an extra resource from a previous freebie bundle: Supermoon Poster Tutorial Freebie Pack.
Copy and paste the Gold Nugget file on to your Photoshop canvas so that the lower left corner covers the heart wreath:
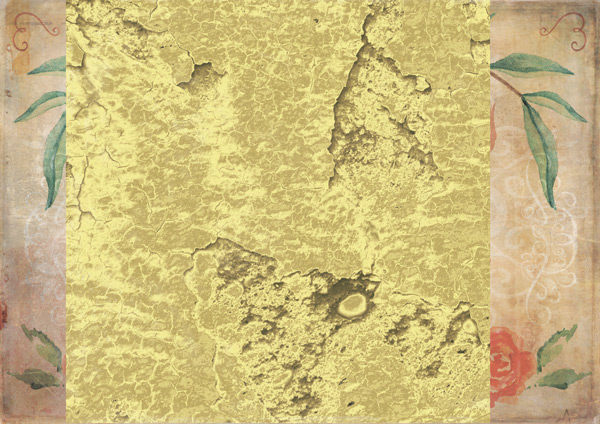
clip the layer to complete the design!
Oh, and as promised, here’s the design without the screen texture we applied at the start:
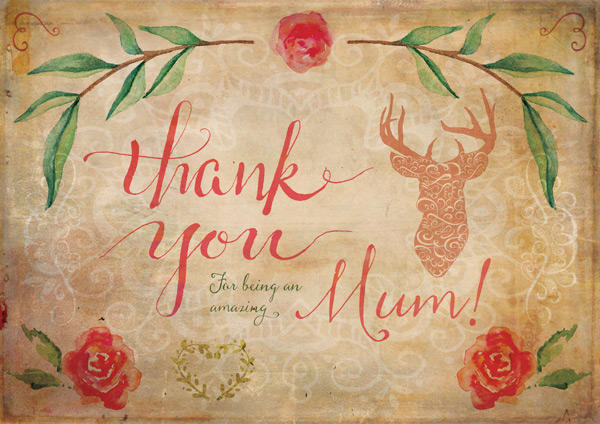
As you can see, it would have made the colours during the design process a little different! ;)
And we’re (almost)done!
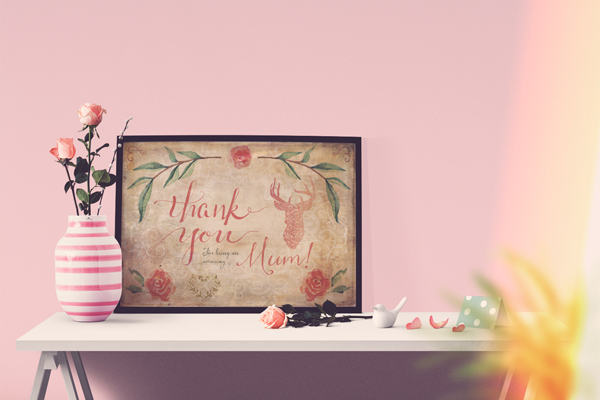
The design of our card is now complete, but we can have a little extra fun by featuring this in to a mockup template for presentation purposes.
As most of you will know, we like to display a mocked-up image of the outcome around this point in the tutorial. Since the current bundle features a perfect Feminine Scene Creator.psd file, we thought it’d be a nice bonus to show you how to create the mockup as well!
(Please note, this file isn’t included in the freebies – this section is designed to show you how to use the mockup file if you’ve purchased the full bundle, or if you’re curious to see how the mockups can be used.)
Step 15:
From the main bundle, open up essential-design-arsenal-placeto > Feminine-Scene-Creator > Feminine Scene Creator.psd

It looks a little bare at the moment, but if you scroll through the layers panel, you start to see the many, many options available for you to play with!
In this case, we’ll start by adding our design. Open up the ‘Poster Frames’ (yellow) group and turn the visibility on for the ‘Medium Landscape’ group, which is towards the bottom.

Open up the group and double-click on the ‘Place your image here’ layer:

That should open up a new window with the following image:

Thanks to the useful dimensions included, we can save our card design as a jpeg to fit. The height stretches jut a tiny bit, but not so much that it affects the design:
Save the file and then go back to the main mockup window to see our changes:

Step 16:
Now that our image is in place, we can have some fun with the props!
There are hundreds here to choose from and an almost infinite number of combinations. As a starting point, here’s what I’ve gone with:
Accessories (blue)
Greetings card (standing open landscape) ( smart object )
Large Kähler vase ( + c )
Flower petal ( c ) x3
Blurred forground elements
Plant top
As they are, the image looks like this:

We’ll move a few layers around to change the position of the items so that they fit better. Remember, you can change the order of the layers too – which is useful to correct the current rose-petal-in-the-middle-of-the-bird issue!

Step 17:
Finally, this mockup creator comes with some great light filters for the perfect finishing touch. Feel free to try out different ones to see which you like. Since all you have to do is turn the visibility on and off, it’s very easy to experiment. :) I’ve gone for ‘LLS II – Bleak’:
And we’re done!
I hope you enjoyed this tutorial and got a feel for how you can use some of the great resources in this bundle. With such an extensive selection and variety, it really only scratches the surface of the potential creativity to be unleashed!
Remember to share your designs on the Facebook page too, as we love being inspired by the way you make these tutorials your own. :)
Hopefully this tutorial showed you how to get creative with just some of the resources available in this vast and varied bundle. Remember, you can get this great deal for a mega 98% off this week! Grab it below, while you still can:
The Essential, Creative Design Arsenal (1000s of Best-Selling Resources)
When I apply screen blend mode on the gypseyink detail, the effect it isn’t a soft effect like in the tutorial photo, it dissapears completely.
Hey Jose,
Thanks for the comment! I can certainly help you with the tutorial.
We have had a look through this and there is actually an error in the tutorial. I am really sorry about this but thank you for bringing it to our attention. We are amending it immediately.
If you invert the shape to white before using the screen blend mode, it should work for you. If it is black, it will hide the shape which is what I think is happening here! Let me know how you get on!
Wow, never in a million years will I reach this level of competence and creativity! I found it fascinating, and will attempt to follow it step-by-step for myself.
Hey Lorraine,
Thanks for the comment!
I am really pleased that you liked the tutorial and I would love to see how you get on with it!
You are already awesome! Don’t forget that you are starting your journey into the world of design- before you know it you will be amazing yourself with your level of competence and creativity. During your journey, if you have any questions, just ask DC! We are always happy to help :)
Very nice….great toutorial.
Hey Ann,
Thanks for the comment!
We are really pleased that you enjoyed this tutorial. How did you get on with it?
Please feel free to share anything that you have created- we would love to see it :).
Are all of the elements in this tutorial, or do I need to purchase some to do it? Would like to know before I start this time. :)
Hey Sandra,
Thanks for the comment!
You will be pleased to know that all the elements for this tutorial are included in the freebie pack.
We really took everyone’s feedback onboard about previous tutorials that didn’t include all the elements required. All future tutorials will have everything in the freebie pack :).
I would love to see how you get on with the tutorial!
Neat piece, Jo!
I am in total agreement with you Simon- this piece is awesome Jo :).