Learn to create custom branding for a Coffee Shop with Illustrator and Photoshop!
In this tutorial I will be taking you through the process of how to create a custom logo for a fictitious Coffee Shop that will be applied to a strong branded mockup. Using a combination of Photoshop and Illustrator techniques we will first go through the process of building out our logo and establishing a few different versions for use. Once we’ve pinned down our logo variations we will begin applying them to a custom branded mockup to help bring it all together to help express the overall feel of our business. If you’re ready to get started then fire up Illustrator and let’s get to it!
HAVE YOU SEEN OUR YOUTUBE CHANNEL?
Watch the video tutorial below and subscribe to our YouTube channel for regular updates direct to your inbox.
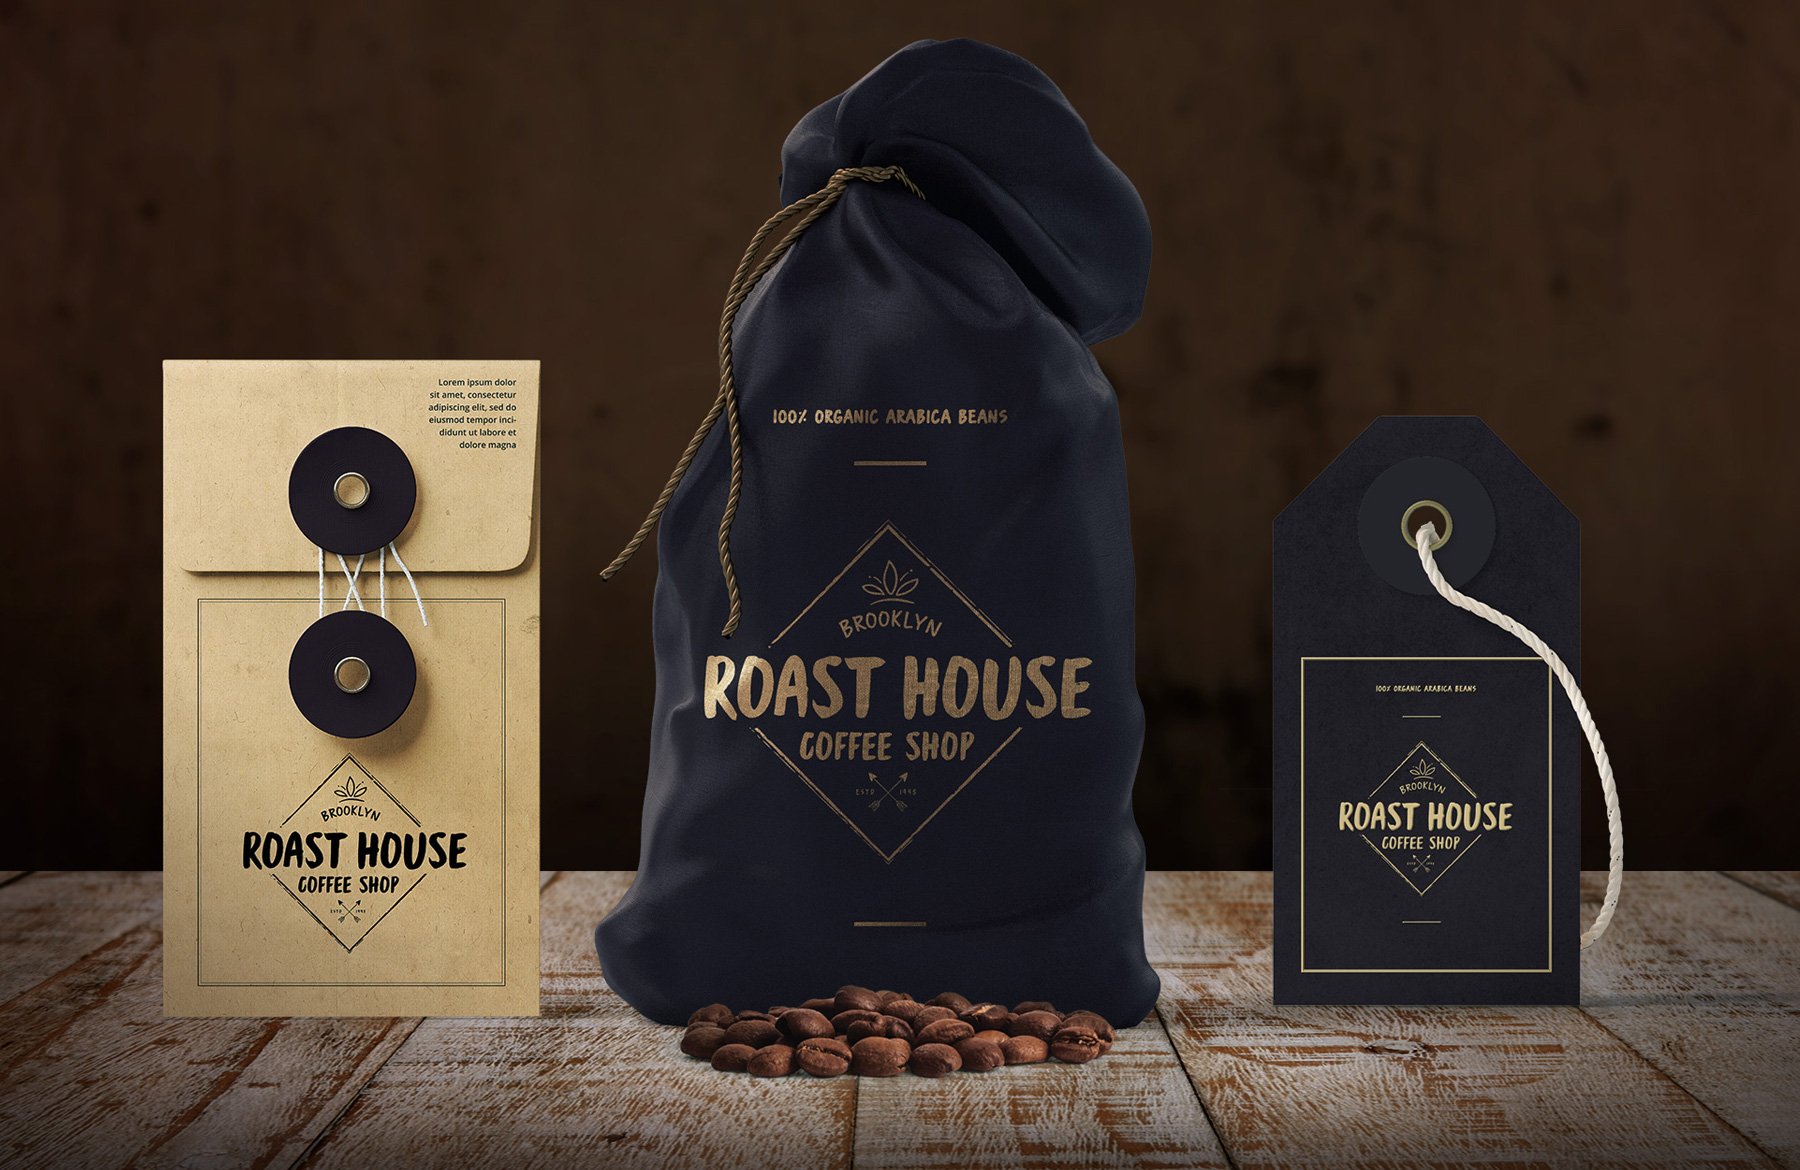
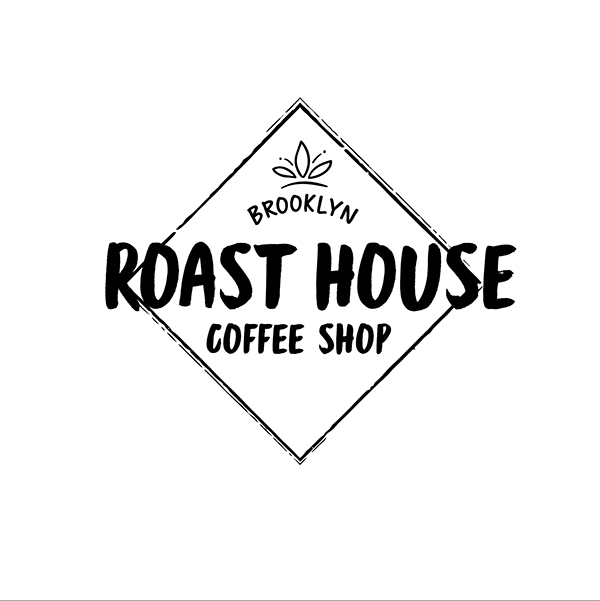
Here’s a look at what we’ll be creating:
Follow along with this tutorial: Download the freebie files
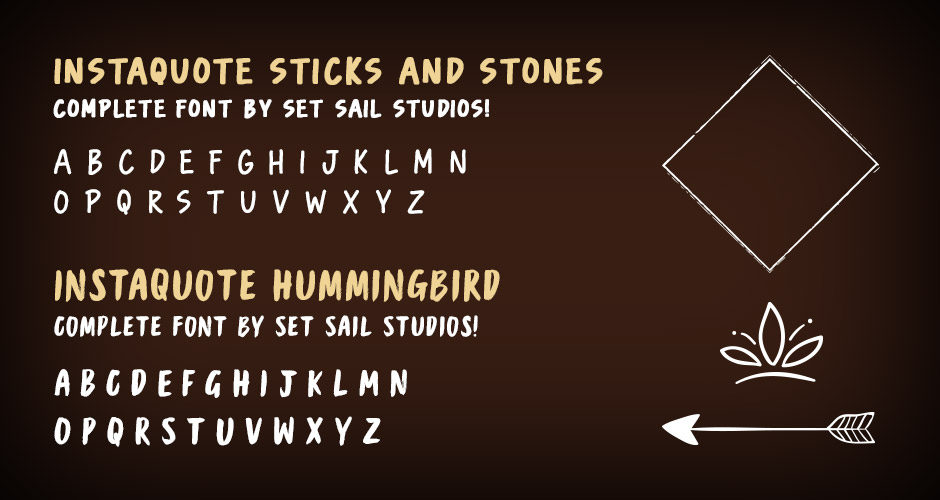
This freebie pack includes two unique typefaces and several professionally crafted vector elements.
The freebie pack is just a small sample of what you will find in the The Ultimate Time-Saving Templates Bundle for just $29 (that’s 99% off). This bundle includes a huge variety of time-saving, professional templates, ranging from branding sets and logos, to infographics, social media kits, Powerpoint/Keynote presentations, business cards, resumes and so much more!
Step 1: Roast House Brand Design
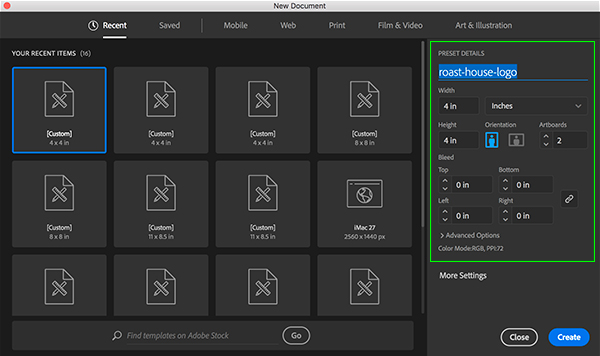
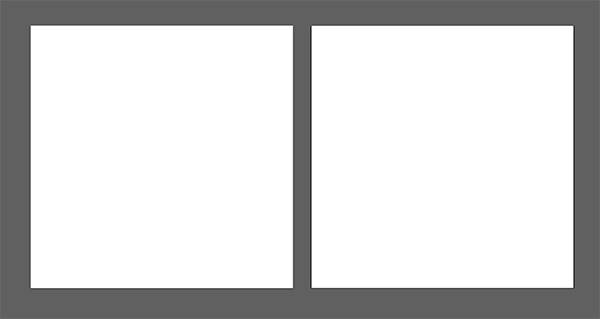
Let’s begin by opening Illustrator and creating a New Document. For the name let’s enter ‘roast-house-logo’ and then make the ‘Height’ and ‘Width’ both ‘4’ using inches as the increments. We will also want to enter the number ‘2’ for the ‘Artboards’ so we can begin with two of those. Once you have set up your new document go ahead and press ‘Return’ on the keyboard or click ‘Create’ from the lower right corner.
You should now have two artbaords in your document as shown here:
Step 2: Bringing in the Frame
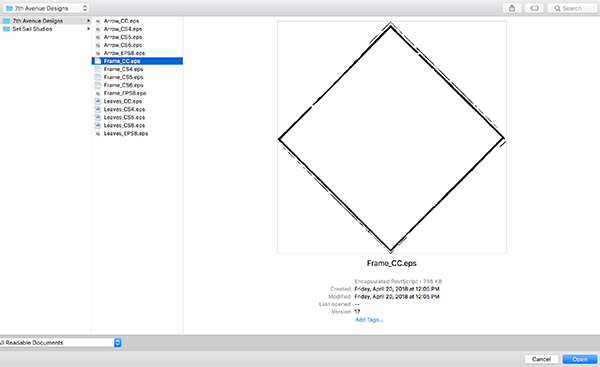
Let’s go to the ‘File’ menu and choose ‘Open’ before navigating to the freebies folder for this tutorial. Next, go to the ‘7th Avenue Designs’ folder and locate the ‘Frame_xx.eps’ file. Here you will find several different EPS files and you will want to choose the version that is compatible with the version of Illustrator you are using. Once you have chosen your desired EPS file let’s choose ‘Open’ to bring it up.
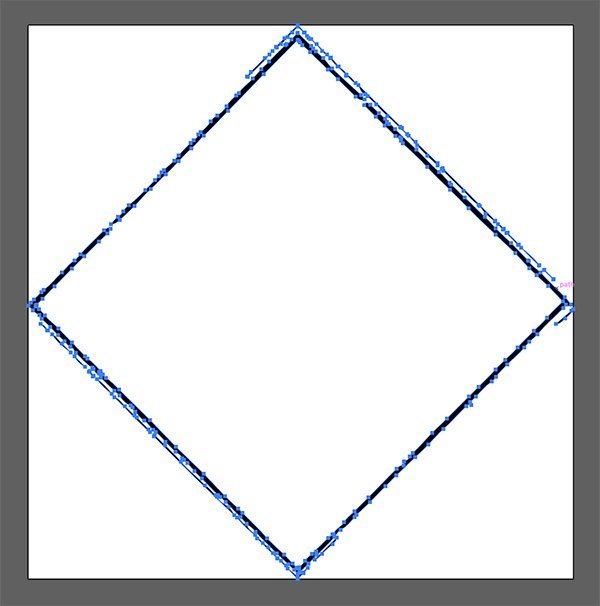
After opening your file, press Command/Ctrl+A on the keyboard to ‘Select All’ and then Command/Ctrl+C to copy it. Once you have done that you can press Command/Ctrl+W to close the tab.
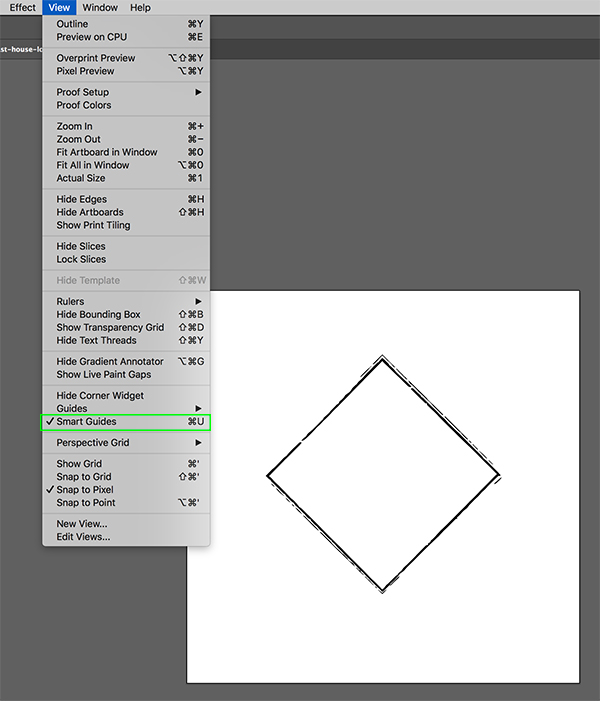
Go to your first artboard and press Command/Ctrl+F to ‘Paste in Front’ which, should place the frame in the middle of your artboard. Before we continue we want to check to make sure that our ‘Smart Guides’ are turned on to help us with the alignment of our elements. To do this, simply go to the ‘View’ menu and make sure to check off ‘Smart Guides’. Conversely, you will see the shortcut displayed which is Command/Ctrl+U on the keyboard.
Step 3: Roast House Coffee Shop
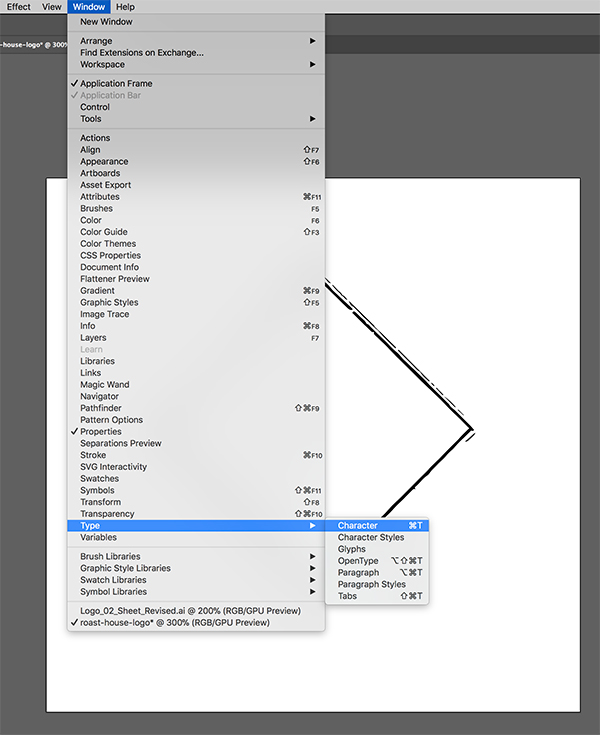
Now we are going to add some text to the lockup. To do that we will first need to open up our Character Panel, so let’s go to the ‘Window’ menu and then ‘Type > Character’ as shown in the image below:
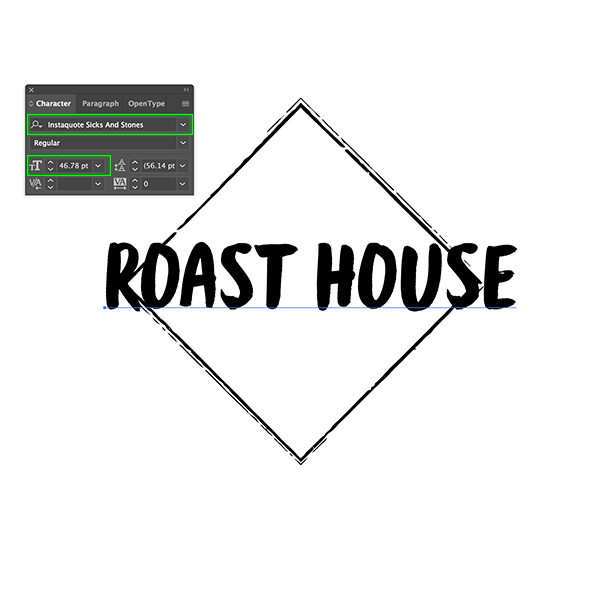
Once you’ve opened the Character Panel, press ’T’ on the keyboard and then click on your first artboard to type out the words ‘ROAST HOUSE’ in all caps. For the typeface we will be using ‘Instaquote Sticks and Stones’ which is one of several lovely fonts from Set Sail Studios which are available in the full bundle. For the point size here let’s go with a size of about ’46.78 pt’ or you can just round it up to ’47 pt’ as long as it’s roughly about the same size as the image shown here:
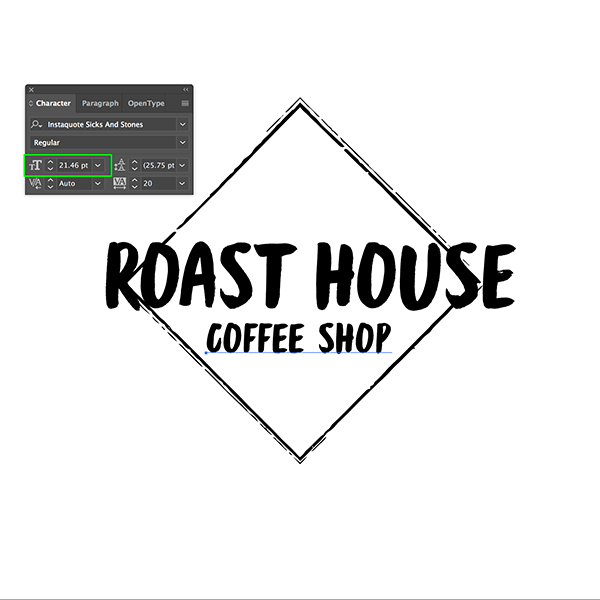
Now let’s press Command/Ctrl+Shift+A to ‘Deselect All’ and then click below the first line of text to create a new line. Next, type out the words ‘COFFEE SHOP’ using the same typeface, but this time we will make our font about ’21.46 pt’ or ’21.5 pt’ for the size.
Step 4: Brooklyn
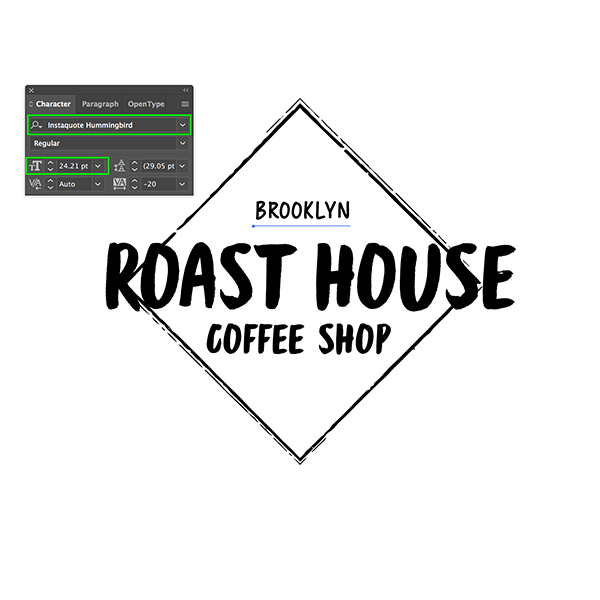
After typing out the ‘COFFEE SHOP’ text we can use the same keyboard shortcut as before to deselect everything – Command/Ctrl+Shift+A, or you can go to the ‘Select’ menu and choose ‘Deselect’ from the dropdown. Let’s now click above the ‘ROAST HOUSE’ text with our Type Tool (T) still active and this time type out the word ‘BROOKLYN’ in all caps. Return to the Character Panel and change the typeface to our second typeface from Set Sail Studios called ‘Instaquote Hummingbird’ with a size of about ’24.21 pt’ as shown below:
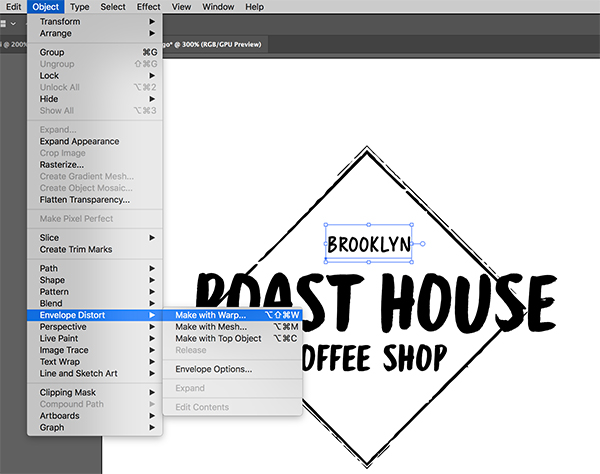
With your ‘BROOKLYN’ text still selected, go to the ‘Object’ menu and choose ‘Envelope Distort > Make with Warp…’ from the list.
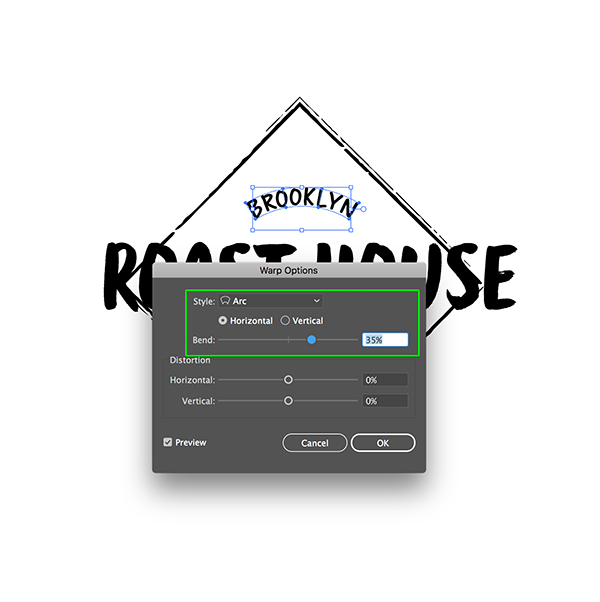
Under the ‘Warp Options’ dialog box that appears, make sure you have ‘Arc’ selected under the ‘Style’ menu and then choose ‘Horizontal’ before entering a value of ’35%’. If you check off the ‘Preview’ box at the bottom you will also be able to move the slider around to see how this effect looks with different settings applied. After entering the settings go ahead and click ‘OK’ or simply press ‘Return’ on the keyboard to apply the warp effect to your text.
Step 5: Leaves
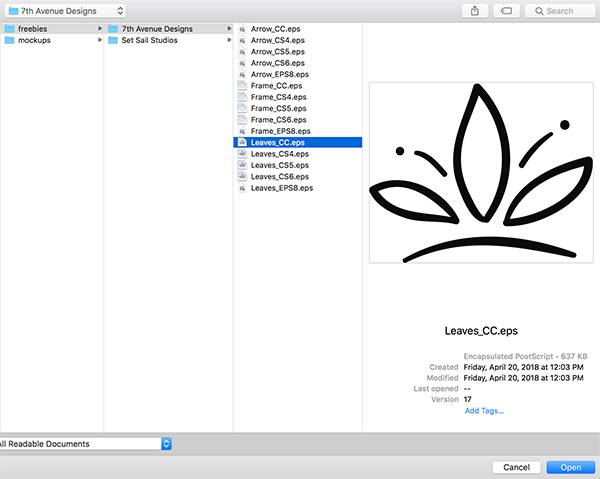
Return to the ‘File’ menu and choose ‘Open’ once again. Now we want to select the ‘Leaves_xx.eps’ file from the freebies folder to open it in Illustrator.
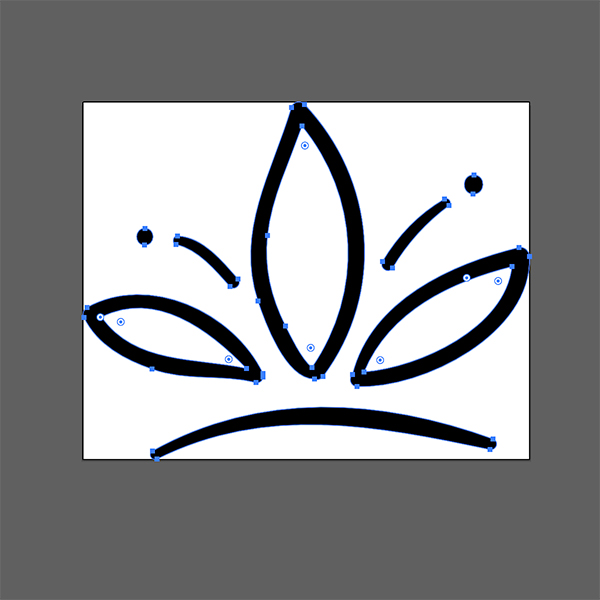
After opening the file, press Command/Ctrl+A to select it and then Command/Ctrl+C to copy it. Once you have done that, press Command/Ctrl+W to close the tab and return to your main document.
Once you are back in your working document press Command/Ctrl+V to paste the leaves vector and then hold the Shift Key and drag inwards from any of the four corners of the bounding box to scale it down and place it just above the curved ‘BROOKLYN’ text as shown here:
Step 6: Shooting Arrows
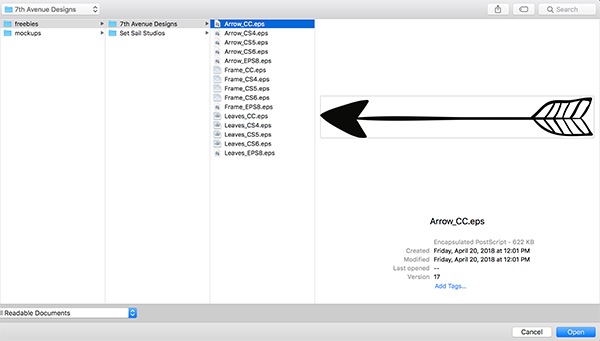
Return to the ‘File’ menu and choose ‘Open’ once again. Now we want to select the ‘Arrow_xx.eps’ file from the freebies folder to open it in Illustrator.
After opening the file, press Command/Ctrl+A to select it and then Command/Ctrl+C to copy it. Once you have done that, press Command/Ctrl+W to close the tab and return to your main document.
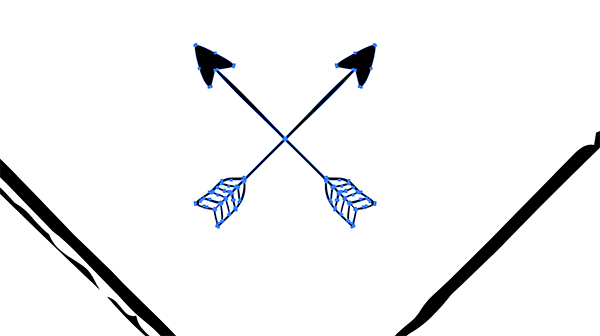
Once you are back in your working document press Command/Ctrl+V to paste the arrow vector and then hold the Shift Key and drag inwards from any of the four corners of the bounding box to scale it down and place it below the ‘COFFEE SHOP’ text. We will also want to rotate the arrow about 45º so in order to do that we will just hold the Shift Key again and move your cursor over any of the four corners of the bounding box until it changes to a curved, double sided arrow. From here you can move your mouse to the left to rotate the arrow by increments of 45º until it looks like the arrow shown here:
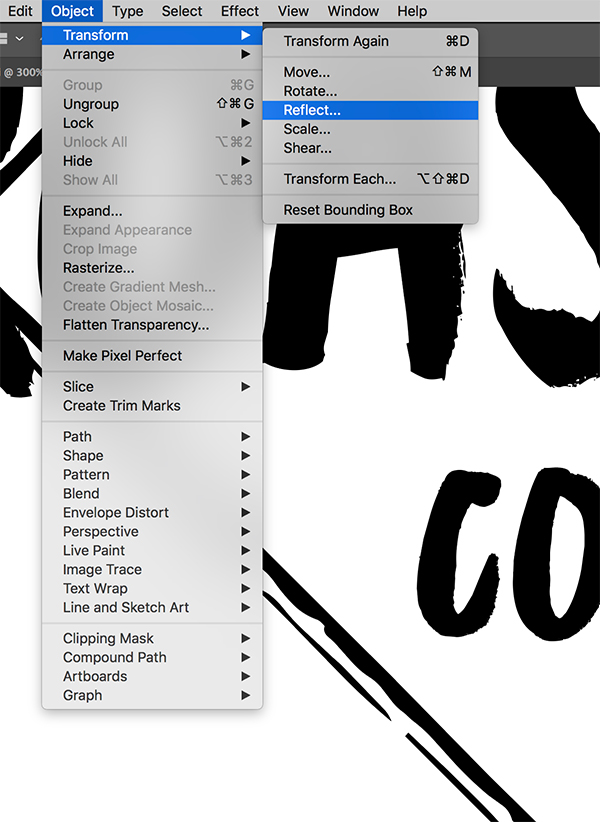
After you’ve rotated your arrow, make sure it is still selected by clicking on it with your Selection Tool (A) and then press Command/Ctrl+C to copy it and then Command/Ctrl+F to paste a new copy on top of the original. From here, go to the ‘Object’ menu and choose ‘Transform > Reflect…’ from the list.
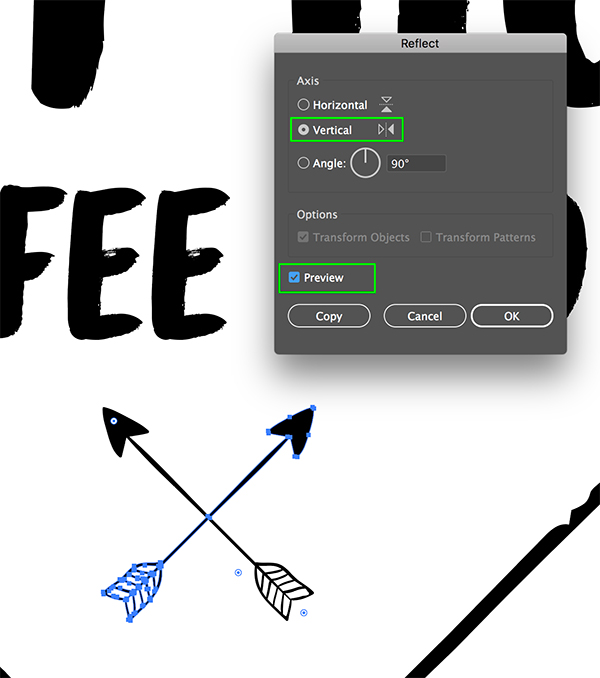
When the dialog box appears we want to make sure that we have the ‘Axis’ set to ‘Vertical’ and check off the ‘Preview’ box to make sure that you see a mirror reflection of your first arrow. If everything looks good, go ahead and press ‘Return’ on the keyboard to apply the changes.
Press Command/Ctrl+Shift+A to deselect everything and then press ‘V’ to revert to your main Selection Tool which is the black arrow in the toolbar. From here, click and drag around both of the arrows to select them at the same time and then press Command/Ctrl+G to group them together as one.
Step 7: Lining Things Up
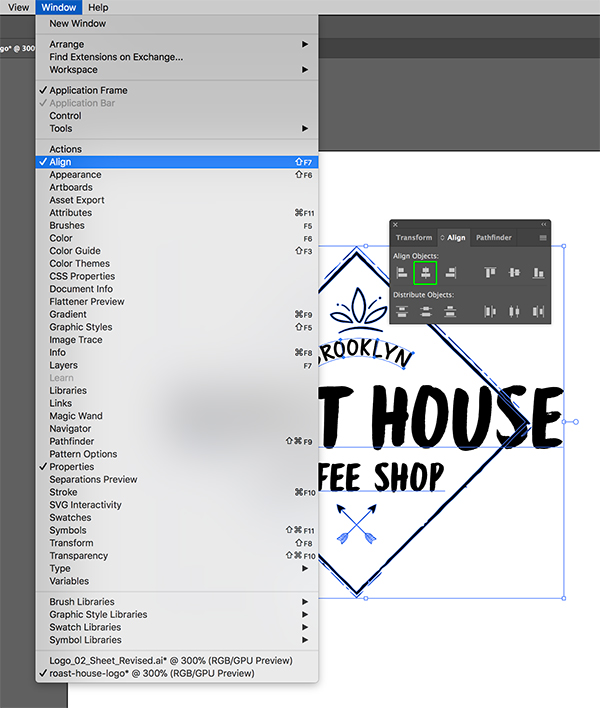
Now that we’ve grouped our arrows together we want to make sure that everything is nice and centered. First, let’s make sure everything is deselected by using the keyboard shortcut Command/Ctrl+Shift+A and then we will press ‘V’ to switch back to our Selection Tool. Click and drag around the entire logo to select everything or use the keyboard shortcut Command/Ctrl+A to Select All. From here, go to the ‘Window’ menu and choose ‘Align’ from the dropdown menu.
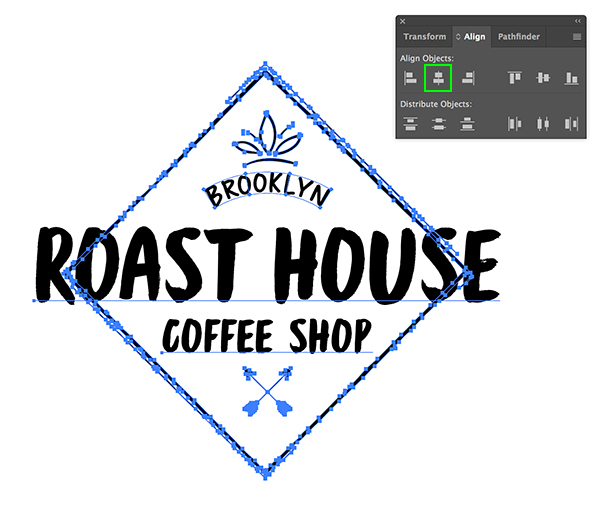
Once the Align panel appears, choose the second icon from the left in the top row, which is ‘Horizontal Align Center’ as shown here:
Step 8: Secondary Text
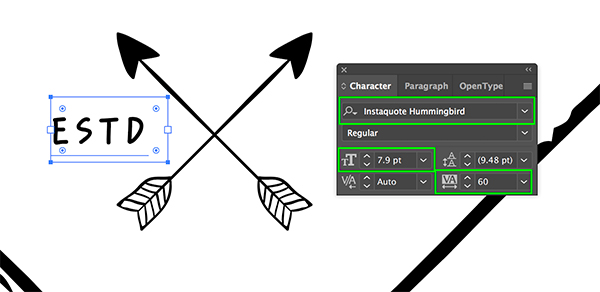
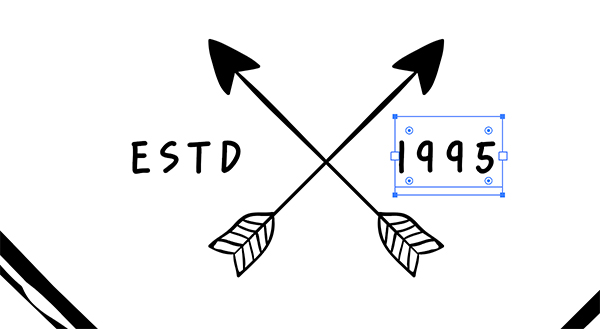
Press ’T’ to switch back to your Type Tool and then click to the left of your arrows and type out the letters ‘ESTD’ in all caps using the Instaquote Hummingbird typeface with a size of about ‘8 pt’ and a tracking setting of ’60’ as shown below:
Press Command/Ctrl+Shift+A to deselect all and then ‘V’ to switch back to your Selection Tool. Click on the text with your Selection Tool and then drag it over to the opposite side of the arrows while holding the Alt/Option+Shift keys at the same time. Doing this should create a copy of the text that you can move over to the other side. After duplicating your text on the opposite side, press ’T’ to switch back to your Type Tool and then click inside the text two or three times to highlight the entire word before changing it to ‘1995’ so your image looks like this:
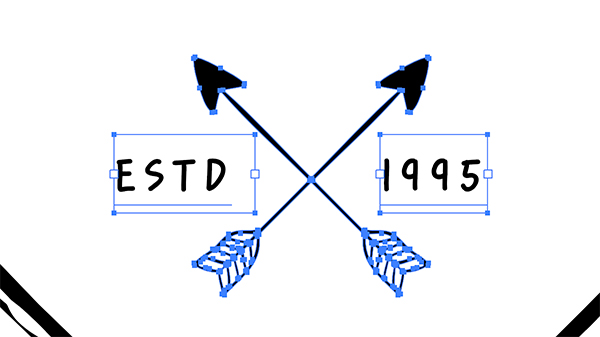
Try to make sure that there is an even amount of space between the arrows and the text on either side and then use your Selection Tool (V) to click and drag around the entire group consisting of both text boxes and the two arrows. From here, press Command/Ctrl+G to group them together so we can select this as one whole unit.
Step 9: Creating Outlines
Use the shortcut to deselect everything (Command/Ctrl+Shift+A) and then switch over to your Selection Tool (V). Click and drag around the entire logo or use the keyboard shortcut Command/Ctrl+A to Select All.
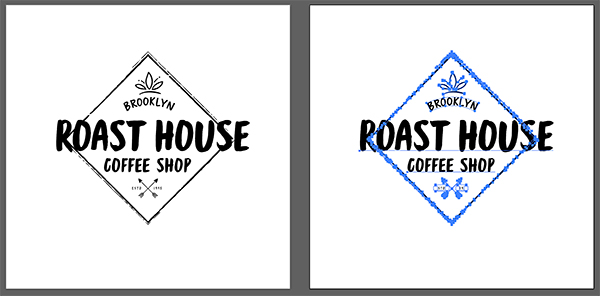
After you have selected your whole logo so far press Command/Ctrl+C to copy it. Now we want to use our Selection Tool (V) to click on the second artboard in our document and then press Command/Ctrl+F to paste a copy of our logo on our second artboard. It should paste the logo in exactly the same place, just over on the next board as shown here:
With your newly pasted logo still selected, go to the ‘Type’ menu and choose ‘Create Outlines’ from the dropdown menu.
By creating these outlines on this version of our logo we have converted all of the text into shapes. This means that we can no longer edit the text in the same way we normally would with the Character Panel, but we will still have the original copy with live text on the first artboard in case we need it.
Step 10: Offset Paths
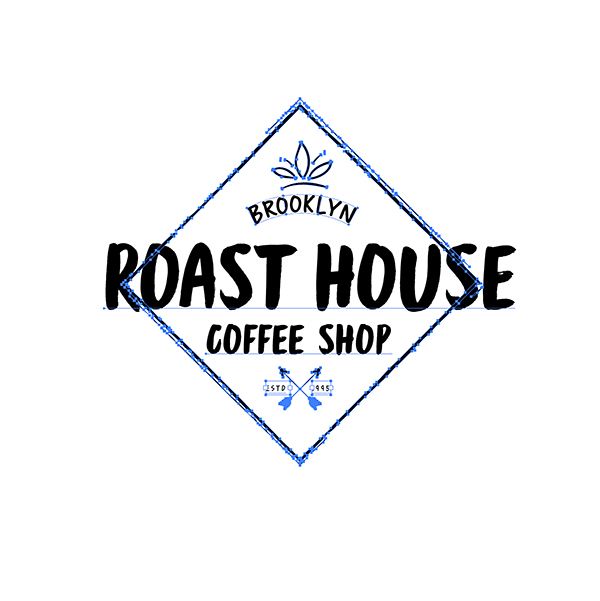
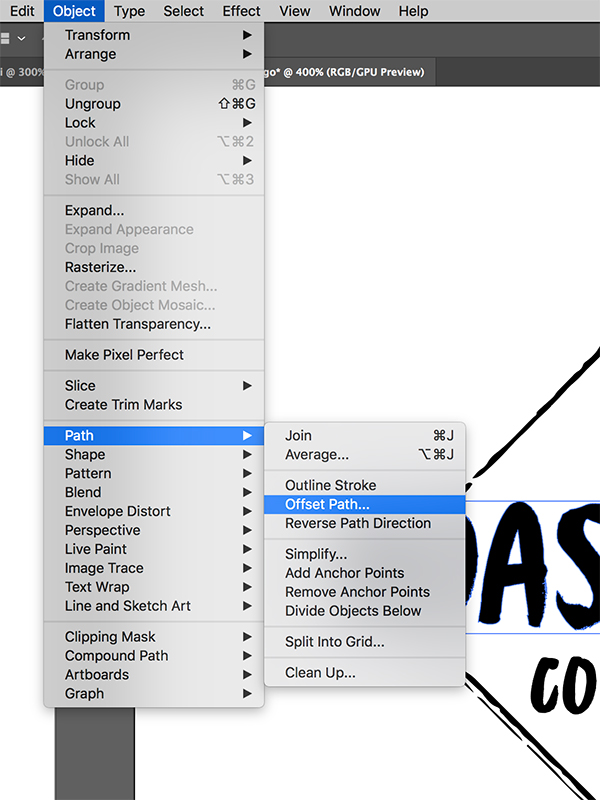
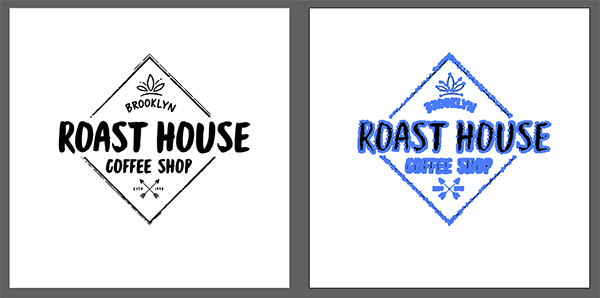
Everything is looking good so far except we don’t want the frame to be interfering with the legibility of our ‘ROAST HOUSE’ text. In order to fix this we will need to take a few steps. Let’s start by using our Selection Tool (V) to select only the ‘ROAST HOUSE’ text. From here, go to the ‘Object’ menu and choose ‘Paths > Offset Path…’ as shown in the image below:
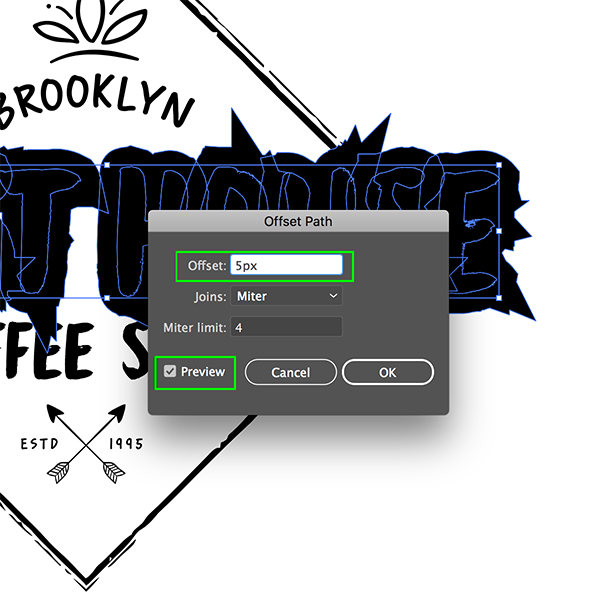
When the dialog box appears make sure to check off the ‘Preview’ box and then enter an ‘Offset’ value of ‘5px’ and then press ‘OK’ or hit ‘Return’ on the keyboard.
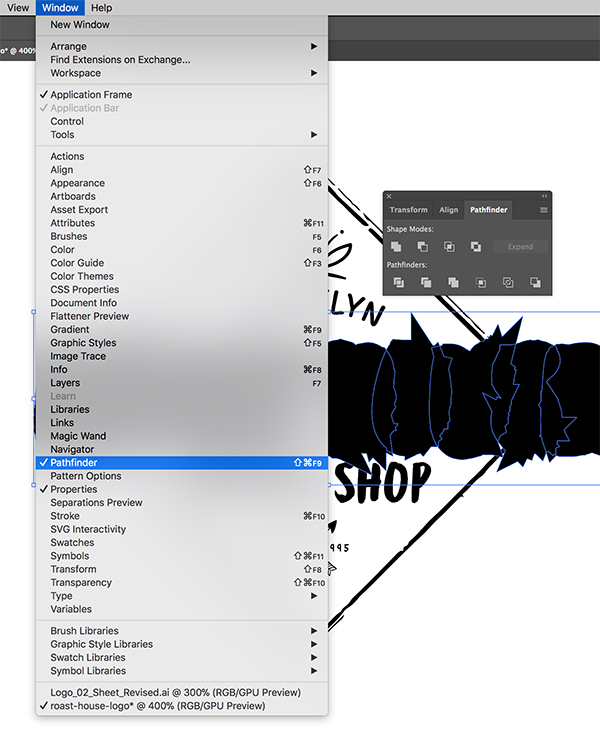
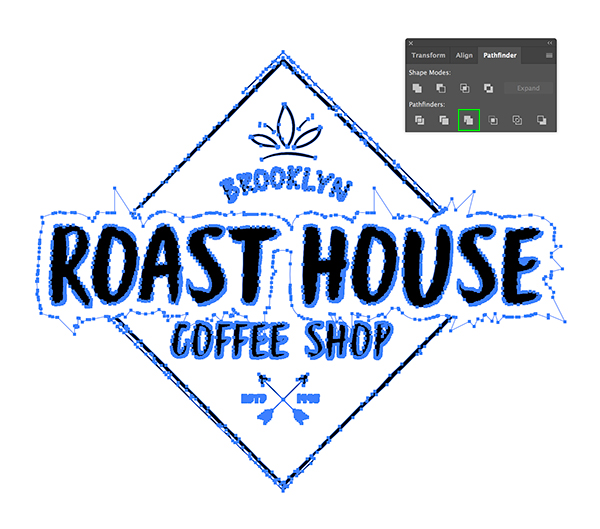
By offsetting the path by 5 pixels we are essentially just expanding our selection so we can create a new shape that has a larger area than our original text. While your new path is still active, go to the ‘Window’ menu and choose ‘Pathfinder’ from the menu.
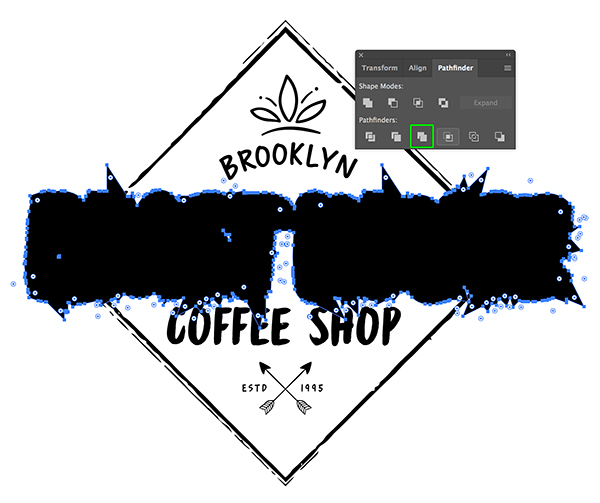
With your shape still active, click on the third icon from the left in the bottom row of Pathfinder tools (Merge). Doing this will merge all of the shapes into one single shape. Once you have merged this shape together, press Command/Ctrl+X to cut the shape. This step is very important as we want to remove the merged shape before we can drop it back in and change the color.
Step 11: KO
Press Command/Ctrl+F to paste your merged pathfinder shape back in exactly where it was before. Next, press ‘I’ on the keyboard to switch to your Eyedropper Tool and then click on any white part of the artboard to sample the color and change the shape to solid white as shown here:
Once you have changed this shape to solid white, press Command/Ctrl and the left bracket key on the keyboard to move the shape backwards. We want to continue pressing these same keys and moving the shape backwards several times until the merged white shape is behind everything except for the frame like this:
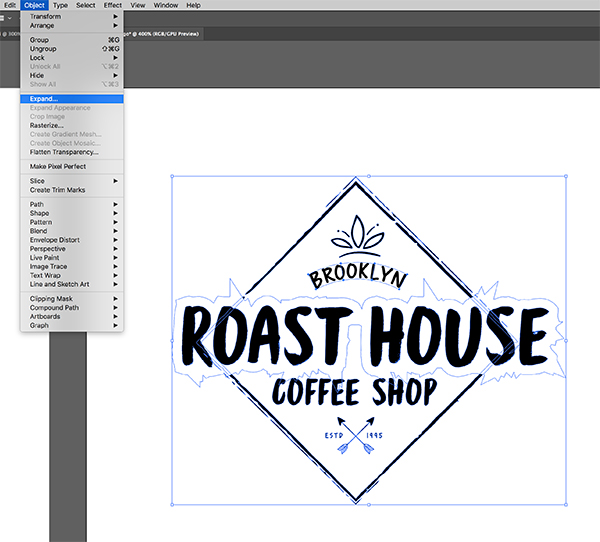
Once your shapes are in the correct order press Command/Ctrl+Shift+A to deselect everything, and then press ‘V’ to switch over to your main Selection Tool. Click and drag around your entire logo and then go to the ‘Object’ menu and choose ‘Expand…’ from the list.
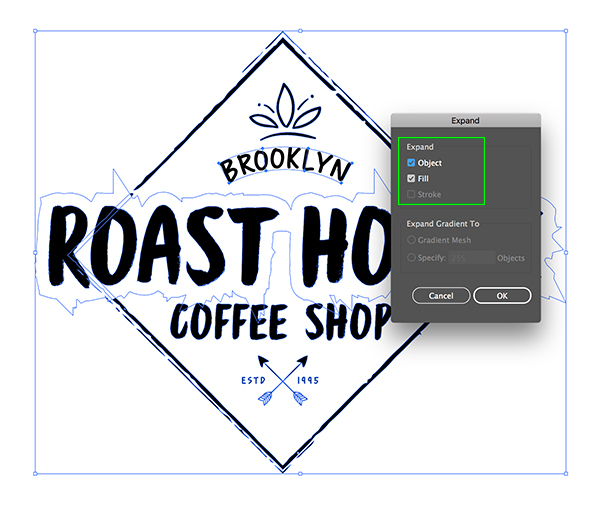
You will then be prompted with a dialog box where you’ll want to check off both the ‘Fill’ and ‘Stroke’ options before clicking ‘OK’ to ensure that our whole logo gets expanded or broken down into points.
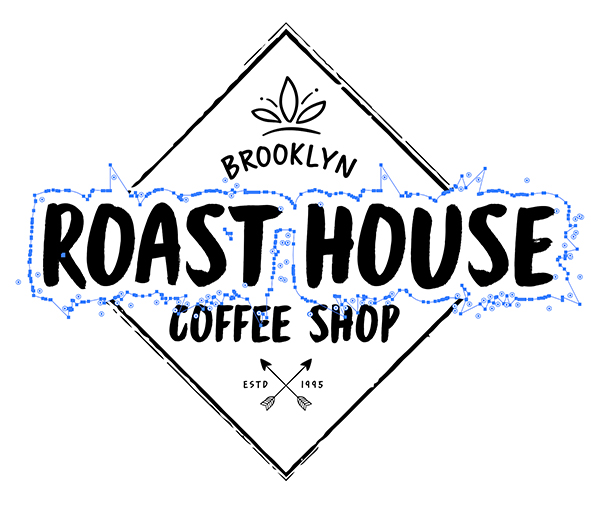
After expanding the logo you should now see all of those points that are making up the whole shape, including the offset path around the ‘ROAST HOUSE’ text that we created in the previous steps. We now want to return to the Pathfinder and choose the ‘Merge’ option from the bottom row of icons in order to merge all of these points and shapes together.
Step 12: Direct Selection
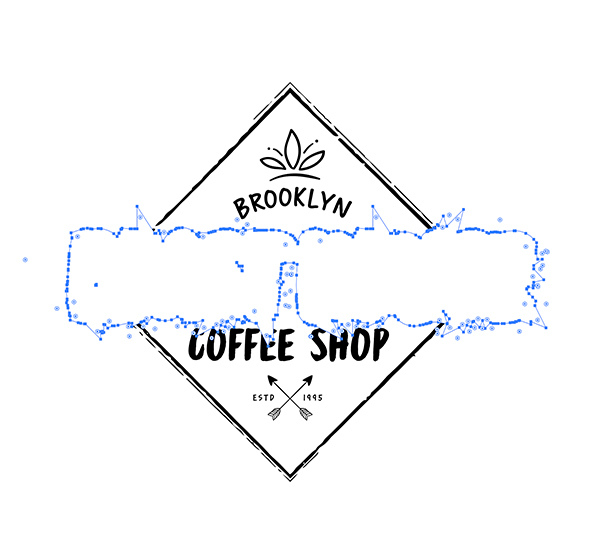
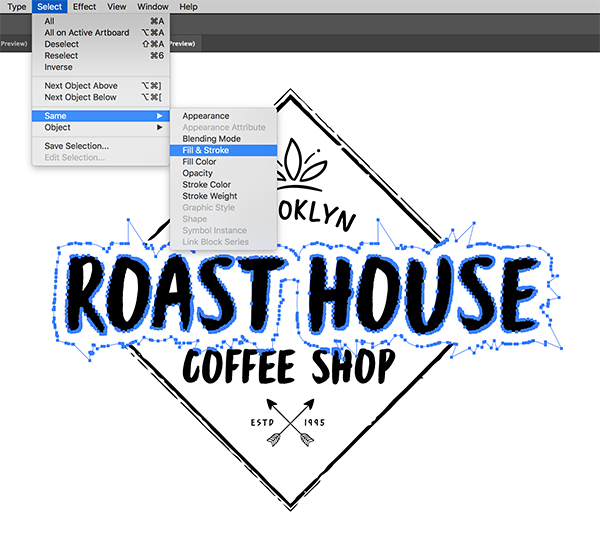
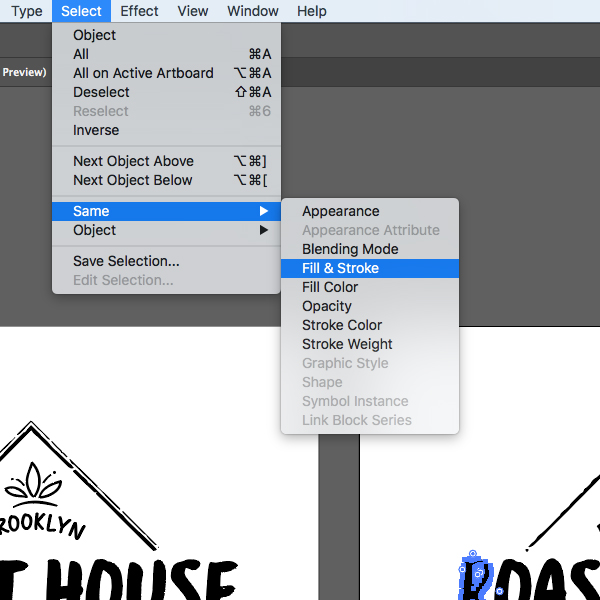
After merging your expanded logo, press ‘A’ on the keyboard to switch to the white arrow tool – the Direct Selection Tool (A). Click on any part of the offset path that is filled with white to select it. After selecting some of the white from the offset path, go to the ‘Select’ menu and choose ‘Same > Fill & Stroke’ from the menu.
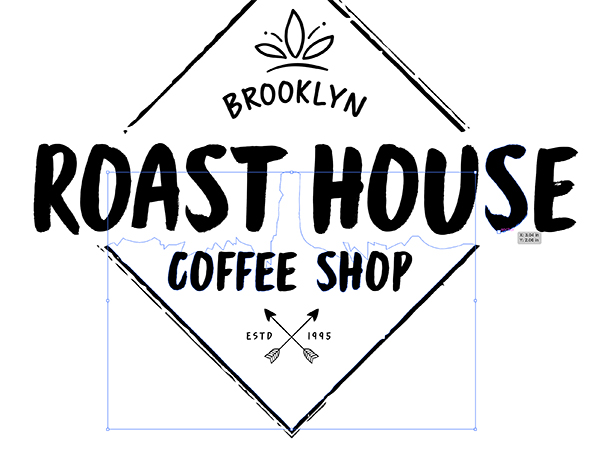
You should now have all of the white areas in your merged shape selected, and once you do you can simply press the ‘Delete’ key on the keyboard to remove all of the white. You should now have something like this:
You may still have some strange lines showing up in your logo like I have here below the ‘ROAST HOUSE’ text. If you are seeing something like this it’s okay – we just need to use our Direct Selection Tool (A) to click on any part of this shape and you should see that there are some empty shapes with no fill or stroke color.
Once you have selected a portion of the empty area, return to the ‘Select’ menu and once again choose ‘Same > Fill & Stroke’ to select all of the other empty shapes in the logo.
With all of the empty parts of the logo selected, press ‘Delete’ once again to remove them. Now all you should be left with is a single color logo only consisting of black.
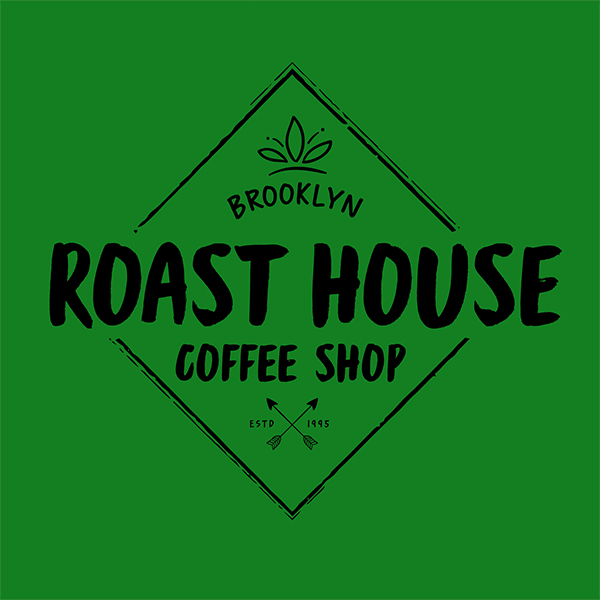
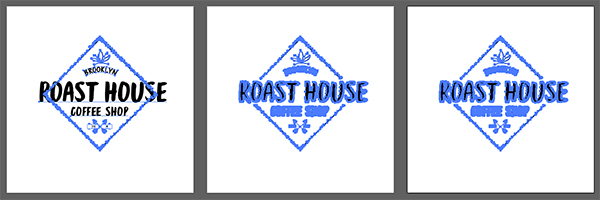
To make sure that we have a true one color logo I have just added a green square behind the shape. You can press ‘M’ on the keyboard and drag out a square or rectangle of your own and then change the fill color and place it all the way in the back by using the keyboard shortcut Command/Ctrl+Shift and the left bracket on the keyboard. You should now have something like this:
Step 13: New Artboards
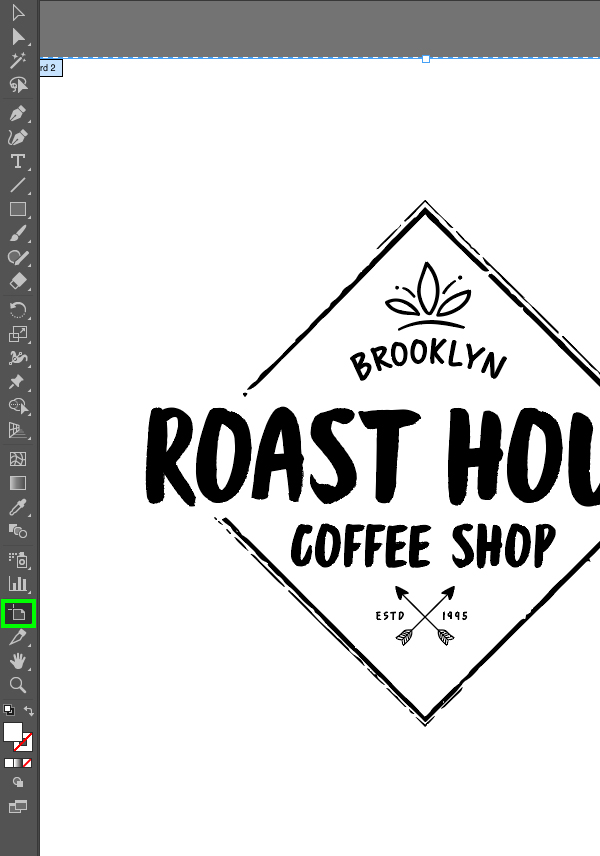
Next, go to the toolbar over to the left side of the interface and select the Artboard Tool highlighted in the image below:
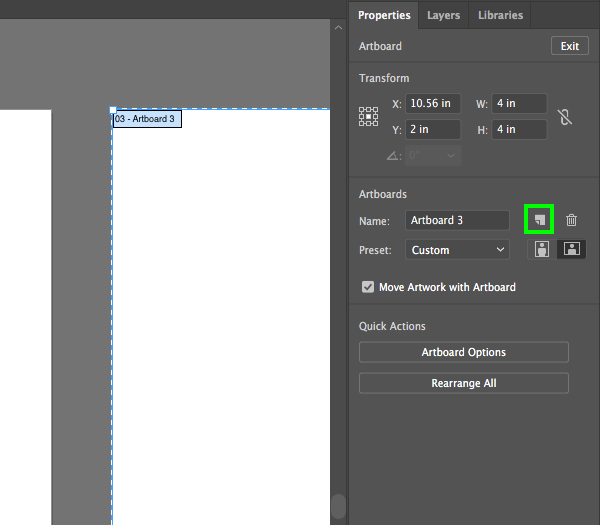
Now on the opposite side of the interface you should see the Properties panel where we want to click on the icon to add a new artboard shown here:
You should now have three artboards in your document. From here, use your Selection Tool (V) to click and drag around the outlined logo on the second artboard and then press Command/Ctrl+C to copy it. Select your new, blank artboard and then press Command/Ctrl+F to paste it in front and you should now have another copy of the outlined logo on your new artboard.
Step 14: Locking Selections
You should now have three artboards in your document with the same outlined logo on both the second and third. Press Command/Ctrl+A now to select everything in the document.
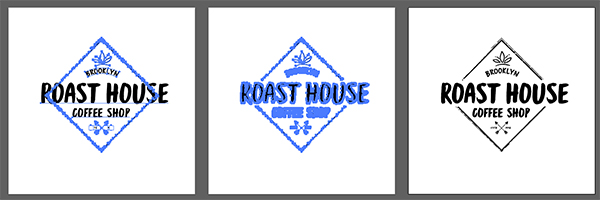
With all three of the logos highlighted, press ‘V’ again or click on the Selection Tool and then click and drag around the third copy of the logo so now only the first two are highlighted.
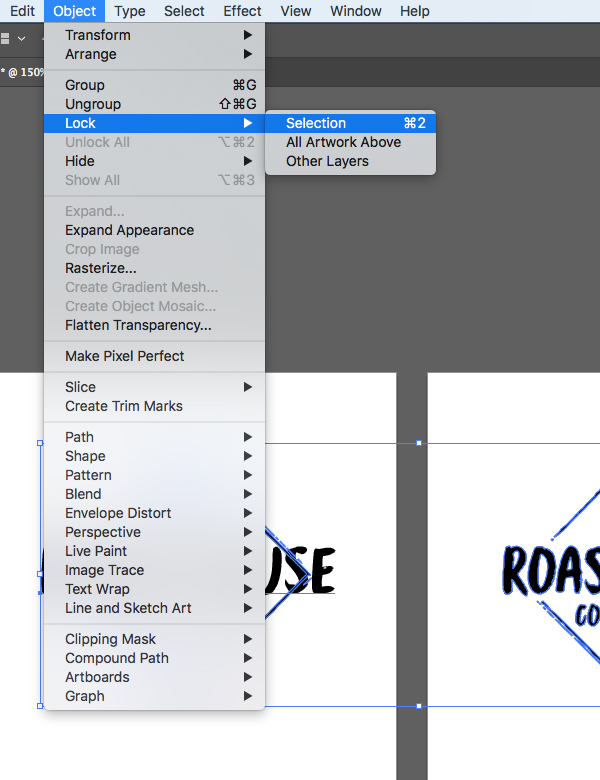
Go to the ‘Object’ menu and choose ‘Lock > Selection’ to lock the first two logos.
Step 15: Coloring the Logo
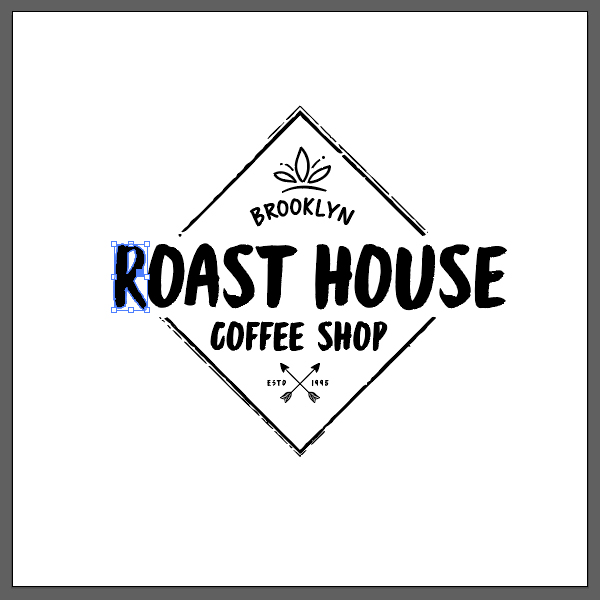
Switch to your Direct Selection Tool (A) and then click on the letter ‘R’ in ‘ROAST’ on the third logo.
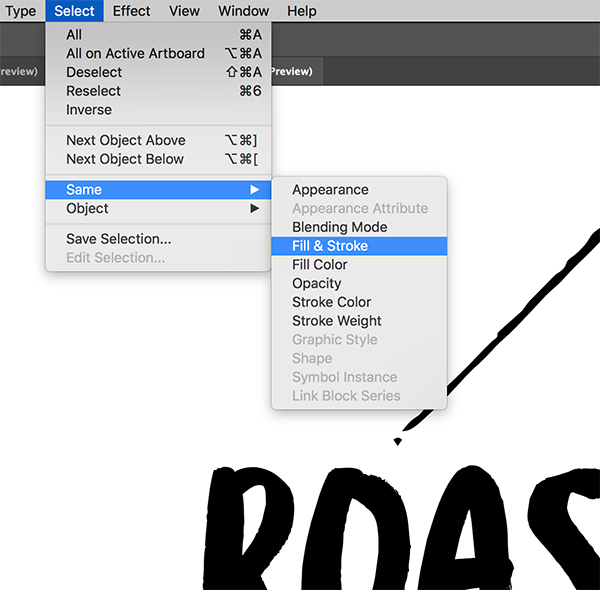
Go to the ‘Select’ menu and choose ‘Same > Fill & Stroke’ to selecte everything else that shares the same fill and stroke color.
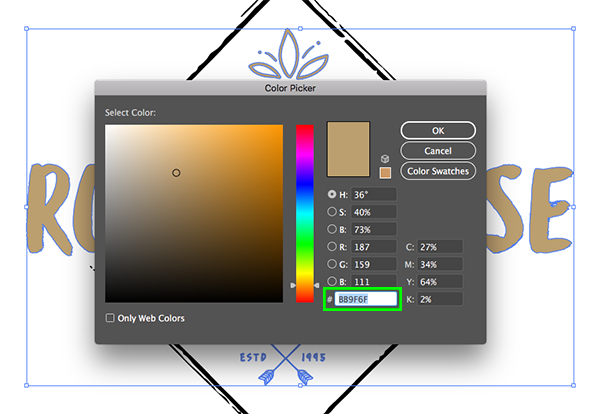
Once all of the other elements are selected, double click on your foreground color to bring up the Color Picker and enter the hex value ‘#B89F6F’ and then press ‘Return’ or click ‘OK’ to apply the color change.
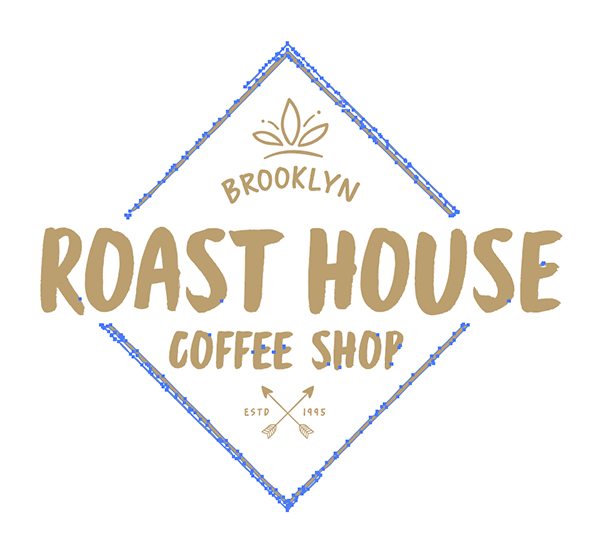
You will notice that everything except for the frame has now been changed to our gold color. If this happens all you need to do is use the Direct Selection Tool (A) once again to select a part of the frame, and then go to the Select menu and choose ‘Same > Fill & Stroke’ to grab the rest of the frame. After that, press ‘I’ to grab your Eyedropper Tool and then click on any of the gold text or vector elements to sample the same fill color.
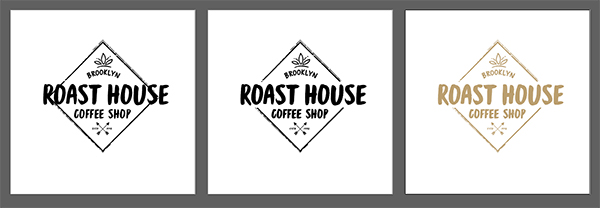
You should now have three different versions of your logo on each of the three artboards as shown here:
Step 16: First Mockup
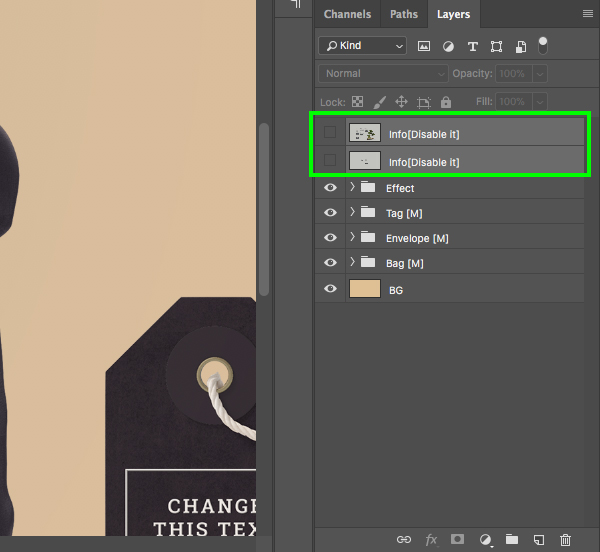
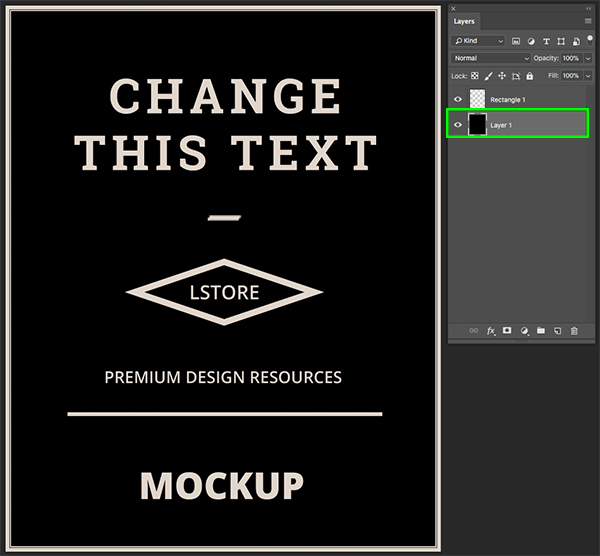
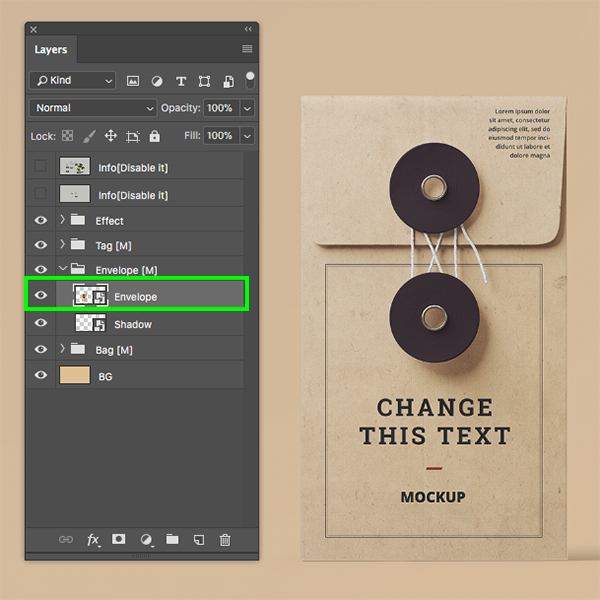
Now we will be applying our logo to a realistic packaging mockup. For this step we will first need to download the free mockup from I am Creator which you can find by visiting Graphic Burger for the demo. Once you have downloaded the first mockup, open up the ‘Scene_002.psd’ file in Photoshop. From here, turn off the visibility of the first two layers in the file indicated by the highlighted box in the image below:
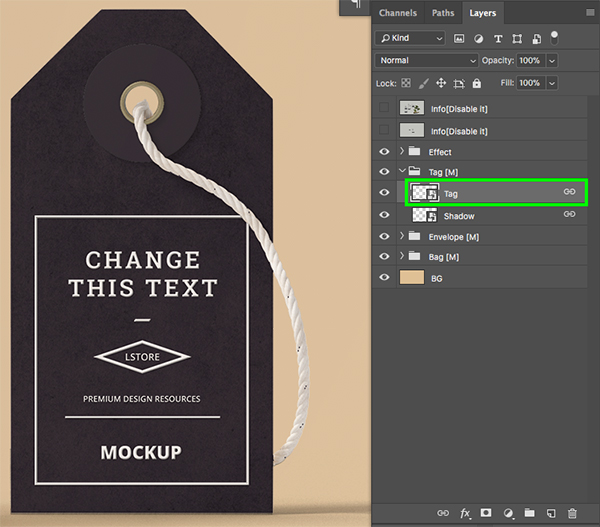
Let’s start by customizing the tag in the mockup. To get started, expand the contents of the ‘Tag (M)’ folder to reveal the Smart Object labeled ’Tag’ inside. Double click on this layer to open the artwork in a new tab.
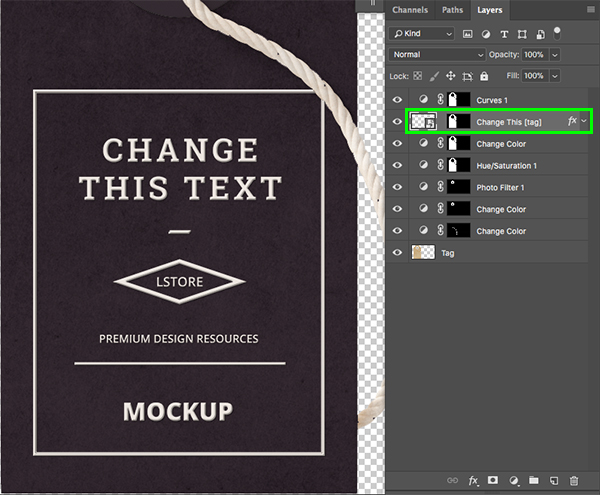
You will now be in a new tab that contains the tag as well as the artwork for the label. Here we will need to go inside of the ‘Change This (tag)’ Smart Object by double clicking on it.
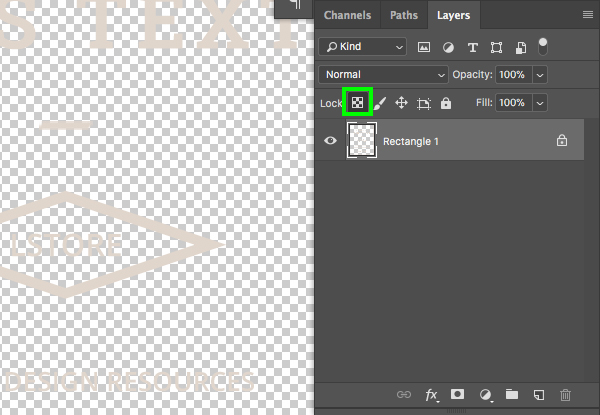
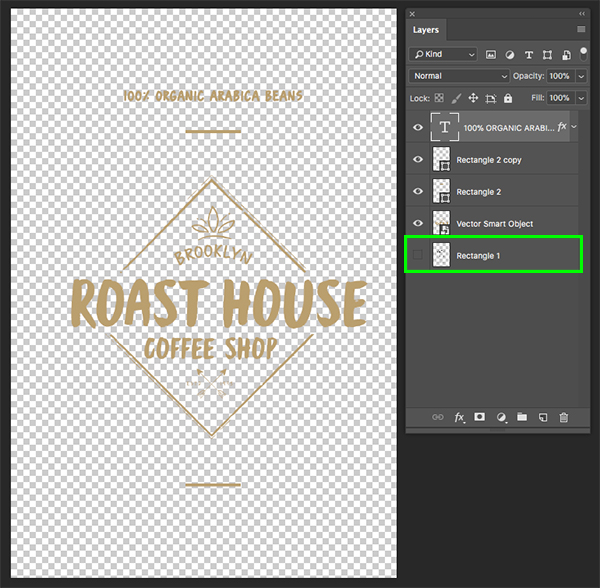
Now we are in another new window containing the artwork for the tag itself. Inside of here there is only a single layer named ‘Rectangle 1’. Let’s start by unlocking the pixels for this layer by clicking on the icon highlighted in the image below:
Add a new layer to the Layers Palette, press the letter ‘D’ to revert to your default colors, and then with black set as your foreground color press Alt/Option+Delete on the keyboard to fill the layer. Next, move this layer below the ‘Rectangle 1’ layer so we can see the artwork better.
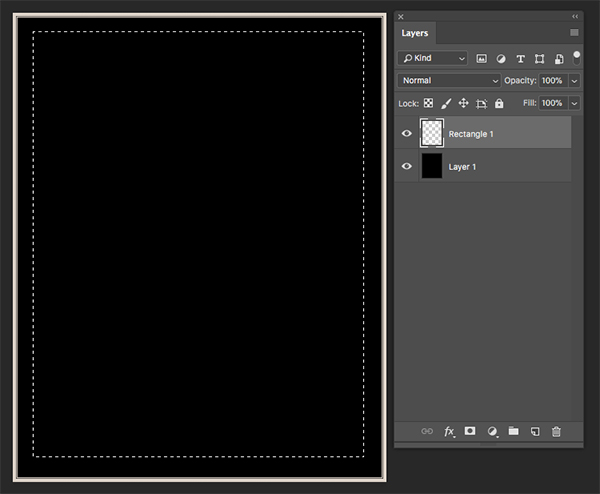
Press ‘M’ on the keyboard to switch to your Rectangular Marquee Tool and click and drag around all of the artwork on the ‘Rectangle 1’ layer except for the border, and then press ‘Delete’ to get rid of it. After deleting the artwork you can press Command/Ctrl+D to deselect everything before moving on to the next step.
Step 17: Applying the Logo to the Tag
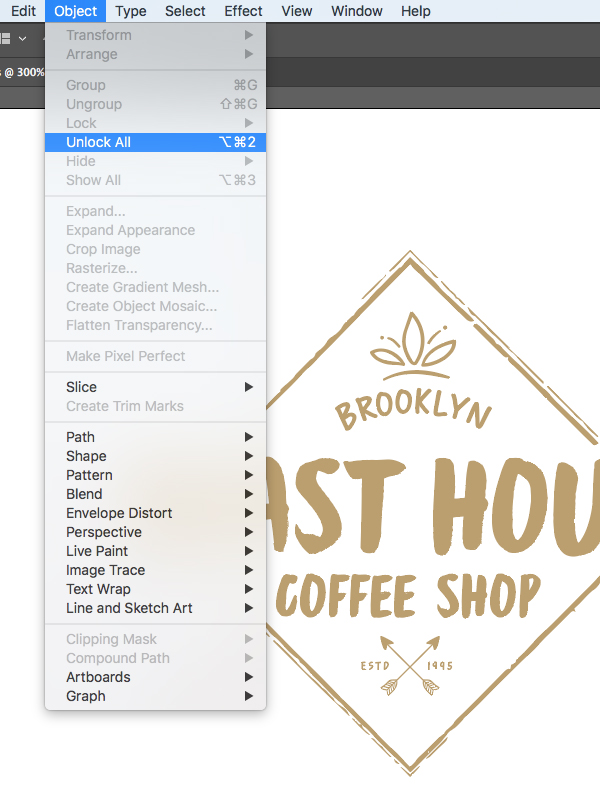
Return to Adobe Illustrator and go to the Object menu before choosing ‘Unlock All’ to make sure everything is unlocked.
Next, use your Selection Tool (V) to click and drag around the entire gold logo and copy it by pressing Command/Ctrl+C.
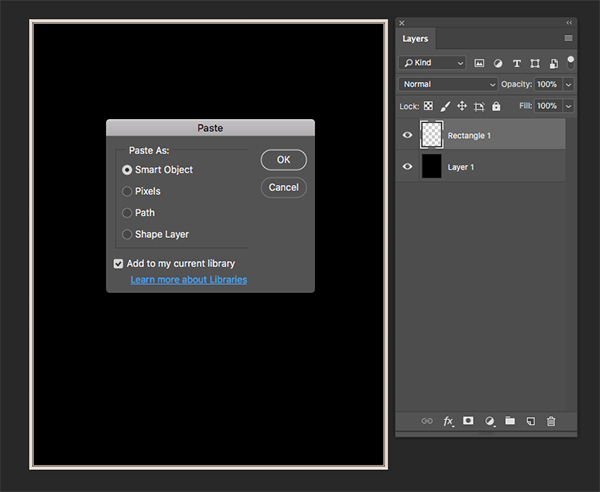
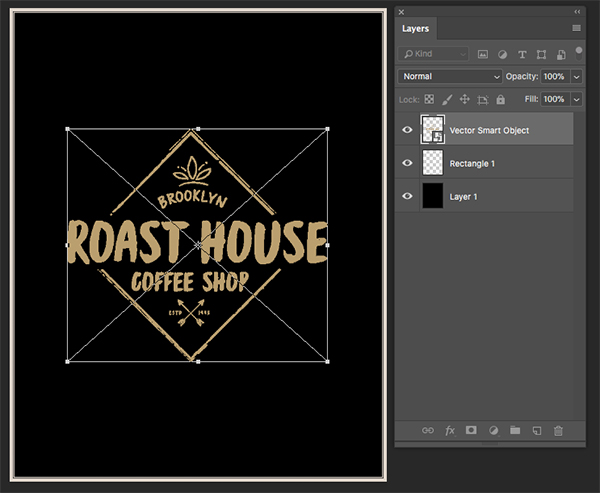
Return to Photoshop and press Command/Ctrl+V to paste it and then you will be prompted with a dialog box. Here we just want to make sure we choose ‘Smart Object’ and then press ‘Return’ on the keyboard or click ‘OK’ to paste the logo.
Once your logo appears, hold the Alt/Option+Shift keys and drag outwards from any of the four corners of the bounding box to scale it up and make it larger. Place the logo roughly in the center of the image and then press ‘Return’ once again to apply the transformation.
Step 18: Coloring the Border
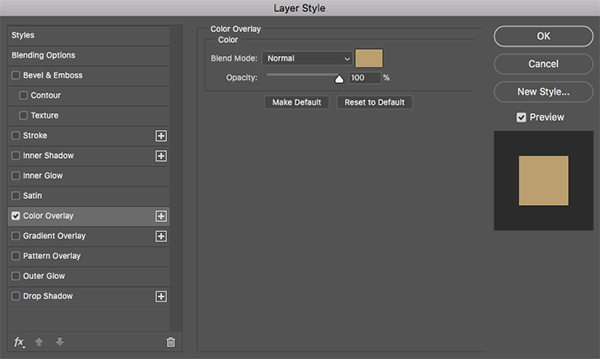
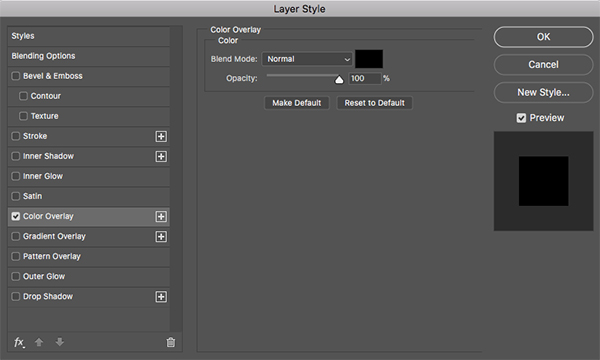
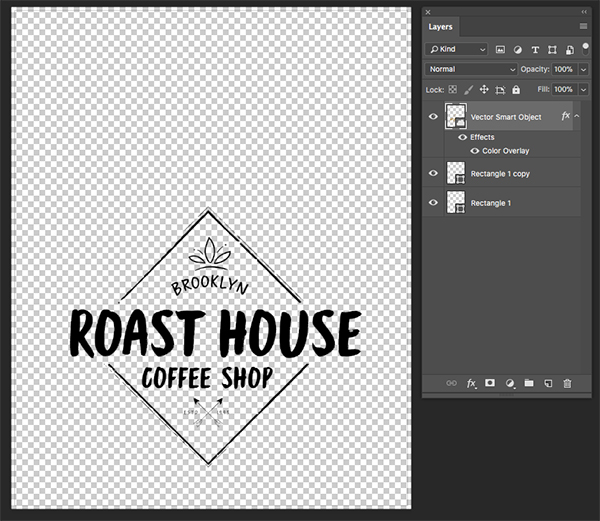
Double click on the ‘Rectangle 1’ layer to open the Layer Style panel and then check off the ‘Color Overlay’ option as shown below:
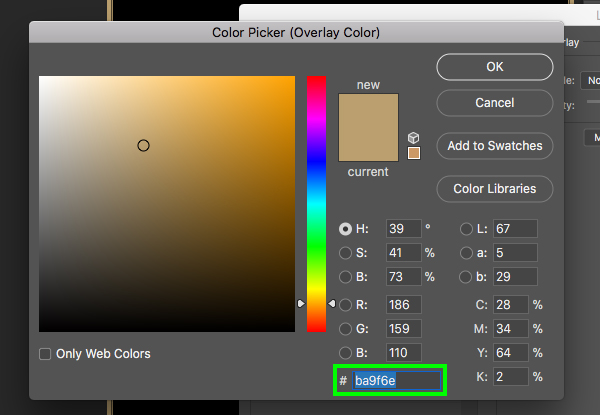
Enter the hex value ‘#BA9F6E’ and then click ‘OK’ twice to apply the changes and close out of both panels.
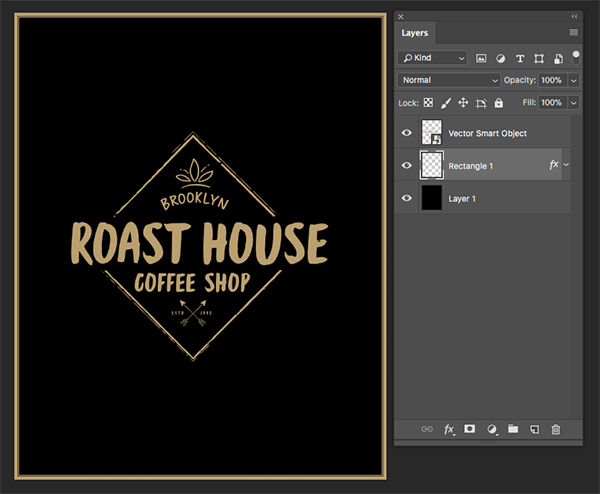
Your border should now be the same color as the logo.
Step 19: Adding the Tagline
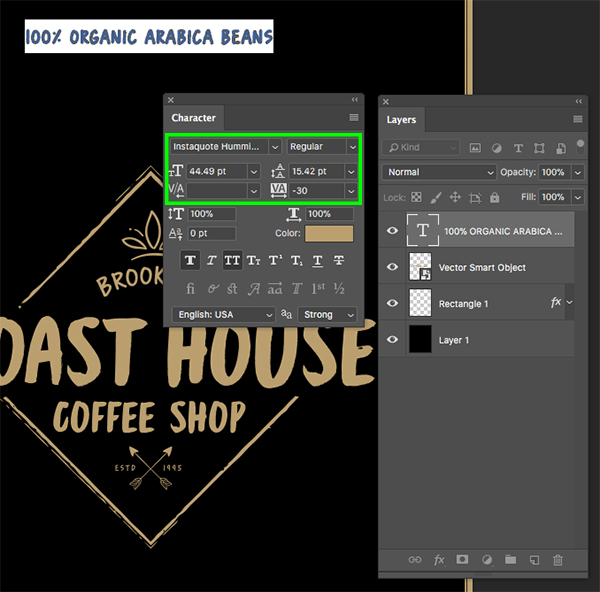
Create a new layer at the top of the Layers Palette and switch to your Type Tool (T). If you don’t have it open already, bring up the Character Panel by going to the Window menu and choosing ‘Character’ from the list. Now we want to type out the words ‘100% ORGANIC ARABICA BEANS’ using the Instaquote Hummingbird typeface with a point size of about ’44.5’ and a tracking setting of about ‘-30’. As for the fill color, simply click on the color swatch in the Character Panel and then use the Eyedropper Tool to sample any of the gold.
Step 20: Adding the Rules
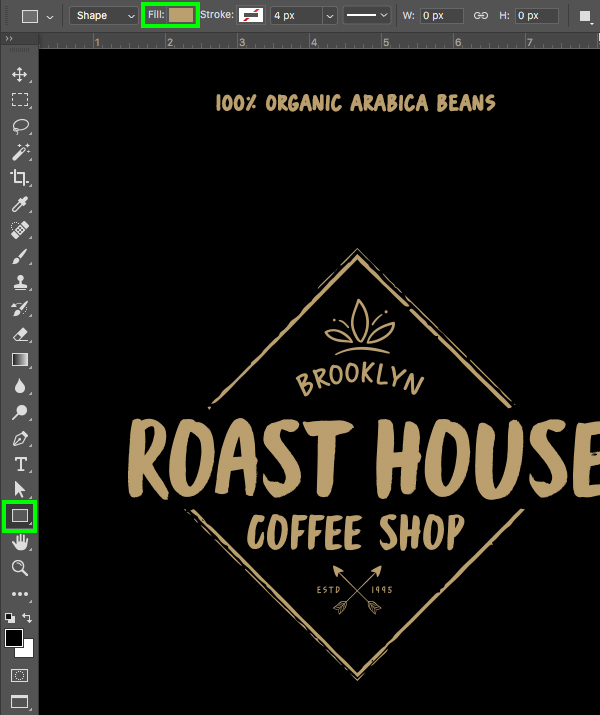
Press the letter ‘U’ on the keyboard to grab your Rectangle Tool or select it in the toolbar and then click on the ‘Fill’ at the top of the interface as shown below:
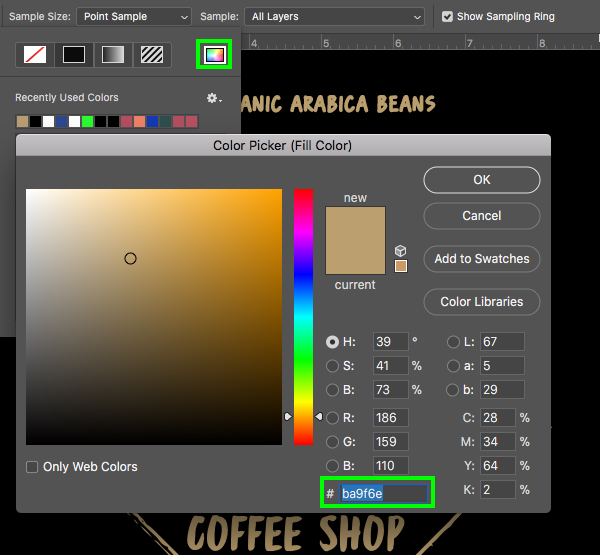
To change the fill color you will just need to click on the rainbow colored icon in the top of the dropdown menu and then enter the hex value ‘#BA9F6E’ and then press ‘Return’ on the keyboard.
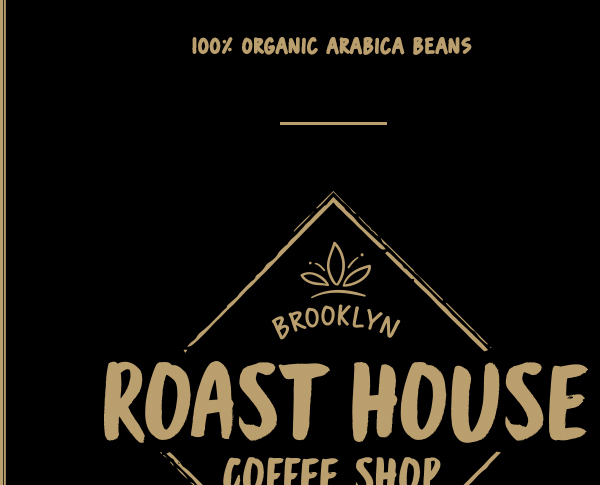
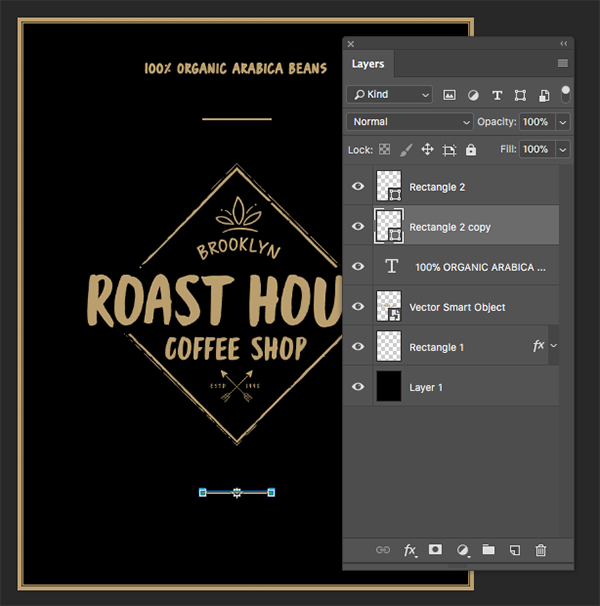
Click and drag a short, narrow rectangle out between the line of text and the logo as shown here:
Select the rectangle layer and then press Command/Ctrl+J to duplicate it. Press Command/Ctrl+T to do a Free Transform and then click on the rectangle, hold the Shift key, and drag it downwards to place it below the logo. Once you are happy with the positioning of the second rectangle and everything looks pretty evenly spaced out, press ‘Return’ on the keyboard to apply the changes.
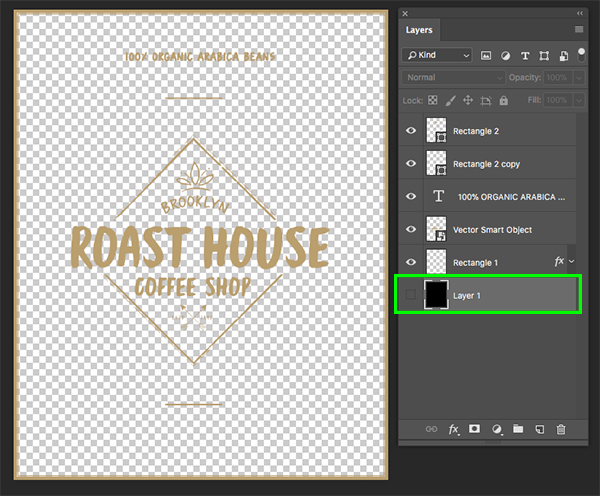
Now that we have our elements in place we can turn off the visibility of the black background layer to make sure it doesn’t appear in our mockup. Once you have done that, press Command/Ctrl+S to save the Smart Object and then Command/Ctrl+W to close the window.
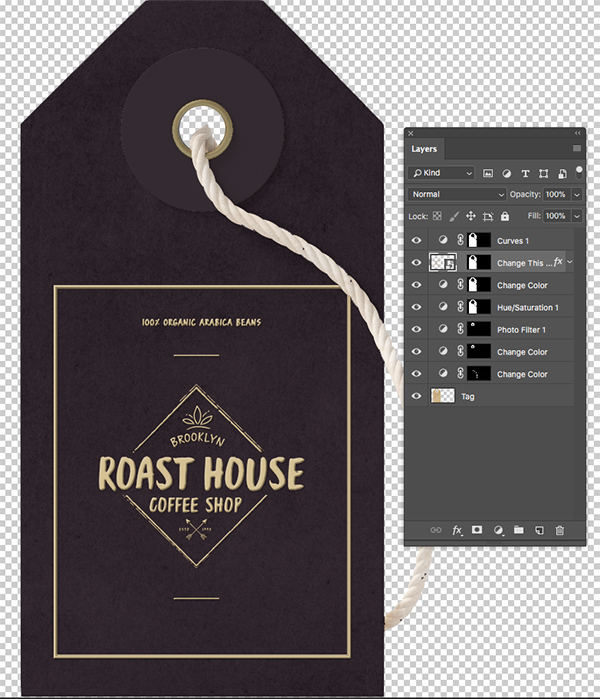
You should now see your artwork appearing on the tag as shown below:
Press Command/Ctrl+S and then Command/Ctrl+W again to save this Smart Object file and close out to return to the main mockup PSD file.
Step 21: Custom Envelope
Next, expand the ‘Envelope (M)’ folder to reveal the contents and then double click the top ‘Envelope’ Smart Object layer to open it in a new window.
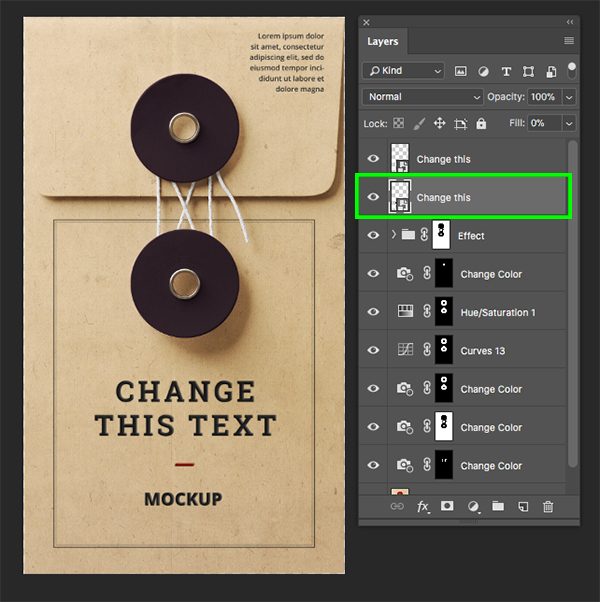
Once you are inside the first Smart Object, double click on the second Smart Object down as highlighted in the image below:
Inside of this Smart Object we will turn off the visibility of the first three layers. After that, go back to Illustrator, select and copy your gold logo, and then return to Photoshop and paste it as a Smart Object like we did in the previous steps. Remember to scale the logo up just hold the Alt/Option+Shift keys while dragging outwards.
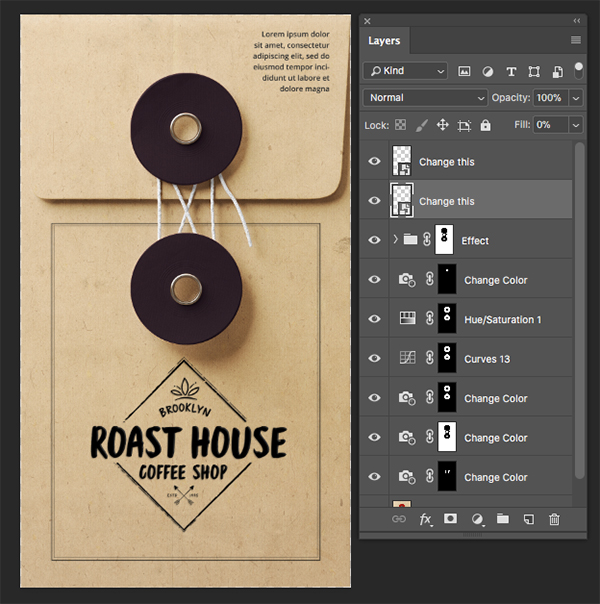
After pasting in your logo, double click on the layer to open the Layer Style dialog box and check off the ‘Color Overlay’ option as shown here:
For the fill color we just want to use a solid black and then press ‘Return’ or click ‘OK’ twice to apply the changes and close out of both panels. Next, move the logo down so it’s lower than the center of your document and then press Command/Ctrl+S to save the file and Command/Ctrl+W to close out of the window.
You should now see your previous Smart Object where the logo now appears on the envelope. If the top of the logo is covered by the black circular wheel of the envelope, simply go back into the ‘Change this’ Smart Object, move the logo down, and resave it. Once you are happy with the size and positioning of the logo, save the file and close out of the window to return to the main mockup PSD.
Step 22: Custom Bag
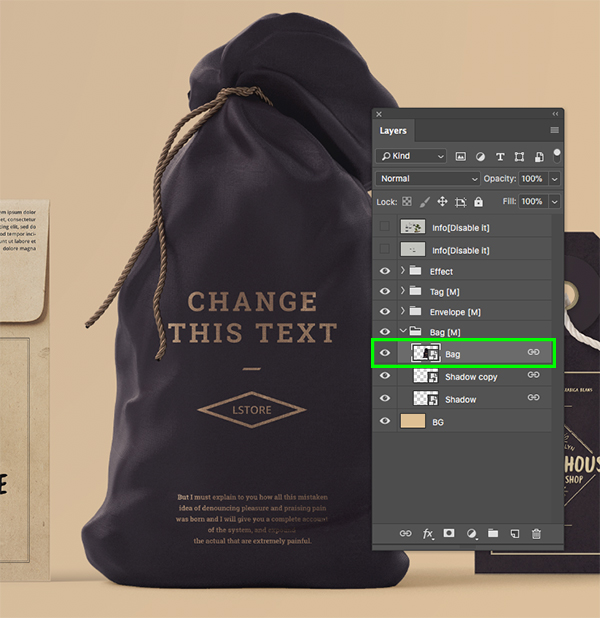
Next, expand the ‘Bag (M)’ folder to reveal the contents and then double click the ‘Bag’ Smart Object layer to open it in a new window.
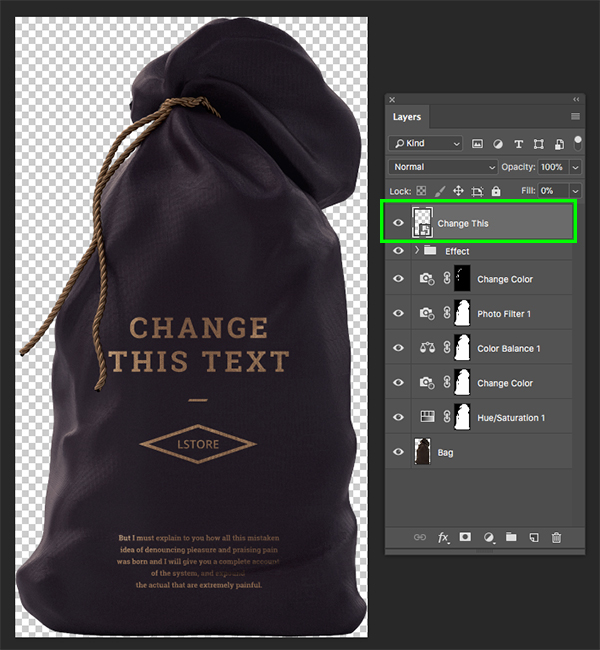
Once you are inside the first Smart Object, double click on the ‘Change This’ Smart Object at the top of the layer stack.
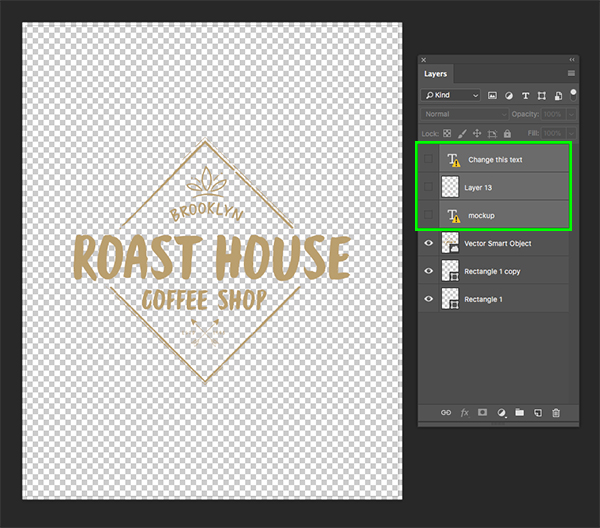
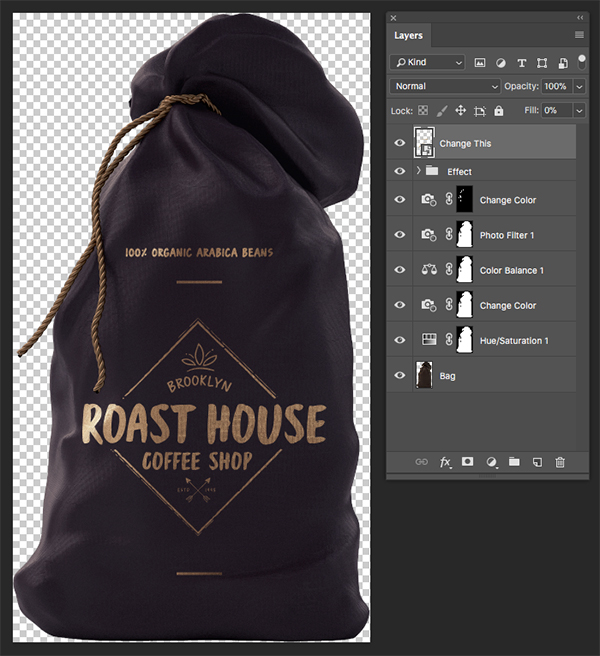
Once you are inside of the main Smart Object where the artwork lives, turn off the visibility of the ‘Rectangle 1’ layer. From here we will use the same configuration that we applied to our tag back in steps 17-20. After doing that your file should have the same layers and look like this:
After setting up the artwork, press Command/Ctrl+S to save the Smart Object and then Command/Ctrl+W to close out of the window. You should now see your lockup applied to the bag and will want to repeat the process of saving and closing out to return to the main mockup once again.
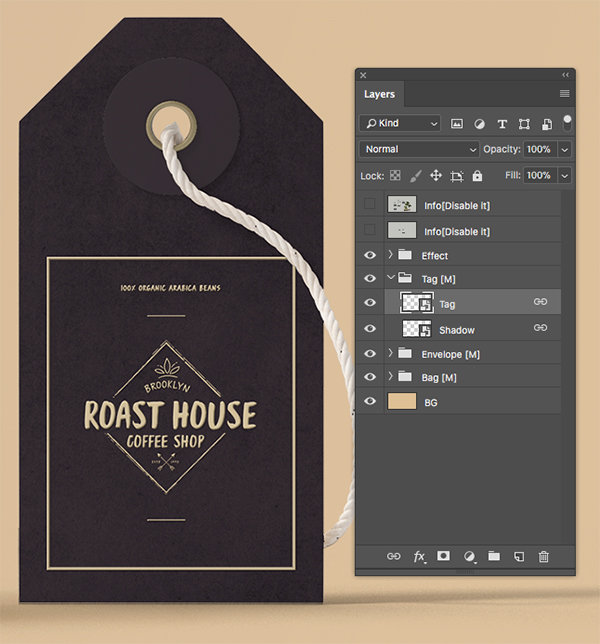
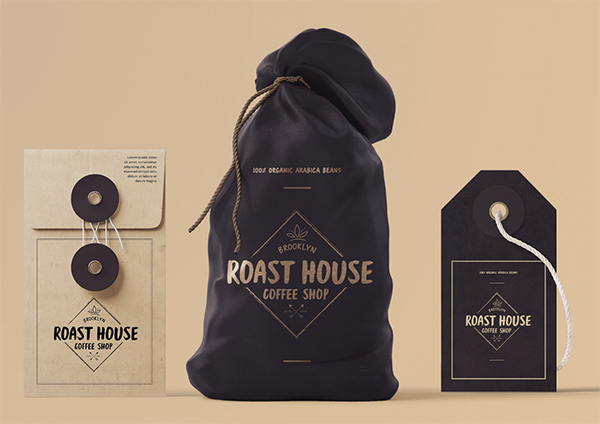
We now have all of our branded elements set up in the main mockup file. Hopefully yours will match and look like the image shown here:
Step 23: Spilling the Beans
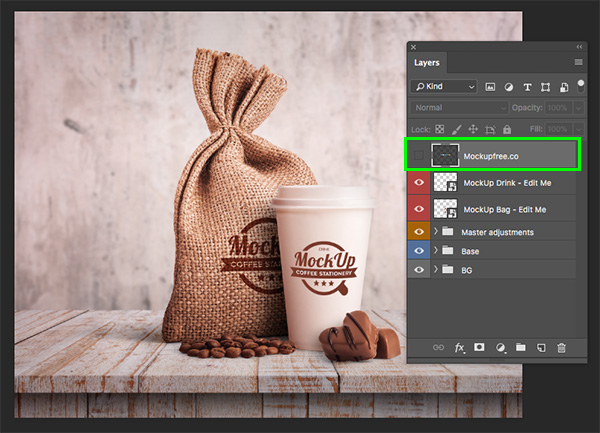
Now we will need to download the second free mockup by heading over to Free PSD Templates.com where can get the Coffee Stationary Mockup PSD. Once you’ve downloaded the files go ahead and open the ‘MockUp_2.psd’ file in Photoshop and turn off the visibility of the top watermarked layer.
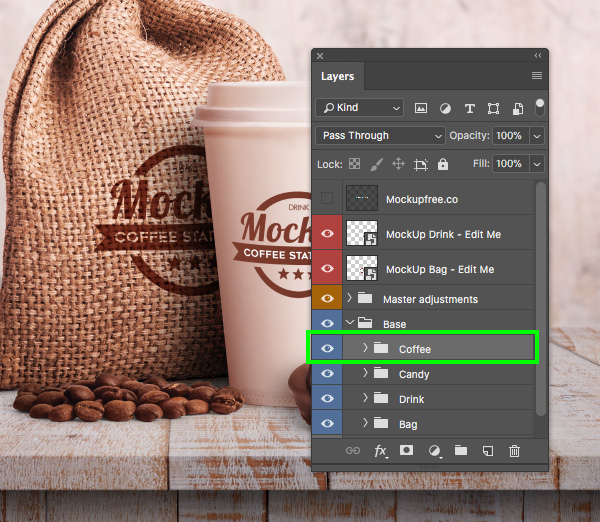
Select the ‘Base’ folder and click the small arrow to reveal the contents of the folder. From here, select the ‘Coffee’ subfolder and then hold the Command/Ctrl+Shift keys and drag it into your working document.
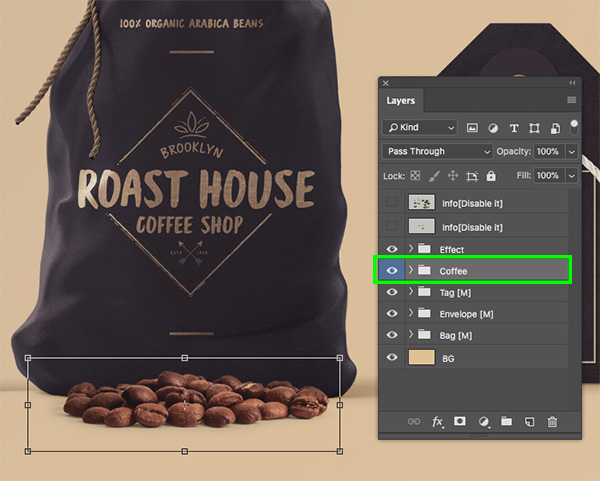
Place the ‘Coffee’ folder just below the ‘Effect’ folder in your main document and then press Command/Ctrl+T to initiate a Free Transform. From here, hold the Alt/Option+Shift keys to scale it down and place it in front of the bag of coffee beans, slightly overlapping as shown below:
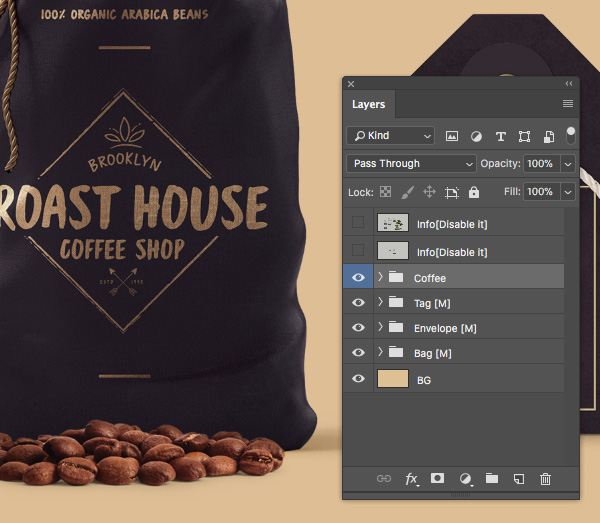
At this point let’s go ahead and remove the ‘Effect’ folder by simply deleting it as we will be applying some new adjustments of our own that we will use instead.
Step 24: Adjusting the Beans
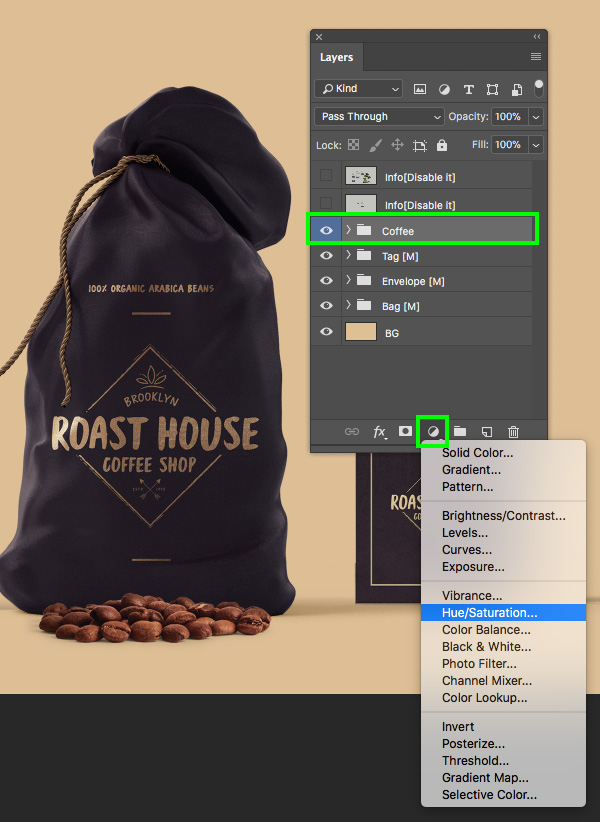
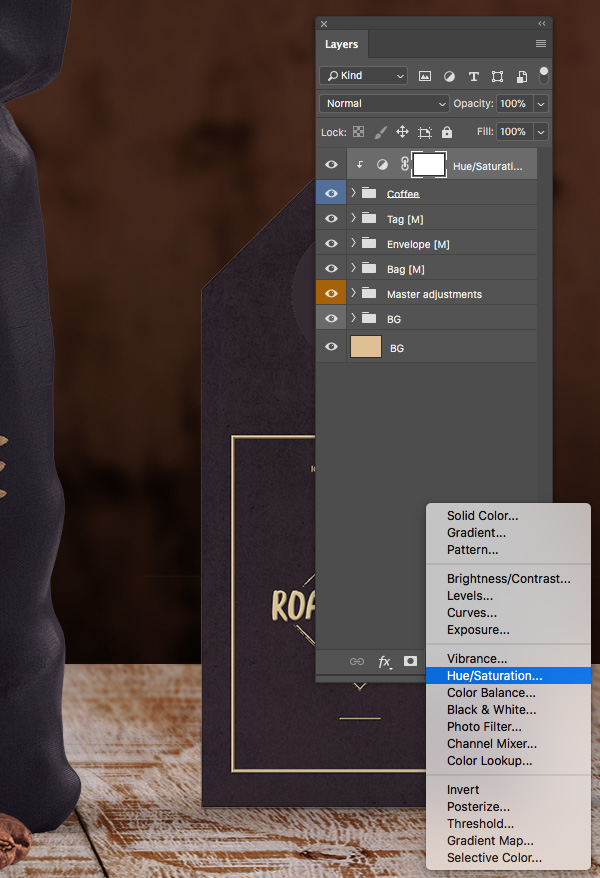
Select the ‘Coffee’ folder and then hold the Alt/Option key and click on the Adjustment Layer icon at the bottom of the Layers Palette. From here, select the ‘Hue/Saturation…’ option from the dropdown menu.
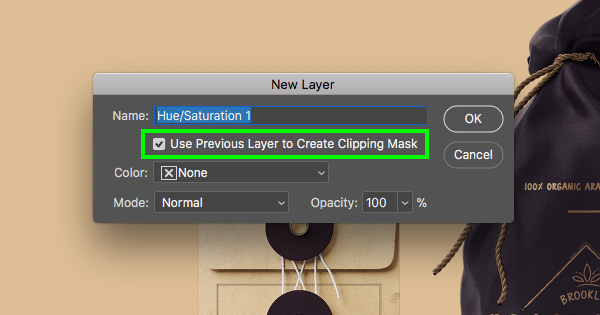
You should now be prompted with a dialog box where you will want to check off the option that says ‘Use Previous Layer to Create Clipping Mask’ and then press ‘Return’ or click ‘OK’ to proceed.
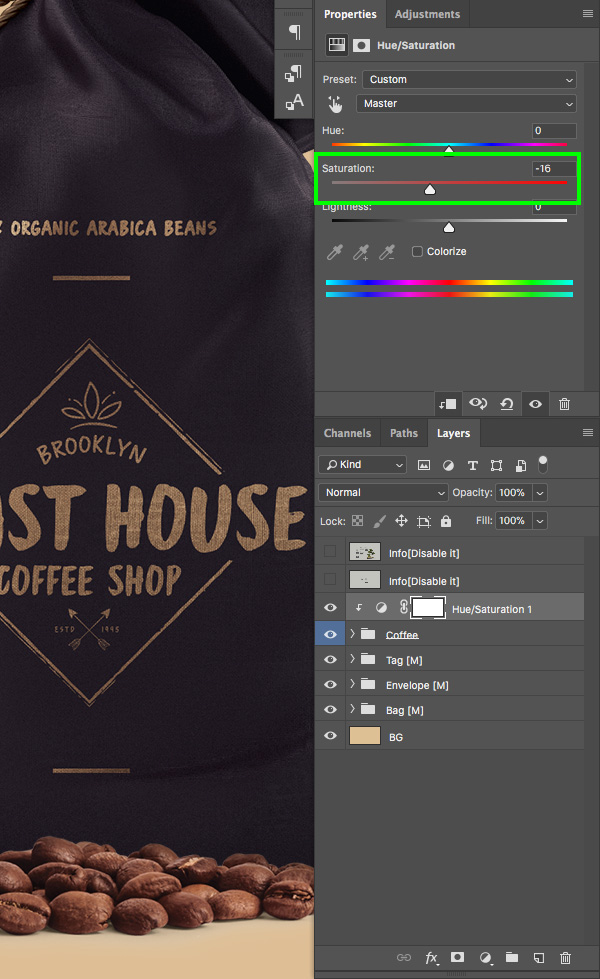
You should now see a Clipping Mask applied to the ‘Coffee’ folder so the new Hue/Saturation Adjustment Layer will only affect this folder. For the properties let’s move the middle, Saturation slider towards the left so that it’s set to about ‘-16’ as shown in the image below:
Step 25: Adding the Background
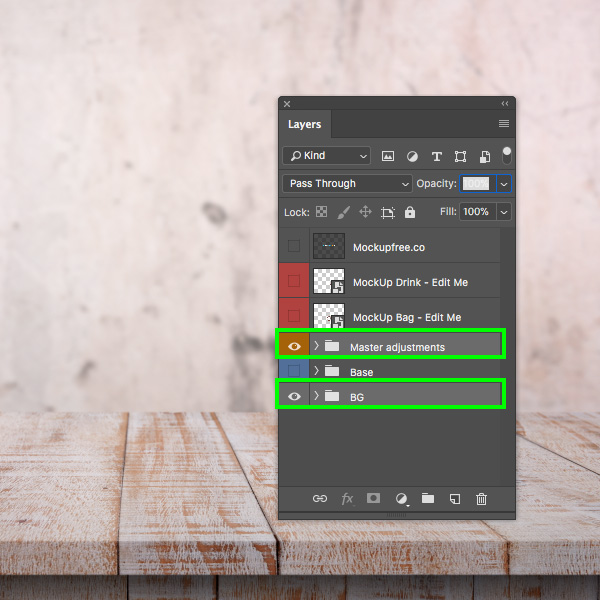
Back in the mockup PSD file let’s select the ‘Master adjustments’ folder, hold the Command/Ctrl key, and then also select the ‘BG’ layer so they are both selected simultaneously.
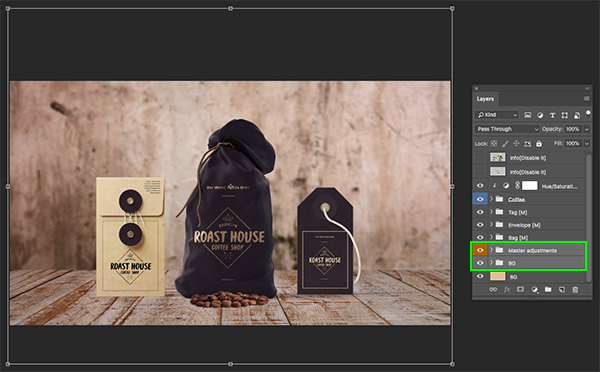
Hold the Command/Ctrl+Shift keys and drag both of these folders into your working document and place them at the bottom of the Layers Palette, just above the original ‘BG’ layer. With both of your folders still selected, press Command/Ctrl+T and then hold the Alt/Option+Shift keys and scale both layers down until the width matches the width of our document. Once you have positioned the folders accordingly, press ‘Return’ on the keyboard to apply the transformation. Notice that we will want the horizon line where the table ends to be slightly higher than the bottom of our branded objects to add perspective.
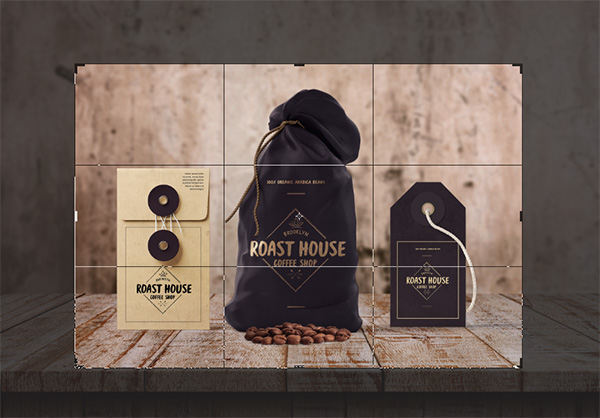
Press ‘C’ on the keyboard to switch to the Crop Tool and then move the top handle down slightly and move each of the side handles inwards so we can keep the focus on the packaging in the center of the image. Once you have a nice tight crop go ahead and press ‘Return’ on the keyboard to apply the change.
Step 26: Modifying the Background
Expand the ‘BG’ folder and then add a new layer just below the ‘Lighting’ subfolder inside. After that, press ‘M’ on the keyboard and draw out a large rectangle around the entire top portion of the background with the bottom ending just above the top edge of the table.
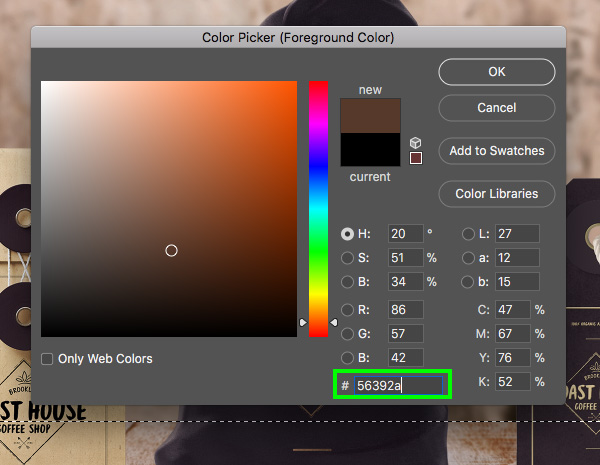
With your selection still active, click on your foreground color and change it to the hex value ‘#56392A’ and then press ‘OK’.
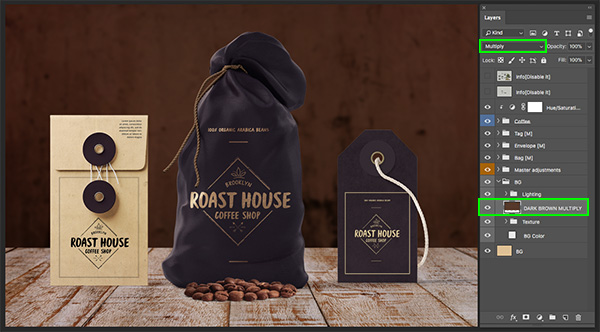
Next, press the Alt/Option+Delete keys to fill your active selection with the dark brown color and then change the Blend Mode of the layer from ‘Normal’ to ‘Multiply’ as shown below:
Step 27: Background Fade
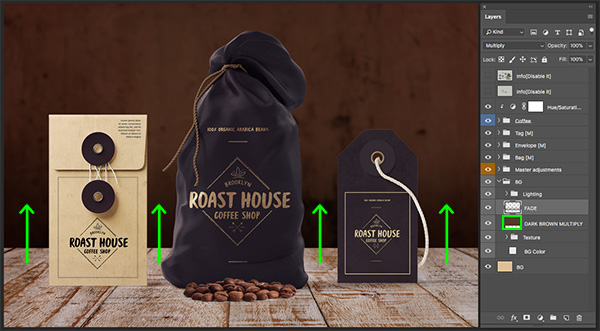
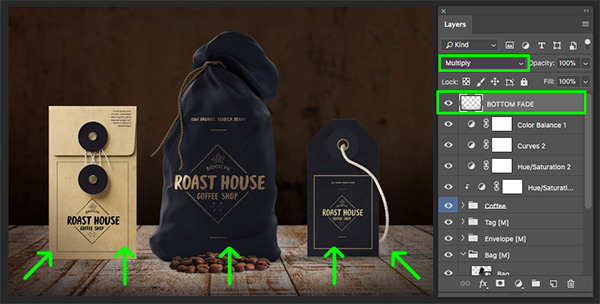
Create another new layer above the dark brown multiply layer and then press ‘G’ on the keyboard to switch to your Gradient Tool. In the top toolbar, make sure that you have a Linear Gradient selected that fades from our dark brown color to transparent. Your settings should look like the image below:
Next, hold the Command/Ctrl key and click on the layer thumbnail icon of the solid brown multiply layer just below your new, empty layer. Doing this will activate a selection around the area we have filled with color in the previous step even though our empty layer is still highlighted in the Layers Palette. From here, click and drag upwards from the bottom up to create a fade along the bottom of the image. Here we will also want to change the Blend Mode of the layer to ‘Multiply’.
Step 28: Saturation Boost
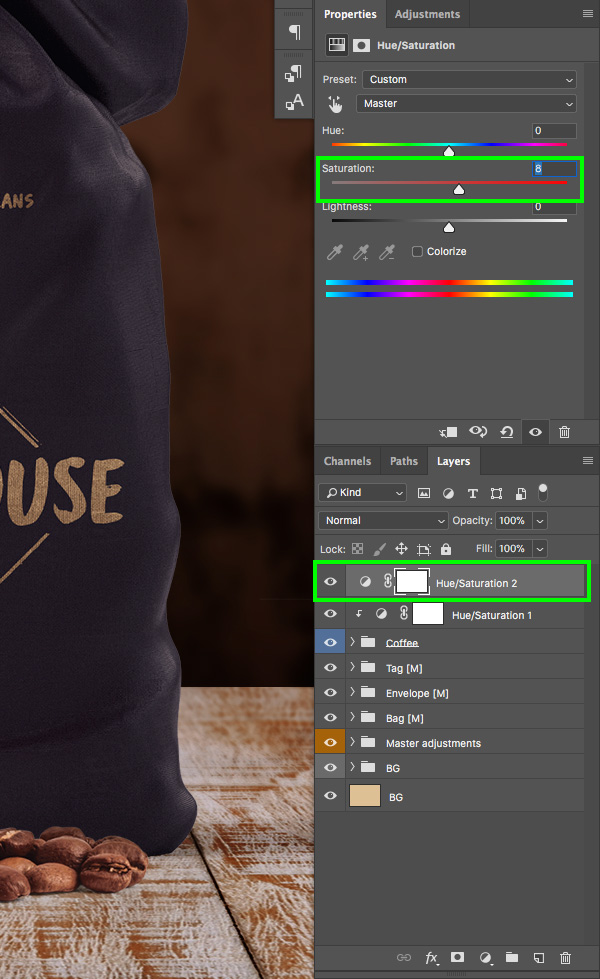
You may notice that I’ve deleted both of the watermark layers that were previously at the top of the Layers Palette – feel free to do the same as we have no need for these layers. Your top layer should now be the Hue/Saturation Adjustment Layer that is clipped to the ‘Coffee’ folder. From here, let’s click on the Adjustment Layer icon at the bottom of the Layers Palette and choose ‘Hue/Saturation…’ from the list that appears.
Notice that we do not want this layer to have a Clipping Mask applied as it will be affecting all of the layers in our entire design. For the properties let’s move the ‘Saturation’ slider up to about ‘8’ as shown below:
Step 29: Contrast Boost
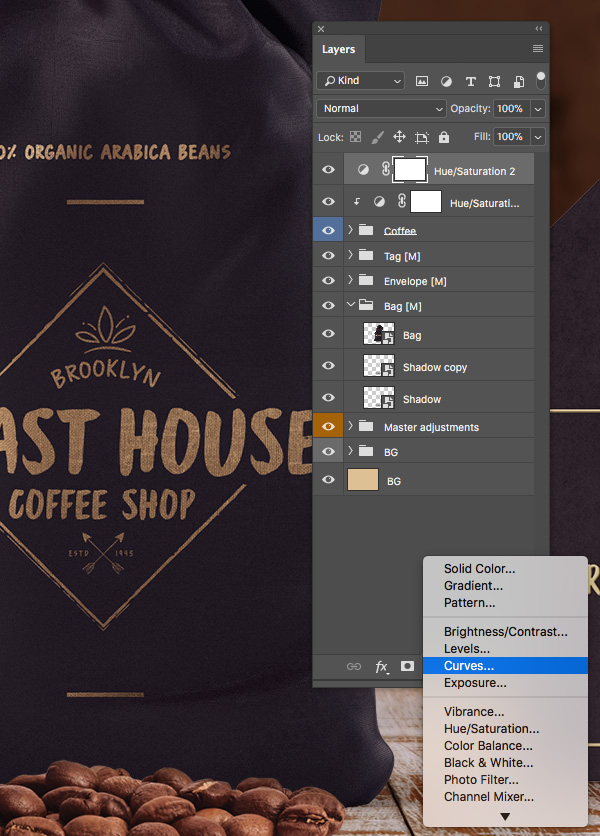
Select the overall Hue/Saturation Adjustment Layer from the previous step and then click on the Adjustment Layer icon at the bottom of the Layers Palette once again. This time, let’s add a ‘Curves…’ layer to our image.
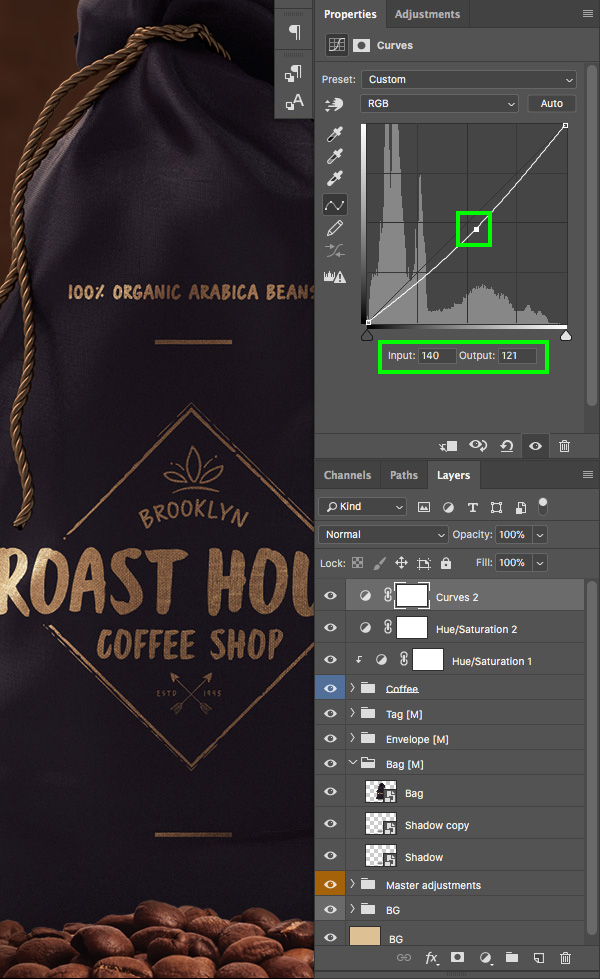
Let’s now create a single point in the center of the grid on the Curves Adjustment Layer and move it slightly downwards and to the right. Pay attention to the settings here to make sure the ‘Input’ is set to ‘140’ and the ‘Output’ is at ‘121’.
Step 30: Color Balance
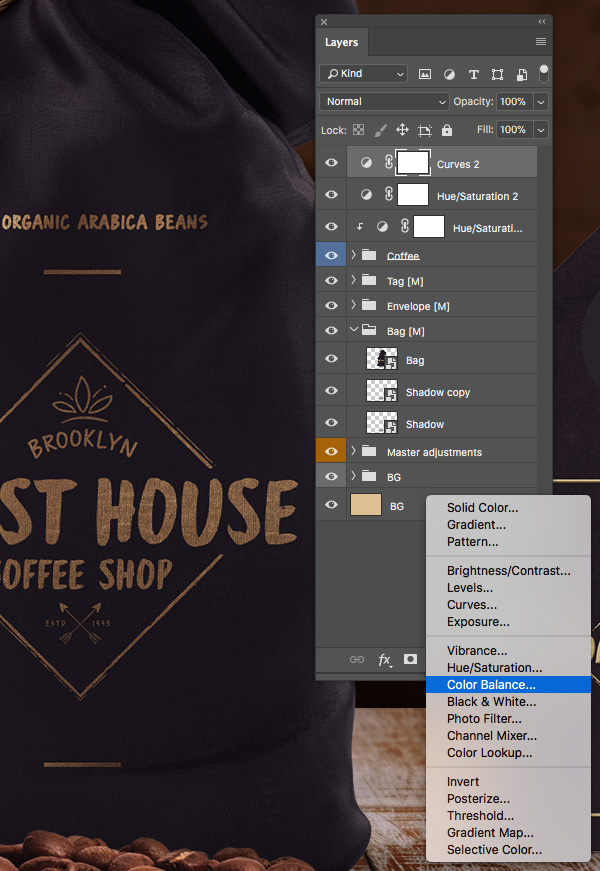
Select the Curves Adjustment Layer at the top of the Layers Palette and click on the Adjustment Layer icon once again. This time let’s add a ‘Color Balance…’ Adjustment Layer as shown below:
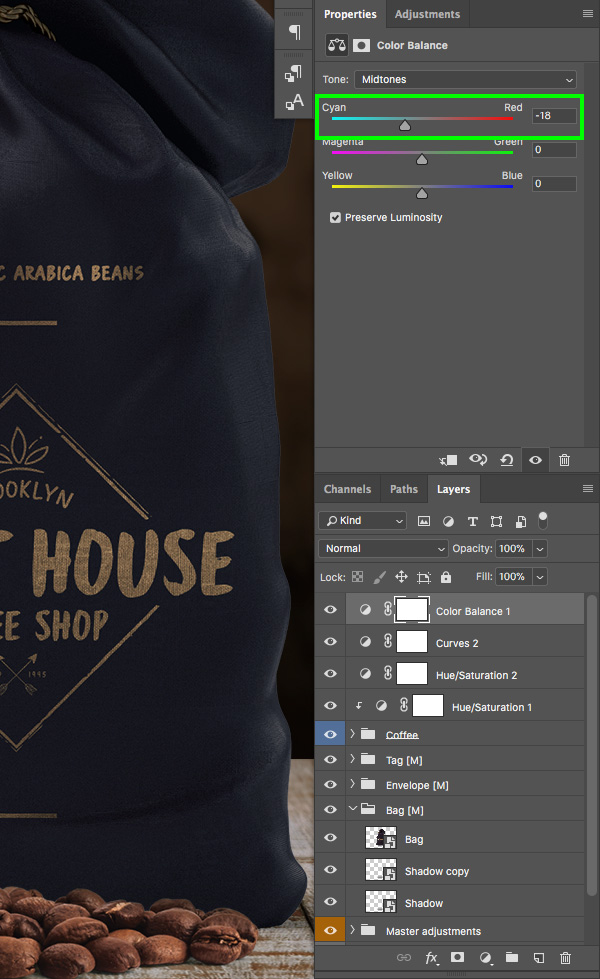
For the settings, let’s move the top slider to the left until it’s set to ‘-18’ to remove the red tone from the image and make it more balanced.
Step 31: Vignette Effect
As a finishing touch, let’s add a new layer to the very top of the Layers Palette and then grab our Gradient Tool (G) once again. Using the same dark brown color from the previous steps, click and drag upwards from the very bottom of the image to create a faded vignette effect. In order to round it out we also want to drag inwards from the lower left and lower right corners in towards the center. Once you have created a nice rounded fade along the bottom of the image, change the Blend Mode to ‘Multiply’ and experiment with the opacity to achieve a nice effect.
We have now completed our custom branding for the Roast House Coffee Shop! By first creating a unique logo with a few variations we were able to then apply it to a branded mockup to help establish a look and feel for the overall brand. We also saw how you can combine elements from different mockups to create an even more unique looking scene. It is important to remember that a brand is about more than a logo, it’s about the way your business or service is perceived by the people who use and interact with it. With this lesson we used only a few of the elements from this truly massive design bundle. We invite you to discover more of these high-quality resources in this incredible collection to help you speed up your workflow and impress all of your clients!
Remember that whether it’s your outcome for this tutorial or something new you’ve made, we’d love to see your designs on our Facebook page.
Please leave a comment if you have any questions or suggestions. I always look forward to hearing from you!
There’s still time to check out The Ultimate Time-Saving Templates Bundle that will help you shave days off of your projects all for an unbeatable price of $29!









It so,a nice way tutor. Thank U
Woohoo we’re so happy that you think so Hailu, and we know that Jo will be so pleased to hear that you enjoyed her tutorial :).
Great step by step. For me, adding the wood environment doesn’t look as nice as the flat color so I’d probably stop there. Thanks for posting!
Hey L W,
Thanks so much for leaving us a comment and we are so glad to hear that you found this tutorial useful.
It’s so great to hear your feedback and your preferred look for this design. As this design was created purely for our tutorial’s purposes, that extra step of adding the wood environment hopefully offers our community extra tips on the variety of ways in which you can work with your templates and mockups, but it’s great that you feel it works as is :)
We hope that you have picked up some really useful tips and tricks for your own projects!
Another awesome tutorial! Thanks Eric – you’re the best!
Hey Andrea,
Thanks so much for the awesome comment on this and we will definitely pass your lovely feedback over to Eric- he will be delighted to hear you enjoyed it!
Please do feel free to share your finished design with us if you are keen as we would love to see how you got on :)