In this design tutorial we will be creating an invitation for a zombie themed party in Photoshop. To do this we will be using some elements from The Hugely Versatile Vector Bundle and a few free typefaces from DaFont.com. If you are ready for a zombie party then let’s fire up Photoshop and get started!
HAVE YOU SEEN OUR YOUTUBE CHANNEL?
Watch the video tutorial below and subscribe to our YouTube channel for regular updates direct to your inbox.
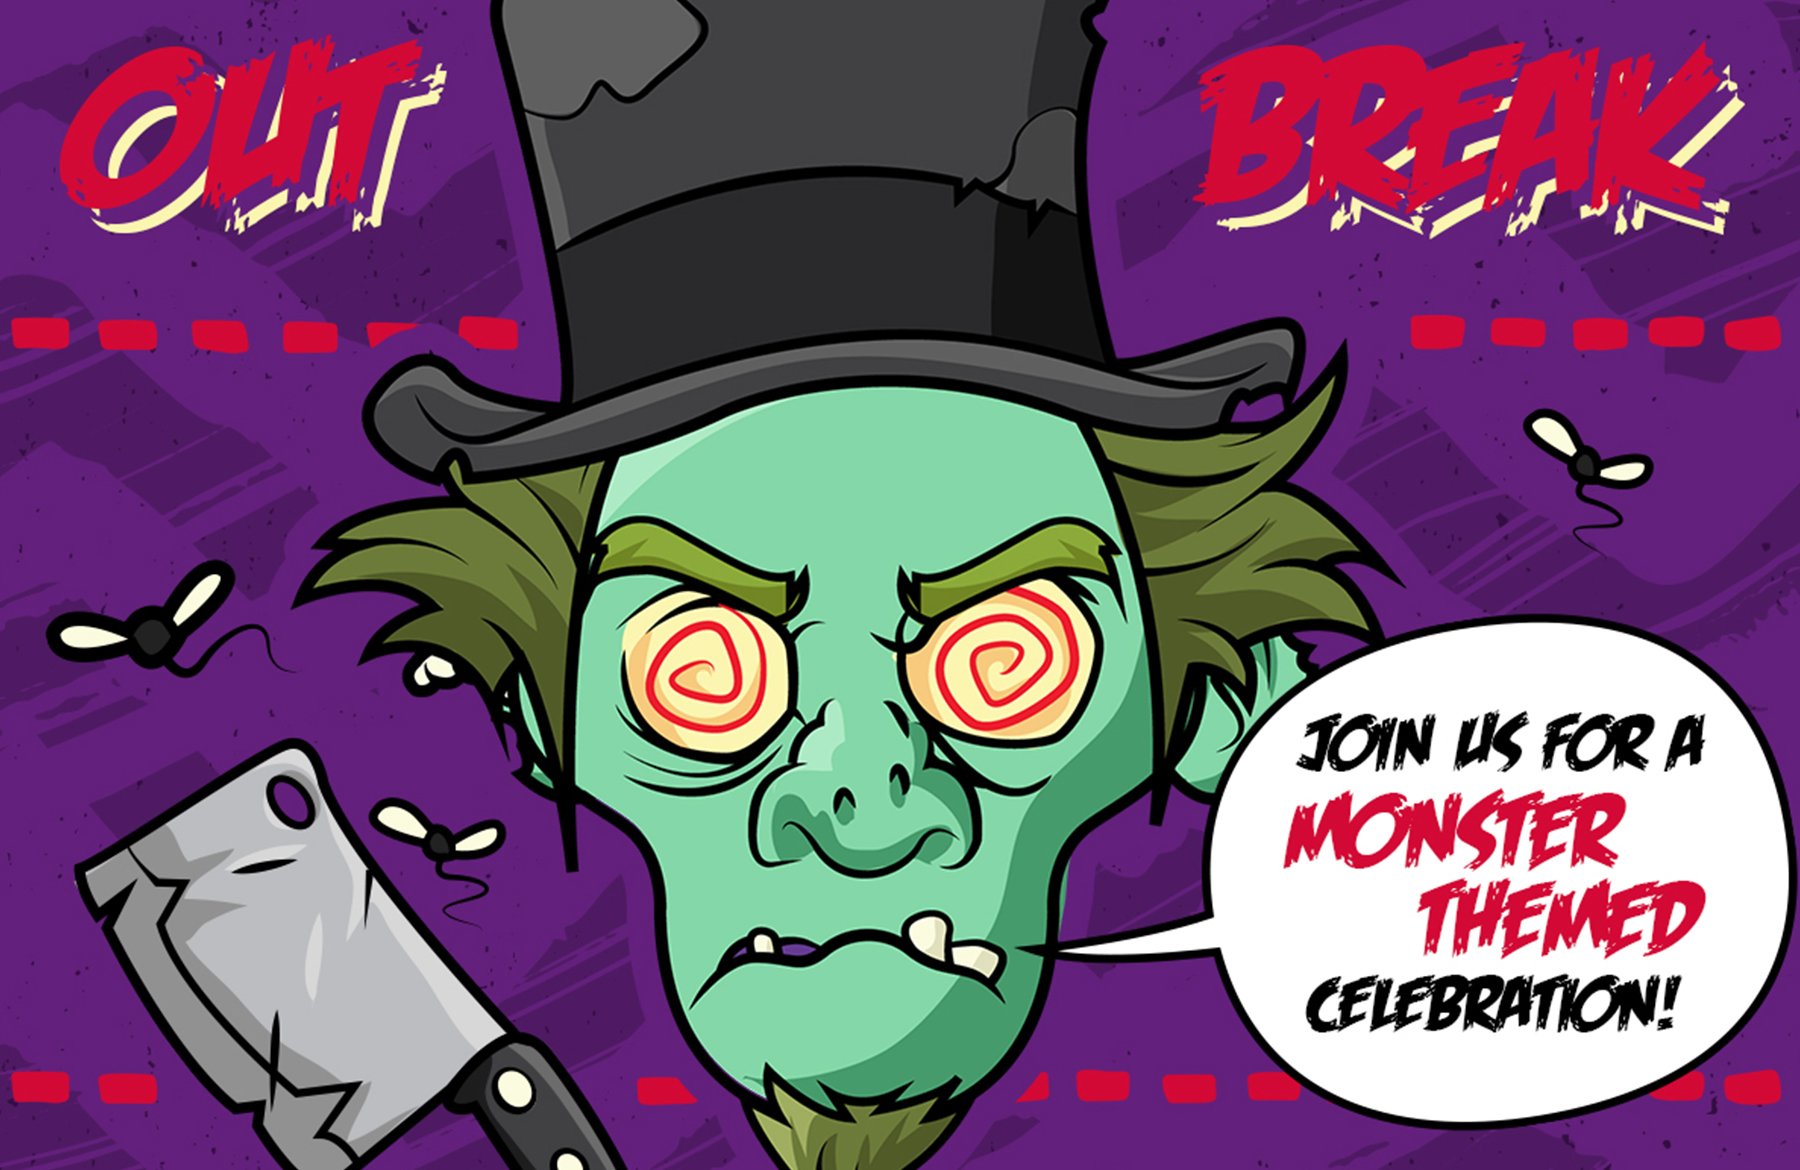
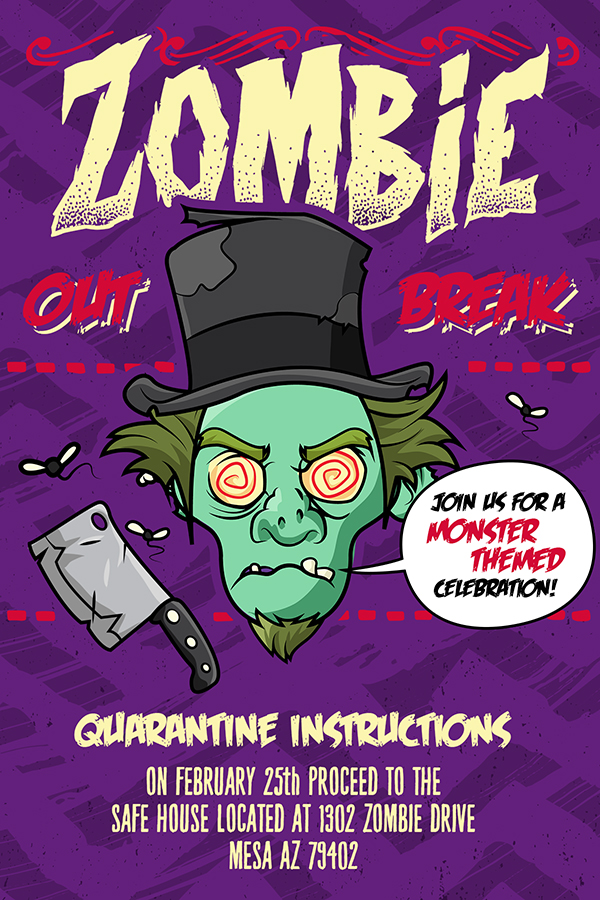
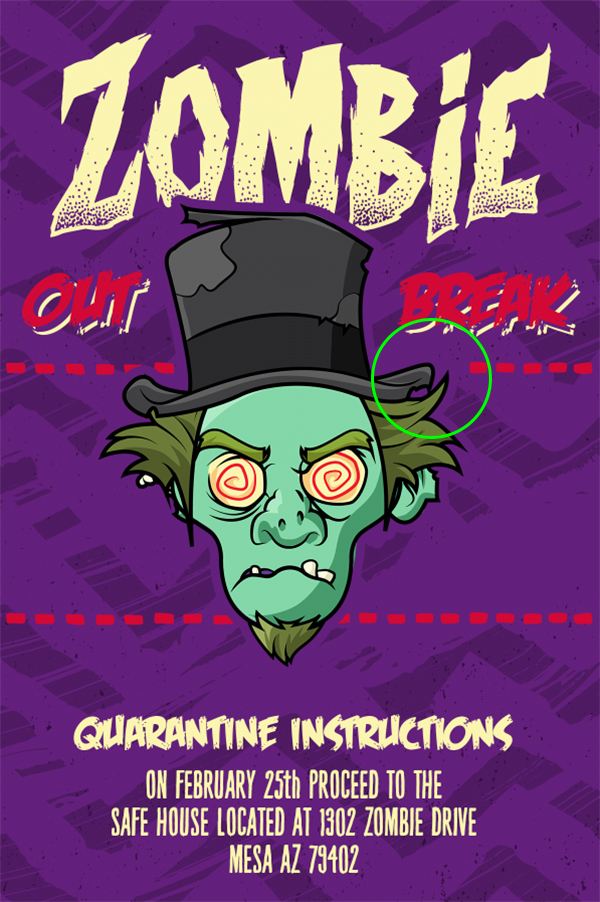
Here’s a look at what we’ll be creating:
Follow along with this tutorial: Download the freebie files
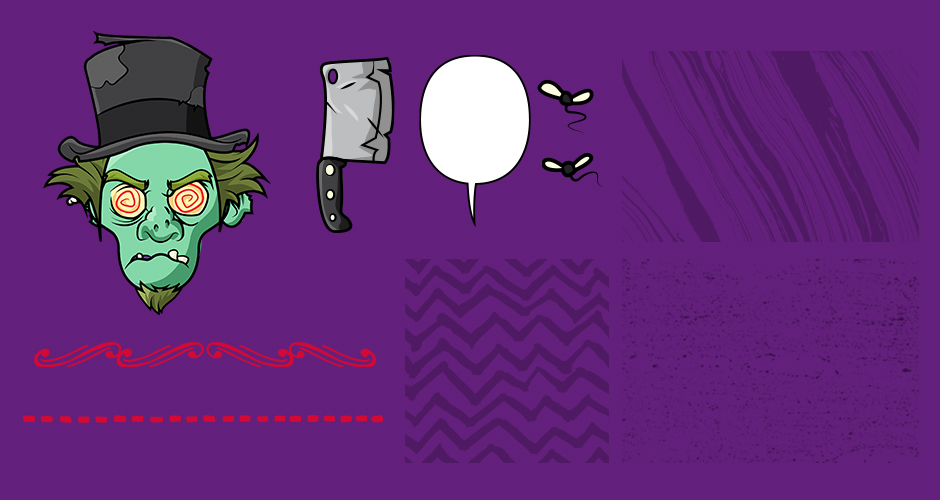
This freebie pack includes some super fun resources from the Serkworks-Art-Lab Zombie Avatar Builder along with some great vector freebies from Katy-Clemmans, PicByKate, and Downloads-for-Designers!
The freebie pack is just a tiny taste of the resources available in The Hugely Versatile Vector Bundle for just $29 (that’s 99% off). This bundle contains thousands of professional quality vectors and is jam-packed with incredible brushes, retro graphics, logo creation kits, illustrations and so much more!
Step 1: Zombie Party Invitation Design
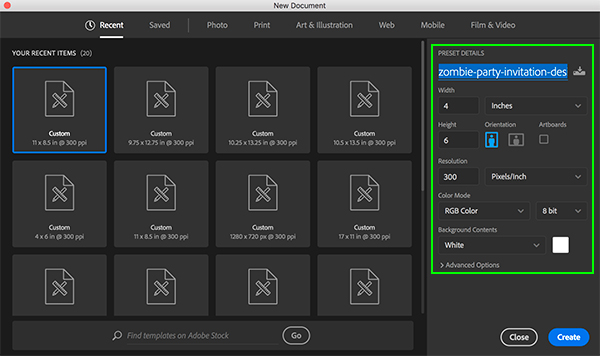
To begin, let’s start Photoshop and create a New Document. The first thing we want to do is give our file a name – here I will be using ‘zombie-party-invitation-design’ just to keep things simple and consistent, but feel free to use any other name that you would like. After that, make sure your document is set up as ‘4’ inches wide by ‘6’ inches tall, ‘300’ for the ‘Resolution’ and ‘RGB’ for the ‘Color Mode’. We can leave the ‘Background Contents’ set to ‘White’ and ‘8 bit’ should be fine for what we are going to be creating. Once you have set everything up, go ahead and click on the ‘Create’ button in the lower right corner to make your new file.
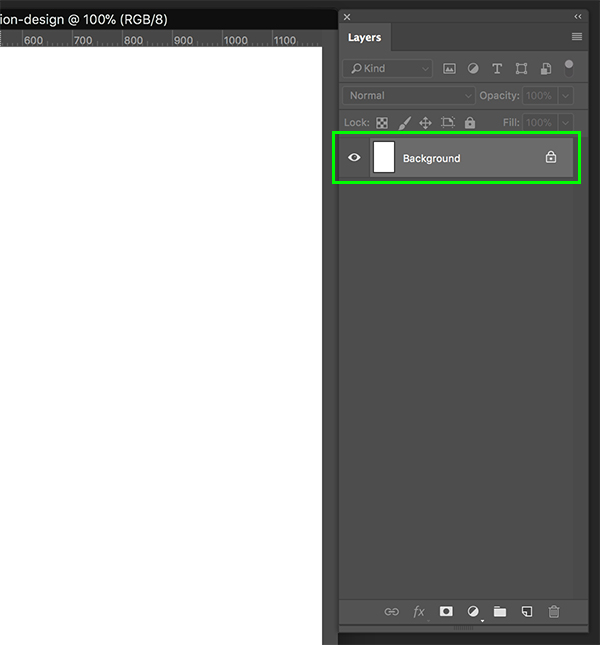
After creating your document you will see that you only have a single ‘Background’ layer filled with white that has a small lock icon next to it. What we want to do here is double click on this layer to unlock it.
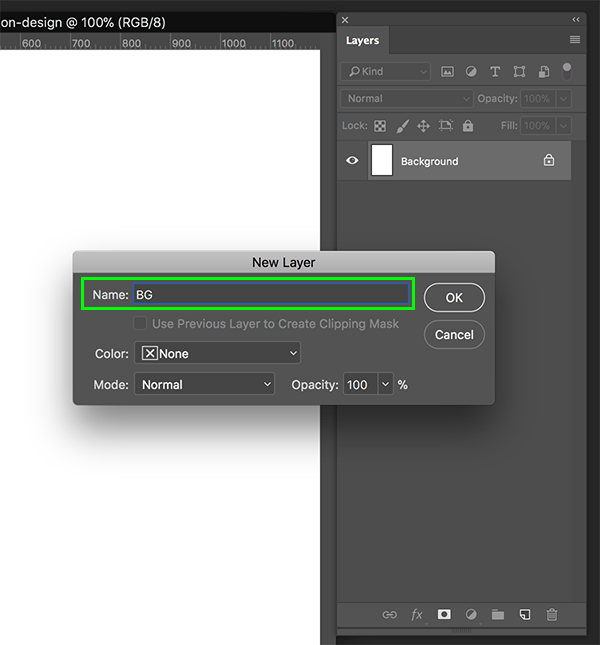
After double clicking on the layer you will be prompted with a ‘New Layer’ dialog box where we can enter a new name for our layer. Let’s just type in ‘BG’ and then click ‘OK’ to rename and unlock the layer.
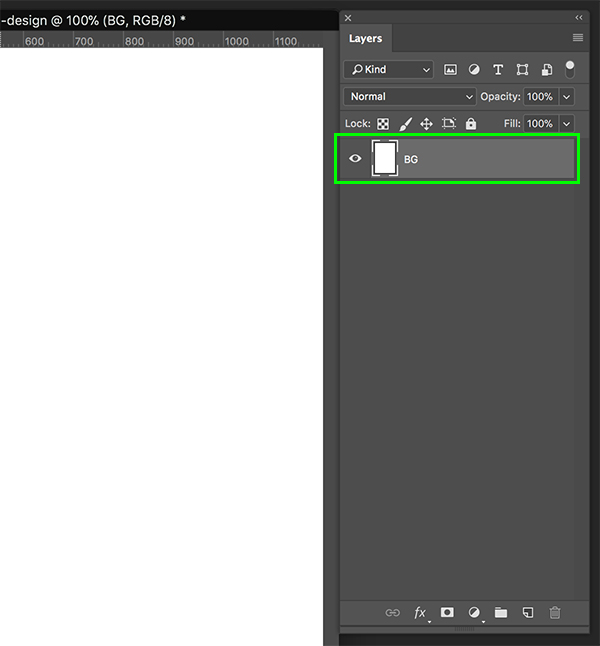
You should now see the new name for your layer and the small lock icon will have disappeared.
Step 2: Purple Haze
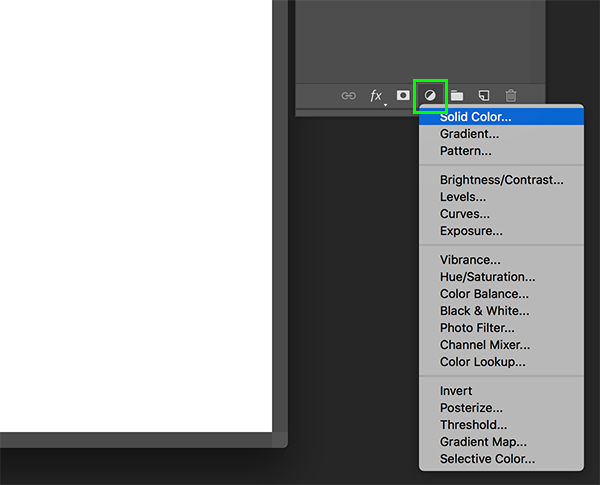
Next, click on the Adjustment Layer icon found at the bottom of the Layers Palette (this is the icon that looks like a half-black and half-white circle). From the list that appears, let’s choose ‘Solid Color…’ from the top as shown below:
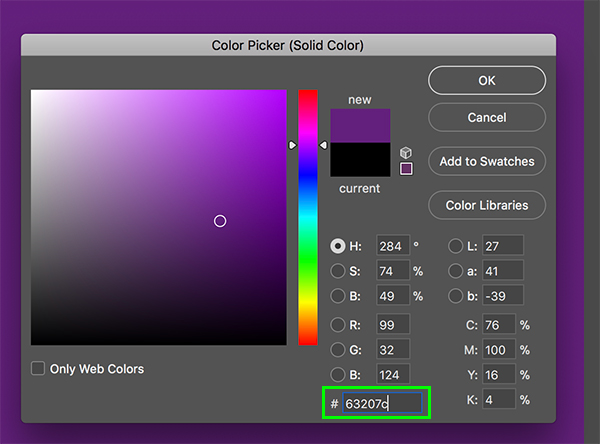
For the fill color, let’s enter the hex value ‘#63207C’ and then press ‘OK’ to apply the change.
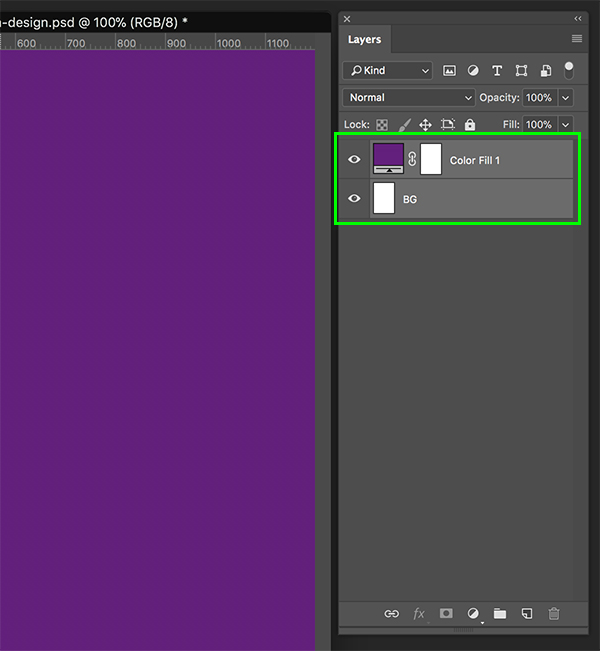
You should now have your ‘Color Fill 1’ layer just above your ‘BG’ layer. Let’s select the top layer, hold the Shift Key, and then click on the ‘BG’ layer below it so that both layers are selected at the same time.
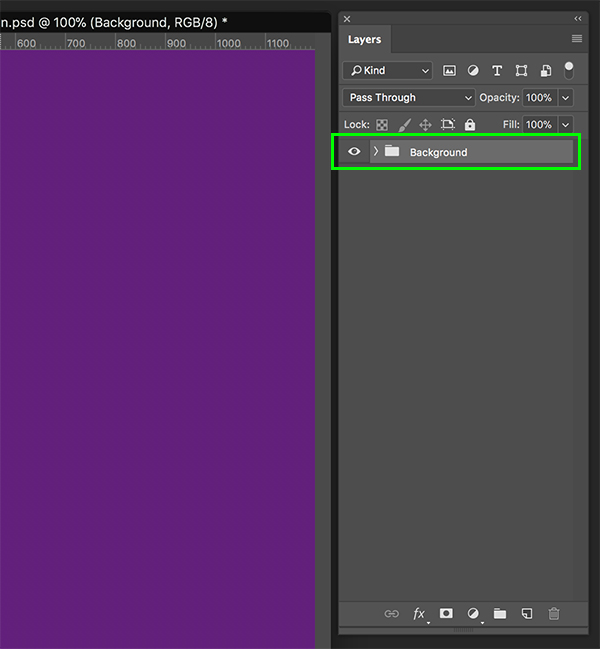
With both layers selected, press Command/Ctrl+G to place them into a new folder. Double click the ‘Group 1’ text for the folder in the Layers Palette and rename the folder ‘Background’ as shown here:
Step 3: Zig Zags
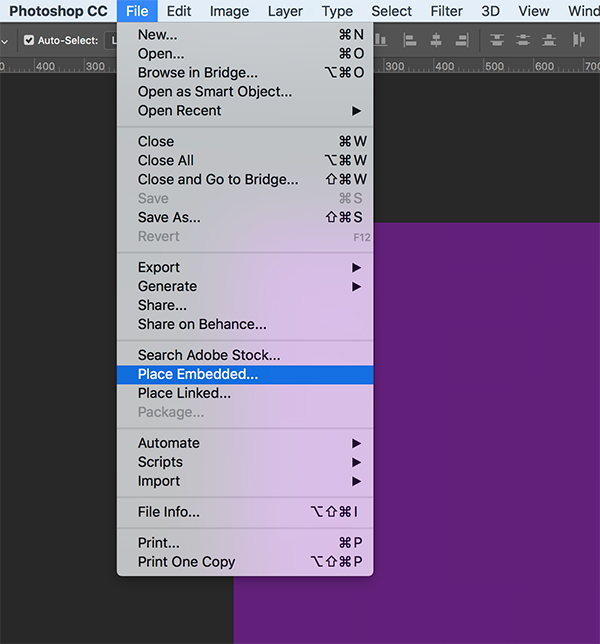
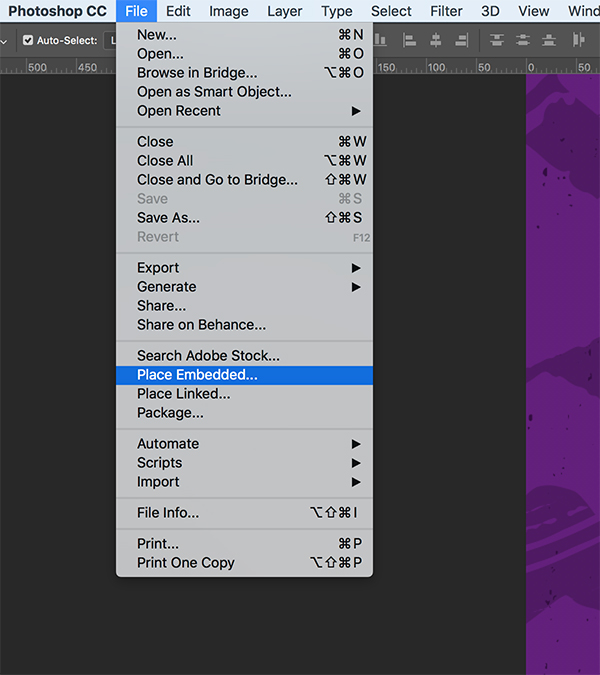
The next thing we are going to do is go to the ‘File’ menu and choose ‘Place Embedded…’ from the list as shown here:
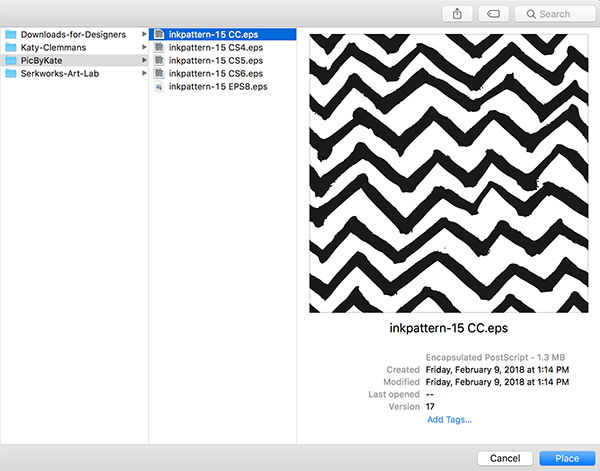
Navigate to the ‘inkpattern-15.eps’ file from PicByKate in the freebies folder for this tutorial. You will notice that there are several versions saved out so choose the one that is compatible with the version of Illustrator you have.
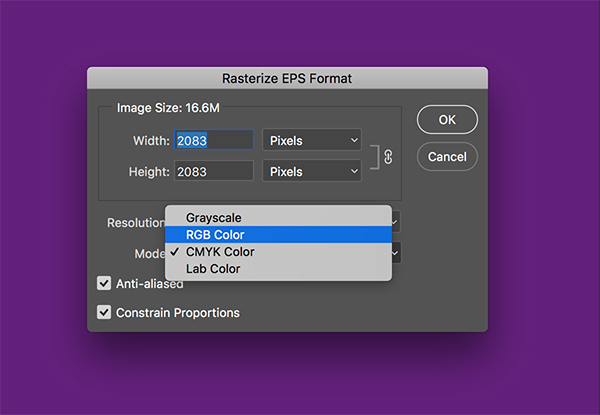
You will most likely be prompted with a dialog box asking you to ‘Rasterize EPS Format’ so before clicking ‘OK’ just make sure to change the ‘Mode’ from ‘CMYK’ to ‘RGB’ as shown here:
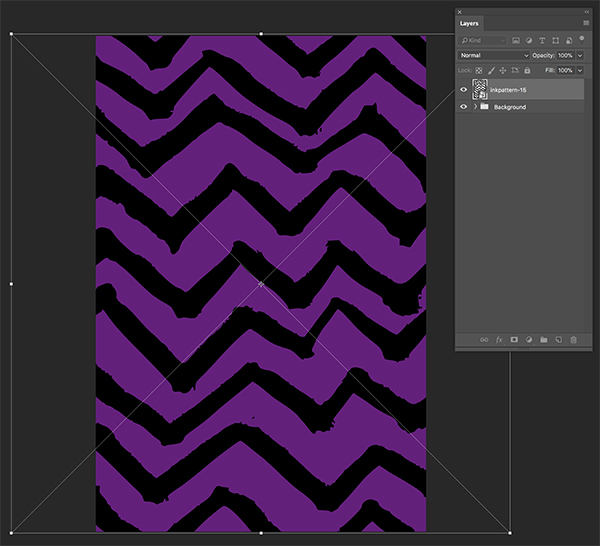
You should now see your zig zag pattern added to your Layers Palette and you will have a bounding box around the pattern by default. Before we press ‘Return’ to place the file, hold the Alt/Option+Shift keys and drag outwards from any of the four corners of the bounding box to scale the pattern up until it covers the entire canvas like this:
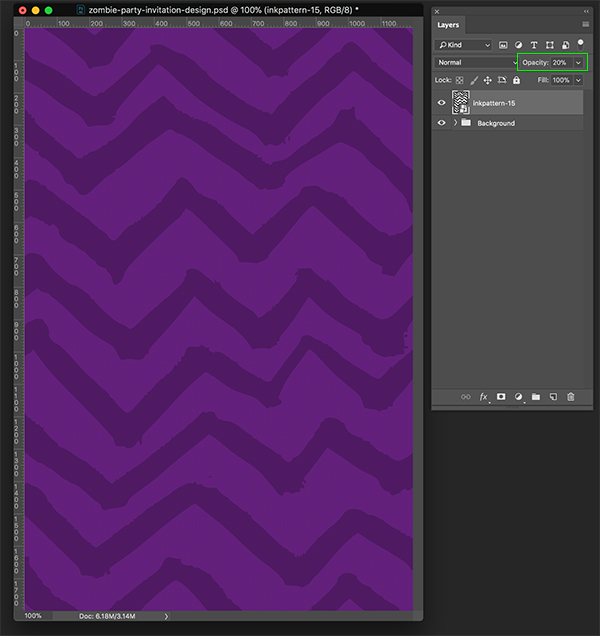
After placing your Smart Object all you will need to do is reduce the opacity of the layer to about ’20%’ as shown in the image below:
Step 4: Marble Texture
We will now open the ‘Bonus Vector from – Downloads for Designers Messy Marbling Vol 1 .eps’ file in Adobe Illustrator. Be sure to select the file that matches up with your version of Illustrator for compatibility.
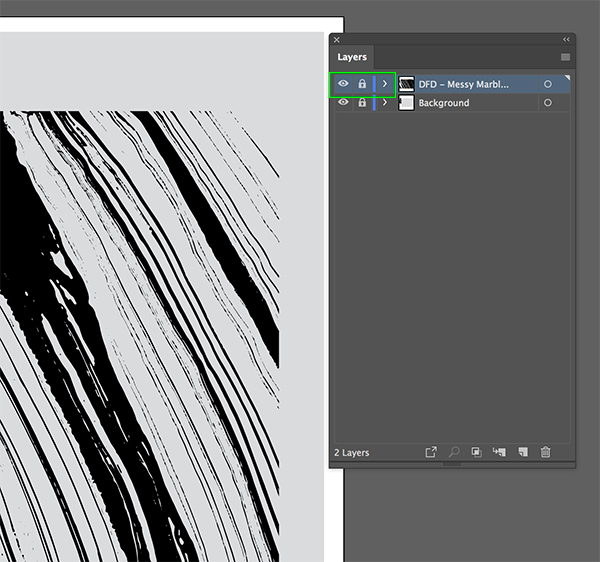
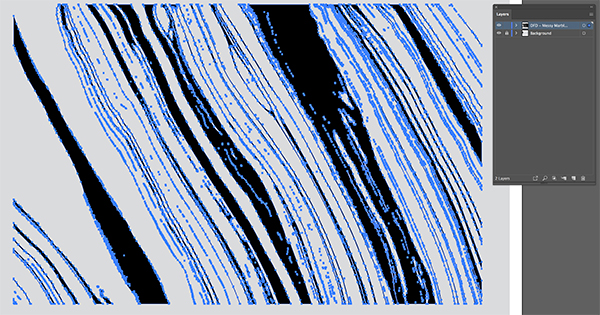
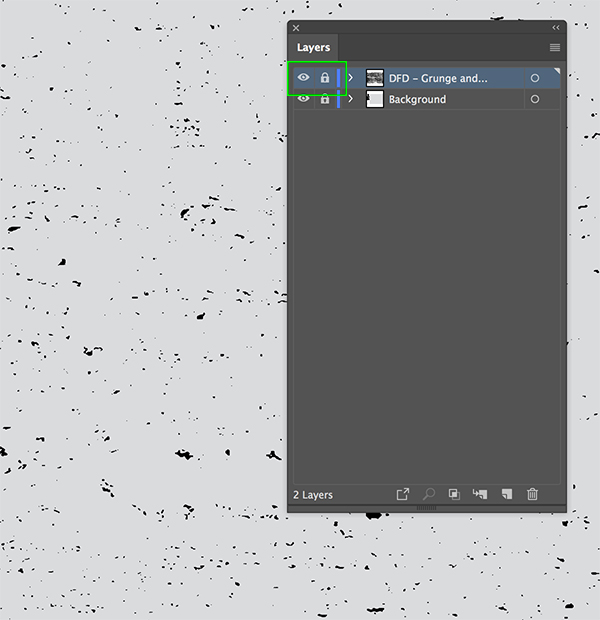
You will notice that after opening the EPS file there will be two layers, both of which are locked. To remedy this we will simply need to click on the lock icon in the Layers Panel and then press ‘V’ on the keyboard to switch to your Selection Tool. From here you can click on any part of the marble texture to select it. After you’ve selected the texture, press Command/Ctrl+C to copy it and then return to Photoshop and press Command/Ctrl+V to paste the file.
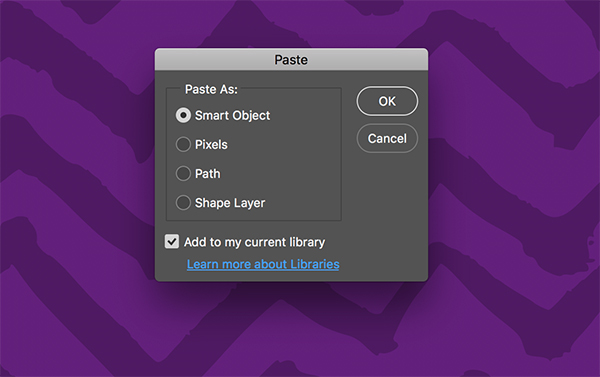
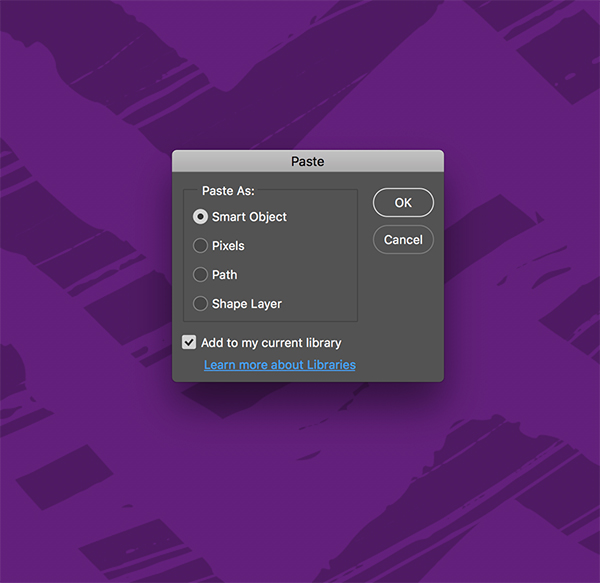
When you try to paste the file in Photoshop you will be prompted with a dialog box asking how you’d like to paste the file – here we want to select ’Smart Object’ and then click ‘OK’ to proceed and paste the file.
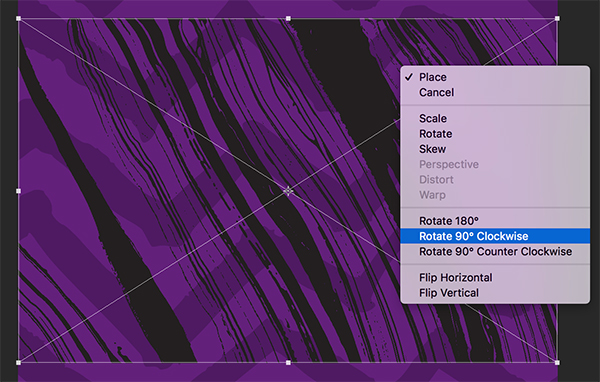
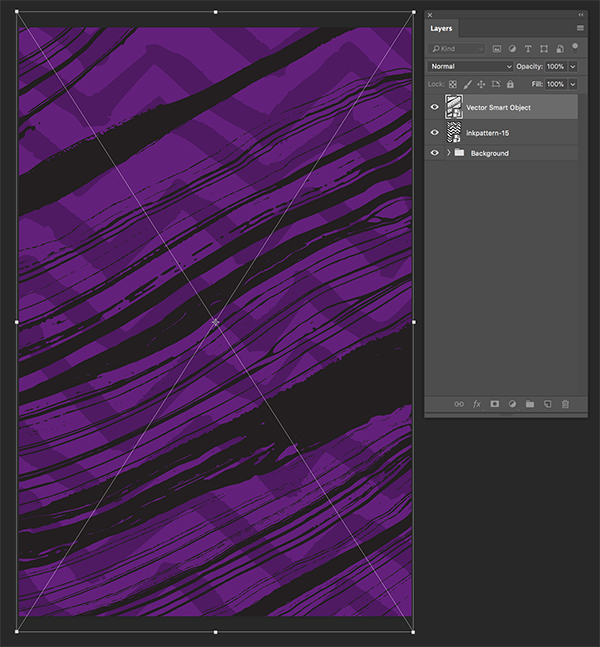
After pasting the file as a Smart Object you should see the texture appear and it will have a bounding box around it. Before pressing ‘Return’ to apply the changes, hold the Control Key and click on the texture before choosing ‘Rotate 90º Clockwise’ from the menu that pops up.
Once you have rotated the texture you can then press the Alt/Option+Shift keys and drag outwards from any of the four corners of the bounding box to scale the texture up until it fills your entire canvas. After scaling the texture up go ahead and press the ‘Return’ key to apply the transformations.
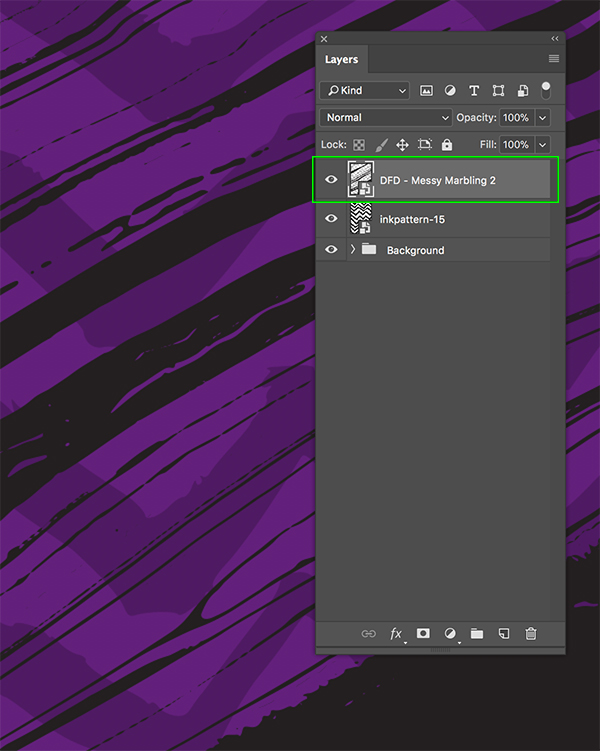
After placing the texture, double click on the ‘Vector Smart Object’ text in your Layers Palette and change the name of the layer to ‘DFD Messy Marbling 2’ which is the layer name in Illustrator.
Step 5: Layer Styles
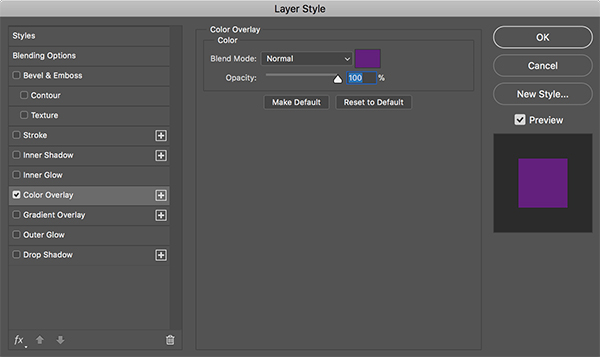
Double click on your marble texture Smart Object layer to bring up the Layer Styles box and check off the ‘Color Overlay’ option.
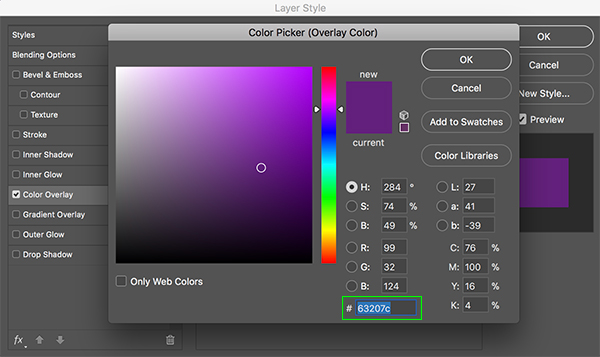
For the fill color we are going to use the same purple color that we used for our background – ‘#63207C’. After entering the correct hex value, click ‘OK’ two times to apply the changes and close out of both dialog boxes.
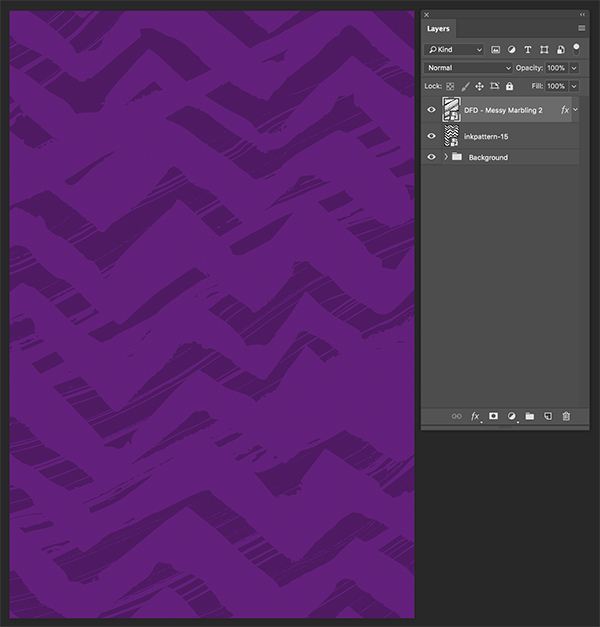
After applying the ‘Color Overlay’ your image should now look like this:
Step 6: Grunge and Dirt
Next, open the ‘Bonus Vector from – Downloads for Designers – Grunge and Dirt Vector Pack Vol 1 3.eps’ file in Illustrator. Here we will repeat the same process for bringing in our previous texture which starts by first unlocking the layer with the texture.
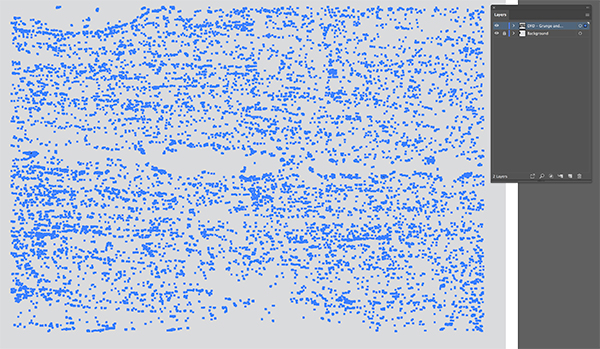
After unlocking the layer, grab your Selection Tool (V) and click anywhere on the texture. Once you’ve selected the texture, press Command/Ctrl+C to copy it, and then return to Photoshop and press Command/Ctrl+V to paste.
When prompted with the dialog box asking how you would like to paste the object, choose ‘Smart Object’ and then click ‘OK’ to place the texture.
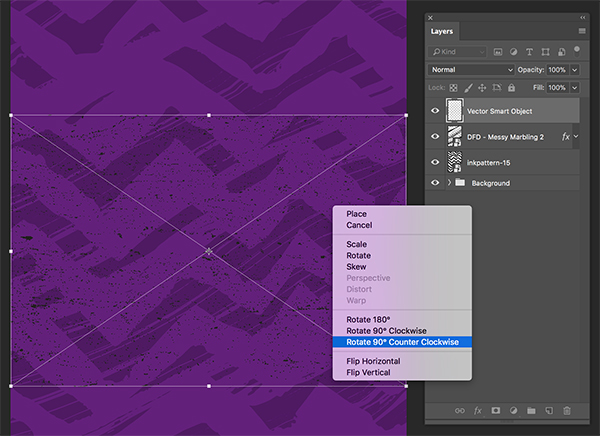
By default, your texture will be pasted horizontally as it appeared in Illustrator, so while we still have the bounding box around our texture let’s hold the Control Key and click on it to reveal the dropdown menu where we then want to select the option to ‘Rotate 90º Counter Clockwise’.
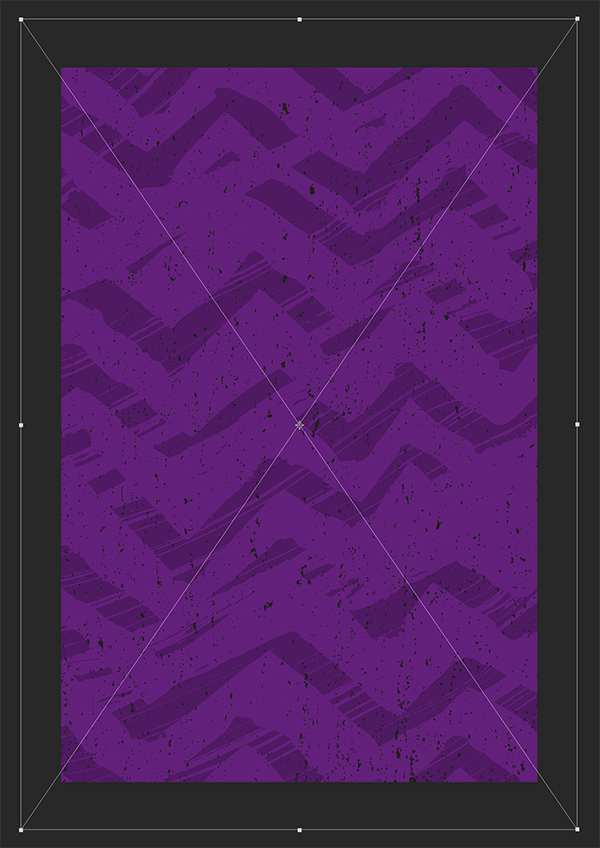
After rotating the texture so that it’s vertical, hold the Alt/Option+Shift keys and drag outwards to scale it up until it fills the entire canvas. Once you’ve made the texture larger go ahead and press ‘Return’ on the keyboard to apply the transformations and place the texture.
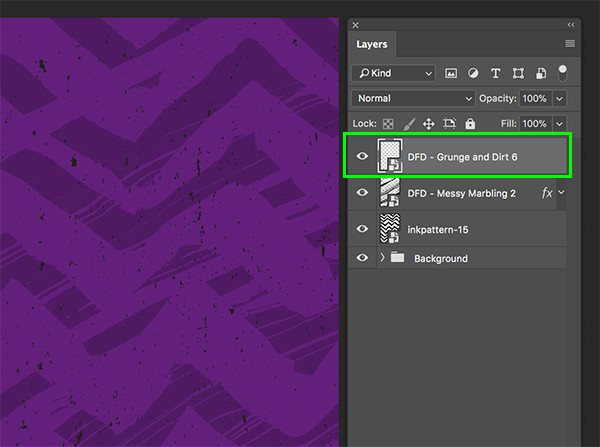
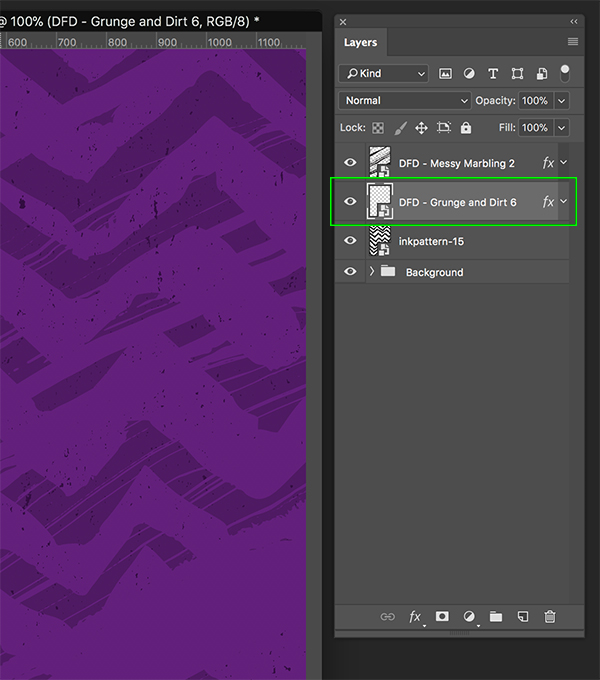
Next, double click on the ‘Vector Smart Object’ text and rename the layer ‘DFD Grunge and Dirt 6’ as shown below:
Step 7: Dirty Layer Styles
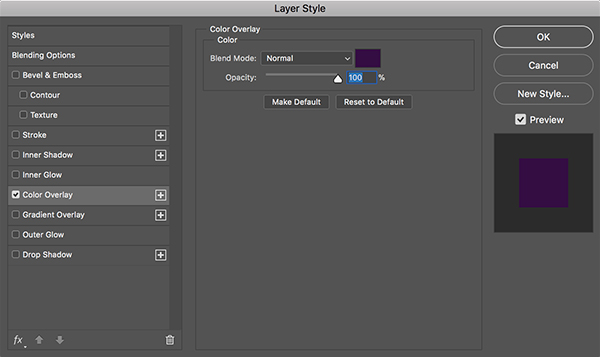
Double click on the grunge and dirt Smart Object in the Layers Palette to open the Layer Style panel and check off the ‘Color Overlay’ option.
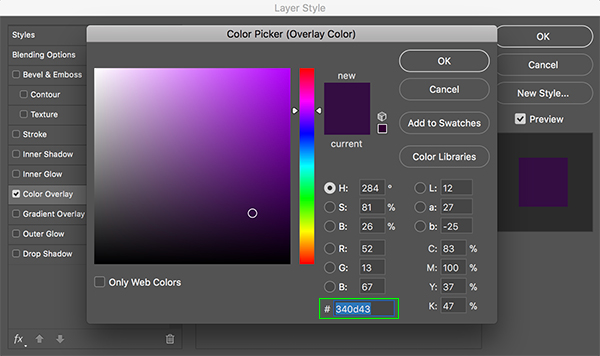
For the fill color, enter the hex value ‘#340D43’ as shown in the image below:
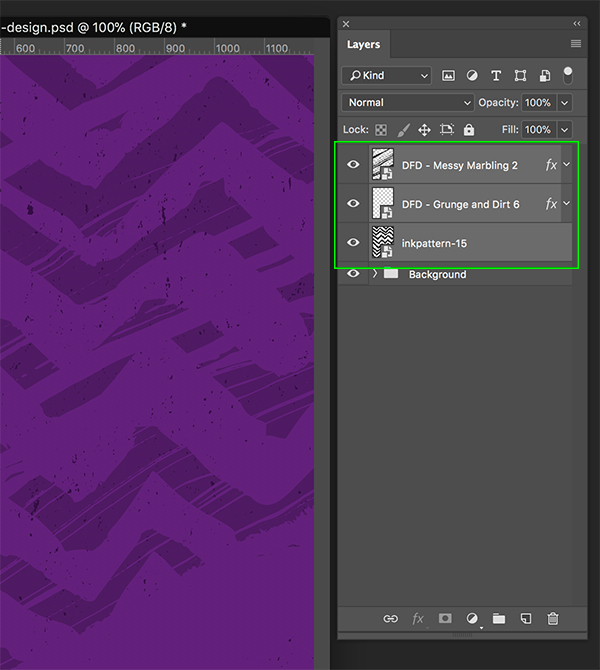
Now that we have changed the color of our dirty texture we want to move it down one spot in the Layers Palette so that it’s below the marble texture. To do this you can either click and drag the layer down one position in the Layers Palette, or select the layer and then press the Command/Ctrl key and the left bracket on the keyboard. The order of your layers should now look like this:
Step 8: Texture Folder
Select your top layer which should now be the ‘DFD Messy Marbling 2’ layer, hold the Shift Key, and then click on the ‘inkpattern-15’ layer so all three of your texture layers are selected at the same time.
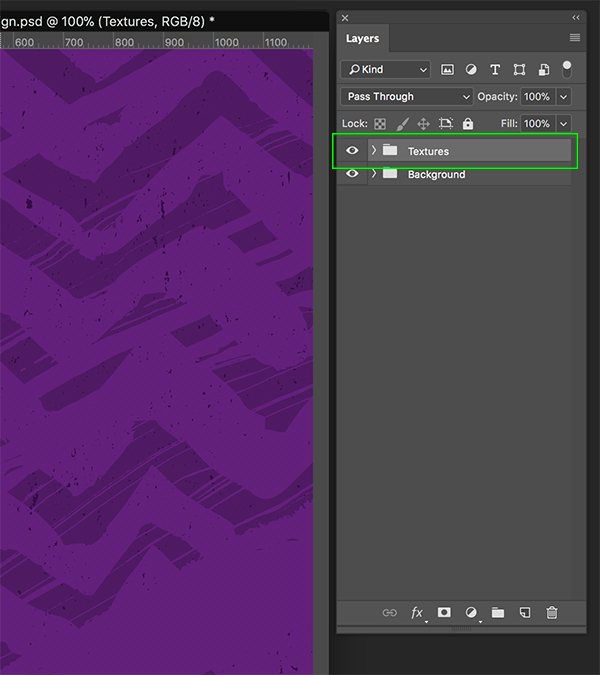
With your three layers selected, press Command/Ctrl+G or click on the small folder icon at the bottom of the Layers Palette to place the layers into a new Group Folder. After that, double click the ‘Group 1’ text and change the name of the folder to ‘Textures’ as shown in the image below:
Step 9: Zombie Time
Go to the ‘File’ menu and choose ‘Place Embedded…’ once again.
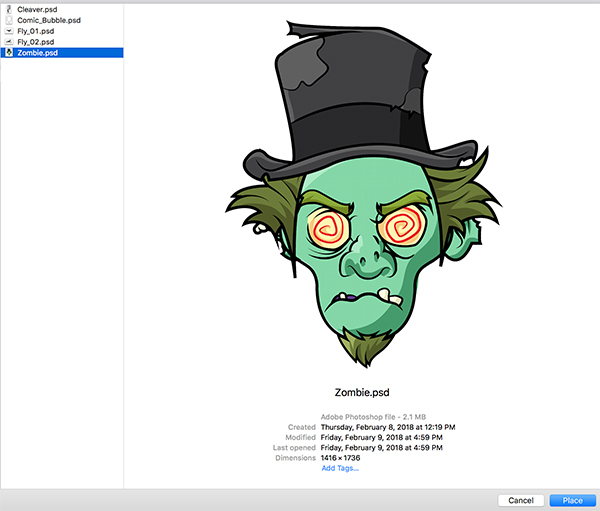
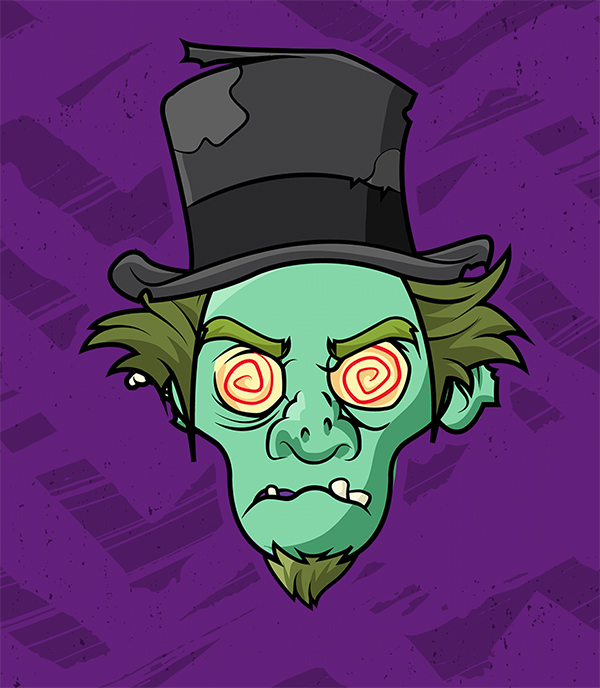
Navigate to the ‘Zombie.psd’ file in the freebies folder. This file was created using the custom Zombie Avatar Builder from Serkworks-Art-Lab just for this tutorial! The full version contains a ton of customizable elements that you can use to create some really awesome looking zombies. Once you have the file selected simply choose the ‘Place’ option from the lower right corner of the dialog box.
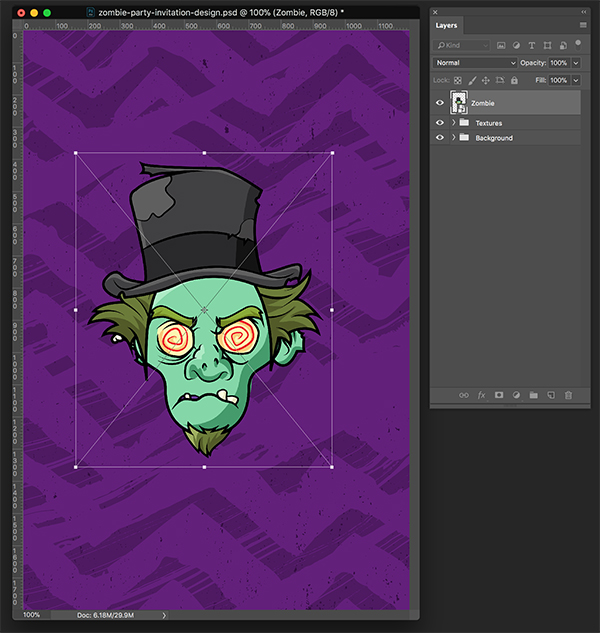
Hold the Alt/Option+Shift keys to scale the image down slightly until it’s about the same size as the zombie in the image below:
Step 10: Zombie Outlines
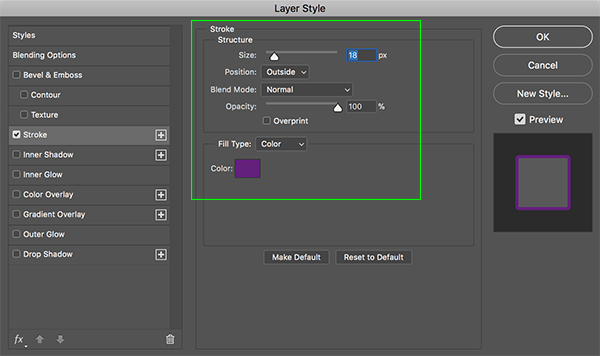
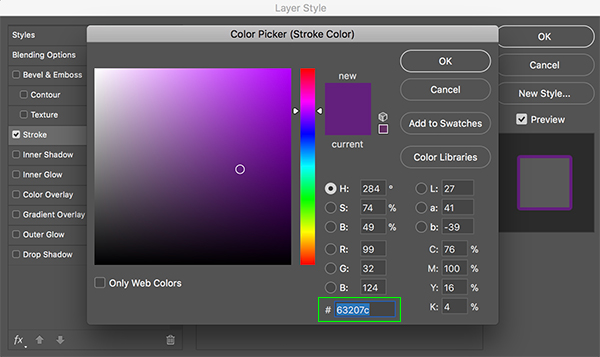
After placing the zombie into your document, double click on the layer to open the Layer Styles and check off the ‘Stroke’ option. For the settings here we want to use a stroke width of about ’18’ pixels, make sure the ‘Position’ is set to ‘Outside’ and use a ‘Fill Type’ of ‘Color’ as shown here:
For the stroke color we will once again use our primary purple hex value – ‘#63207C’. After you enter the correct hex value go ahead and click ‘OK’ two times to apply the changes and close out of both dialog boxes.
You will now see that you have a thick purple outline around the zombie like this:
Step 11: Curse of the Zombie
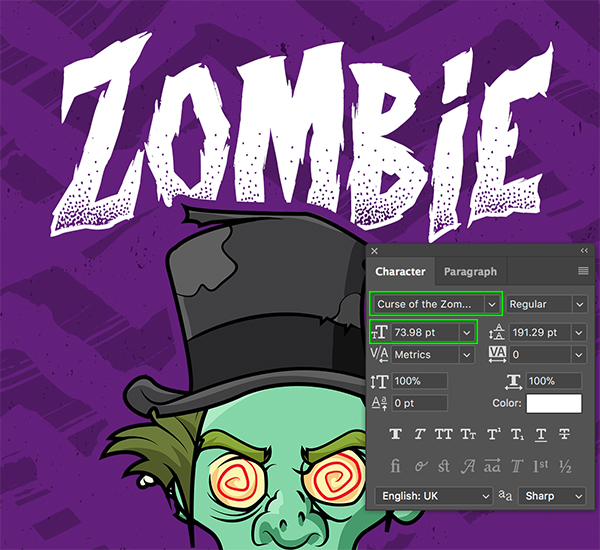
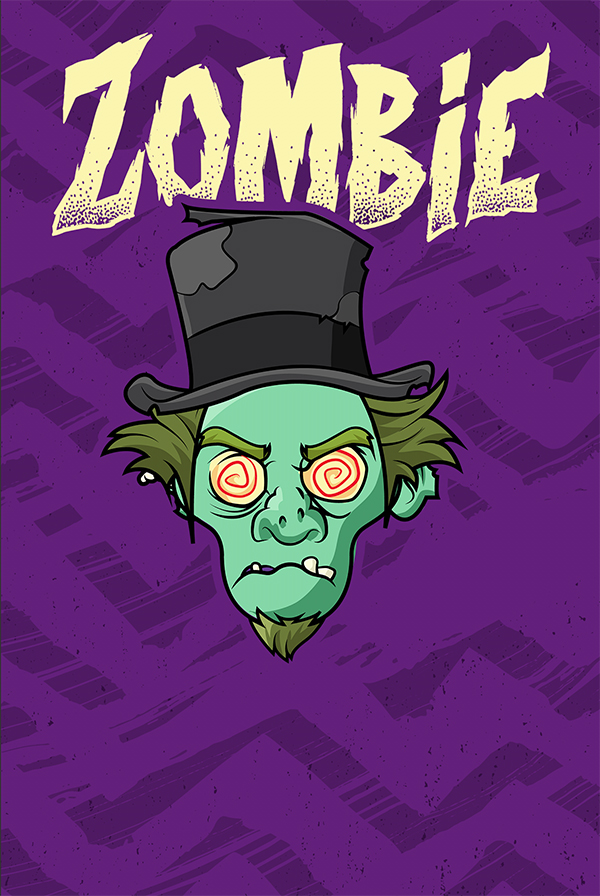
We will now create a new layer by either clicking on the ‘Create a new layer’ icon at the bottom of the Layers Palette or by using the keyboard shortcut Command/Ctrl+Alt/Option+Shift+N. Place this layer below the zombie layer and then press ’T’ to get your Type Tool. We will then proceed to type out the word ‘ZOMBIE’ in all caps using the typeface Curse of the Zombie which is a free font from DaFont.com. This is a great font for our invite that will work very nicely within our design. If you don’t already have the Character Panel on your screen you can bring it up by going to the ‘Window’ menu and choosing ‘Character’ to ensure that you are using the correct font. We also want to make the size of our font about ’74 pt’ as highlighted in the Character Panel in the image below:
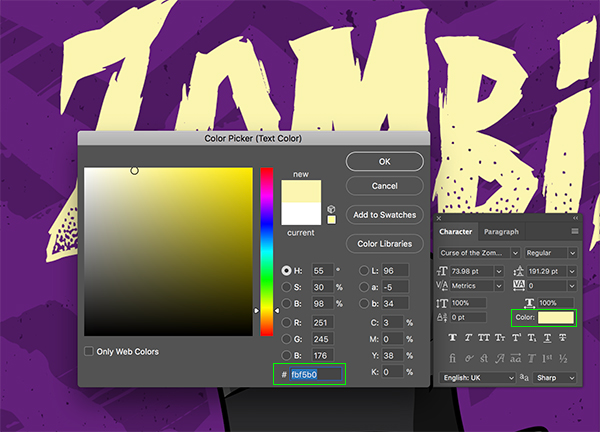
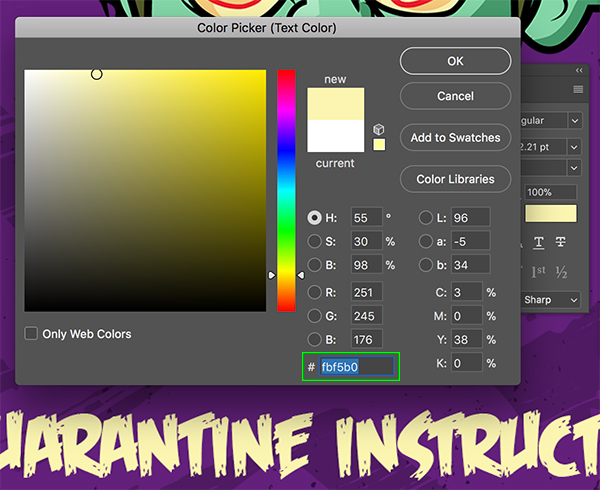
After typing out our ‘ZOMBIE’ text, return to the Character Panel and click on the small swatch next to the ‘Color’ option. We can then change the fill color of our text from solid white to the hex value ‘#FBF5B0’ and then clicking ‘OK’ to apply the color change.
We want to make it so that our zombie will overlap the bottom of the type and you will then be able to see how the stroke around the zombie’s head helps to add a bit of separation and visual interest to the text behind it. Your image should now be looking something like this:
Step 12: Feast of Flesh
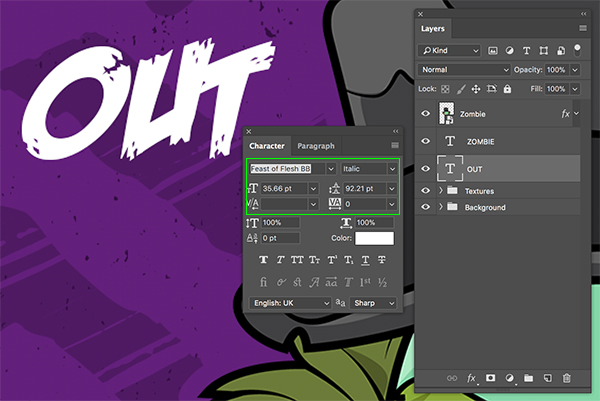
Create another new layer below the ‘ZOMBIE’ text layer and use your Type Tool (T) to type the word ‘OUT’ using the free typeface Feast of Flesh which is the second free font from DaFont.com that we will be using. Here I am using the ‘Italic’ style at a size of ’35.66’ as shown below:
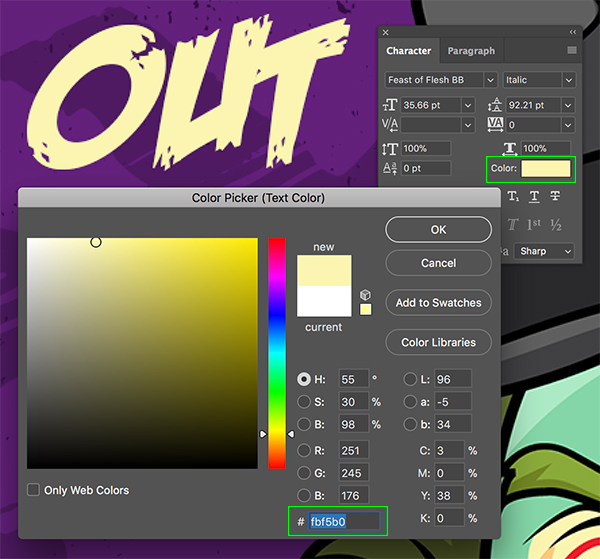
Go back to the Character Panel and click on the small ‘Color’ swatch option. We will now change the fill color of our text from solid white to the same hex value we used before – ‘#FBF5B0’ and then click ‘OK’ to apply the color change.
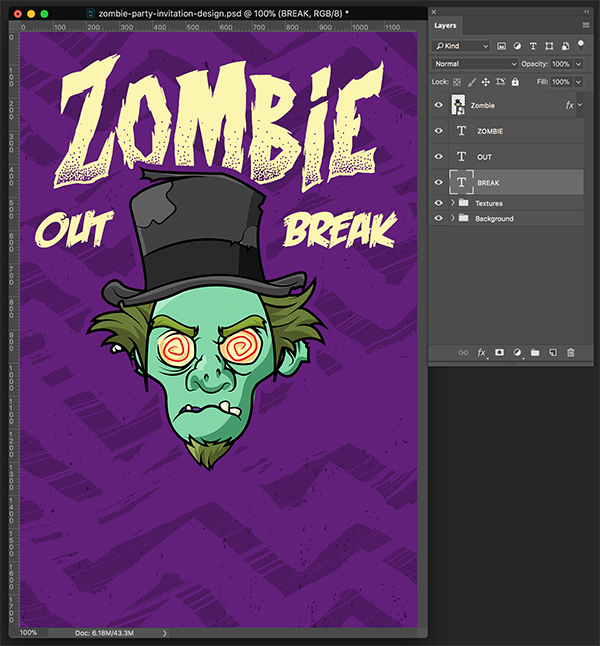
Now that we’ve changed the color of our text and set up the size and style with our ‘Feast of Flesh’ typeface, select the layer and press Command/Ctrl+J to duplicate it. From there, press Command/Ctrl and the left bracket to move the layer down one spot in the Layers Palette. Next, press Command/Ctrl+T to initiate a Free Transform on the newly duplicated text layer, and then hold the Shift Key and slide the copy over to the right so that it’s on the opposite side of the zombie. Press ‘Return’ to apply the transformation and then grab your Type Tool (T) and click inside the text box and change it from ‘OUT’ to the word ‘BREAK’ so you end up with this:
Step 13: Folder Stacks
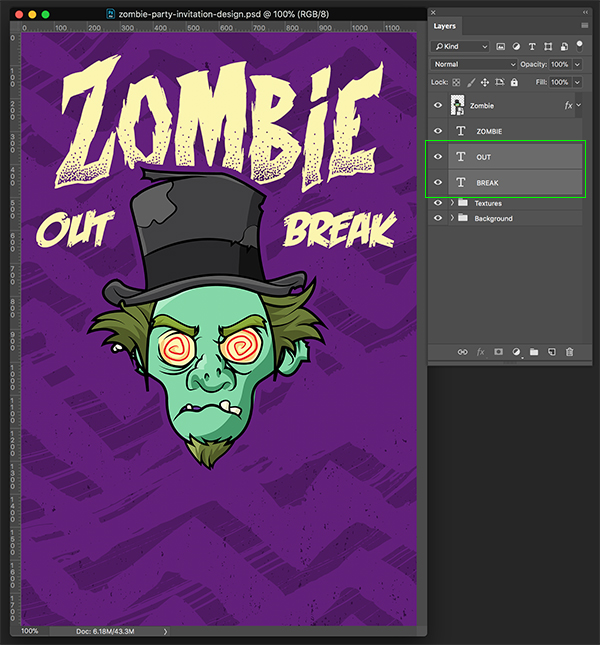
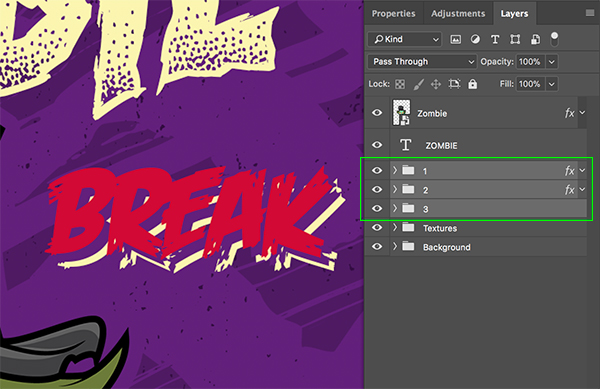
Now we should have ‘OUT’ and ‘BREAK’ on two separate text layers. Select the ‘OUT’ text, hold the Shift Key, and then select the ‘BREAK’ text below so you have them both selected at the same time.
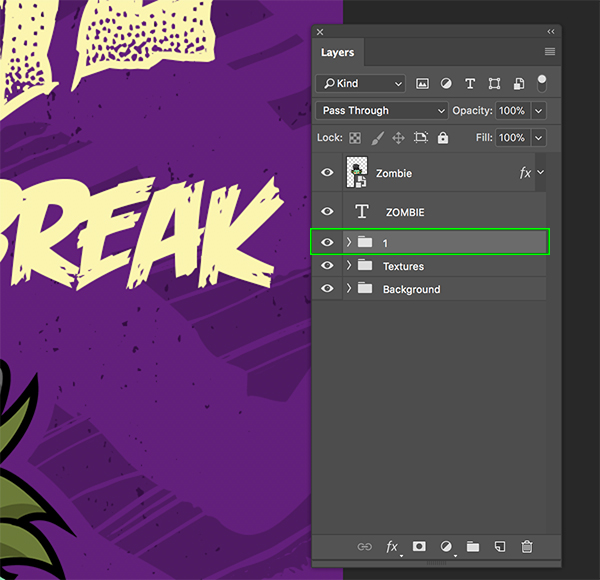
With both layers selected, press Command/Ctrl+G to place them into a new folder and double click the ‘Group 1’ text and change the name of the folder to ‘1’ as shown here:
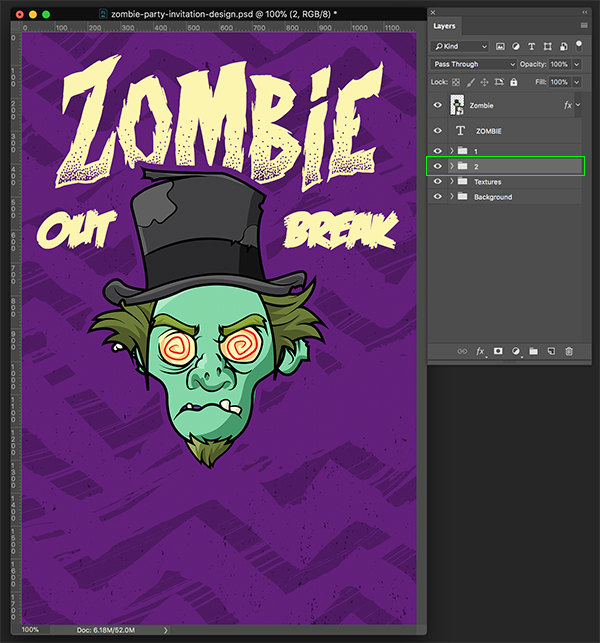
Select the newly created ‘1’ folder and press Command/Ctrl+J to duplicate it. Press Command/Ctrl and the left bracket to move the folder below the original copy, and then rename the folder from ‘1 copy’ to ‘2’. Once you have renamed the folder, use your arrow keys to move the ‘2’ folder down and to the right 6-10 times to offset both of the text layers.
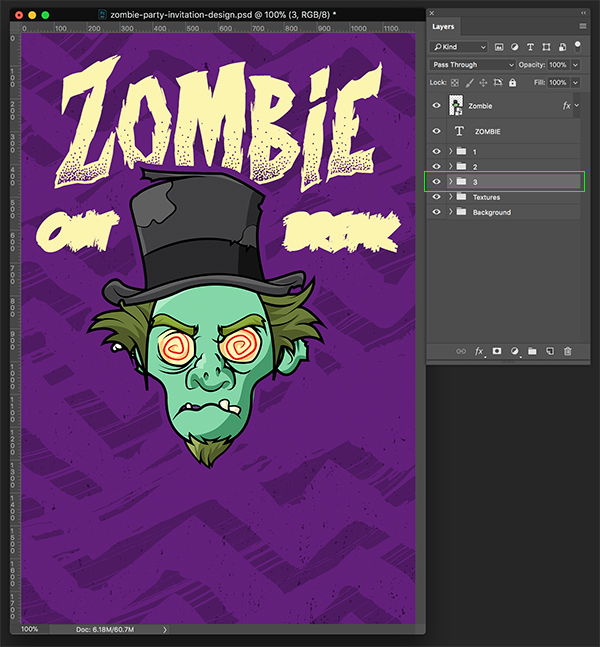
Repeat this process once more to create a ‘3’ folder below the first two copies, and then once again offset them using your arrow keys. You should now have three folders stacked on top of each other.
Step 14: Red Tops
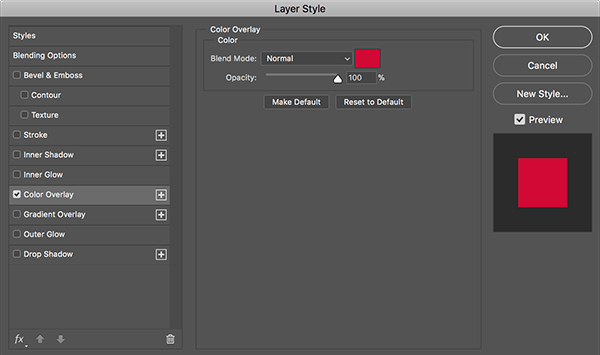
Select your ‘1’ folder and double click on it to bring up the Layer Style panel before checking off the ‘Color Overlay’ option.
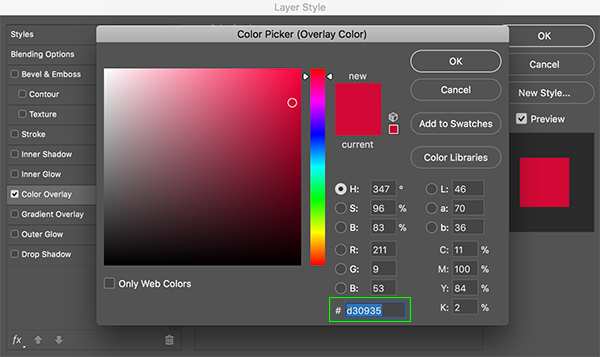
For the fill color enter a hex value of ‘#D30935’ and then press ‘OK’ twice to apply the color change and close out of both dialog boxes.
Step 15: Middle Purples
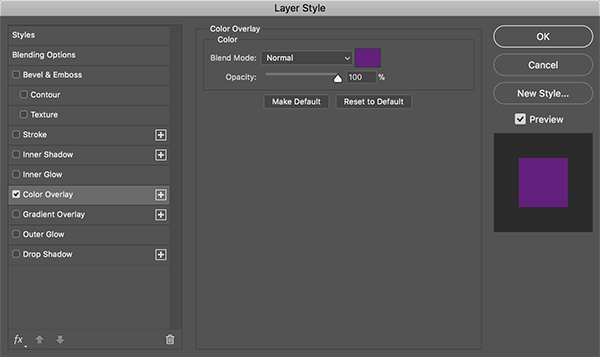
Select your ‘2’ folder and double click on it to bring up the Layer Style panel before checking off the ‘Color Overlay’ option.
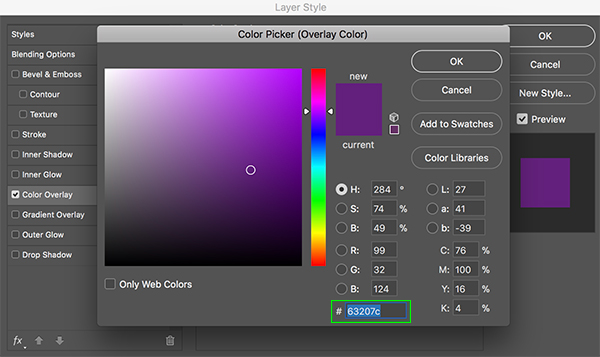
For the fill color enter a hex value of ‘#63207C’ and then press ‘OK’ twice to apply the color change and close out of both dialog boxes.
Step 16: Zombie Outbreak!
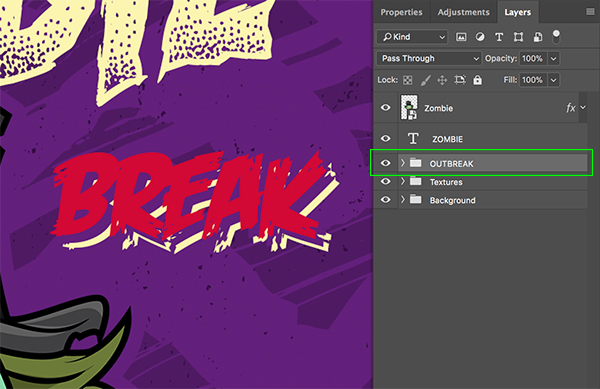
Click on your ‘1’ folder, hold the Shift Key, and then click on the ‘3’ folder so that all three of your folders are selected at the same time.
We will then place all three of these folders into yet another folder by pressing Command/Ctrl+G. Double click the ‘Group 1’ text and change the name of the folder to ‘OUTBREAK’ as it now contains all of our text layers with the offset effect.
Step 17: Zombie Quarantine
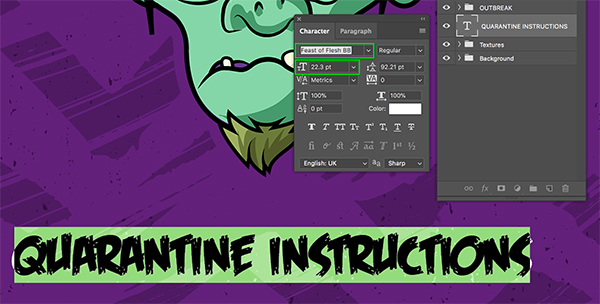
Create a new layer below your ‘OUTBREAK’ folder and use the Type Tool (T) to type out ‘QUARANTINE INSTRUCTIONS’ using the same ‘Feast of Flesh’ font in the ‘Regular’ style this time instead of the ‘Italics’ that we used earlier. Here I am using a point size of about ’22.3’ as highlighted below:
Let’s go ahead and change the fill color of the text to the hex value ‘#FBF5B0’.
Step 18: Quarantine Instructions
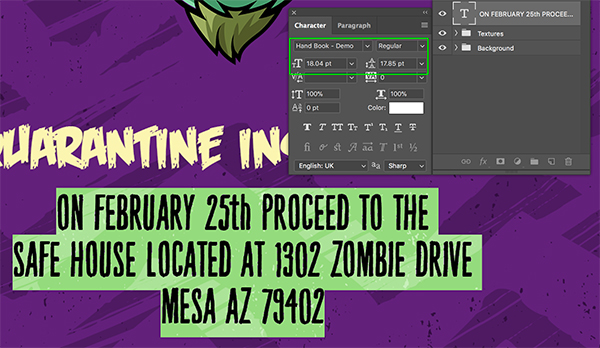
Create another new layer below the ‘QUARANTINE INSTRUCTIONS’ text and use the Type Tool (T) to type out the following text on three separate lines: ‘ON FEBRUARY 25th PROCEED TO THE’ and then hit ‘Return’ to create a second line of text. On the second line type out: ‘SAFE HOUSE LOCATED AT 1302 ZOMBIE DRIVE’ and then create a third line with the text ‘MESA AZ 79402’. For the typeface here we will use the third free font from DaFont.com called Hand Book for our text. Use the Character Panel to make sure the font has a point size of about ’18.04’ and a linespacing of about ’17.85’. Once you’ve typed out your three lines of text, click inside the text box with your Type Tool (T) and press Command/Ctrl+A to ‘Select All’ and then with your text highlighted, press Command/Ctrl+Shift+C to center your type.
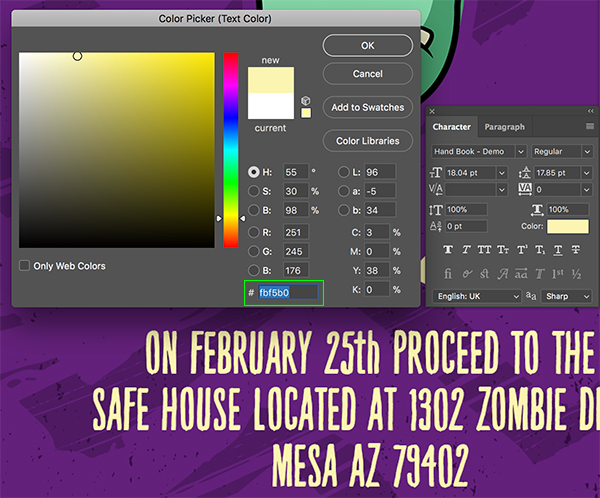
Let’s also change the fill color of the text to the same hex value as before – ‘#FBF5B0’.
Step 19: Group Quarantine
Select the ‘QUARANTINE INSTRUCTIONS’ text layer, hold the Shift Key, and then click on the address text below.
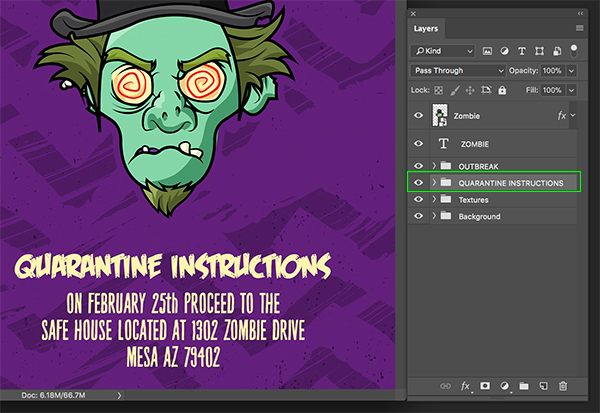
Press Command/Ctrl+G to put both of these text layers into a new folder and double click the ‘Group 1’ folder name to change it to ‘QUARANTINE INSTRUCTIONS’ as shown in the image below:
Step 20: Text Group
Next, select the ‘ZOMBIE’ text layer in your Layers Palette, hold the Shift Key, and then click on the ‘QUARANTINE INSTRUCTIONS’ folder.
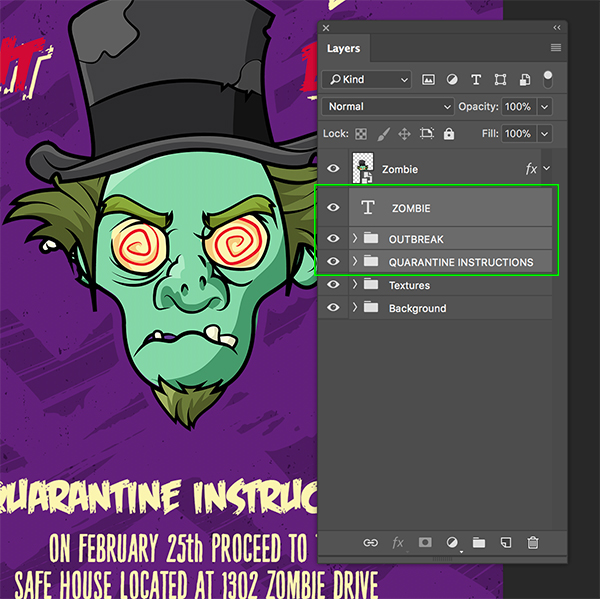
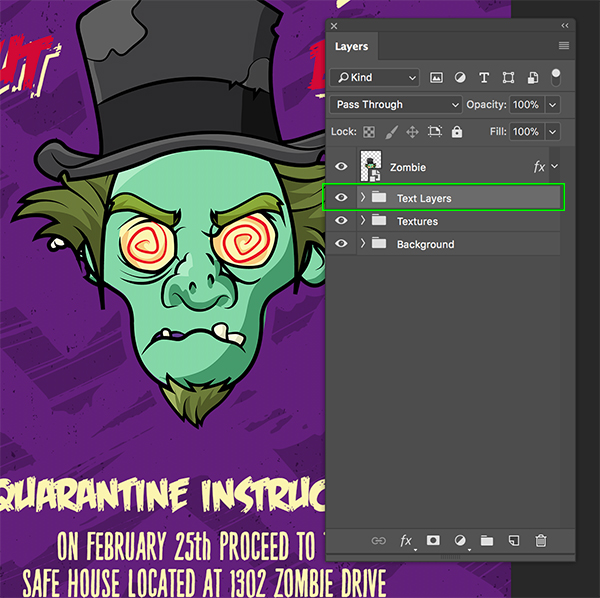
With both of the group folders and your main ‘ZOMBIE’ text layers selected, press Command/Ctrl+G to put all of these layers and folders into a new folder. Double click the folder name in your Layers Palette and change the name of the new folder to ‘Text Layers’ as shown here:
Step 21: Doodle Dividers
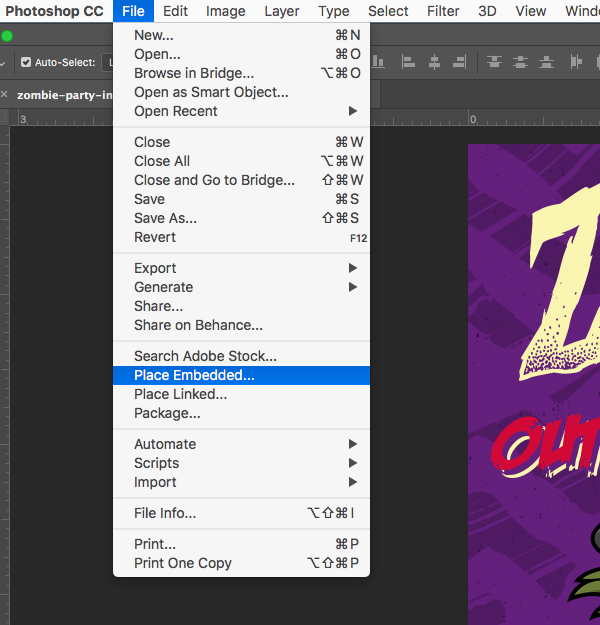
Go to the ‘File’ menu and choose ‘Place Embedded…’ once again.
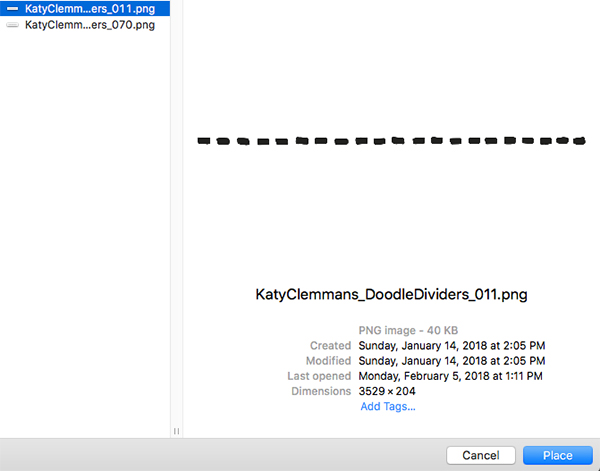
Navigate to the ‘KatyClemmans_DoodleDividers_011.png’ file from the freebies folder for the tutorial and then choose ‘Place’ from the lower right corner of the dialog box.
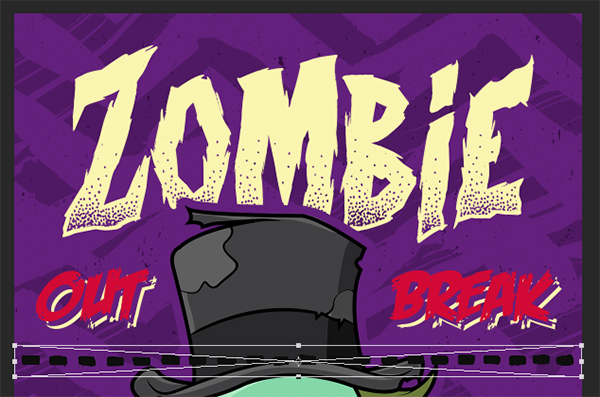
Once your divider has been brought into the document, hold the Shift Key and slide it up so that it runs beneath the ‘OUTBREAK’ text and goes through the head of the zombie as shown below:
Step 22: Red Divide
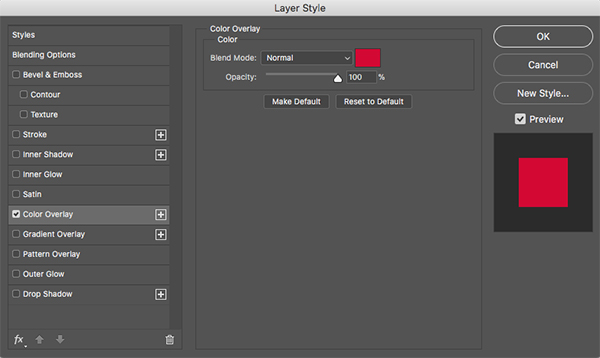
Double click on your doodle divider Smart Object to bring up the Layer Styles and check off the ‘Color Overlay’ option.
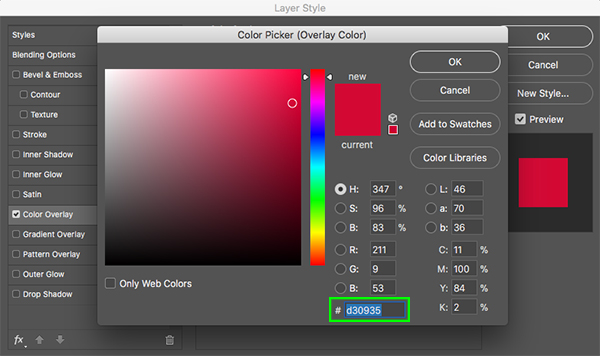
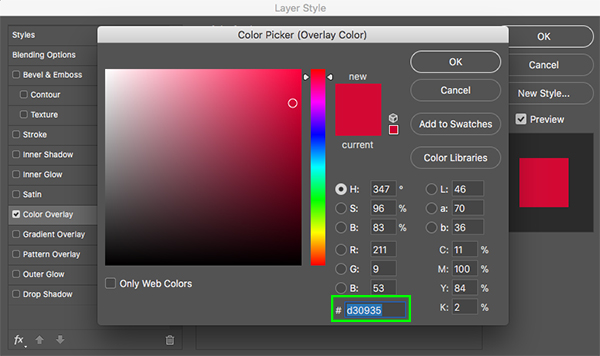
Enter the hex value ‘#D30935’ and then press ‘OK’ twice to apply the changes and close out of both dialog boxes.
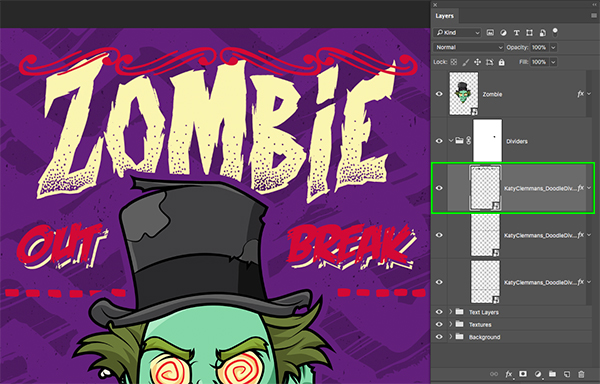
Now we want to move the divider down so that it’s below our ‘Zombie’ layer.
Select the divider and press Command/Ctrl+J to duplicate it, and then hold the Shift Key and slide the second copy down so that it runs through the jaw and chin of the zombie as shown here:
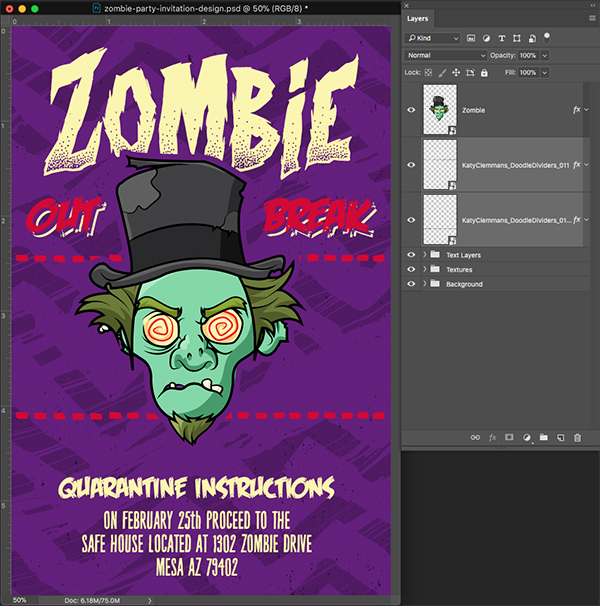
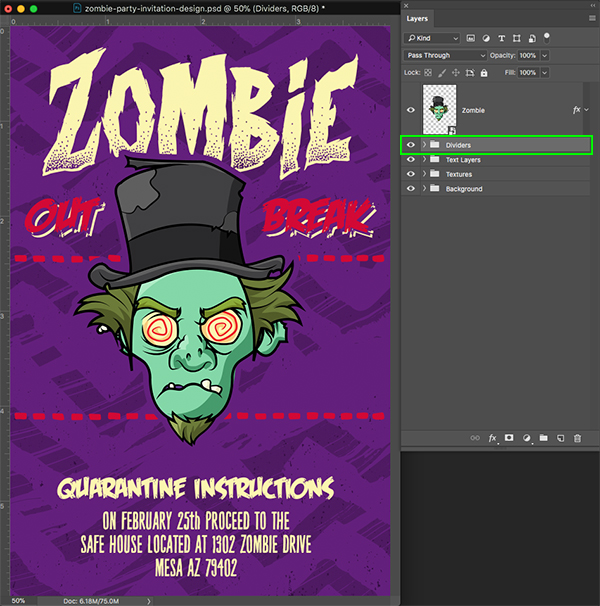
Select both copies of the doodle dividers and then press Command/Ctrl+G to put them into a new folder. Double click on the ‘Group 1’ text and change the folder name to ‘Dividers’.
Step 23: Quick Clean Up
With your ‘Dividers’ folder selected, click the ‘Add layer mask’ icon from the bottom of the Layers Palette to add a mask to the folder.
Press ‘B’ to switch to your Brush Tool and make sure that you have a solid black foreground color. If you have a different color as your foreground color currently, you can simply press ‘D’ to reset the default colors, and then ‘X’ to toggle the foreground and background colors until black is in the foreground. Once you have done that take a look at the settings for your brush along the top toolbar and make sure to choose a hard round brush with full opacity as shown below:
Next we will use our brush to go over the small area where there is just a tiny red piece of the divider showing. If there was a bit more of the divider showing we could probably leave it, but in this case it’s so small that we might as well just mask it out so it doesn’t look like a mistake.
Step 24: Decorative Divider
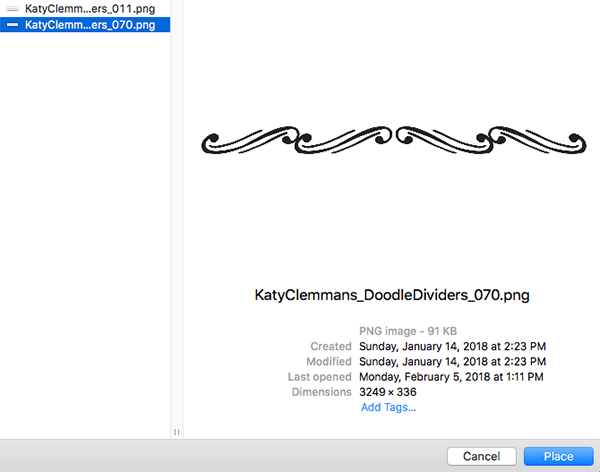
We will once again go to the ‘File’ menu and choose ‘Place Embedded…’ before navigating to the ‘KatyClemmans_DoodleDividers_070.png’ file from Katy Clemens and then choosing ‘Place’ from the lower right of the dialog box.
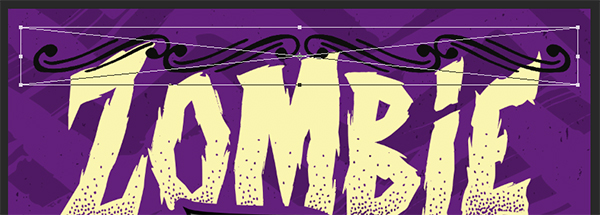
Hold the Alt/Option+Shift keys and drag inwards slightly from any of the four corners of the bounding box to scale the divider down a bit and then slide it towards the top of your image so that it overlaps a bit of the ‘ZOMBIE’ text as shown here:
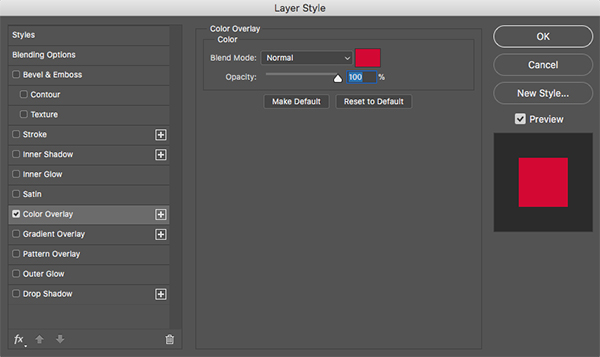
Double click on the layer to bring up the Layer Styles and check off the ‘Color Overlay’ option.
Change the fill color to the hex value ‘#D30935’ and then click ‘OK’ twice to apply the changes and close out of both panels.
Next, click on the small arrow next to the ‘Dividers’ folder to expand it and reveal the two dividers inside. Select the ‘KatyClemmans_DoodleDividers_070.png’ divider that we just placed and put it into the folder with the other two dividers.
Step 25: Decorative Divider
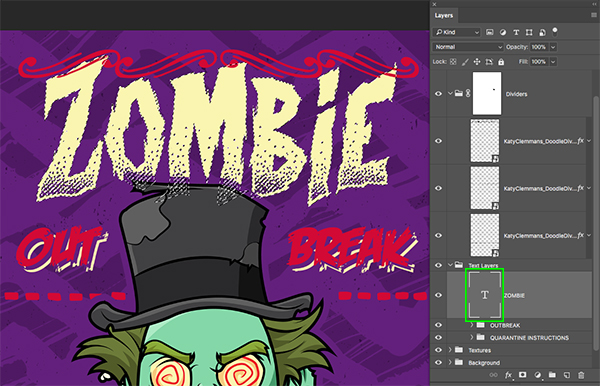
Next, expand the ‘Text Layers’ folder and then hold the Command/Ctrl key and click on the layer thumbnail icon of the ‘Zombie’ text layer to activate a selection around it as highlighted in the image below:
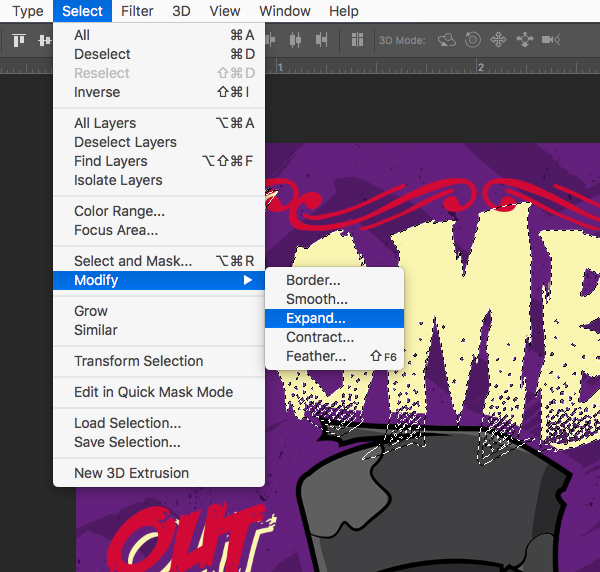
Go to the ‘Select’ menu and then choose ‘Modify > Expand…’ as shown here:
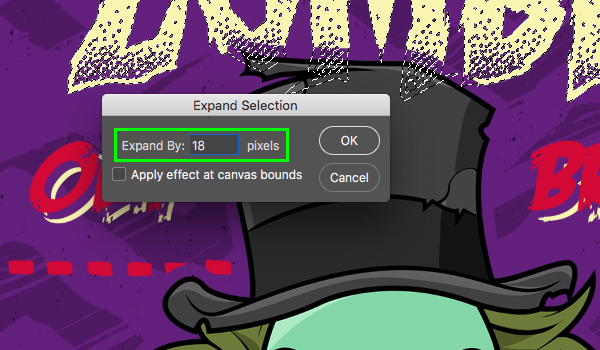
When the ‘Expand Selection’ panel appears, enter a value of ’18’ and then press ‘Return’ or click ‘OK’.
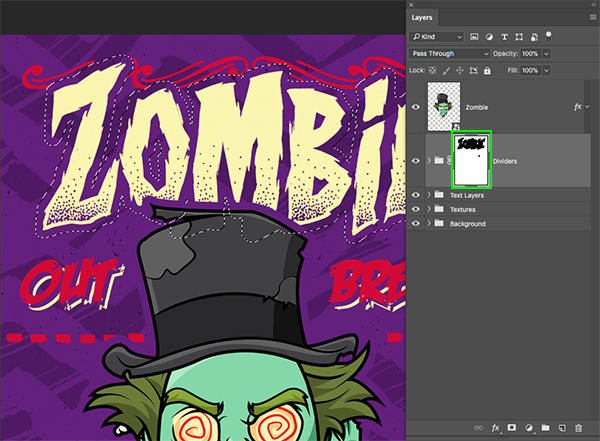
With your selection still active, select the Layer Mask of the ‘Dividers’ folder and then make sure that you still have solid black set as your foreground color before pressing Alt/Option+Delete to fill the selection with black.
Step 26: Cleaver
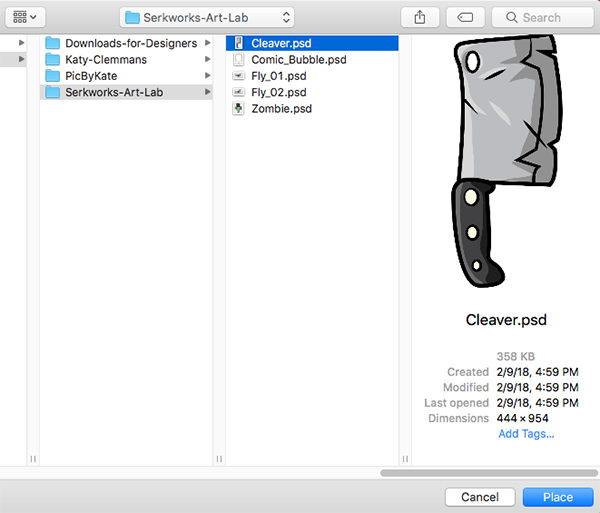
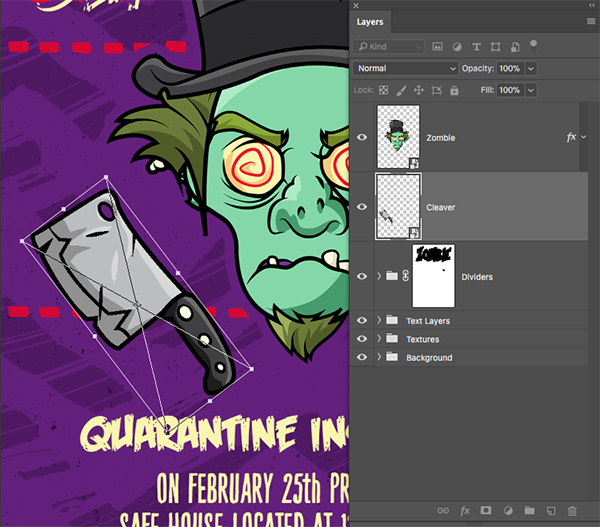
Go to the ‘File’ menu and choose ‘Place Embedded…’ and then navigate to the ‘Cleaver.psd’ file from Serkworks-Art-Lab and choose ‘Place’ from the lower right corner of the dialog box.
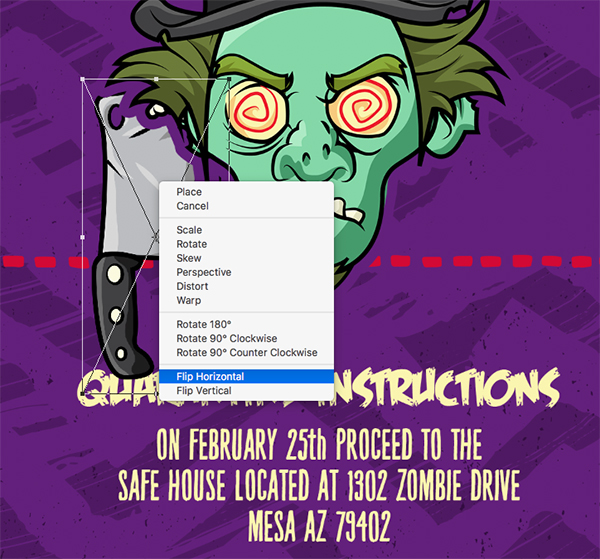
After bringing in the cleaver, hold the Control Key and click on the illustration to reveal a dropdown menu. From this list we want to choose the ‘Flip Horizontal’ option as shown below:
After flipping the cleaver the other way, move your cursor over any of the four corners of the bounding box and then rotate it slightly so it’s angled away from the zombie. After placing the cleaver and rotating it, scale it down slightly while holding the Shift Key and then press ‘Return’ to apply the changes.
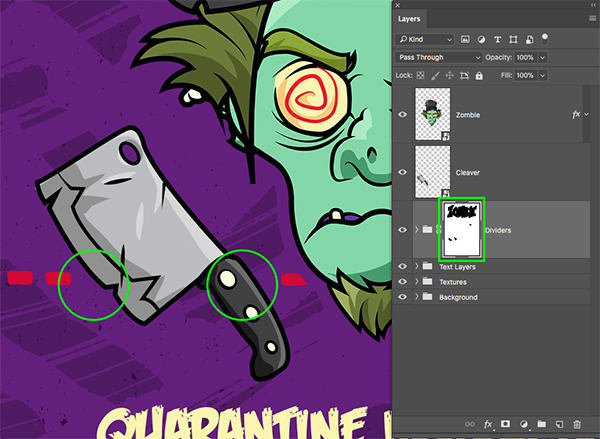
Grab your Brush Tool (B) and with a hard round brush and solid black foreground color, make sure that you have the Layer Mask of the ‘Dividers’ folder selected and then brush out the pieces of the border that are on both sides of the cleaver. The image below shows the areas where I’ve masked out some of the dividers to add some breathing room around the illustration.
Step 27: So Fly
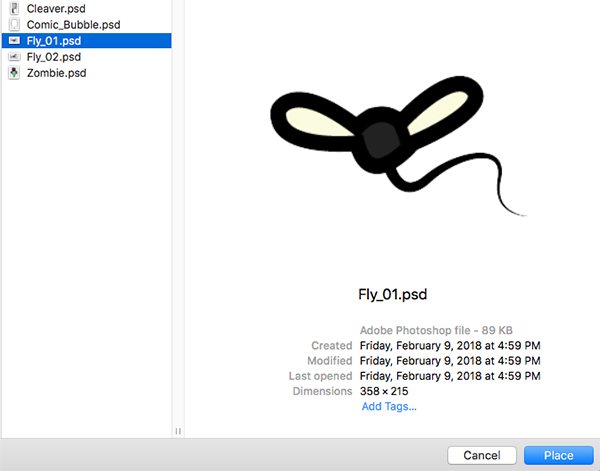
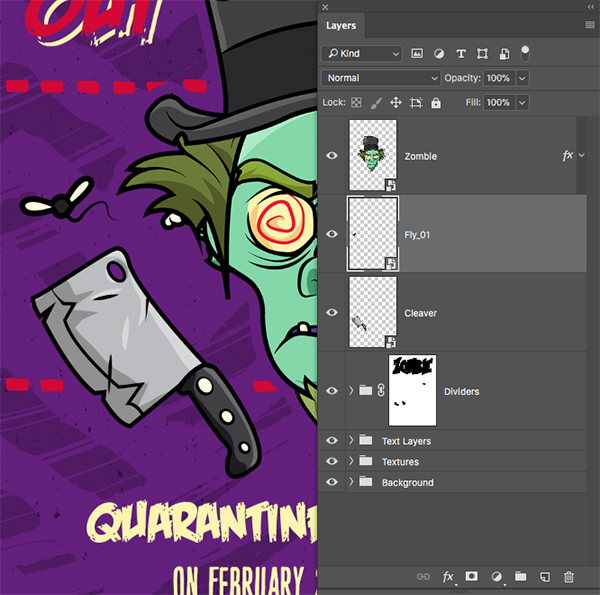
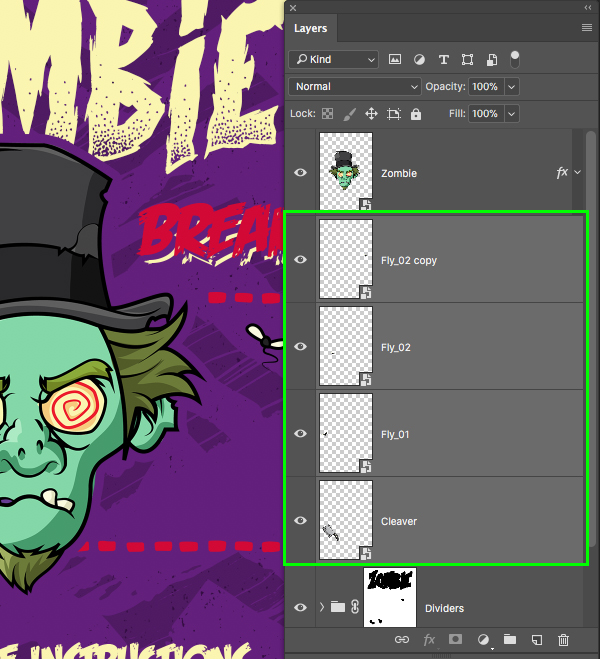
Go to the ‘File’ menu once again and choose ‘Place Embedded…’ and then navigate to the ‘Fly_01.psd’ file. After that, choose ‘Place’ from the lower right corner of the dialog box to bring in the fly illustration.
Position the fly so that it’s slightly above the cleaver and use the image below as a guide for the size and placement of the illustration.
Step 28: Extra Fly
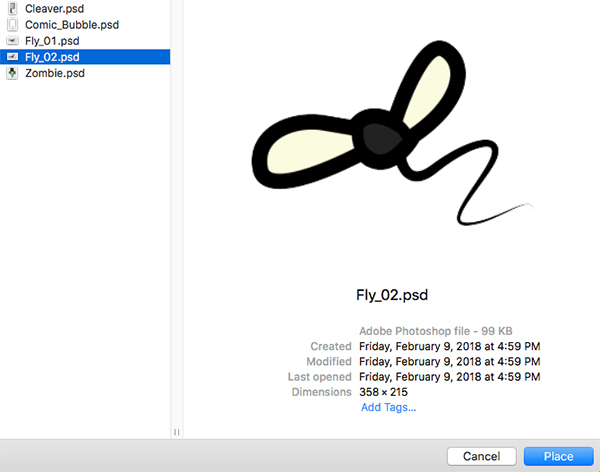
Repeat the process of going to the ‘File’ menu and choosing ‘Place Embedded…’ and this time navigate to ‘Fly_02.psd’ and choose ‘Place’ to bring in the second fly illustration.
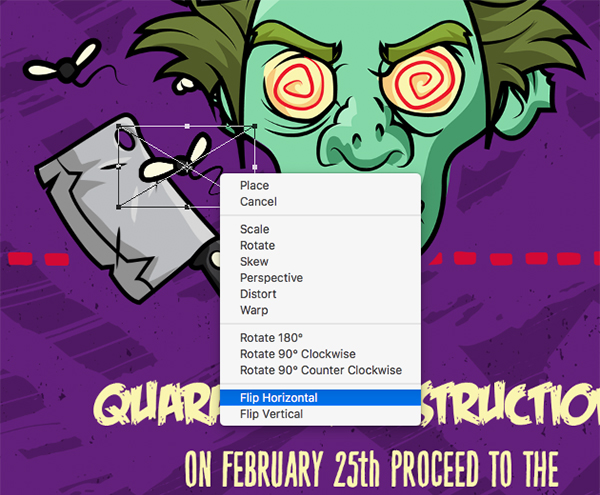
Hold the Control Key and click on the second fly and choose ‘Flip Horizontal’ from the menu that appears.
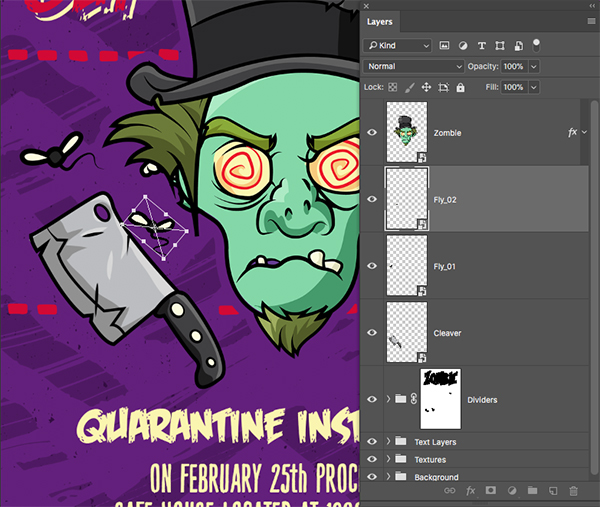
After flipping the fly horizontally, scale it down a bit by dragging any of the four handles of the bounding box inwards while holding the Shift Key. Use the image below as a guide for the size and placement of the second fly.
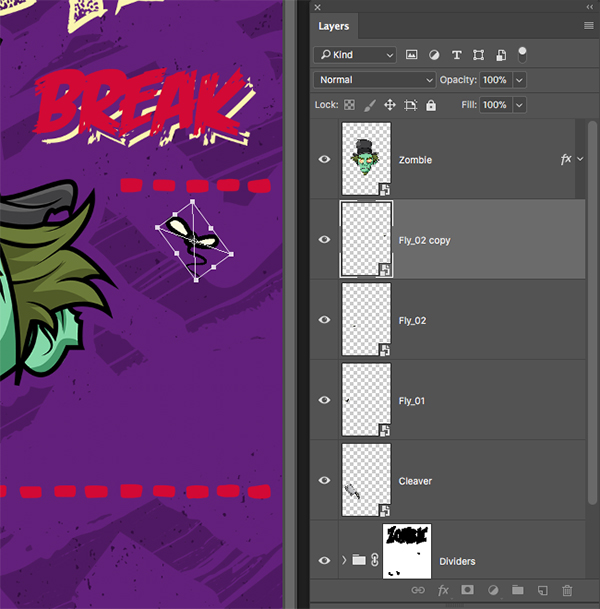
Select the ‘Fly_02’ layer and press Command/Ctrl+J to duplicate it and move the copy over onto the right side of the zombie and then press ‘Return’ to apply the changes.
Step 29: Zombie Props
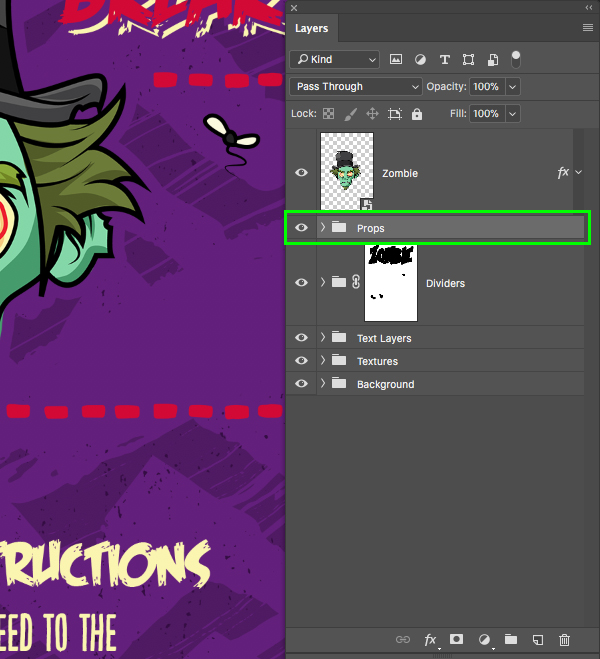
Select the top fly layer, and then hold the Shift Key and select the ‘Cleaver’ layer in your Layers Palette. You should now have all of the props selected simultaneously.
Press Command/Ctrl+G to place all of the objects into a new folder and double click the ‘Group 1’ text before changing the name of the folder to ‘Props’ as shown in the image below:
Step 30: Comic Bubble
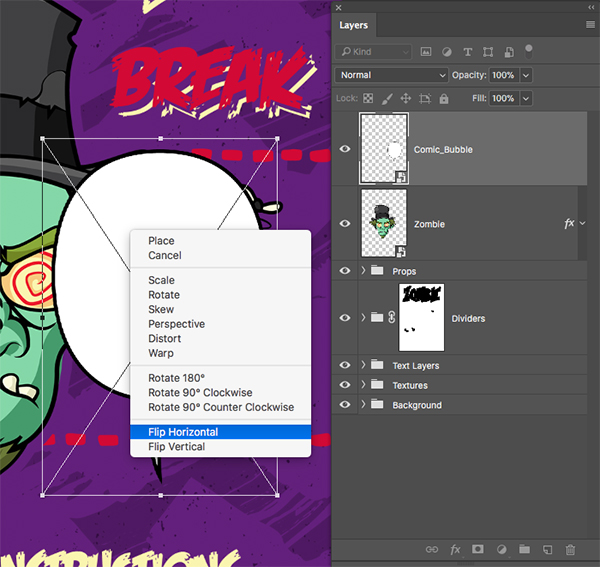
We will now go to the ‘File’ menu and choose ‘Place Embedded…’ to import the ‘Comic_Bubble.psd’ file from Serkworks-Art-Lab in the freebies folder for this tutorial. Once you have selected the file, choose ‘Place’ from the lower right hand corner to bring the image into your document.
After placing the vector into your document, hold the Control Key and click on it to reveal a dropdown menu where we will then select the ‘Flip Horizontal’ option as shown here:
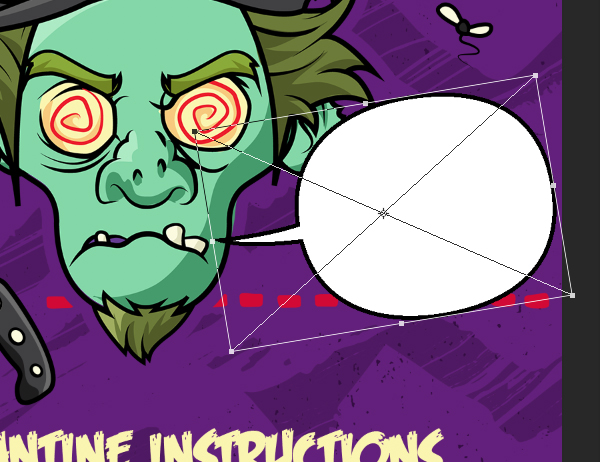
Before pressing ‘Return’ to apply the changes, rotate the bubble and scale it down slightly so that it matches the image below:
Step 31: Comic Bubble Text
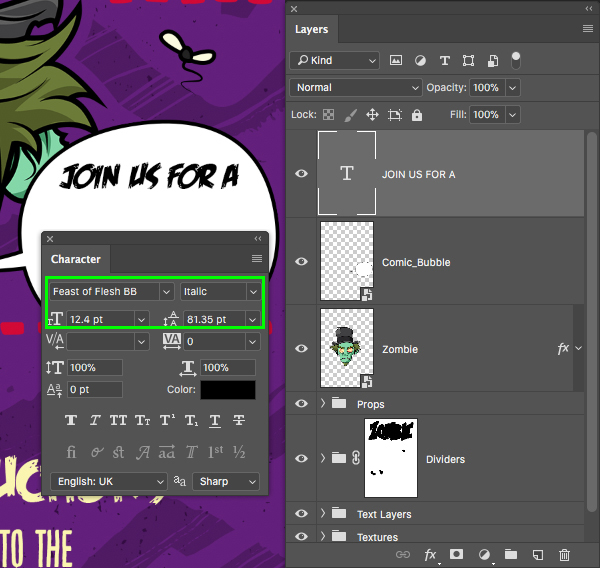
Create a new layer above the ‘Comic Bubble’ layer and then switch over to your Type Tool (T). Use the ‘Feast of Flesh’ font in the ‘Italics’ style with a solid black fill color and a point size of about ’12.4’ to type out the words ‘JOIN US FOR A’ as shown here:
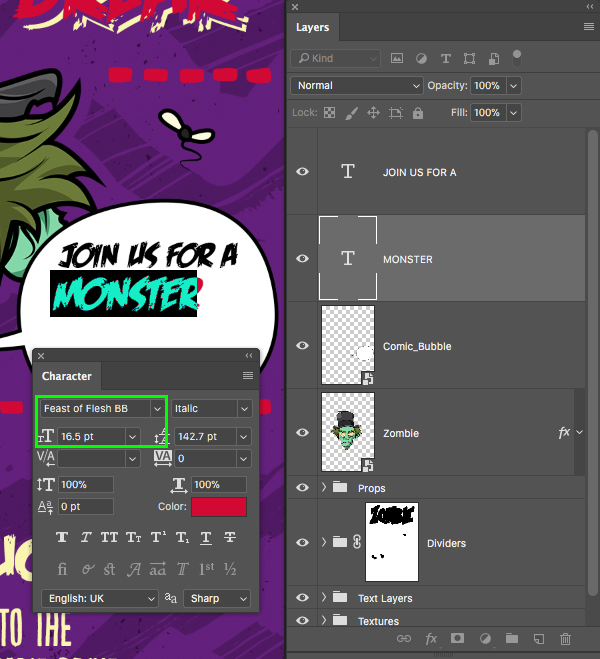
Press Command/Ctrl+J to duplicate the layer, and then Command/Ctrl and the left bracket to move it down one position in the Layers Palette. Tap the duplicate layer down using your arrow keys and then press ’T’ to grab your Type Tool and click inside text box. Change the text to read ‘MONSTER’ using the same font but slightly larger – about ’16.5’ for the point size. We also want to place the text a bit off-centered so that it’s more to the left side of the comic bubble as shown here:
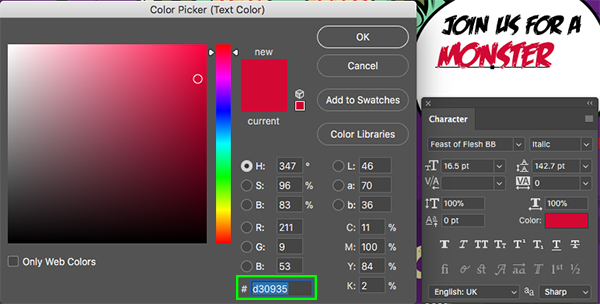
For the fill color let’s use our red, which is the hex value ‘#D30935’.
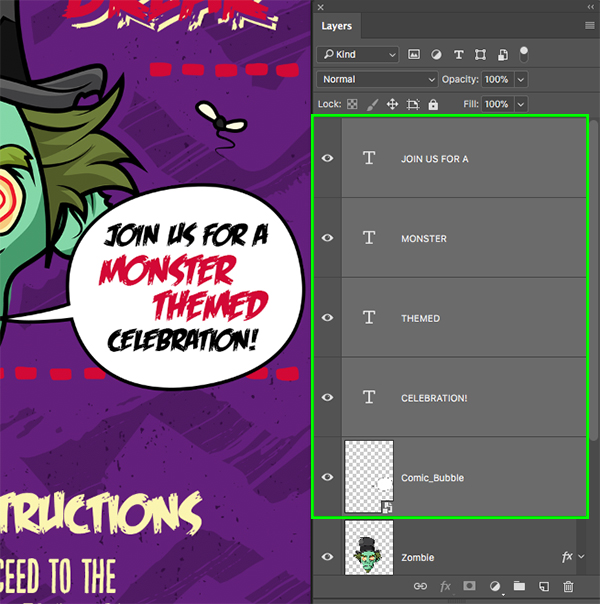
Next, select the red ‘MONSTER’ text layer and duplicate that by pressing Command/Ctrl+J once again. Move this duplicate layer below the original and then use the arrows to position it below and to the right of the original ‘MONSTER’ text. Use your Type Tool (T) once again to click inside the text box and this time change the text to read ‘THEMED’ as shown here:
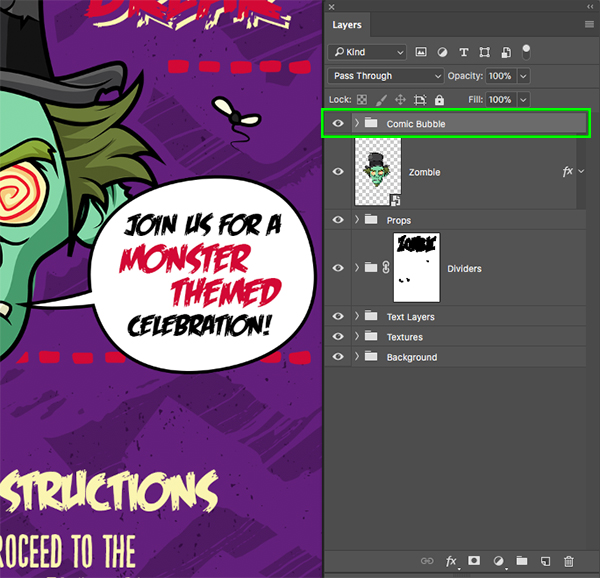
We now want to select the ‘JOIN US FOR A’ text layer and duplicate it. Move the new copy down in the Layers Palette so that it’s below the red ‘THEMED’ text and move it towards the bottom of the bubble to create a forth line of text. Click inside once again with your Type Tool (T) and change the text to read ‘CELEBRATION!’ to complete the phrase inside of the comic bubble. Once you have done that you can select the very top text layer which should be the ‘JOIN US FOR A’ text, and then hold the Shift Key and click on the ‘Comic Bubble’ layer so the bubble and all of the text inside is selected at the same time.
With all of these layers still selected, press Command/Ctrl+G to place them inside of a new folder and change the folder name to ‘Comic Bubble’ as shown in the image below:
Step 32: Loose Ends
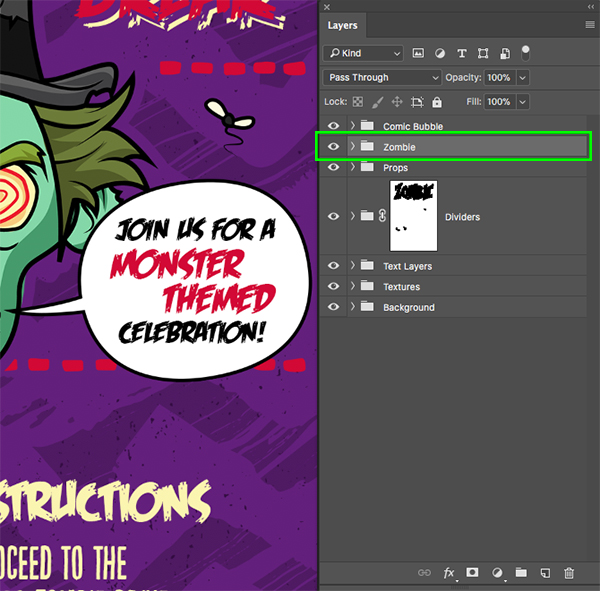
Just to tidy things up a bit, let’s go ahead and select the loose ‘Zombie’ layer and place that inside of a folder called ‘Zombie’ just so everything is nice and organized.
This now completes our Zombie Party Invitation Design! I hope that you have enjoyed this tutorial and found some useful tips and tricks along the way. We created a very fun and spooky design using just a small selection of freebies from this truly massive and versatile collection of professional vectors. In addition to the assets that we have used to create our design, remember that there is so much more for you to take advantage of in the full bundle including retro illustrations, textures, brushes, logo kits and more. We can’t wait to see what you come up with using these assets and the techniques we have covered in the tutorial!
Remember that whether it’s your outcome for this tutorial or something new you’ve made, we’d love to see your designs on our Facebook page.
Please leave a comment if you have any questions or suggestions. I always look forward to hearing from you!
There’s still time to check out The Hugely Versatile Vector Bundle where you’ll discover an absolutely huge collection of versatile vectors at an incredible 99% off.






I happy to see that the zombie safe house is just one town away from me lol. Great tutorial!
Ha this comment is gold Erin :). At least we know you will make it safe and have the kettle on for the rest of us lol!
We are so happy you liked this one- Eric will be delighted to hear that :)
Great tutorial, thanks once again.
Thank you so much for the awesome feedback Andrea!
We’re glad you liked it :)
Thank you very much!
Hey Irena,
Thank you so much for your comment!
We hope you love following this one :)